
Fine until they get water in the vacuum line and partially engage and make annoying grinding noise
Sponsored
Grinding noises are always more than annoying! LOLFine until they get water in the vacuum line and partially engage and make annoying grinding noise
Speaking of grinding noise we took the new Braptor to Moab and on the way back to the place we rented I noticed a noise from the lower front driver tire area that sounded like grinding/ marbles being shook in a can. It would only happen at low RPM's and when I was feathering the gas to stay up to speed after coasting. After I got above the 1800RPM mark or so it sounded like it would catch and stop making the noise. I have been researching for days and finally ruled out the typical loose heat shield or wastegate rattle. After finding a video about this happening on the Raptor trucks and reading on this thread about when the 2H shift takes place after a half mile I have confirmed that I have an issue with my IWE already. I have an appointment on Monday to get it checked out, but I am worried about when it will actually get fixed since I am sure parts are scarce. If I swap into 4H after that half mile and then go back to 2H it won't make the noise again until I shut it off and drive somewhere else. Just something to keep an eye on if you have a Braptor since I am having an issue with it after 4,000 miles already. After looking under the hood and watching the Raptor truck IWE check valve install video I can tell you that the hoses, check valve location, and what it all looks like are not the exact same as the truck so I won't be able to just order the $10 part and do it myself. Fingers crossed they can get it fixed and I am not waiting months to get it sorted out. I am glad I was able to figure out what it was before taking it in though so they don't have to do their days long, take things apart, look everywhere, and diagnosis deal. I can pretty much make it happen on command so it shouldn't be too hard to prove my point with a quick ride-along. I am glad this thread was posted so I could confirm my suspicions.
I have watched a couple install videos on the trucks and it looks extremely simple, but after looking under my hood they definitely didn't do it the exact same way and use the exact same parts. I have already installed a slipstream, rock sliders, and filled up all my aux switches with lights so a few hoses don't scare me. From what I can see the hoses look totally different and they are not in the same places. I have tried to just google to find the actual Braptor part, but have not had any luck.parts will not be scarce if it is the same as what is used on the F150.
@flip might be able to help if there are actual part #s now.I have watched a couple install videos on the trucks and it looks extremely simple, but after looking under my hood they definitely didn't do it the exact same way and use the exact same parts. I have already installed a slipstream, rock sliders, and filled up all my aux switches with lights so a few hoses don't scare me. From what I can see the hoses look totally different and they are not in the same places. I have tried to just google to find the actual Braptor part, but have not had any luck.
No numbers or illustrations yet.@flip might be able to help if there are actual part #s now.
Is this taking longer than other vehicles? Sure would be nice to check out the diagrams.No numbers or illustrations yet.
Yes.Is this taking longer than other vehicles? Sure would be nice to check out the diagrams.

| 204-592 Separator, Lower Arm Ball Joint TKIT-2006C-FFMFLM TKIT-2006C-LM TKIT-2006C-ROW |
| Tie Rod End Remover |

|
|
|
|
|
|
|
|

|
|
|
|

|
|

|
|
|
|

|
|
|
|

|
|

|
|
|
|

|
|

|
|
|
|
|

|
|
|
|
|
|
|

|
|
|
|
|
|
|
|
|
|

|
|
|
|
|
|
| 204-592 Separator, Lower Arm Ball Joint TKIT-2006C-FFMFLM TKIT-2006C-LM TKIT-2006C-ROW |
| Tie Rod End Remover |
|
|
|
|
|
|
|
|
|
|
|
|
|
|
|
|
|
|
|
|
|
|
|
|
|
|
|
|
|
|
|
|
|
|
|
|
|
|
|
|
|
|
|
|
|
|
|
|
|
|
|
|
|
|
|
|
|
|
|
|
|
|
|
|
|
|
|
|
|
|
|
|
|
|
|
|
|
|

| Item | Description |
|---|---|
| 1 | AWD module. |
| 2 | Transfer case range sensor. |
| 3 | ATCM |
| 4 | Rear ELD connector. |
| 5 | Rear differential. |
| 6 | Rear driveshaft. |
| 7 | Transfer case. |
| 8 | Transfer case shift motor. |
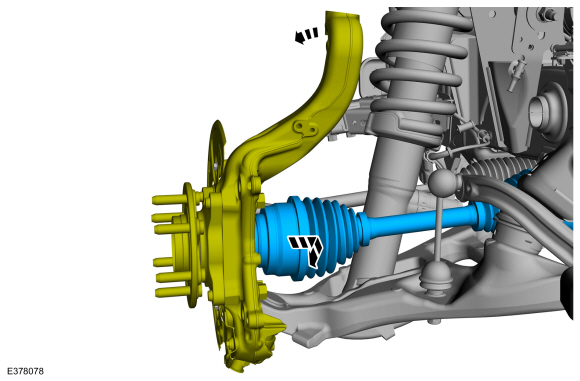
| 9 | Front driveshaft. |
| 10 | Front ELD connector. |
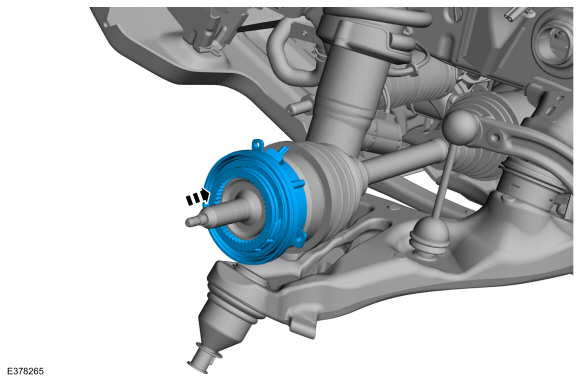
| 11 | Front differential. |
| 12 | Transmission. |
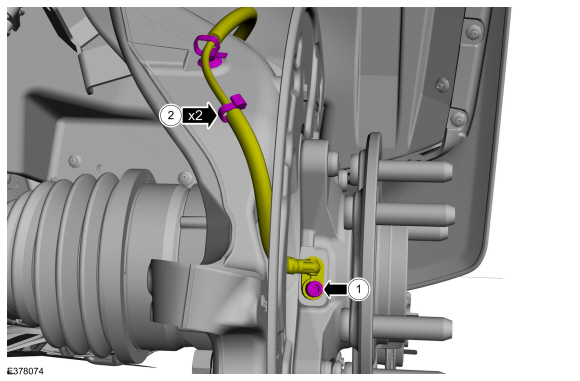
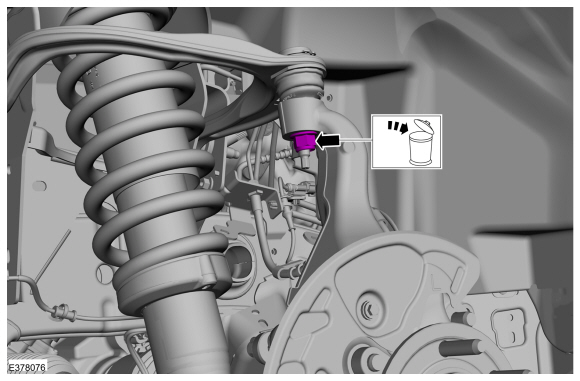
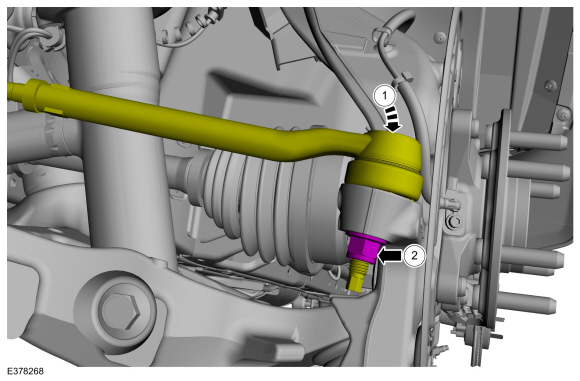
| 1 | IWE s (spring-loaded vacuum hubs) |
| 2 | Vacuum hoses |
| 3 | IWE solenoid |
| 4 | Vacuum reservoir |


