
- Thread starter
- #1
Evening, fellow Bronco enthusiast. This post is to give my honest view on the new Caroboter Digital Gauge Cluster for the 6th Gen Bronco. This cluster is new to the Bronco world and was just released on 8/28/25. The vendor is not new to the off-road world and has made several different offerings to the JEEP and Toyota brands. Also, they have released versions for the Ford F150.
I ordered the cluster on 8/28, and it arrived at the installation shop on 9/5. The shop is Dalto Shop Customs in Miami. They specialize in off-road vehicle customization as well as classic and other vehicles. The bulk of their work is on off-road vehicles. The shop is indeed impressive and has a long history of doing custom work. They are also at the forefront of doing Caroboter installations for the cluster installations.
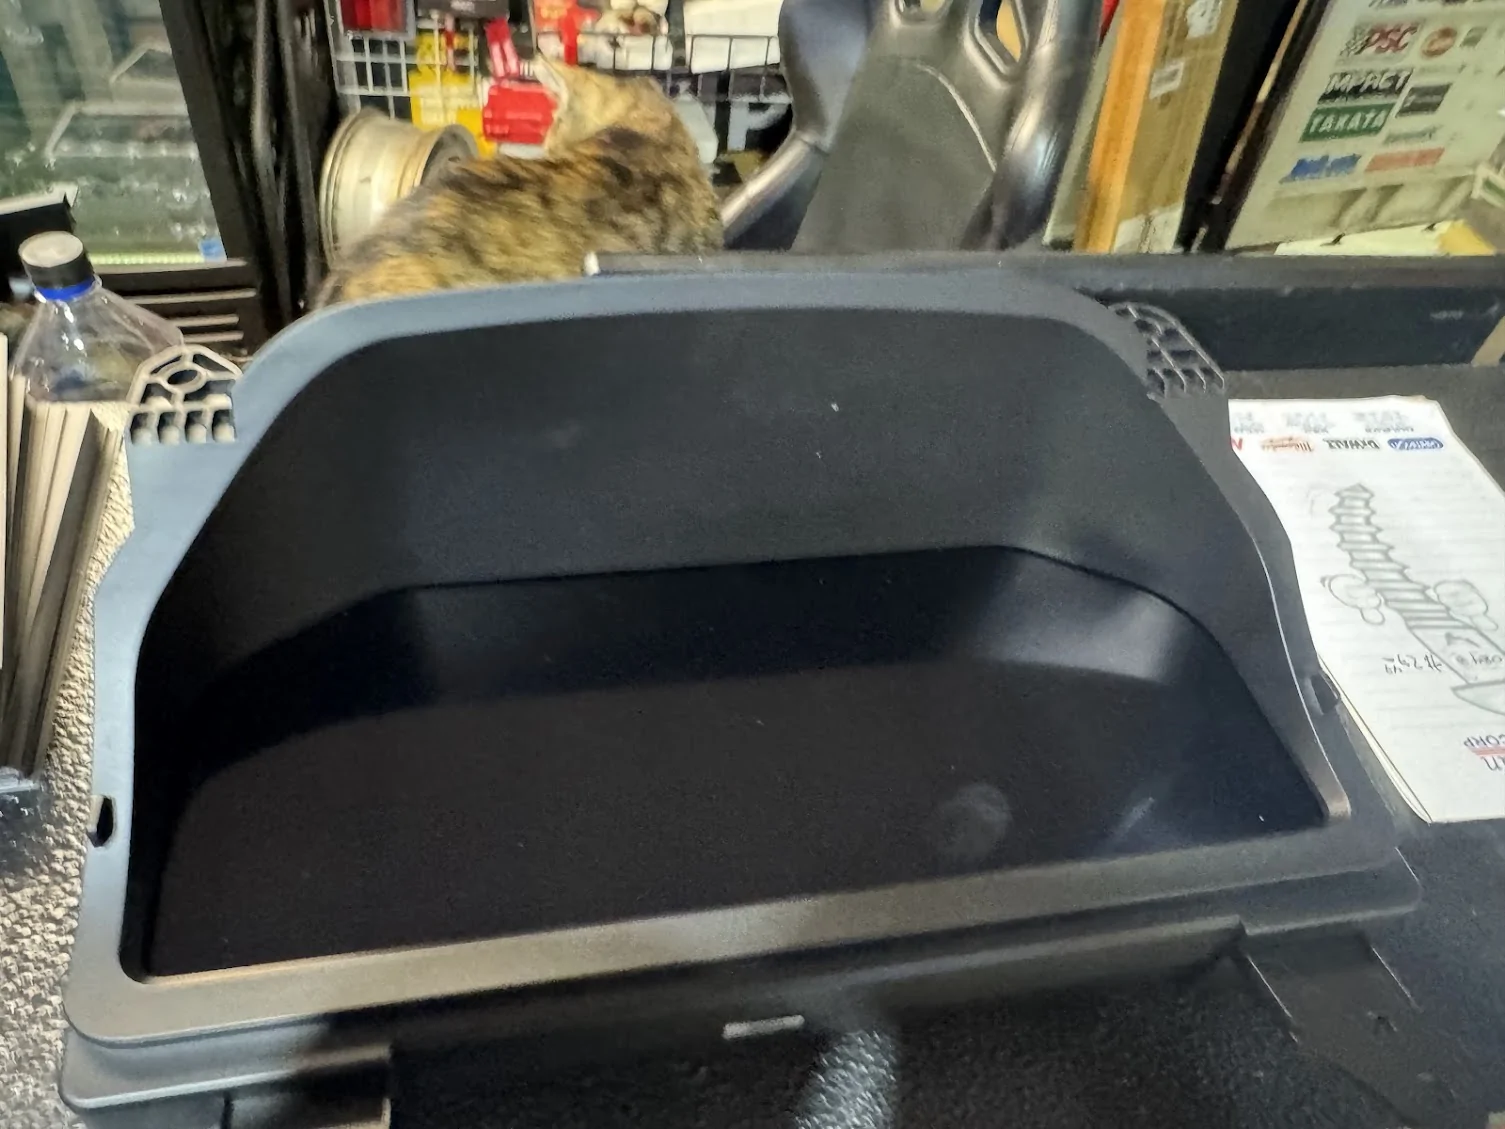
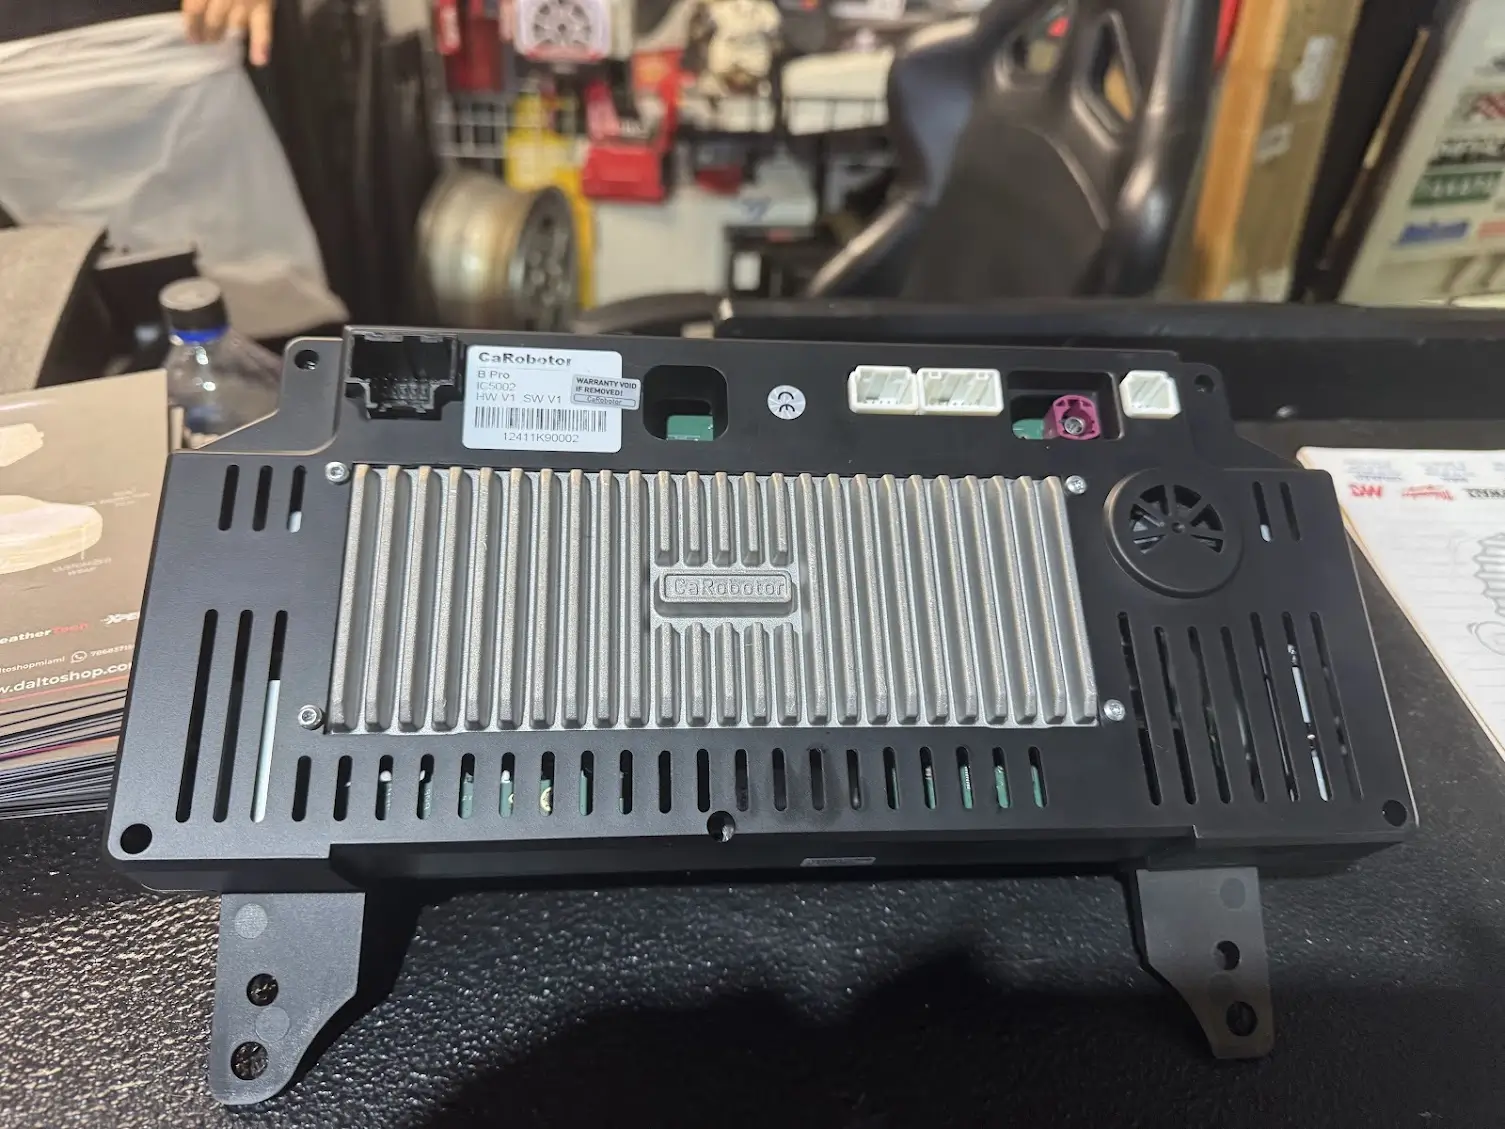
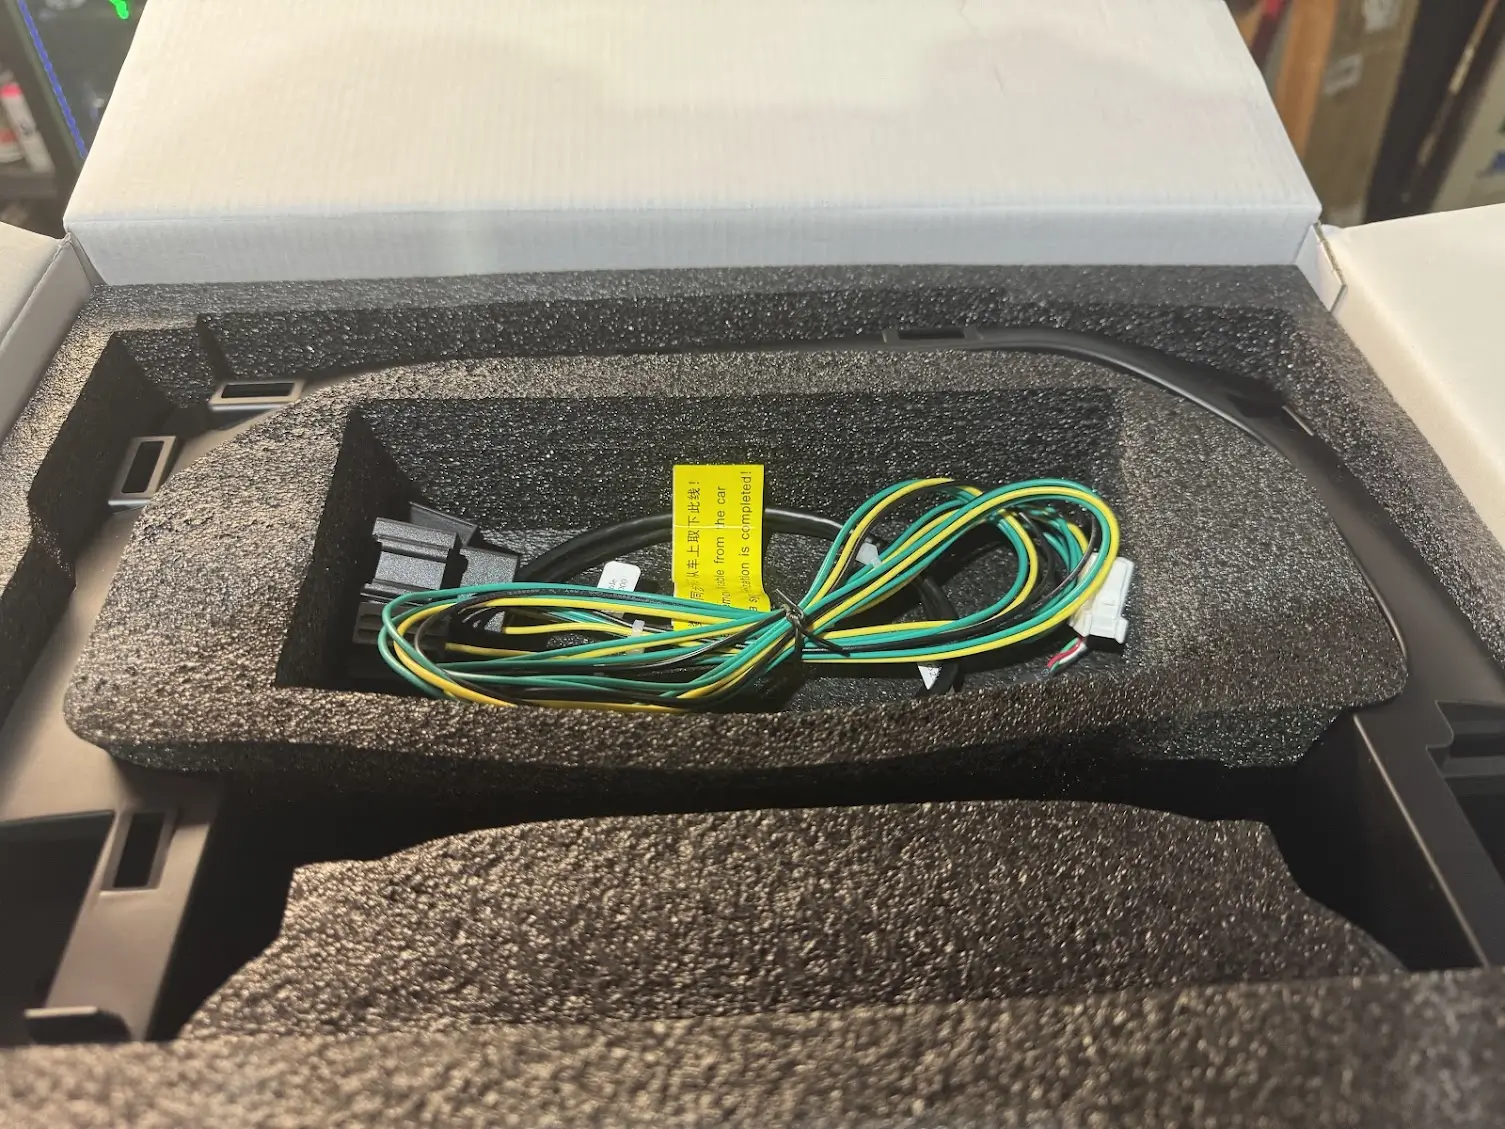
I went to the shop this morning for my 10:30 installation. The shop owner (Mauro) greeted me with my cluster. It was well packaged and had my vehicle's nickname on the box. (This is how it was sent from the vendor; they asked you for a nickname.) I unpacked it with him, and I was surprised by the heft it had. It was sturdy, well put together. Did not feel cheap at all; it was every bit put together as the OEM cluster, if not more. Not bad. In the package, it had a sync cable, and sync password, the cluster, and a bezel for it. It did not have any instructions. I questioned this, and Mauro informed me that the cluster in its setup had instructions to get from the WEB. I will also state that if you do not know how to pull your old cluster out, I do not think you are going to get it from Caroboter. I could be wrong, as I did not see the install due to shop policy, so maybe...they have an instruction video you cannot pull up unless you are doing the install. I have seen other vendors take this approach as well.

The Dalto Shop will release an installation video themselves (He had his social media guy there documenting it all). I was not able to watch it being done. What I do know it is pretty much a plug-and-play setup, with removing our OEM cluster, and plugging this one in. Set the sync cable and punch in the activation code. Let it sync up to the system and restart. That's it. After about 2 1/2 hours or so, Mauro came out to the main showroom and told me it was completed. Huzzah! Let's see what we got.
The Caroboter Cluster
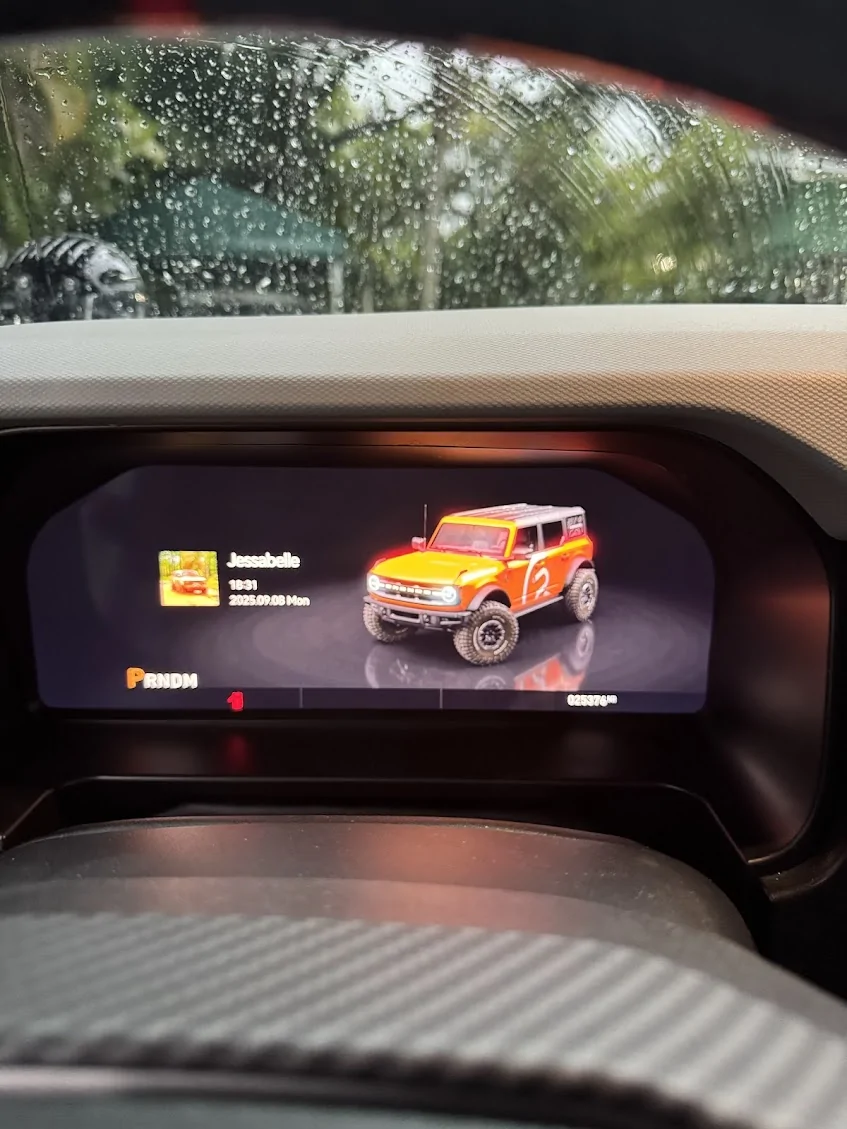
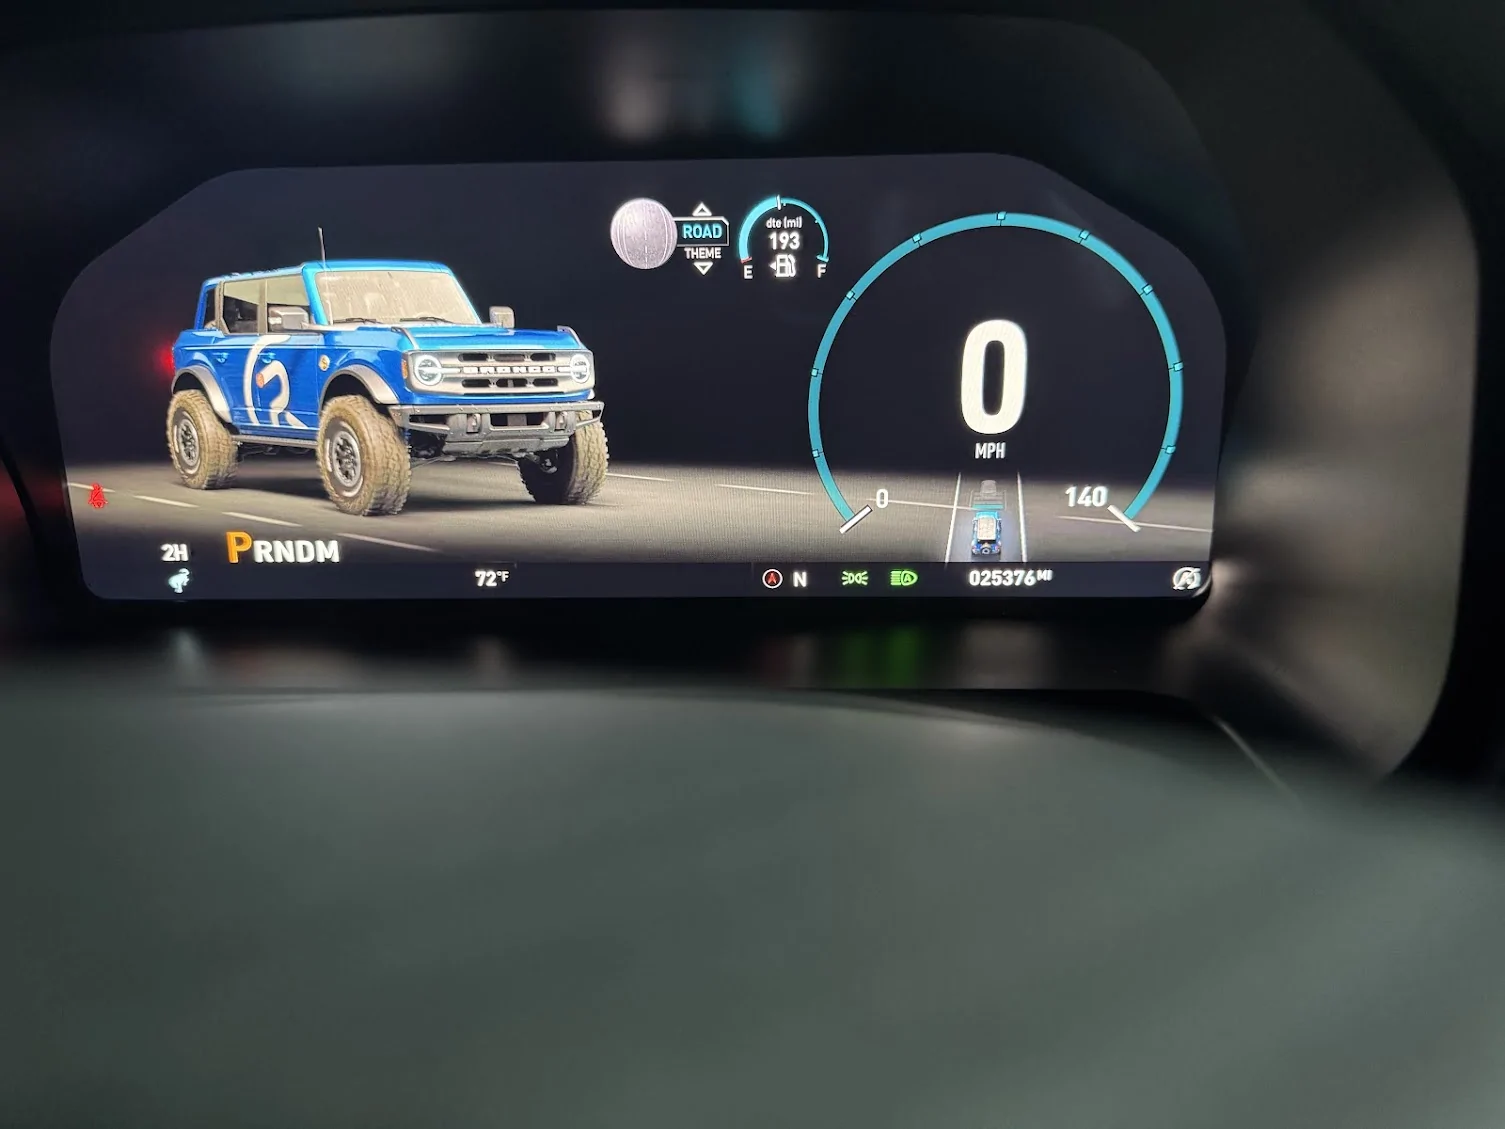
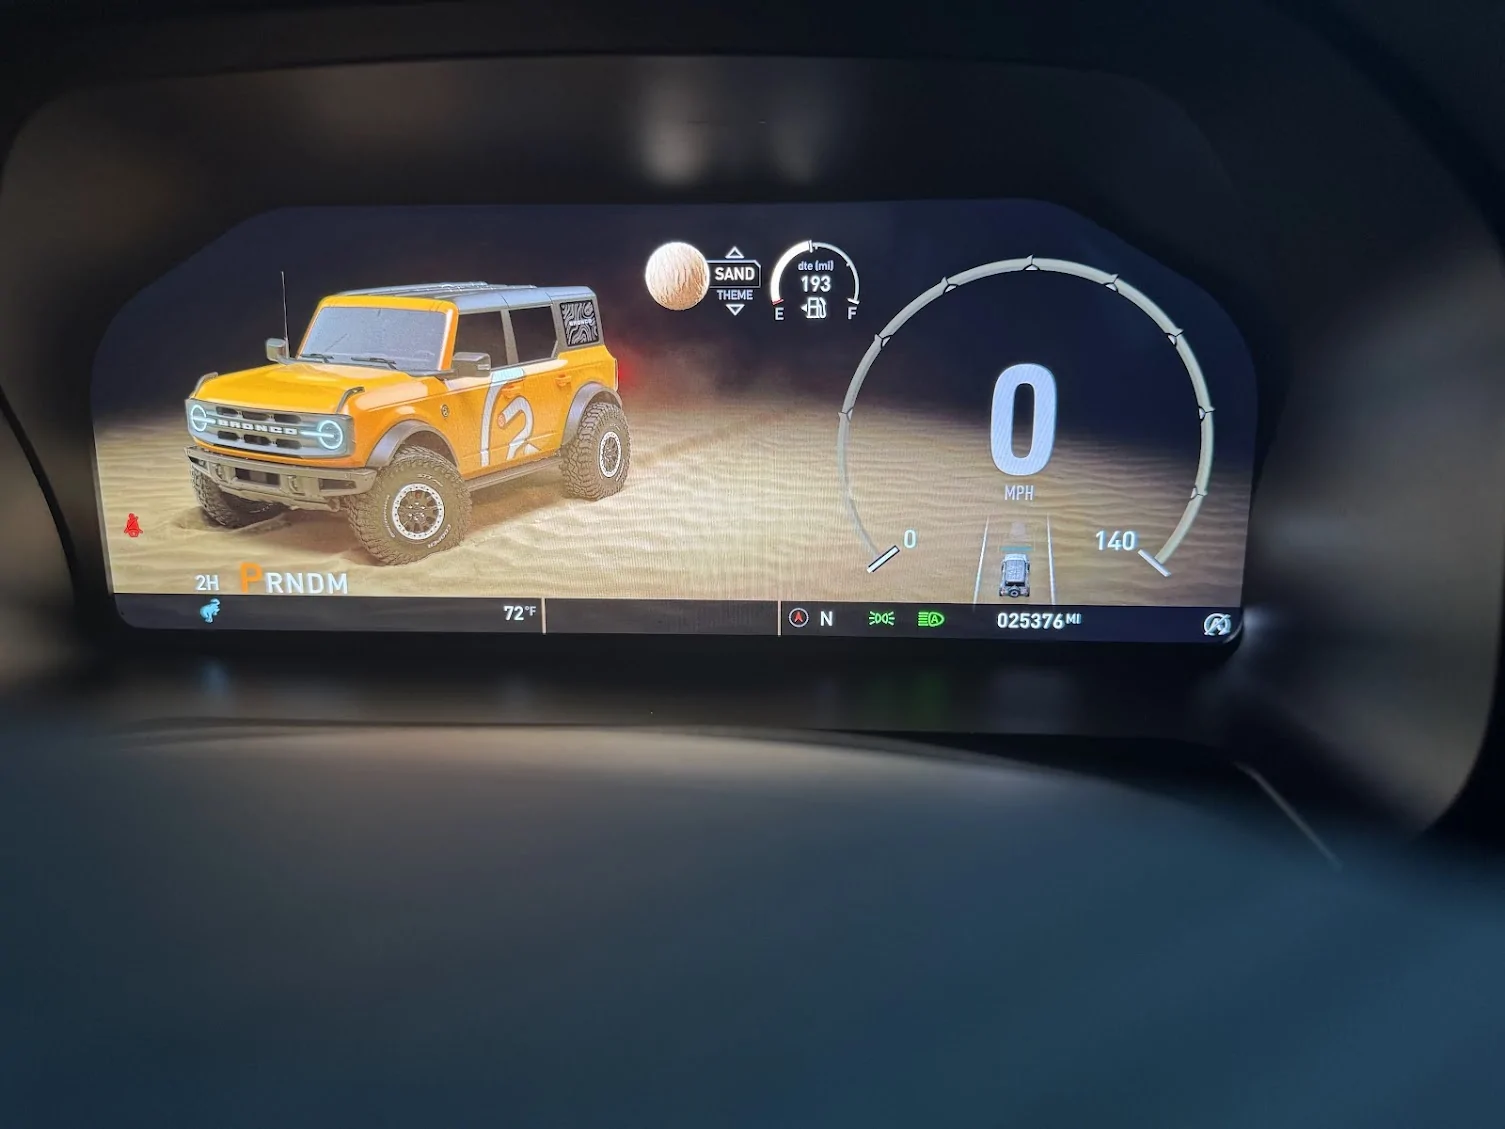
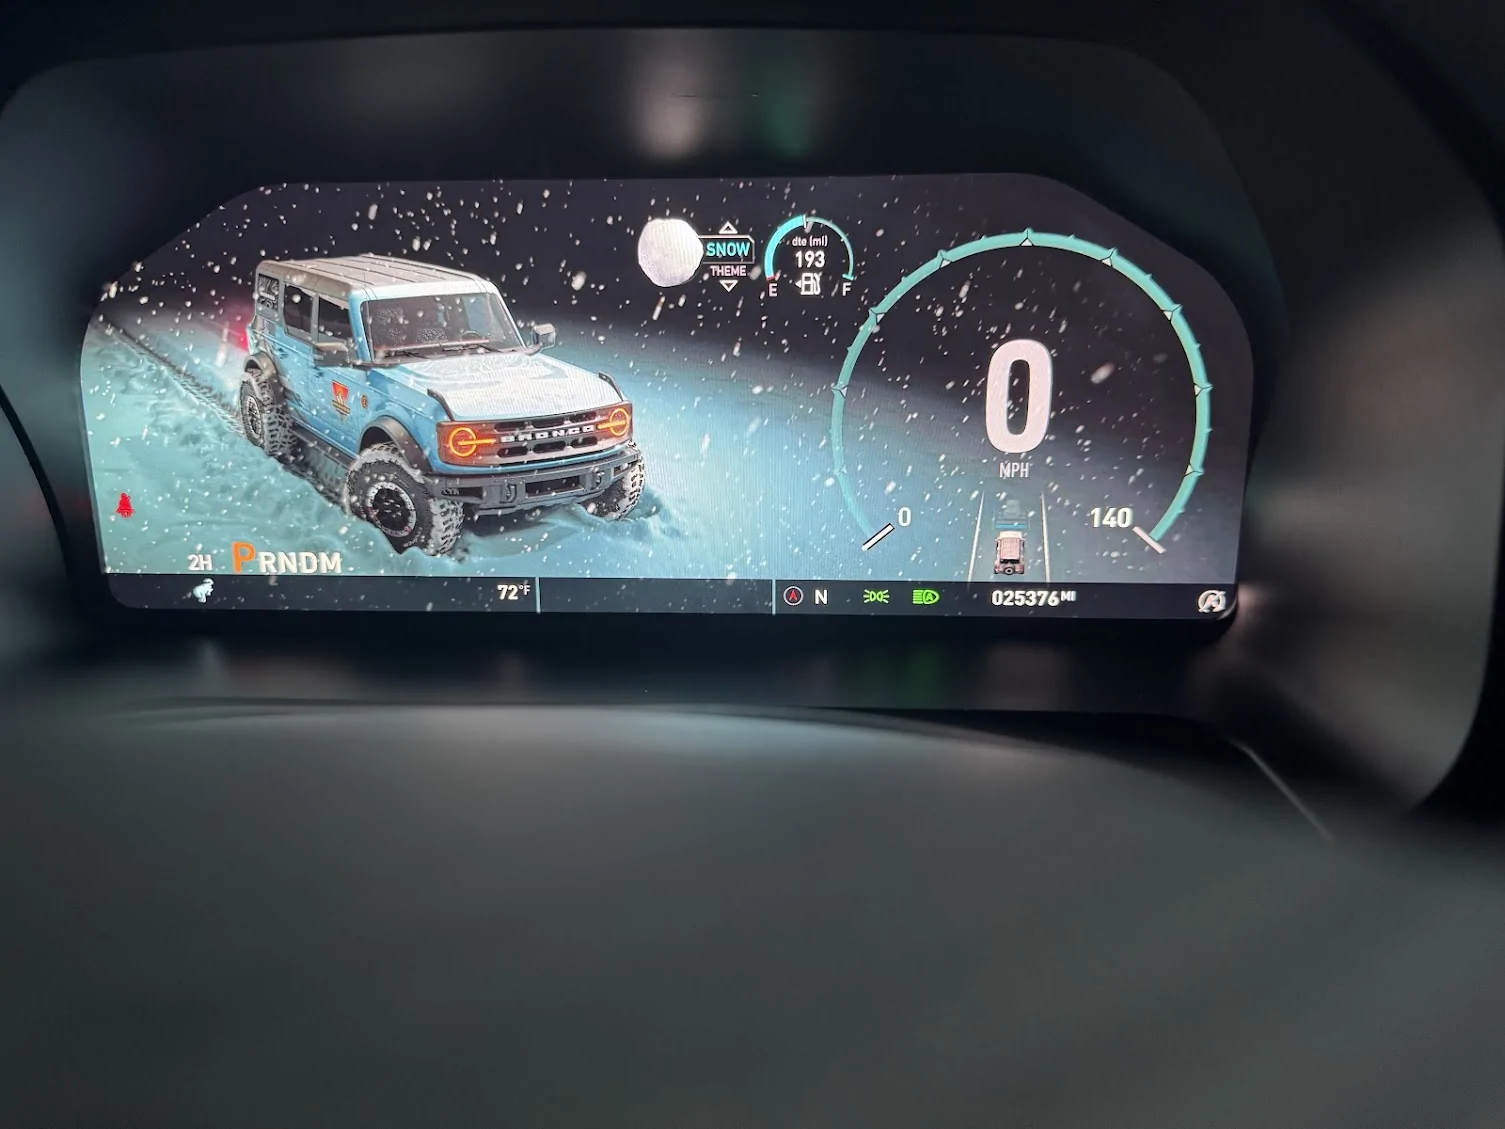
A vehicle rolls along, a 4-door Bronco, customized of course, and it looks good. (They ask if you have a 2-door or a 4-door, so I believe if you have a few doors, it will show that). Your TAC is on the left, the SPEED is on the right. In the middle, you have different screens you can rotate through. The default one is the custom-looking 4-door Bronco, with the time in a bigger bold print, the date and day, and the nickname you submitted. (Jessabelle) In my case. Under the TAC you have the PRDNM, the 2H, 4A, 4H, 4L, drive mode, and temp. To the right, you have the compass, direction (N), and lights. In the speedo, you have the lane keeping, which is animated. Underneath the speedo, you can change the display from several individual displays; the default is your mileage. Above, you have displays much like the BRaptor setup, and they can all be changed. A note, the changes to PSI and F/C go from the vehicle setup to the custer. You can no longer change those settings in the vehicle settings.
Start-up and Driving
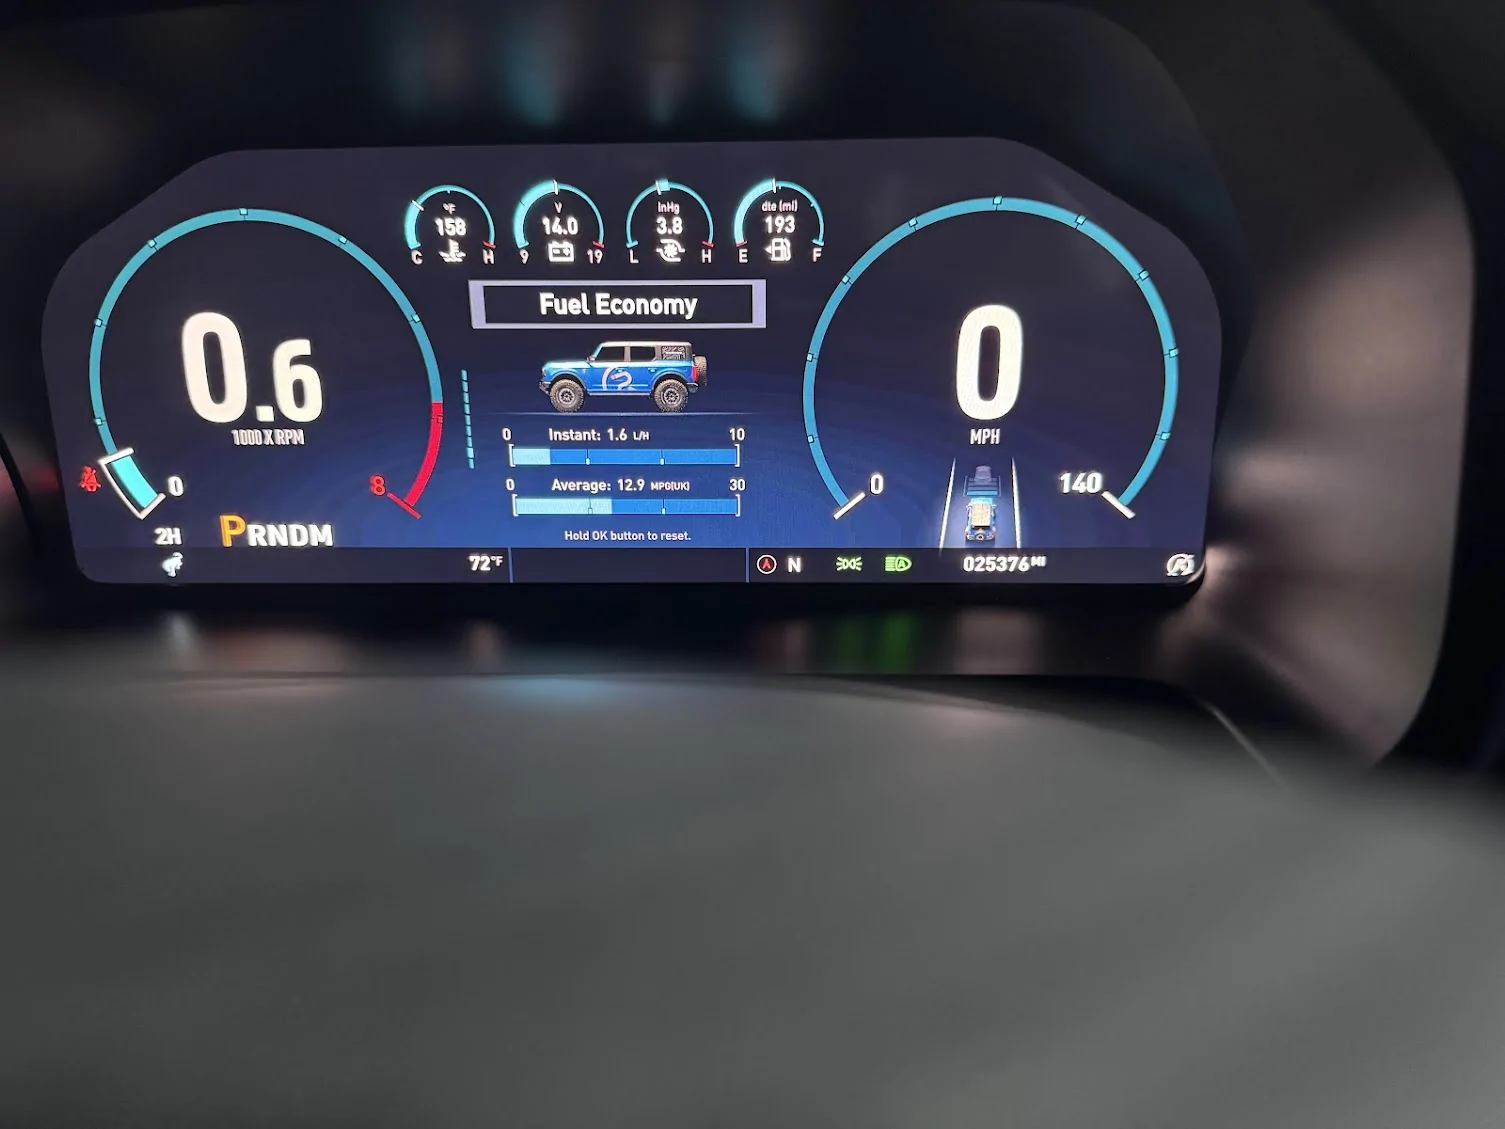
I jumped into Jessabelle and fired her up. I was greeted with a picture of Jessabelle, (one I had sent to the vendor), along with Jessabelle's text, including the time and date underneath it. Cool. It then went into the Caroboter logo (snazzy)to the driving screen with an animation that was smooth and quick. Honestly, the sequence was about the same time as the Ford boot-up sequence for OEM if not quicker. First, the screen is really, really clear. Pics do not do it justice. It is truly HD, 1080p, or perhaps higher. Heck, it could be 2k. It is just that clear. The animations are nice and smooth. It is truly high quality. I went through the setup as I changed things from European to American metrics. Pretty simple. With that done, I set the values of what I wanted to see on screen at the top. I chose Oil, Battery, Turbo, and Fuel. You can turn off lane keeping by hitting your button (if equipped) I left it on.
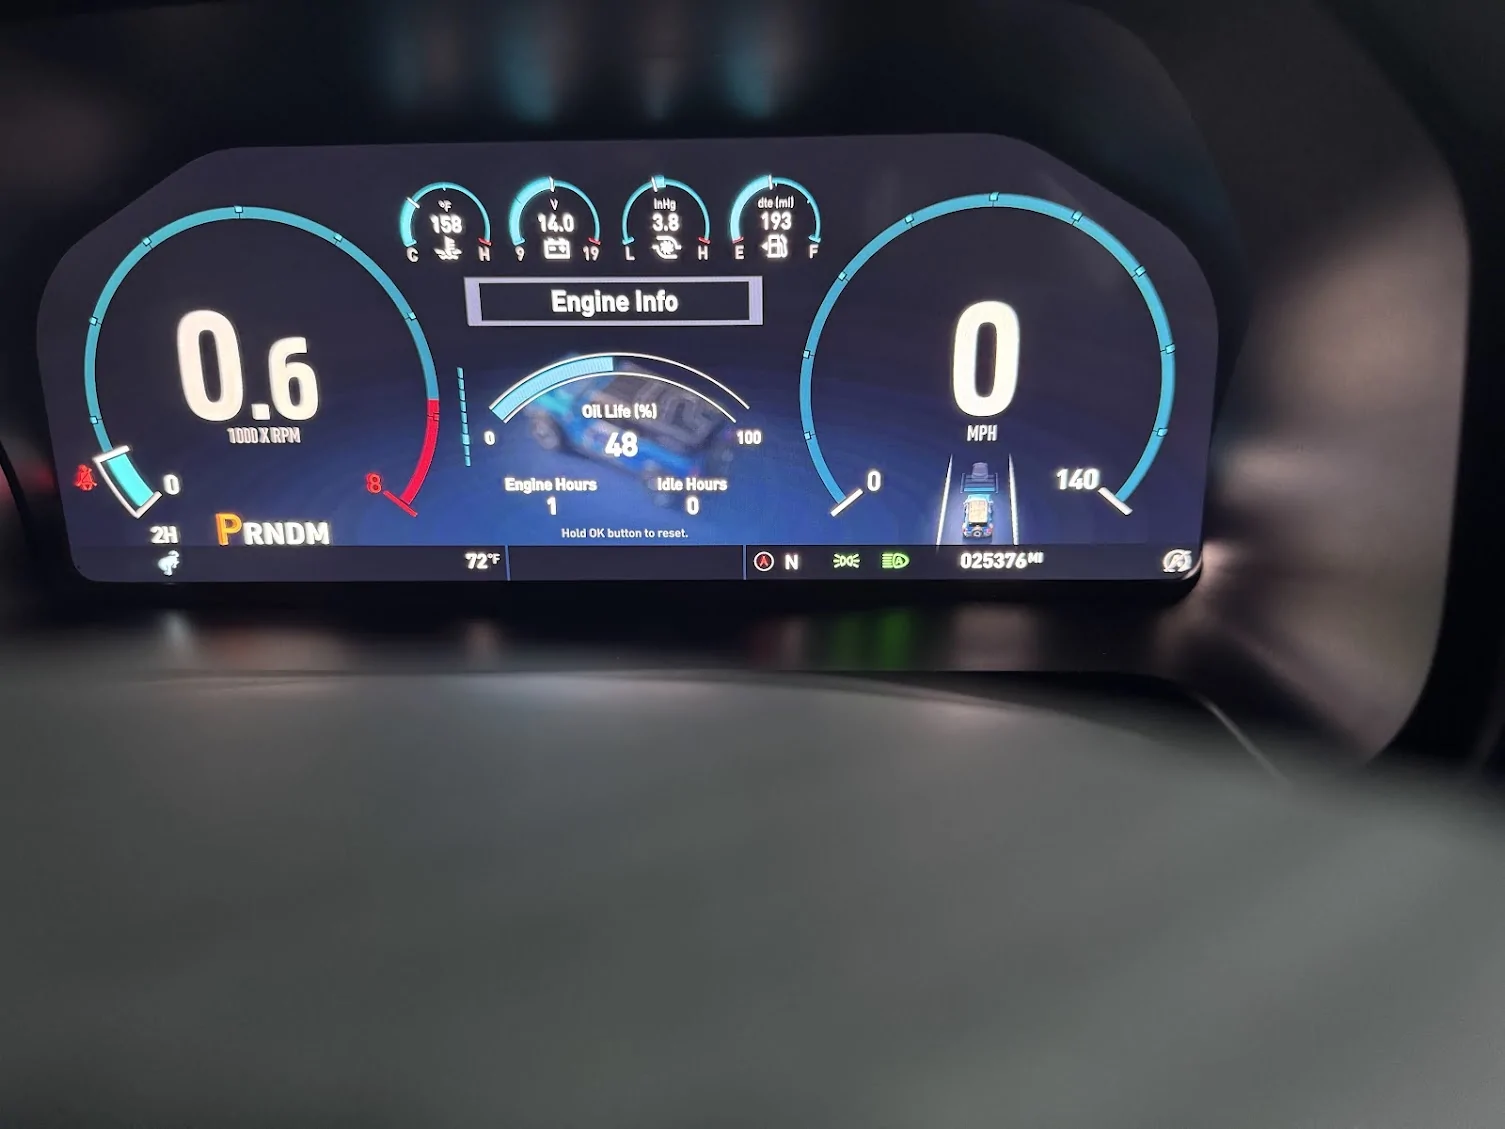
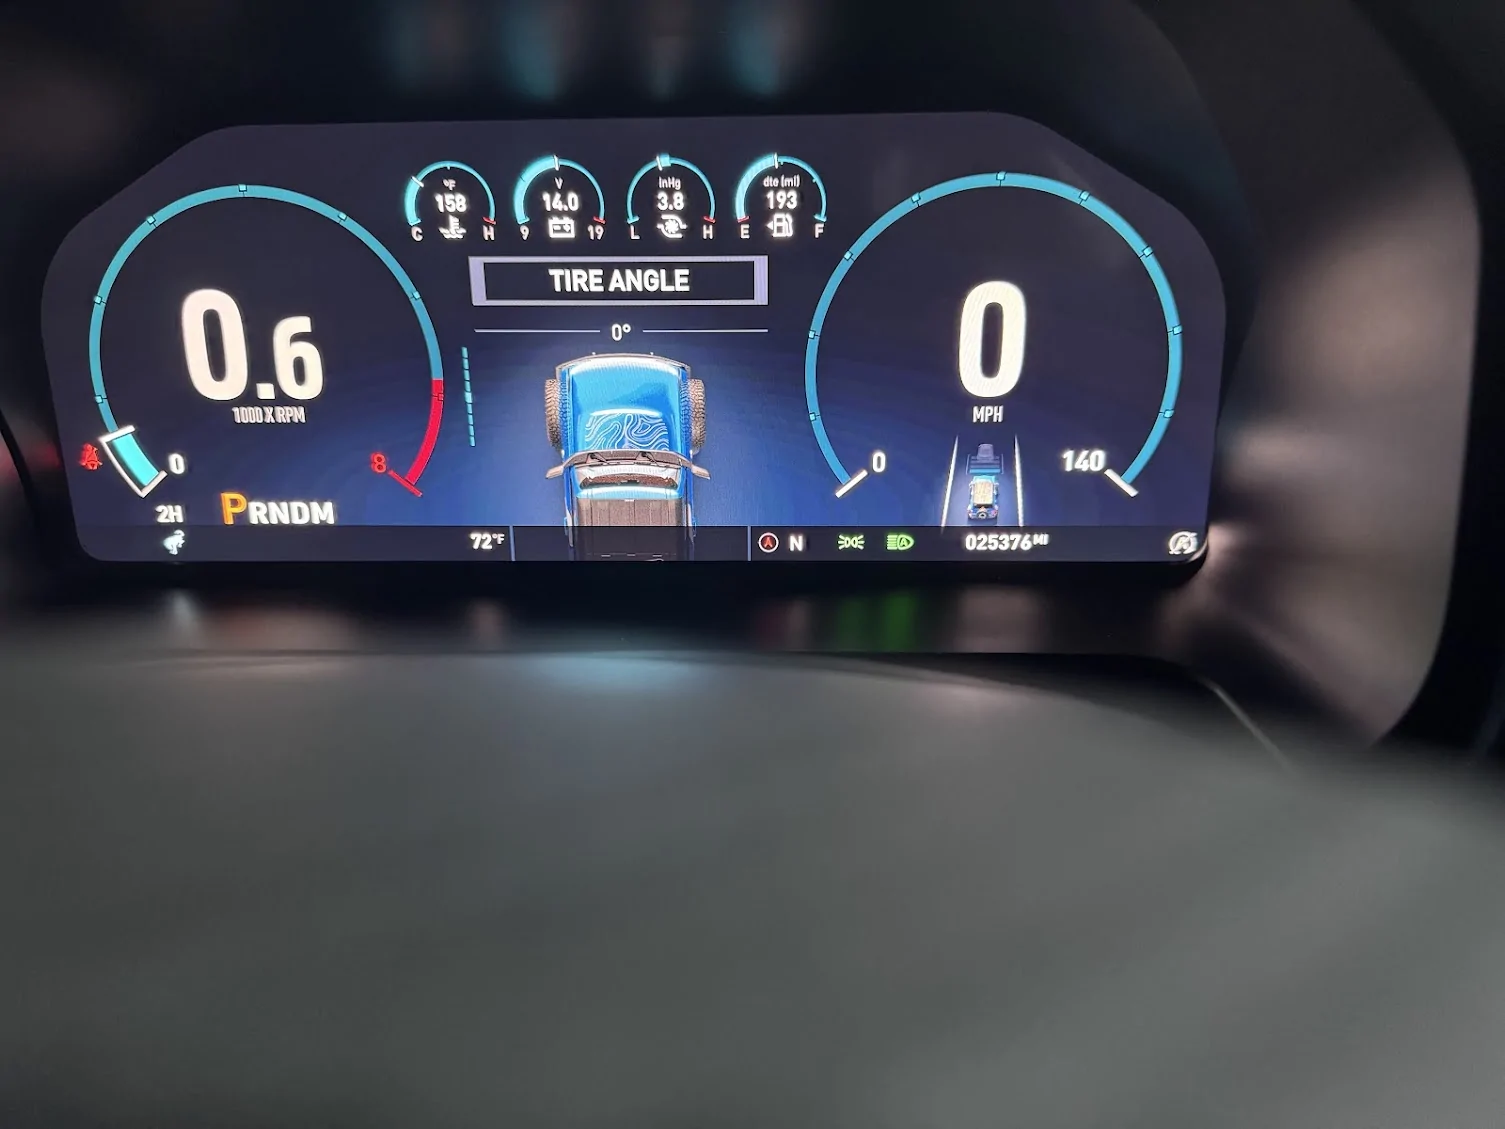
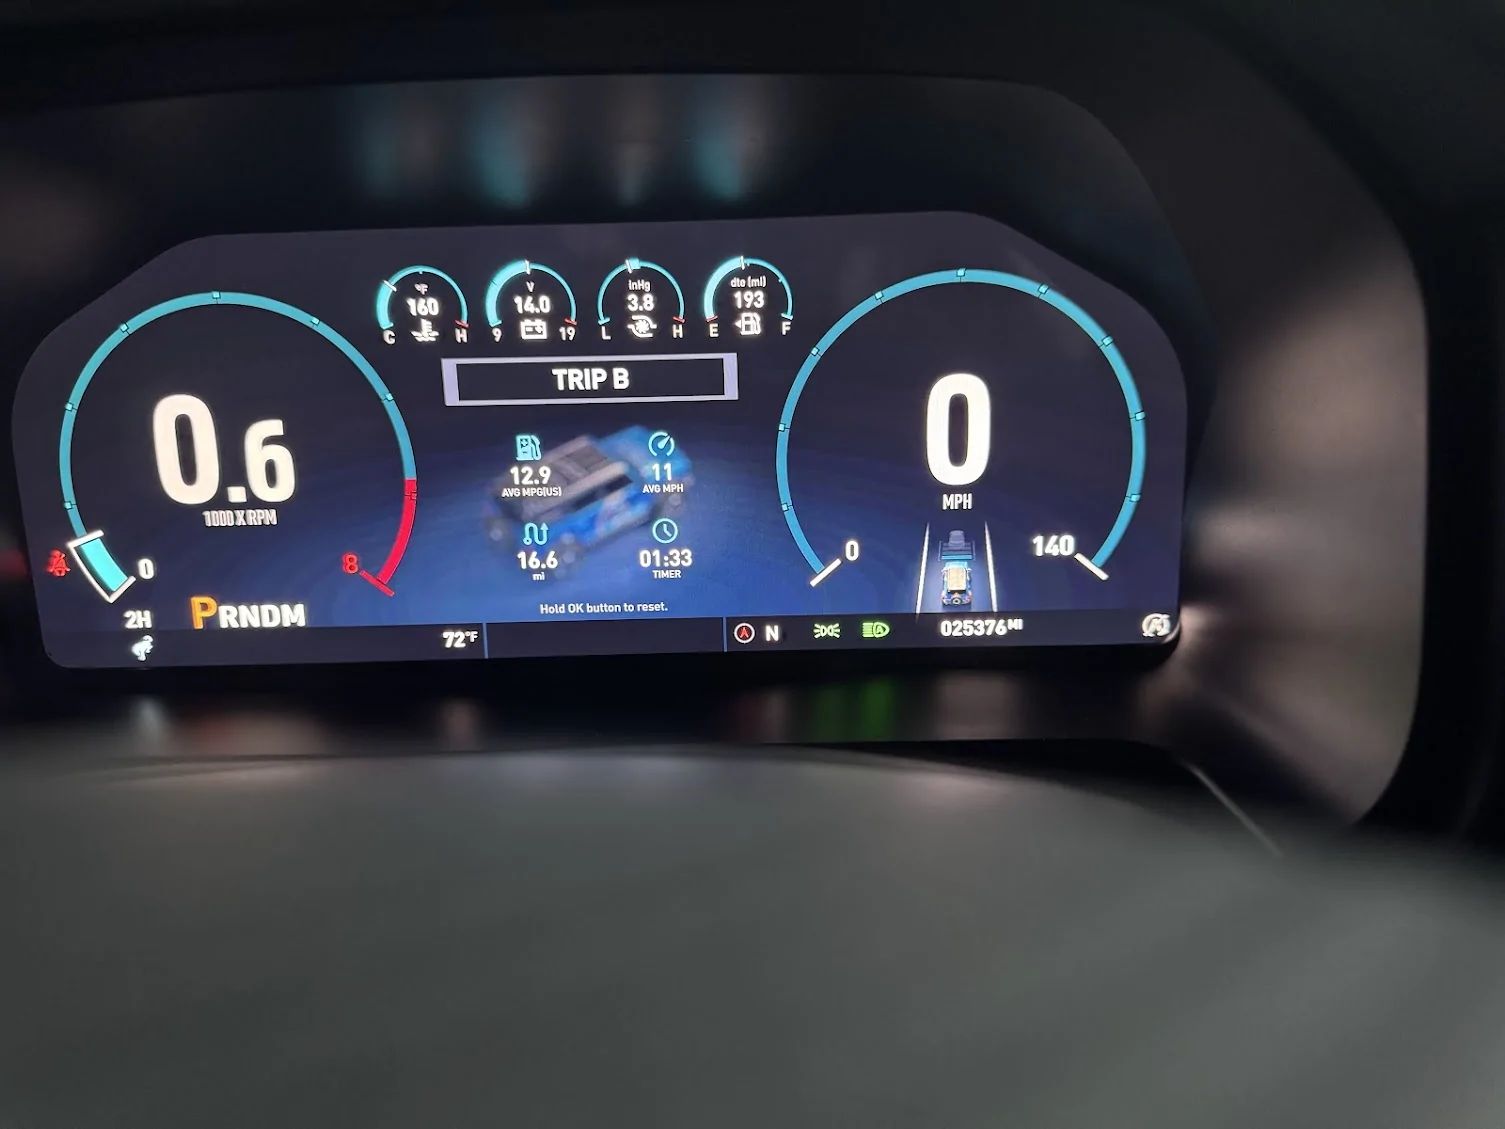
All of your things pop up on the center screen, the seatbelt chime....bloody hell, I think they made it LOUDER. You will buckle up just not to hear it blaring at you. The blinker noise is more muted, almost sounds like a knock tone. The PRDNM lights up as usual, and your mode shows next to it. great. The animation for the dials does not lag and is snappy. It simply works and is pleasing to the eye. Your speed is displayed in the right circle, your RPM in the left, followed by a bar to show where you are on the unit. (Reminds me of my GT500 cluster) No more looking at a vertical bar for the TAC. There are clear numbers in the upper modules, easy to see. In the center screen, you can change what you are looking at. Trip A/B, The time/date with your vehicle Nickname, Drive assist, Fuel Economy, Engine Info, Tire Angle(Not sure what this does, my wheels do not turn when I turn the wheel), and TPMS.
The Modes and Themes
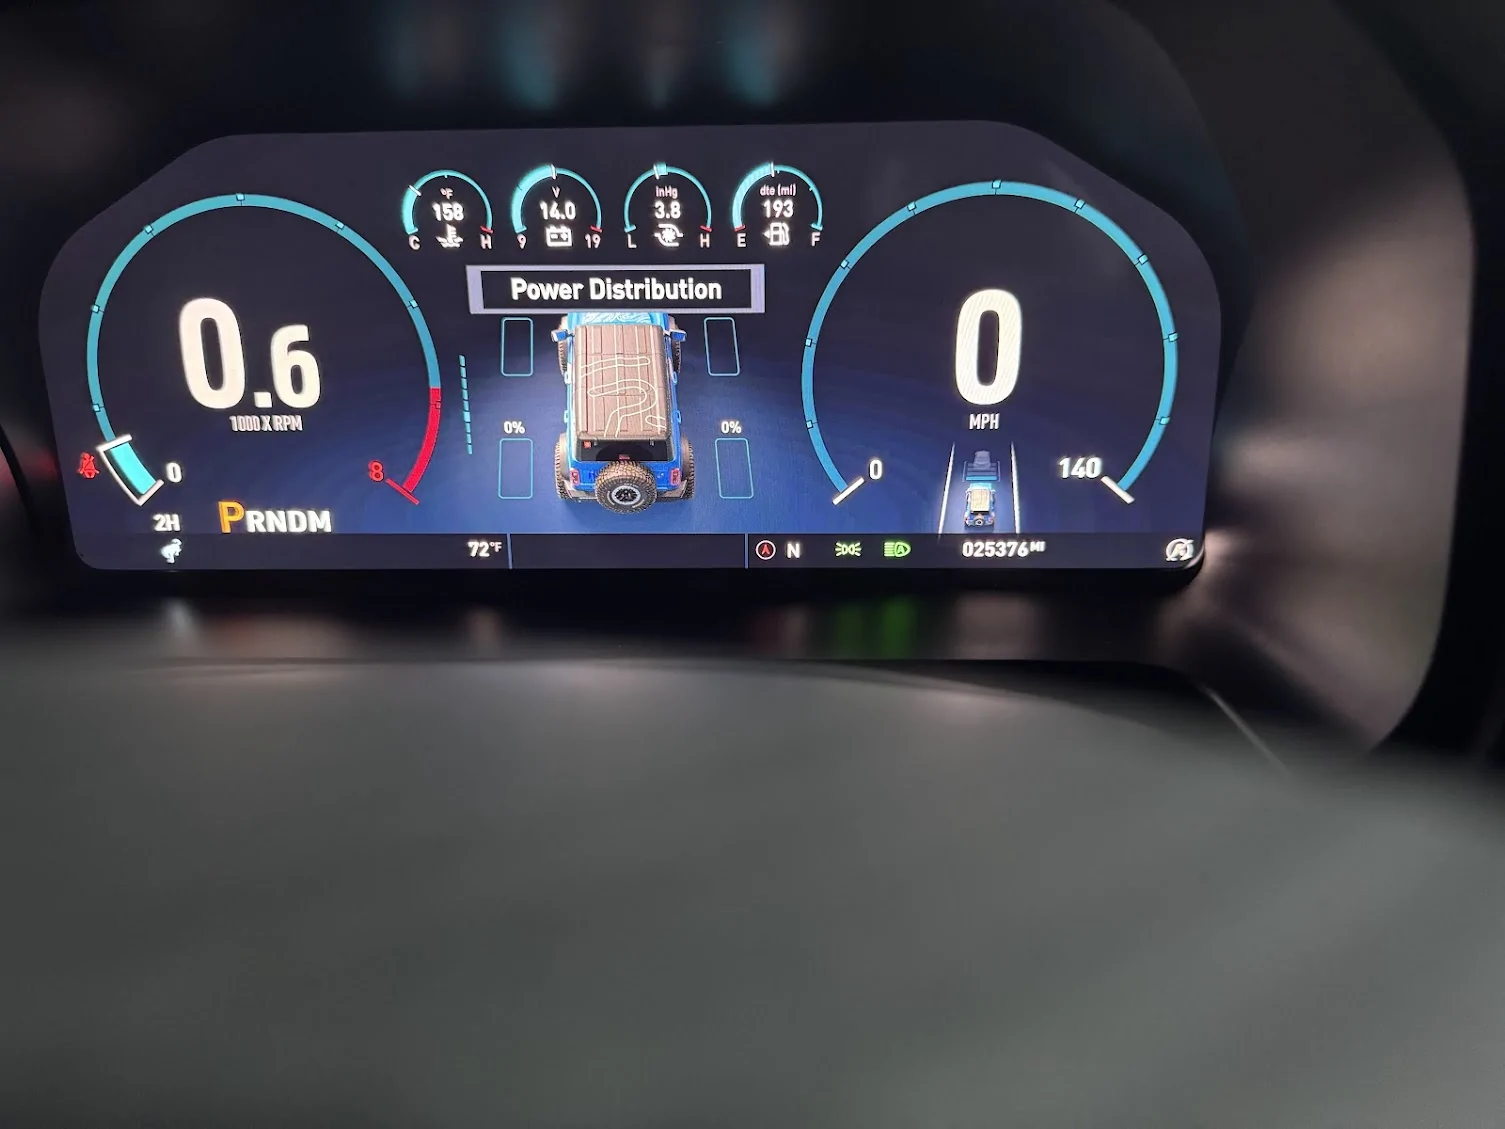
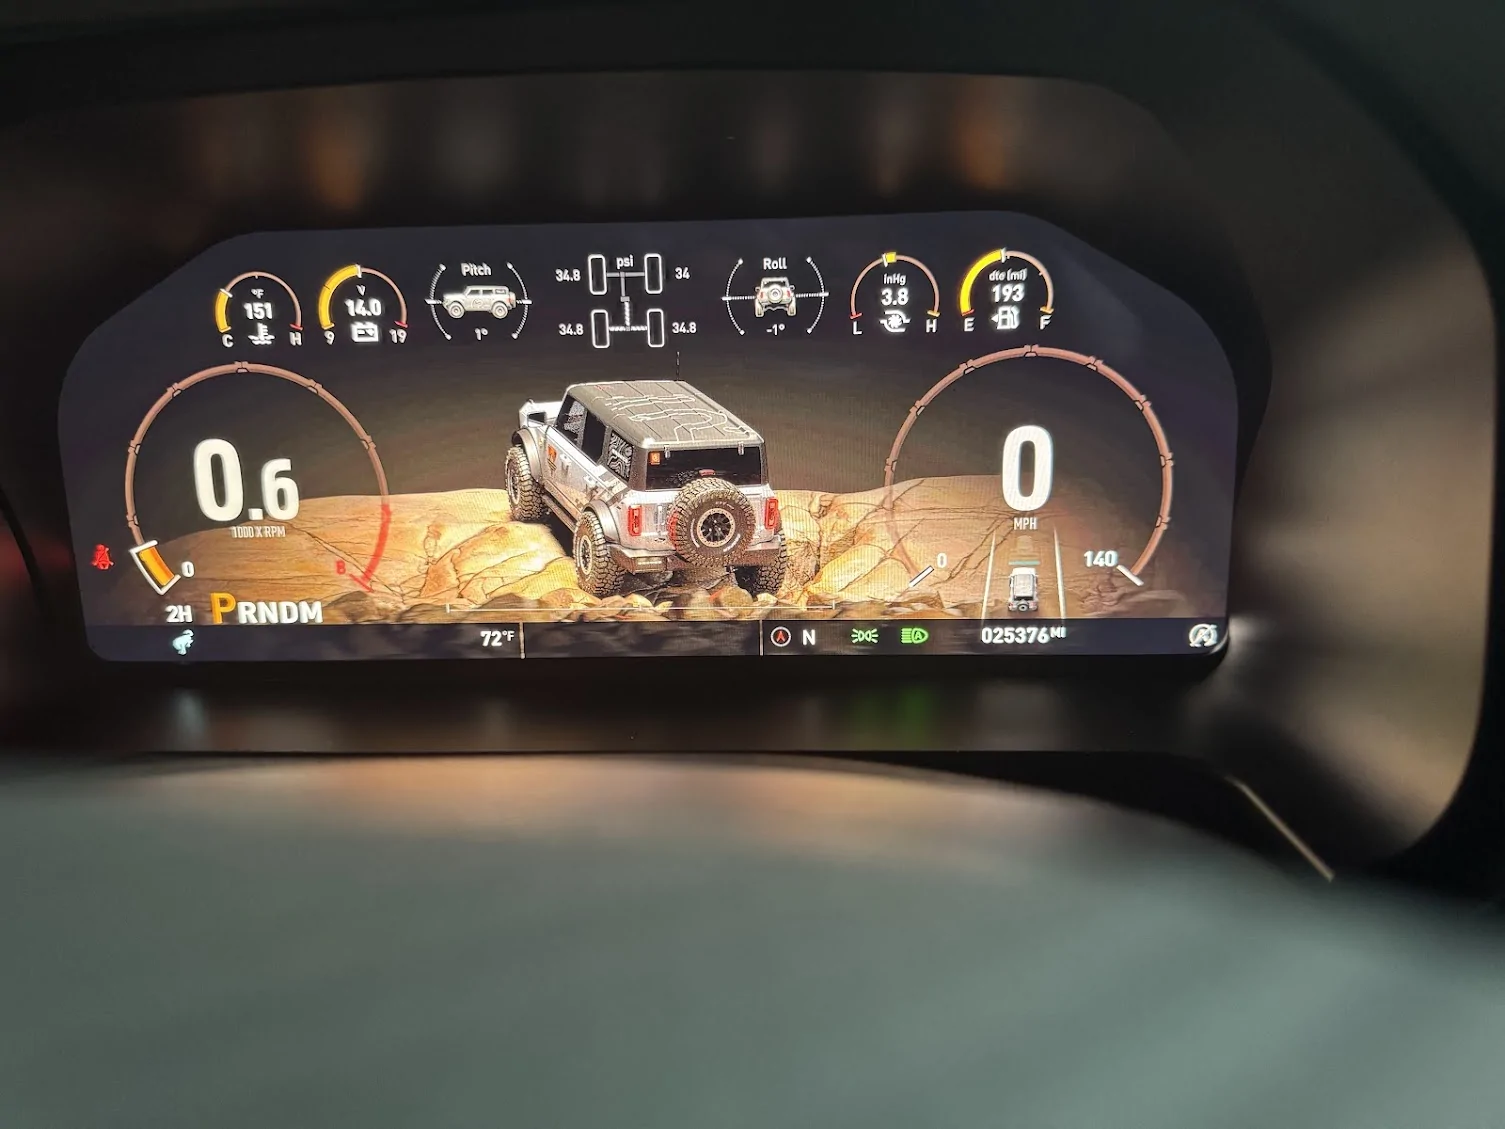
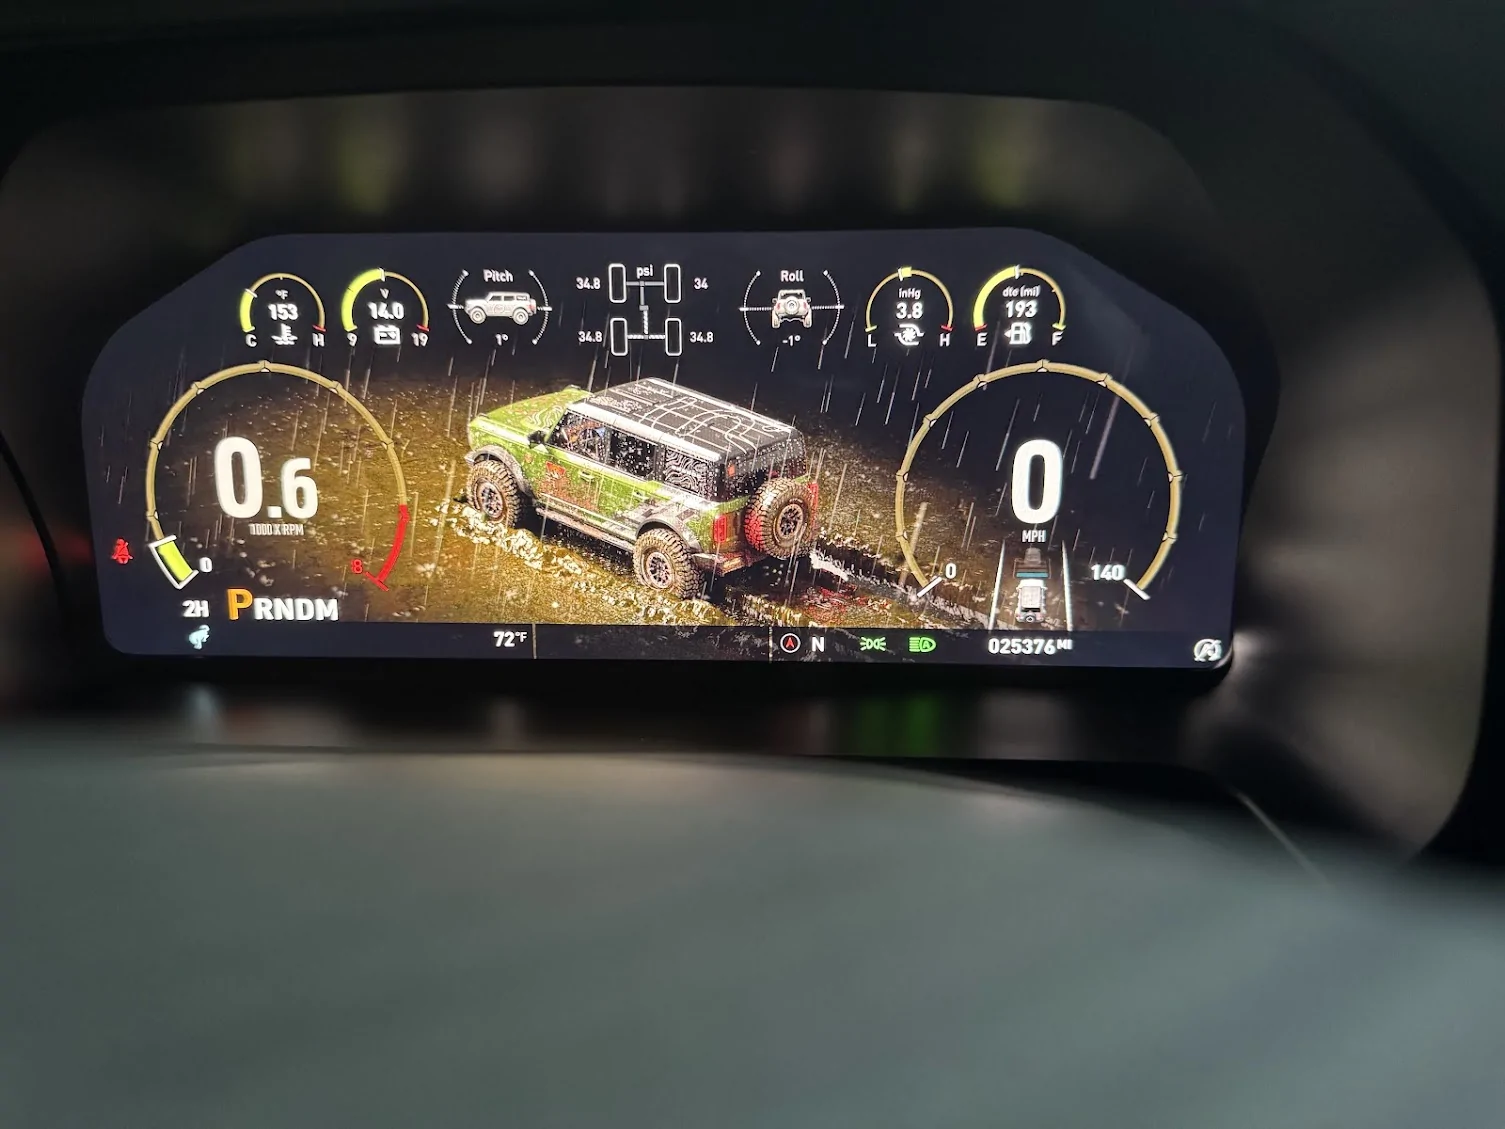
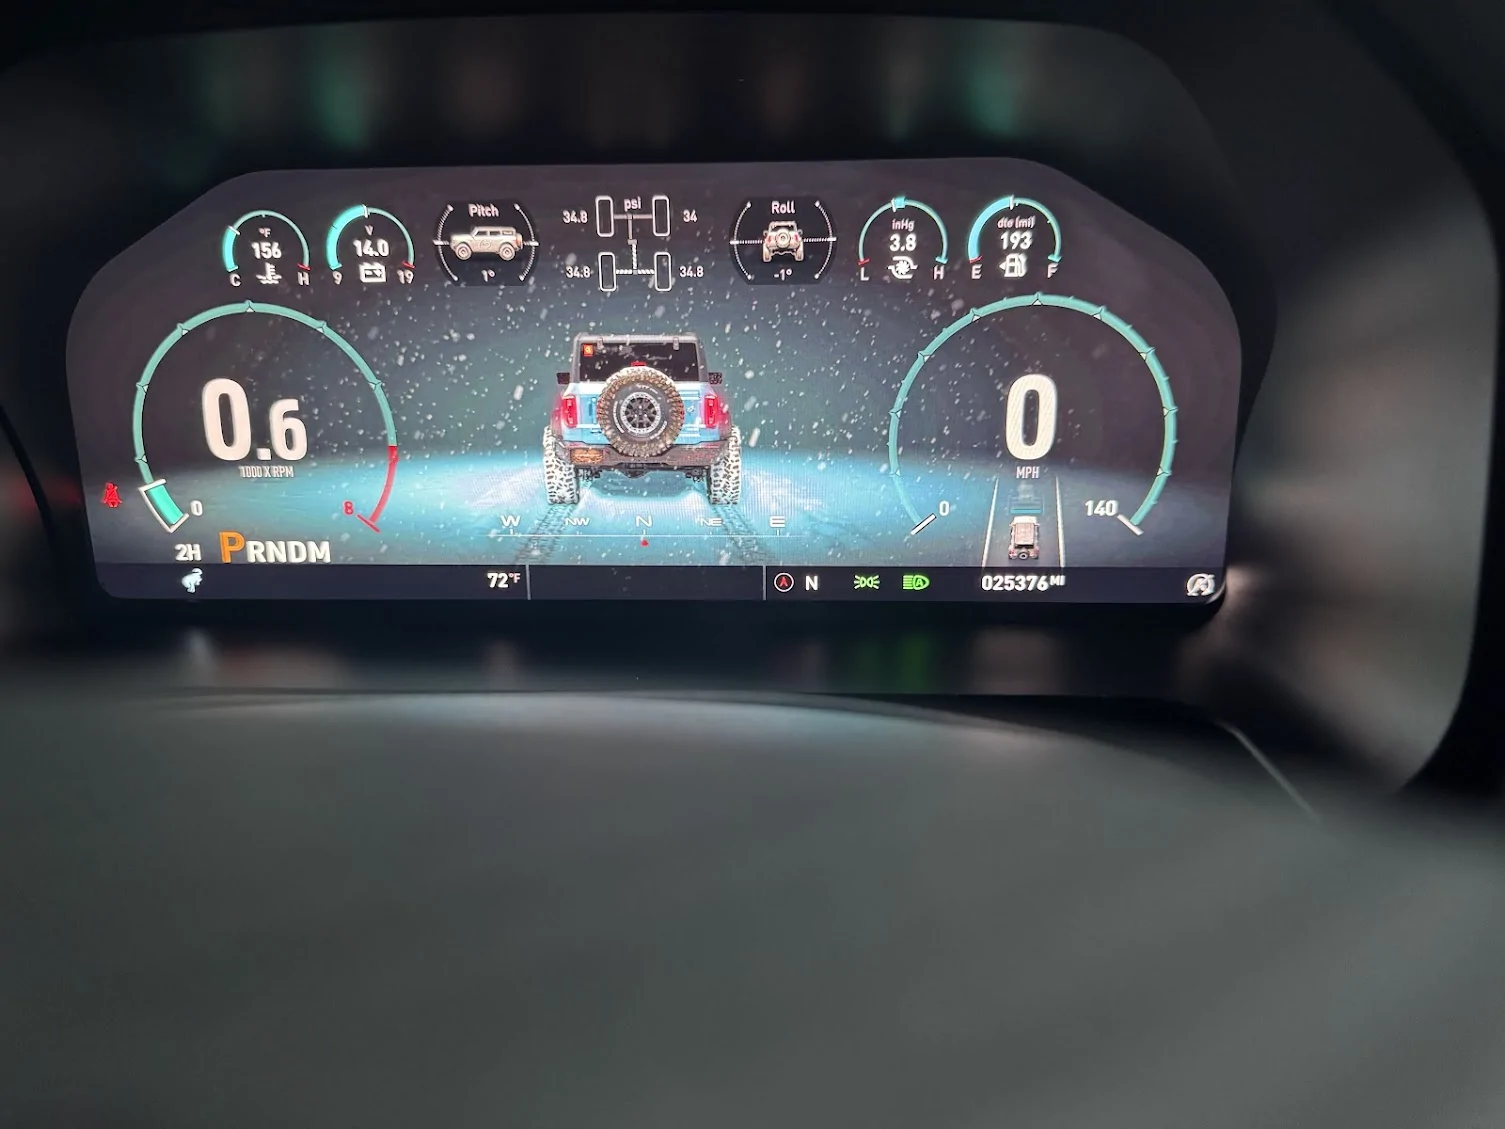
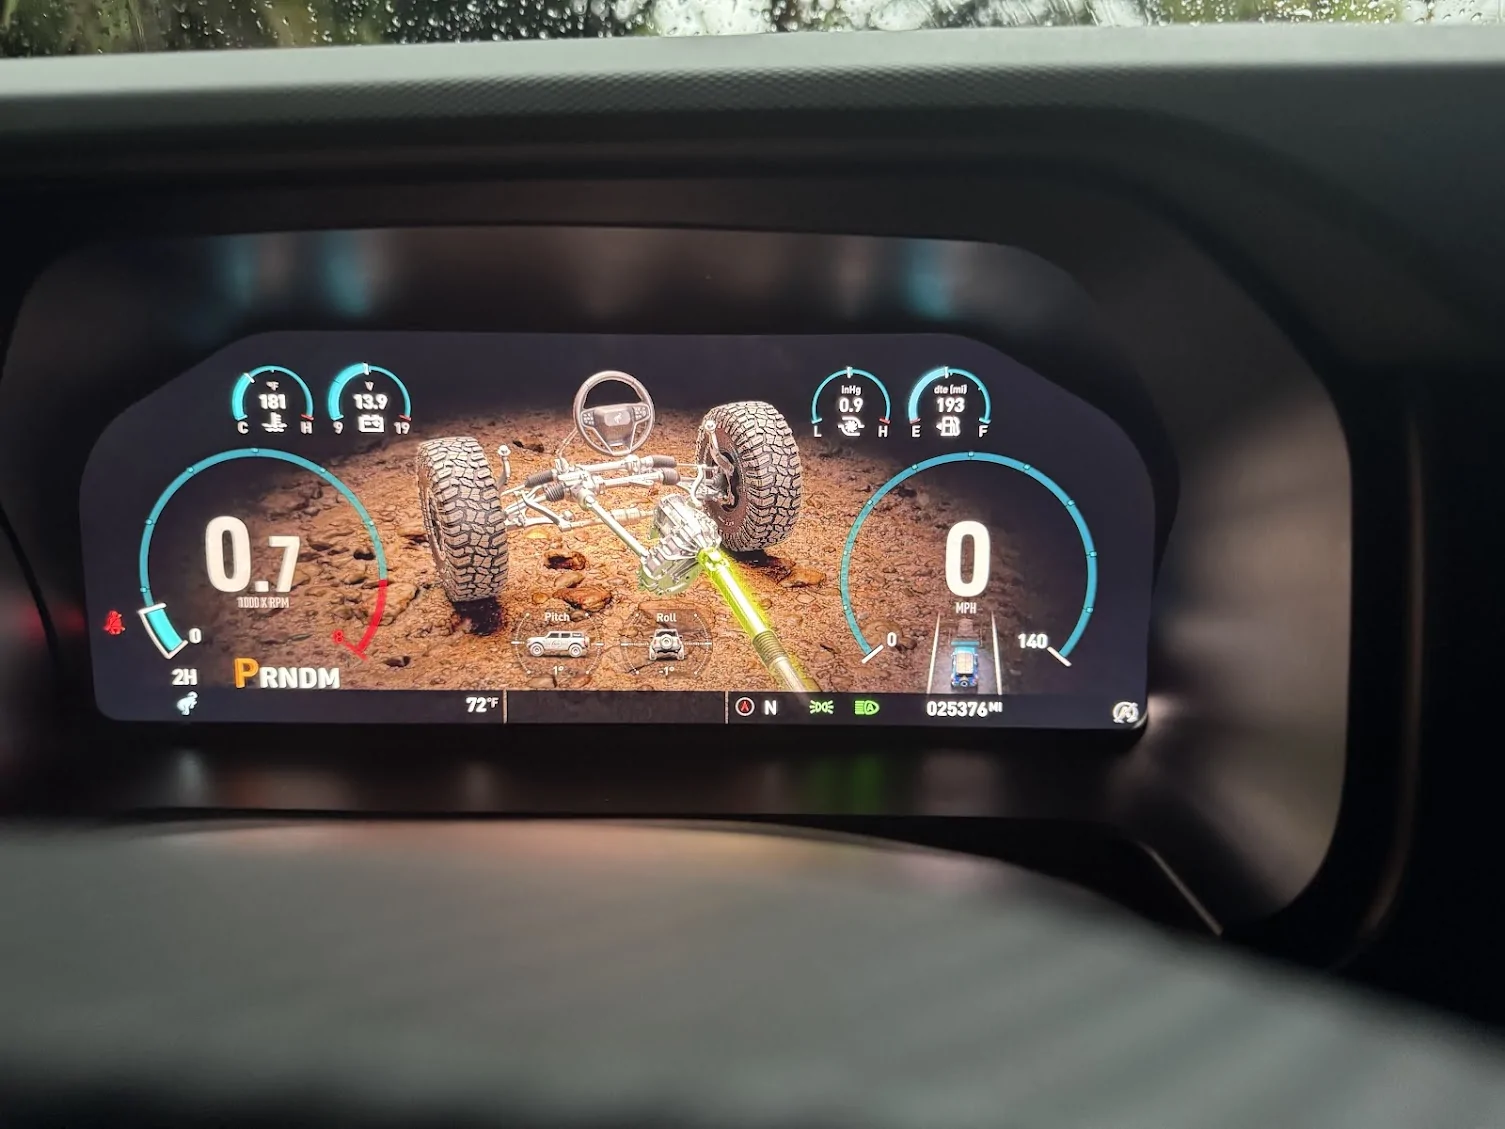
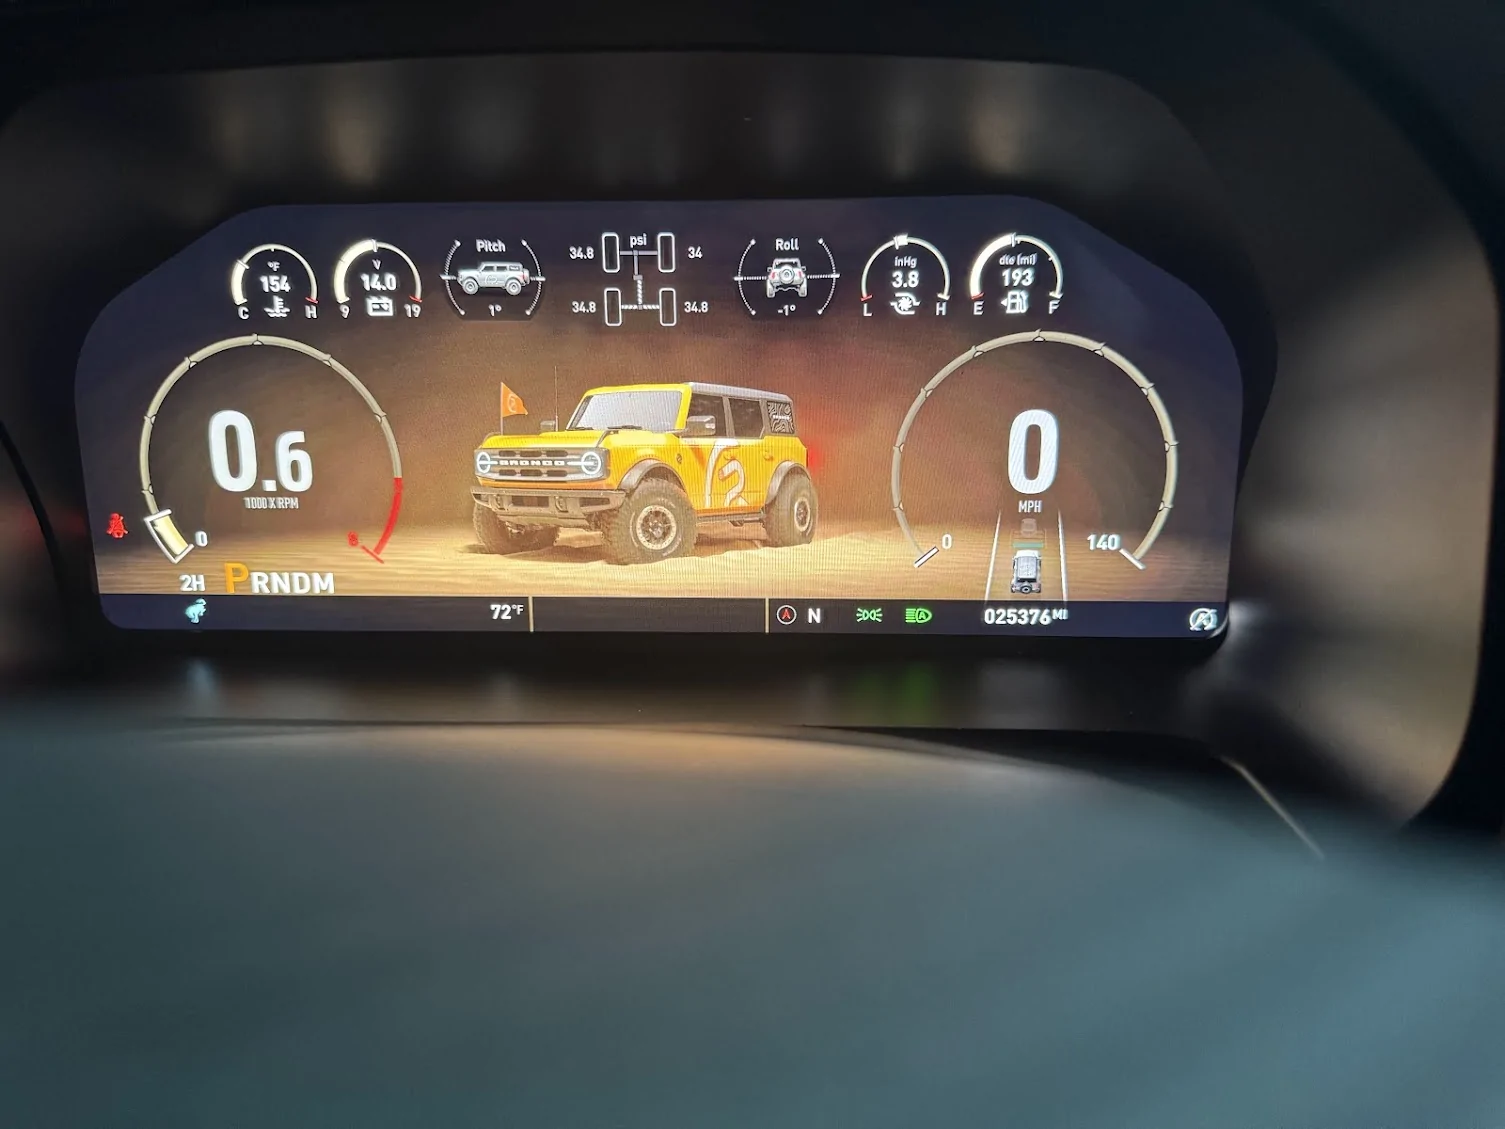
The modes, or rather themes, are changed by hitting OK, then using the up and down arrows. They change from Street, Snow, Sand, Mud, and Rocks. They all have animations that can be turned on or off. When using your GOAT modes and the THEMES, the GOAT modes will change with an ICON in the lower left-hand corner, and you will get the normal changing shift screens. THIS WILL NOT CHANGE THE THEMES. You can drive in any GOAT mode on any of the THEMES screens. If you change to say SAND GOAT mode, you have to manually change to the SAND THEME. Now it may seem like a HUH? moment, but it works. When you change to the SAND THEME mode, you are rewarded with a Sandstorm(lol), but more importantly, you get the pitch and angles icons, as well as the power distribution icon. It works well. Also, the Rocks, Mud N Ruts have the same type of screen. You also have a full OFF-ROAD theme, which will show an animated driveline that will show when your lockers are locked, when you have your sway-bar disconnected. It also has a steering wheel that is supposed to show the angle of your wheel turn, but that is not working. Again, not sure if that did not make it in, or if something is not connected.
Final Thoughts
I find the cluster(so far) as a solid piece. At the intro price I purchased it for (less than 1k) I think it's a good investment and upgrade for those who do not like the OEM cluster. It has all the functions of the cluster; it just flat-out looks better. There is no fear of locking things up in the ECU, because it reads and collects all of its info from the ECU. It then displays it on the screen. The build is quality, the graphics are crisp, and the animations are fluid. I think it's a coin well spent and a great upgrade.
I am going to post some pics, and try my hand at putting together a video I recorded.......So on to the next thread.
I ordered the cluster on 8/28, and it arrived at the installation shop on 9/5. The shop is Dalto Shop Customs in Miami. They specialize in off-road vehicle customization as well as classic and other vehicles. The bulk of their work is on off-road vehicles. The shop is indeed impressive and has a long history of doing custom work. They are also at the forefront of doing Caroboter installations for the cluster installations.
I went to the shop this morning for my 10:30 installation. The shop owner (Mauro) greeted me with my cluster. It was well packaged and had my vehicle's nickname on the box. (This is how it was sent from the vendor; they asked you for a nickname.) I unpacked it with him, and I was surprised by the heft it had. It was sturdy, well put together. Did not feel cheap at all; it was every bit put together as the OEM cluster, if not more. Not bad. In the package, it had a sync cable, and sync password, the cluster, and a bezel for it. It did not have any instructions. I questioned this, and Mauro informed me that the cluster in its setup had instructions to get from the WEB. I will also state that if you do not know how to pull your old cluster out, I do not think you are going to get it from Caroboter. I could be wrong, as I did not see the install due to shop policy, so maybe...they have an instruction video you cannot pull up unless you are doing the install. I have seen other vendors take this approach as well.

The Dalto Shop will release an installation video themselves (He had his social media guy there documenting it all). I was not able to watch it being done. What I do know it is pretty much a plug-and-play setup, with removing our OEM cluster, and plugging this one in. Set the sync cable and punch in the activation code. Let it sync up to the system and restart. That's it. After about 2 1/2 hours or so, Mauro came out to the main showroom and told me it was completed. Huzzah! Let's see what we got.
The Caroboter Cluster
A vehicle rolls along, a 4-door Bronco, customized of course, and it looks good. (They ask if you have a 2-door or a 4-door, so I believe if you have a few doors, it will show that). Your TAC is on the left, the SPEED is on the right. In the middle, you have different screens you can rotate through. The default one is the custom-looking 4-door Bronco, with the time in a bigger bold print, the date and day, and the nickname you submitted. (Jessabelle) In my case. Under the TAC you have the PRDNM, the 2H, 4A, 4H, 4L, drive mode, and temp. To the right, you have the compass, direction (N), and lights. In the speedo, you have the lane keeping, which is animated. Underneath the speedo, you can change the display from several individual displays; the default is your mileage. Above, you have displays much like the BRaptor setup, and they can all be changed. A note, the changes to PSI and F/C go from the vehicle setup to the custer. You can no longer change those settings in the vehicle settings.
Start-up and Driving
I jumped into Jessabelle and fired her up. I was greeted with a picture of Jessabelle, (one I had sent to the vendor), along with Jessabelle's text, including the time and date underneath it. Cool. It then went into the Caroboter logo (snazzy)to the driving screen with an animation that was smooth and quick. Honestly, the sequence was about the same time as the Ford boot-up sequence for OEM if not quicker. First, the screen is really, really clear. Pics do not do it justice. It is truly HD, 1080p, or perhaps higher. Heck, it could be 2k. It is just that clear. The animations are nice and smooth. It is truly high quality. I went through the setup as I changed things from European to American metrics. Pretty simple. With that done, I set the values of what I wanted to see on screen at the top. I chose Oil, Battery, Turbo, and Fuel. You can turn off lane keeping by hitting your button (if equipped) I left it on.
All of your things pop up on the center screen, the seatbelt chime....bloody hell, I think they made it LOUDER. You will buckle up just not to hear it blaring at you. The blinker noise is more muted, almost sounds like a knock tone. The PRDNM lights up as usual, and your mode shows next to it. great. The animation for the dials does not lag and is snappy. It simply works and is pleasing to the eye. Your speed is displayed in the right circle, your RPM in the left, followed by a bar to show where you are on the unit. (Reminds me of my GT500 cluster) No more looking at a vertical bar for the TAC. There are clear numbers in the upper modules, easy to see. In the center screen, you can change what you are looking at. Trip A/B, The time/date with your vehicle Nickname, Drive assist, Fuel Economy, Engine Info, Tire Angle(Not sure what this does, my wheels do not turn when I turn the wheel), and TPMS.
The Modes and Themes
The modes, or rather themes, are changed by hitting OK, then using the up and down arrows. They change from Street, Snow, Sand, Mud, and Rocks. They all have animations that can be turned on or off. When using your GOAT modes and the THEMES, the GOAT modes will change with an ICON in the lower left-hand corner, and you will get the normal changing shift screens. THIS WILL NOT CHANGE THE THEMES. You can drive in any GOAT mode on any of the THEMES screens. If you change to say SAND GOAT mode, you have to manually change to the SAND THEME. Now it may seem like a HUH? moment, but it works. When you change to the SAND THEME mode, you are rewarded with a Sandstorm(lol), but more importantly, you get the pitch and angles icons, as well as the power distribution icon. It works well. Also, the Rocks, Mud N Ruts have the same type of screen. You also have a full OFF-ROAD theme, which will show an animated driveline that will show when your lockers are locked, when you have your sway-bar disconnected. It also has a steering wheel that is supposed to show the angle of your wheel turn, but that is not working. Again, not sure if that did not make it in, or if something is not connected.
Final Thoughts
I find the cluster(so far) as a solid piece. At the intro price I purchased it for (less than 1k) I think it's a good investment and upgrade for those who do not like the OEM cluster. It has all the functions of the cluster; it just flat-out looks better. There is no fear of locking things up in the ECU, because it reads and collects all of its info from the ECU. It then displays it on the screen. The build is quality, the graphics are crisp, and the animations are fluid. I think it's a coin well spent and a great upgrade.
I am going to post some pics, and try my hand at putting together a video I recorded.......So on to the next thread.
Sponsored


")


