Sponsored

Show me your 3D printed accessories. 3D Prints for Bronco Enthusiasts.

Greenbronc

Black Diamond
Active Member
First Name
Joe
Joined
Jan 14, 2024
Threads
1
Messages
35
Reaction score
25
Location
Texas
Vehicle(s)
2024 BD manual 4-door
Your Bronco Model
Black Diamond
Clubs
 
I did a cup holder for something else that had captive tpu inserts, could look at that

looks great shocked at how many people have printed them, I do agree with adding some thing to keep them from rattling. Still not bad for me using a tape measure and cardboard for basically all of it šŸ˜‚
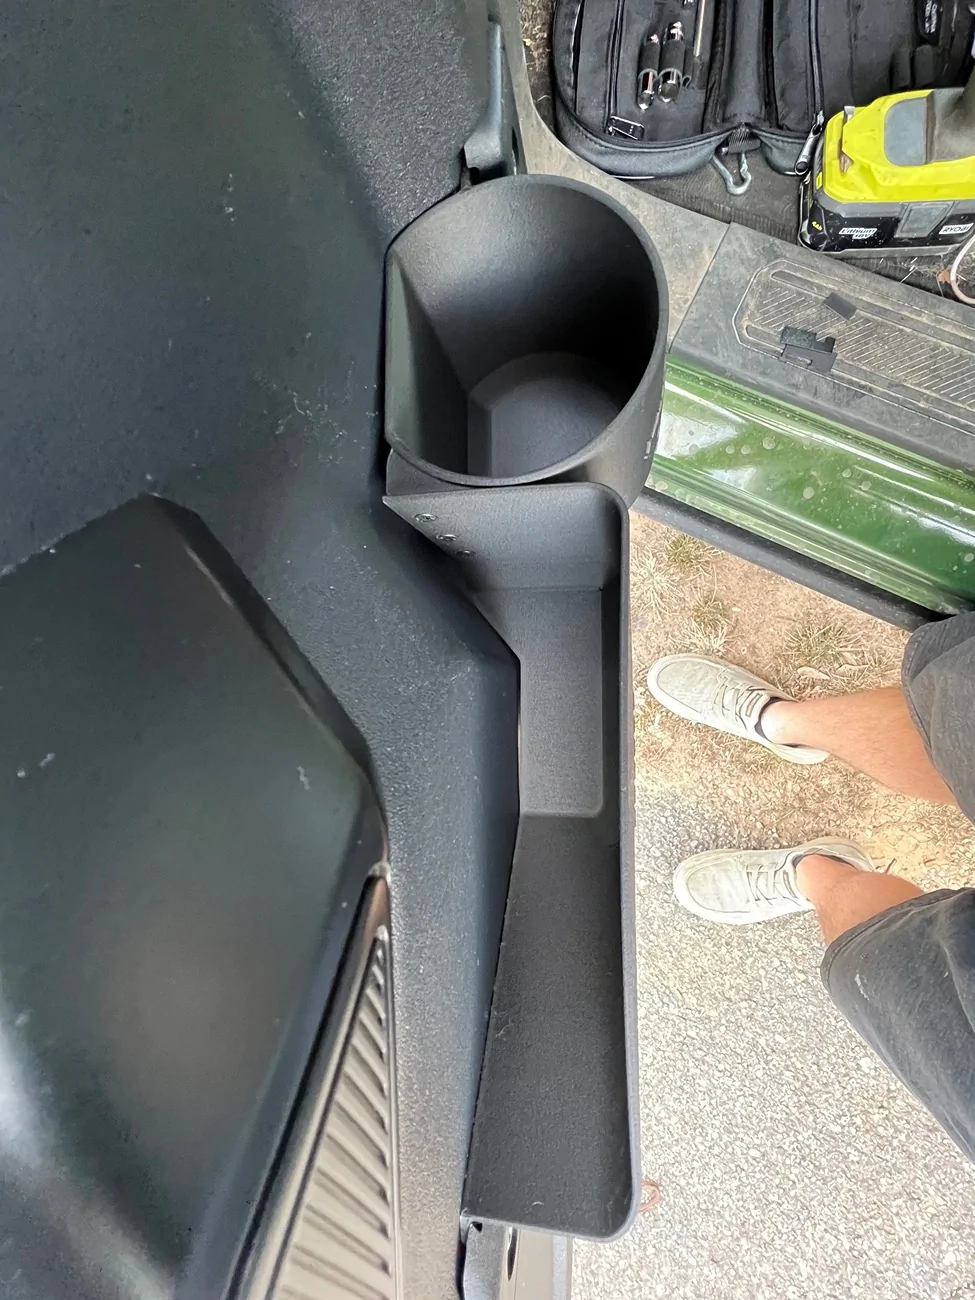
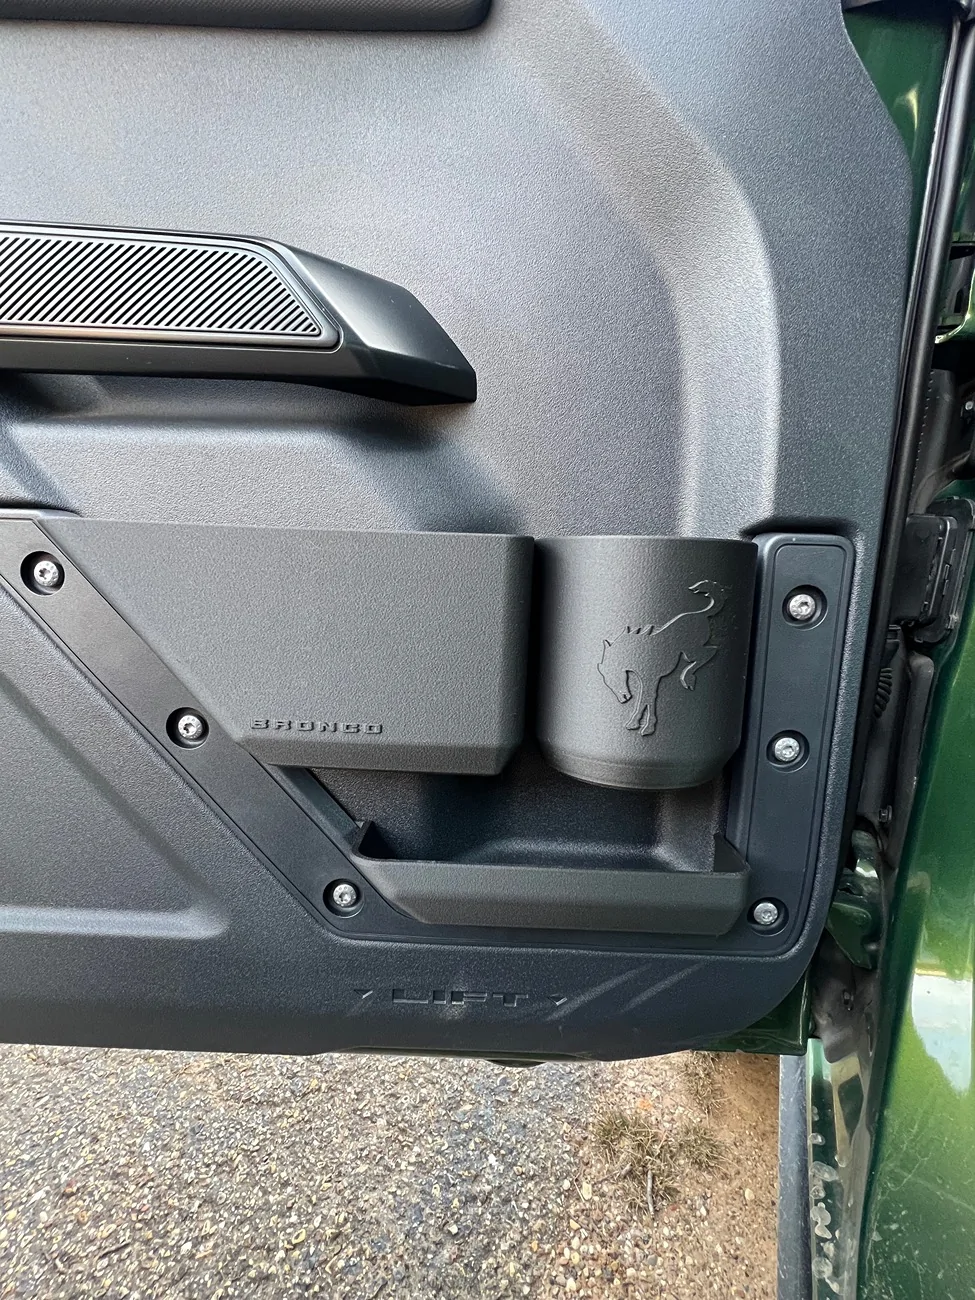
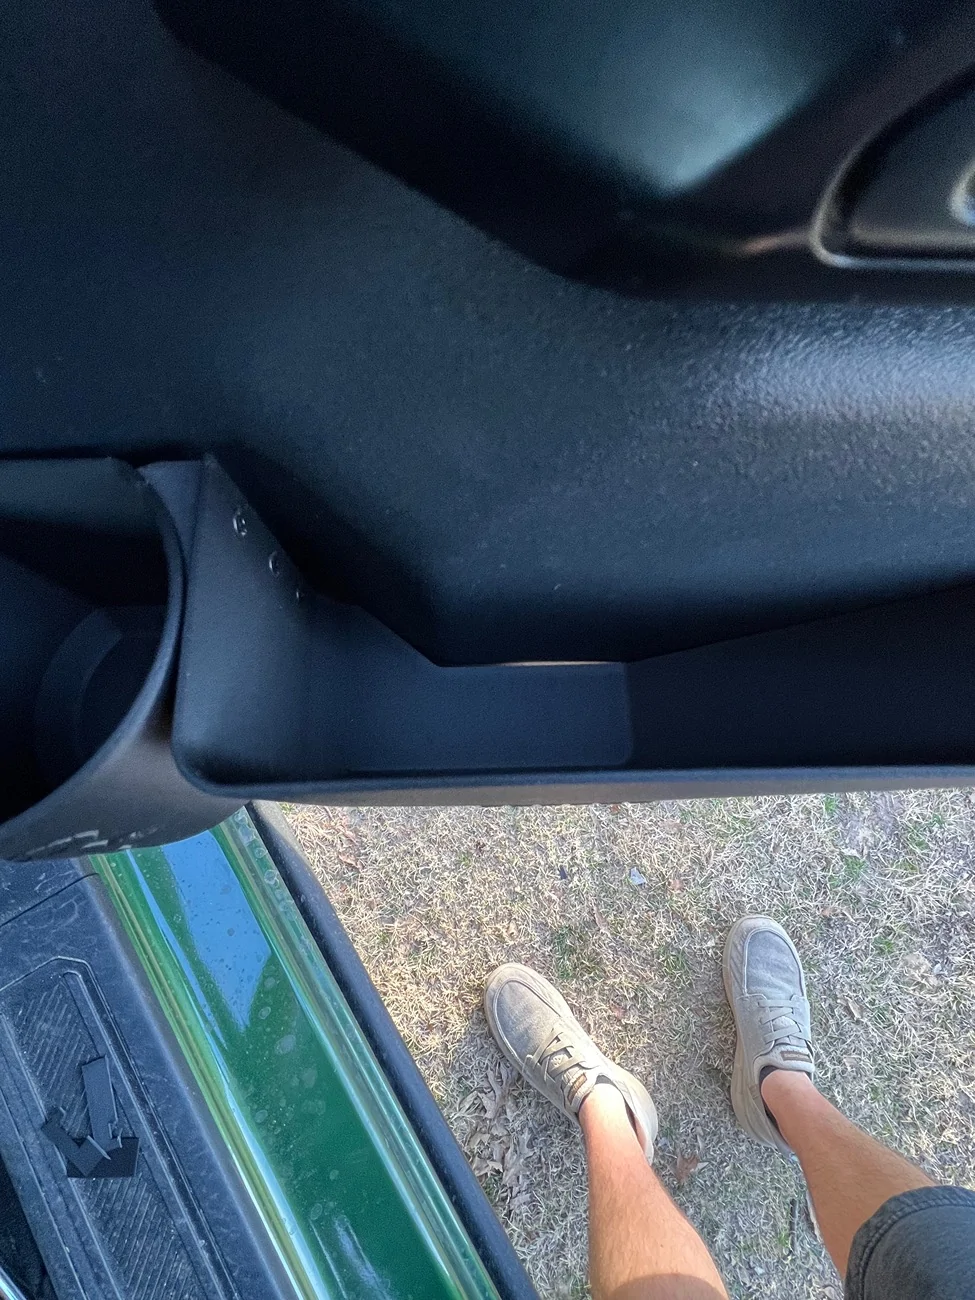
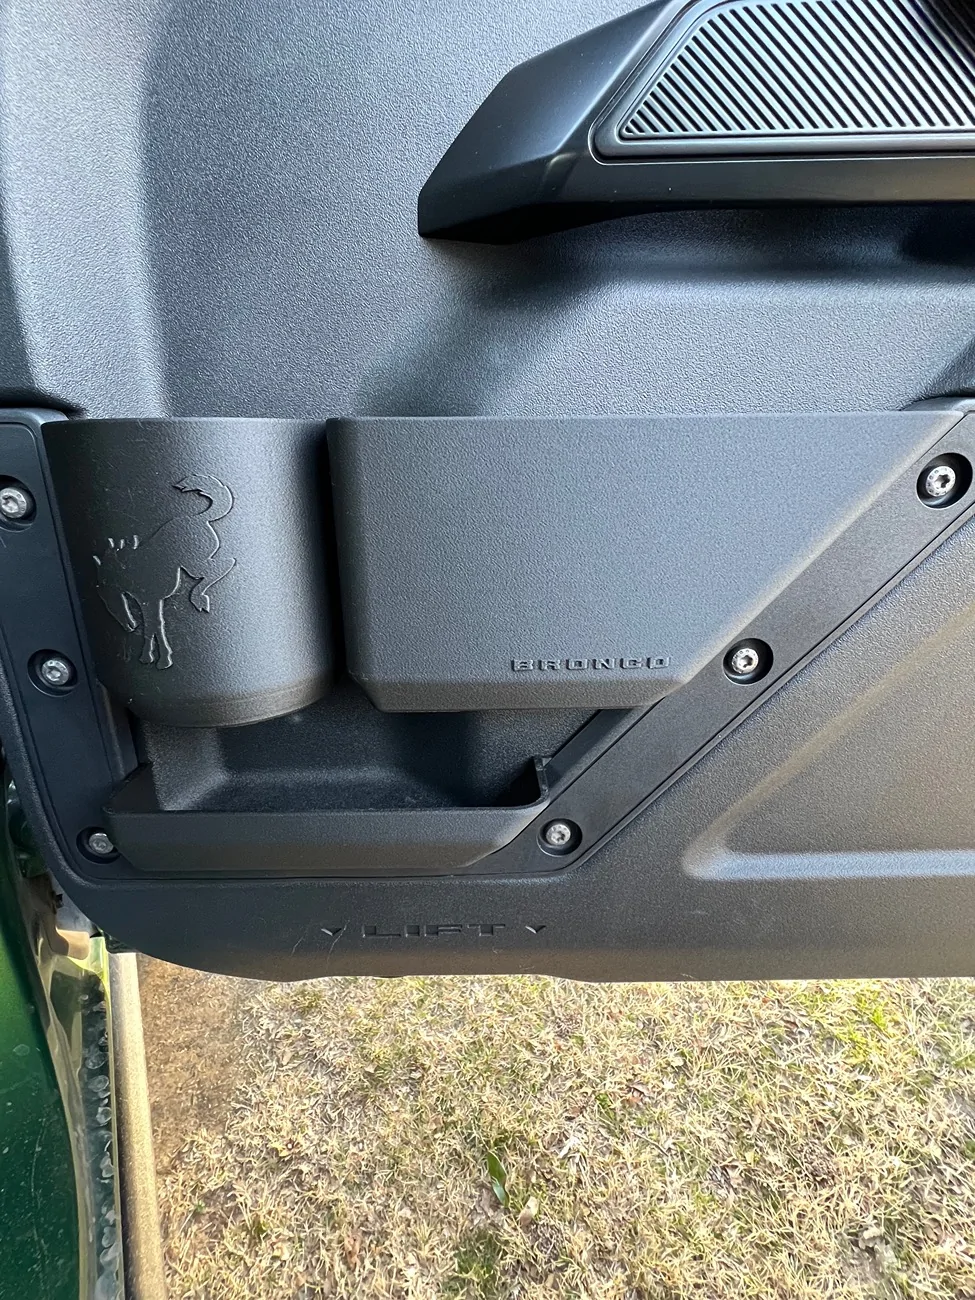
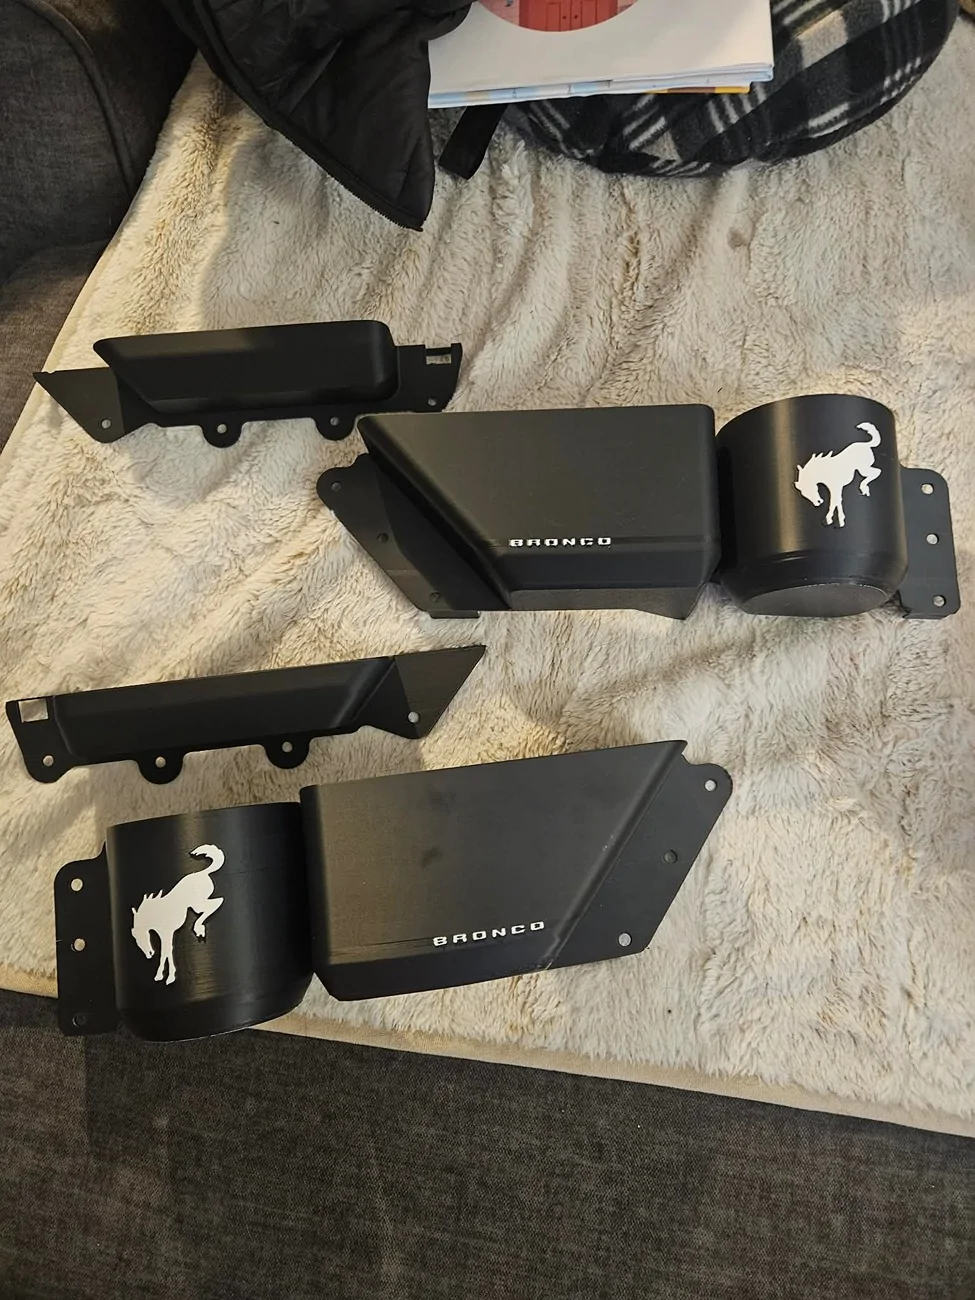
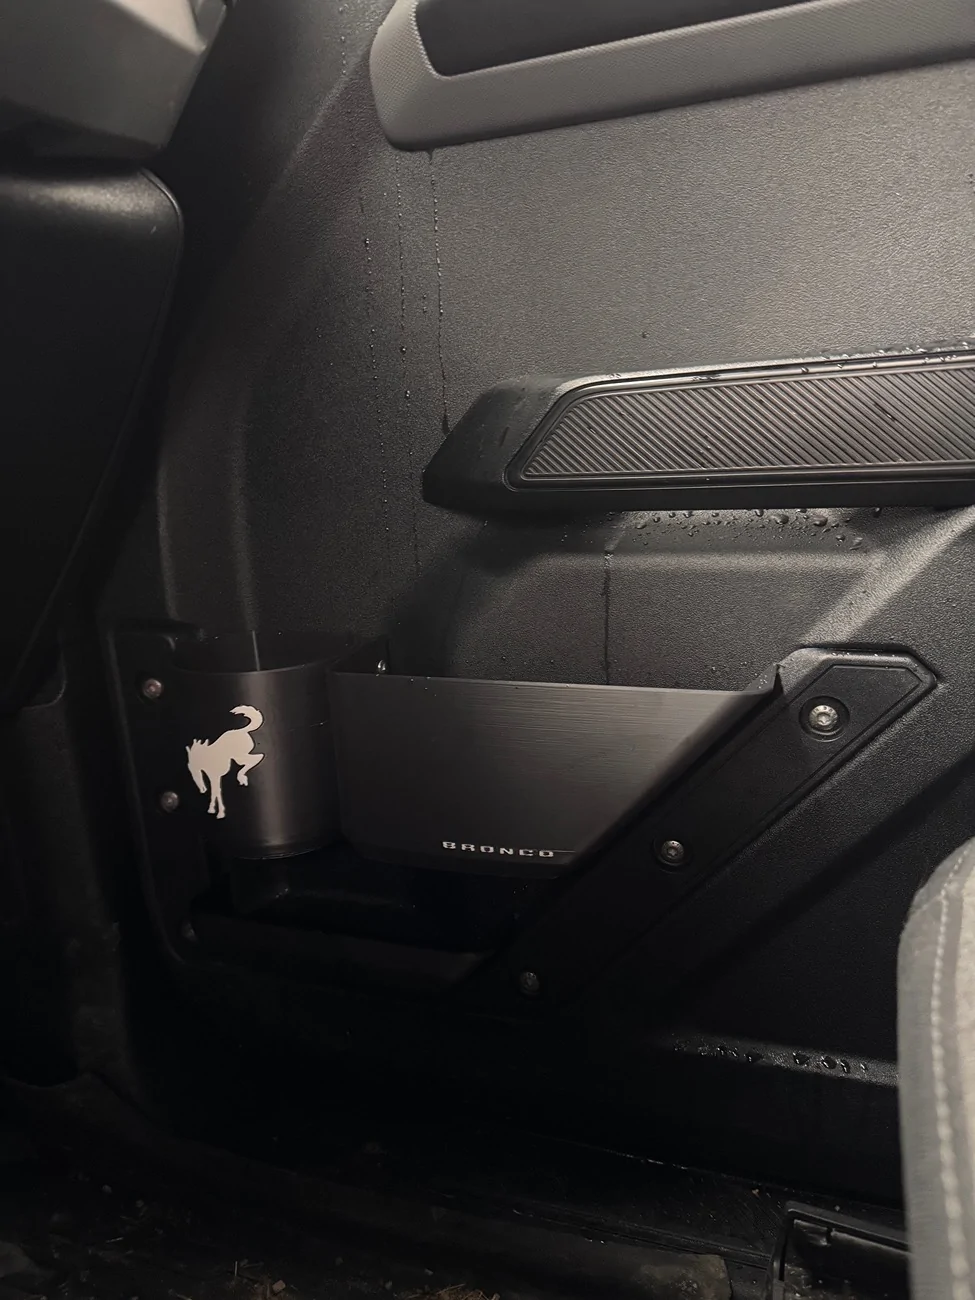
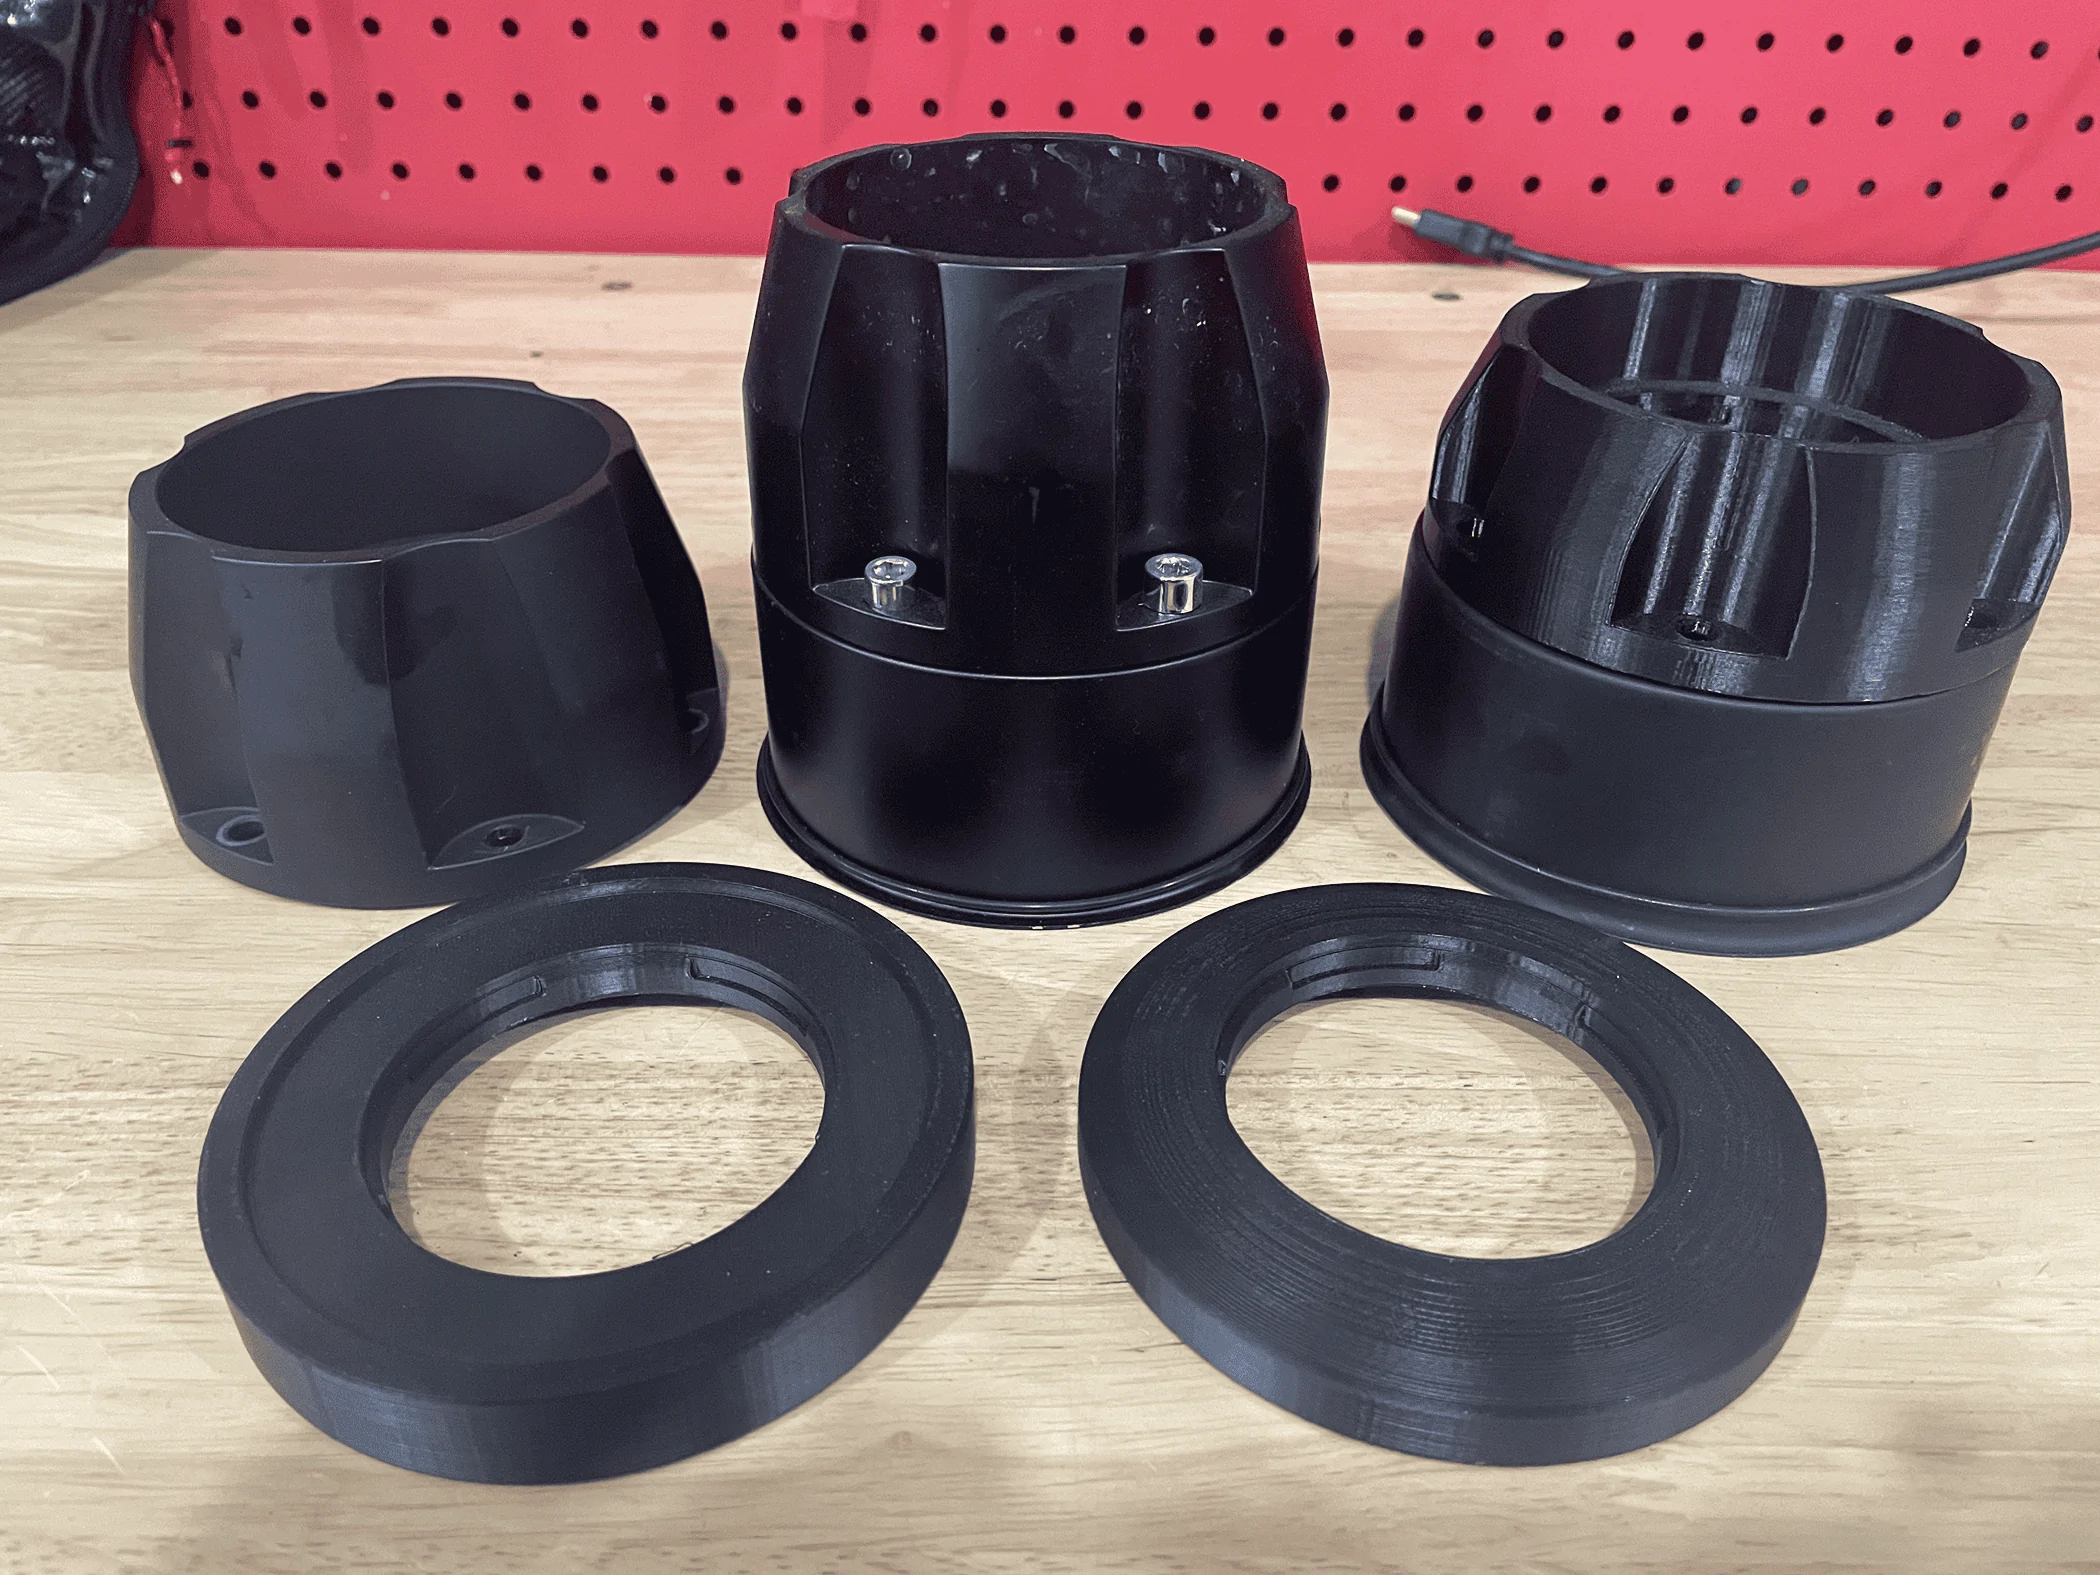
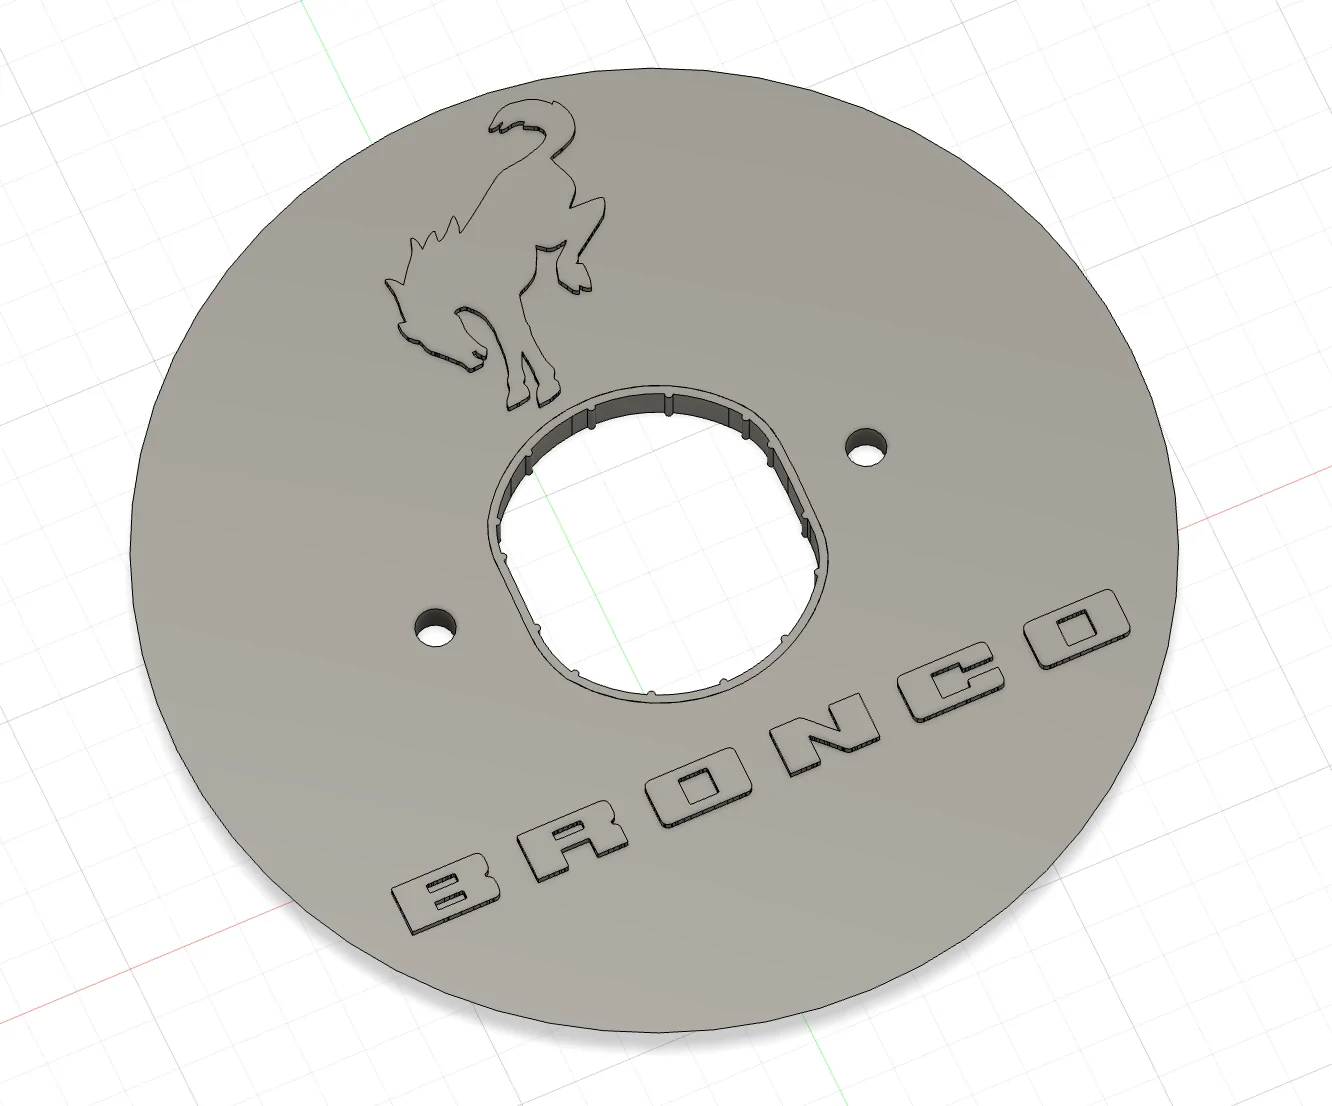
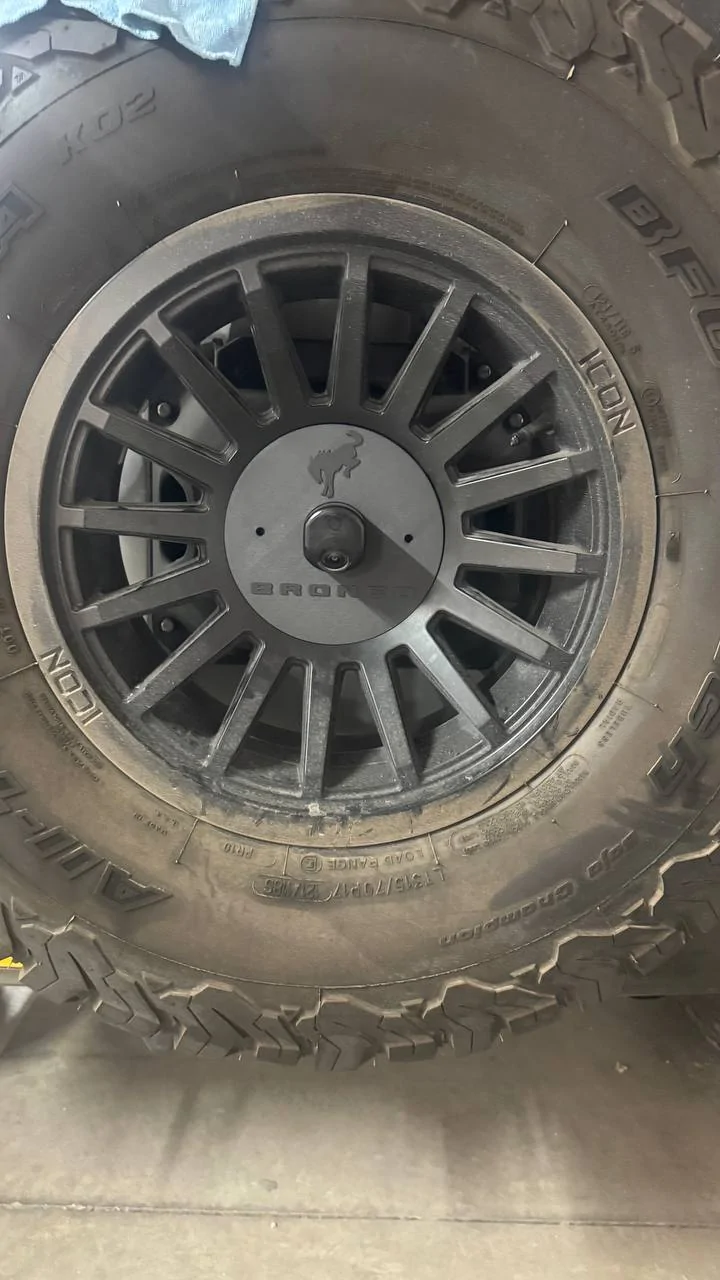
I’m not saying you should start a print farm, but it’s a very good print
Sponsored


DarthLincoln

Badlands
Well-Known Member
First Name
Chuck
Joined
Feb 11, 2022
Threads
2
Messages
927
Reaction score
2,303
Location
Northern California - Contra Costa County
Vehicle(s)
1999 BMW M coupe, 2023 Ford Bronco Badlands 2dr
Your Bronco Model
Badlands
Clubs
 
They came out perfect. I did leave them in the oven to anneal them. Hopefully they survive the Texas heat. Also ordered some eruption green paint, I’ll update whenever it comes in.
I did have little gaps that I need to put some weather stripping around. Probably add some foam behind the cupholder to make it fit tighter and prevent rattling.

IMG_6477.webp


IMG_6476.webp


IMG_6479.webp


IMG_6478.webp
that’s an amazing quality print! I can’t detect the print layers. Is that from the oven annealing, or from printer settings like fuzzy skin?
 

Greenbronc

Black Diamond
Active Member
First Name
Joe
Joined
Jan 14, 2024
Threads
1
Messages
35
Reaction score
25
Location
Texas
Vehicle(s)
2024 BD manual 4-door
Your Bronco Model
Black Diamond
Clubs
 
that’s an amazing quality print! I can’t detect the print layers. Is that from the oven annealing, or from printer settings like fuzzy skin?
I changed the fan speed to 100 and set it to stay on the entire time it printed, also adjusted the nozzle temperature and put the bed temp to 55c. I used poly maker ht-pla-gf. I searched the Bambu and poly maker site to find the best settings and combined them, no fuzzy skin. It came off the printer looking like that. I didn’t notice any difference from before or after the oven other than maybe they’re a little stiffer. I’ve never had a print turn out that clean. It was on a Bambu A1
 

DarthLincoln

Badlands
Well-Known Member
First Name
Chuck
Joined
Feb 11, 2022
Threads
2
Messages
927
Reaction score
2,303
Location
Northern California - Contra Costa County
Vehicle(s)
1999 BMW M coupe, 2023 Ford Bronco Badlands 2dr
Your Bronco Model
Badlands
Clubs
 
I changed the fan speed to 100 and set it to stay on the entire time it printed, also adjusted the nozzle temperature and put the bed temp to 55c. I used poly maker ht-pla-gf. I searched the Bambu and poly maker site to find the best settings and combined them, no fuzzy skin. It came off the printer looking like that. I didn’t notice any difference from before or after the oven other than maybe they’re a little stiffer. I’ve never had a print turn out that clean. It was on a Bambu A1
Ah. Maybe it’s the glass fibers in the HT-PLA-GF. Their sample print object in HT-PLA-GF has a slight texture without the harsh print layer ridges that the regular PLA has. I’ll have to try it.

HT-PLA-GF:
Ford Bronco Show me your 3D printed accessories. 3D Prints for Bronco Enthusiasts. IMG_0344


PLA:
Ford Bronco Show me your 3D printed accessories. 3D Prints for Bronco Enthusiasts. IMG_0343
 

waltBronco

Big Bend
Active Member
First Name
Walter
Joined
Oct 5, 2025
Threads
0
Messages
28
Reaction score
60
Location
Canada
Vehicle(s)
Ford Bronco
Your Bronco Model
Big Bend
Clubs
 
Here are the files for the drivers door, I used ASA for the material as its better for car environments. I have not mirrored for the passenger side yet but will soon. I wanted to try these out for a few days make sure i didn't need to tweak anything.

There's some tabs on two of the parts I did that just to aid the print and trimmed them off. the big pocket attaches to the cup holder with m4 screws I did this so it would fit in my printer/ modularity if i wanted to change anything in the future!

I will post on makerworld when both driver and passenger are done
Hi I had them printed up! Can’t wait to put them on but had one question. What length of M4 screws do you use? Did you need screw inserts as well? Thanks.

Ford Bronco Show me your 3D printed accessories. 3D Prints for Bronco Enthusiasts. att.mg7bsFCXo0QuySBgY1nDpsyFCZj8LscRQ6o2FxpXvjc


Update installed. The mesh was just about coming apart worse that I thought. Used self taping screws and 2 part epoxy. Went on easily. I really like how it places the drink holder further forward because I have long arms. šŸ¤˜šŸ¼

Ford Bronco Show me your 3D printed accessories. 3D Prints for Bronco Enthusiasts. IMG_0215
 
Last edited:

Sponsored

ejedmo5

Wildtrak
Active Member
First Name
Eric
Joined
Oct 3, 2025
Threads
0
Messages
34
Reaction score
99
Location
indiana
Vehicle(s)
2022 wildtrak
Your Bronco Model
Wildtrak
Hi I had them printed up! Can’t wait to put them on but had one question. What length of M4 screws do you use? Did you need screw inserts as well? Thanks.

att.mg7bsFCXo0QuySBgY1nDpsyFCZj8LscRQ6o2FxpXvjc.webp
I think it was 8mm length is what I used no need for inserts, they have held great in my case. Those turned out great!
 

beachbraptor

Raptor
Member
First Name
Sean
Joined
Feb 15, 2026
Threads
0
Messages
10
Reaction score
23
Location
NJ
Vehicle(s)
Bronco Raptor, Explorer ST, Model 3 Performance
Your Bronco Model
Raptor
I was wondering if anyone happened to have an STL for a part that fits onto the rear MIC roof (where roof racks clip into)? I have an idea, was hoping to get started with something that already fits there, but otherwise will get to work on modeling it.
 

beachbraptor

Raptor
Member
First Name
Sean
Joined
Feb 15, 2026
Threads
0
Messages
10
Reaction score
23
Location
NJ
Vehicle(s)
Bronco Raptor, Explorer ST, Model 3 Performance
Your Bronco Model
Raptor
I will scan the roof and interior cargo to include the roof bar. .
Let me plan it out and see what I can get you guys. I will make it a class project.
Any updates on this project? Sounds awesome!
 

accidentpronee

Base
New Member
First Name
John
Joined
Jan 2, 2026
Threads
0
Messages
1
Reaction score
0
Location
san leandro
Vehicle(s)
bronco
Your Bronco Model
Base
Clubs
 
You mind sending me the STL for that?
I’ll also take
We could make something that works by sticking onto the lugs I think. Main issue is figuring out the sweep profile needed for everything to fit. For something like this, I would start with a side profile that would be revolved around an axis. We need to figure out what that profile needs to be, then can add some type of lug attachment system, and the Bronco logo interface details.

1712834758355-10.png
1712834774651-gn.png
1712834849267-rj.png


Also for those interested or curious, I designed a version of these caps for Method wheels for a buddy of mine. As you may know, the stock hub cap for the methods is very long (cool design but weirdly long), so I started off by copying that design, then shortening it to something more reasonable, and adding the interface to reuse the OEM Bronco Logo's.

1712835009063-2h.png
1712835037128-fh.png

Top left: stock cap. Top middle: stock on top of the Method adapter. Top right: my truncated version (allowing use of Bronco center cap), also shown on the adapter.
Bottom left and right are alternative hubs that fit to the Method adapter and allow use of the Bronco center cap
1712928140102-ep.webp


Oh, I totally forgot, but I made some storage hooks for the rear, like some others. I tried to heavily radius everything to reduce stress concentration. One for the blank hole on the side of the roll bar (left), the other one to piggy back on the bolt for the bottom of the speaker (right). Never even got around to adding them to my site, but hit me up if you want the STL.

1712835424797-lw.png
1712835474519-0e.png

1712921848483-47.png
would def take the stl for this!
 

Sponsored

SillyPosition

Badlands
Well-Known Member
First Name
Silly
Joined
Feb 14, 2023
Threads
25
Messages
242
Reaction score
72
Location
Israel
Vehicle(s)
None
Your Bronco Model
Badlands
Spare tire cover, fits icon rims
Made of ASACF and a TPU95A gasket in the center to apply reasonable amount of pressure, yet making it quite easy to remove if needed using the some T shaped tool using the two holes.

I'll upload it to makerworld soon, if anyone is interested

Ford Bronco Show me your 3D printed accessories. 3D Prints for Bronco Enthusiasts. 1772911113623-1

Ford Bronco Show me your 3D printed accessories. 3D Prints for Bronco Enthusiasts. 1772911073211-h5
 

Gage

Badlands
Member
Joined
Feb 19, 2026
Threads
0
Messages
6
Reaction score
11
Location
NE Florida
Vehicle(s)
Subaru Outback, Subaru Forester, Bronco Badlands Sasquatch
Your Bronco Model
Badlands
Spare tire cover, fits icon rims
Made of ASACF and a TPU95A gasket in the center to apply reasonable amount of pressure, yet making it quite easy to remove if needed using the some T shaped tool using the two holes.

I'll upload it to makerworld soon, if anyone is interested

1772911113623-1e.webp

1772911073211-h5.webp
That looks sharp. I would definitely print that out if you will upload it!.
 

SillyPosition

Badlands
Well-Known Member
First Name
Silly
Joined
Feb 14, 2023
Threads
25
Messages
242
Reaction score
72
Location
Israel
Vehicle(s)
None
Your Bronco Model
Badlands
Uploaded: https://makerworld.com/en/models/24...n-icon-rims-spare-wheel-cap#profileId-2741392

I preferred printing in 45deg angle to make sure the top layer looks best.
You can always drop support, lay it on its back, and play around with better top layer paramters but Im not enough of an expert in this..I preferred hacking my way through and printing on its side.
two pieces, simply apply a few drops of CA on its back to make sure the gasket holds to the print properly.

Now thinking on my next item. Thoughts? :)
 

SillyPosition

Badlands
Well-Known Member
First Name
Silly
Joined
Feb 14, 2023
Threads
25
Messages
242
Reaction score
72
Location
Israel
Vehicle(s)
None
Your Bronco Model
Badlands
Nice, it’s 3d printed? What depth is it? And applied with glue?
Sponsored


Top