
- Thread starter
- #1
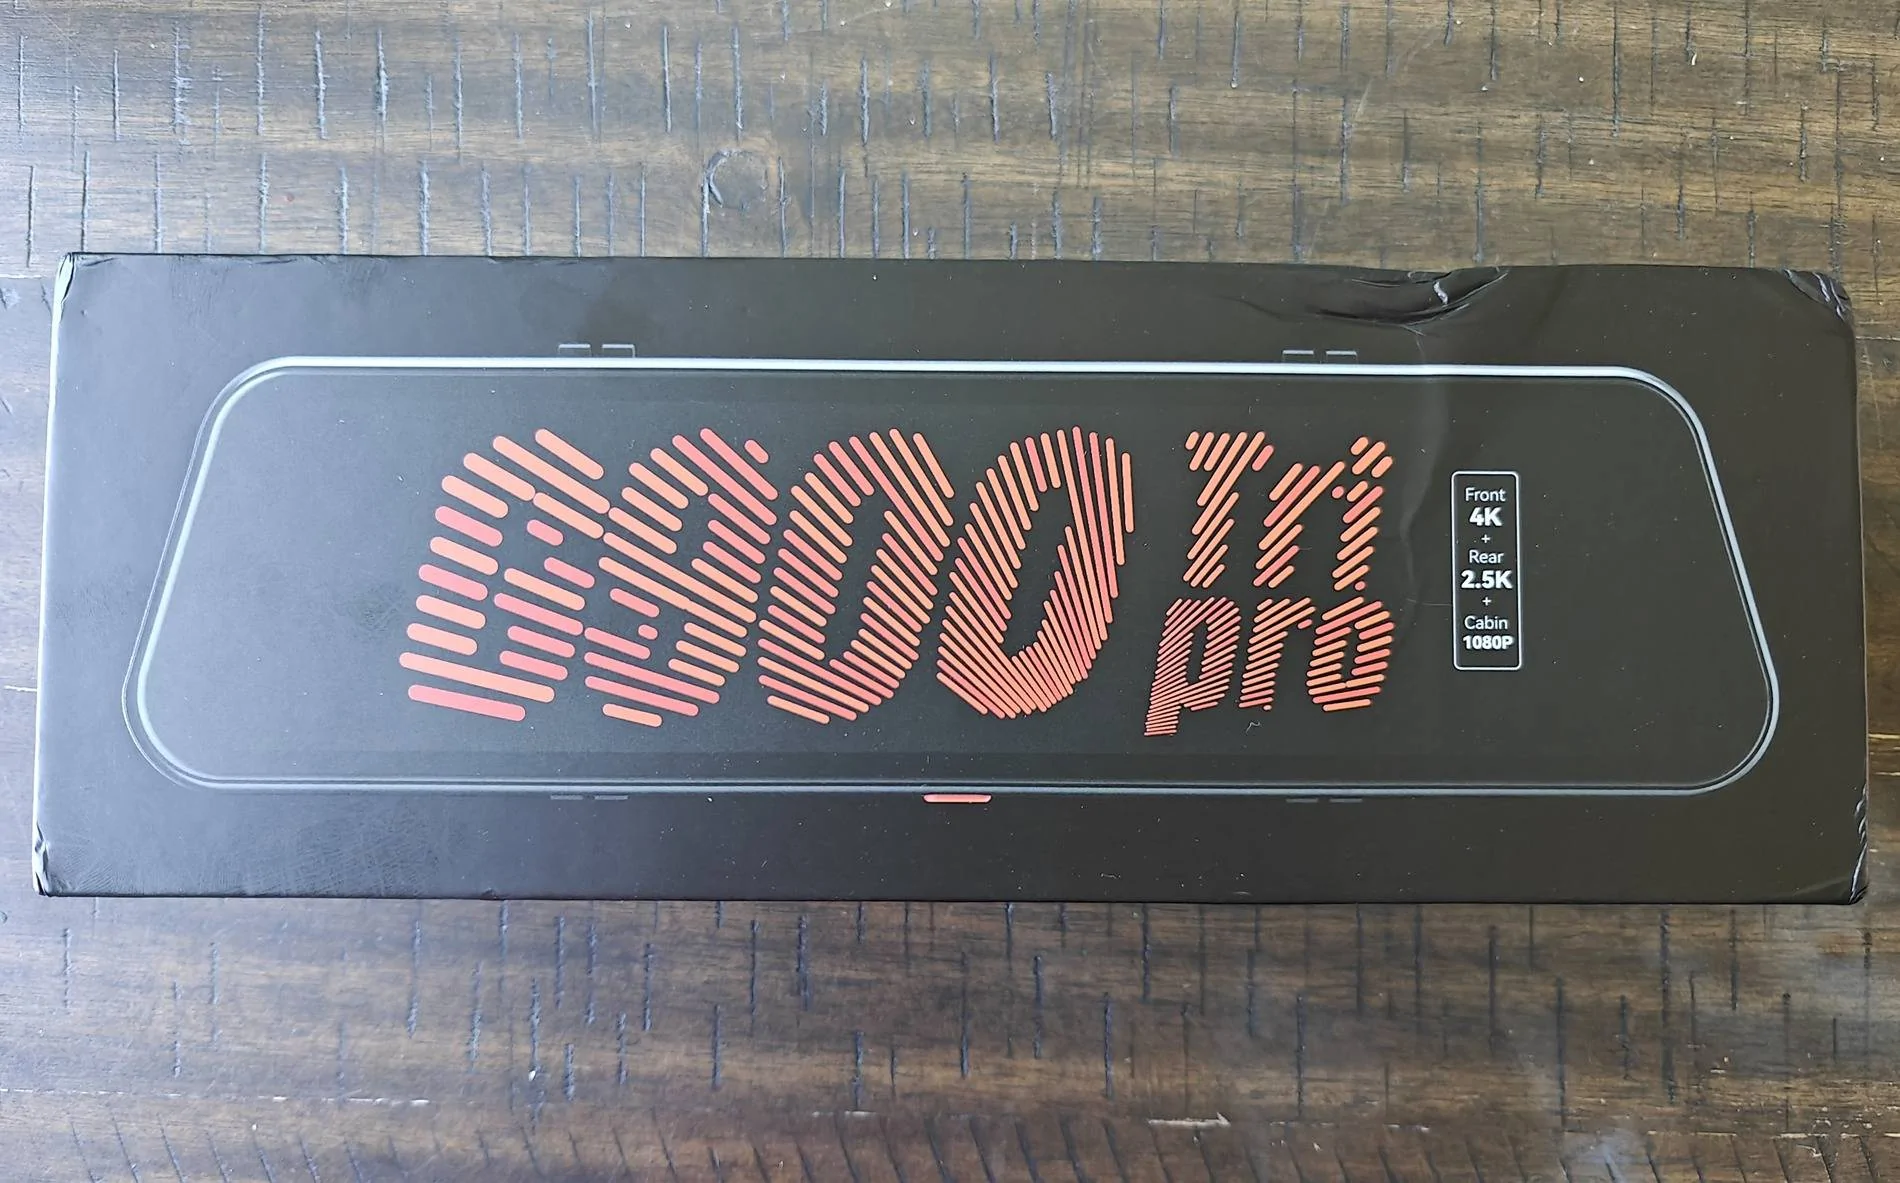
As promised to @WolfBox after winning the Wolfbox G900 TriPro in their giveaway, here is a (lengthy) review of my experience with installing & use!
It arrived in a bubble wrap mailer and the main box had a few dents in it, but the cameras/monitor are properly packaged within and were just fine.

Unboxing video with photos of included components. Please excuse the lack of videographer skill. Google drive link as it is too large a file to upload directly.
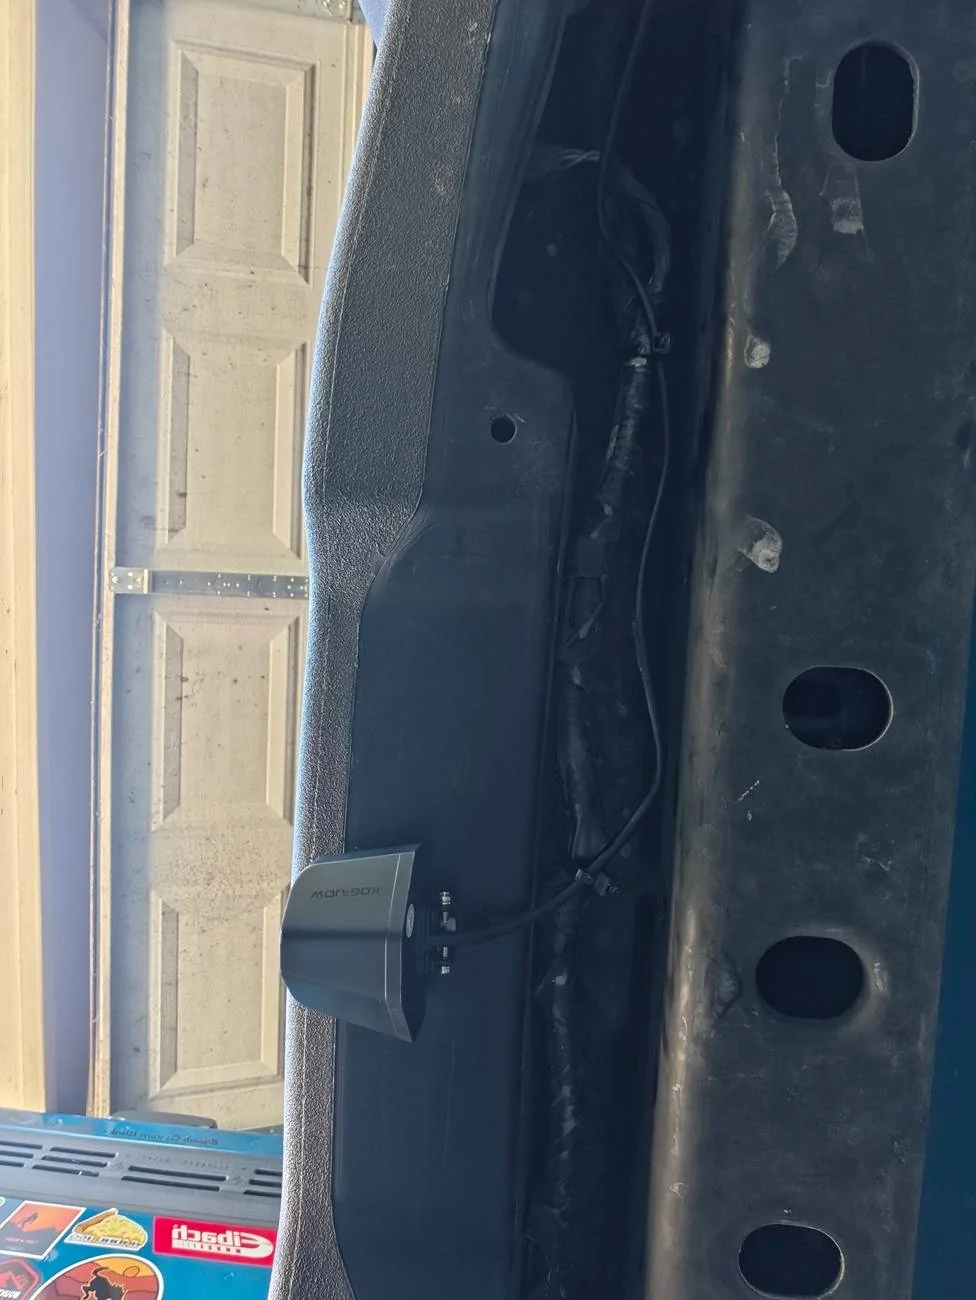
I installed the camera below the bumper, though I have ordered an extension in the event I decide to move it. I didn't love the idea of it perched on top of the third brake light or getting in the way of the spare. It may be a tad vulnerable here, but it works for now. Will be considering alternatives.

I ran the wire along the loom in the bumper and then up behind the cover near the driver taillight. It comes with a reverse tap but I opted not to use that given the Broncos come with a factory reverse camera, and I also have the 360 cameras, so this would be very redundant. That is zip tied up out of the way. The wire continues up behind the weather stripping & into the top of the interior panel. Continuing forward to follow the factory wire loom as I did with my subwoofer wiring.


At this point, you are able to snake it into the corner between the dash/A-pillar using the trim tool, and then follow up the A-pilar & headliner by the windshield and come down at the rearview mirror where the factory auto dim harness comes out.
Having already had a (much more basic) dash cam, I already have the Dongar dongle to provide USB power at the rearview. I was hoping this would still be able to be used, but it unfortunately does not provide enough power to power the G900 TriPro. I used the hardwire kit and ran the wire the same way (pressing in with their provided interior trim tool) down to the interior fuse panel. There is a spot where you can feed it in towards the dash, from below the pillar, for a nice clean install.
Important note - if you decide to use the standard power cord they provide with the cigarette lighter, it is not long enough to tuck neatly away behind interior trim and reach the center console. It is also not an accessory on/off power source in the Bronco (I believe it maintains power for a period of time after ignition off, but I didn't test how long or if it stays on permanently). I tested this cord out, before opting to use the hardwire kit, out of curiosity. The hardwire kit really is the way to go as it also allows for the function of "Sentry Mode" if you want to use that as well.
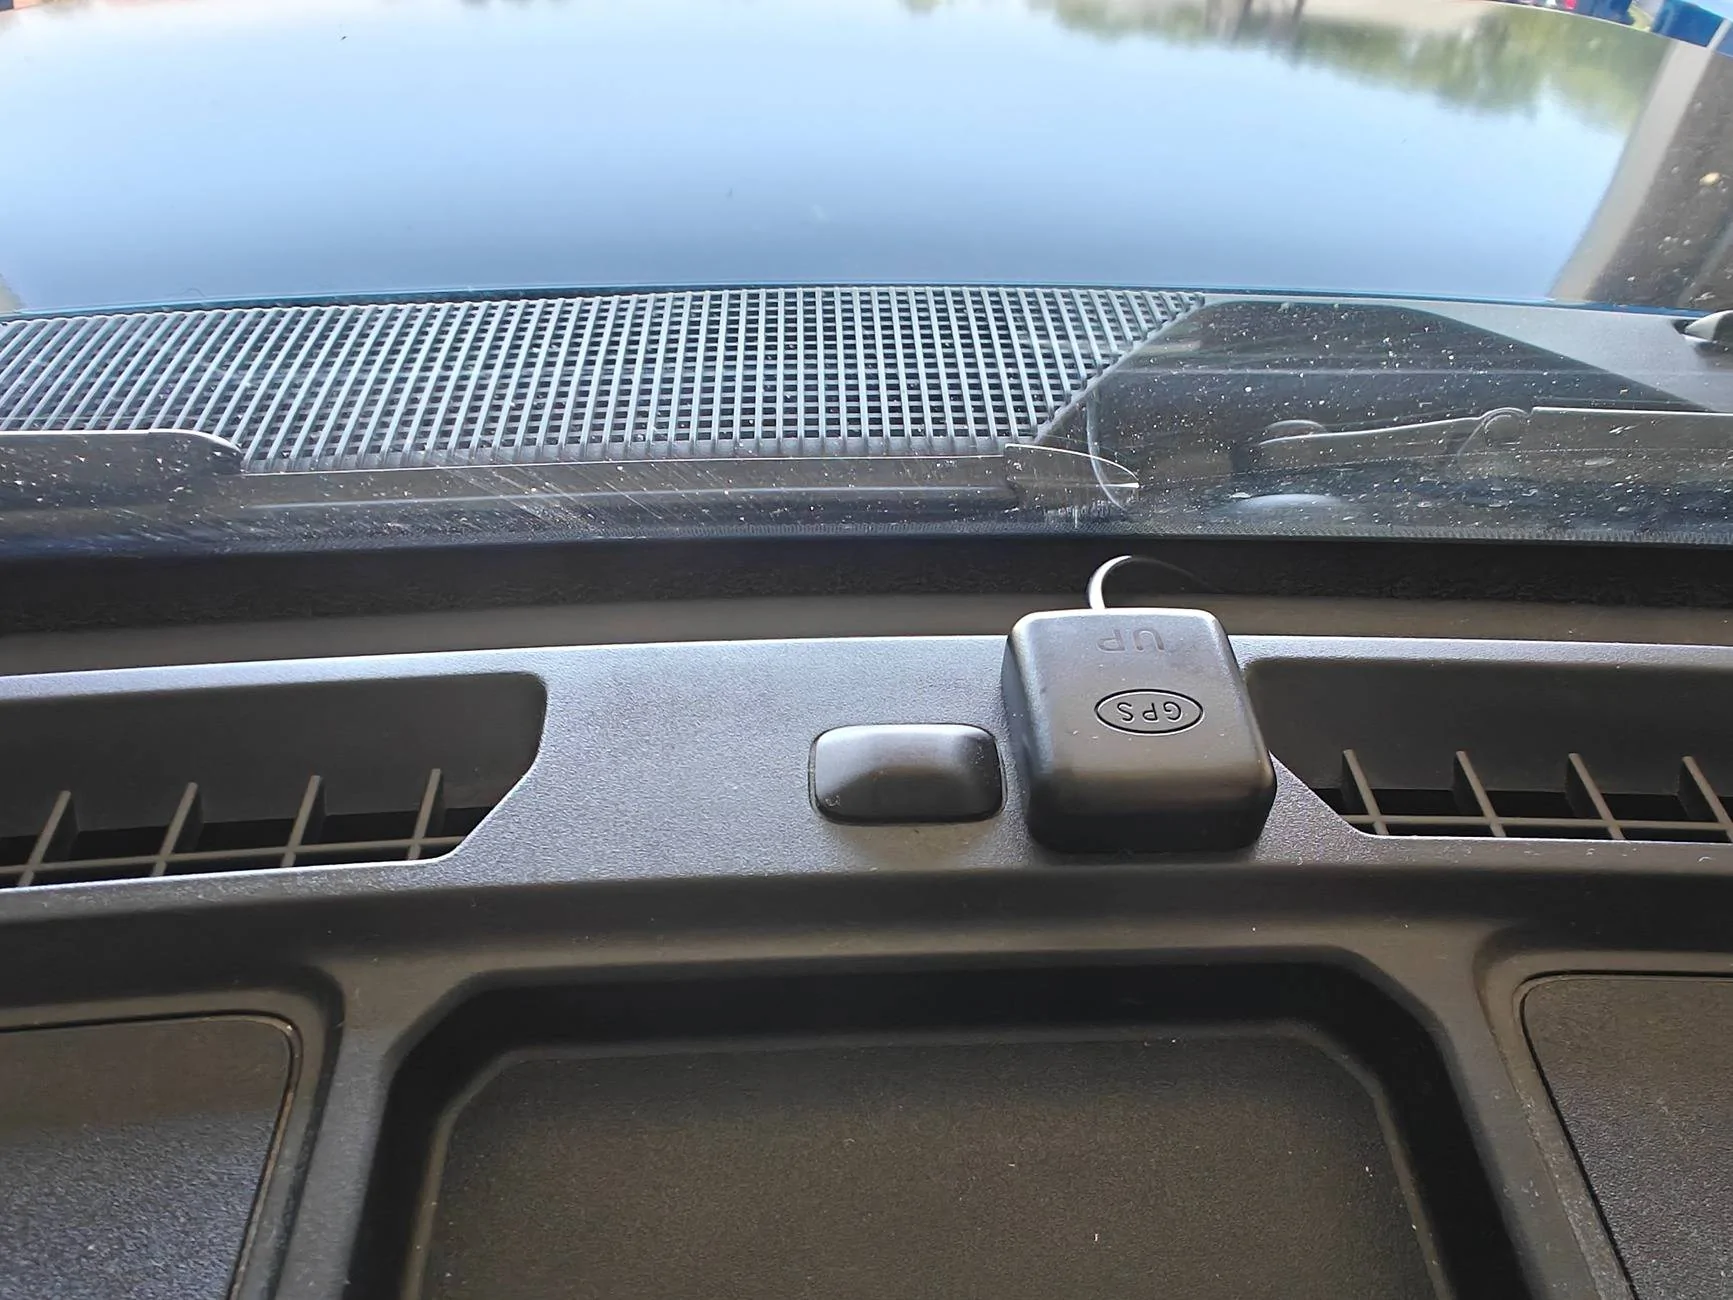
The GPS module I fed the same way as the power/rear cam wires, however, down the passenger side, and have the sensor mounted on the center of the dash.
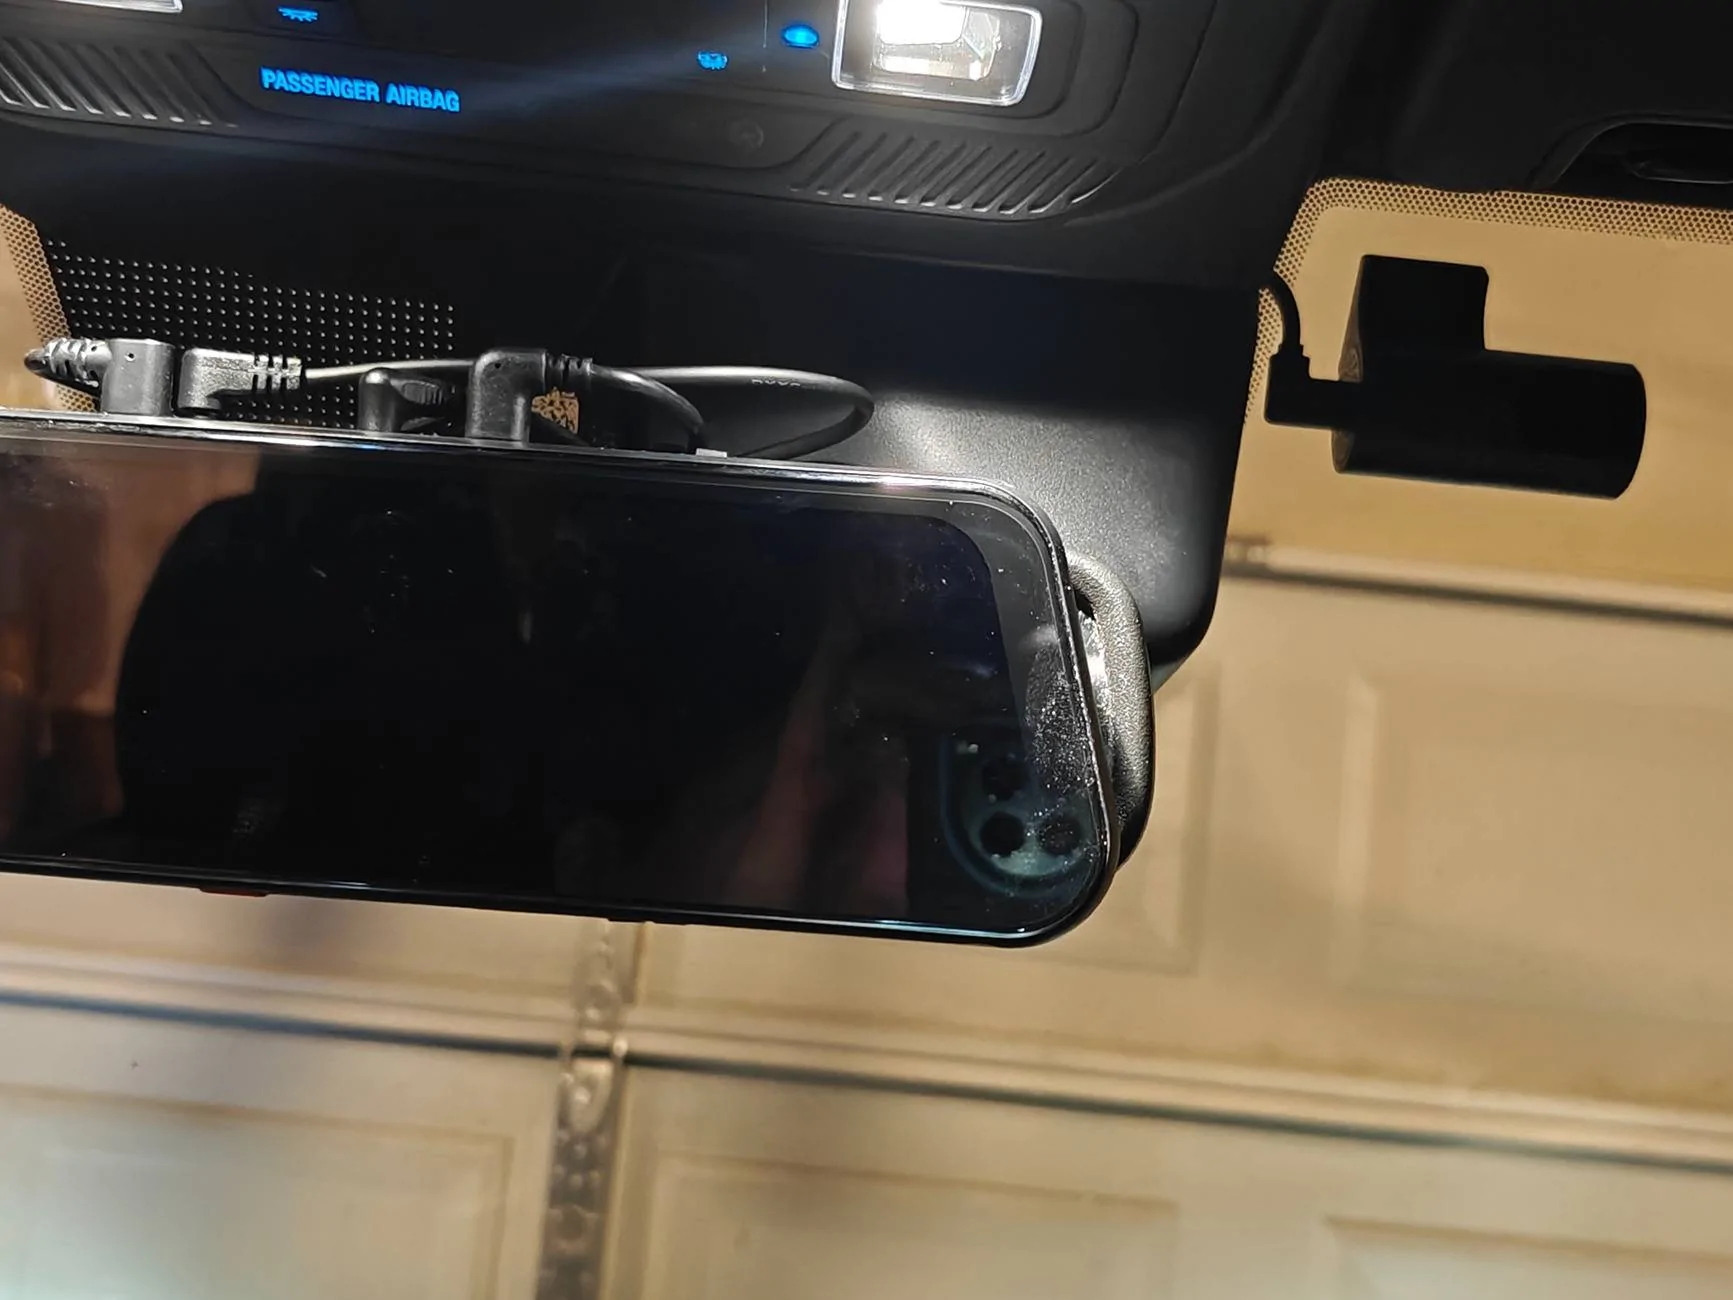
As for the monitor itself, there are two ways to mount it. One way is with the provided straps & strapping it to your OEM rearview mirror... and the other involves a secondary ($20) purchase in order to replace your mirror with their bracket. I mounted mine with the provided straps but have ordered the bracket. The straps, while a nice "option", do not feel like a long term nor attractive solution at all. The Wolfbox monitor sits too far off to the side in order to fit the forward facing camera. It also leaves the edge of the oem mirror peeking out on the opposite side. It does not look good like this.
Being more off center also gets in the way of the driver's visor & causes the visor to cover part of the display.

I mounted the cabin camera up to the right of the rear view mirror. I liked this spot for being out of the way and the angle of the cabin it provided, but it does get covered if the passenger chooses to use the visor. Something to consider when you choose your cabin cam location, if this would bother you.
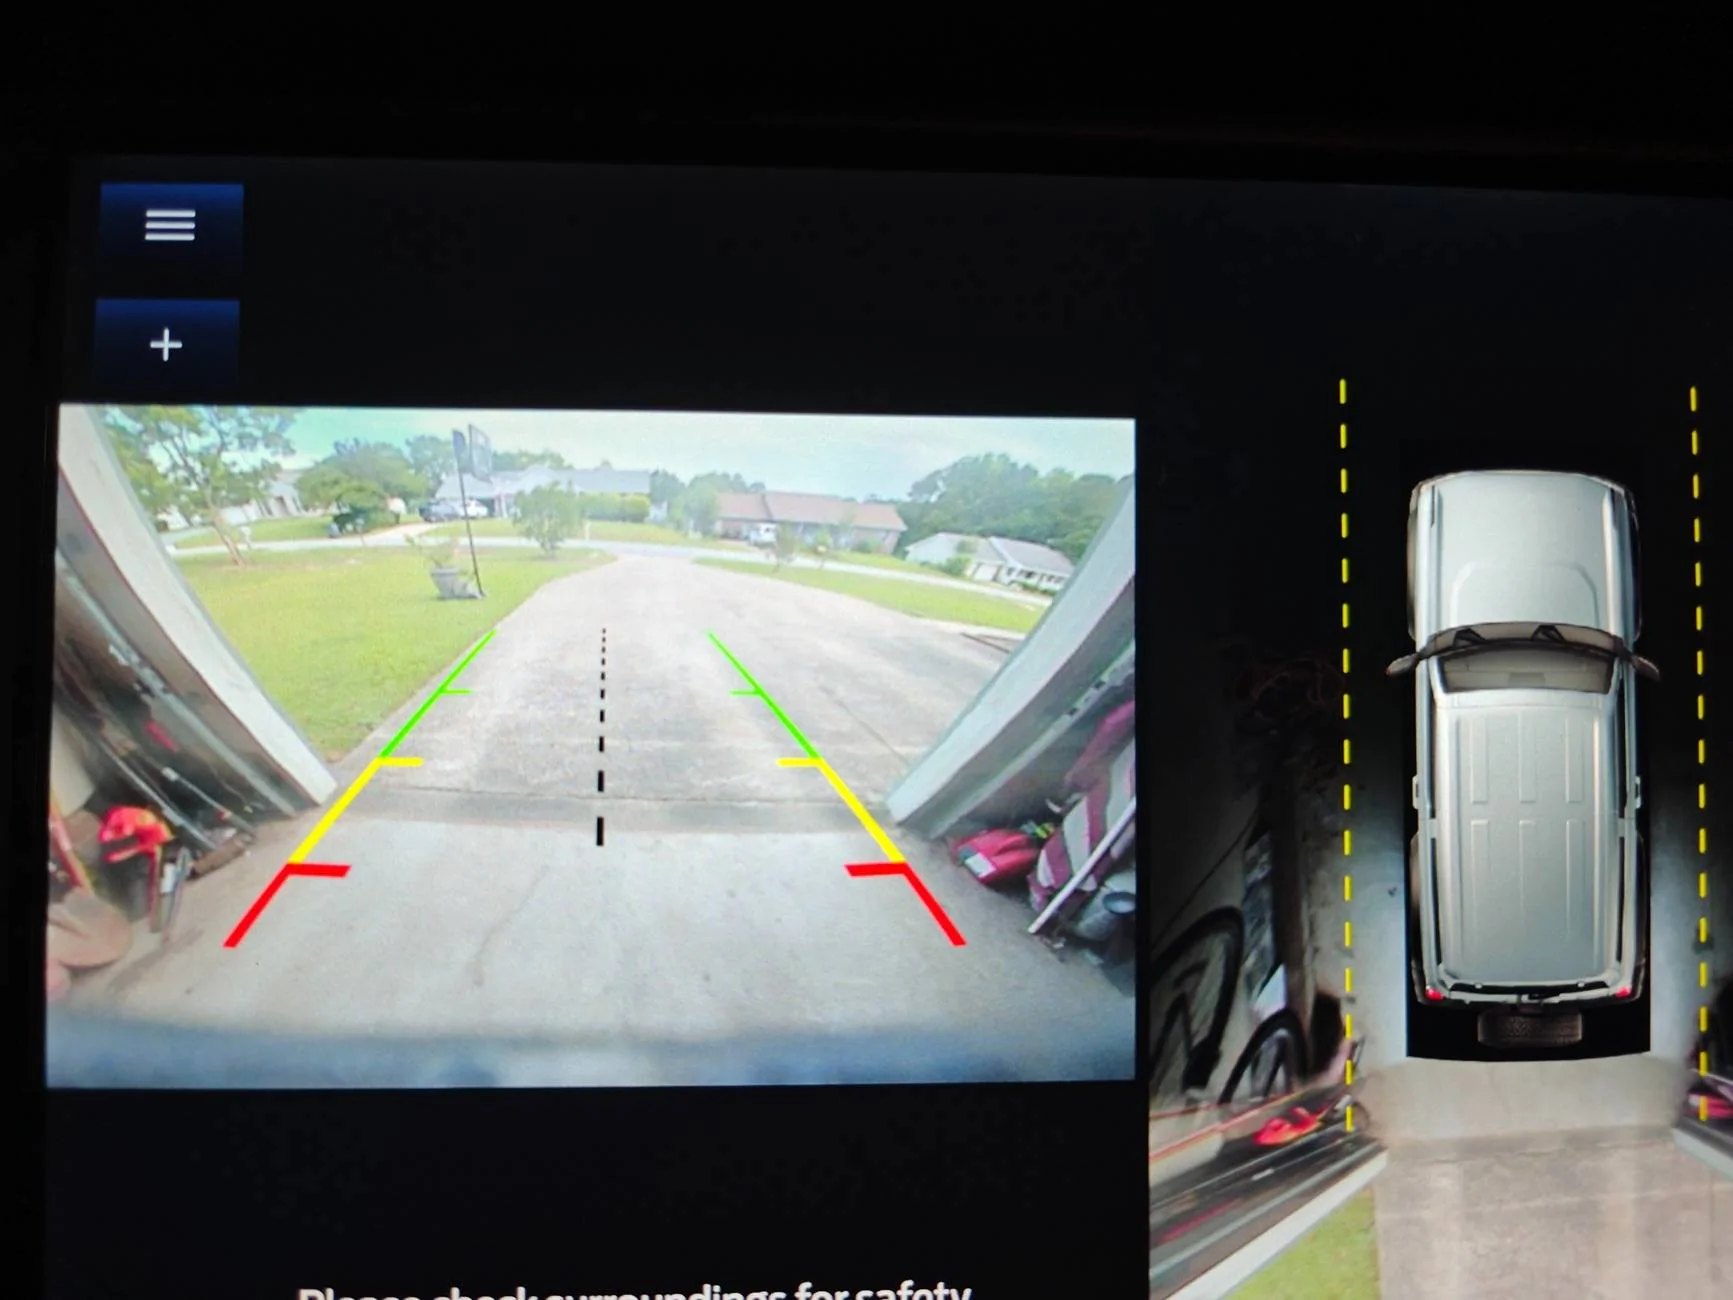
When the display is off it still has enough reflectivity to be usable as a rear view. Here is a comparison of the field of view the camera allows (REALLY helping with blind spots).
Display off (acting as regular rearview)
Vs the digital display
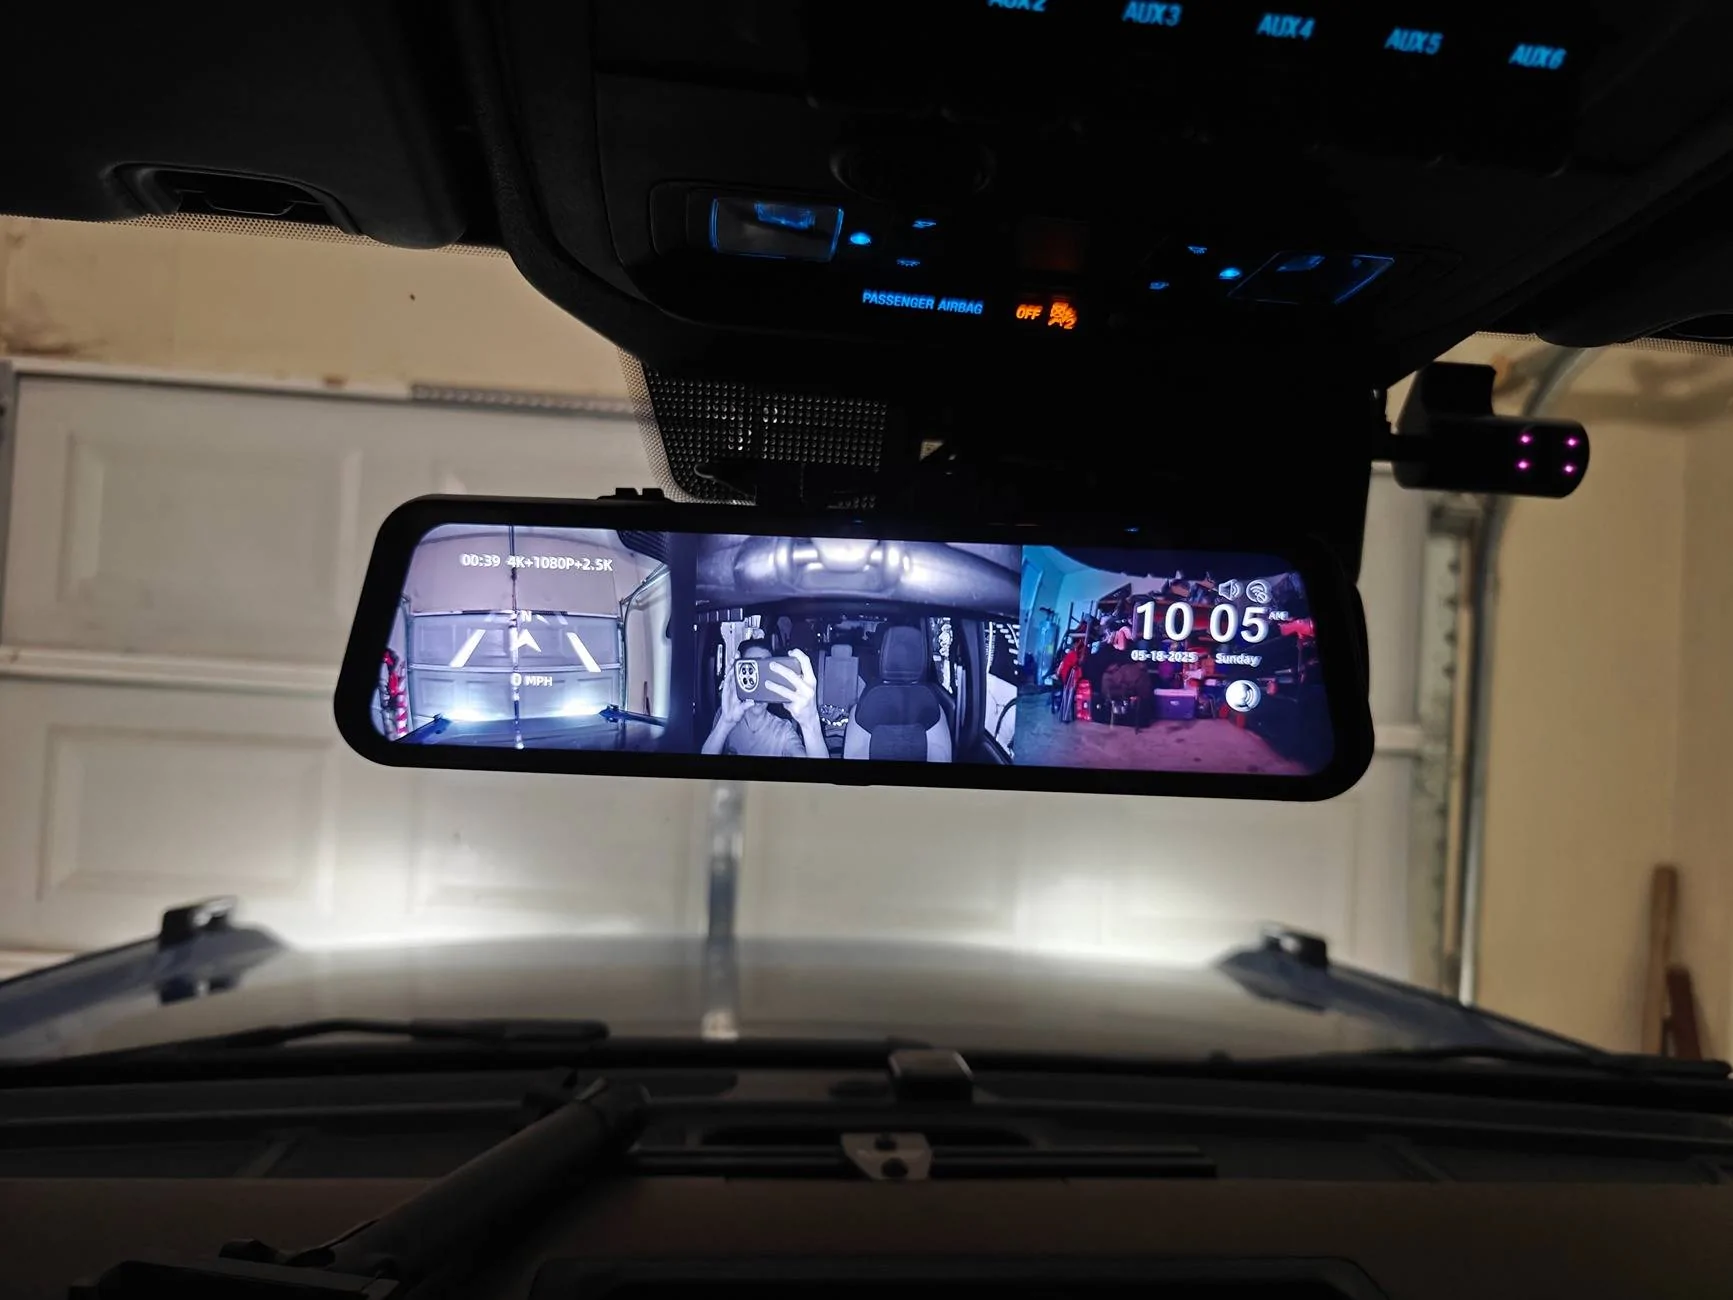
The display can be switched from full forward cam, full rear cam, full cabin cam, or all three at once! You can do so by swiping or voice control. Voice control seems pretty responsive and picks up well when you say the right verbiage.
"Take picture"
Corresponding photo downloaded via wifi/Wolfbox app. (I blocked GPS location out).

3-way split screen image
At night/low-lighting the cabin cam automatically switches to night vision and does a great job. (I blocked GPS location out).
Vs daytime
All 3 cameras can be adjusted on the fly by swiping up/down to change the viewing angle. You can also adjust display brightness easily as well (as you can see I hit it on accident swiping). It is one of the available options on the screen, when you tap it and the menu pops up.
The display resolution is beautiful. Bright & crisp image. It actually makes my OEM display look blurry/lower quality.
Compared to my previous dash cam, the Wolfbox app is more user friendly to connect to via wifi, and quicker to access/download photos & videos. I was pleasantly surprised.
Display interface is smooth & pretty seamless.
Things I could "complain" about:
* There is some shaking while driving with the rear camera in the display. It is mounted securely (but may be improved by a different mounting location - will confirm if/after I move the camera... It also may just be the ever so slight delay with feedback being an electronic display vs a mirror). It doesnt bother me as we don't drive staring at the rear view and it is acceptable for "glancing" at it as needed.
*The display has a glossy finish so sometimes lighting can cause glare during the day (adjusting brightness up in those times helps)... a matte protector (which I believe they offer) would help, though would likely prevent using the screen as a rear view with the display powered off. So has both positive/negative aspect.
* Mounting with the straps seems like an after thought. Makes it universal buttttt not a great solution.
* Cigarette lighter not long enough for Broncos for those that would like to use that/don't feel comfortable using the fuse taps - but also would like to tuck it away neatly.
*Display seems to run a lil warm - hoping that doesn't affect longevity.
*Multiple coords plug in a the top of the device making the plugs visible from the cabin - some may not like the look.

Overall I am very pleased with this camera system & all the components they provide with the kit! So far I would absolutely recommend the product.
It arrived in a bubble wrap mailer and the main box had a few dents in it, but the cameras/monitor are properly packaged within and were just fine.
Unboxing video with photos of included components. Please excuse the lack of videographer skill. Google drive link as it is too large a file to upload directly.
I installed the camera below the bumper, though I have ordered an extension in the event I decide to move it. I didn't love the idea of it perched on top of the third brake light or getting in the way of the spare. It may be a tad vulnerable here, but it works for now. Will be considering alternatives.

I ran the wire along the loom in the bumper and then up behind the cover near the driver taillight. It comes with a reverse tap but I opted not to use that given the Broncos come with a factory reverse camera, and I also have the 360 cameras, so this would be very redundant. That is zip tied up out of the way. The wire continues up behind the weather stripping & into the top of the interior panel. Continuing forward to follow the factory wire loom as I did with my subwoofer wiring.


At this point, you are able to snake it into the corner between the dash/A-pillar using the trim tool, and then follow up the A-pilar & headliner by the windshield and come down at the rearview mirror where the factory auto dim harness comes out.
Having already had a (much more basic) dash cam, I already have the Dongar dongle to provide USB power at the rearview. I was hoping this would still be able to be used, but it unfortunately does not provide enough power to power the G900 TriPro. I used the hardwire kit and ran the wire the same way (pressing in with their provided interior trim tool) down to the interior fuse panel. There is a spot where you can feed it in towards the dash, from below the pillar, for a nice clean install.
Important note - if you decide to use the standard power cord they provide with the cigarette lighter, it is not long enough to tuck neatly away behind interior trim and reach the center console. It is also not an accessory on/off power source in the Bronco (I believe it maintains power for a period of time after ignition off, but I didn't test how long or if it stays on permanently). I tested this cord out, before opting to use the hardwire kit, out of curiosity. The hardwire kit really is the way to go as it also allows for the function of "Sentry Mode" if you want to use that as well.

The GPS module I fed the same way as the power/rear cam wires, however, down the passenger side, and have the sensor mounted on the center of the dash.
As for the monitor itself, there are two ways to mount it. One way is with the provided straps & strapping it to your OEM rearview mirror... and the other involves a secondary ($20) purchase in order to replace your mirror with their bracket. I mounted mine with the provided straps but have ordered the bracket. The straps, while a nice "option", do not feel like a long term nor attractive solution at all. The Wolfbox monitor sits too far off to the side in order to fit the forward facing camera. It also leaves the edge of the oem mirror peeking out on the opposite side. It does not look good like this.
Being more off center also gets in the way of the driver's visor & causes the visor to cover part of the display.
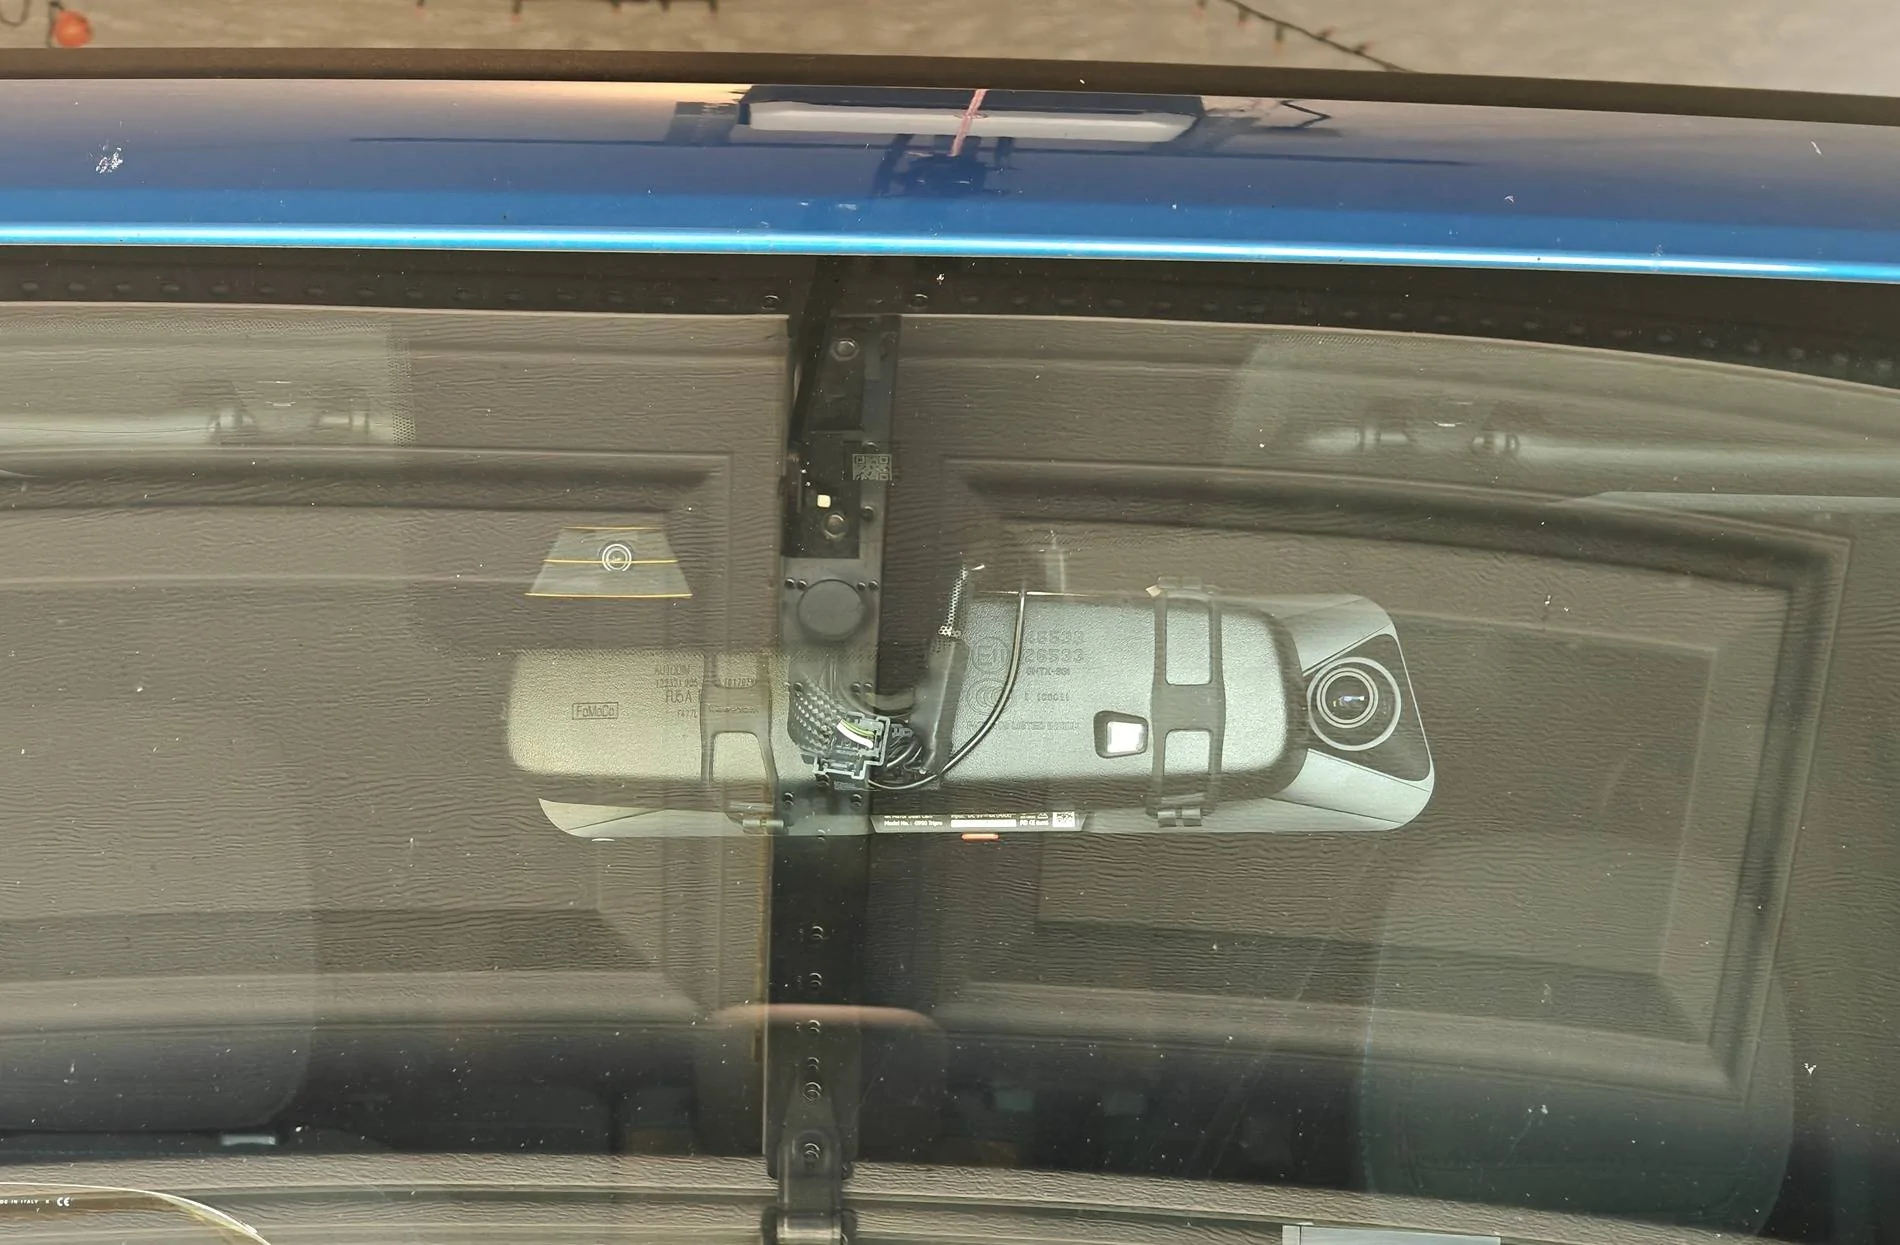
I mounted the cabin camera up to the right of the rear view mirror. I liked this spot for being out of the way and the angle of the cabin it provided, but it does get covered if the passenger chooses to use the visor. Something to consider when you choose your cabin cam location, if this would bother you.
When the display is off it still has enough reflectivity to be usable as a rear view. Here is a comparison of the field of view the camera allows (REALLY helping with blind spots).
Display off (acting as regular rearview)

Vs the digital display

The display can be switched from full forward cam, full rear cam, full cabin cam, or all three at once! You can do so by swiping or voice control. Voice control seems pretty responsive and picks up well when you say the right verbiage.
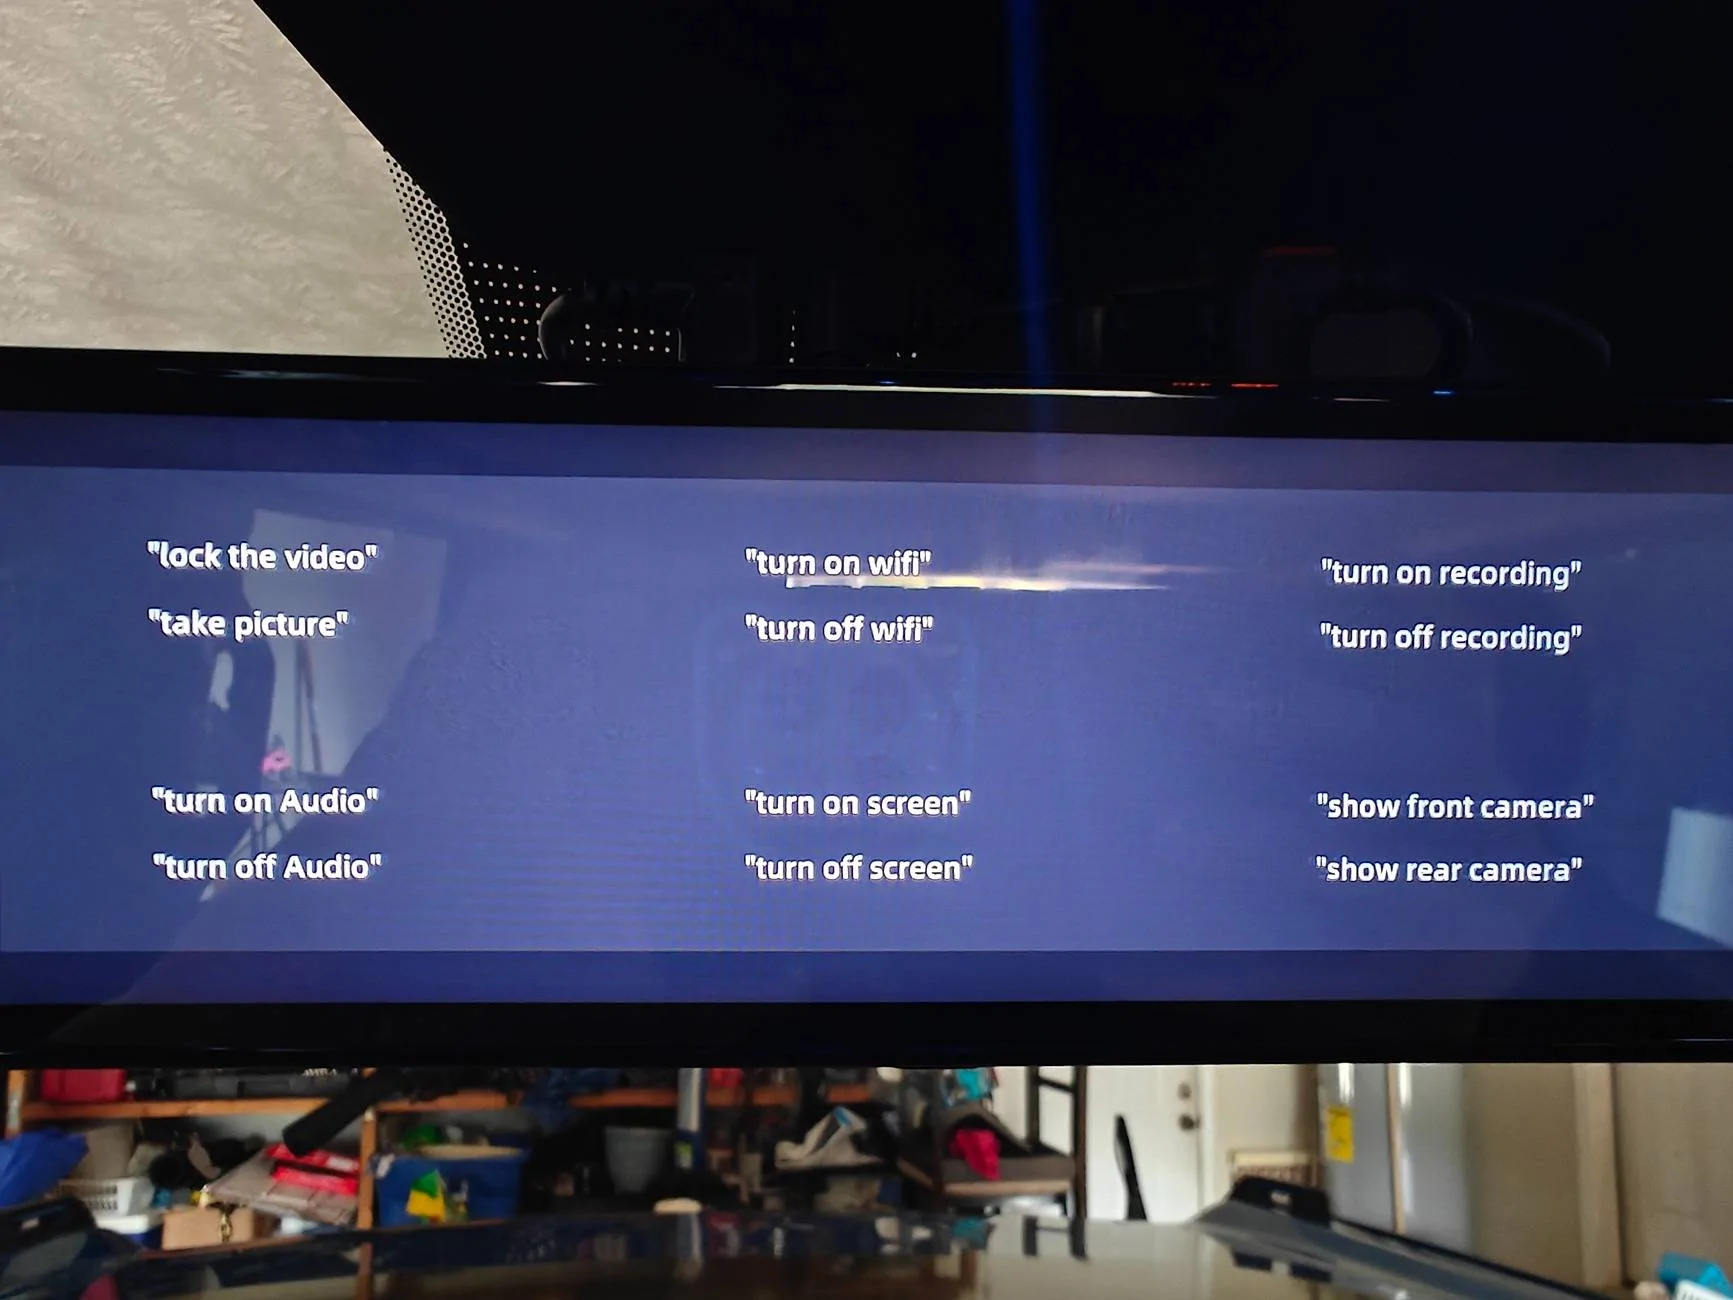
"Take picture"
Corresponding photo downloaded via wifi/Wolfbox app. (I blocked GPS location out).

3-way split screen image
At night/low-lighting the cabin cam automatically switches to night vision and does a great job. (I blocked GPS location out).

Vs daytime

All 3 cameras can be adjusted on the fly by swiping up/down to change the viewing angle. You can also adjust display brightness easily as well (as you can see I hit it on accident swiping). It is one of the available options on the screen, when you tap it and the menu pops up.
The display resolution is beautiful. Bright & crisp image. It actually makes my OEM display look blurry/lower quality.

Compared to my previous dash cam, the Wolfbox app is more user friendly to connect to via wifi, and quicker to access/download photos & videos. I was pleasantly surprised.
Display interface is smooth & pretty seamless.
Things I could "complain" about:
* There is some shaking while driving with the rear camera in the display. It is mounted securely (but may be improved by a different mounting location - will confirm if/after I move the camera... It also may just be the ever so slight delay with feedback being an electronic display vs a mirror). It doesnt bother me as we don't drive staring at the rear view and it is acceptable for "glancing" at it as needed.
*The display has a glossy finish so sometimes lighting can cause glare during the day (adjusting brightness up in those times helps)... a matte protector (which I believe they offer) would help, though would likely prevent using the screen as a rear view with the display powered off. So has both positive/negative aspect.
* Mounting with the straps seems like an after thought. Makes it universal buttttt not a great solution.
* Cigarette lighter not long enough for Broncos for those that would like to use that/don't feel comfortable using the fuse taps - but also would like to tuck it away neatly.
*Display seems to run a lil warm - hoping that doesn't affect longevity.
*Multiple coords plug in a the top of the device making the plugs visible from the cabin - some may not like the look.

Overall I am very pleased with this camera system & all the components they provide with the kit! So far I would absolutely recommend the product.
Sponsored
Last edited:


