- First Name
- Matt
- Joined
- Jun 17, 2022
- Threads
- 20
- Messages
- 210
- Reaction score
- 206
- Location
- Pittsburgh
- Vehicle(s)
- 2021 Ford Bronco
- Your Bronco Model
- Black Diamond
- Thread starter
- #1
Disclaimer: It may look like it via video/ pictures but I am not a professional I do not even constitute as a amateur. Without further ado, enjoy and feel free to point out flaws or advice this was my first time ever attempting anything like this. I like to show my mistakes as a way to show people aren't perfect, you can fix it. I am not these "influencers" who plug and play their mods etc. Give me an example or idea and I can attempt to make it work.
I wanted to challenge myself and prove to others that you can do it also.
Earlier this month a member posted a link: https://srqcustoms.com/product/ford-bronco-subwoofer-enclosure-with-grille/
I saw this and wanted to see how much it was, 600$! and me being disgusted at the prices for aftermarket parts and accessories for the bronco.... LETS MAKE A THING!!!
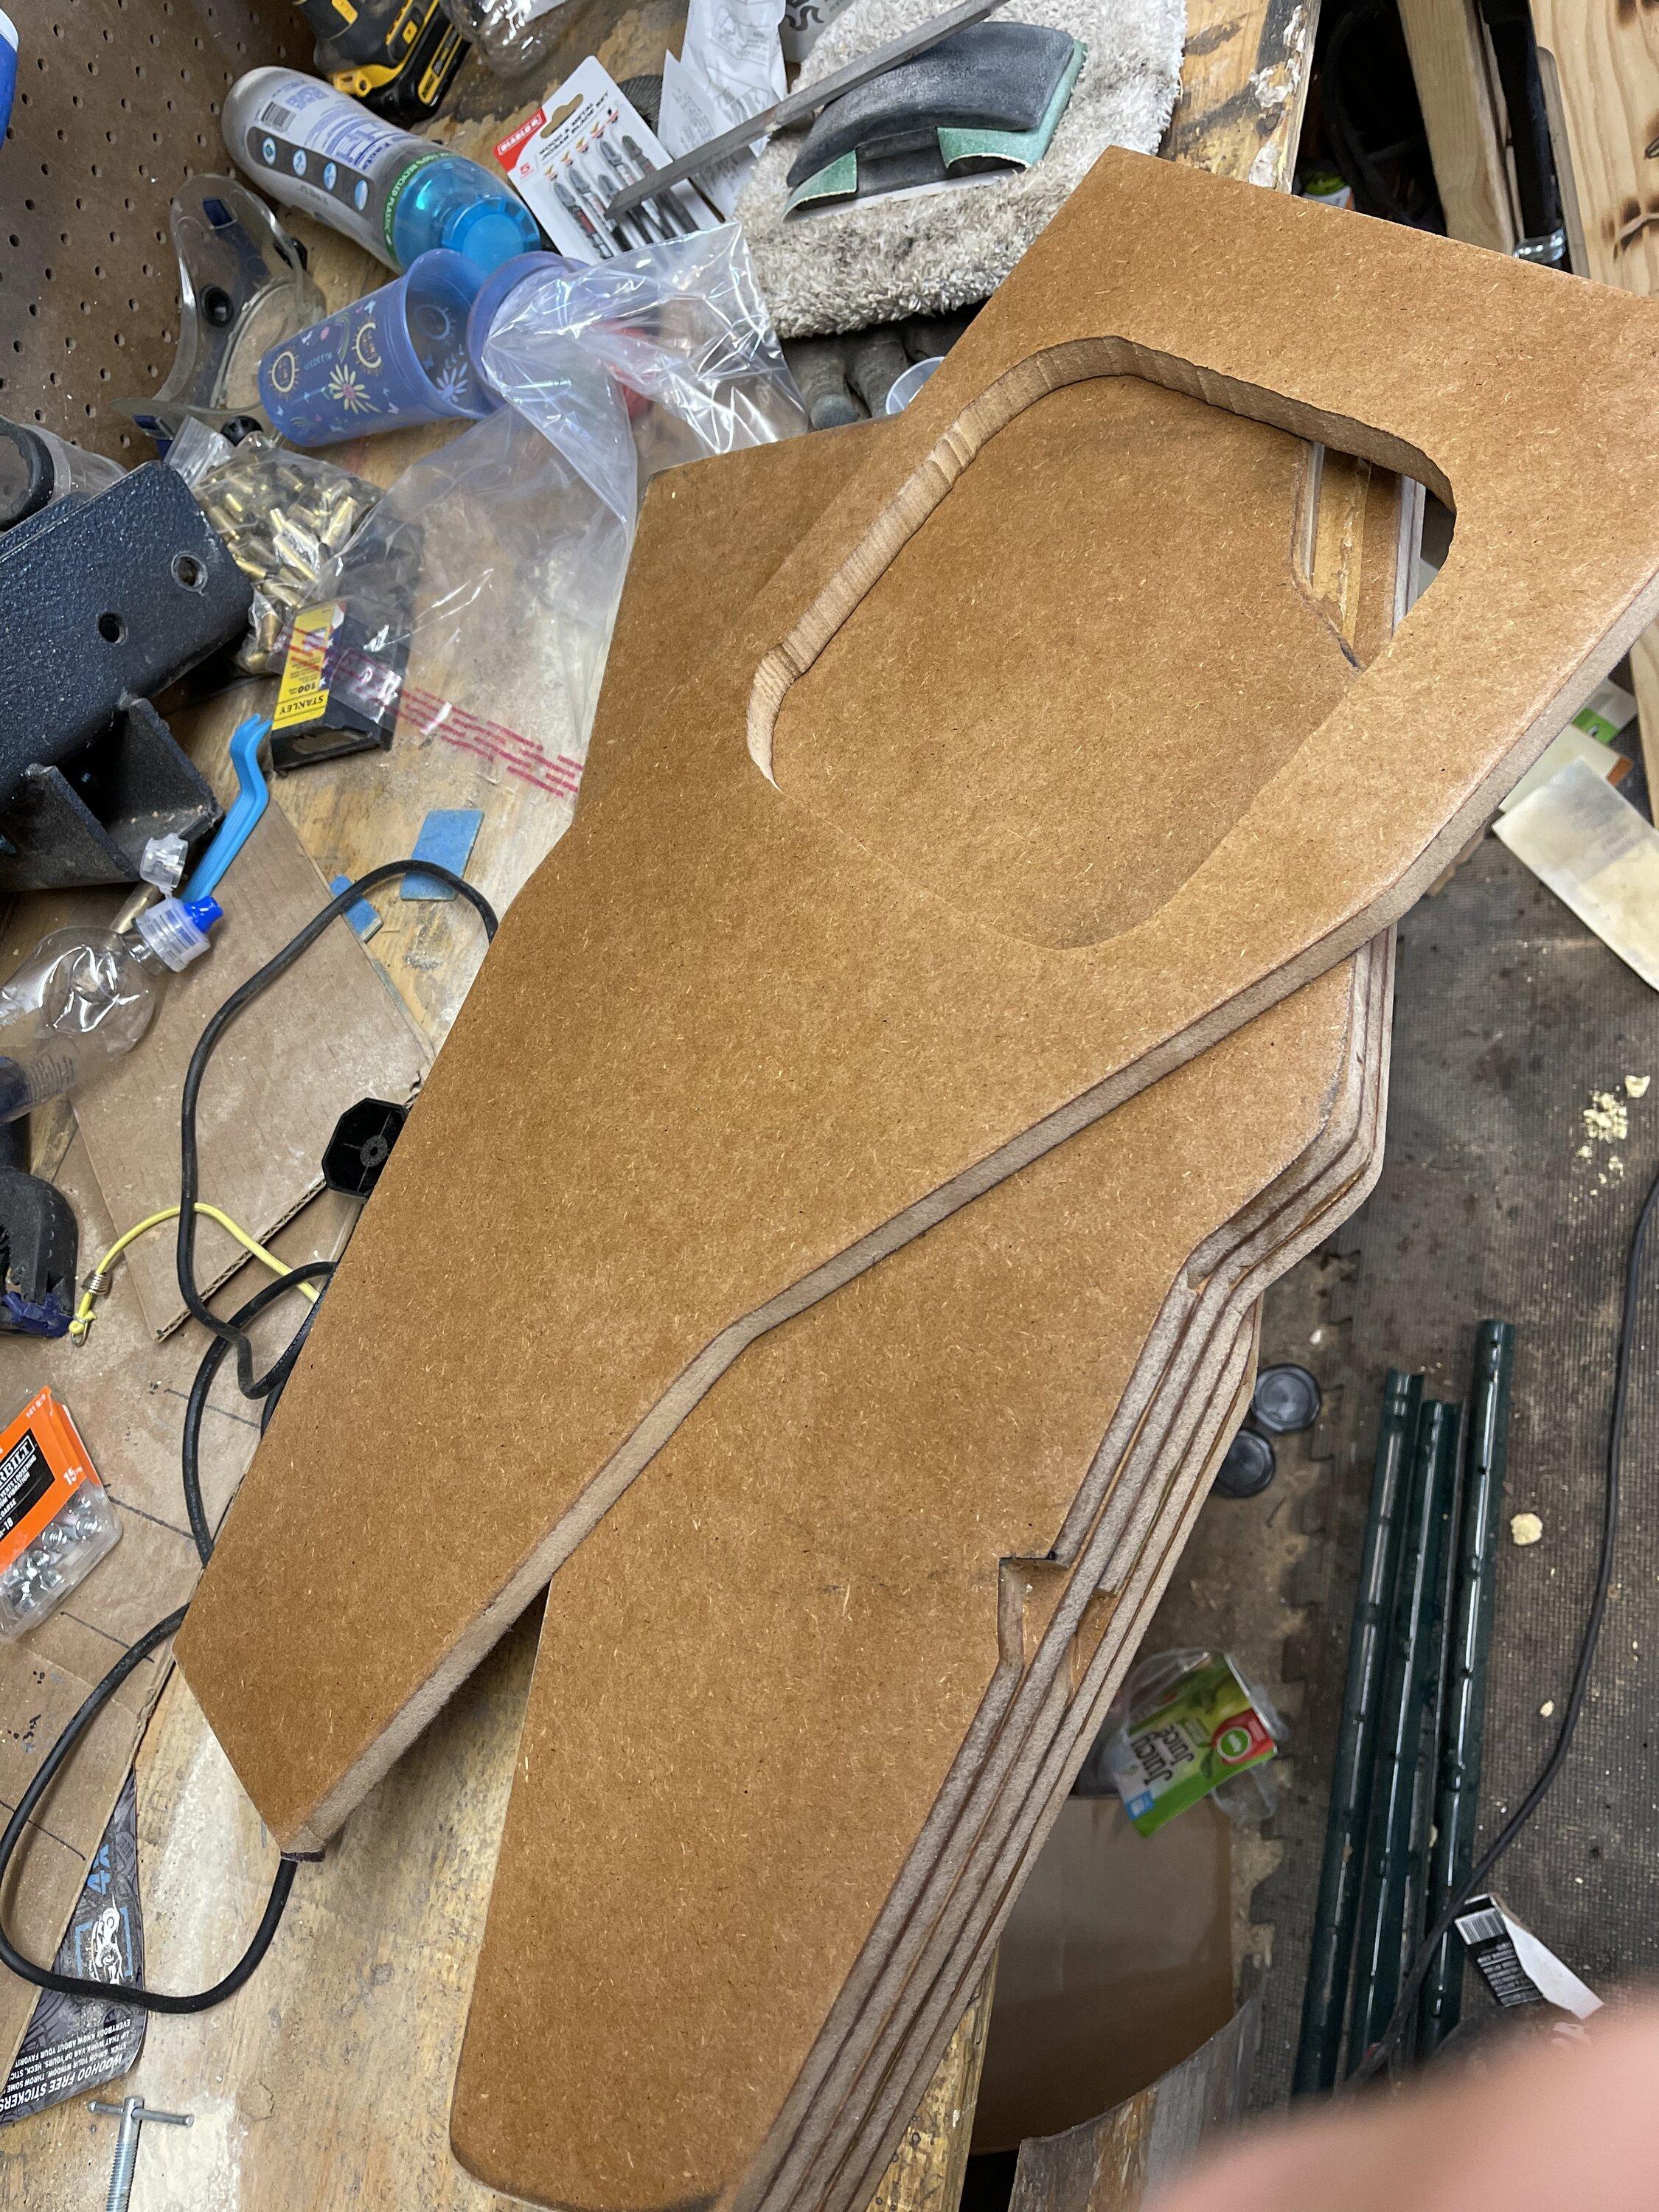
-Just by looking at it i guessed it had to be 6 layers of 3/4 or 1/2 mdf. I picked up a 8x4 sheet of 3/4 inch mdf cut that down to 2 feet long sections to make it easier to work with. $50 thus far.

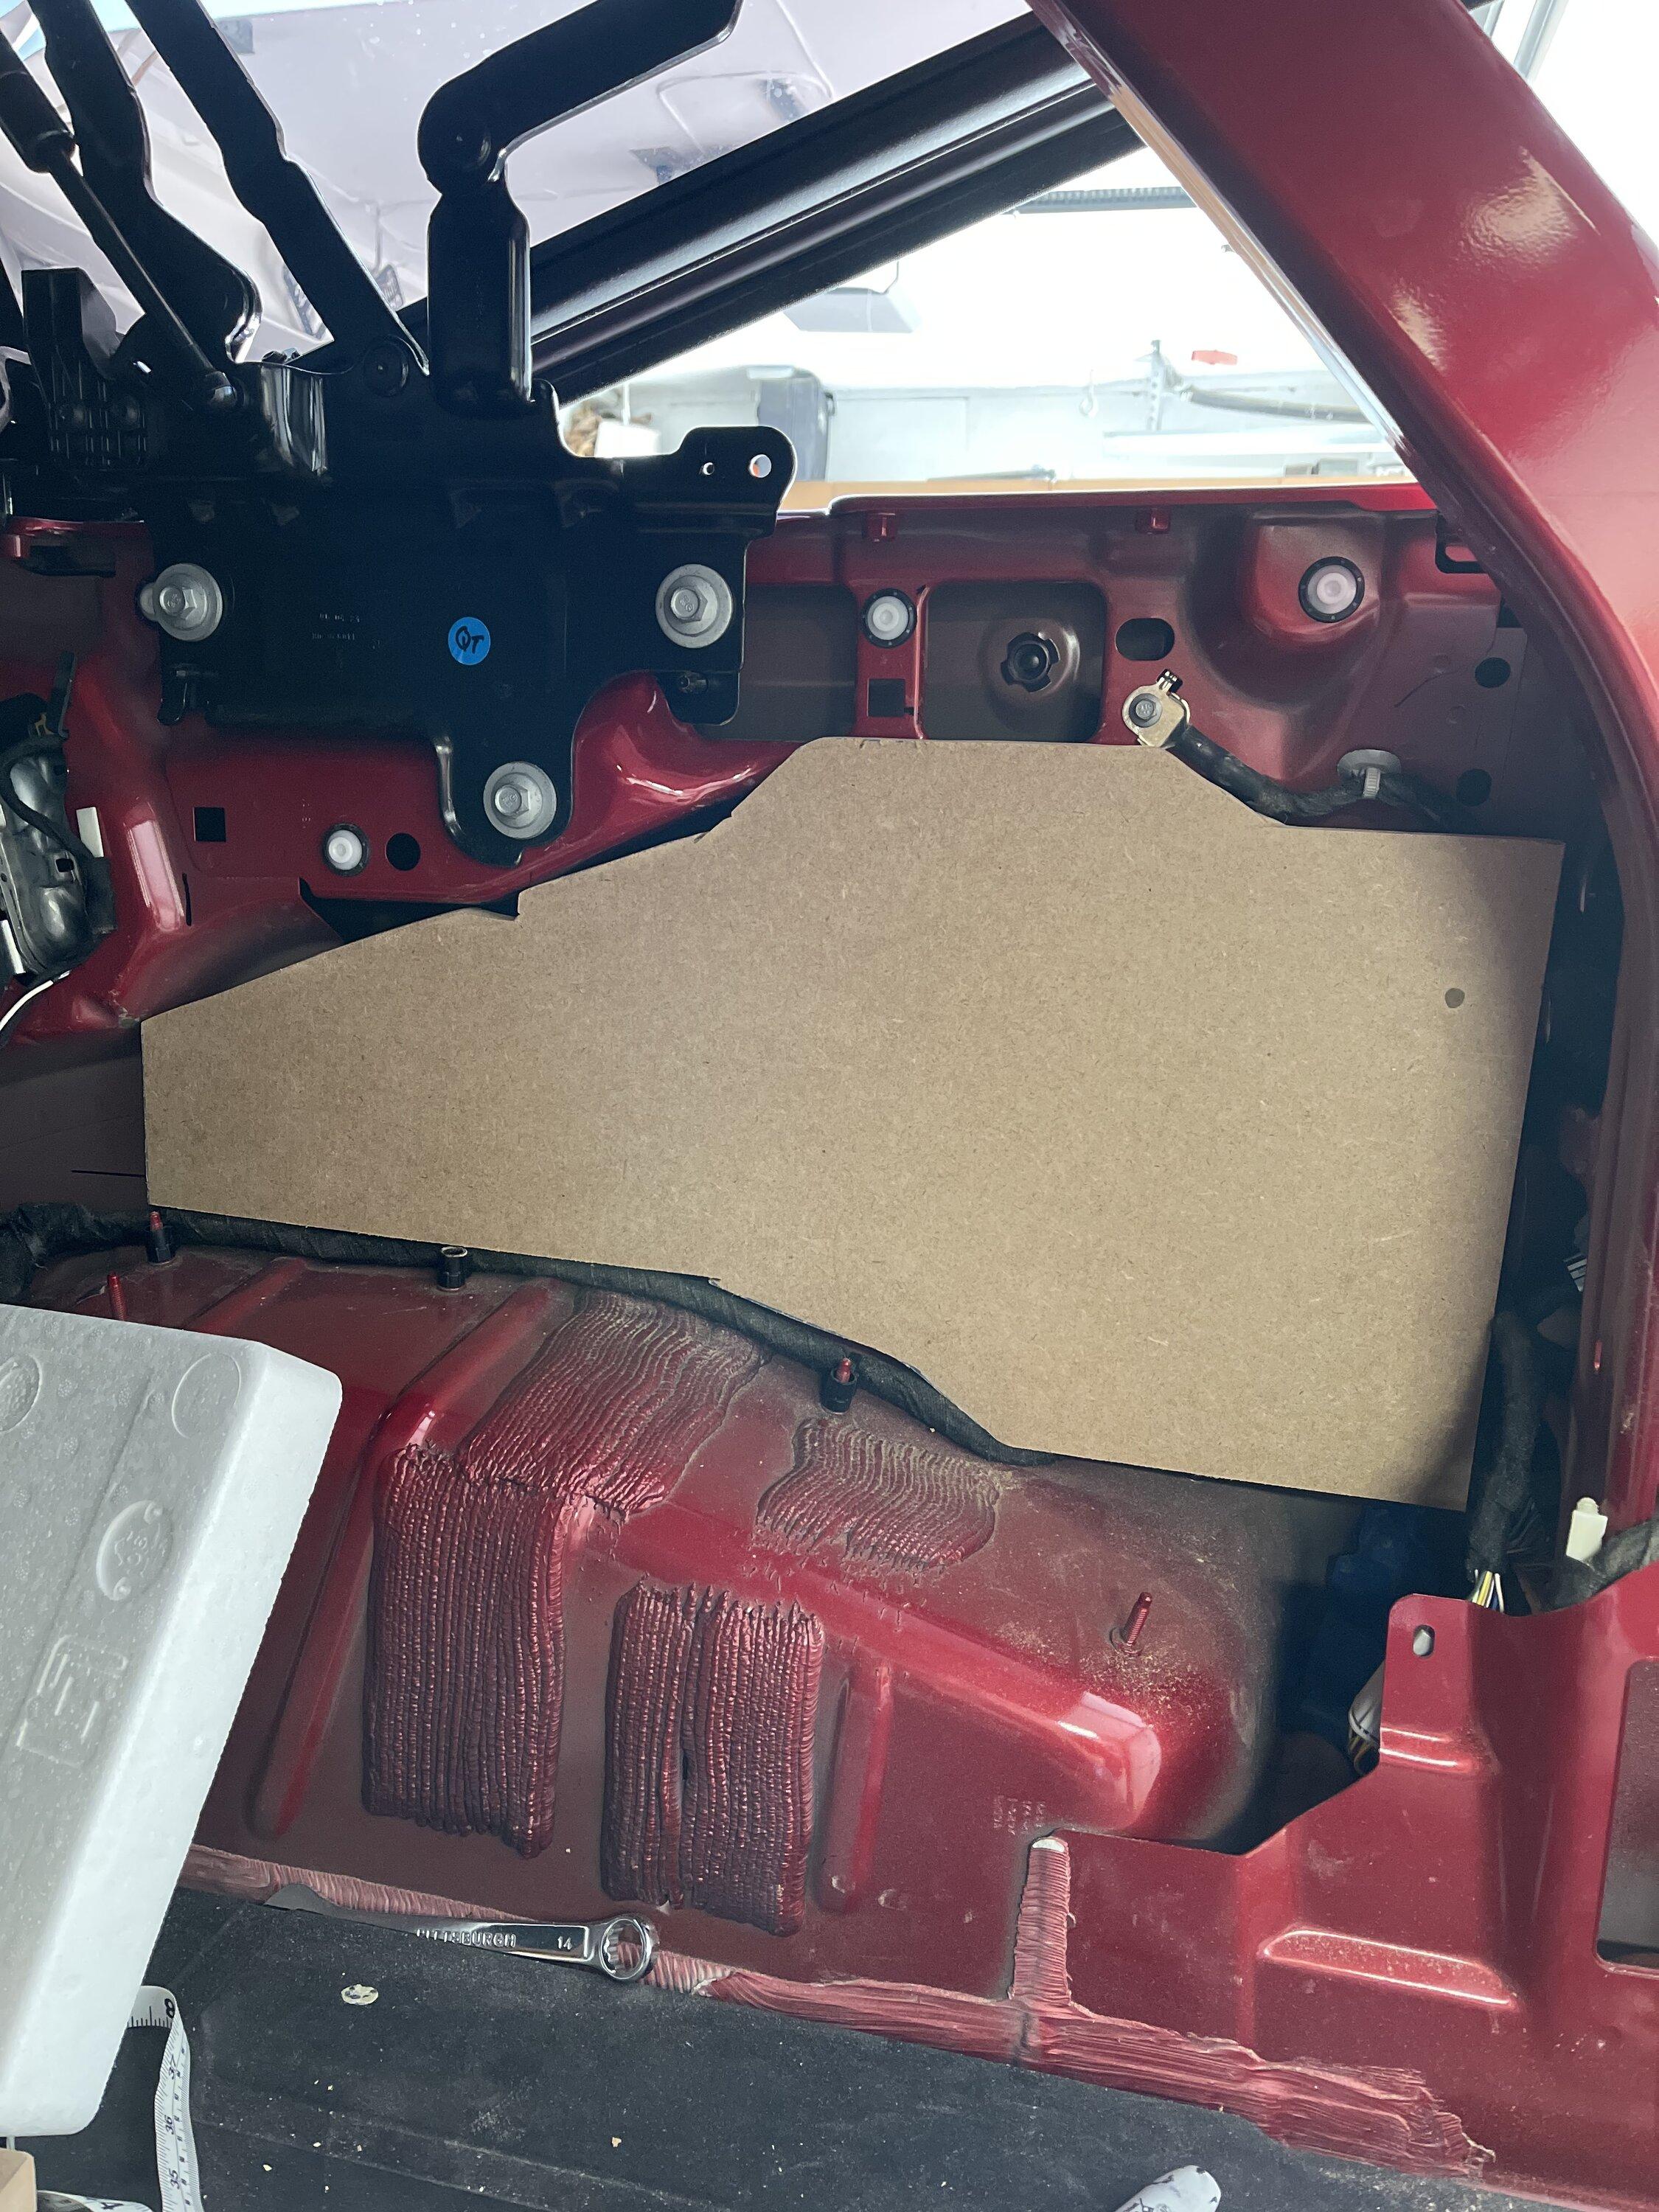
I had to remove, rear tailgate cowl, cargo floor, the floor seat cowl(???) soft top latch, unplug the keyless antenna, 12v and light, right rear trim panel, Now lets get the rough measurements/ templates. Shoutout to @Ksjrb03 for attaching the PDFS for removal of the trim.
NOTE: I will address the box build by layers, 6,5,4,3,2,1. Layer 6 being the outer most where the sub screws into, One being the layer closest to the tire. Each layer was glued and nailed with 1.2 in finishing nails.
The overall length of the box is around 2 feet long. On the site they said (dimensions taken down?) 12x10x24 if I recall. That gave a an rough idea on the layers and whatnot.
Trim prep: I took a 3/4 drill bit and drilled out the plastic welds(?) holding the storage cubby in place. and then I pulled out the fabric. (Afterthought do not pull that off. Leave it.)
Layer 1: When measuring this layer I found it slightly difficult to get a good reference point to measure, looking at the example i can see the far left bolt so I knew the box started at that point or just passed. I started my box there as a good reference point, all the way to the left. The example shows at least an inch or so, someone with better experience could use that space to mount an amp. I unplugged some of the plastic pins to give more space and stuffed them into the frame. You can plug the keyless antenna in as well. I marked on the frame of the vehicle every 2 inches to help guide my template around the wheel well The first prototype (sub box mark 1 ) my cuts were not straight thus I had to use a jigsaw which provided an ugly box. I was able to see where my original marks where and where I could add some width, length etc. The top right of the box you have to cut a 45 degree to clear a ground wire.

Layer 2: This was cuz exactly like layer one but no more 45 degree cut on top right. I cleared the wire. I used my adjustable angle (R.I.P she was a good tool ) set at 3/4 of an in for the boarder to glue and nail. I used the jigsaw and cut it out.
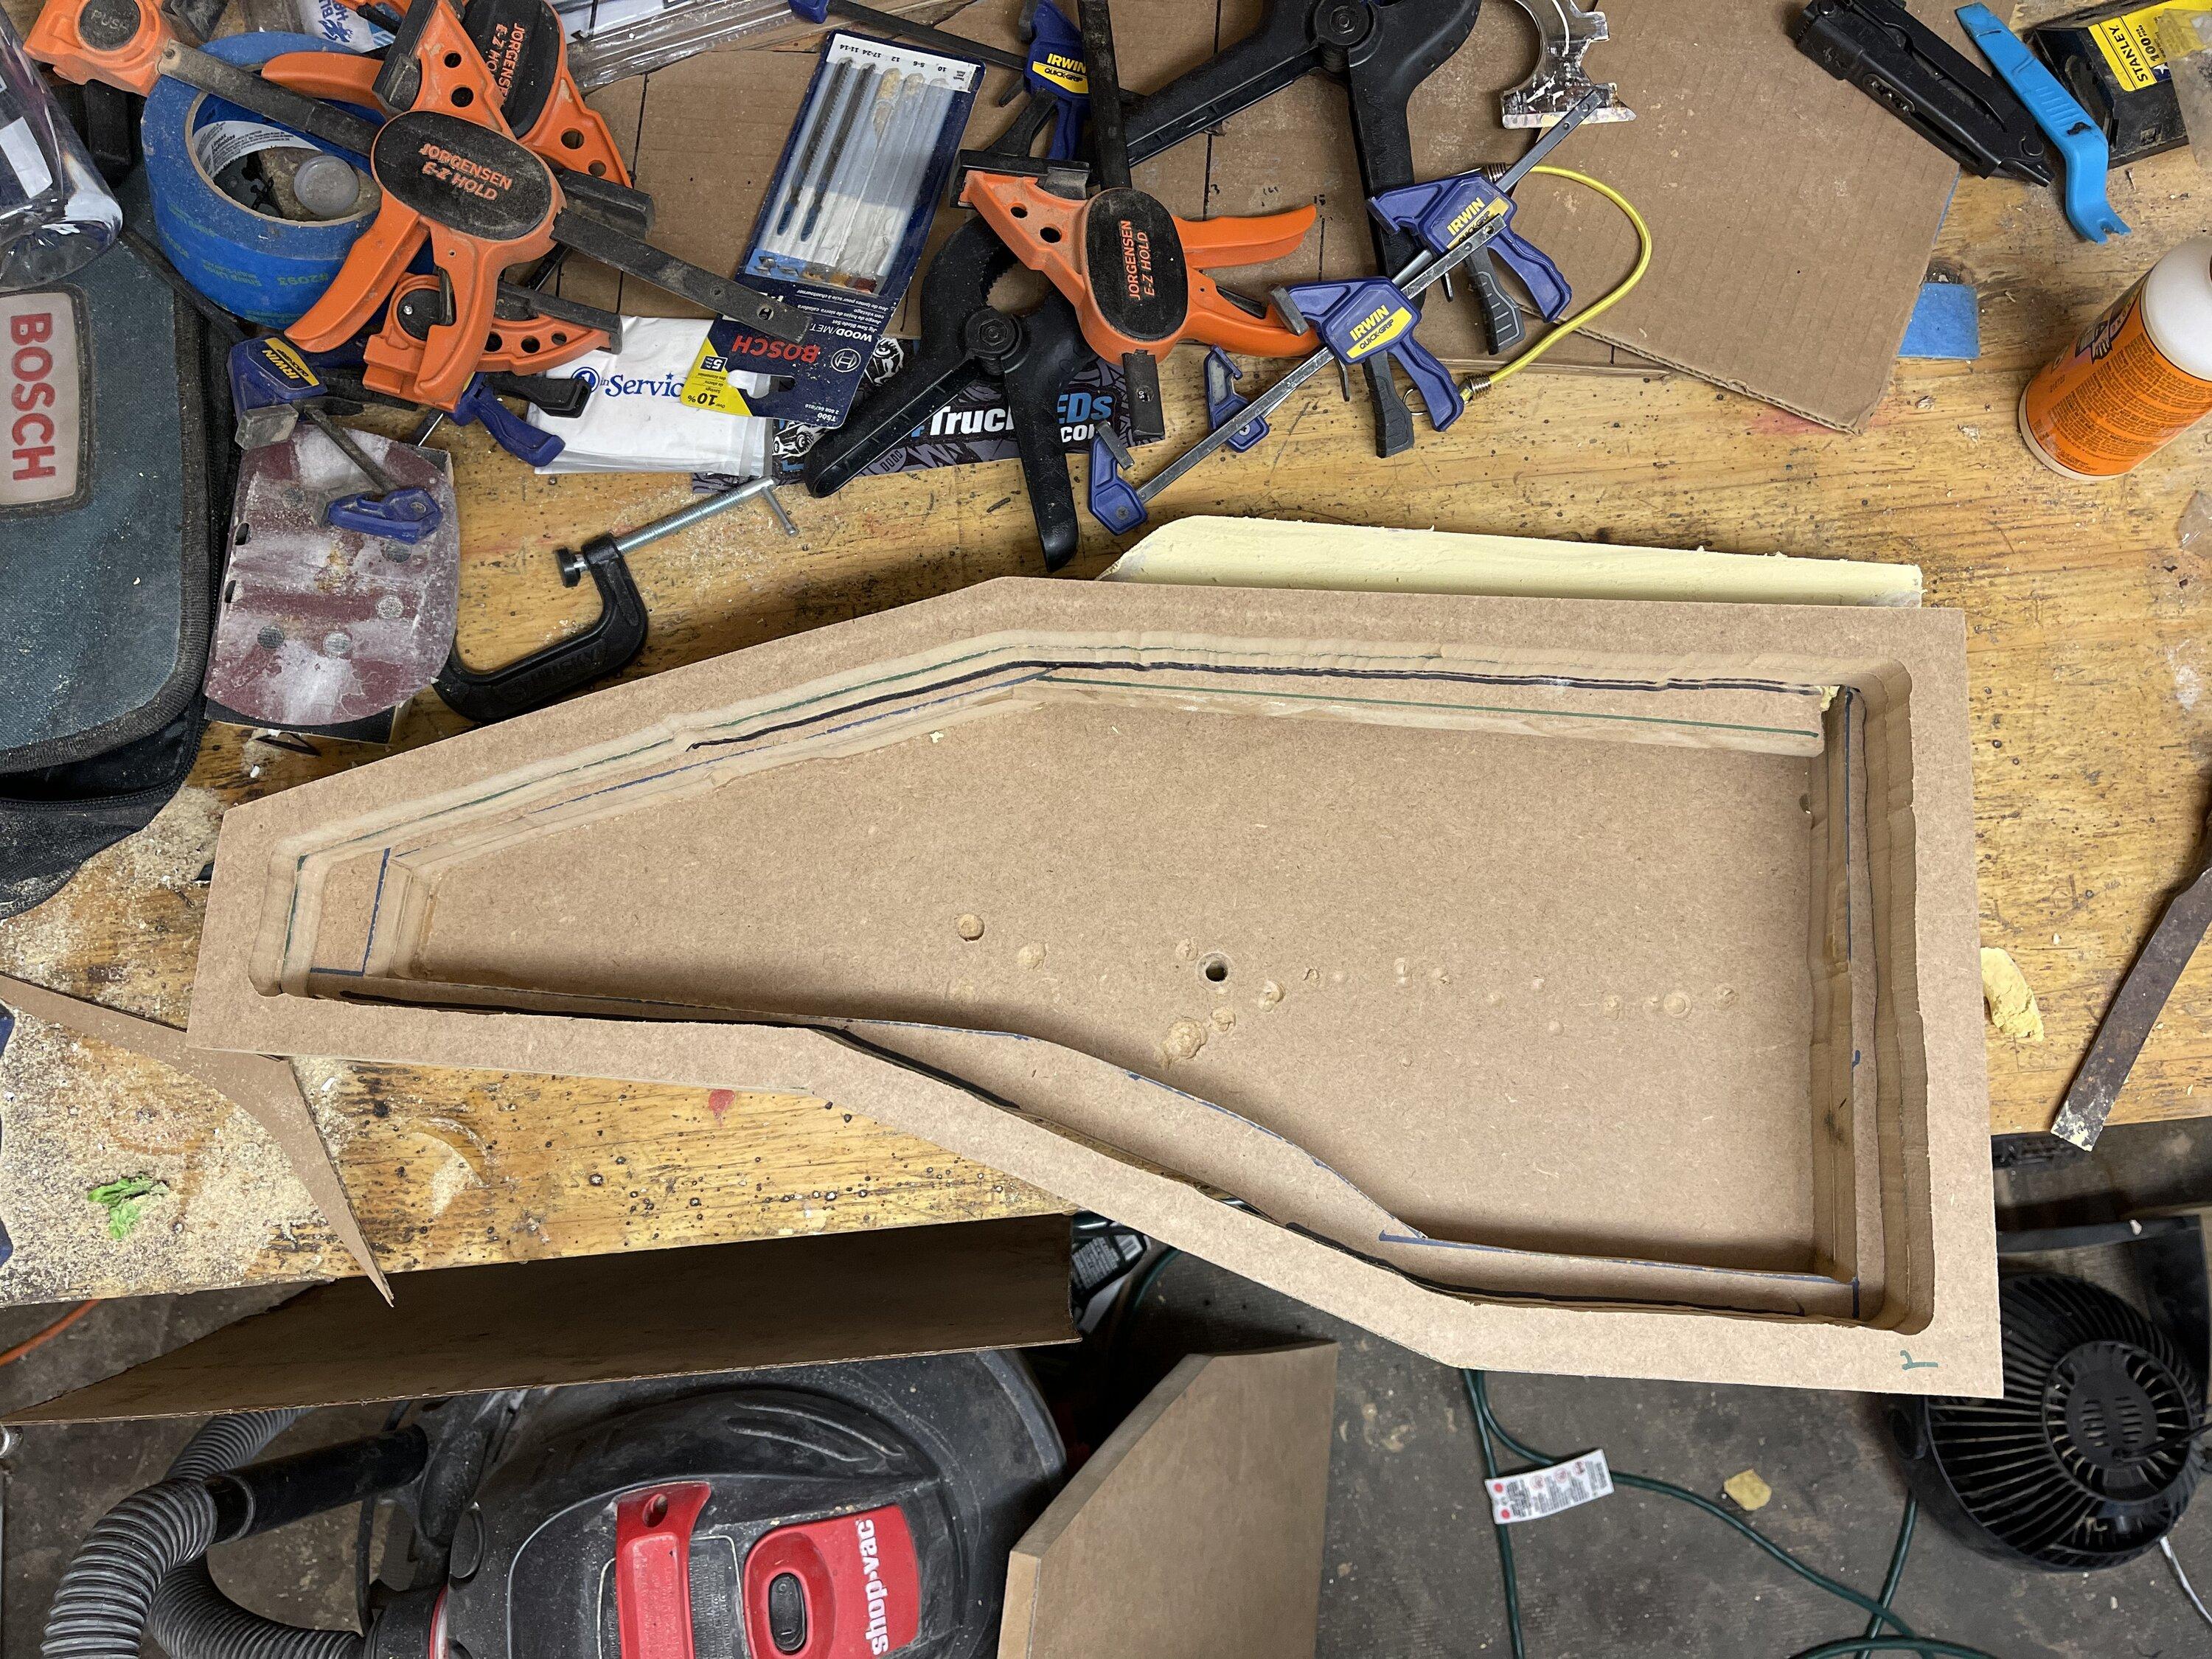
Layer 3: The picture is a mistake on sub box mk1. I needed more material on this layer to copy the example and layers 4,5,6 will be narrower (10 inches wide) I mounted the MK1 and stared at it for a couple minutes, looked at where I can improve. This is where MK1 dies. Now on to MK2.
Improvements to MK1: layer 1 i made it thicker on the angle from the left side you can see a notch I cant remember the thought process on that, But all my cuts came from a circular saw and the testy areas I used my jig saw. Then with the help of my brother he recommended cut a rough shape of the boarder at 3/4 then use the router to match the rest. Again Layers 2,3 are the same.
MK2 Layer 3: I routered this layer out and remembered I needed more at the top of the box because layer 4,5,6 are the same. Thankfully I kept the scrap and was able to use wood glue and filler to salvage this layer. What I learned here is to go slow and test fit as many times as you can.

Layer 4: This is where I realized that 3/4 was too thick. The sub the example uses is a kicker L7T it has a minimum .2 cuft with a max of .75 cuft. I did some rough calculation and I think I got .165. So in order to test I wrapped the box in two layers of trash bags then filled it up. I would need at least 5.66 liters of water. I was able to get 6.03 liters inside. I went ahead anyway and the next two layers I had a 1/2 wall thickness. Now layer 2 and 3 are at 3/4 thick. Home depot has a 1/2 by 2 inch router bit I grabbed for 22$ Which is fine. I needed a new right angle anyway. Thinned out the wall I am above the minimum so it will only increase the sound. On the bottom of the box you can see I adjusted the angle which also provided more space inside. Note: Poly fill will not work in this case, that will only work if you are below minimum to "trick" the sub into being in a bigger box.
Layer 5: Same as layer 4. Once this layer was on I went ahead and got my sander out and sanded down the outside of the box and inside to clear up any random cuts to make it nice a smoothish.
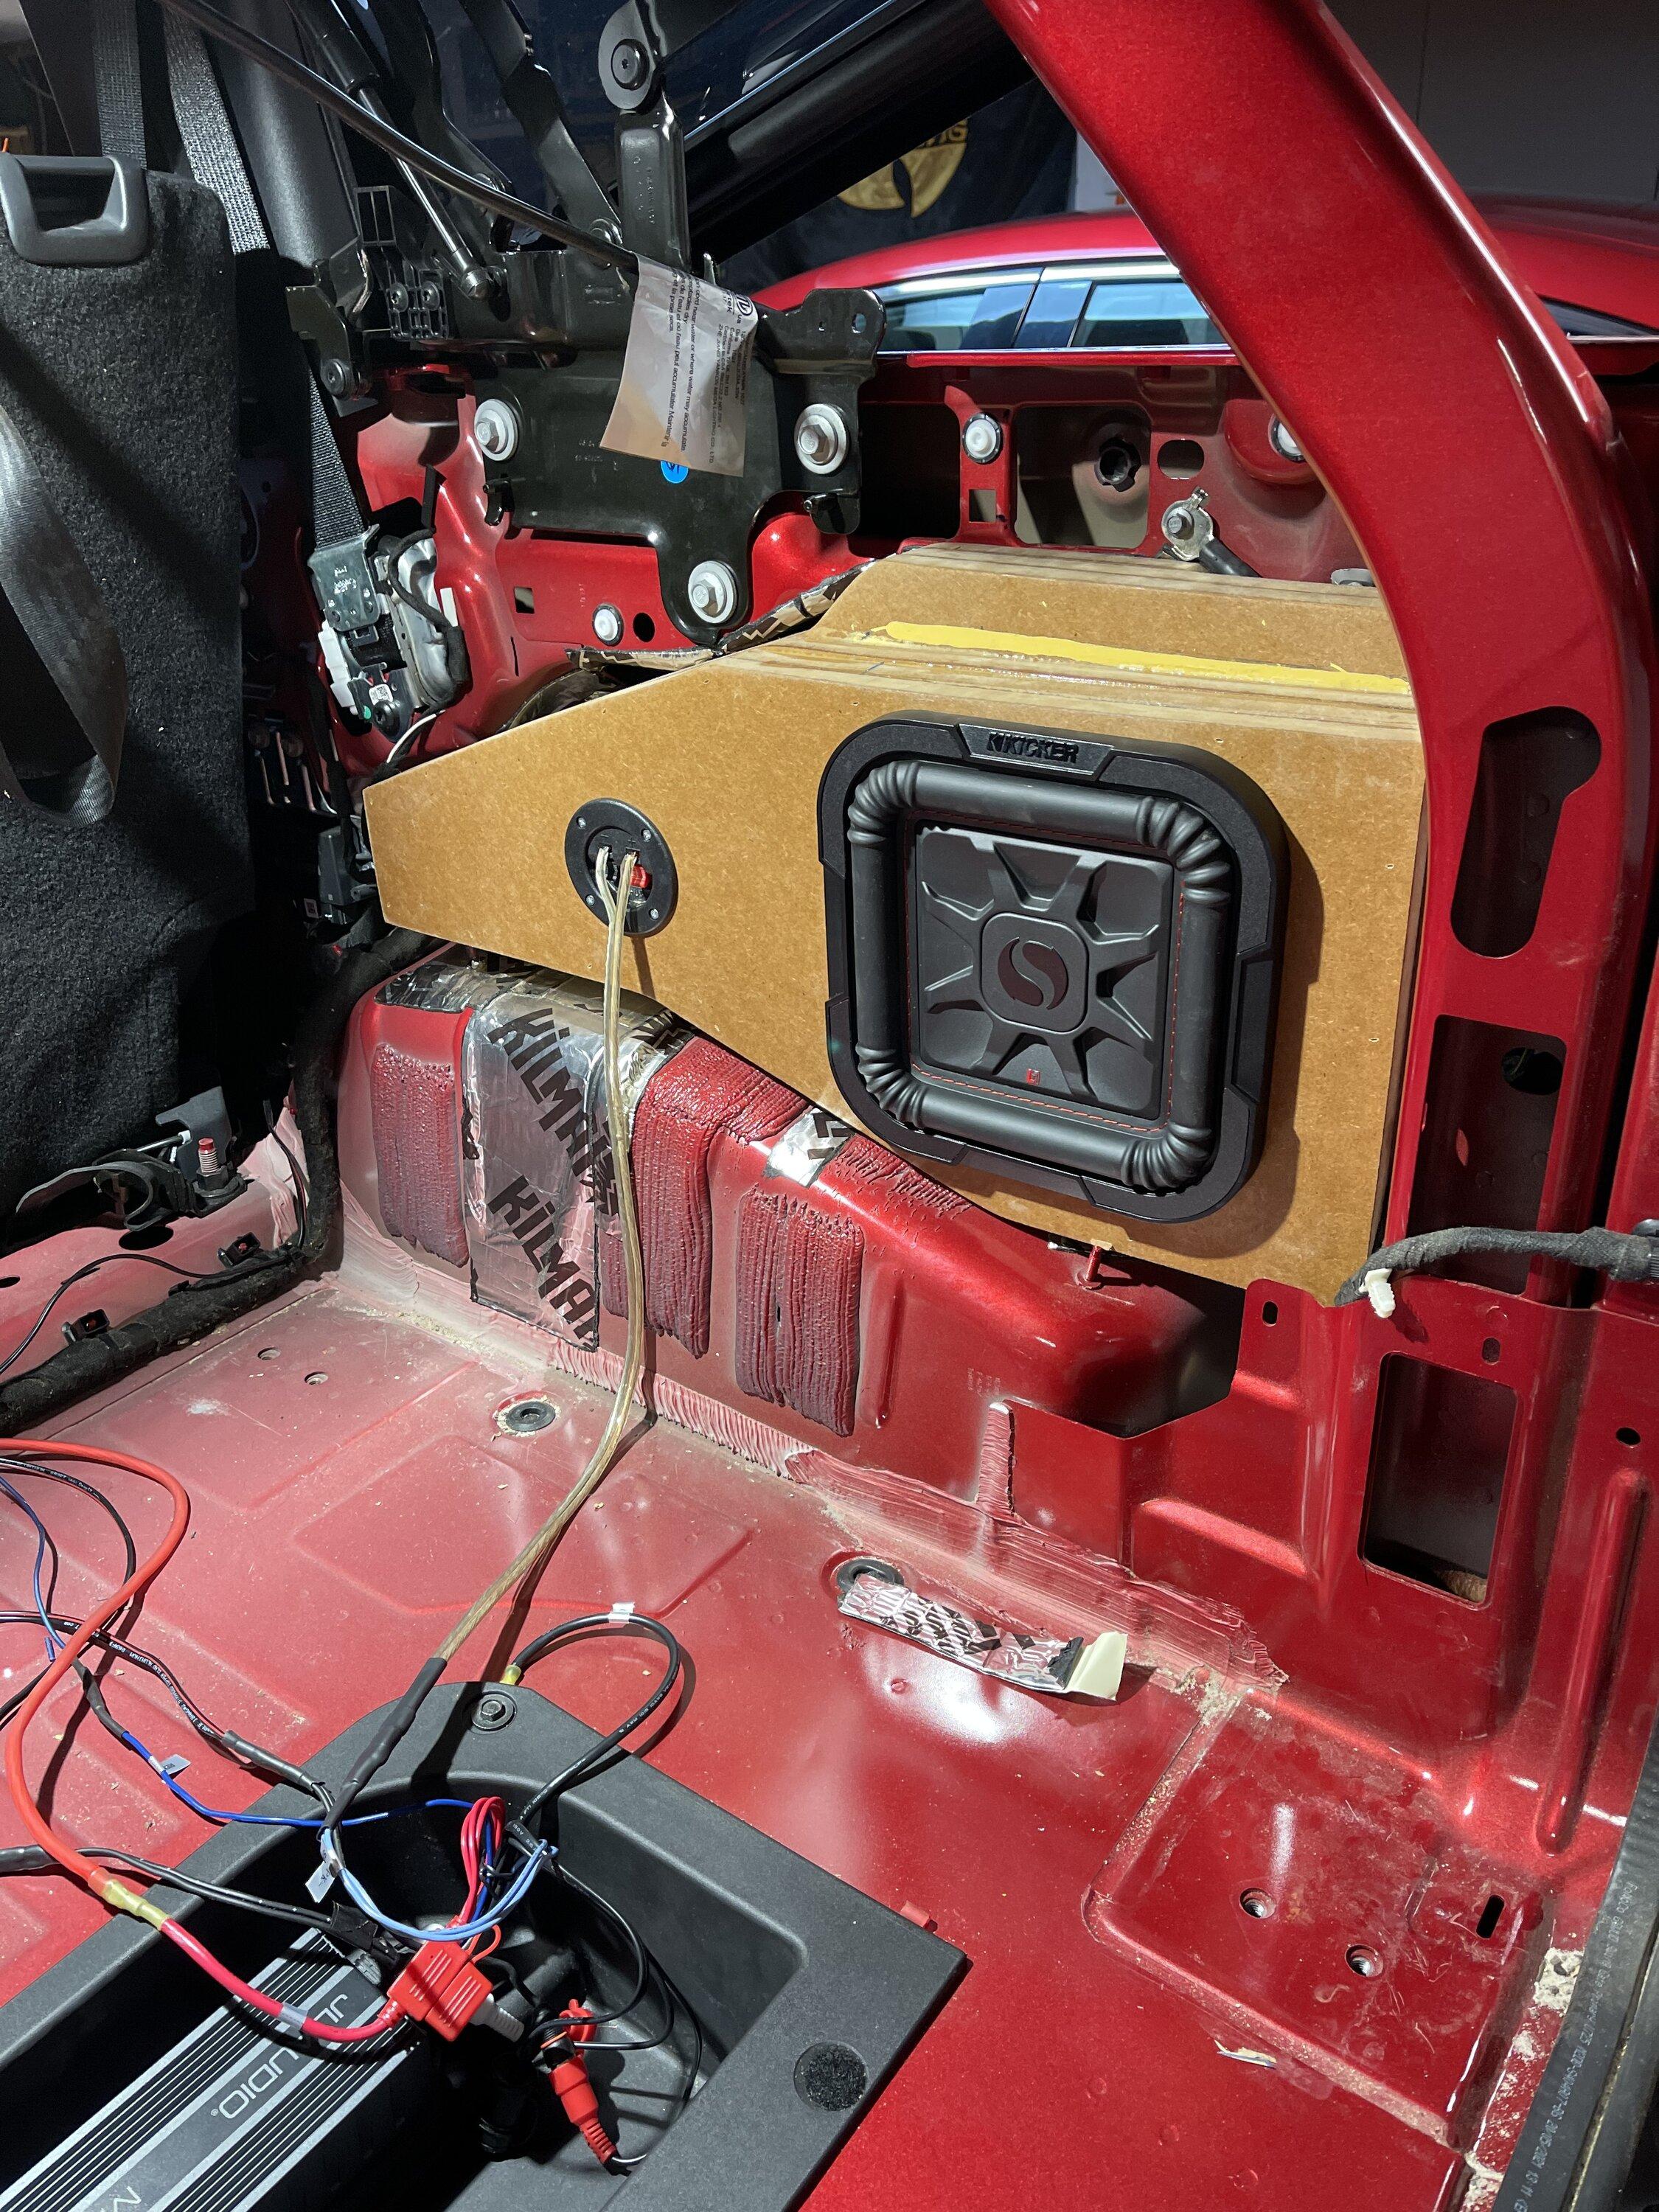
Layer 6: Exactly like 4 and 5. To mount the sub I went ahead and attempted to guess where that cubby was located in order to mount it where that was. It prove to be a little difficult to get the right spot. Looking at the example that one isn't mounted close either. I went ahead and mounted it 1/2 in in from the sides. To my surprise that was a pretty reliable method. The sub is 75% exposed. Before I mounted this layer I flipped it over and routered out 1/8th inch under the box to increase cuft. I sprayed Polyurethane (4 coats) around the entire box for moisture and water repellant ( should have painted it first then poly). I mounted the Meta terminal just to the left of the sub box. I considered using terminals that screw into the side having a minimal footprint but these added 1/2 length to the outside of the box. The metra terminal was flush. Pilot holed where the sub would mount and its ready for nail and glue.
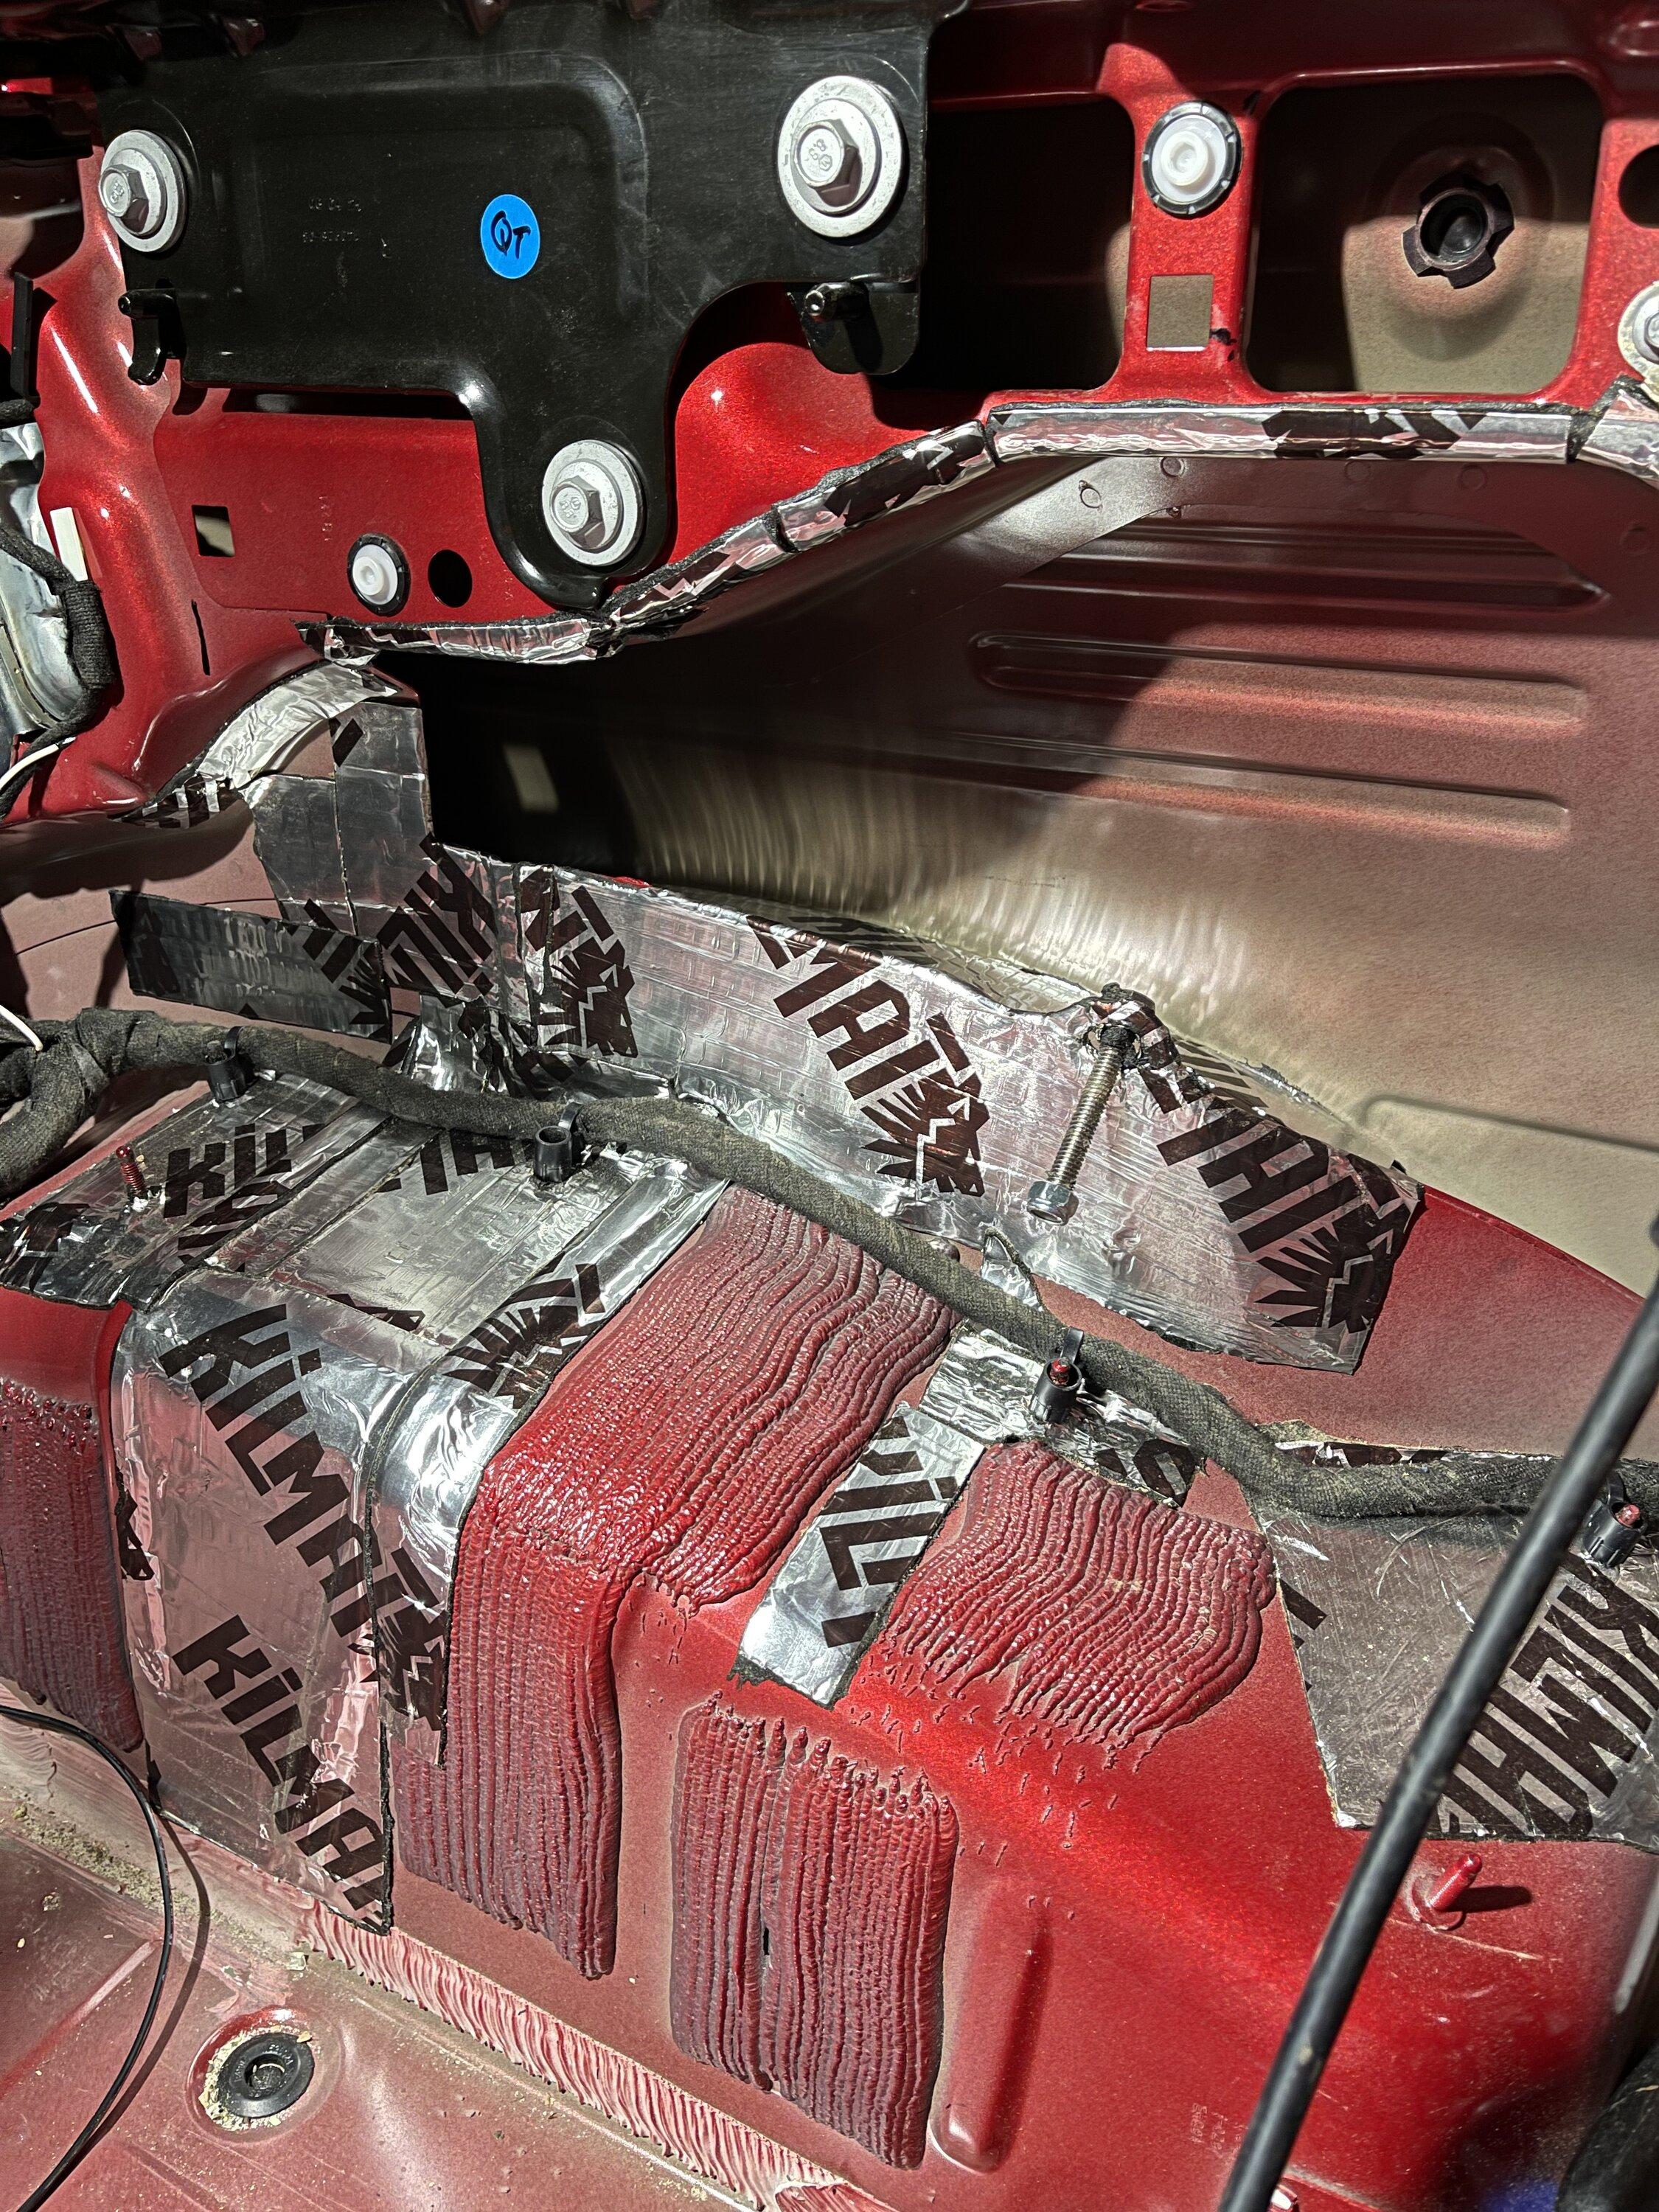
Mounting: On the frame of the vehicle there is a spot where I believe the B&O sub attaches to I used a 5/8 bolt with a nylon nut to attach the box. Prior to attaching the box I used Killmat (really good product) around the wheel well, under the wire, everywhere that I thought the box would be sitting against the metal. I also threw some in there for good measure just because.
Wiring: What a pain in the as$ so! I had to run 18g wire from the kick/ wheel speakers. (pro tip: when in doubt Crutchfield it out.) the trim isn't hard to remove. I got a poraxy trim kit off amazon a while ago for 20$ and its already paid for itself. If you don't want that there is a trim removal tool that idk how else to describe it, at the end is a U its metal and around 8 inches long that was a huge help especially during the rear trim removal. I was able to reach in with said tool and apply pressure around the clip. I ran the wires with ease. I had a choice, Run the amp power wire from the engine bay across and enter the car on the passenger side or just run it up straight down the driver side. The driver side speaker panel is a PITA with the foot rest. There is a rubber plug which I drilled a 3/4 hold and pushed the wire through. I also used the same hole for the remote on switch. Luckily I had the add a fuse for my oracle lights so I spliced into that. Each light draws <0.1a and so far no issues.
Amp: I went with JL MX300/1 Marine grade (https://www.crutchfield.com/p_13698406/JL-Audio-MX300-1.html) its small, so I can put this anywhere I really want. Ideally I tried to do it under the plastic trim from the rear to the seats. I tried to mount it there and it sort of worked and the trim did not lock into place. I decided to mount the amp in the storage bin under the rear panel. I considered under the rear seats as well, it looked like this would fit with a ABS sheet but I did not try, I was happy with the bin. Ran the wires under the rear trim board and 12g wire into the terminal with 12g wire going into the sub. The only down fall of this amp the adjustment knobs are under the unit and covered by a rubber panel. So you need to set up your sub then attach the panel then mount to your spot of choice. Looking at the box I noticed there was a decent amount of space on the bottom right, It was almost 9 inches deep, Hindsight 20/20 i bet the amp would fit there. Just killmat/ poly around that area to stop the rattle.
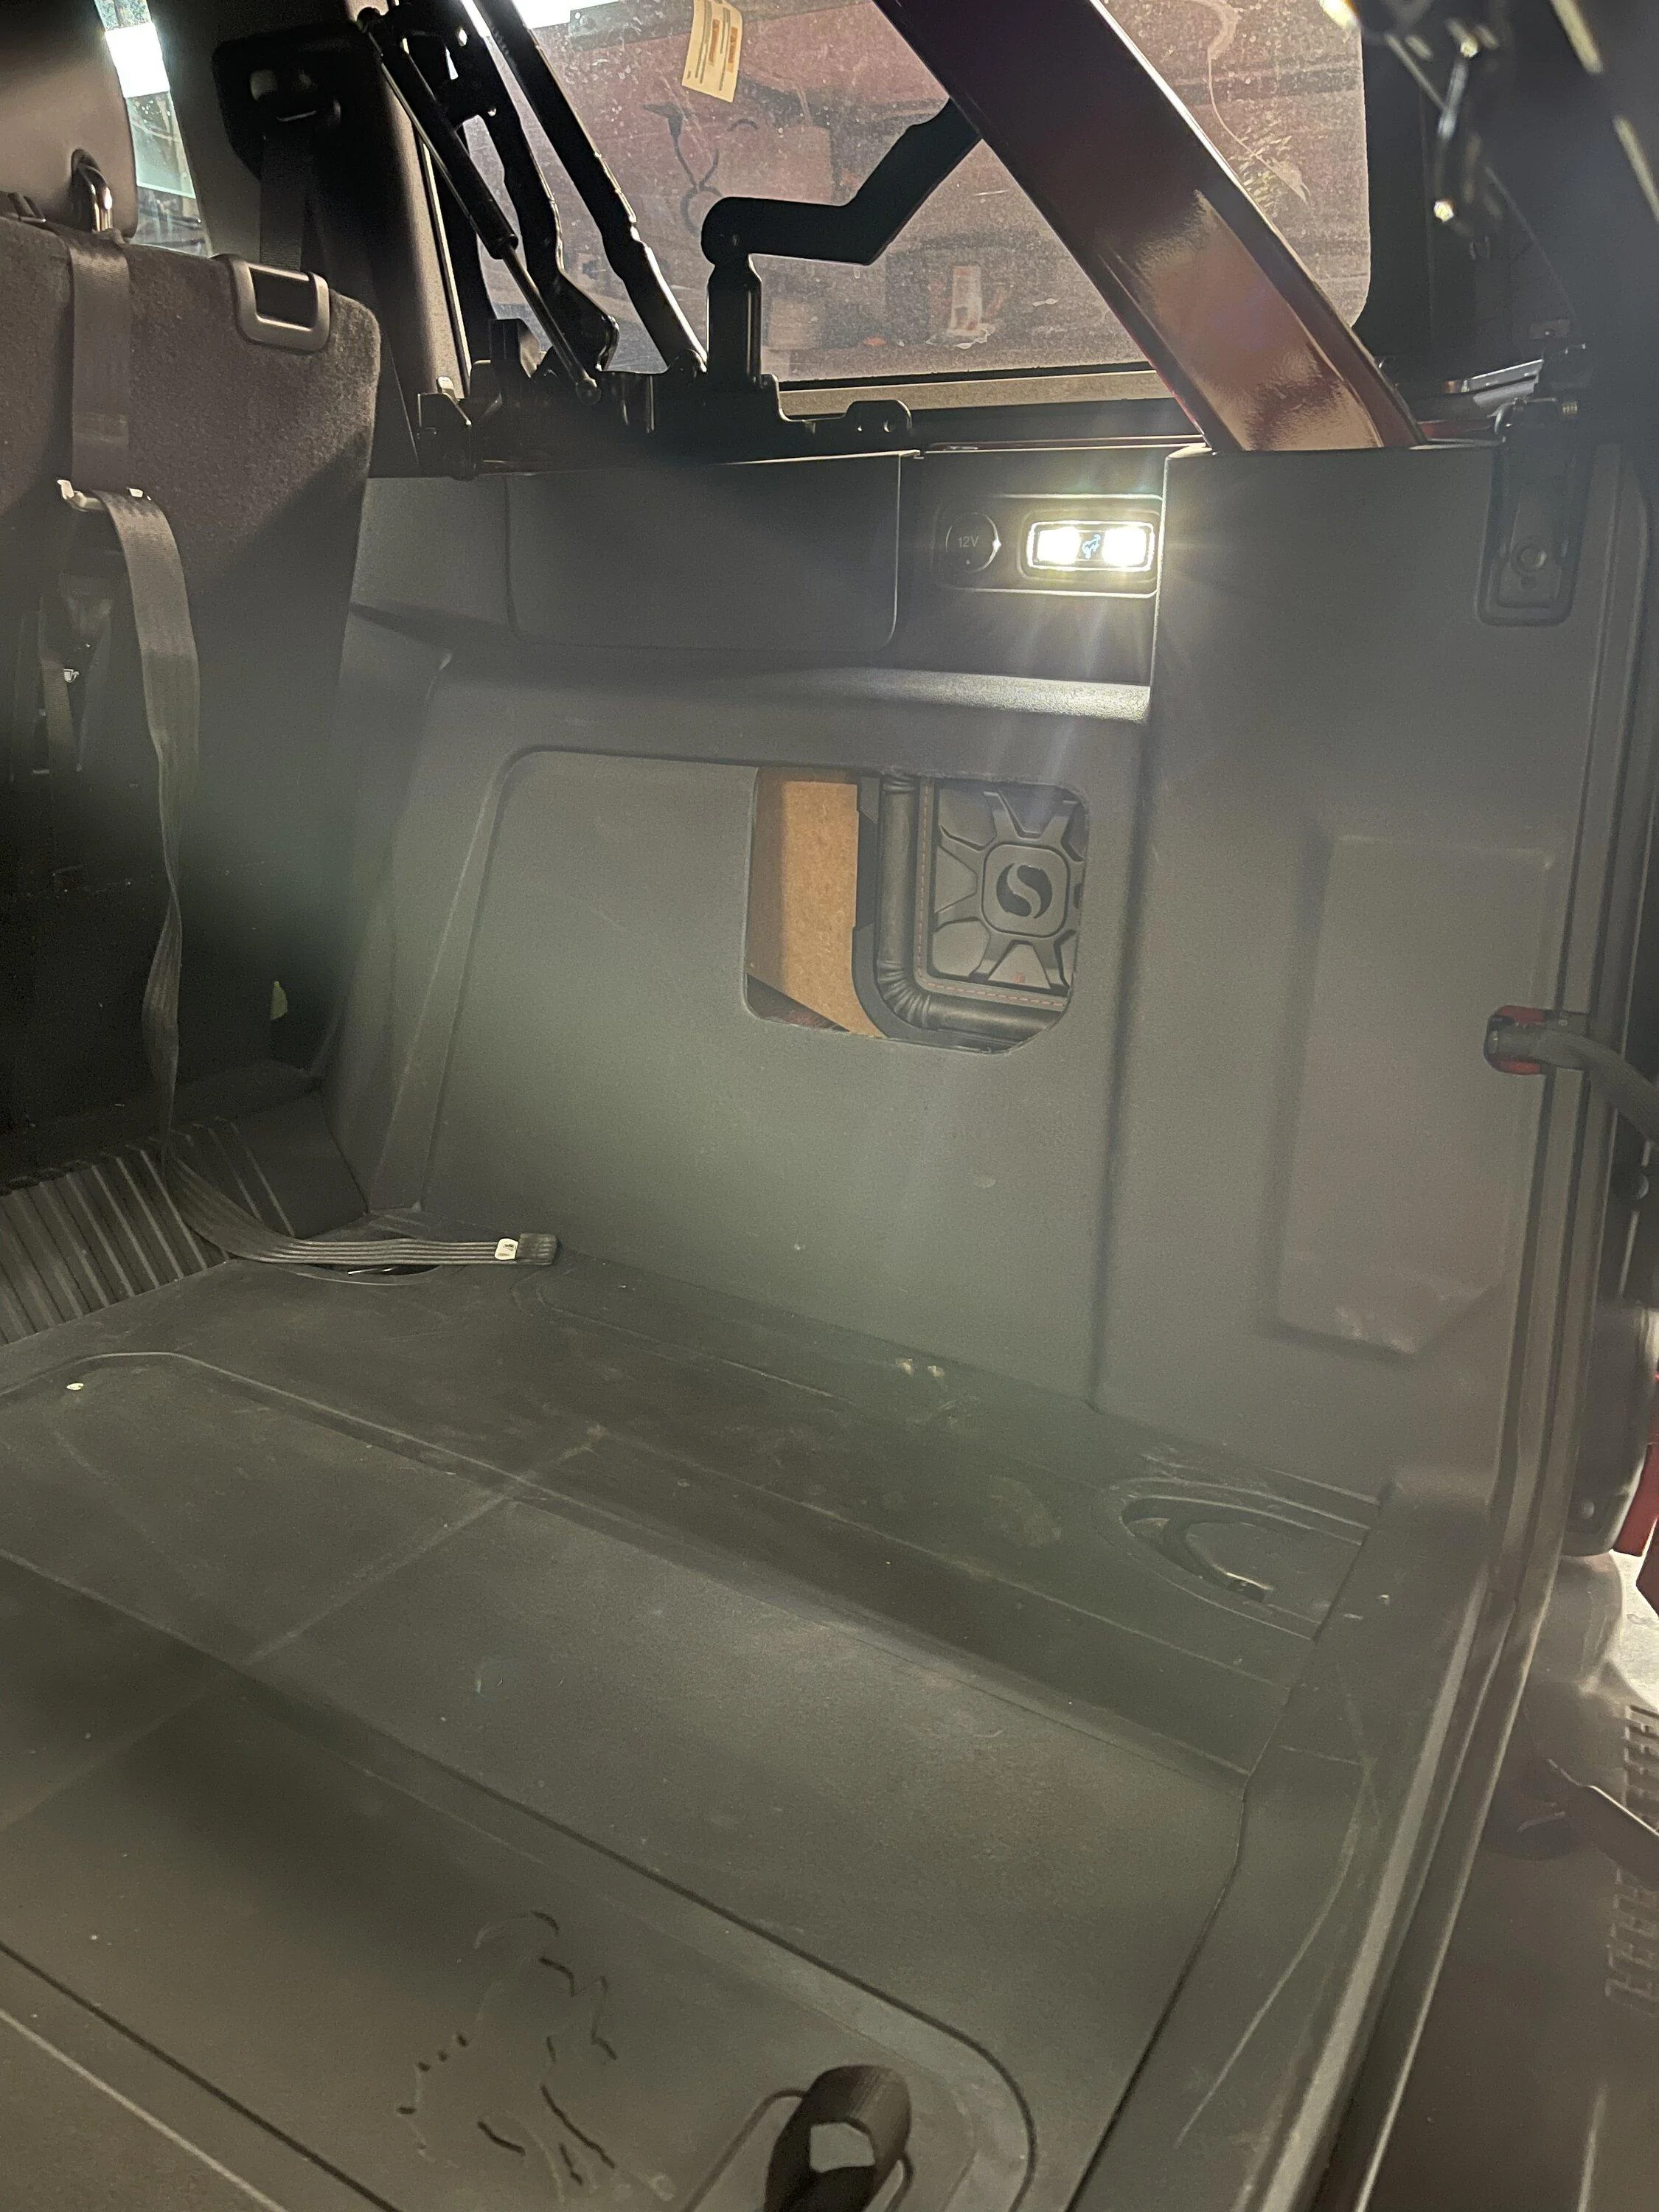
Assemble the trim: I found out that I needed to sand down the top of layer 6,5,4 in order for the trim to fit. I was 1/8 inch too thicc. No big deal for the sander and Dremel. The example shows that around one corner.
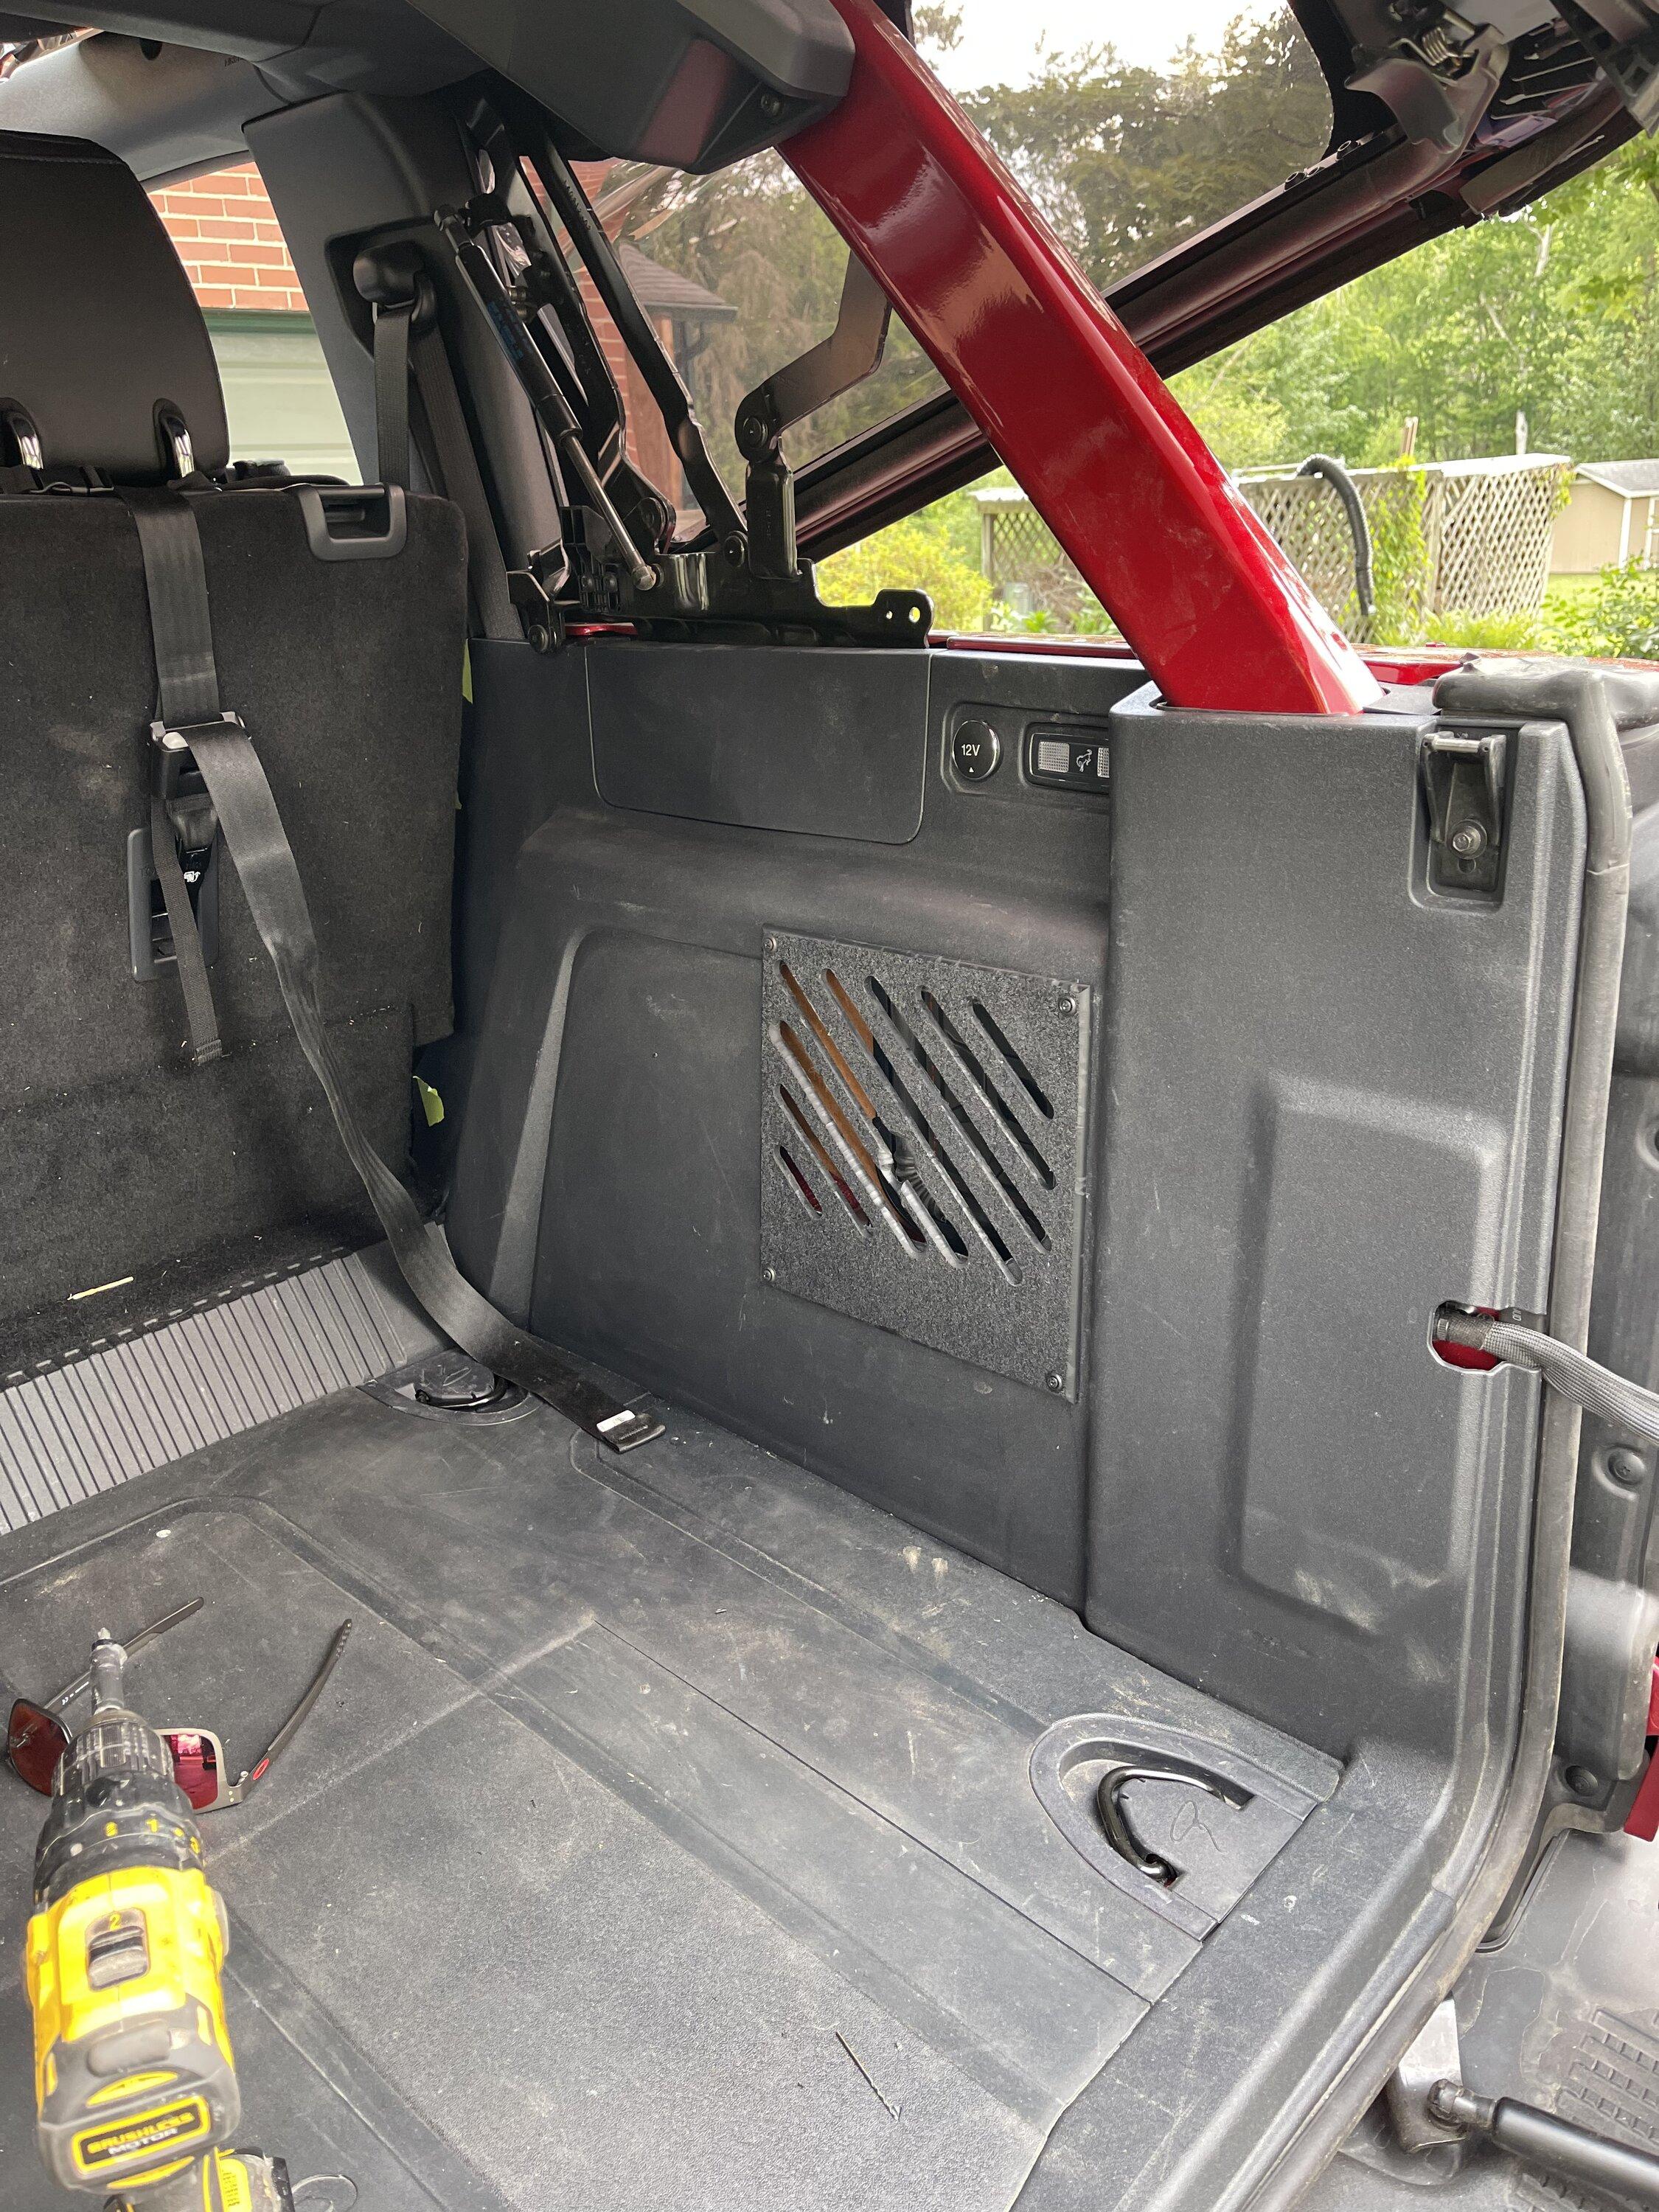
Protection panel: This was a 10x10 ABS 1/4 thick I had left over. I lined up the top of the ABS to the top of the trim before it turns inward. I measured where the hole was starting at the bottom and that's where the start of my slots would be. Using that 2 inch long router bit (too lazy to change, you could go smaller) and my new 90 degree angle I drew straight lines and just made the width of said ruler wide (1 inch to 1.3 wide) for spacing in between the lines. It came out rough, I intended to make the edges smooth with a shaping bit. The first slot worked well. The second, I must have sneezed and it caught screwing it up. That's okay, I plan on doing a 3d print version.
And there we have it folks. That's my journey on making a thing for a fraction of the price:
MDF:50$
90 angle: 12$
Bit: 22$
Bolts, nuts, electrical equipment: 50$
Beer: 30$
Amp:250$
Sub: 250$
664$ total complete.
whereas you buy it
Box 600$
Amp:250$
Sub:250$
1100$
The cheapest and quickest method would be getting the B&O box from the dealer and upgrade that.
Overall this was a nice upgrade and plenty of sound/bass that id expect from an 8 inch sub. Its not gonna rattle the doors off however, there is a notable difference when its plugged in and when its not. Also don't judge my messy shop pics. Its organized chaos.
I appreciate any and all feedback.
I wanted to challenge myself and prove to others that you can do it also.
Earlier this month a member posted a link: https://srqcustoms.com/product/ford-bronco-subwoofer-enclosure-with-grille/
I saw this and wanted to see how much it was, 600$! and me being disgusted at the prices for aftermarket parts and accessories for the bronco.... LETS MAKE A THING!!!
-Just by looking at it i guessed it had to be 6 layers of 3/4 or 1/2 mdf. I picked up a 8x4 sheet of 3/4 inch mdf cut that down to 2 feet long sections to make it easier to work with. $50 thus far.

I had to remove, rear tailgate cowl, cargo floor, the floor seat cowl(???) soft top latch, unplug the keyless antenna, 12v and light, right rear trim panel, Now lets get the rough measurements/ templates. Shoutout to @Ksjrb03 for attaching the PDFS for removal of the trim.
NOTE: I will address the box build by layers, 6,5,4,3,2,1. Layer 6 being the outer most where the sub screws into, One being the layer closest to the tire. Each layer was glued and nailed with 1.2 in finishing nails.
The overall length of the box is around 2 feet long. On the site they said (dimensions taken down?) 12x10x24 if I recall. That gave a an rough idea on the layers and whatnot.
Trim prep: I took a 3/4 drill bit and drilled out the plastic welds(?) holding the storage cubby in place. and then I pulled out the fabric. (Afterthought do not pull that off. Leave it.)
Layer 1: When measuring this layer I found it slightly difficult to get a good reference point to measure, looking at the example i can see the far left bolt so I knew the box started at that point or just passed. I started my box there as a good reference point, all the way to the left. The example shows at least an inch or so, someone with better experience could use that space to mount an amp. I unplugged some of the plastic pins to give more space and stuffed them into the frame. You can plug the keyless antenna in as well. I marked on the frame of the vehicle every 2 inches to help guide my template around the wheel well The first prototype (sub box mark 1 ) my cuts were not straight thus I had to use a jigsaw which provided an ugly box. I was able to see where my original marks where and where I could add some width, length etc. The top right of the box you have to cut a 45 degree to clear a ground wire.

Layer 2: This was cuz exactly like layer one but no more 45 degree cut on top right. I cleared the wire. I used my adjustable angle (R.I.P she was a good tool
) set at 3/4 of an in for the boarder to glue and nail. I used the jigsaw and cut it out.
Layer 3: The picture is a mistake on sub box mk1. I needed more material on this layer to copy the example and layers 4,5,6 will be narrower (10 inches wide) I mounted the MK1 and stared at it for a couple minutes, looked at where I can improve. This is where MK1 dies
. Now on to MK2.Improvements to MK1: layer 1 i made it thicker on the angle from the left side you can see a notch I cant remember the thought process on that, But all my cuts came from a circular saw and the testy areas I used my jig saw. Then with the help of my brother he recommended cut a rough shape of the boarder at 3/4 then use the router to match the rest. Again Layers 2,3 are the same.
MK2 Layer 3: I routered this layer out and remembered I needed more at the top of the box because layer 4,5,6 are the same. Thankfully I kept the scrap and was able to use wood glue and filler to salvage this layer. What I learned here is to go slow and test fit as many times as you can.
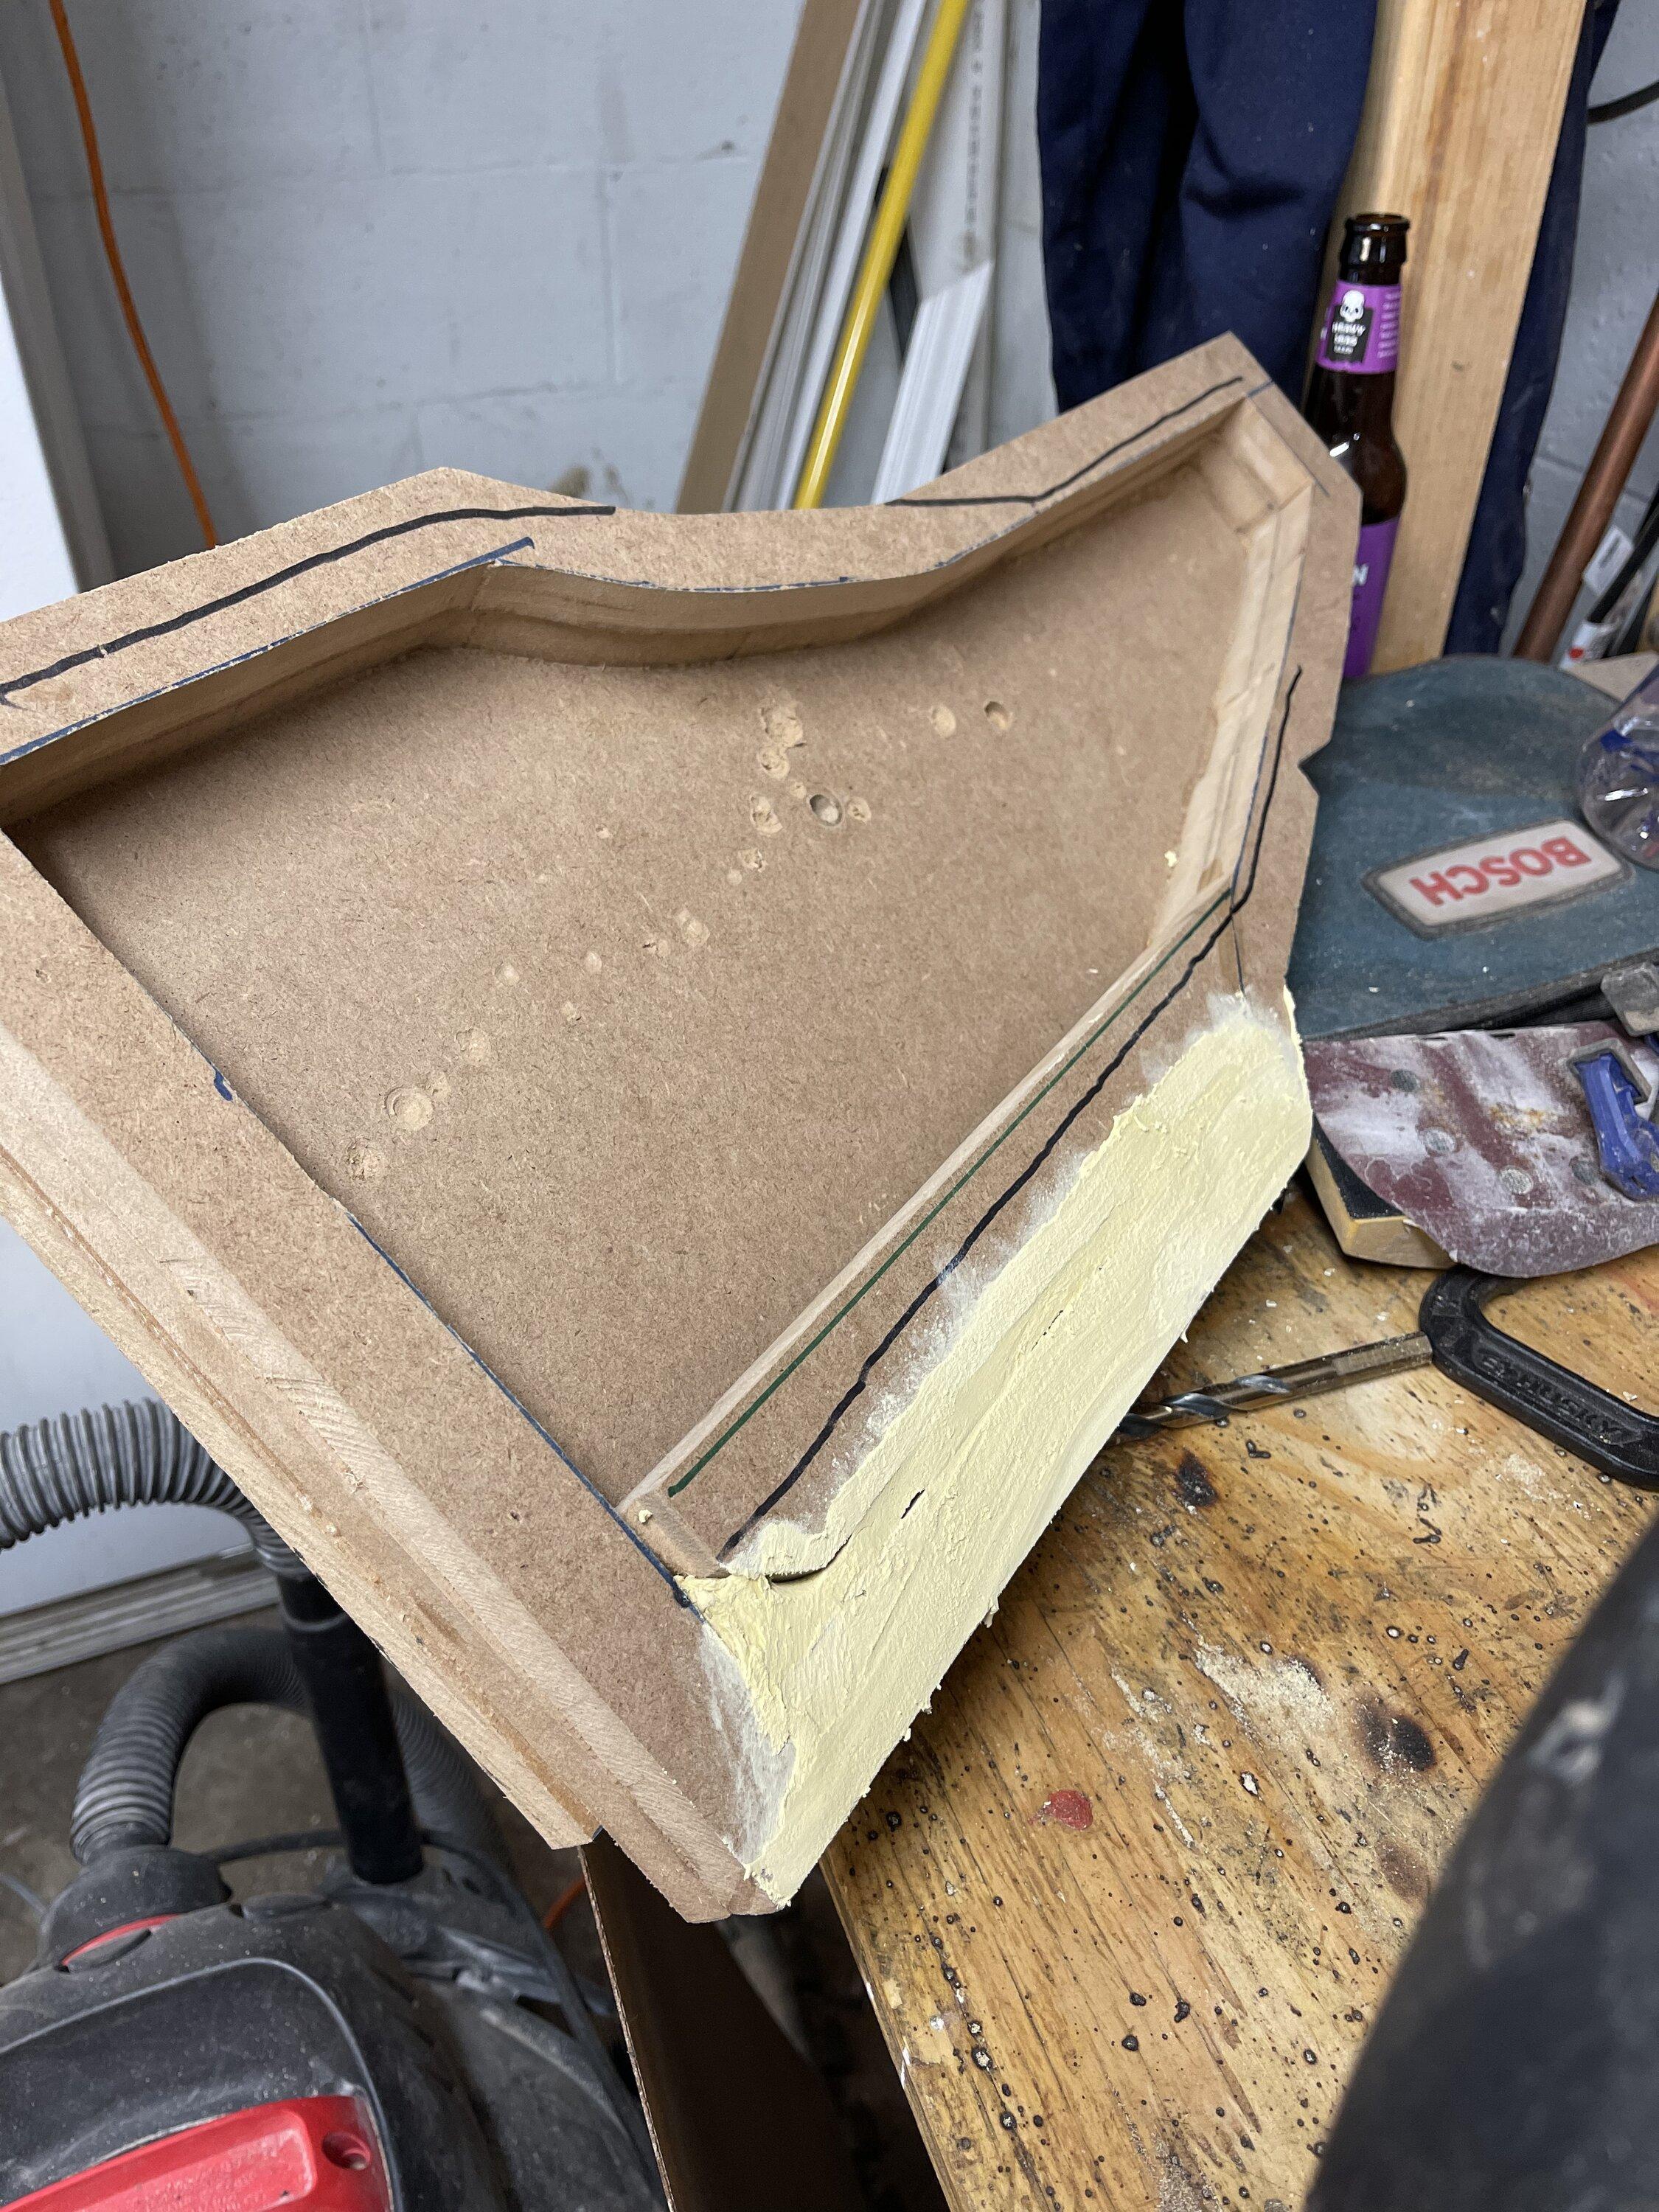
Layer 4: This is where I realized that 3/4 was too thick. The sub the example uses is a kicker L7T it has a minimum .2 cuft with a max of .75 cuft. I did some rough calculation and I think I got .165. So in order to test I wrapped the box in two layers of trash bags then filled it up. I would need at least 5.66 liters of water. I was able to get 6.03 liters inside. I went ahead anyway and the next two layers I had a 1/2 wall thickness. Now layer 2 and 3 are at 3/4 thick. Home depot has a 1/2 by 2 inch router bit I grabbed for 22$ Which is fine. I needed a new right angle anyway. Thinned out the wall I am above the minimum so it will only increase the sound. On the bottom of the box you can see I adjusted the angle which also provided more space inside. Note: Poly fill will not work in this case, that will only work if you are below minimum to "trick" the sub into being in a bigger box.
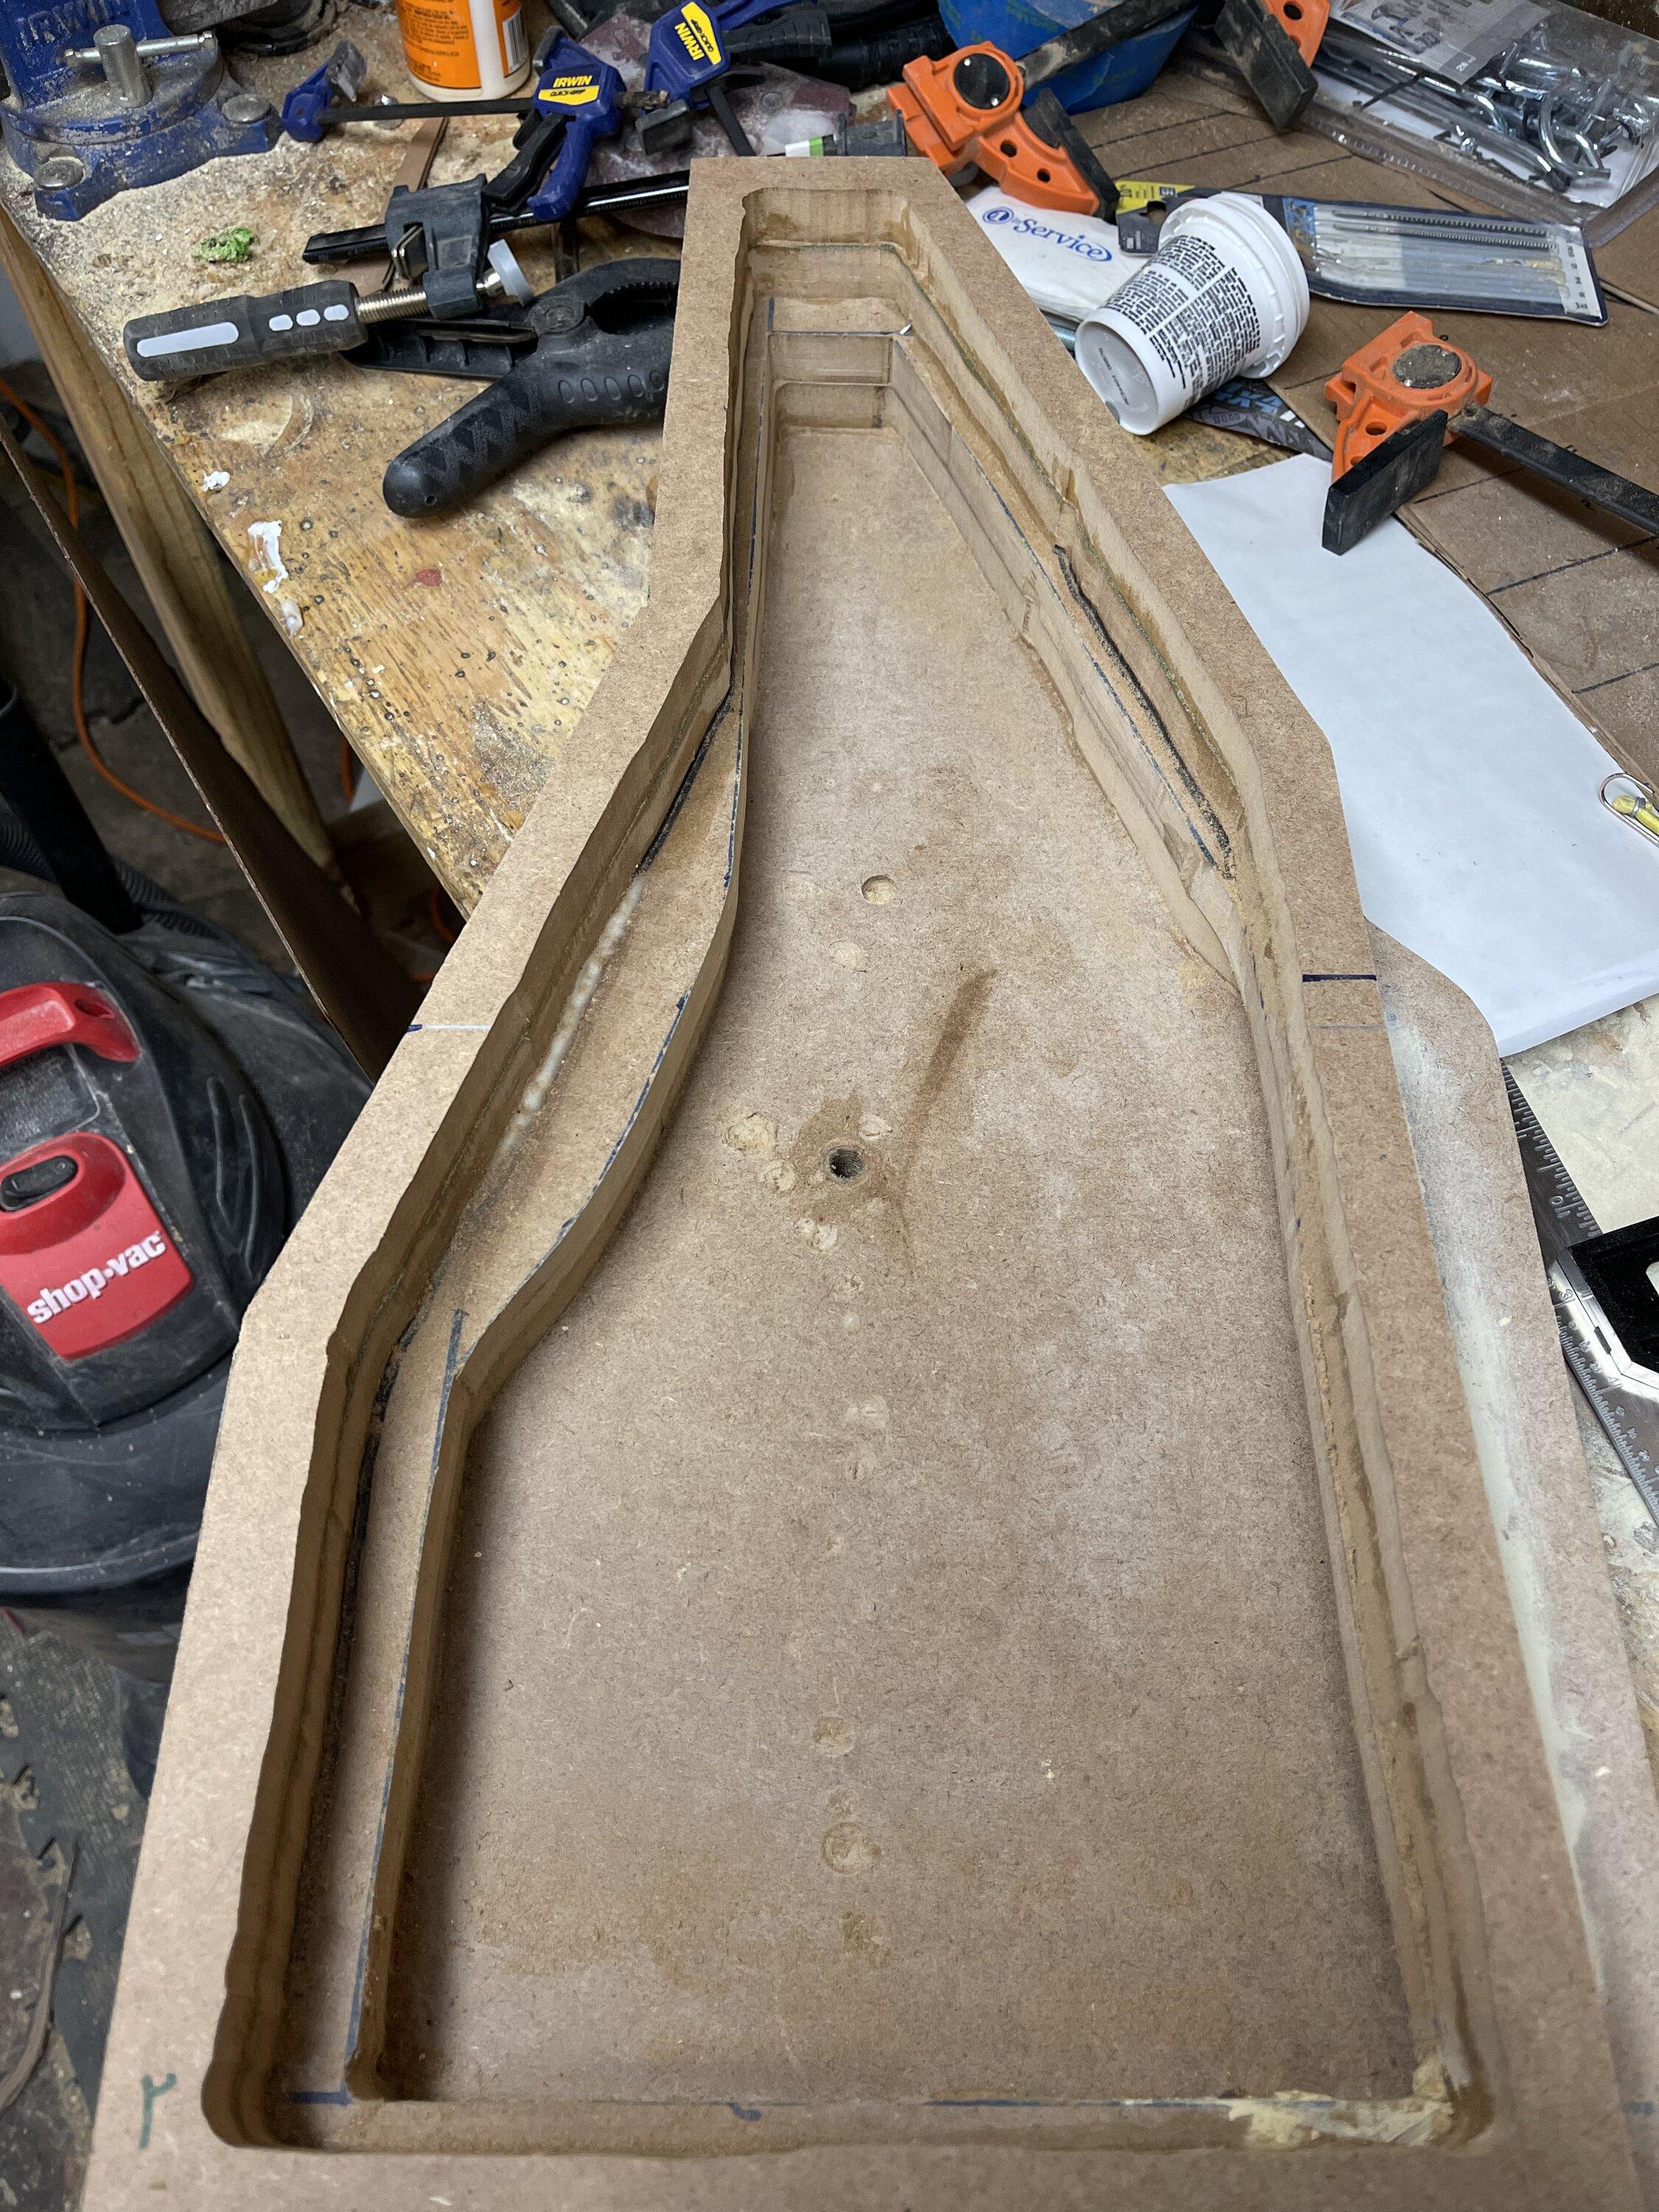
Layer 5: Same as layer 4. Once this layer was on I went ahead and got my sander out and sanded down the outside of the box and inside to clear up any random cuts to make it nice a smoothish.
Layer 6: Exactly like 4 and 5. To mount the sub I went ahead and attempted to guess where that cubby was located in order to mount it where that was. It prove to be a little difficult to get the right spot. Looking at the example that one isn't mounted close either. I went ahead and mounted it 1/2 in in from the sides. To my surprise that was a pretty reliable method. The sub is 75% exposed. Before I mounted this layer I flipped it over and routered out 1/8th inch under the box to increase cuft. I sprayed Polyurethane (4 coats) around the entire box for moisture and water repellant ( should have painted it first then poly). I mounted the Meta terminal just to the left of the sub box. I considered using terminals that screw into the side having a minimal footprint but these added 1/2 length to the outside of the box. The metra terminal was flush. Pilot holed where the sub would mount and its ready for nail and glue.
Mounting: On the frame of the vehicle there is a spot where I believe the B&O sub attaches to I used a 5/8 bolt with a nylon nut to attach the box. Prior to attaching the box I used Killmat (really good product) around the wheel well, under the wire, everywhere that I thought the box would be sitting against the metal. I also threw some in there for good measure just because.
Wiring: What a pain in the as$ so! I had to run 18g wire from the kick/ wheel speakers. (pro tip: when in doubt Crutchfield it out.) the trim isn't hard to remove. I got a poraxy trim kit off amazon a while ago for 20$ and its already paid for itself. If you don't want that there is a trim removal tool that idk how else to describe it, at the end is a U its metal and around 8 inches long that was a huge help especially during the rear trim removal. I was able to reach in with said tool and apply pressure around the clip. I ran the wires with ease. I had a choice, Run the amp power wire from the engine bay across and enter the car on the passenger side or just run it up straight down the driver side. The driver side speaker panel is a PITA with the foot rest. There is a rubber plug which I drilled a 3/4 hold and pushed the wire through. I also used the same hole for the remote on switch. Luckily I had the add a fuse for my oracle lights so I spliced into that. Each light draws <0.1a and so far no issues.
Amp: I went with JL MX300/1 Marine grade (https://www.crutchfield.com/p_13698406/JL-Audio-MX300-1.html) its small, so I can put this anywhere I really want. Ideally I tried to do it under the plastic trim from the rear to the seats. I tried to mount it there and it sort of worked and the trim did not lock into place. I decided to mount the amp in the storage bin under the rear panel. I considered under the rear seats as well, it looked like this would fit with a ABS sheet but I did not try, I was happy with the bin. Ran the wires under the rear trim board and 12g wire into the terminal with 12g wire going into the sub. The only down fall of this amp the adjustment knobs are under the unit and covered by a rubber panel. So you need to set up your sub then attach the panel then mount to your spot of choice. Looking at the box I noticed there was a decent amount of space on the bottom right, It was almost 9 inches deep, Hindsight 20/20 i bet the amp would fit there. Just killmat/ poly around that area to stop the rattle.
Assemble the trim: I found out that I needed to sand down the top of layer 6,5,4 in order for the trim to fit. I was 1/8 inch too thicc. No big deal for the sander and Dremel. The example shows that around one corner.
Protection panel: This was a 10x10 ABS 1/4 thick I had left over. I lined up the top of the ABS to the top of the trim before it turns inward. I measured where the hole was starting at the bottom and that's where the start of my slots would be. Using that 2 inch long router bit (too lazy to change, you could go smaller) and my new 90 degree angle I drew straight lines and just made the width of said ruler wide (1 inch to 1.3 wide) for spacing in between the lines. It came out rough, I intended to make the edges smooth with a shaping bit. The first slot worked well. The second, I must have sneezed and it caught screwing it up. That's okay, I plan on doing a 3d print version.
And there we have it folks. That's my journey on making a thing for a fraction of the price:
MDF:50$
90 angle: 12$
Bit: 22$
Bolts, nuts, electrical equipment: 50$
Beer: 30$
Amp:250$
Sub: 250$
664$ total complete.
whereas you buy it
Box 600$
Amp:250$
Sub:250$
1100$
The cheapest and quickest method would be getting the B&O box from the dealer and upgrade that.
Overall this was a nice upgrade and plenty of sound/bass that id expect from an 8 inch sub. Its not gonna rattle the doors off however, there is a notable difference when its plugged in and when its not. Also don't judge my messy shop pics. Its organized chaos.
I appreciate any and all feedback.
Sponsored
Last edited: