
- Thread starter
- #1
I know it's been done, but I can't find how. Does anyone have instructions for the panel removal? Tips? Extra parts I need?
Sponsored
| Interior Trim Remover |
|
|
|
|
|
|

|
|
|
|
|
|
I had the right side panel off to do some wiring and replace my seat belt retractor. It’s a little tight but the seats being in didn’t really make it more difficult. I would leave them in personally.@Ducati1098 thank you! It looks like rear seat removal would expidite the panels being removed.
I'm trying to figure out if I have the tow control module behind the right panel. I have everything upfront, plug included, but I don't know if that plug actually goes anywhere.
I'm thinking it's not, but the dealer was able to plug the brake controller into the correct connector. Either way, I trace some wires, buy a module, or have everything. And you're right, it's on the left. My mind is stuck in RHD, and the module is on the driver's side.I had the right side panel off to do some wiring and replace my seat belt retractor. It’s a little tight but the seats being in didn’t really make it more difficult. I would leave them in personally.
As far as the trailer/tow control module, that I’m unsure about. However the workshop manual shows it being behind the left trim panel, not the right one. If your bronco didn’t come with the tow package, I would assume that module is not there.
Awesome! Will come in handy to work on the sub!Loadspace Trim Panel - 3-Door
Special Tool(s) / General Equipment
Removal
Interior Trim Remover
NOTE: Removal steps in this procedure may contain installation details.
- Remove the front scuff plate trim panel.
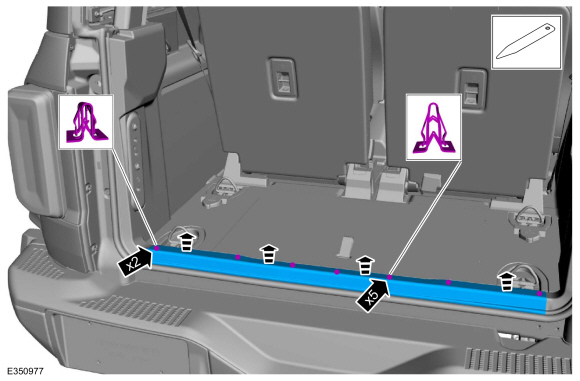
Refer to: Front Scuff Plate Trim Panel (501-05 Interior Trim and Ornamentation, Removal and Installation).- Release the clips and remove the loadspace scuff plate trim panel.
Use the General Equipment: Interior Trim Remover


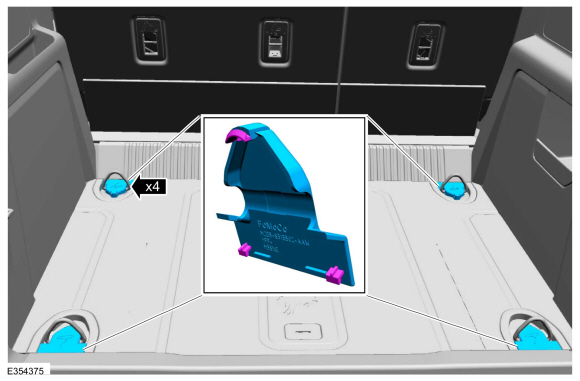
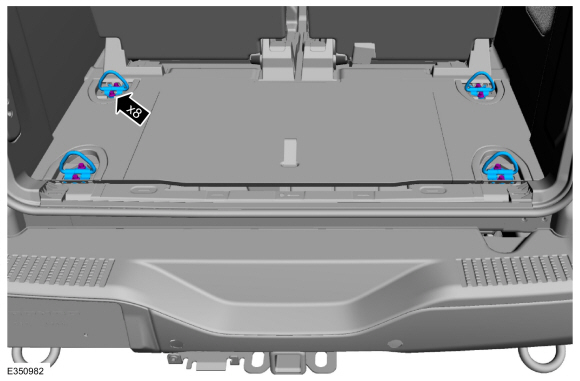
- Remove the load compartment floor covering tie down covers.
- Remove the bolts and the load compartment floor covering tie downs.
Torque: 21 lb.ft (28 Nm)
- Remove the loadspace floor covering.
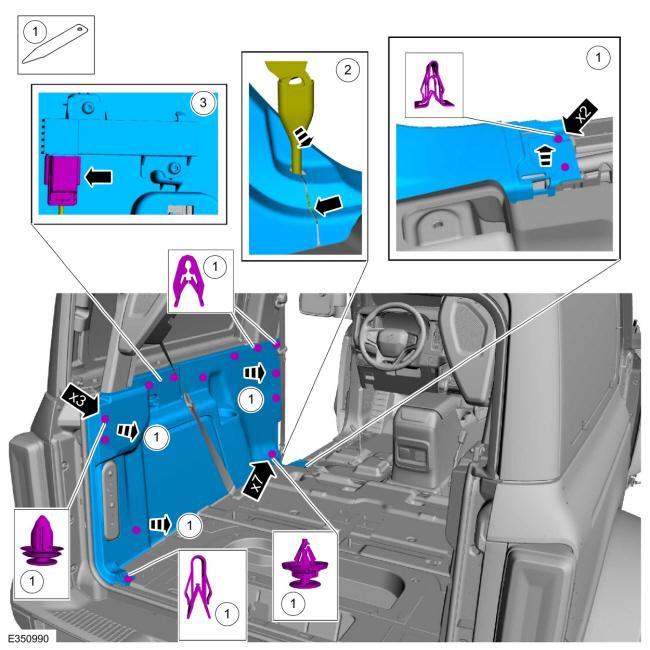
Left hand side
- NOTE: Seats removed for clarity.
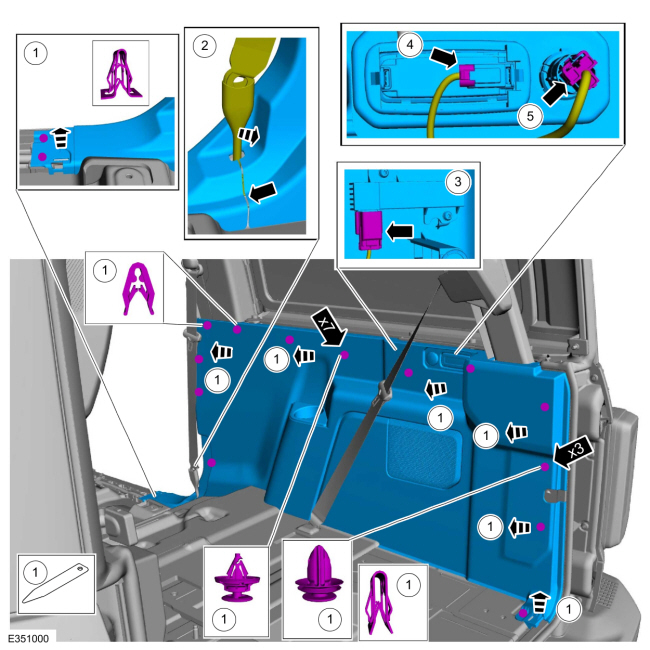
Remove the loadspace trim panel.
- Release the clips.
Use the General Equipment: Interior Trim Remover
- Feed the front seatbelt retractor and pretensioner through the opening in the loadspace trim panel.
- Disconnect the PATS rear antenna electrical connector.
Right hand side
- NOTE: Seats removed for clarity.
Remove the loadspace trim panel.
- Release the clips.
Use the General Equipment: Interior Trim Remover
- Feed the front seatbelt retractor and pretensioner through the opening in the loadspace trim panel.
- Disconnect the PATS rear antenna electrical connector.
- Disconnect the loadspace interior rear light electrical connector.
- Disconnect the power point electrical connector.
Installation
- NOTE: If installing a new loadspace trim panel, transfer parts as necessary.
To install, reverse the removal procedure.

W721378-S300 if it’s these ones you are referring to.Does anyone know the part number for the plastic retainer clips that disconnect when you pull the panel off? They are the white ones with a black rubber gasket that snap back together for assemble. I had a few break when they were removed.

Thank you!! Exactly what i was looking for.W721378-S300 if it’s these ones you are referring to.

