Sponsored
OP
OP
Nibroc99

Nibroc99

Wildtrak
Well-Known Member
First Name
Corbin
Joined
Apr 22, 2025
Threads
18
Messages
494
Reaction score
403
Location
Rochester, MA, USA
Website
www.corbonthecob.com
Vehicle(s)
2022 Wildtrak: The WildeBeast
Your Bronco Model
Wildtrak
Clubs
 
I spent the money for the MTI dash plates because I was already buying their rear pods because they’re the only ones that make rear pods that fit a raptor and when I called them with fit questions around the dash plates and questions they gave me a pretty good deal on all of it if I bought it all together. And I live in an urban area where if I mounted tweeters to the dash and pods somebody would break in just to steal them unfortunately. They are not cheap, but they will make them specifically for whatever components that you’re going to go with, in my case the focal flax Evo and you just have to wait a little bit for them to print them.

IMG_6310.webp
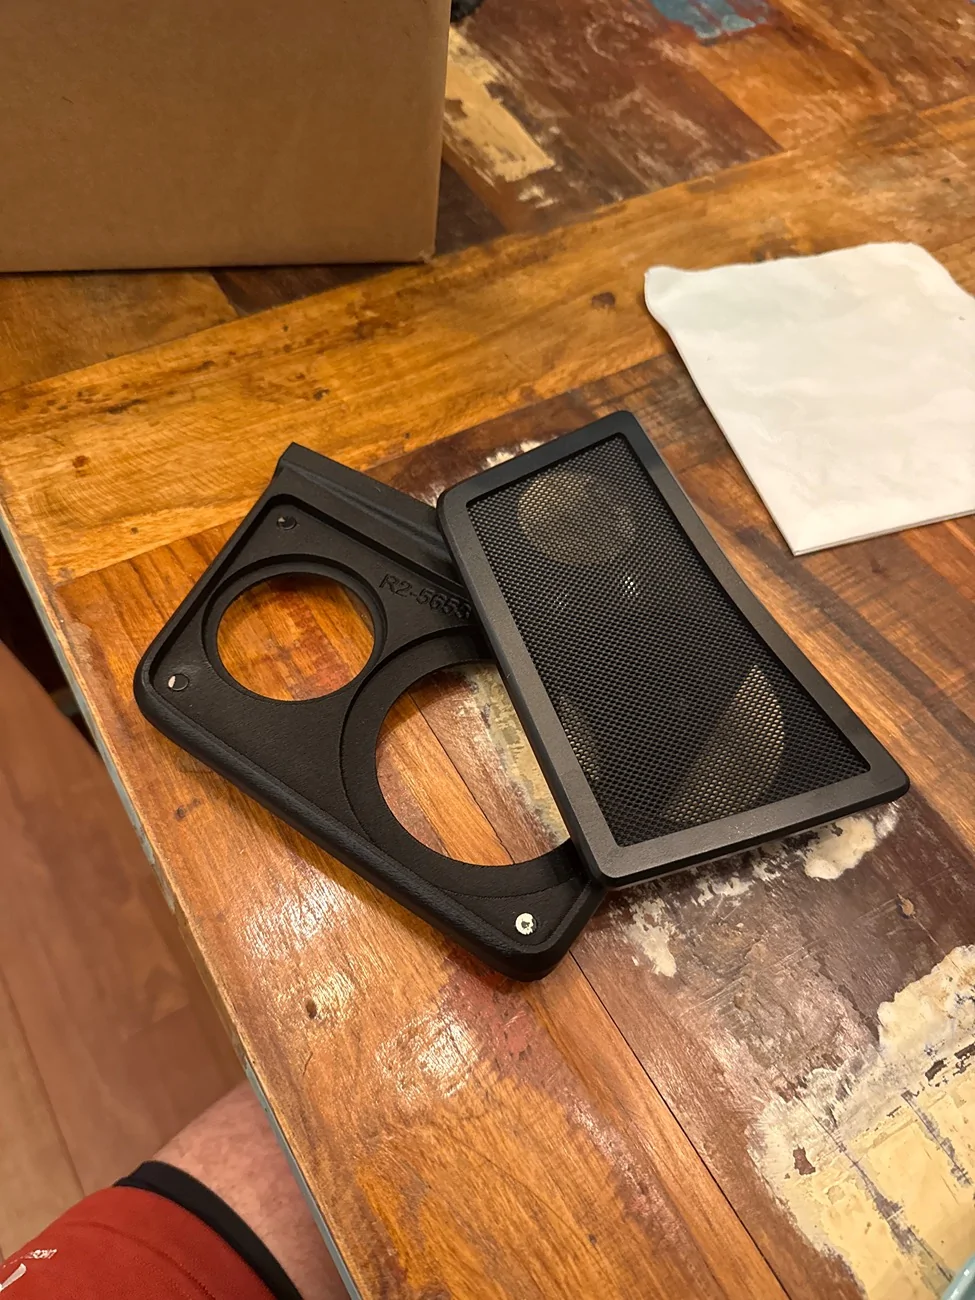
That's a pretty awesome little setup from them, damn! Might have to look into this. I feel silly buying a 3d printed item though when I in fact could just 3d priunt it on my own printer lol. I like the layout, though. Giving me ideas! I could even make my own grille instead of trying to fit both the tweeter and the midrange under the factory grille.
Sponsored

 
OP
OP
Nibroc99

Nibroc99

Wildtrak
Well-Known Member
First Name
Corbin
Joined
Apr 22, 2025
Threads
18
Messages
494
Reaction score
403
Location
Rochester, MA, USA
Website
www.corbonthecob.com
Vehicle(s)
2022 Wildtrak: The WildeBeast
Your Bronco Model
Wildtrak
Clubs
 
Update: I decided to go hard mode on myself last night and just measure using calipers and recreate the B&O dash speaker bracket manually in Adobe Illustrator. And I did it and confirmed the fitment to be good! Worked perfectly! I even routed out the holes for my new midrange speakers. Attached are PDFs of both a blank template and the template I used for my speakers! I cut these out of .030" 8010 Polycarbonate, but if I find that these are too flimsy, I'll end up routing it out of .060" 8010 polycarb.
The speakers I went with are Dayton Audio RS100P-4 4" Reference Paper Woofer 4 Ohm
You can just barely see in the second pic that it's also perfectly centered with the circle in the speaker grille. :)
Ford Bronco Audio System Upgrade Log - The WildeBeast 1000024318
Ford Bronco Audio System Upgrade Log - The WildeBeast 1000024317

Ford Bronco Audio System Upgrade Log - The WildeBeast 1000024326
 

Attachments

Last edited:
OP
OP
Nibroc99

Nibroc99

Wildtrak
Well-Known Member
First Name
Corbin
Joined
Apr 22, 2025
Threads
18
Messages
494
Reaction score
403
Location
Rochester, MA, USA
Website
www.corbonthecob.com
Vehicle(s)
2022 Wildtrak: The WildeBeast
Your Bronco Model
Wildtrak
Clubs
 
Just updated with steps 3-6! The build is like 99% complete, just missing the tweeter mounting brackets! Woohoo!
 

23OBX2.7

Outer Banks
Well-Known Member
First Name
2.7
Joined
Sep 3, 2025
Threads
38
Messages
2,244
Reaction score
1,192
Location
AB Canada
Vehicle(s)
2023 Bronco
Your Bronco Model
Outer Banks
Update: I decided to go hard mode on myself last night and just measure using calipers and recreate the B&O dash speaker bracket manually in Adobe Illustrator. And I did it and confirmed the fitment to be good! Worked perfectly! I even routed out the holes for my new midrange speakers. Attached are PDFs of both a blank template and the template I used for my speakers! I cut these out of .030" 8010 Polycarbonate, but if I find that these are too flimsy, I'll end up routing it out of .060" 8010 polycarb.
The speakers I went with are Dayton Audio RS100P-4 4" Reference Paper Woofer 4 Ohm
You can just barely see in the second pic that it's also perfectly centered with the circle in the speaker grille. :)
1000024318.webp
1000024317.webp

1000024326.webp
Very nice. I could use one of those adaptor plates for my new Dayton TCP 115 any chance you can sell me 1-3 and pop it in the mail? If so please DM me.
 
OP
OP
Nibroc99

Nibroc99

Wildtrak
Well-Known Member
First Name
Corbin
Joined
Apr 22, 2025
Threads
18
Messages
494
Reaction score
403
Location
Rochester, MA, USA
Website
www.corbonthecob.com
Vehicle(s)
2022 Wildtrak: The WildeBeast
Your Bronco Model
Wildtrak
Clubs
 
Very nice. I could use one of those adaptor plates for my new Dayton TCP 115 any chance you can sell me 1-3 and pop it in the mail? If so please DM me.
I'll see if my boss is cool with me using the CNC cutter to make a few more! I found that taping two of them together worked well to make it more rigid.
 

Sponsored

23OBX2.7

Outer Banks
Well-Known Member
First Name
2.7
Joined
Sep 3, 2025
Threads
38
Messages
2,244
Reaction score
1,192
Location
AB Canada
Vehicle(s)
2023 Bronco
Your Bronco Model
Outer Banks
I'll see if my boss is cool with me using the CNC cutter to make a few more! I found that taping two of them together worked well to make it more rigid.
Im returning the dayton but thanks!
 
First Name
Seth
Joined
Jul 10, 2024
Threads
0
Messages
6
Reaction score
9
Location
Houston
Vehicle(s)
2024 Bronco Wildtrak 2015 Explorer Sport
Your Bronco Model
Wildtrak
2022 4-door Ford Bronco Wildtrak with Lux and B&O sound
Hey all, wanted to do a little build log following my current audio upgrades! I've finally purchased the PAC AmpPro AP4-FD31 Amplifier Interface so that I can install my own amps and speakers to replace the B&O system entirely. This is mostly using audio equipment I had left from my previous vehicle, which got totalled, and I stripped my custom audio system out of it and kept it all.
The whole system including sub will be 4ohm. I'm going for a good balance of loudness and quality, but leaning towards quality.

Here's the plan:
  1. [DONE] Replace rear speaker pods with SSV Works BR-B65U 6.5" unloaded pods. Install sound insulation inside pods to reduce internal resonance (I ended up using Second Skin PolyZorbe™ Vivid Hexagon Acoustic Panels, cutting one up into 4.75" squares, one per pod. One hexagon did the trick. I bought two just in case, since I didn't know if one would work, and wanted room for playing with them if needed. They're like $7 each.) Install Skar NPX65 6.5" 300 Watt Neodymium Mid-Range Loudspeaker in each pod.
  2. Install Skar SPX-T 320 Watt Max 1-Inch Elite Dome Tweeters in the rear roll bar, facing forward, since I want my driving audio experience to be good and I don't care much about the rear passengers since I'm a selfish jerk. :sunglasses: {NOTE: I have the tweeters leftover from my last build, but these tweeters came as part of the Skar SPX-65C 6.5" 400 Watt 2-Way Component Speaker System. The midwoofers that came with that system rusted away in the doors of my old vehicle, so I replaced them with the previously mentioned NPX65 loudspeakers, and I'm glad I did because those fit in the SSV pods, but the SPX-65C midwoofers do NOT fit in the pods without some trimming. Their mounting hole size is a slightly larger requirement (SPX-65C is 5.68") than the NPX65 (which is 5.59"). The SSV pods have a hole that is 5.589", which is just slightly too small for the SPX-65C midwoofers.} I intend to eventually drill holes into the overhead plastic panel to mount these tweeters to, but will first affix them temporarily to test the locations [TESTED LOCATIONS: they sound great facing forward in the roll bar, so I'm moving forward with drilling the holes!] I already have the crossovers that split the tweeters and woofers, and those will mount nicely inside that plastic trim on the roll bar without interfering with the airbag pressure tanks Turns out there's not much room inside the plastic roll bar, so I'm mounting them to the outside of the plastic. I like the 'exposed technology look anyway, kinda cool to show off the customness of the system. I will rewire the midwoofers in the pods to hook up to the crossovers, I'll of course wire the tweeters into the crossovers, and then I'll run my own speaker wires to the amplifier when I eventually get to that - but for now I will just hook the factory pod speaker wires into the input of the crossovers and have the rear channel drive the midwoofer pods and overhead tweeters.
  3. Replace factory kick panel speakers and dash speakers with Skar SPX-65C 6.5" midwoofer and 1" neodymium dome tweeter, and Skar TX4 | 4" 120 Watt Elite Coaxial Car Speakers Dayton Audio RS100P-4 4" Reference Paper Woofer 4 Ohm. Will need Metra 82-5605 Speaker Mounting Bracketsto convert factory mounts to fit aftermarket kick panel speakers. The amp I have drives up to 200 watts RMS 4Ω per channel, so I'll still be well under that limit at 130 watts RMS per channel at 4Ω. I'll be using the following filters in place of a single crossover to split the frequencies of the three speakers:
    • The following are from parts-express.com
    • 5 kHz High Pass 4 Ohm Crossover for the neodymium dome tweeter from SPX-65C
    • 800 Hz Low Pass 4 Ohm Crossover for the 6.5" midwoofer from SPX-65C
    • 800-5 kHz Band Pass 4 Ohm Crossover for the 4" TX4 coax
  4. Install the PAC module.
  5. Install my amp, a Skar SKv2-200.4D | 1,600 Watt 4-Channel Car Amplifier. I'm thinking I'll install this where the factory subwoofer is, since I'll be removing the factory subwoofer altogether. I'll be running 4-gauge positive wire, fused, from the battery to the rear passenger quarter panel area, and grounding to a good spot on the chassis. Running speaker wire to the rear channels will be pretty straightforward from here as well, as I'll be able to just run wire straight up to the roll bar. I used the factory wiring for the front channels.
  6. Last but not least: Install my subwoofer amp and sub box. The subwoofer is a 4ohm 10" Kicker Comp R in a Sound Ordnance™ Bass Bunker. The amp is a Rockford Fosgate Prime R500X1D (500 Watts RMS x 1 @ 2Ω). The CompR is dual 4Ω coils, wired in parallel resulting in a 2Ω load, and therefore the 500w output of the amp is plenty more than the 400w rating of the speaker. I'll have the sub box strapped down next to my toolbox in the cargo area. Eventually, I'll get a better enclosure for the 10" sub that fits the space better, if I find it's taking up too much space.
Finally, I'll be using an oscilloscope to dial in every channel's clip point from every step along the final build; checking first for the output from the PAC device, then checking the output from the amps.

Let the build commence! Any questions or suggestions along the way are more than welcome!!

STEP 1

The speaker pods were super easy to replace. As planned, I loaded each SSV pod with a square of sound-damping material to reduce internal resonance.
20251015_164913.webp
I simply cut the hexagon of PolyZorbe into a 4.75" square and it pressed tightly into the pod between the structural support fin things. No adhesive needed as it was a very tight fit.
The SPX-65C kit comes with its own speaker grilles which I put to use here. Looks super clean in my opinion.
I took off my hard top to access the pods easier. Here are a few comparison pics of the old vs new pods. The old pod speakers are so wimpy and tiny! Little 4" speakers... No wonder it was so quiet at full volume with the top off at any speed higher than 40mph! These bigger speakers will do nicely to fill the air with more sound.
20251015_173818.webp
20251015_173934.webp
20251015_173840.webp
20251015_174016.webp
20251015_174027.webp
20251015_180442.webp
20251015_175251.webp


Now then... How should I mount the tweeters? I have two different locations in mind for the rear. What do you think would be a better option? My main concern is to not interfere with the airbags, so I'm thinking option 1 may be more suitable. Other ideas are more than welcome though!
Option 1: on the large overhead plastic trim piece [This is the option I ended up choosing. The side pieces in option 2 would interfere with the airbags slightly.]
20251015_175251-idea1.webp

Option 2: on the smaller side trim pieces
20251015_175251-idea2.webp


STEP 2
Complete! I mounted the crossovers on the outside of the plastic trim since there turned out to not be enough room behind it. I can now also easily fiddle about, fiddle about with the switches/settings on the crossovers, if the tweeters are too loud. I mounted the tweeters on the front of the large plastic piece (see: option 1) since they sound pretty good there especially in surround mode. We'll see how they sound once I get the amp installed though.
Needless to say it was nerve-wracking to cut 1⅞" holes in my Bronco. 😂
1000024313.webp
1000024315.webp


STEP 3
Since my job involves measuring customer chassis and creating vector files to create labels that fit on recessed parts of tools and things, I put my knowledge to use with the front dash speakers. I've attached a template I just made, using calipers to measure the factory speaker and Adobe Illustrator, that includes the shape and screw hole locations of the factory dash tweeters of the 2022 B&O system (not sure if it's the same for the 6 speaker system). I'm going to CNC route that template out with the right size hole for my 4" dash speakers that I got (Also attached). I couldn't find any templates that were just a flat cutout path, so I made my own! Feel free to use it and distribute as you please.
Before images of the dash speaker:
20251104_201700.webp

20251104_201656.webp

Here's my bracket with no speaker:
20251030_111408.webp

Here's the fit of it cut out with the speaker sitting in the plastic (dry-fit without bolts). I CNC cut the templates out of .030" 8010 polycarbonate. If I find that they're too flimsy, I'll route it out of .060" polycarb. (Using polycarb because it's readily available at work lol)
1000024318.webp

Hard to see, but it is indeed perfectly centered with the circle in the grille! And best part is, no trimming required of the bronco other than snapping off the two little alignment tabs where the screw holes are. Just a drop-in speaker replacement now. Aside from the wiring of course.
1000024317.webp

Next up is the wiring of the dash speakers. I used the existing bronco wiring for the dash and kick panel speakers, which I was able to tap into using the PAC audio splitter. I did not end up needing to use the T-harness under the radio up front; only had to use the harness in the rear where the subwoofer was. That means I retained the factory center channel, for whatever that's worth.

This is where the passive crossover filters come into play. They tucked nicely inside the dashboard after wiring them to the dash panel wires. There was plenty of room to tuck them away next to where the 4" speaker mounted.
20251104_205759.webp

The crossovers, being long and fairly thin, I wrapped in fabric tape and tucked into the dash in the circled area (mirrored on the driver's side the same way, just a little tighter with the instrument cluster)
Screenshot 2025-11-14 at 7.33.11 AM.webp


And here's the current look until I fabricate brackets for the tweeters. I just used some mounting tape to hold them in place till then.
20251104_213649.webp


The dash speakers sound GREAT. Fantastic decision going with the 4" midrange speaker in addition to the tweeter and kick panel midwoofers. Speaking of the kick panels...

I didn't get a good picture of them, but it's pretty straightforward. I bought that bracket to mount 6.5" speakers in the kick panel location, bolted up the speakers to the brackets, and used the existing wiring as well for the midwoofers. I installed the crossover filters in the factory subwoofer area behind the cargo area trim panel so that they were out of the way, since those are a fair bit bigger than the dash speaker filters were.

Here was my one issue with the kick panels. Installed them, immediately noticed what sounded like voice-coil separation (a vibrating, rattly noise at higher volumes). Thought "Oh great, time to buy new midwoofers. These must've been damaged while I stored them in my bedroom." Bought new ones (went with Dayton Audio DC160-4 6-1/2" Classic Woofer Speaker) and installed them... Same issue, same exact sound! So I started doing what I should have done in the first place, touching things in the area to see what's vibrating. Lo and behold, these speakers sit in a somewhat sealed metal pocket of the body, and at the bottom of the pocket, there's an access hole of sorts, plugged with a foam piece. That foam piece was vibrating like crazy due to the wind from the speakers on both sides. See photo for what I'm talking about. Red shape represents where the black foam piece was sitting, no adhesive holding it in place or anything.
Screenshot 2025-11-14 at 7.51.22 AM.webp


STEP 4

I actually installed the PAC audio module before the speakers. It was insanely easy. Remove the factory subwoofer, and you just plug all the harnesses from the amplifier attached to the suibwoofer module into the PAC device. It just... Works. No adjustments needed other than the door chime volume, which I did in the computer program. It comes with a bass knob, so I just need to find a good spot for that to mount up front. The PAC audio module also has a wire coming off of its T-harness for the remote signal for your amps.

STEP 5

Installing the amplifier wasn't bad at all. I ran a 4-gauge positive wire from the battery, through the driver's side firewall (the small grommet with the big ears on it - will add pics soon), through the wire tunnel along the driver's side door sills to the point where the back of the rear seats transition to the cargo area, and crossed to the passenger side of the cargo area from there. I bolted the positive wire to my 100-amp fuse in the cargo area, where I forked it apart into two positive 4-gauge connections on the "exit" side of the fuse. I won't be coming close to maxing out these two amps by any means, so this method is completely safe for my use case. Kinda jerry-rigged but so far I've had no issues and the wire isn't warm to the touch at all after extensive listening at full volume for hours.
Here's the rough positioning of the amplifiers. The skar amp for the 4 channels is the big one that's diagonal, and the the Rockford sub amp is now positioned inside the wheel well body panel area (not depicted in this photo). I just zip tied everything to whatever I was able to, no crazy mounting plates or anything because I didn't have room. In fact, I did indeed need to trim the trim panel to get it to fit over the top-left corner of the amp, unfortunately. But clearly I'm kinda going for function over form with this build lol. You can also see what I'm talking about with the fuse below the amp in the photo.
20251104_205656.webp

For the rear channel speakers, I just ran blue speaker wire up the roll bar to the speakers. I considered running it through the D-pillar instead of along the outside of it, but honestly, I kinda like having a little visible wiring going on... Shows that it's custom a bit more I guess. Same way how in Cyberpunk 2077 in all the vehicles there's exposed wire channels and such lol.

STEP 6

Finally, here is what the sub box looks like in the back next to my toolboxes! It nestles in perfectly between my Braun toolbox and my craftsman ⅜" socket case. I have the wire loosely in the cargo area in case I need to move things around. Also, here you can see the slight trimming I had to do to the quarter trim panel. It's a bit of a hack job but I got it to fit without cutting any metal, at least! Clearly, I'm not worried about resale value 🤣
1000024360.webp


And holy moly, all it took after all that was just tuning.

For all the naysayers about the rear tweeters... The cabin sound is much more full and immersive with them installed. I tried unhooking them to see the difference and the stereo image is actually worse without them. It sounds like everything's coming from the front. With them, it sounds like guitars and background vocals come from behind a bit, while vocals are clear and crisp up front from the tweeters and 4" midranges. This is a hell of a setup now and I can finally say that I'm more than happy with it! Listening to Big Bad John literally rumbles my chest.

Thanks for reading along on this journey with me!! Will update with the front tweeter brackets I make soon!

20251112_151420.webp
When are you coming to Houston to replicate this for me?
 
OP
OP
Nibroc99

Nibroc99

Wildtrak
Well-Known Member
First Name
Corbin
Joined
Apr 22, 2025
Threads
18
Messages
494
Reaction score
403
Location
Rochester, MA, USA
Website
www.corbonthecob.com
Vehicle(s)
2022 Wildtrak: The WildeBeast
Your Bronco Model
Wildtrak
Clubs
 
When are you coming to Houston to replicate this for me?
Hah, if only it were that easy!! It was a fun build though, but I'm glad it's already done bc it was a lot of work fabricating things.
 
First Name
Seth
Joined
Jul 10, 2024
Threads
0
Messages
6
Reaction score
9
Location
Houston
Vehicle(s)
2024 Bronco Wildtrak 2015 Explorer Sport
Your Bronco Model
Wildtrak
Hah, if only it were that easy!! It was a fun build though, but I'm glad it's already done bc it was a lot of work fabricating things.
I'll be on this journey in the next few weeks. I'll likely be finished by 2027 :cwl: thanks for all the hard work and info. Will definitely be used.
 
OP
OP
Nibroc99

Nibroc99

Wildtrak
Well-Known Member
First Name
Corbin
Joined
Apr 22, 2025
Threads
18
Messages
494
Reaction score
403
Location
Rochester, MA, USA
Website
www.corbonthecob.com
Vehicle(s)
2022 Wildtrak: The WildeBeast
Your Bronco Model
Wildtrak
Clubs
 
I'll be on this journey in the next few weeks. I'll likely be finished by 2027 :cwl: thanks for all the hard work and info. Will definitely be used.
Glad to hear it. I'm pretty active on this forum so feel free ot reply to the thread with any questions! Replying here rather than DMing ensures others with the same issue can find the info in the future. :) Good luck with your build!!
Sponsored


Top