
- First Name
- Matt
- Joined
- May 7, 2025
- Threads
- 1
- Messages
- 5
- Reaction score
- 9
- Location
- Venice, FL
- Vehicle(s)
- 2025 Ford Bronco
- Your Bronco Model
- Heritage
- Thread starter
- #1
Ready Brute Elite 2 diy install
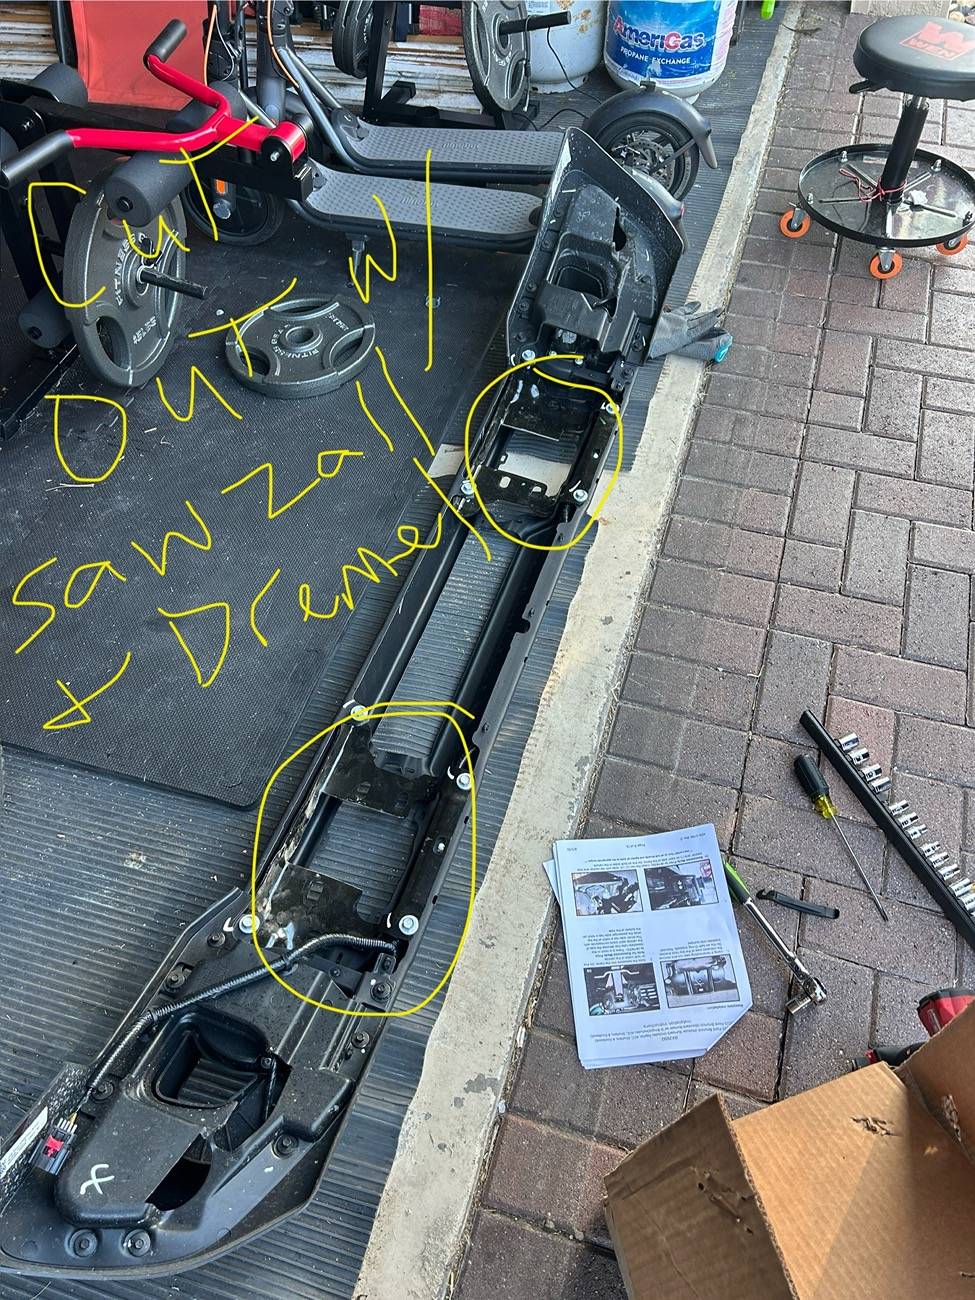
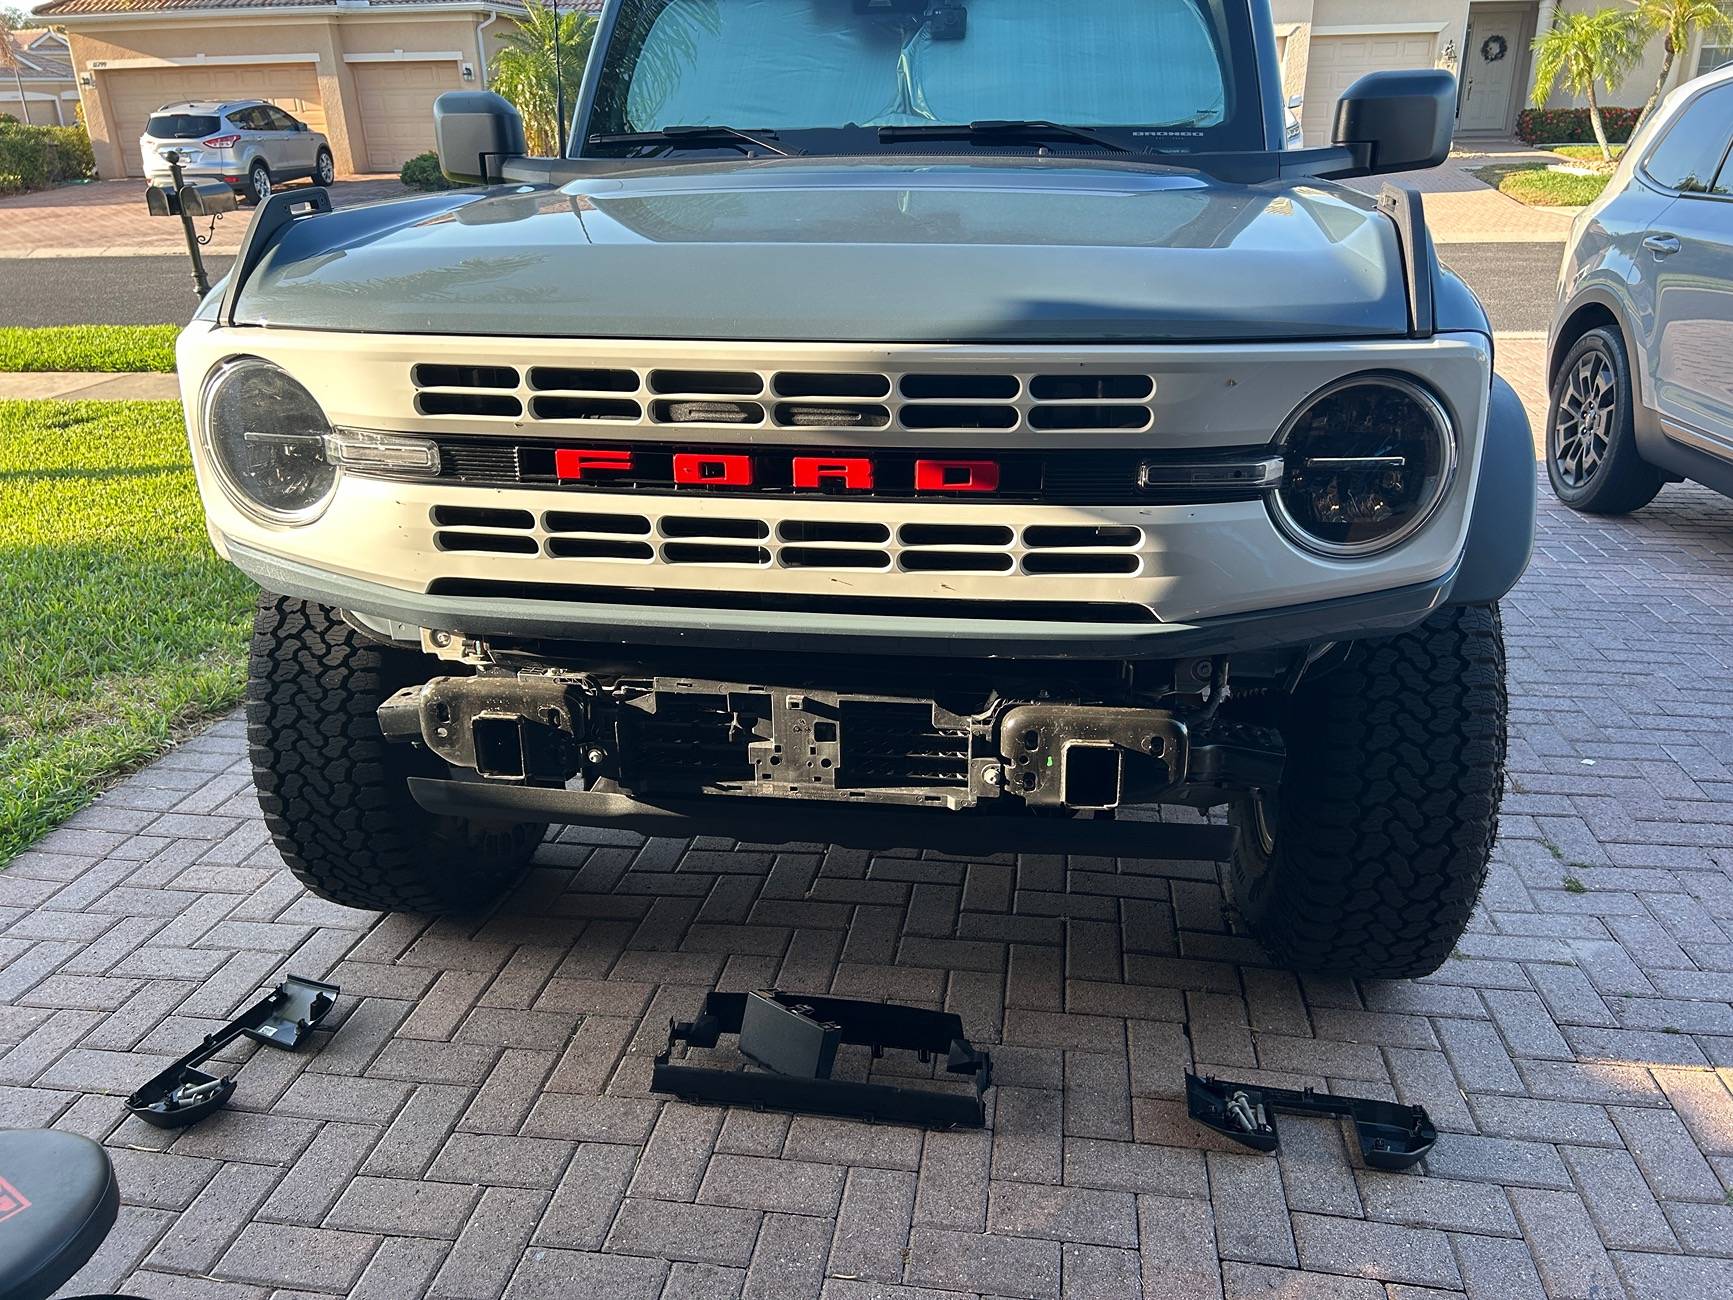
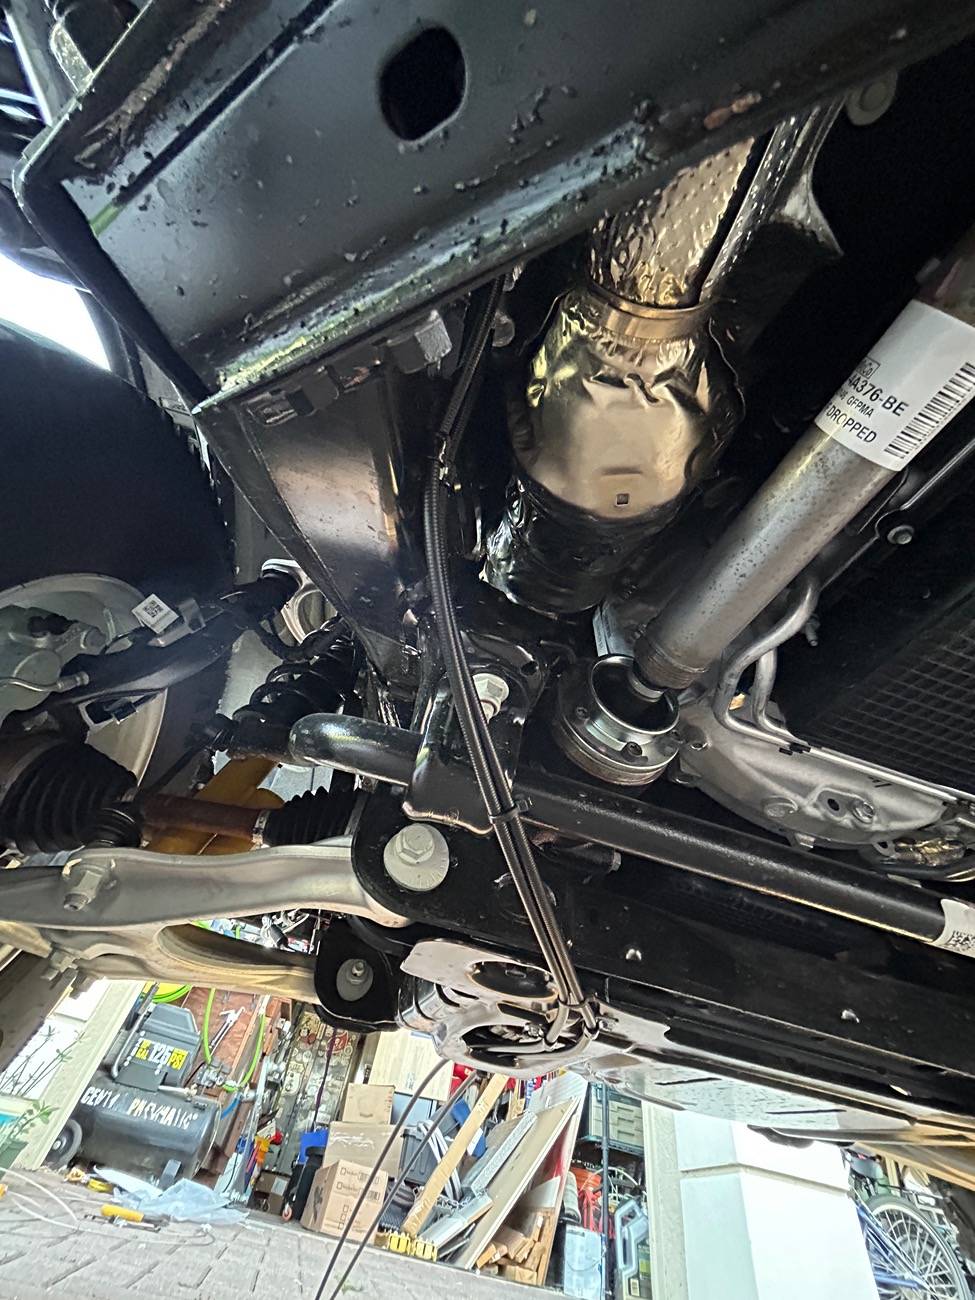
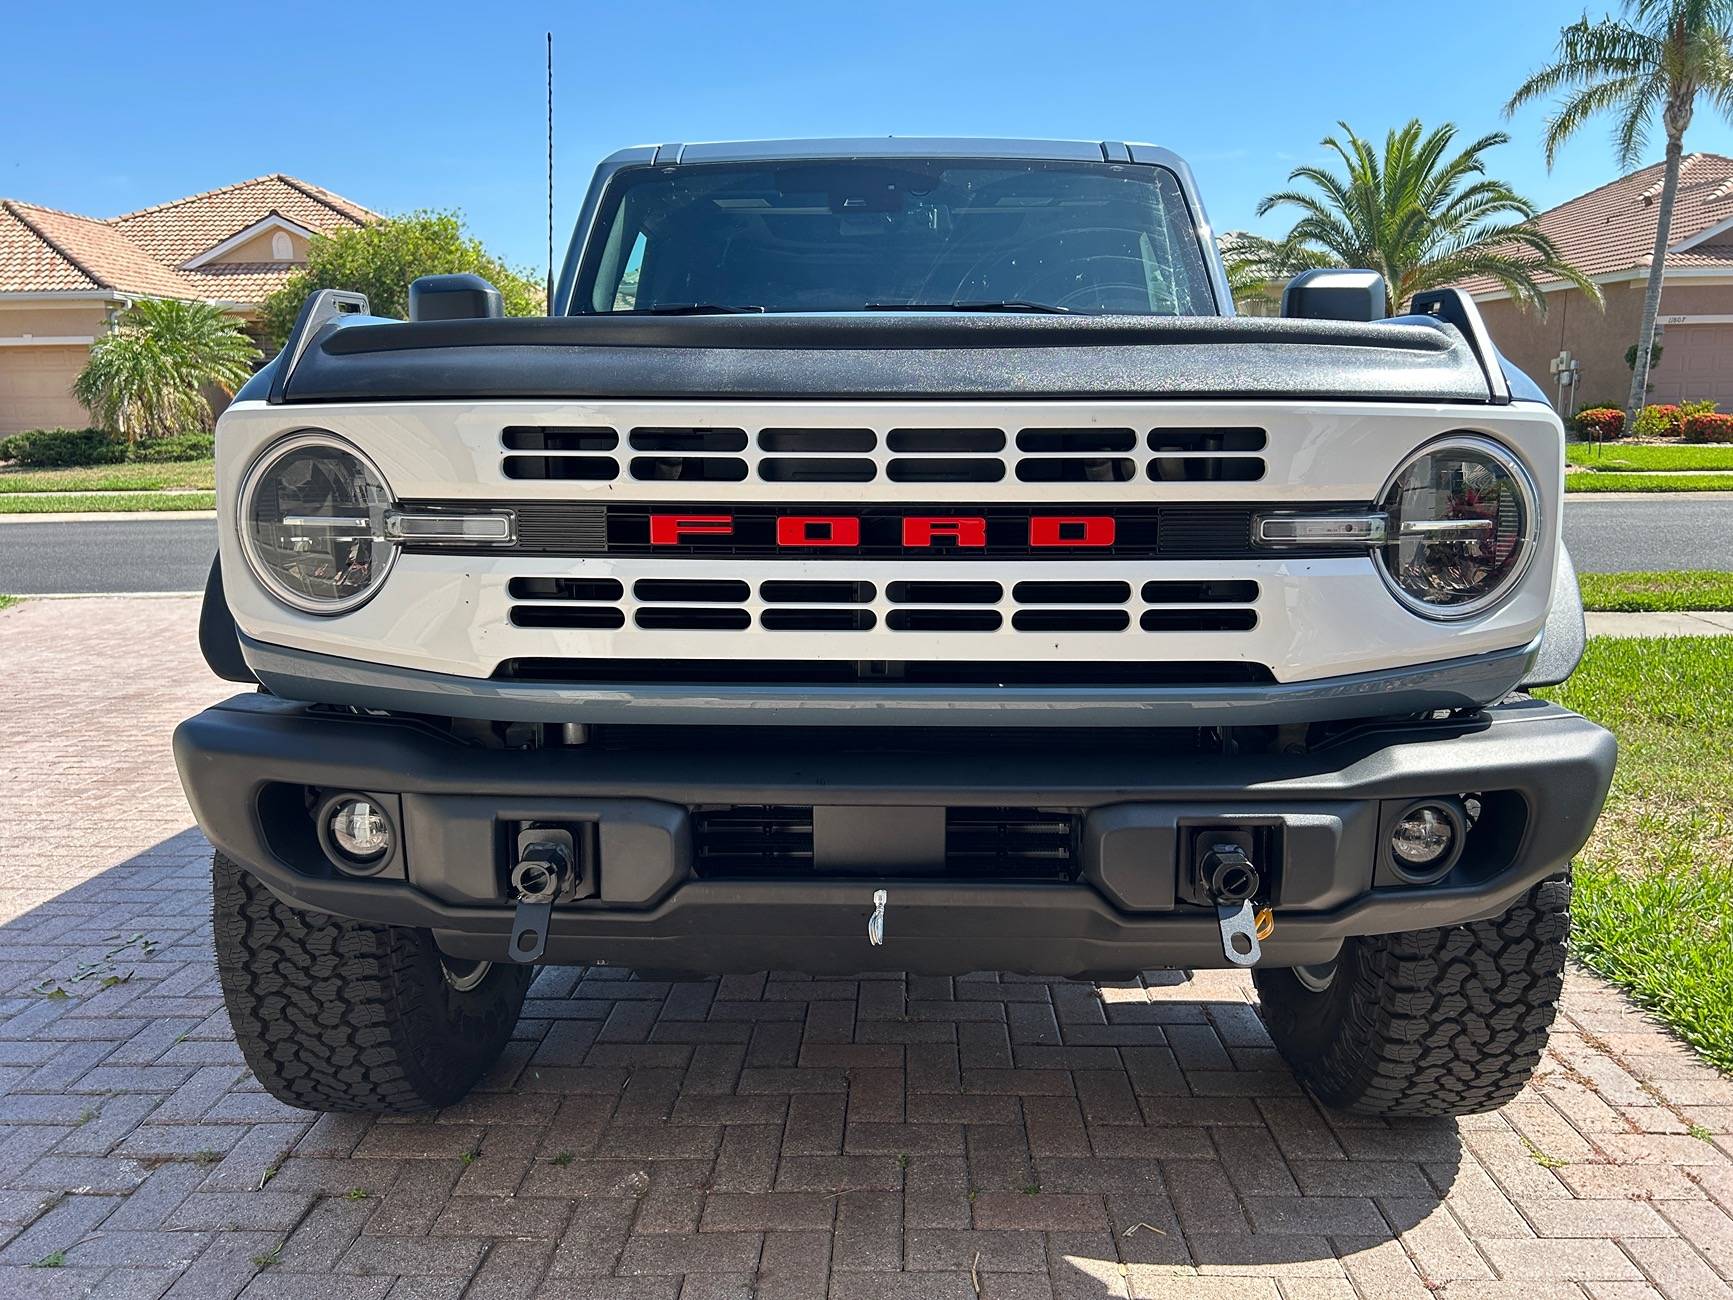
So I finished my install. Fyi when you 1st open the box it will be a little overwhelming. Each step has its own install directions. Initially I thought there would be start to finish step by step instructions but when I found that it wasn’t that’s why it was a bit overwhelming for myself even though I am mechanically inclined. Definitely watch videos on each step. That helped me a lot. Before I watched the videos I was ready to send it back and pay the extra $1500 for install. So I went with the blue ox base plate. This part I think was probably the easiest apart from the wiring. Plus it was the most fun. Depending on what bumper you have will change your install. I have the Capable bumper.
Total hours of install were as follows:
Tips:


So I finished my install. Fyi when you 1st open the box it will be a little overwhelming. Each step has its own install directions. Initially I thought there would be start to finish step by step instructions but when I found that it wasn’t that’s why it was a bit overwhelming for myself even though I am mechanically inclined. Definitely watch videos on each step. That helped me a lot. Before I watched the videos I was ready to send it back and pay the extra $1500 for install. So I went with the blue ox base plate. This part I think was probably the easiest apart from the wiring. Plus it was the most fun. Depending on what bumper you have will change your install. I have the Capable bumper.
Total hours of install were as follows:
- Base plate- about 5 hrs
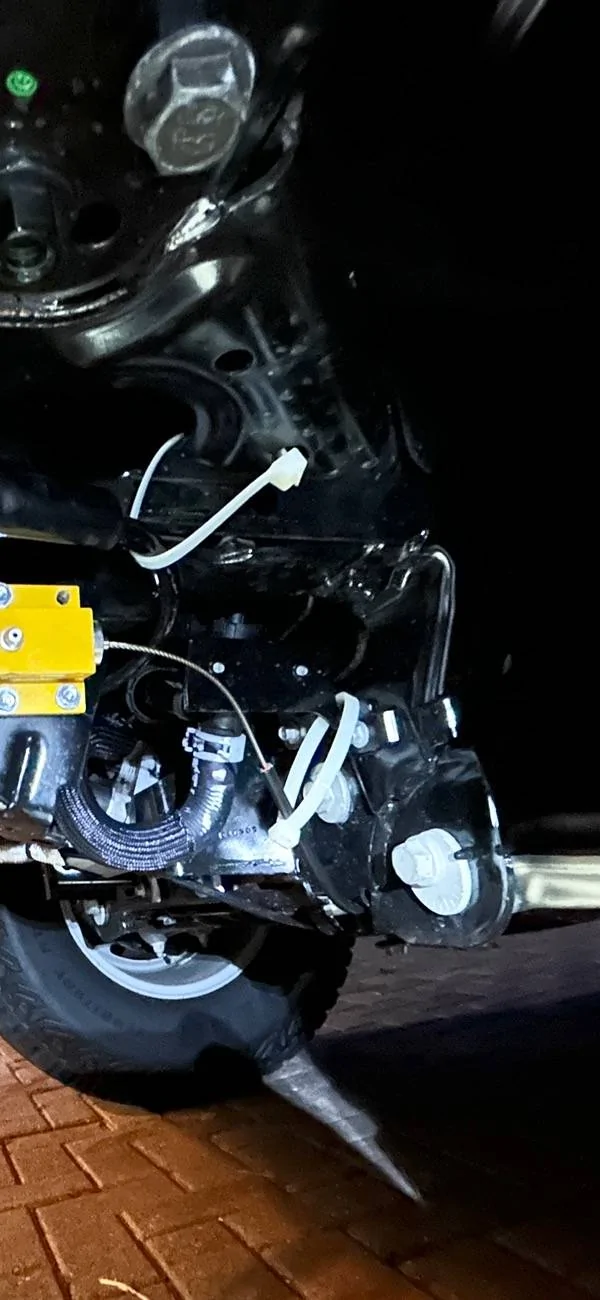
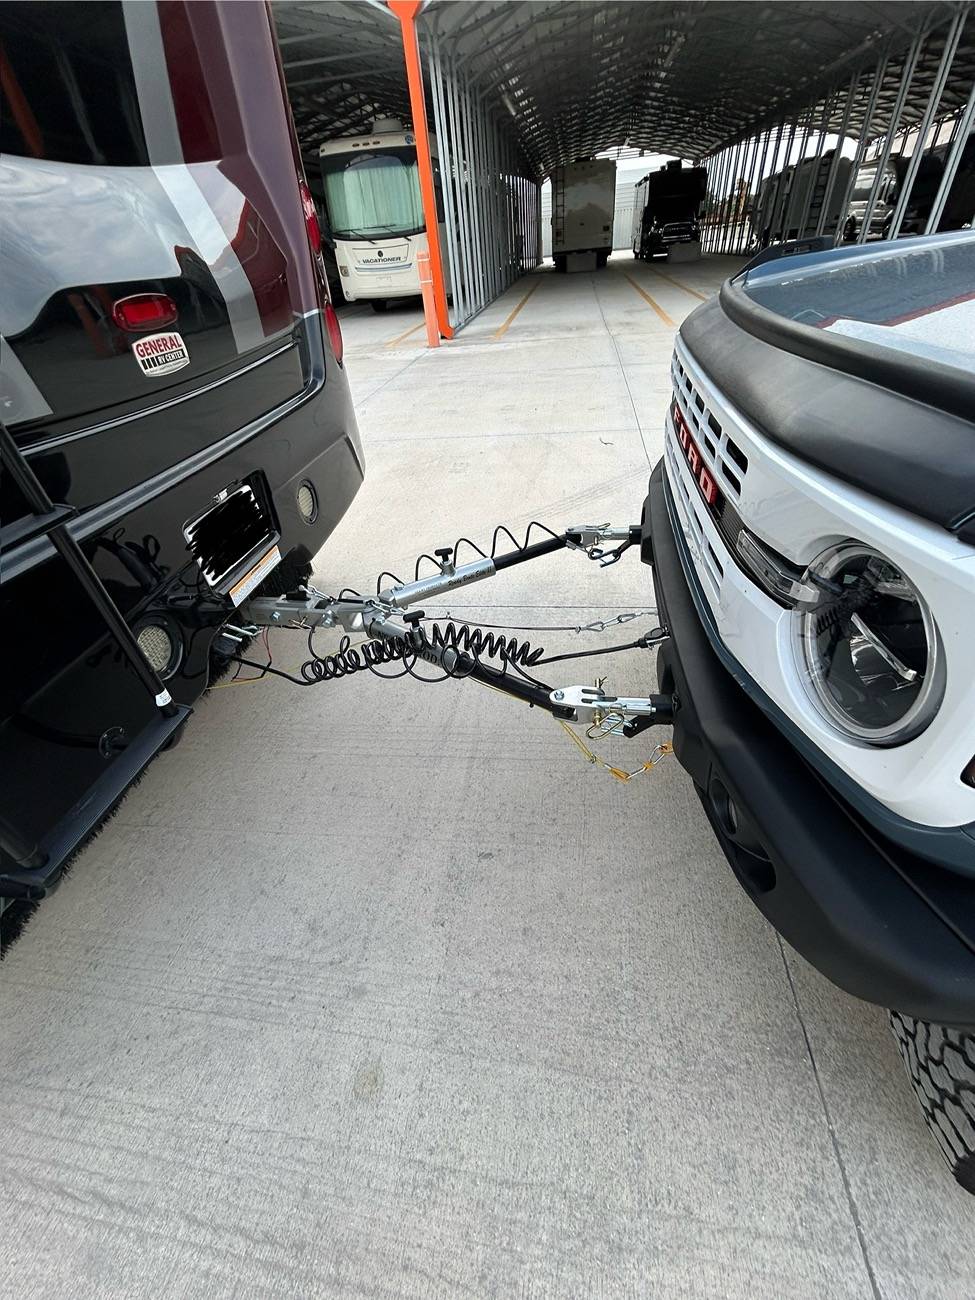
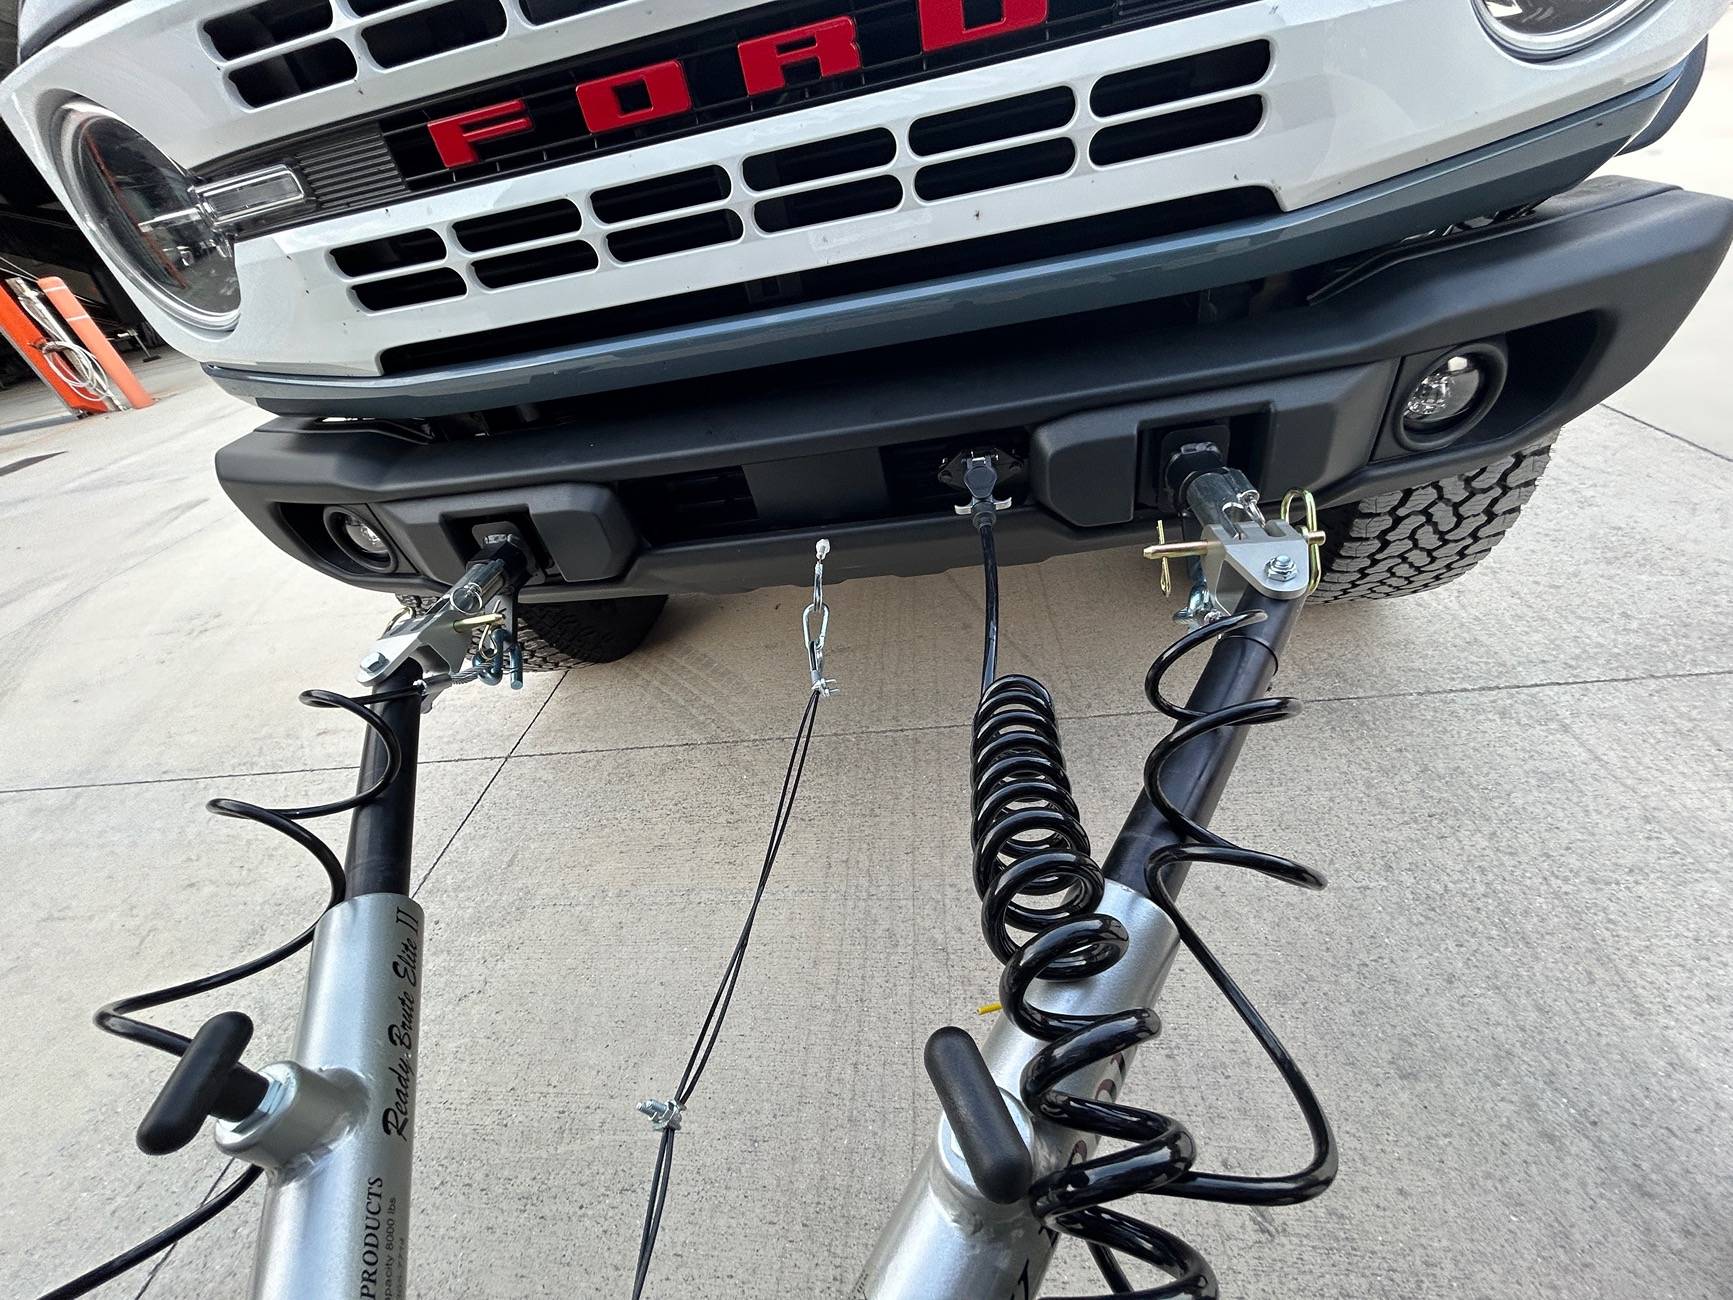
- Breakaway and ready brute brake cable- 5 hrs
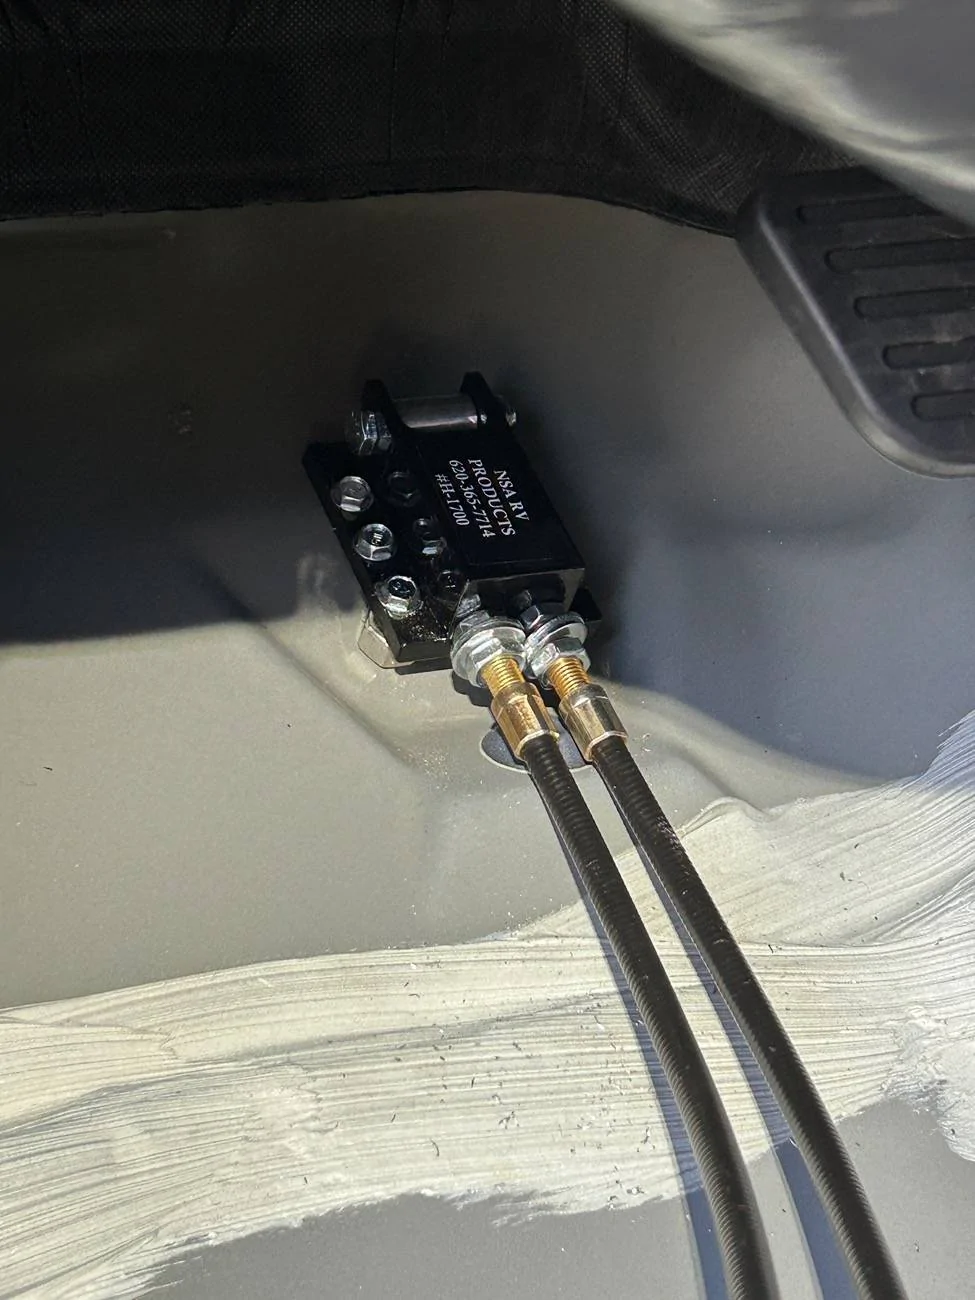
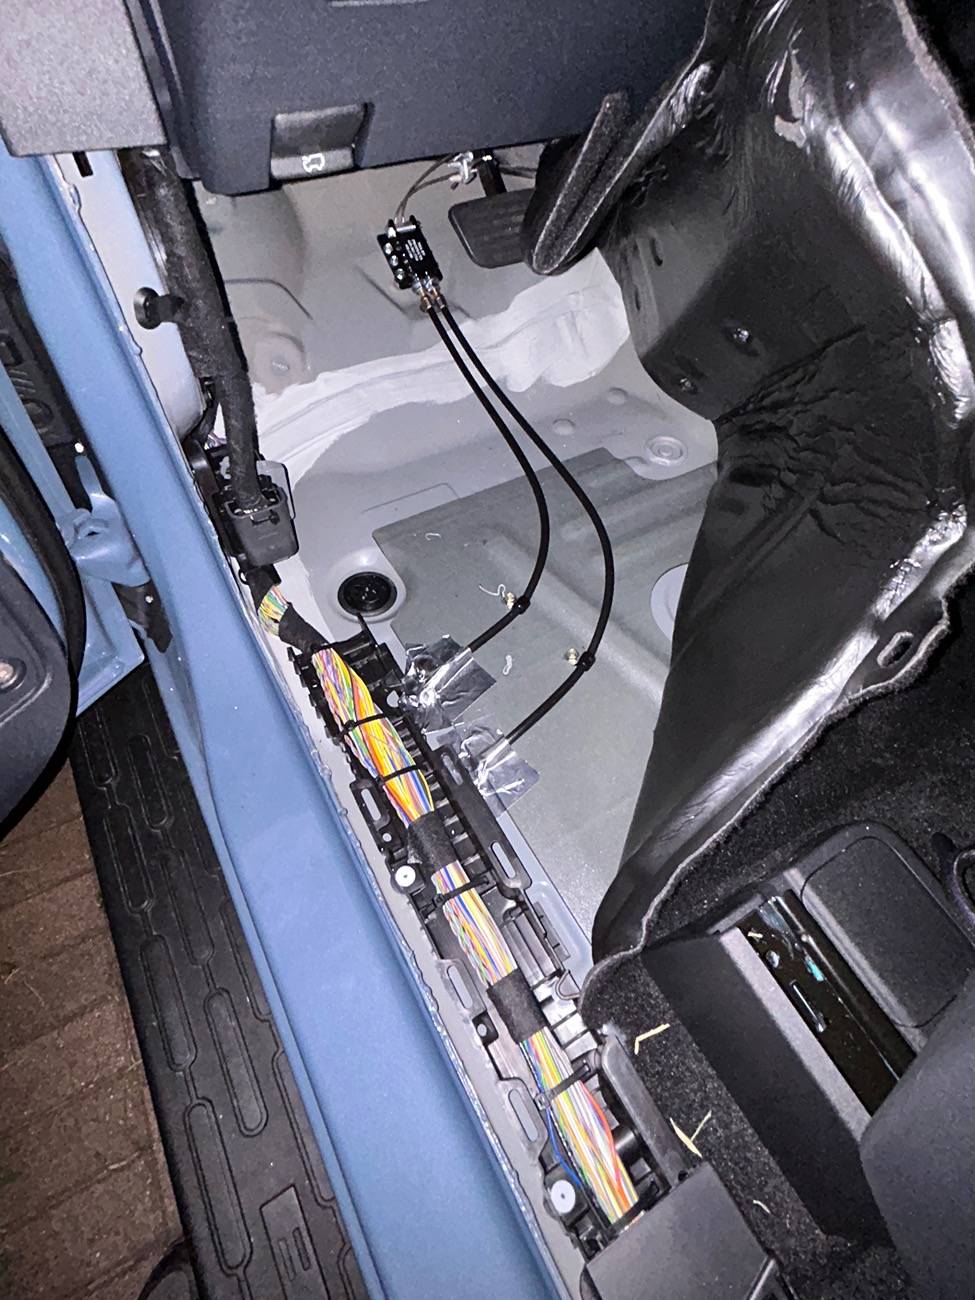
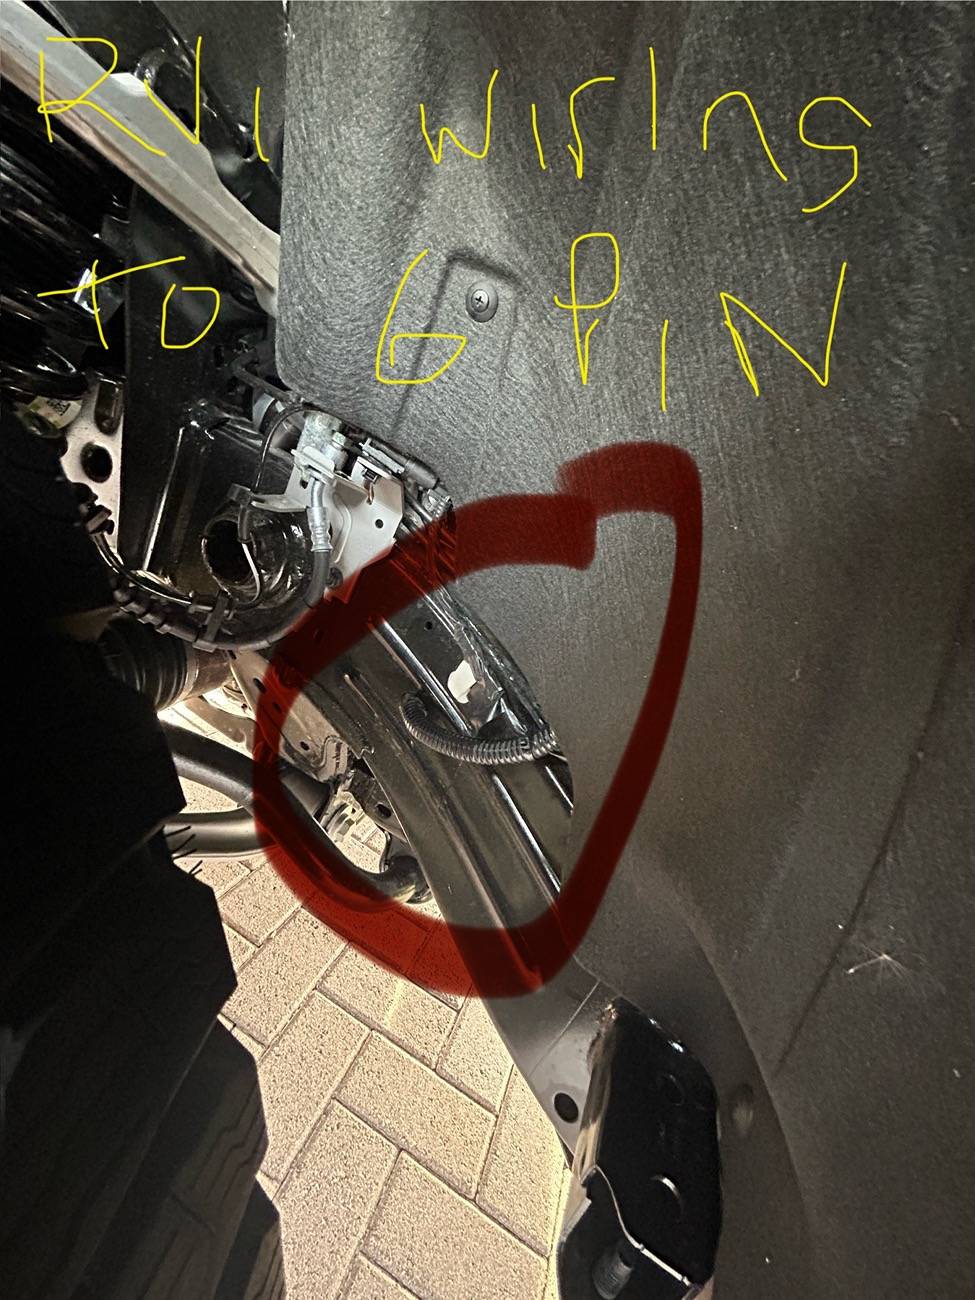
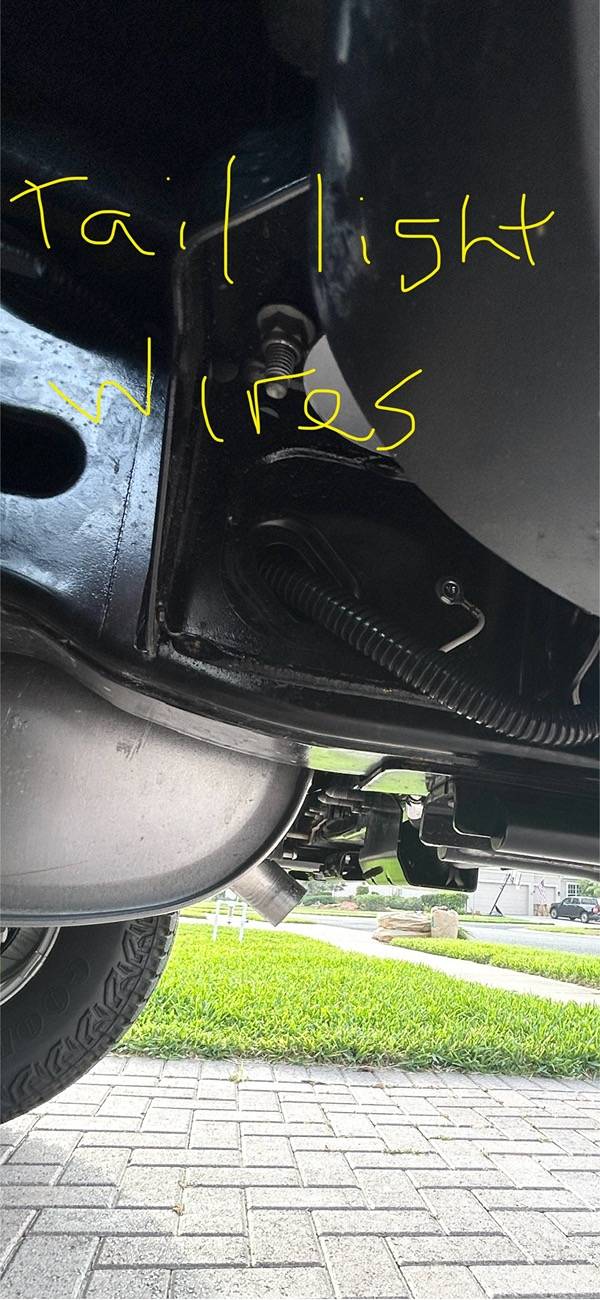
- Taillight wiring- which I recommend using the plug and play connectors. Just cut the flat plug off and run to a 6 pin so you can add a charge wire for battery- 4 hrs
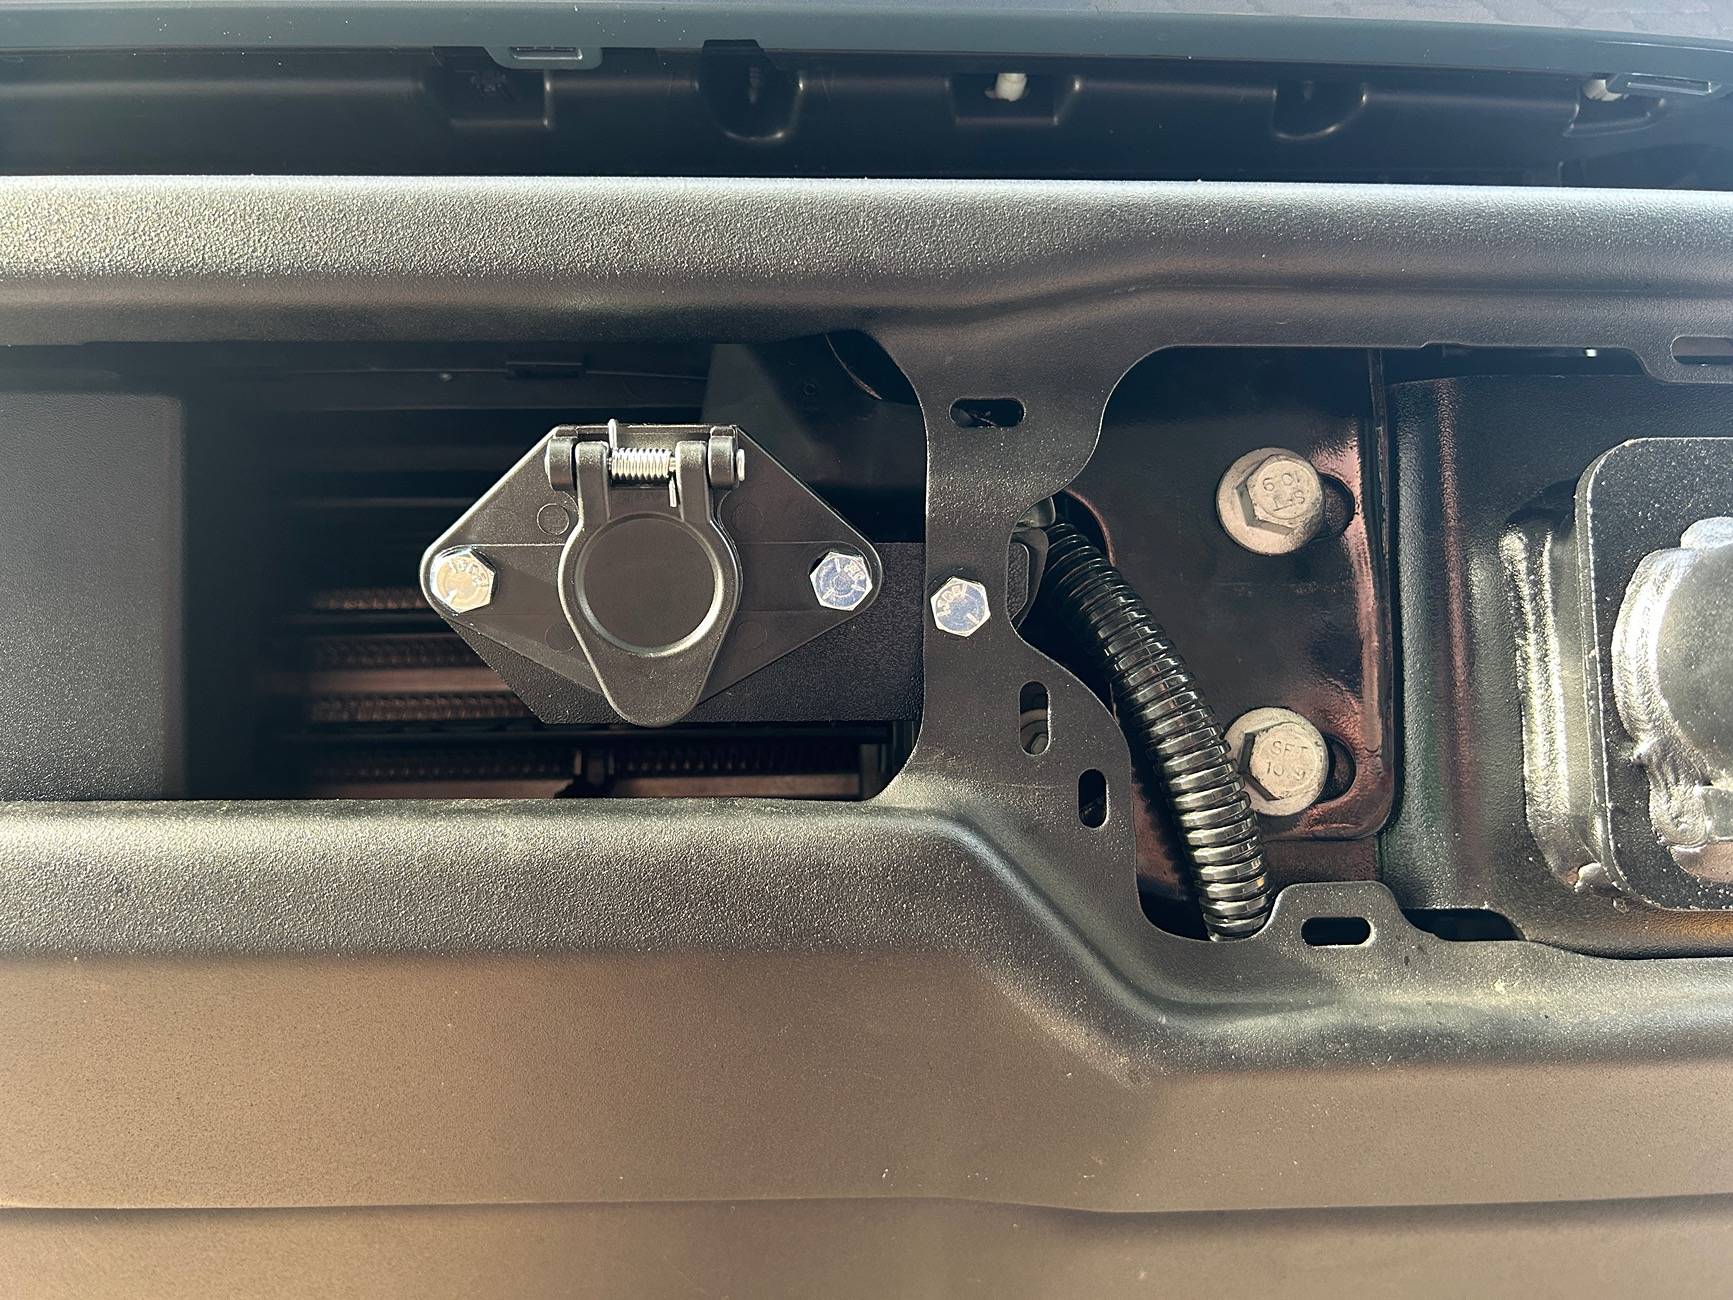
- Wire in rvi towed battery charger and 6 pin plug- 2 hrs
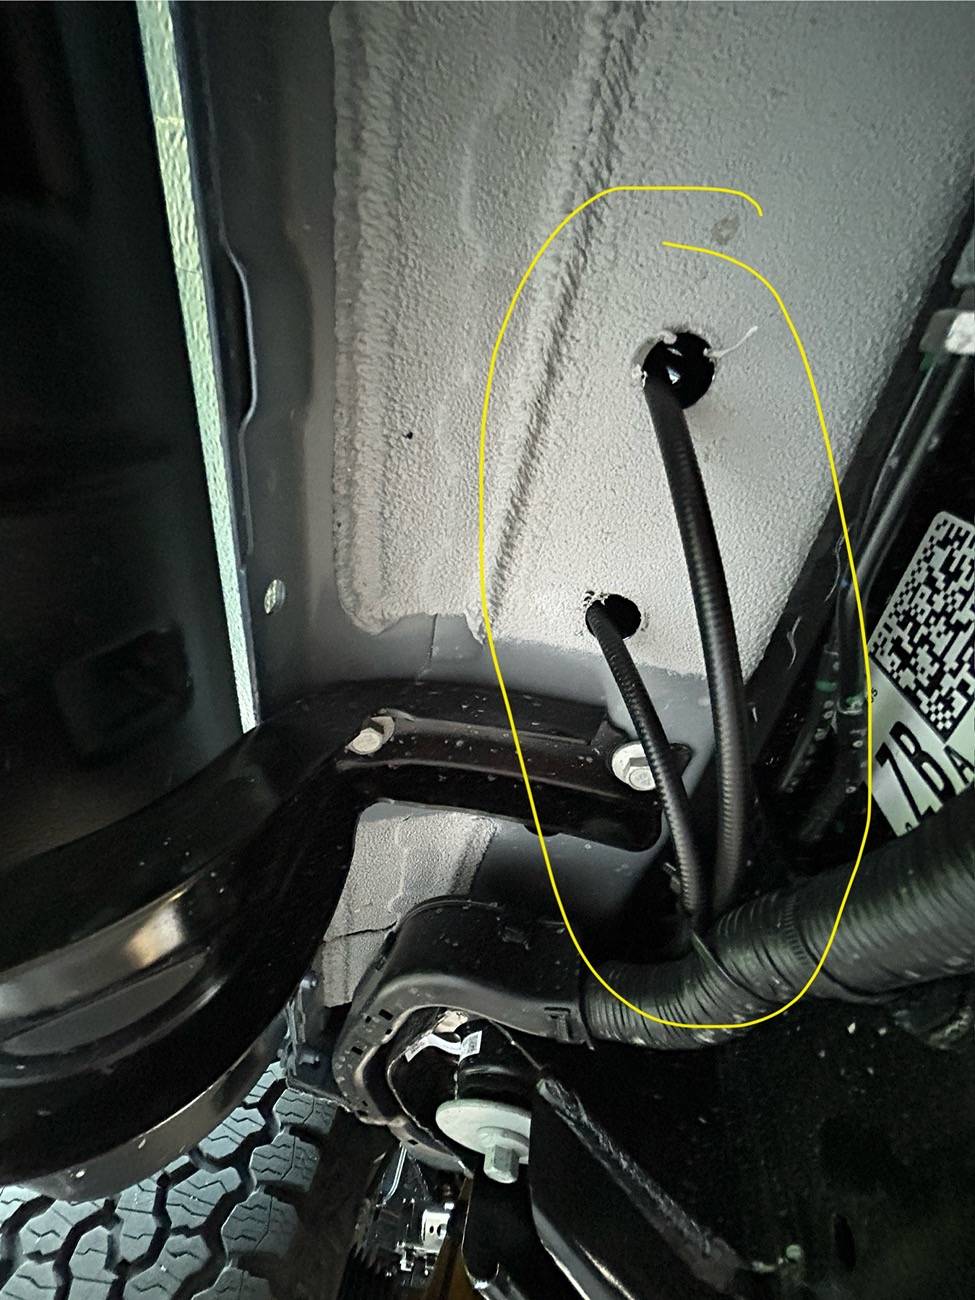
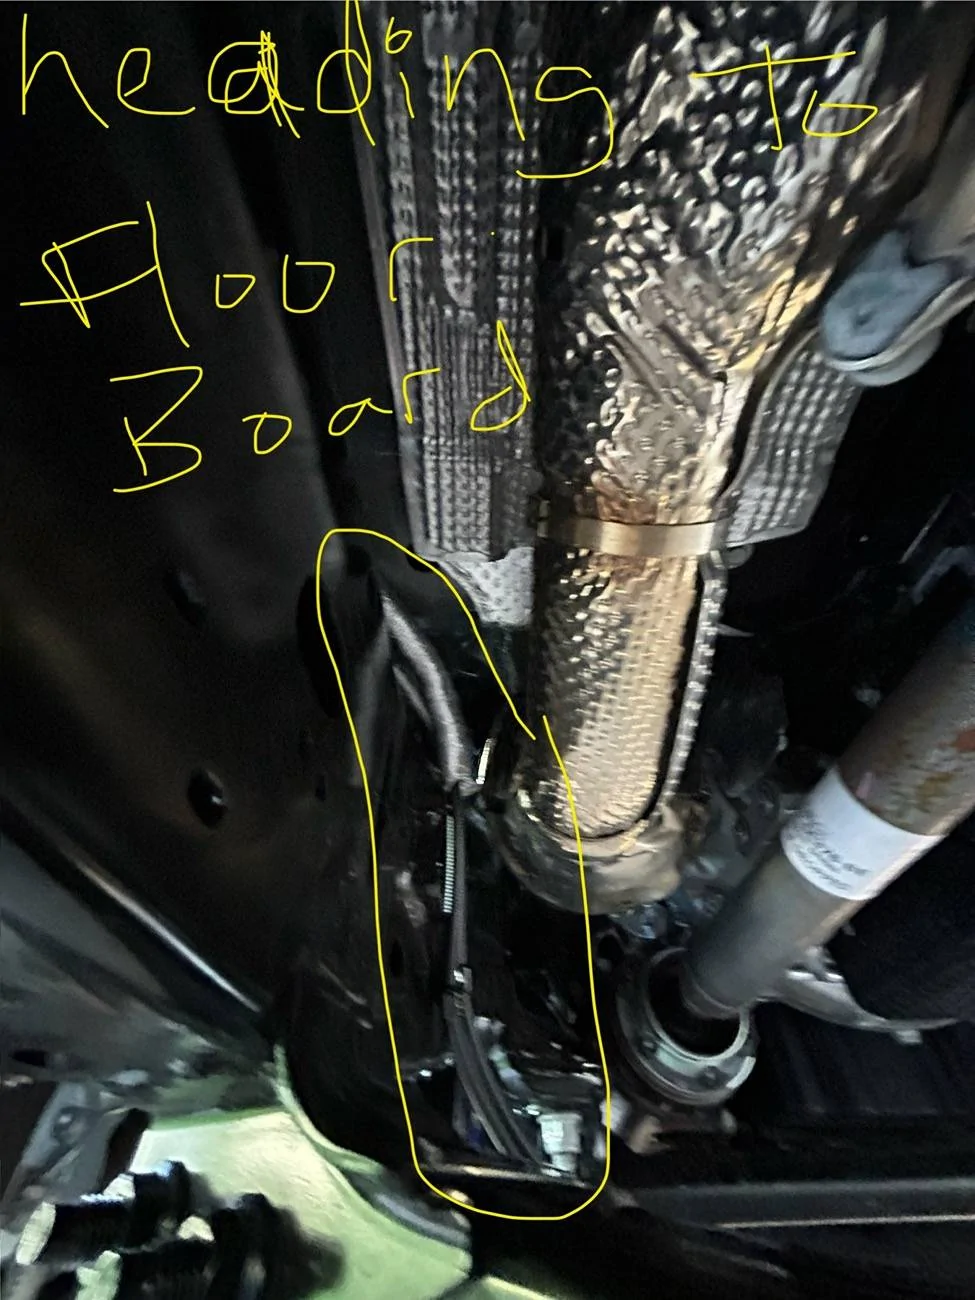
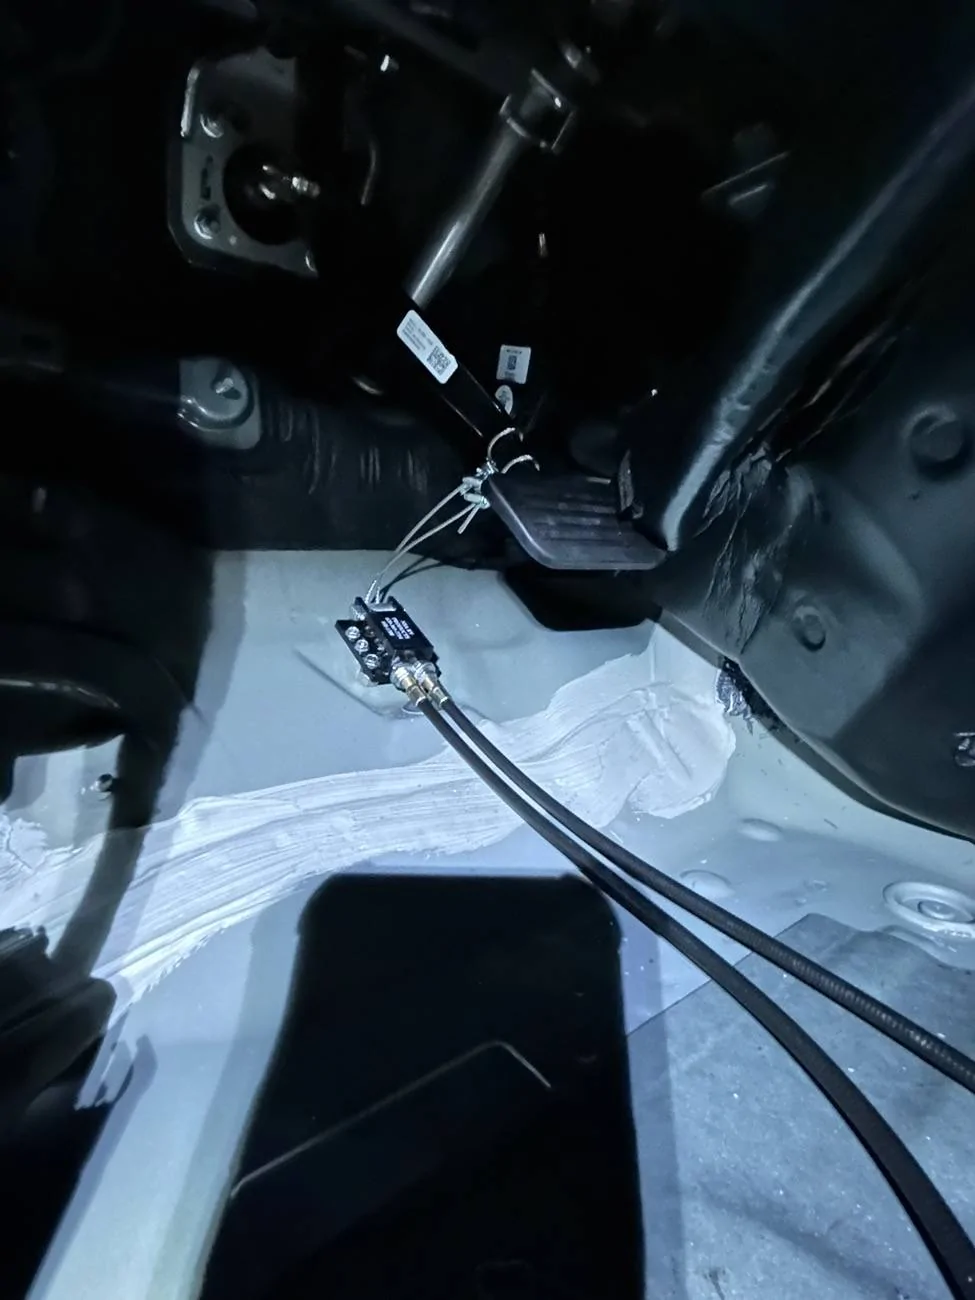
- Install wire from back of rv to rv dash for brake status indicator light- 3 hrs
- Initial tow bar with cables and jumper wire setup- 1 hr
Tips:
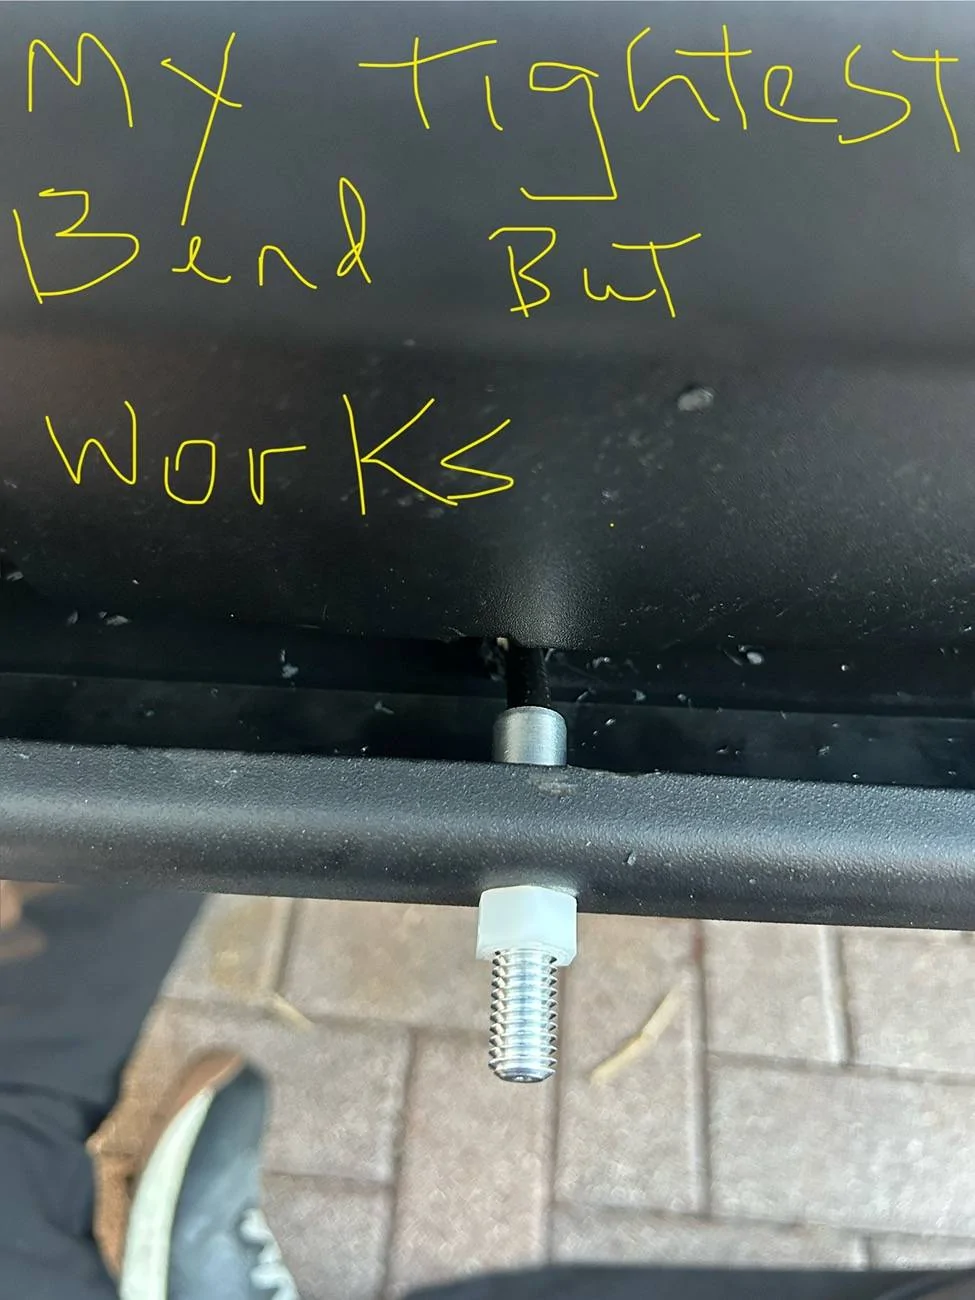
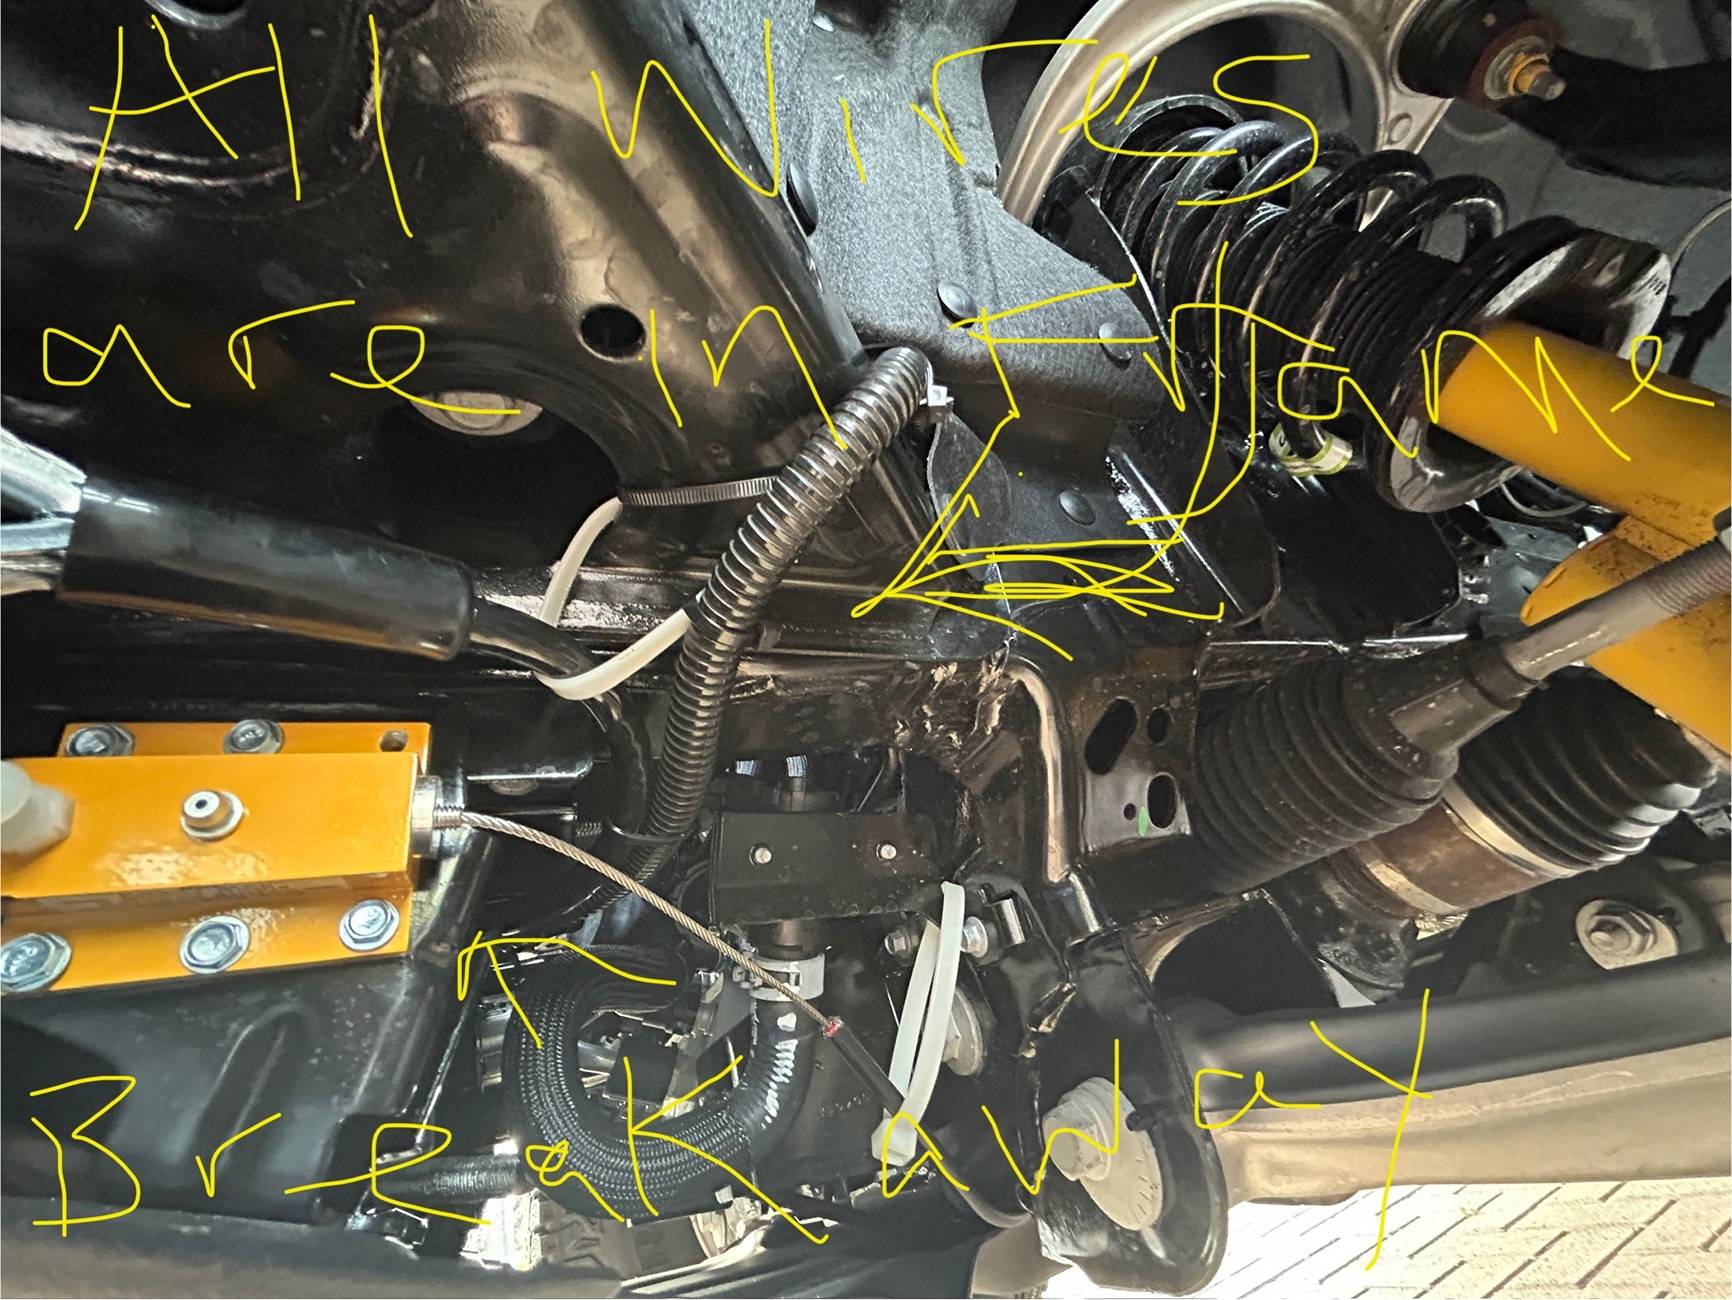
- run both breakaway and brake cable together to save time and same routing. Keep about 6” radius bends.
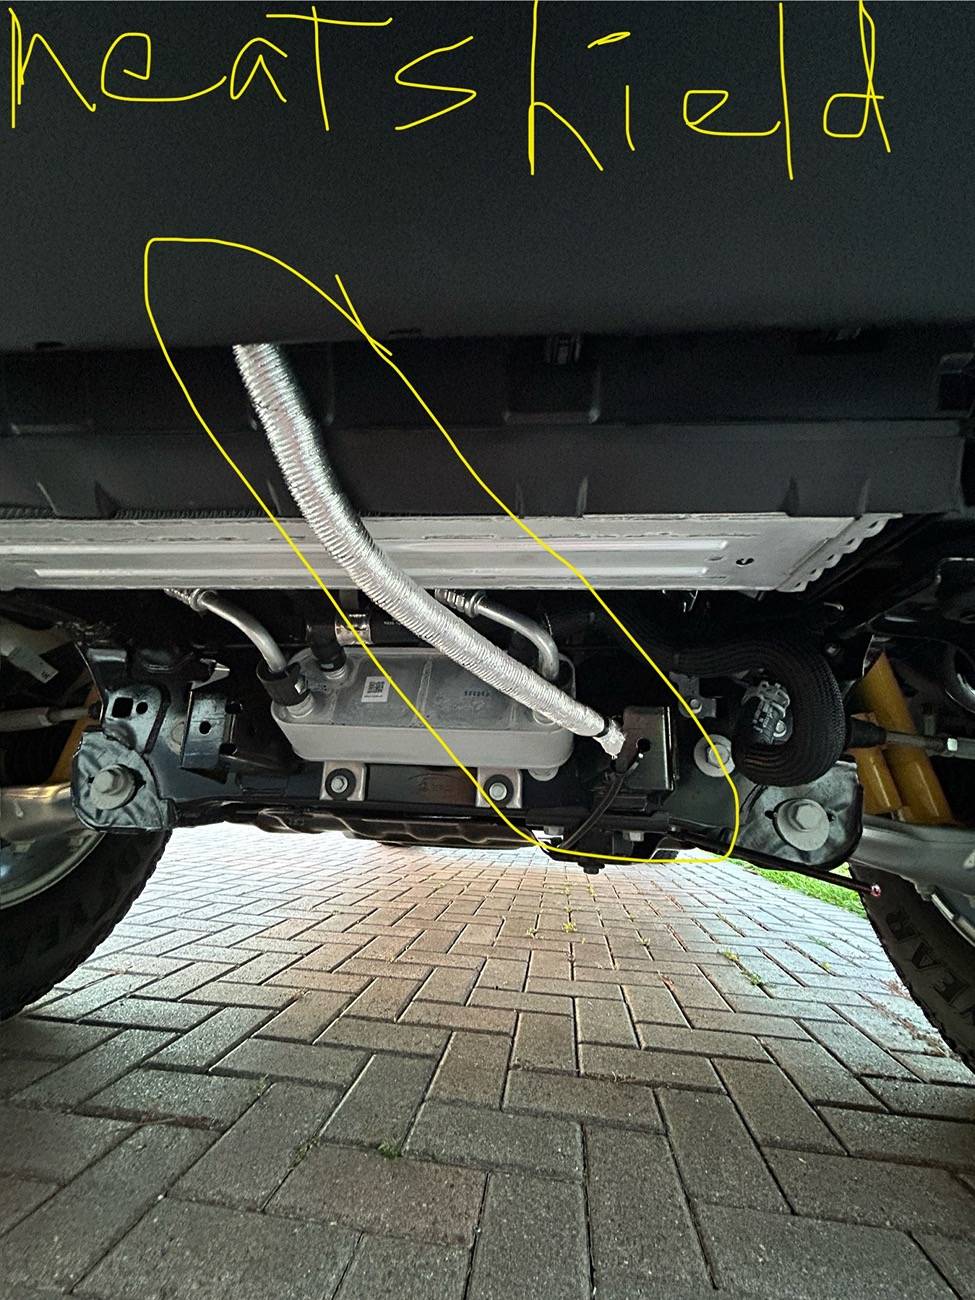
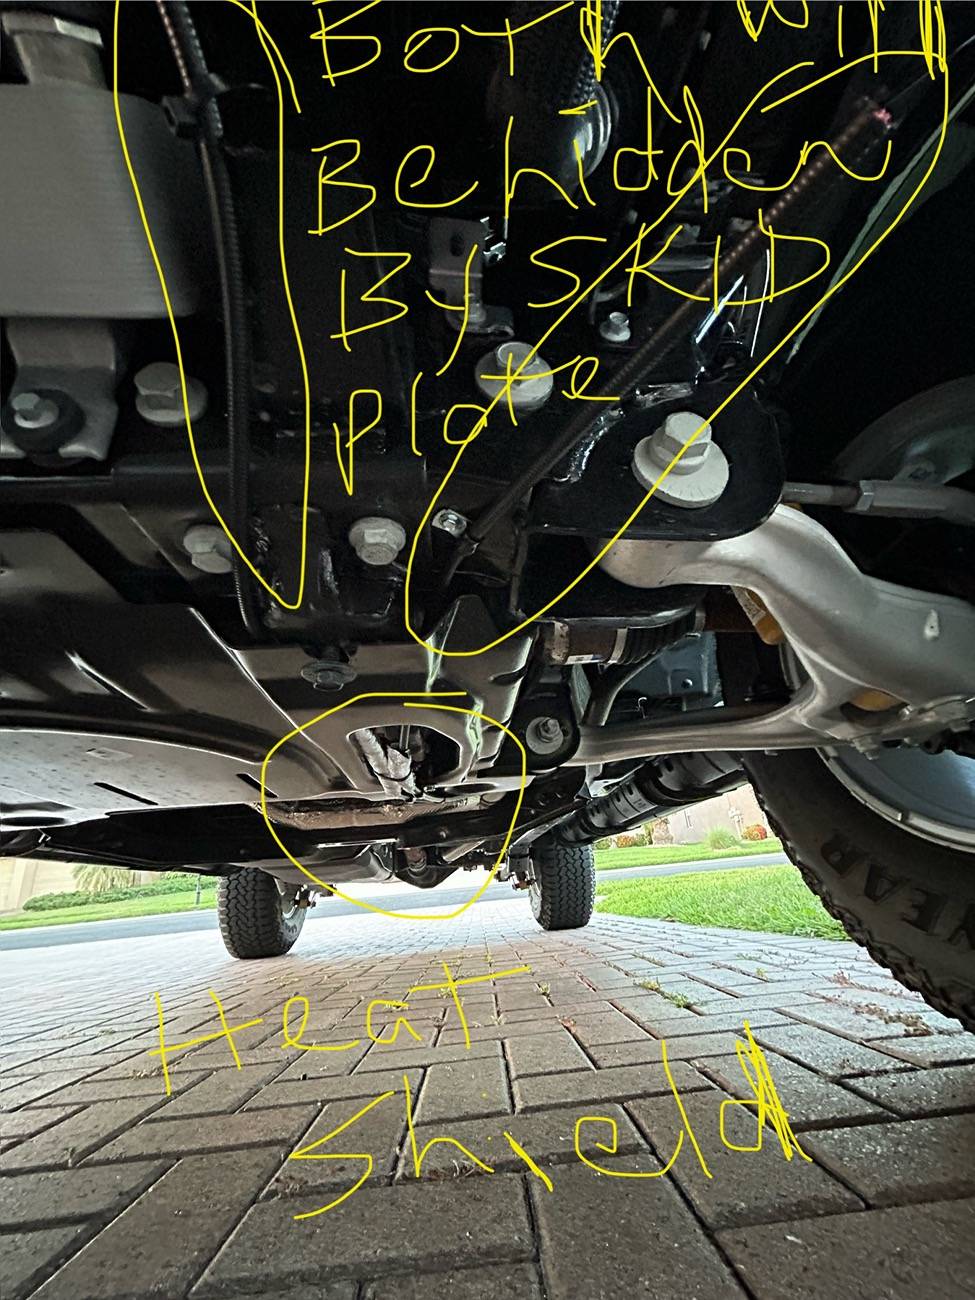
- Drill up into floorboard not down to avoid hitting heat shielding. Also be mindful of where you are drilling. I used the placement of one of the drain holes as a guide and drilled up on the side about an inch away from the main truck wiring channel.
- The whole install was very clean I thought.
- Fish wiring thru as much of the frame as possible. And use split tube casing where wires are exposed.
- Don’t tighten the cables that hook to brake pedal too tight or it will slightly depress the pedal causing an error on dash. Also make sure you cut enough of the carpet to keep from snagging during normal braking. Also creates an Error.
- I spent the extra money for the rvi towed battery charger as opposed to just running a charge wire with a fuse just for my own peace of mind with the use of indicator lights. The purpose of this is to eliminate the possibility of battery drain and possible neutral tow disengaging as this was talked about in earlier years. Mine is 2025 which states that it was fixed but nothing wrong with overkill. Especially when you’re talking about truck damage.
- I think the hardest part was figuring out how to wrap the safety cables attached to base plate and frame without pinching or running into other parts. This took me about an hour before I finally had a plan. Hard to explain but I’ll try; ended up going over the frame from outside and then passing thru an area so that it was the inside frame then going under the frame and both hooks meeting back to baseplate hook. Yea, confusing I know. Sorry.
- If you are able to leave off the skid plate til your done I would. That way all your cables and wiring will be hidden by it. I had to split my steps over different days after work in the evening. So I had to keep putting it back until I didn’t need to anymore.
- I can’t stress enough to definitely watch videos and keep to each steps directions. Very helpful. Don’t wander either. Stay within a step til done.
- Good luck and try to have fun with it.


Sponsored


