
- First Name
- Rob
- Joined
- Jan 1, 2024
- Threads
- 3
- Messages
- 61
- Reaction score
- 229
- Location
- Orange, CA
- Vehicle(s)
- Bronco
- Your Bronco Model
- Big Bend
- Thread starter
- #1
Listen, before everyone crawls up my butt about this, I fully understand this is ridiculous.
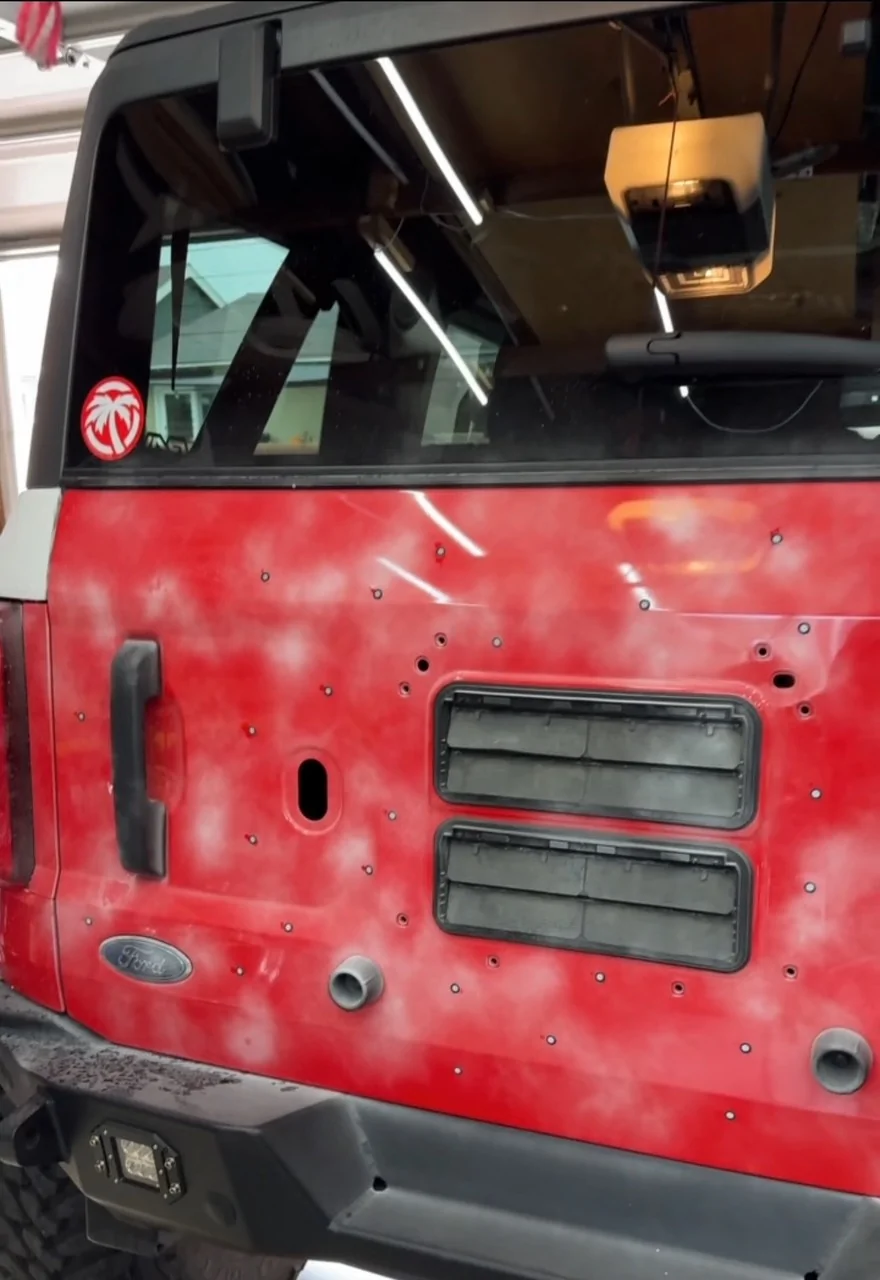
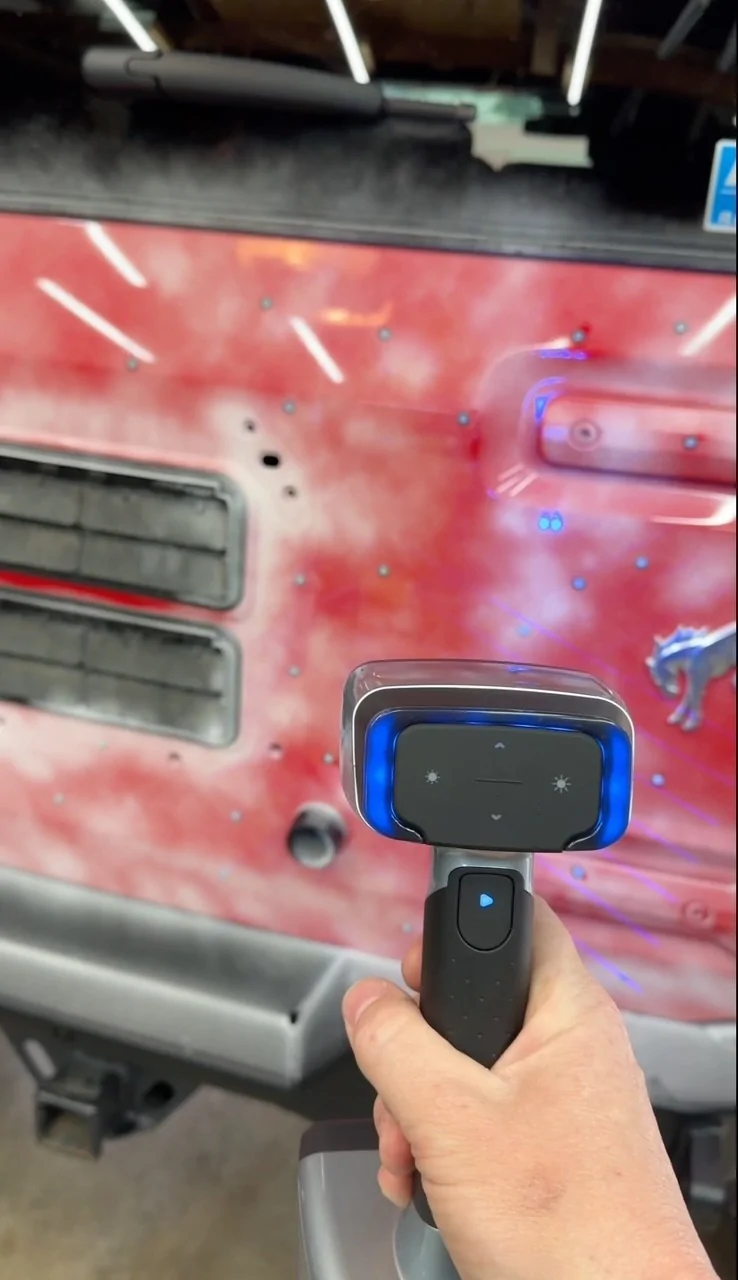
I started out by taking a 3d scan of the full tailgate. I didn't need this much data, but I figured if I'm going to take the time to scan it, I may as well scan the whole thing and trim out the fat that I don't need. (Spoiler alert, it was a lot that I didn't need)


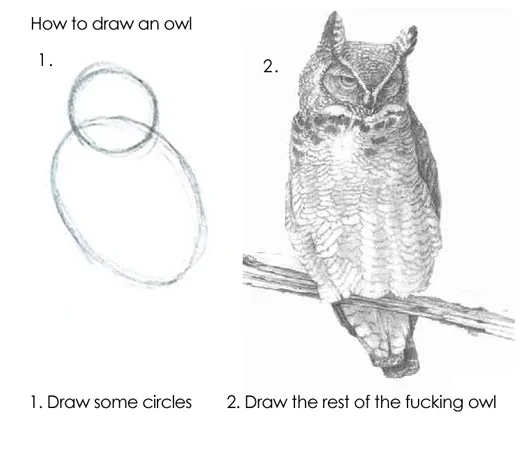
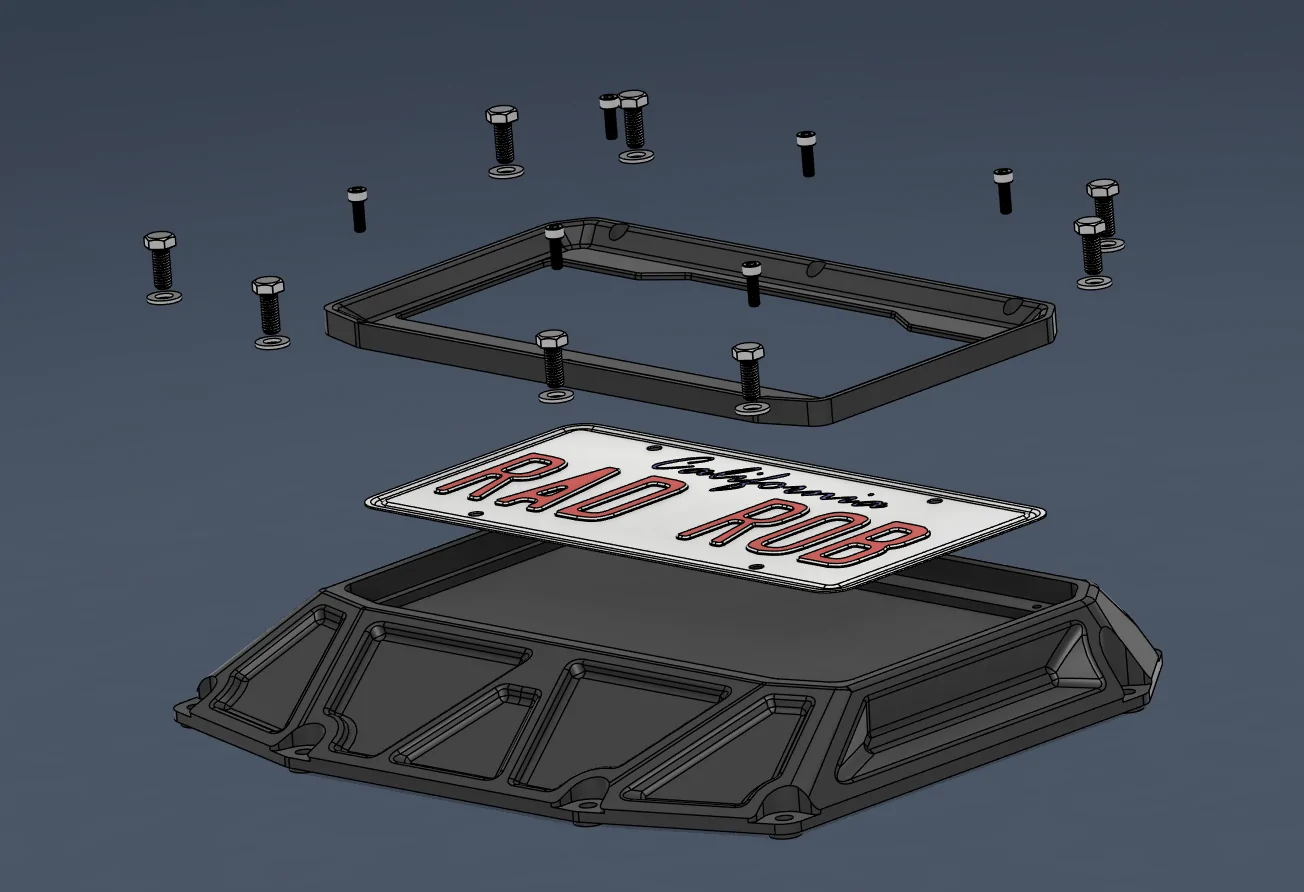
Once the scan was completed, I spent the next few forever amount of hours reverse engineering the scan data to make a usable CAD model. I would get into the details, and would be happy to elaborate if anyone truly cares, but its a bit like this:

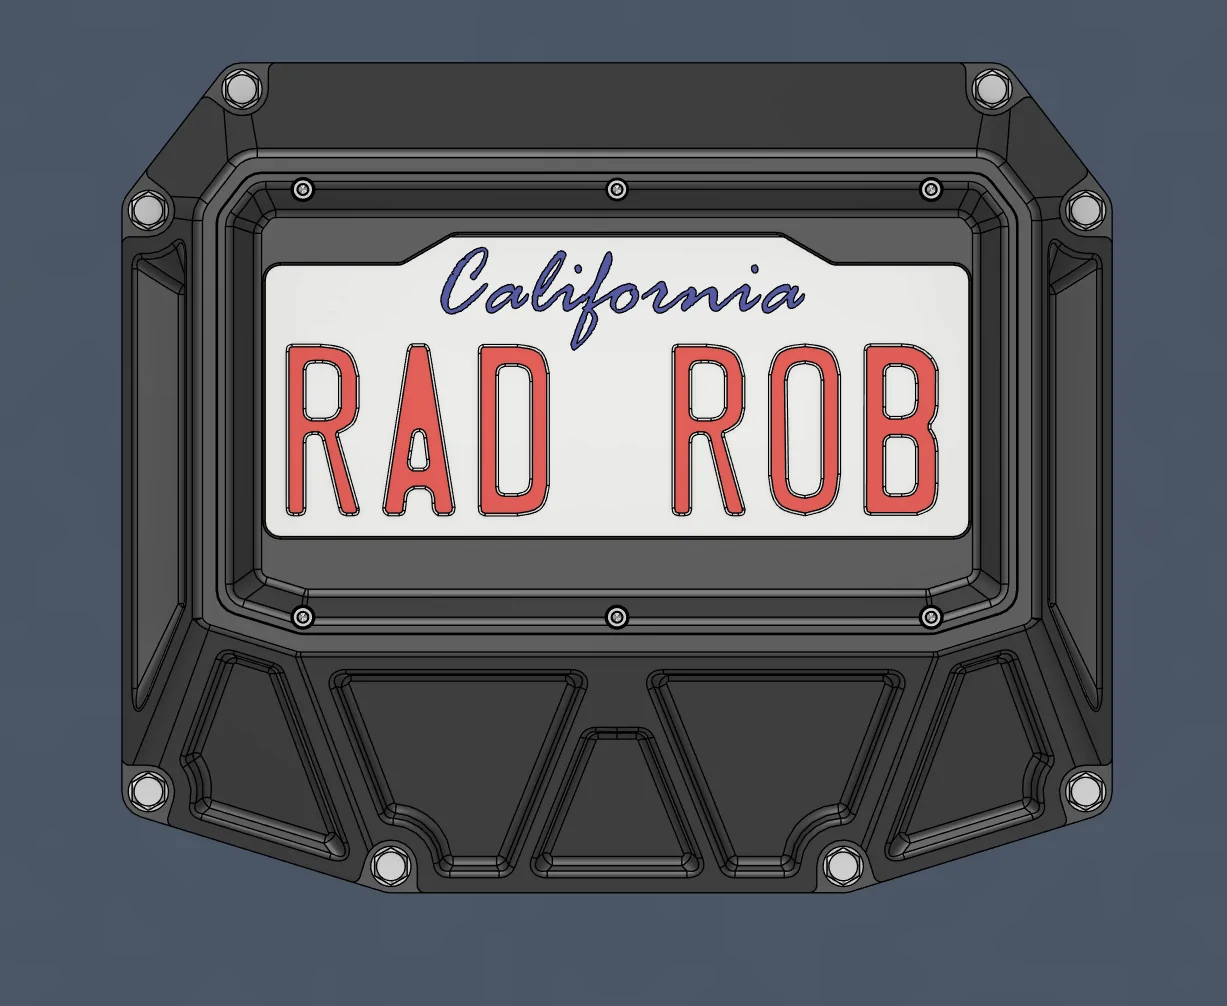
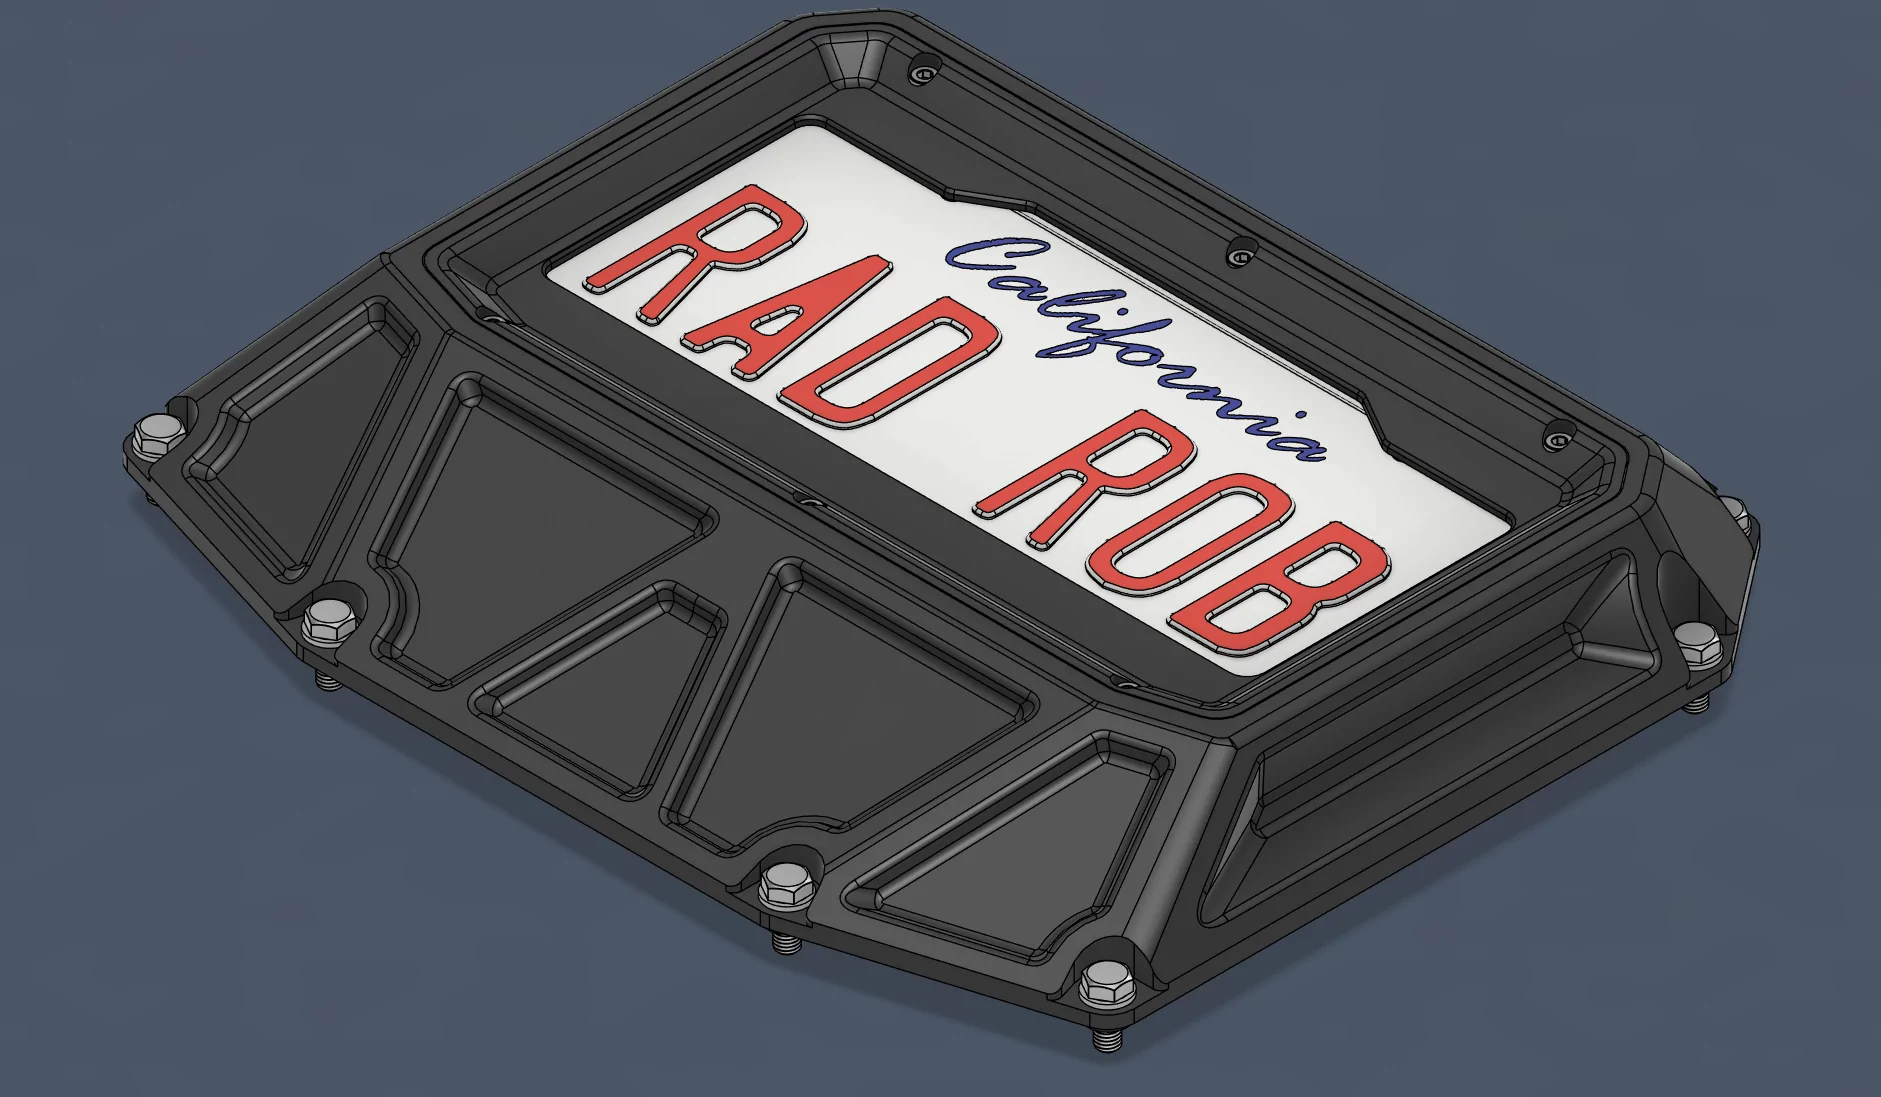
And you end up with this:


At this point in the process, I have lost track of the hours I have spent on this. It was mostly in my "off" time, but I did spend many a night on my couch refining the design to something I was happy with. Before I went too far with it, however, I decided it was time to 3d print a prototype to make sure my all my efforts to this point weren't for nothing.

I had to print the bracket in 2 pieces, then glued them together using alignment dowels. At this point, Im beyond stoked. Everything is working perfectly. If you look super closely, you can see right around the top corner of the bracket, a little OEM hole is poking through. I adjusted my geometry on my CAD model to cover that up. Bada bing, bada boom.
So what's next? First, I need to add provisions for the backup camera, as well as a 3rd brake/chase light. I purchased a Baja Designs light for that duty, and once it arrives, I can scan it and create a model for that. That will more than likely change the top part of the bracket significantly, but more on that when the light comes in. It has a 3rd brake light, license plate light, and chase light all in one. Its like it was made for exactly what I need.
I'll be wiring in a weather pack connector so this whole bracket will bolt on and off in a breeze. I daily drive this thing, and work close to home, so I plan to run this bracket most days, and throw the spare on for off road trips.
Now, on to the part that makes this completely overkill:
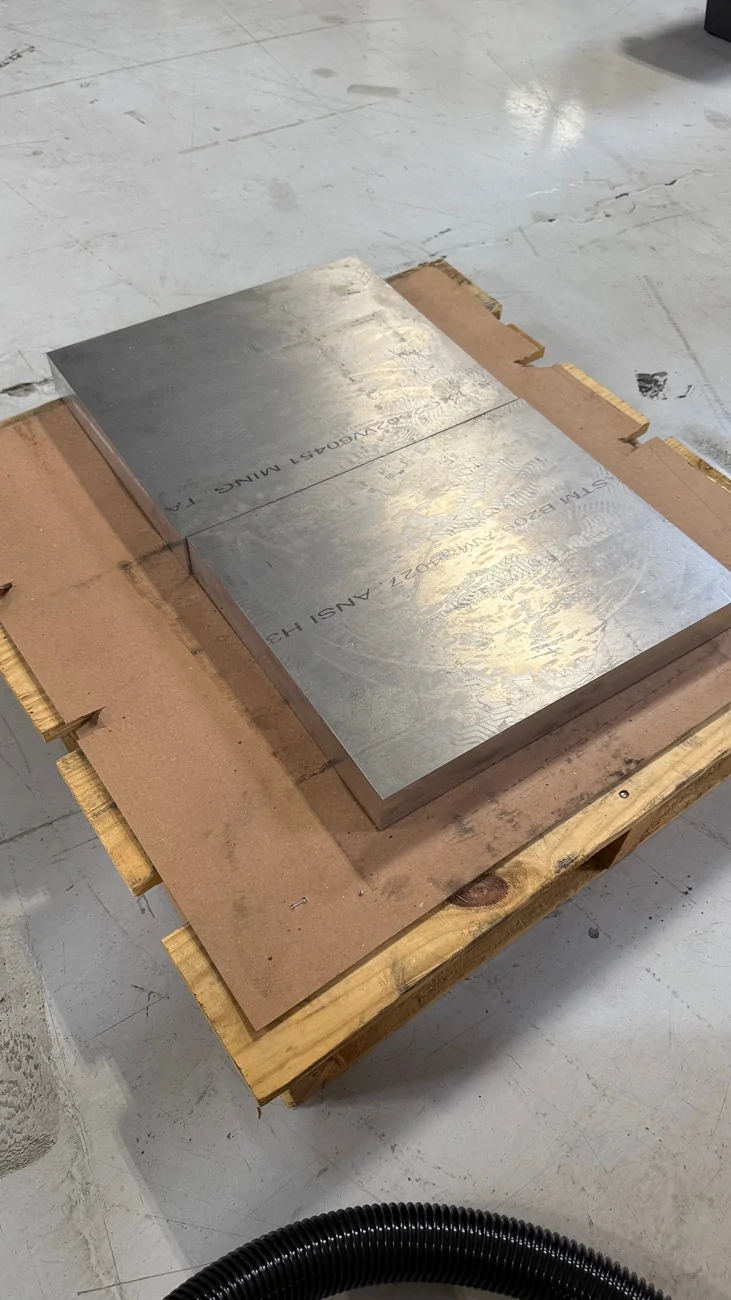
This is going to be CNC machined out of 6061 aluminum. I will get more into that later, but this will be made on my Haas UMC750 5-axis machine. I've been CAD modeling and programming machines for coming up on 20 years now, and I always try to take on side projects to keep things interesting for me, and push my abilities. I have never designed something from a 3d scan, so I figured this is pretty low risk. Yes, its a lot of time. Yes, the material alone cost me more than buying one of the already existing spare tire deletes. I get all that, but I truly enjoy the process.
That being said, I plan to post the journey as I finish the design, and start to get into the machining side of things. There is arguably more ground to cover on that front, as machining something like this presents a few unique challenges, some of which are self inflicted. I purposely designed this so it would have to be made on a 5 axis machine because I'm an idiot. I have 0 intentions of selling these, and to be 100% honest, its not even remotely cost effective. But its cool, and I like cool stuff.
I'll definitely be sure to post more updates as I go, but thought it would be cool to share with others what I'm working on.
I started out by taking a 3d scan of the full tailgate. I didn't need this much data, but I figured if I'm going to take the time to scan it, I may as well scan the whole thing and trim out the fat that I don't need. (Spoiler alert, it was a lot that I didn't need)

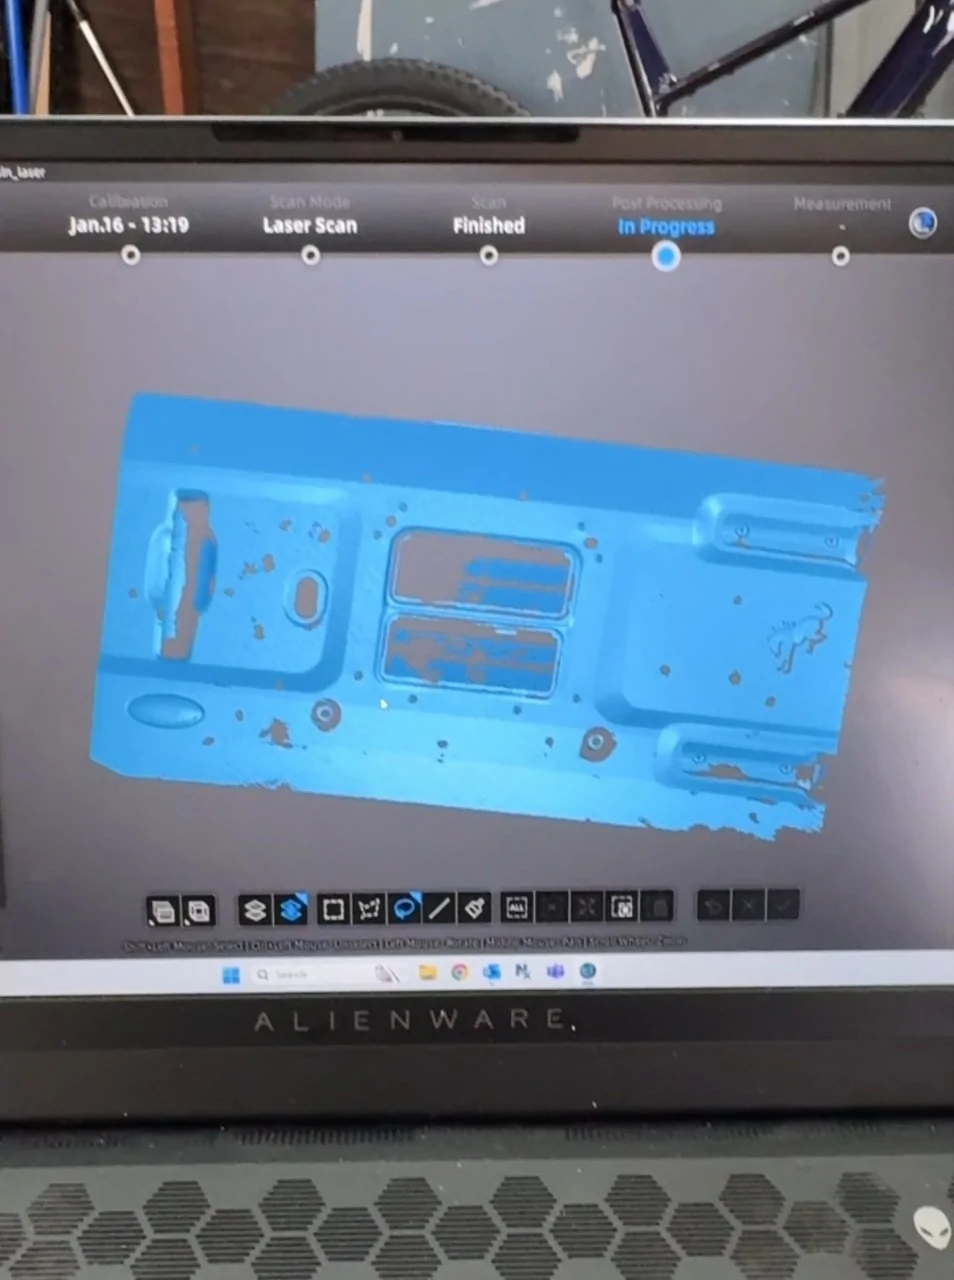
Once the scan was completed, I spent the next few forever amount of hours reverse engineering the scan data to make a usable CAD model. I would get into the details, and would be happy to elaborate if anyone truly cares, but its a bit like this:
And you end up with this:
At this point in the process, I have lost track of the hours I have spent on this. It was mostly in my "off" time, but I did spend many a night on my couch refining the design to something I was happy with. Before I went too far with it, however, I decided it was time to 3d print a prototype to make sure my all my efforts to this point weren't for nothing.
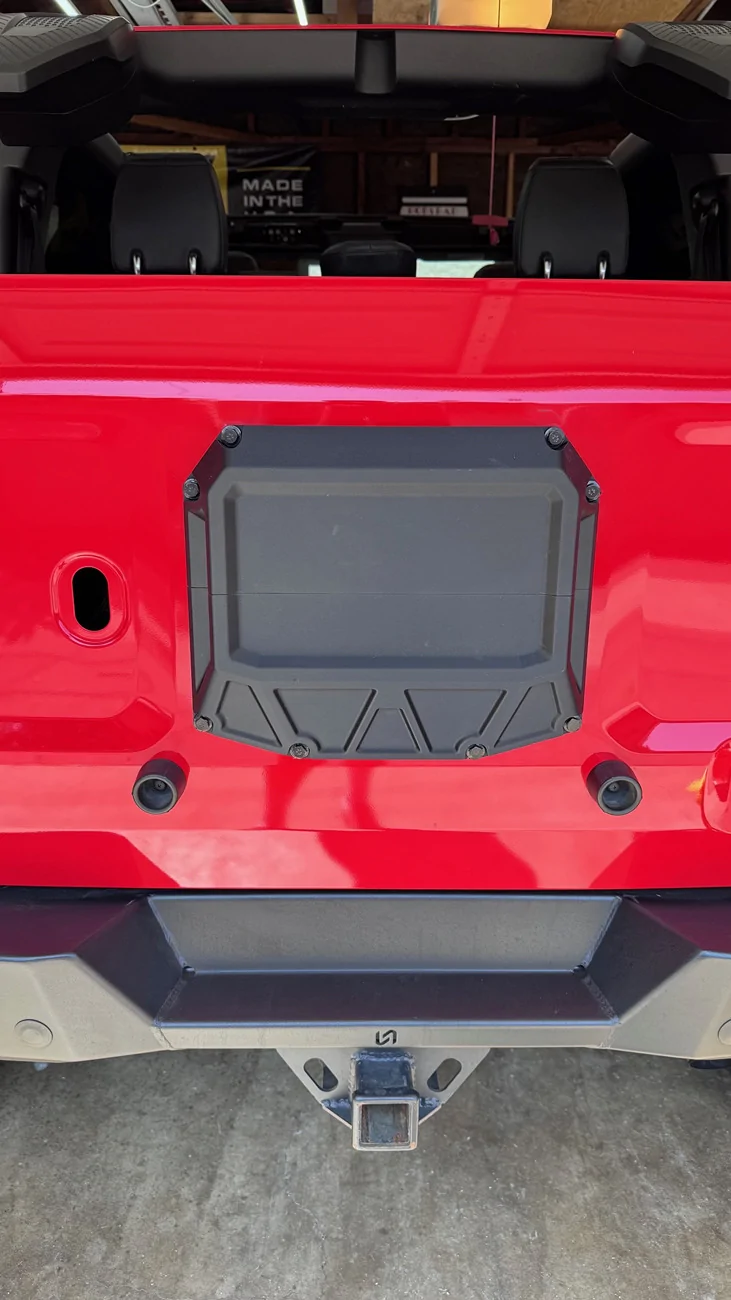
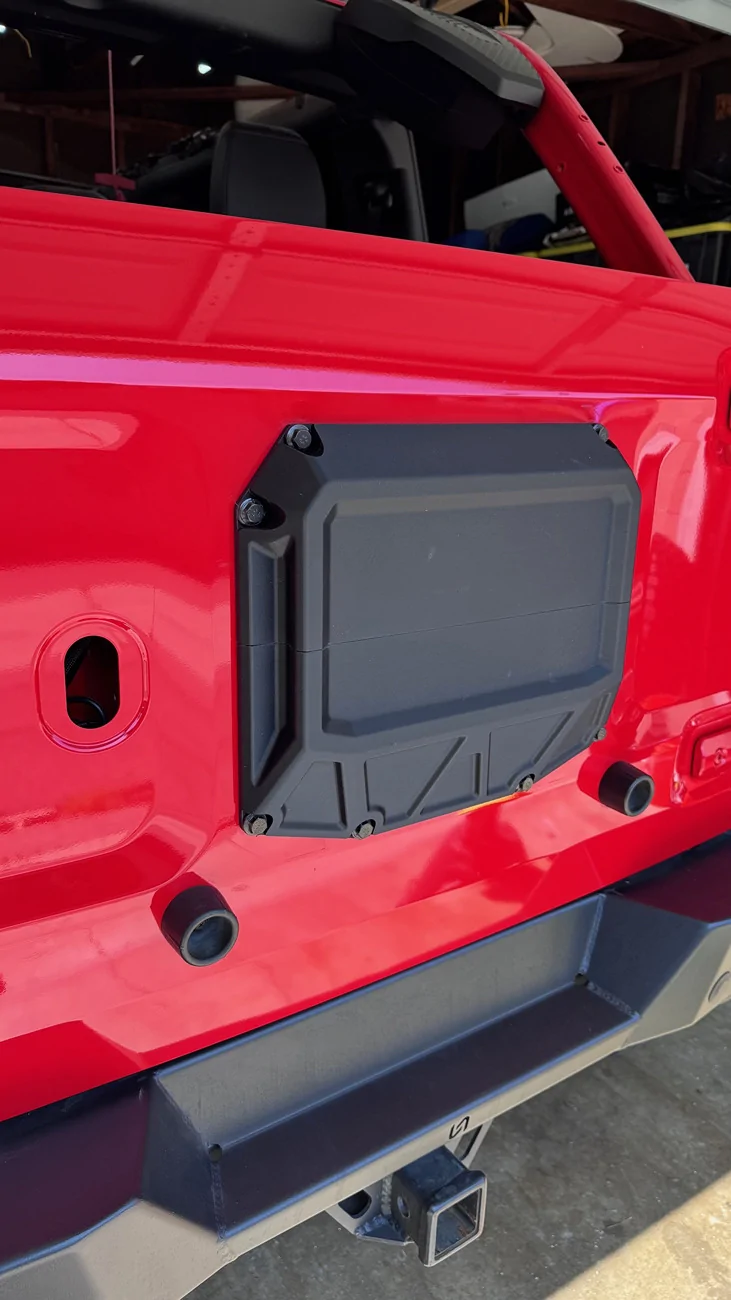
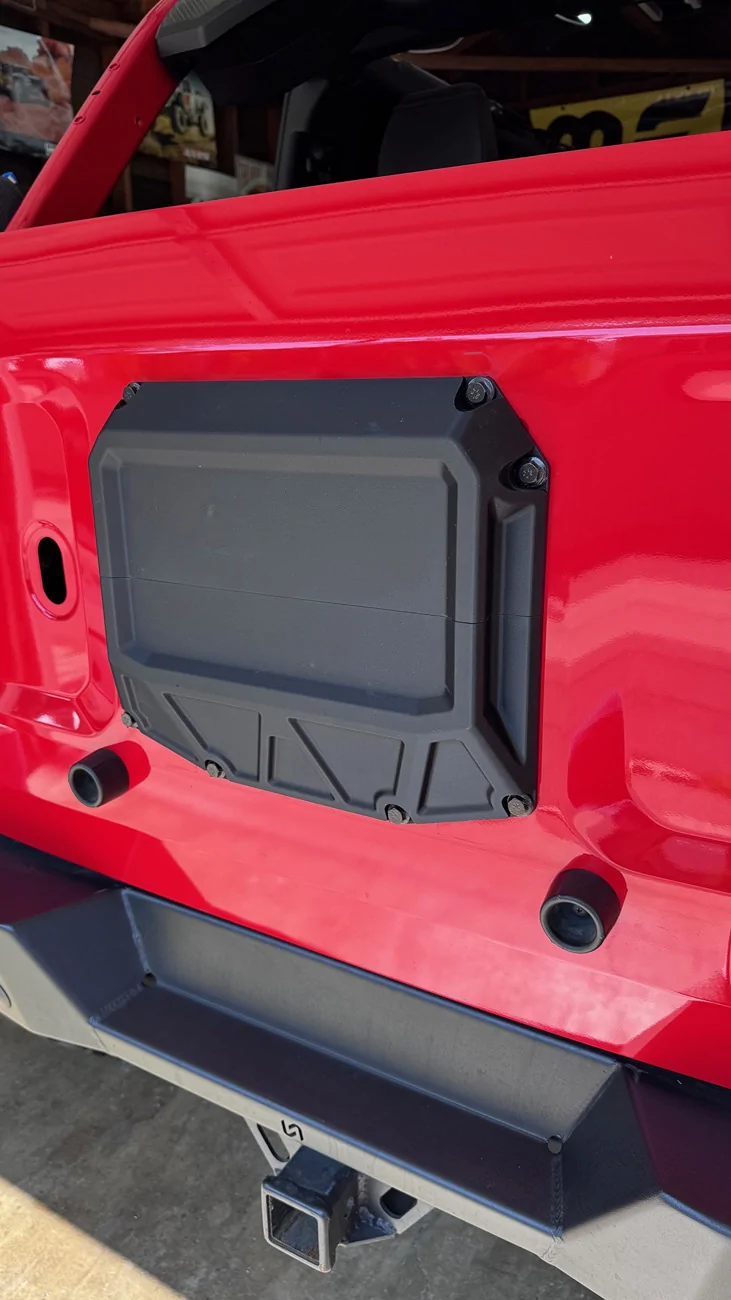
I had to print the bracket in 2 pieces, then glued them together using alignment dowels. At this point, Im beyond stoked. Everything is working perfectly. If you look super closely, you can see right around the top corner of the bracket, a little OEM hole is poking through. I adjusted my geometry on my CAD model to cover that up. Bada bing, bada boom.
So what's next? First, I need to add provisions for the backup camera, as well as a 3rd brake/chase light. I purchased a Baja Designs light for that duty, and once it arrives, I can scan it and create a model for that. That will more than likely change the top part of the bracket significantly, but more on that when the light comes in. It has a 3rd brake light, license plate light, and chase light all in one. Its like it was made for exactly what I need.
I'll be wiring in a weather pack connector so this whole bracket will bolt on and off in a breeze. I daily drive this thing, and work close to home, so I plan to run this bracket most days, and throw the spare on for off road trips.
Now, on to the part that makes this completely overkill:
This is going to be CNC machined out of 6061 aluminum. I will get more into that later, but this will be made on my Haas UMC750 5-axis machine. I've been CAD modeling and programming machines for coming up on 20 years now, and I always try to take on side projects to keep things interesting for me, and push my abilities. I have never designed something from a 3d scan, so I figured this is pretty low risk. Yes, its a lot of time. Yes, the material alone cost me more than buying one of the already existing spare tire deletes. I get all that, but I truly enjoy the process.
That being said, I plan to post the journey as I finish the design, and start to get into the machining side of things. There is arguably more ground to cover on that front, as machining something like this presents a few unique challenges, some of which are self inflicted. I purposely designed this so it would have to be made on a 5 axis machine because I'm an idiot. I have 0 intentions of selling these, and to be 100% honest, its not even remotely cost effective. But its cool, and I like cool stuff.
I'll definitely be sure to post more updates as I go, but thought it would be cool to share with others what I'm working on.

Sponsored
Last edited:


