- Thread starter
- #16
BEST ever metaphor mashup!!! ^^^Very nice. Good to see someone grab the bull by the horns and dive in!
Now swimming with bull.
That absolutely tracks.

Sponsored
BEST ever metaphor mashup!!! ^^^Very nice. Good to see someone grab the bull by the horns and dive in!
People have bent them winching and or lifted by the tow points. Someone might have pictures.That's an interesting thought, although I don't agree.
I did stare at those bolting flanges for quite some time. I'm not dismissing what you're saying entirely. These were designed by engineers, not garage shop fabricators. That means they're mathematically proven to be the cheapest wimpiest thing that could possibly be predicted to get the job done, before the risk of recall would negate the savings achieved by not doing it better!
One of the things I marvel at sometimes on 4x4's is how there can be big strong parts, but sometimes there's a point where it all comes down to some tiny little bit of material like one bolt that carries the entire load. Don't overthink this. It's an impossibly deep rabbit hole to fall down.
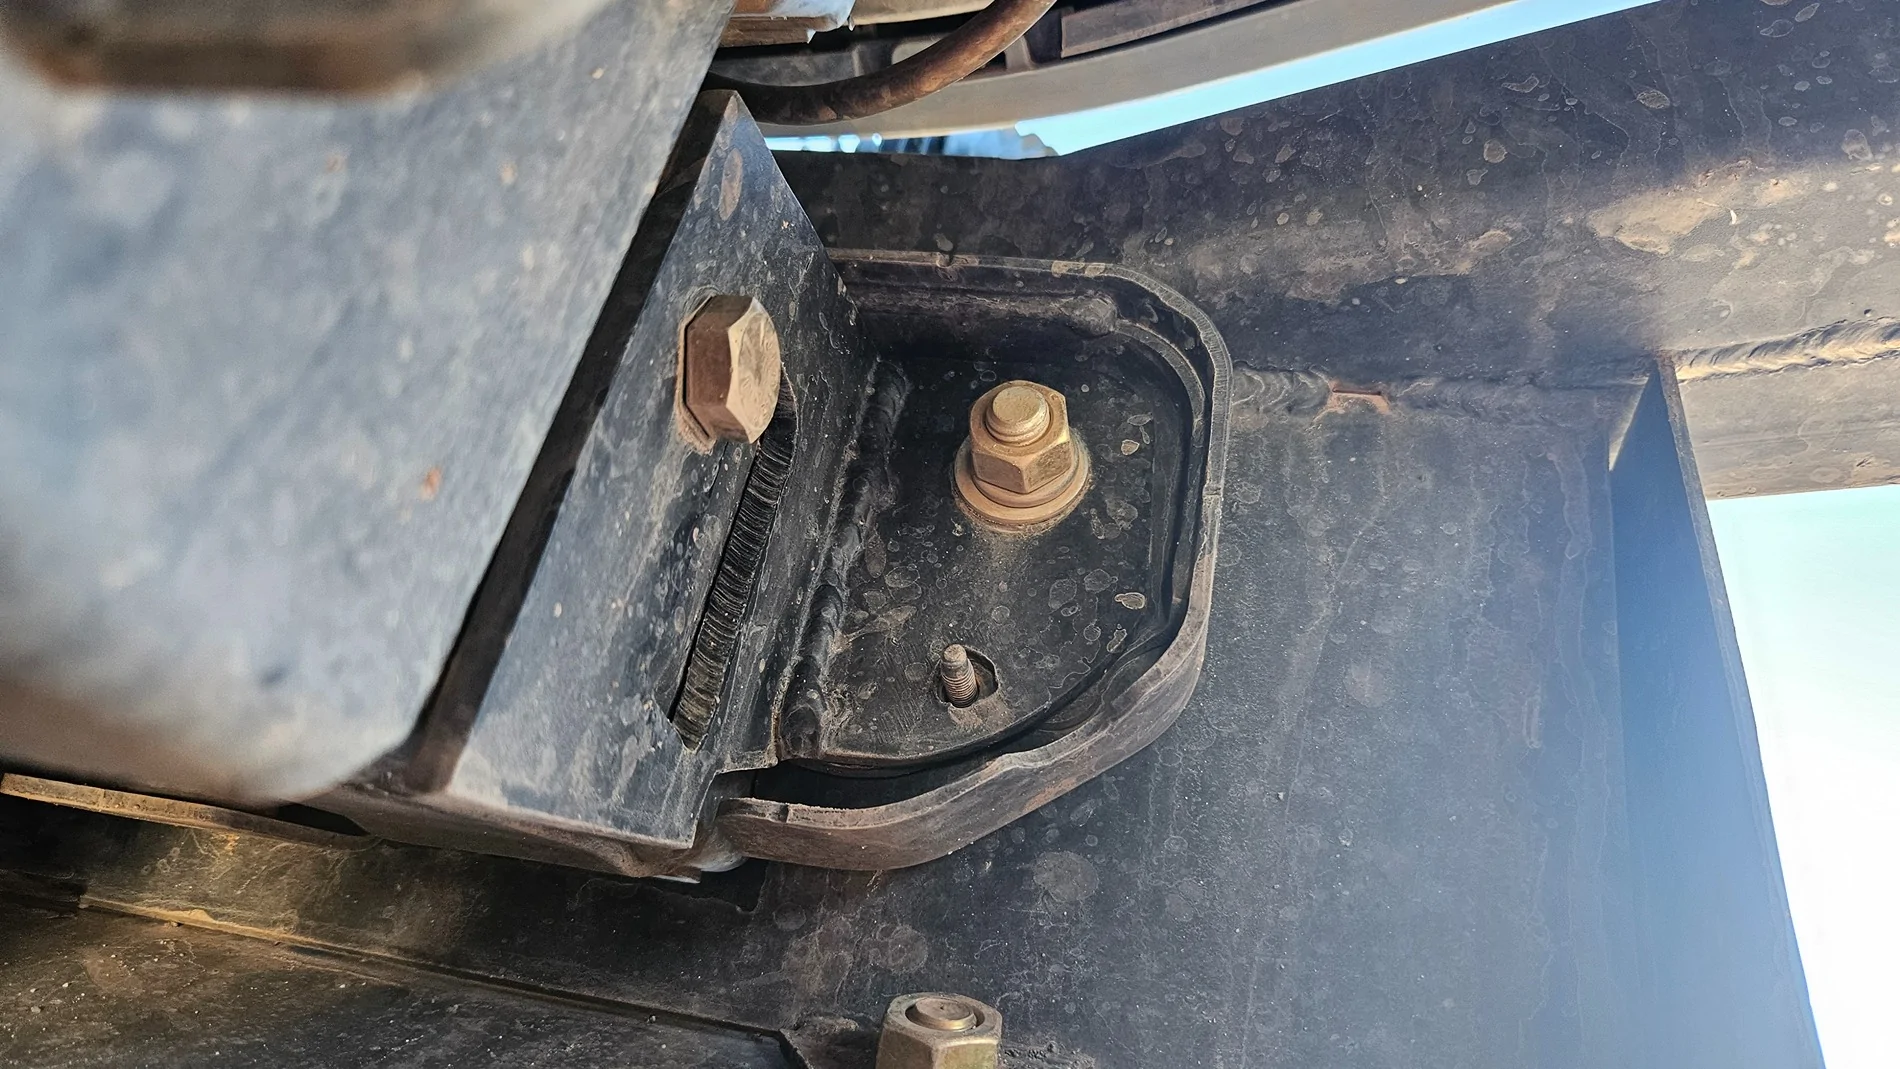
In this case its not even the flange which, I agree, is thin. It looks like the weakest link is the cross sectional area of the welds holding those flanges to the frame! The weld doesn't even go all the way around.
The problem is that even if I were to cut off those flanges and replace with my own versions made from 3/16" or even 1/4" plate, I'd be welding onto the frame rails that are clam shelled from two U-channels of 1/8" wall, and now I'll have a new heat affected zone right behind the old one. Have I really made it stronger? Or have I just moved the weakest link back an inch to where I've killed any heat treatment? Do I plate down the frame? If so, where's the new stress riser? How far back before the next weakest link is an engine mount?
I don't see any posts yet about people ripping off frame mounts while winching, so I *think* it's going to be OK. (please don't jinx me). The Bronco isn't the heaviest rig on the trail.
At this point, I'm pretty sure the first thing that fails on my pull is the synthetic winch rope.
Fortunately, I'm good at knots.

Ford even makes these for their own winch kit.Done.
I'm doing this.
I owe you a beer.
I've got a new project!
Yes, inner and outer frame walls and my backing plate, all 1/4" steel.Done.
I'm doing this.
I owe you a beer.
I've got a new project!
Yes, plus a 1/4" backing plate replacing stock backing plate.So you used the open end of the frame rail to access inside with nuts, and your brackets replaced the backing nut plate.

Great suggestion Snacktime. looks like he is going that route. It’s amazing how many we seen bend or ripped off the last few years.Not bad, still need to make or plate frame horns stronger.
Looking good! I need a die grinder in my life.So I've had some time to tinker with this frame horn reinforcement issue over the weekend, and I should have it all sewn up again by mid week.
I really appreciate the suggestion!
*NOW* I see all the references to the reinforcement options. I'm still curious to see any pics of damage, but I don't have to be convinced that it's possible.
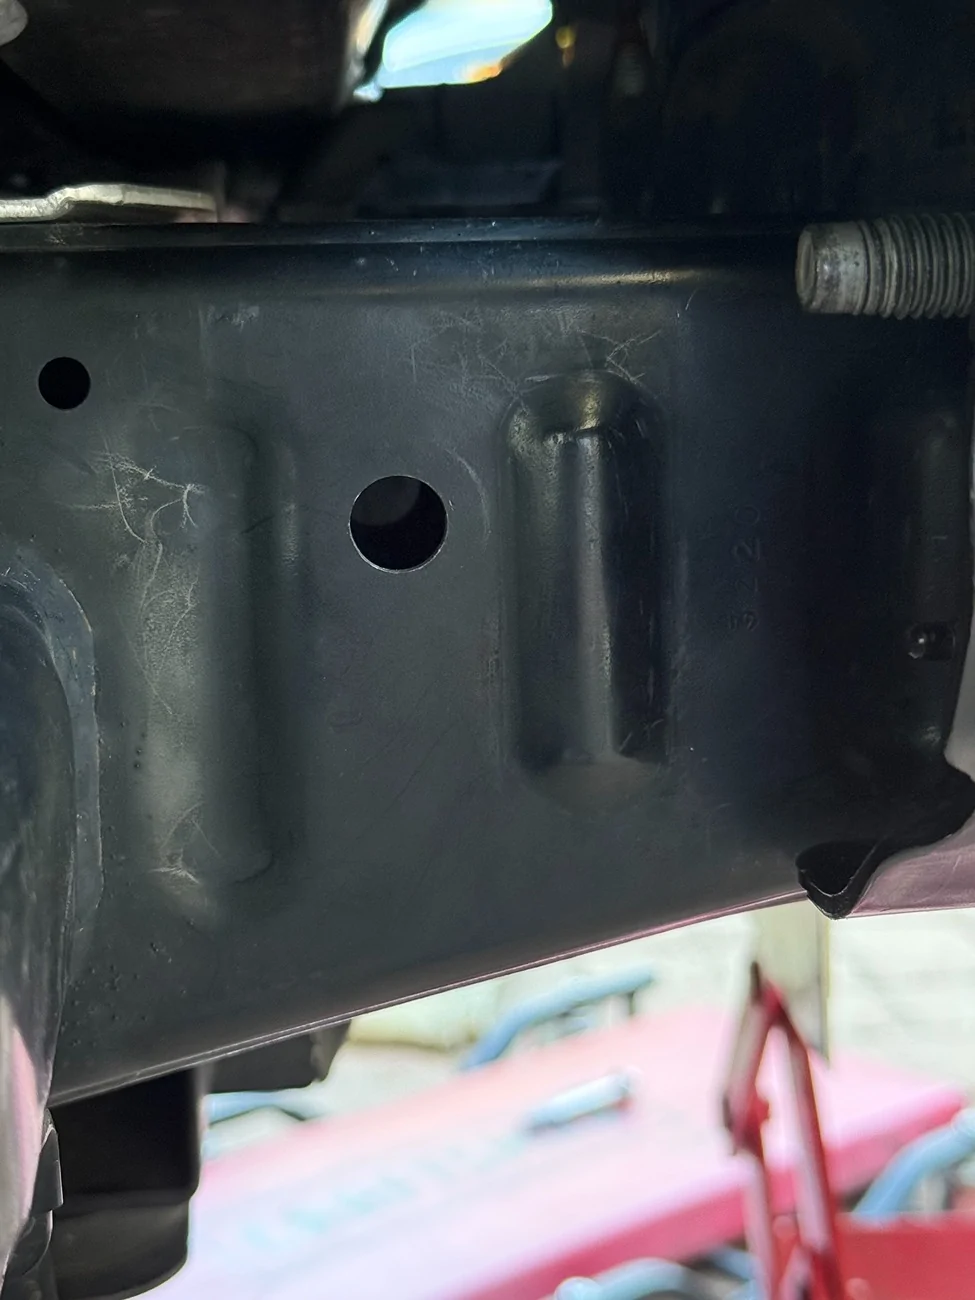
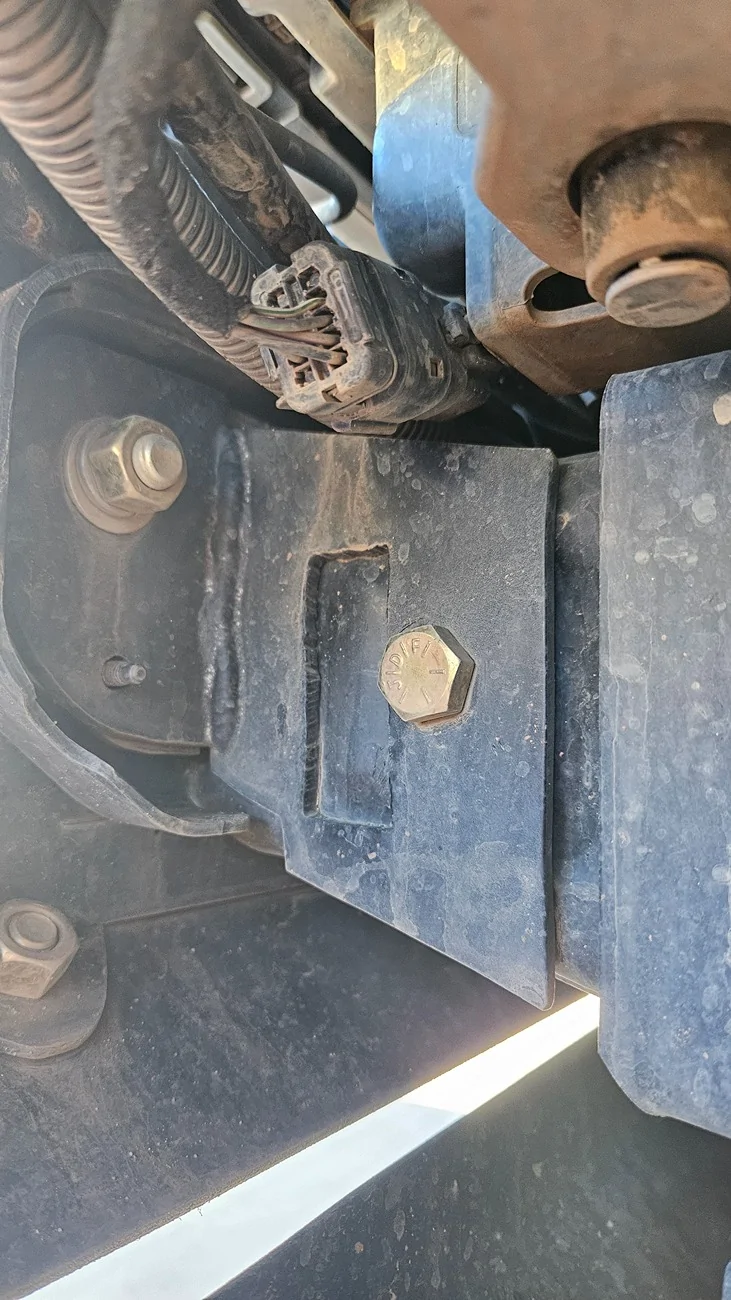
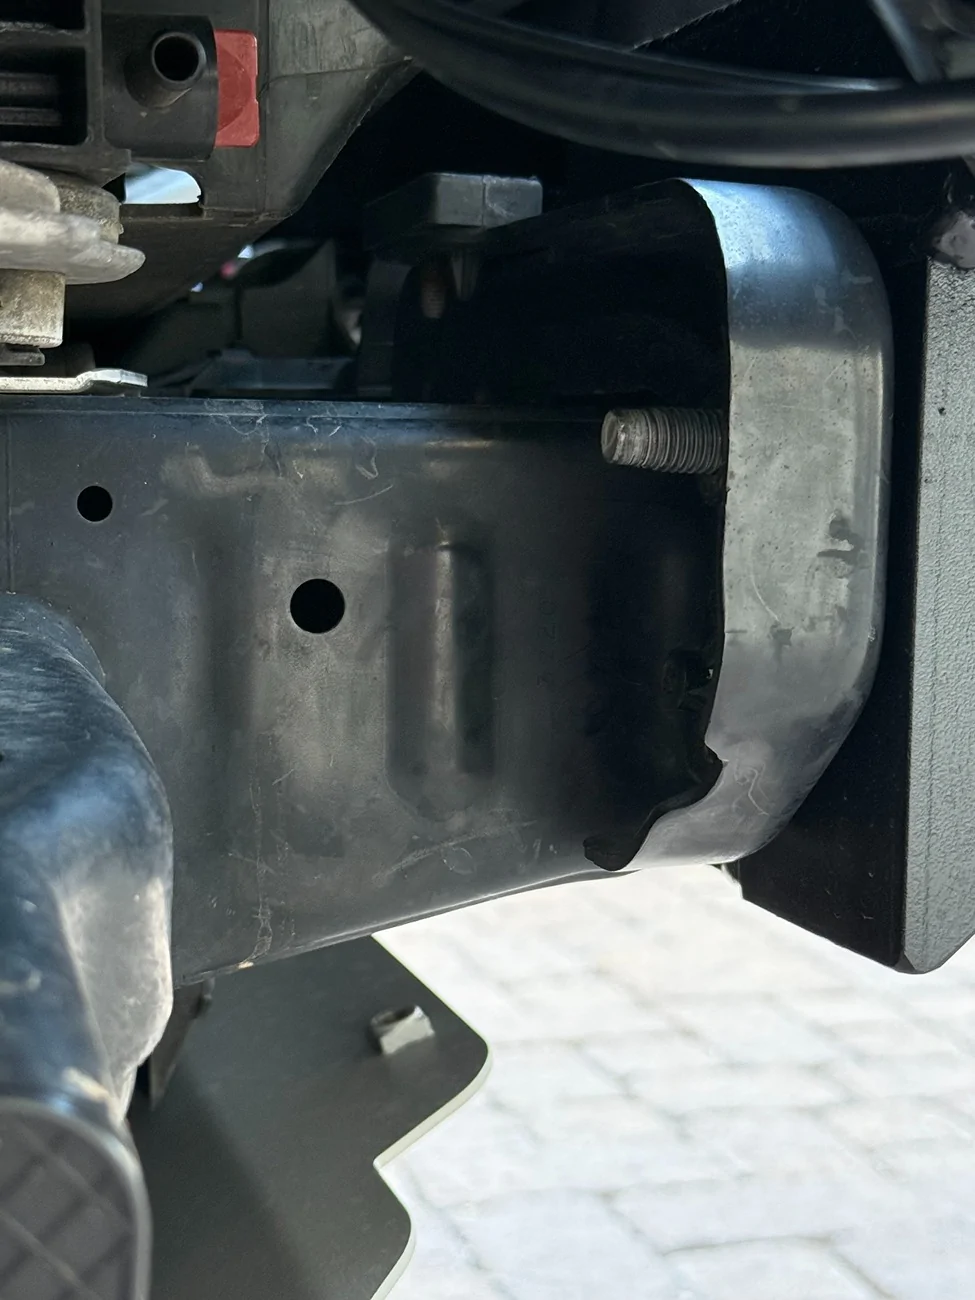
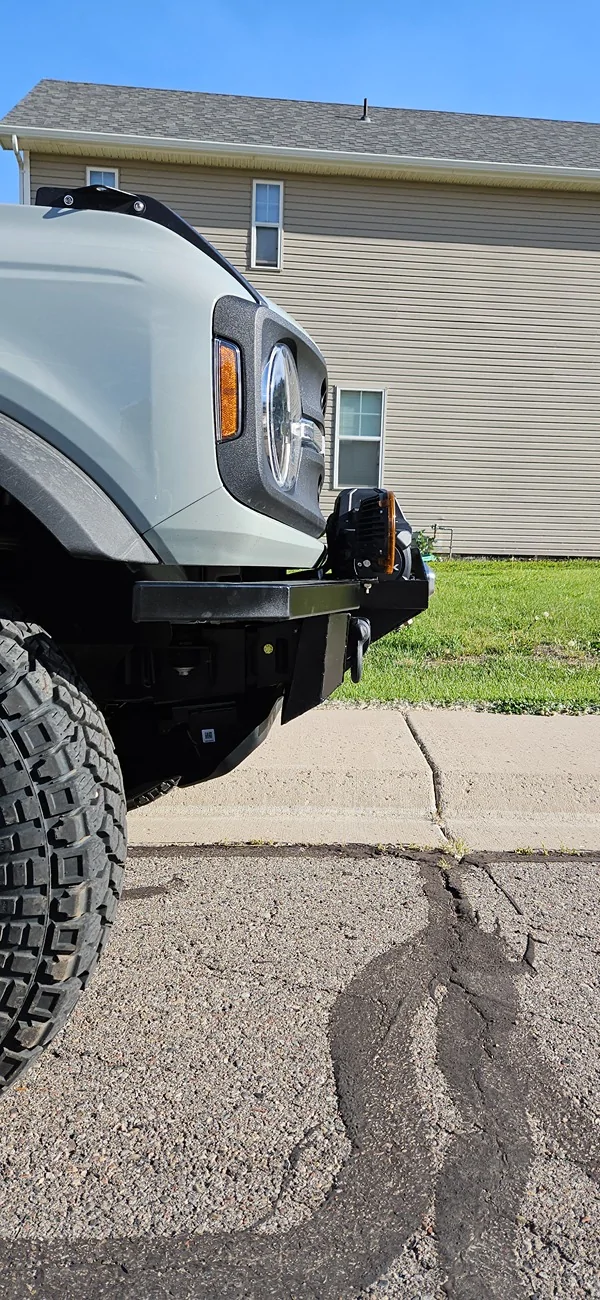
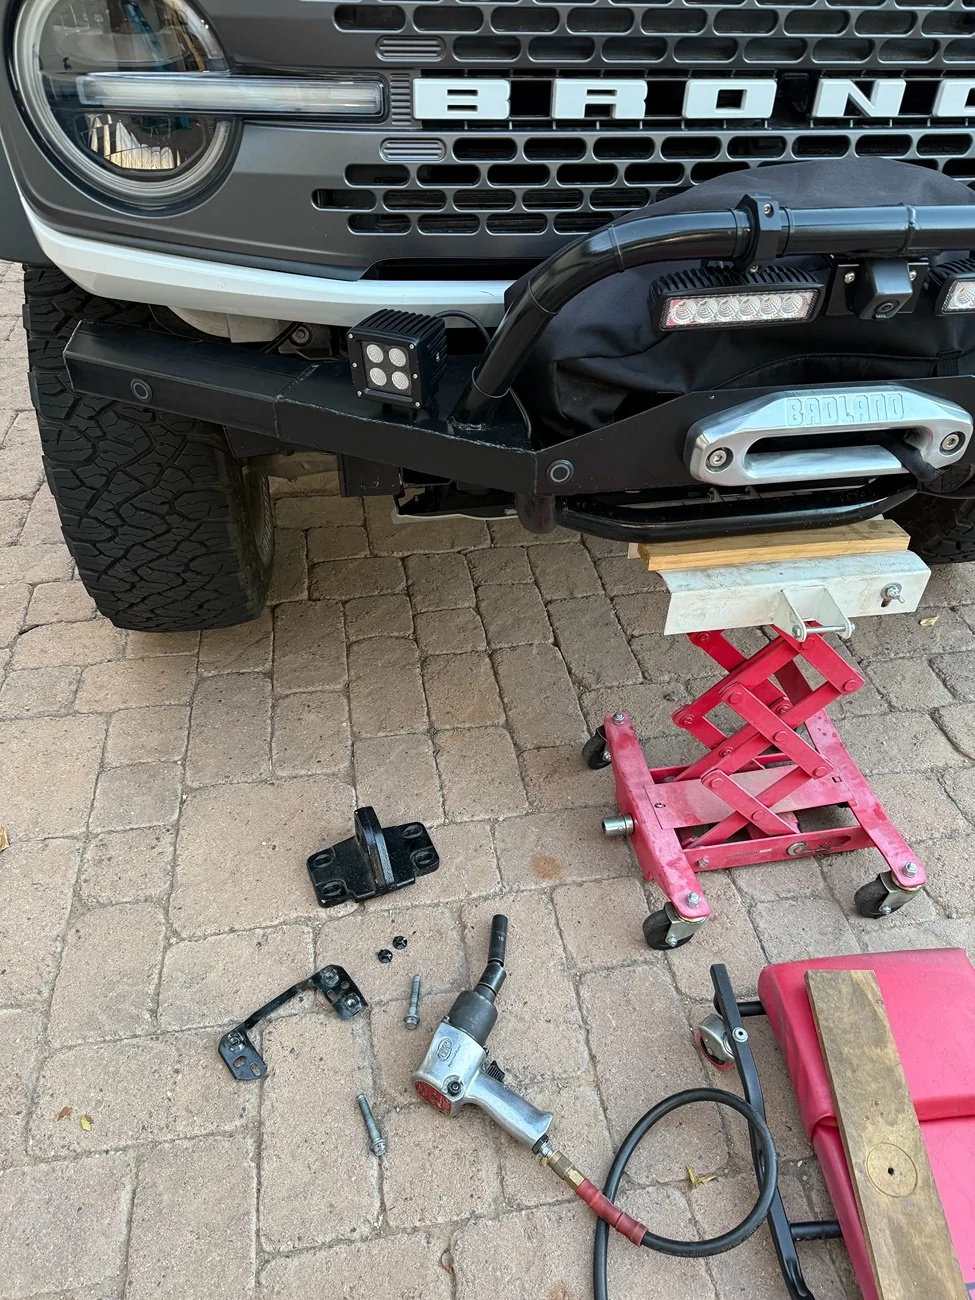
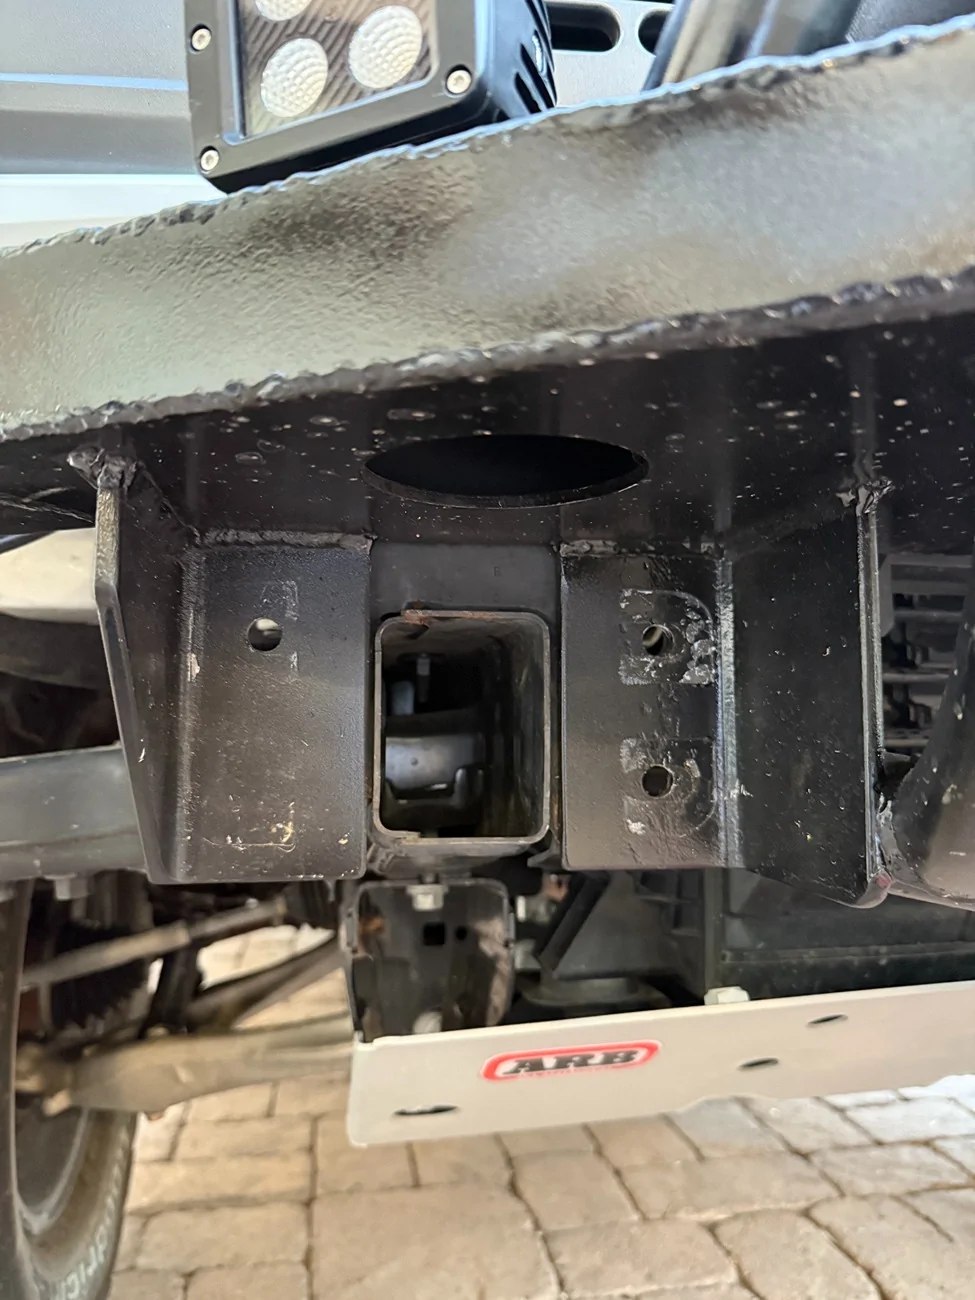
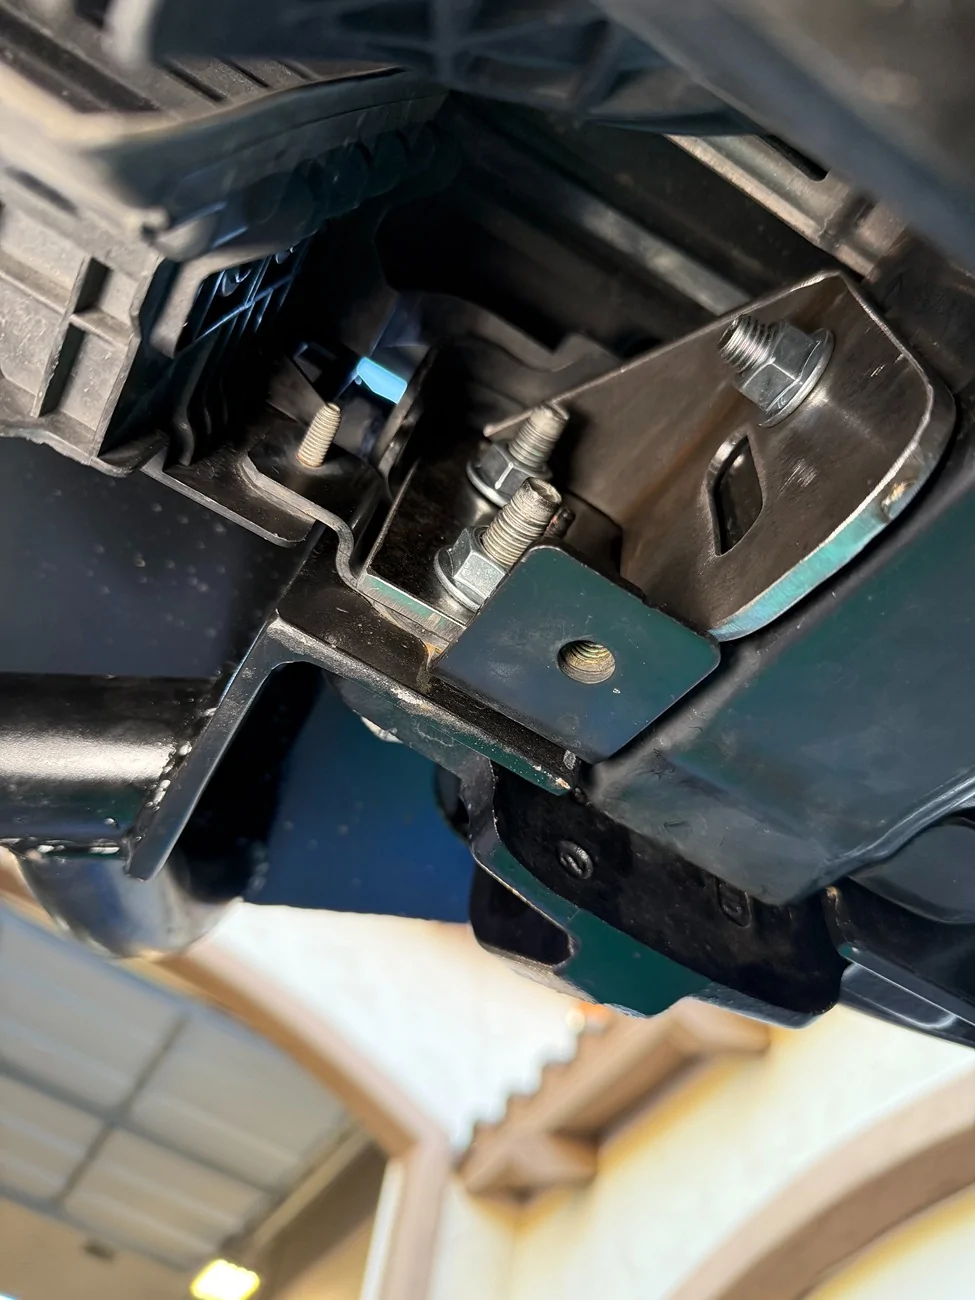
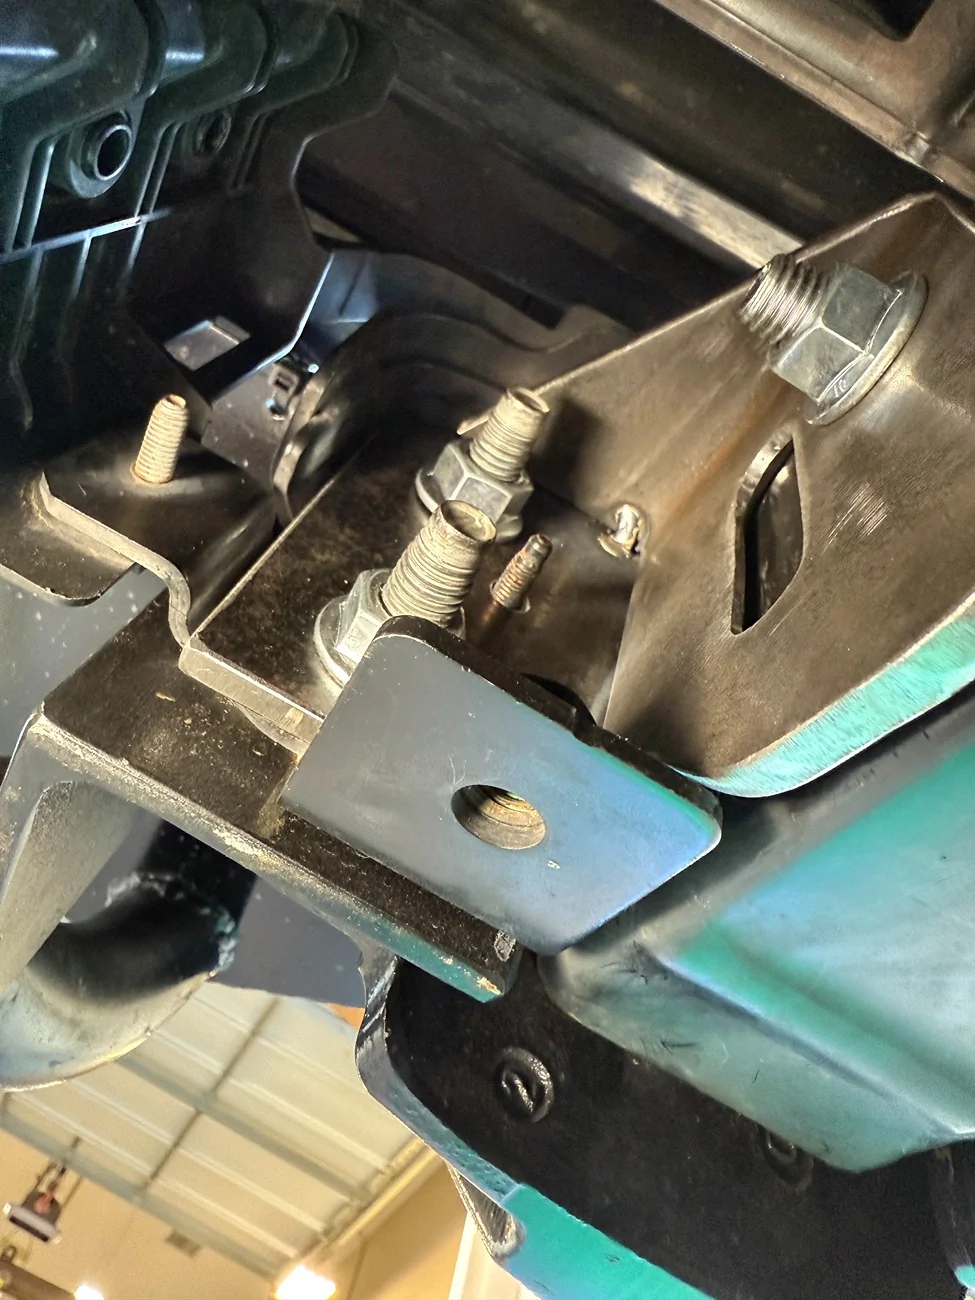
I started by pulling the tow point off and looking up the frame rail.

I'm pretty sure the stamped/embossed folds in the frame rails are crumple zones. Unfortunately there *IS* one that protrudes inward just inside of the weld to the flange surface. I'll have to work around that as I insert a support sleeve that the through-bolt goes into. No big deal. I'm basically defeating the crumple tech by reinforcing here anyhow. If I crash into anything hard enough that the frame would have crumpled, I"m sure I'll get a nice deceleration out of the winch passing through the radiator!
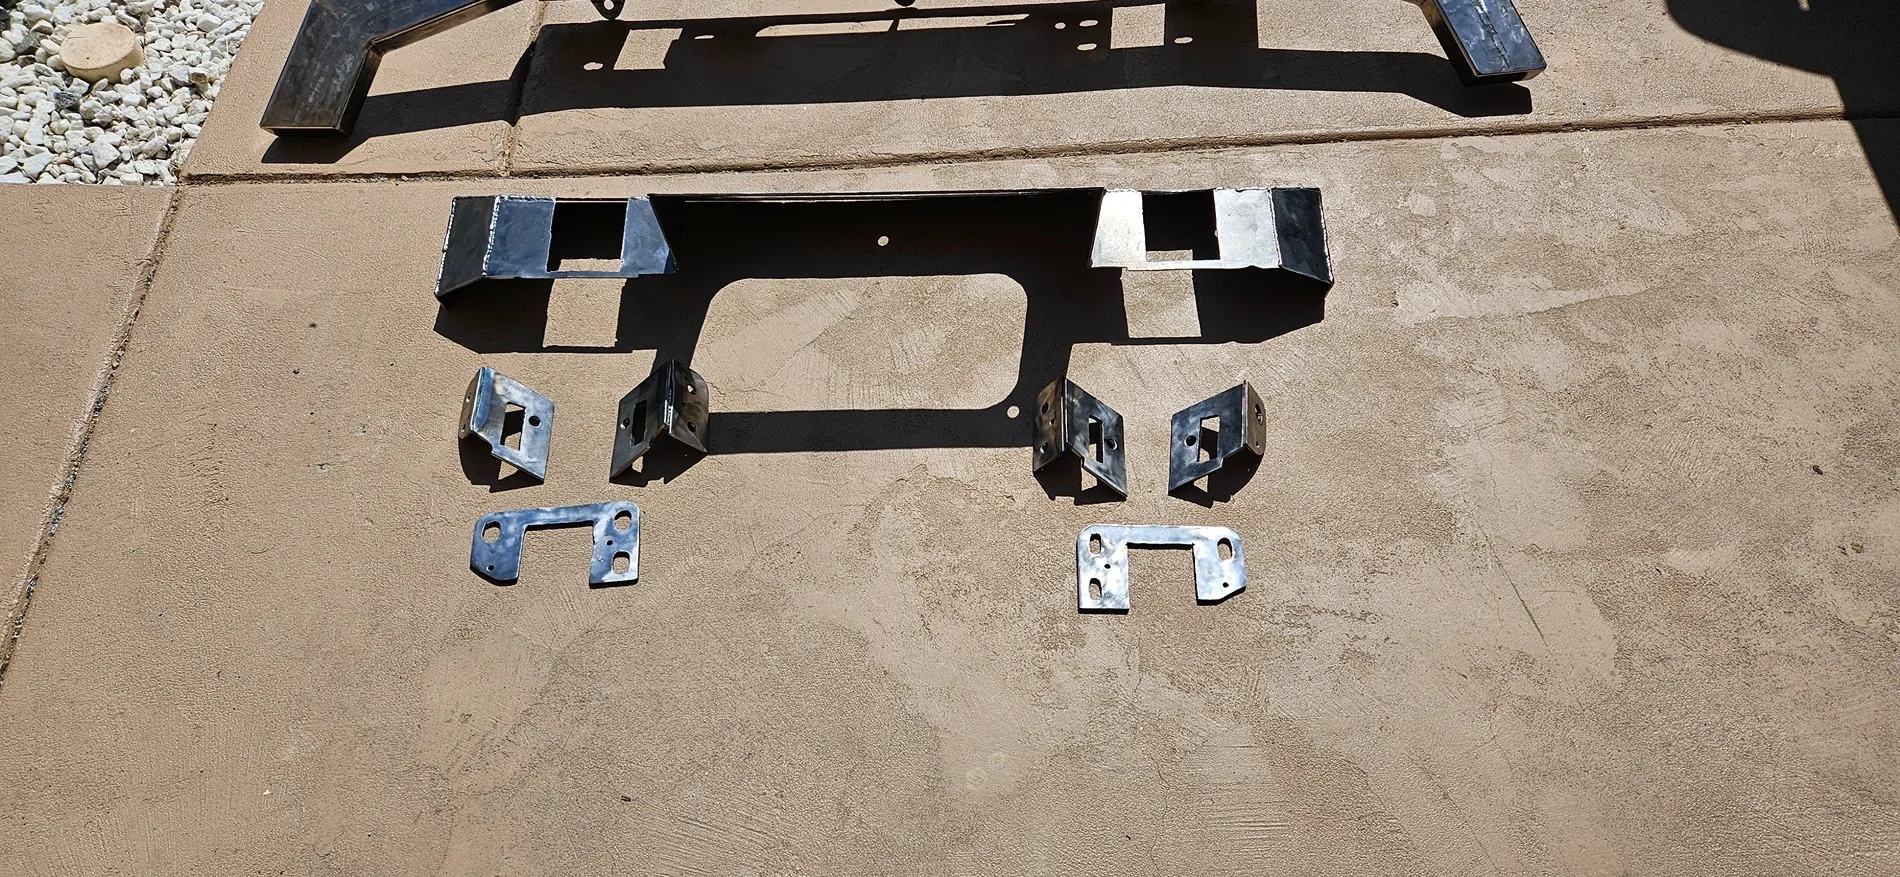
After laying on the creeper and staring at this from underneath for a while, I decided I can get this done with the bumper still on. I just have to do it in stages. First I cut out the pieces and fit them together on one side, then I copy the parts for doing the mirror image job on the other side. The bumper stays attached on at least one side the whole time.
Laparoscopic fabrication. Easy peasy.
So yesterday I got to work shaping and fitting and shaping and fitting and shaping and fitting... figuring things out is always the slowest part. The pace picks up later.
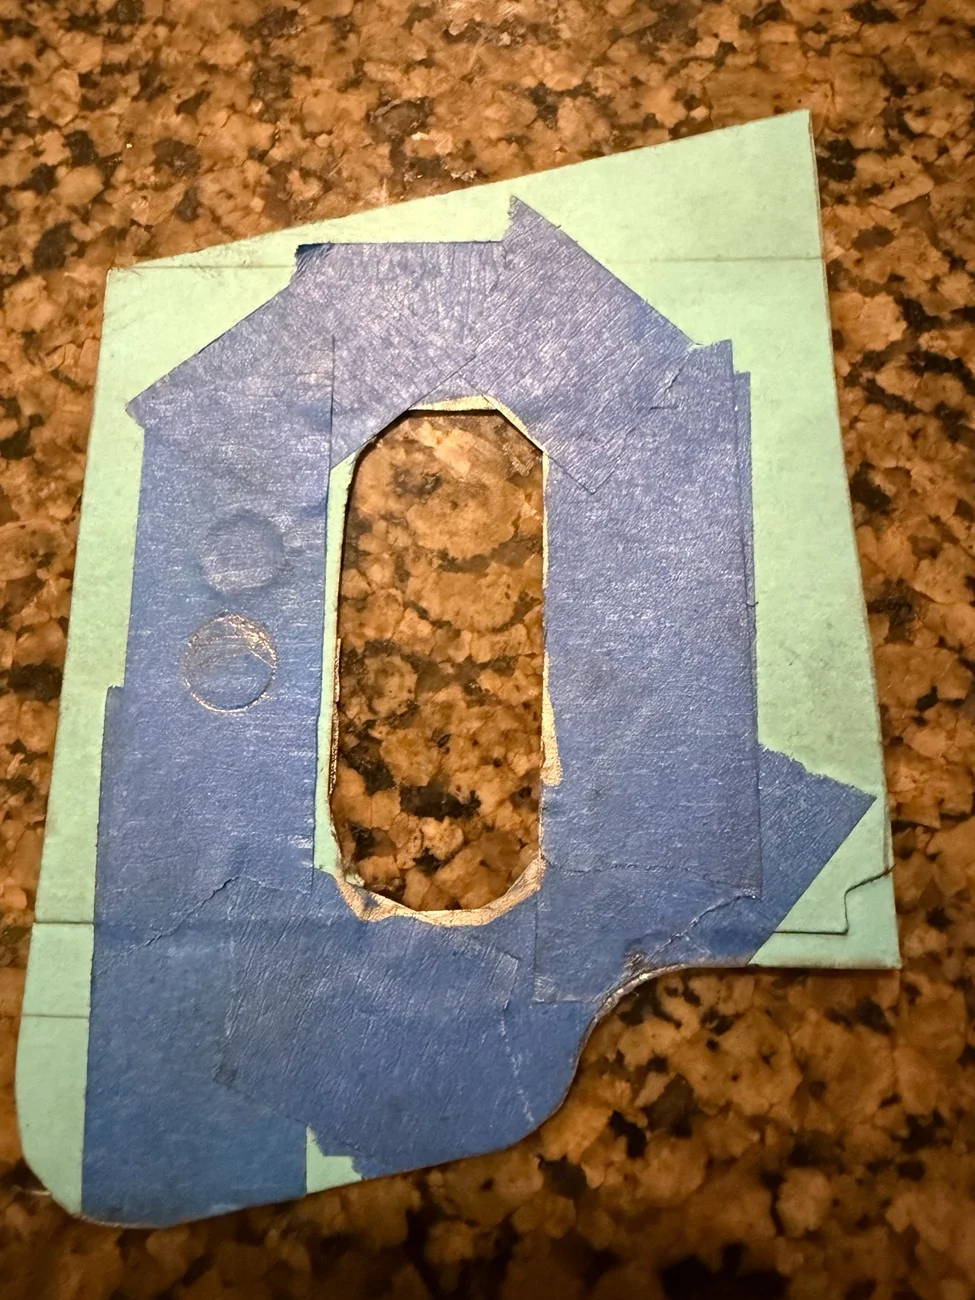
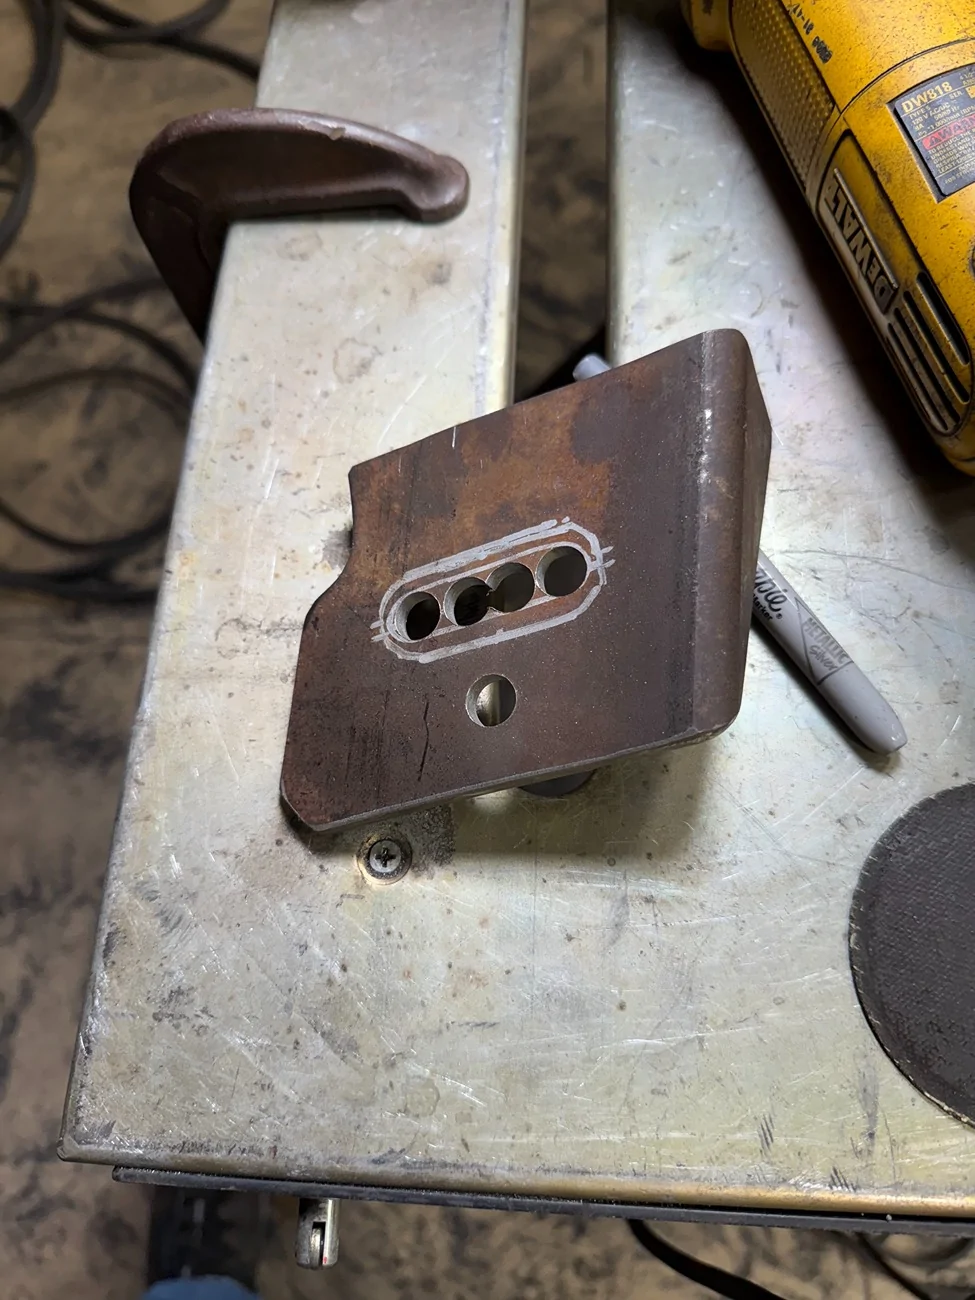
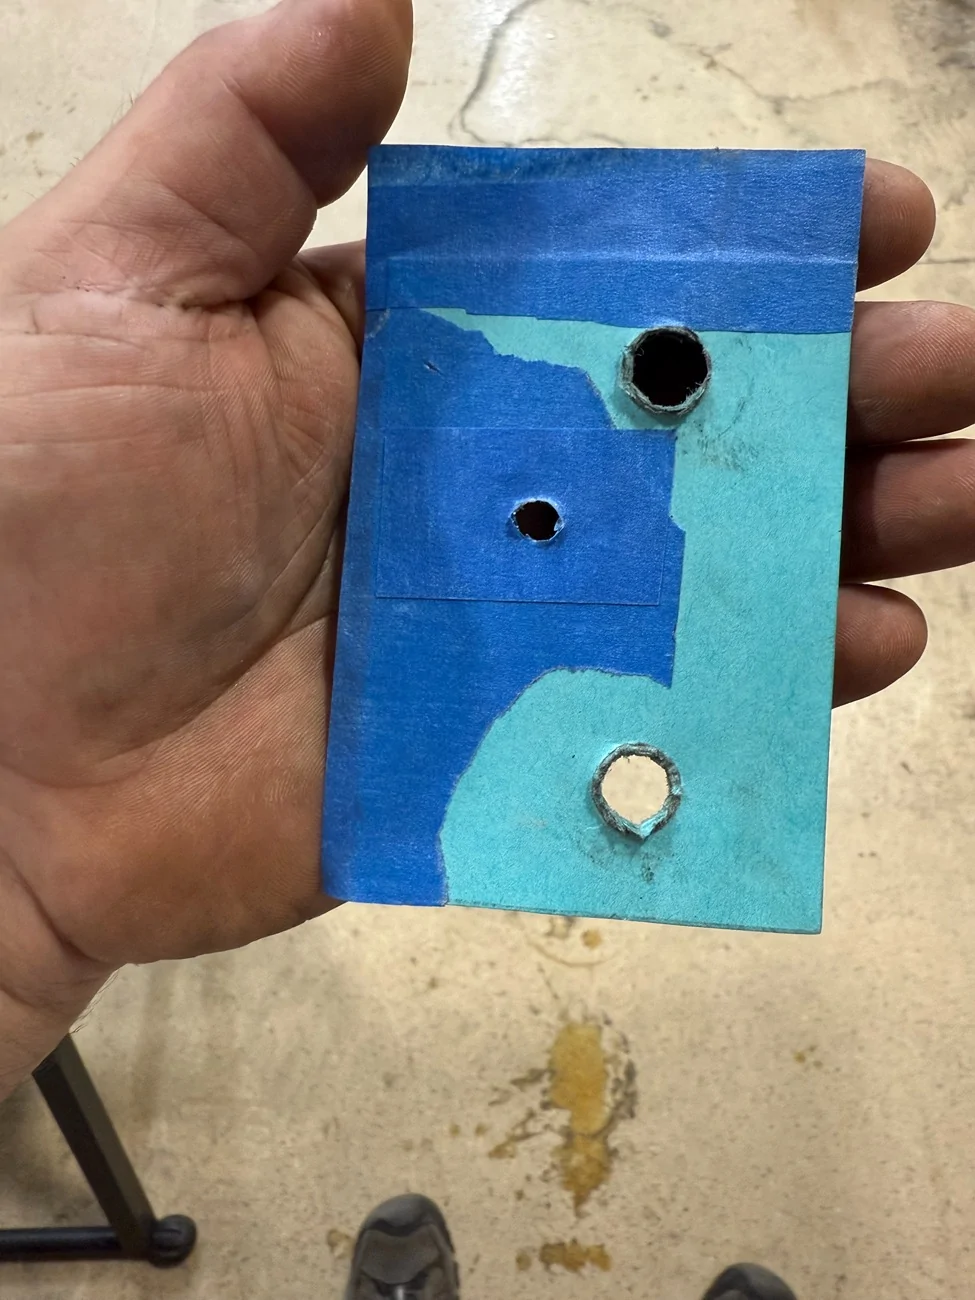
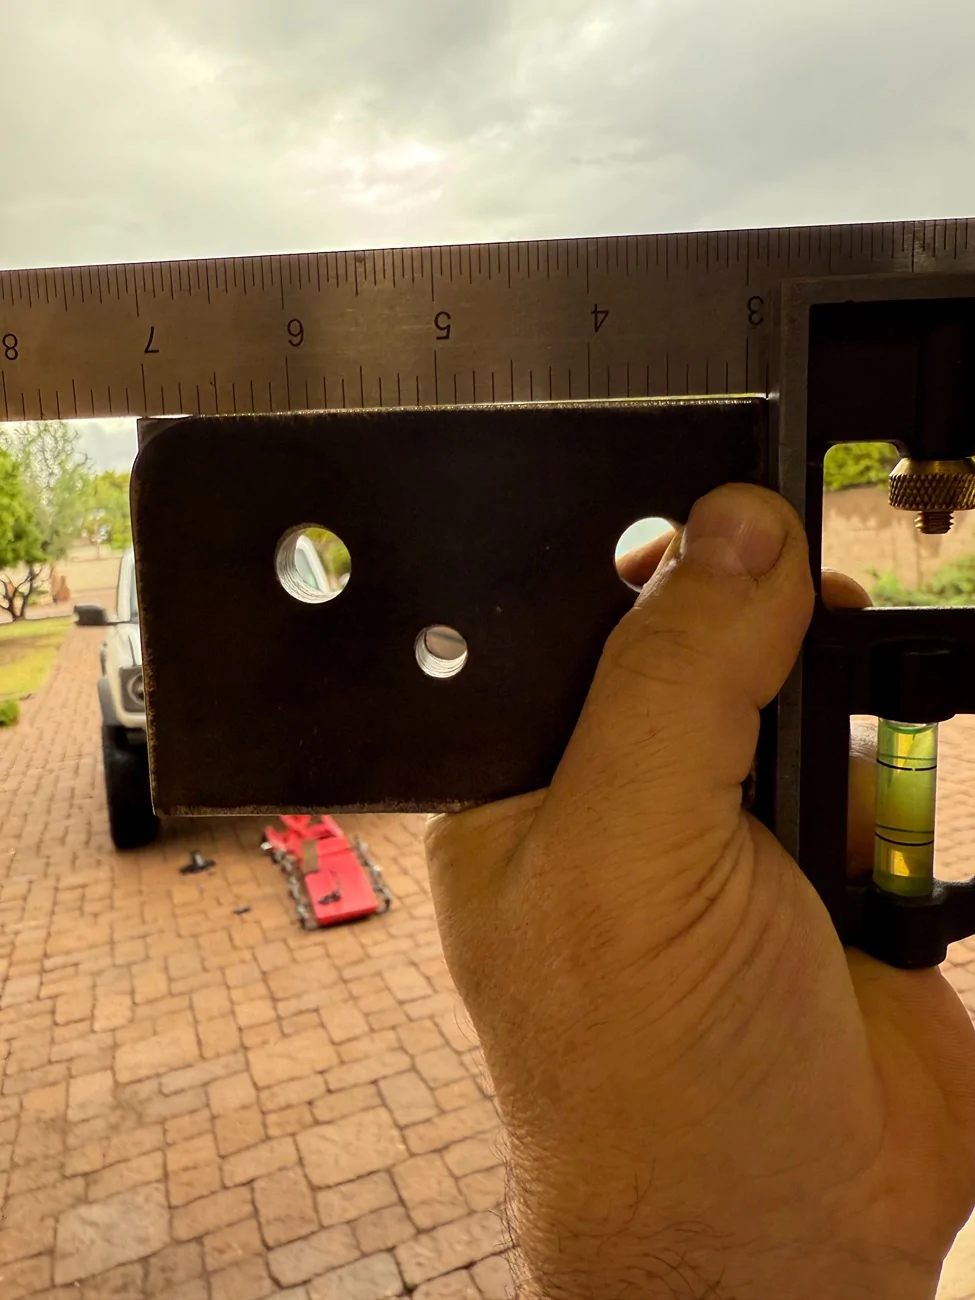
Here's how I get my drilled holes in metal parts to line up with existing bolt holes on the vehicle.
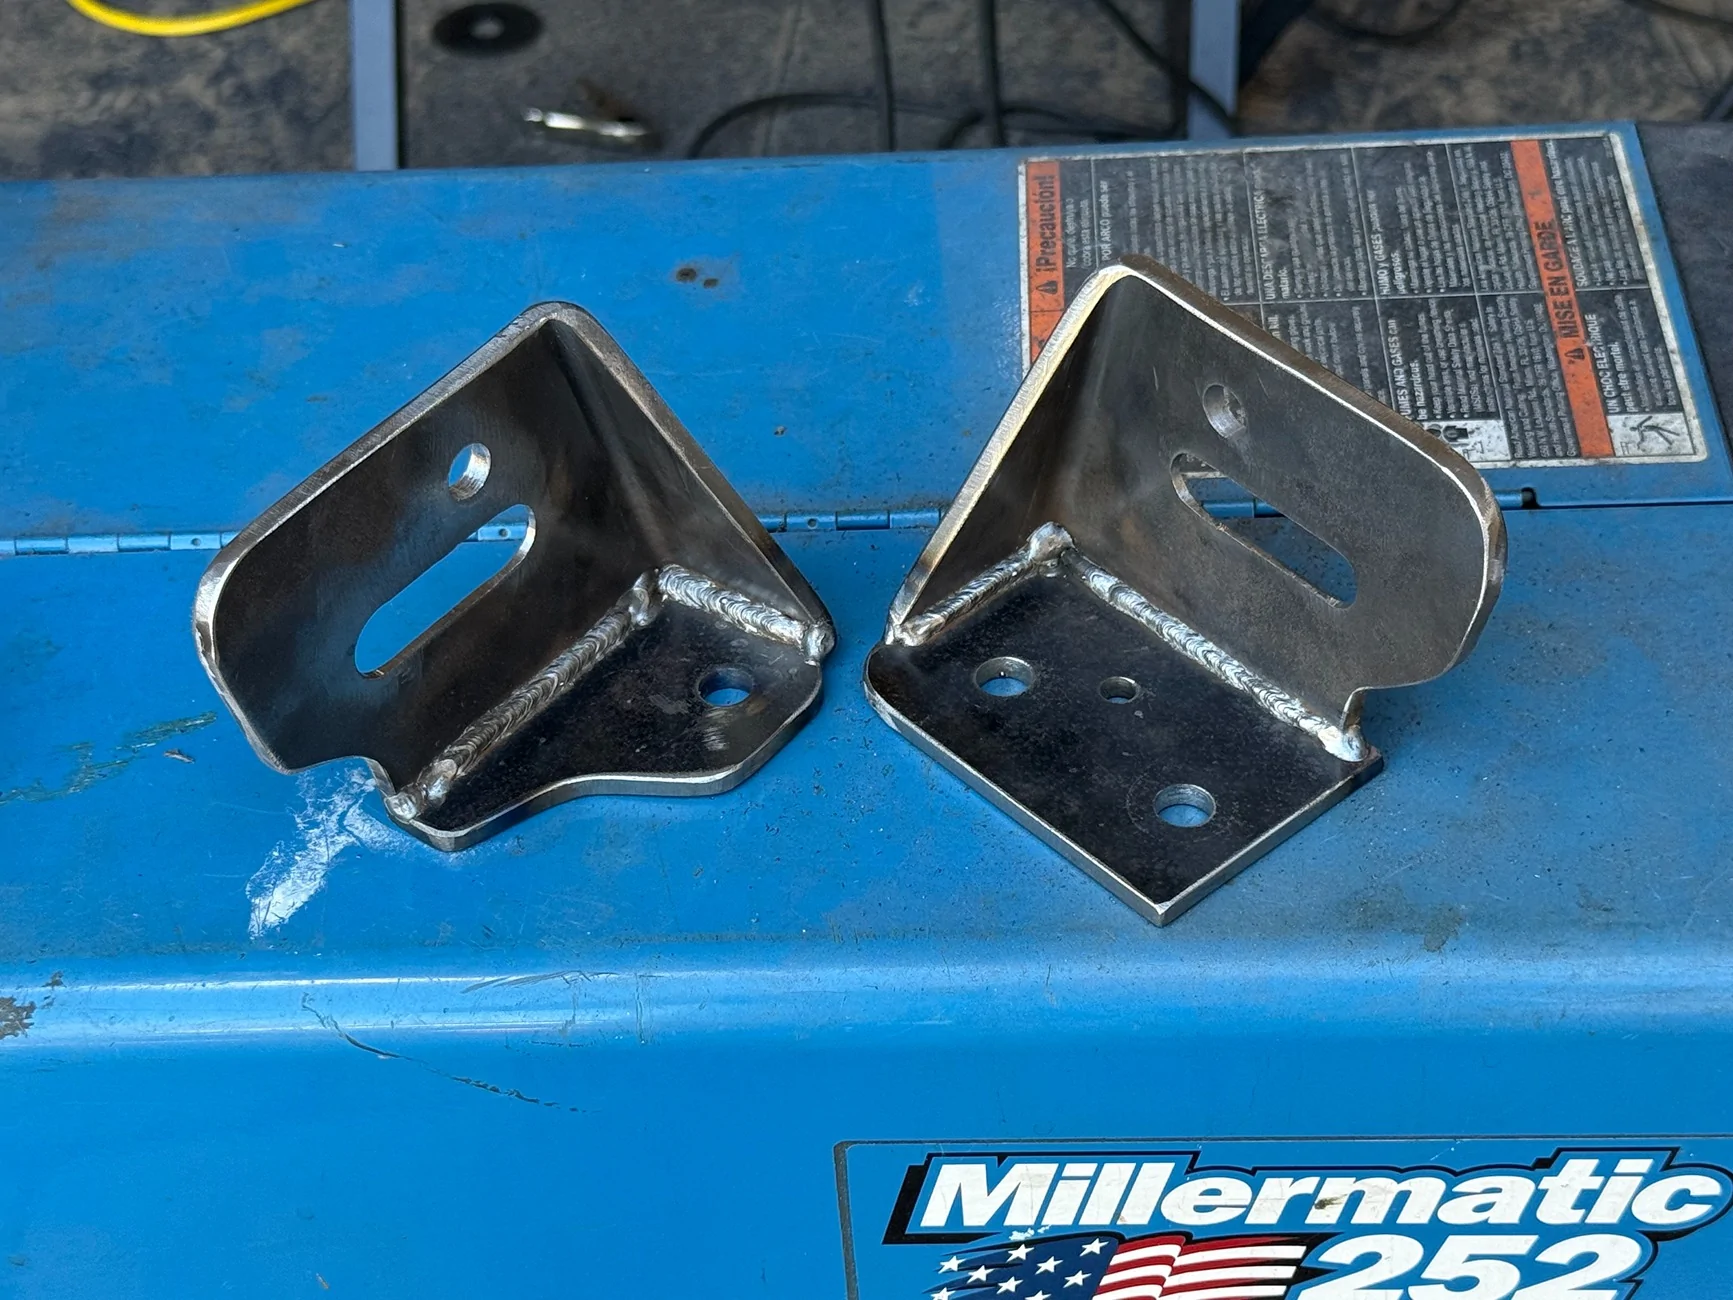
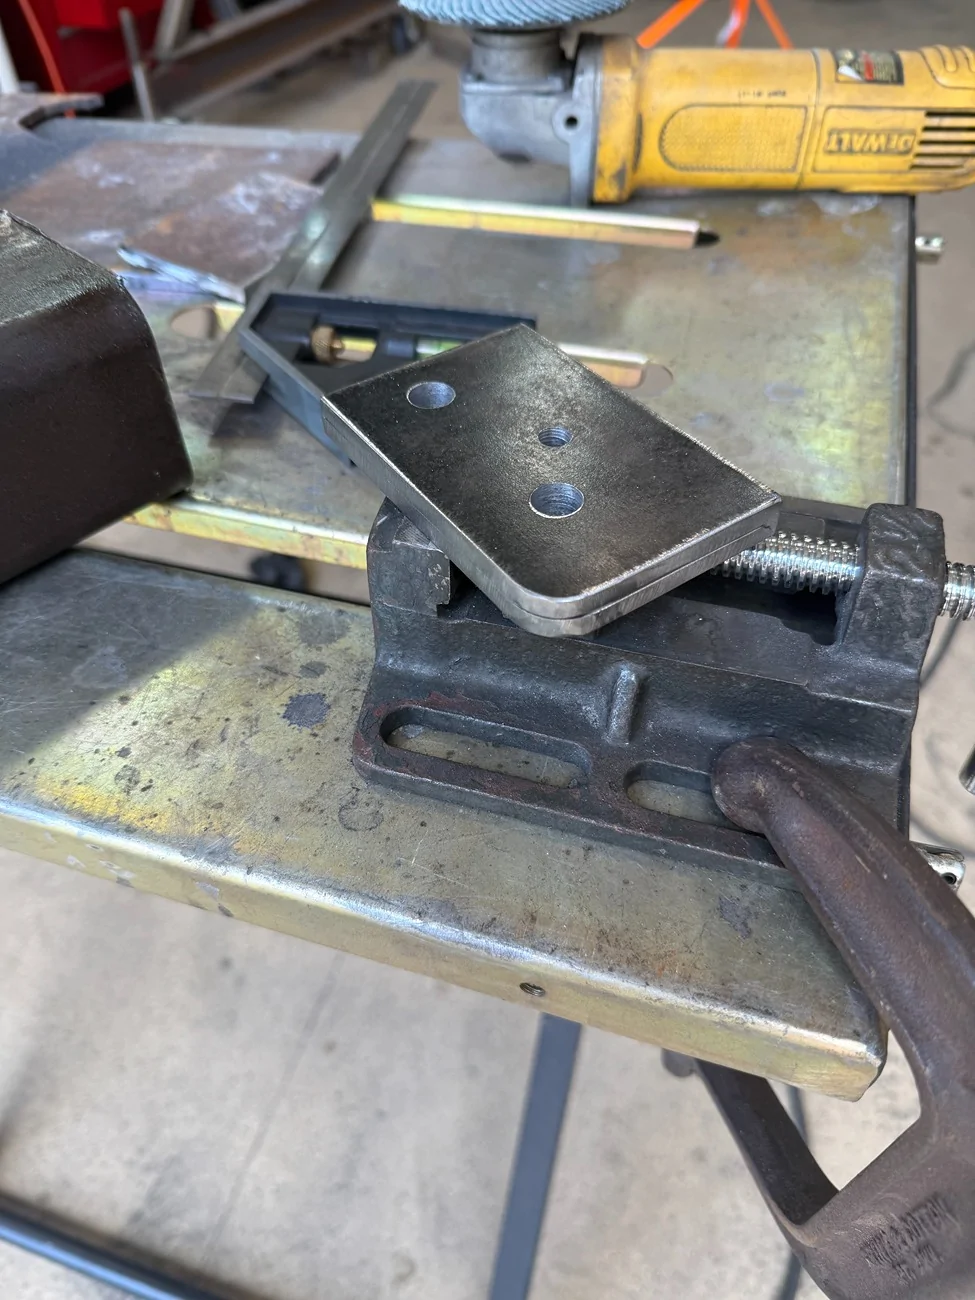
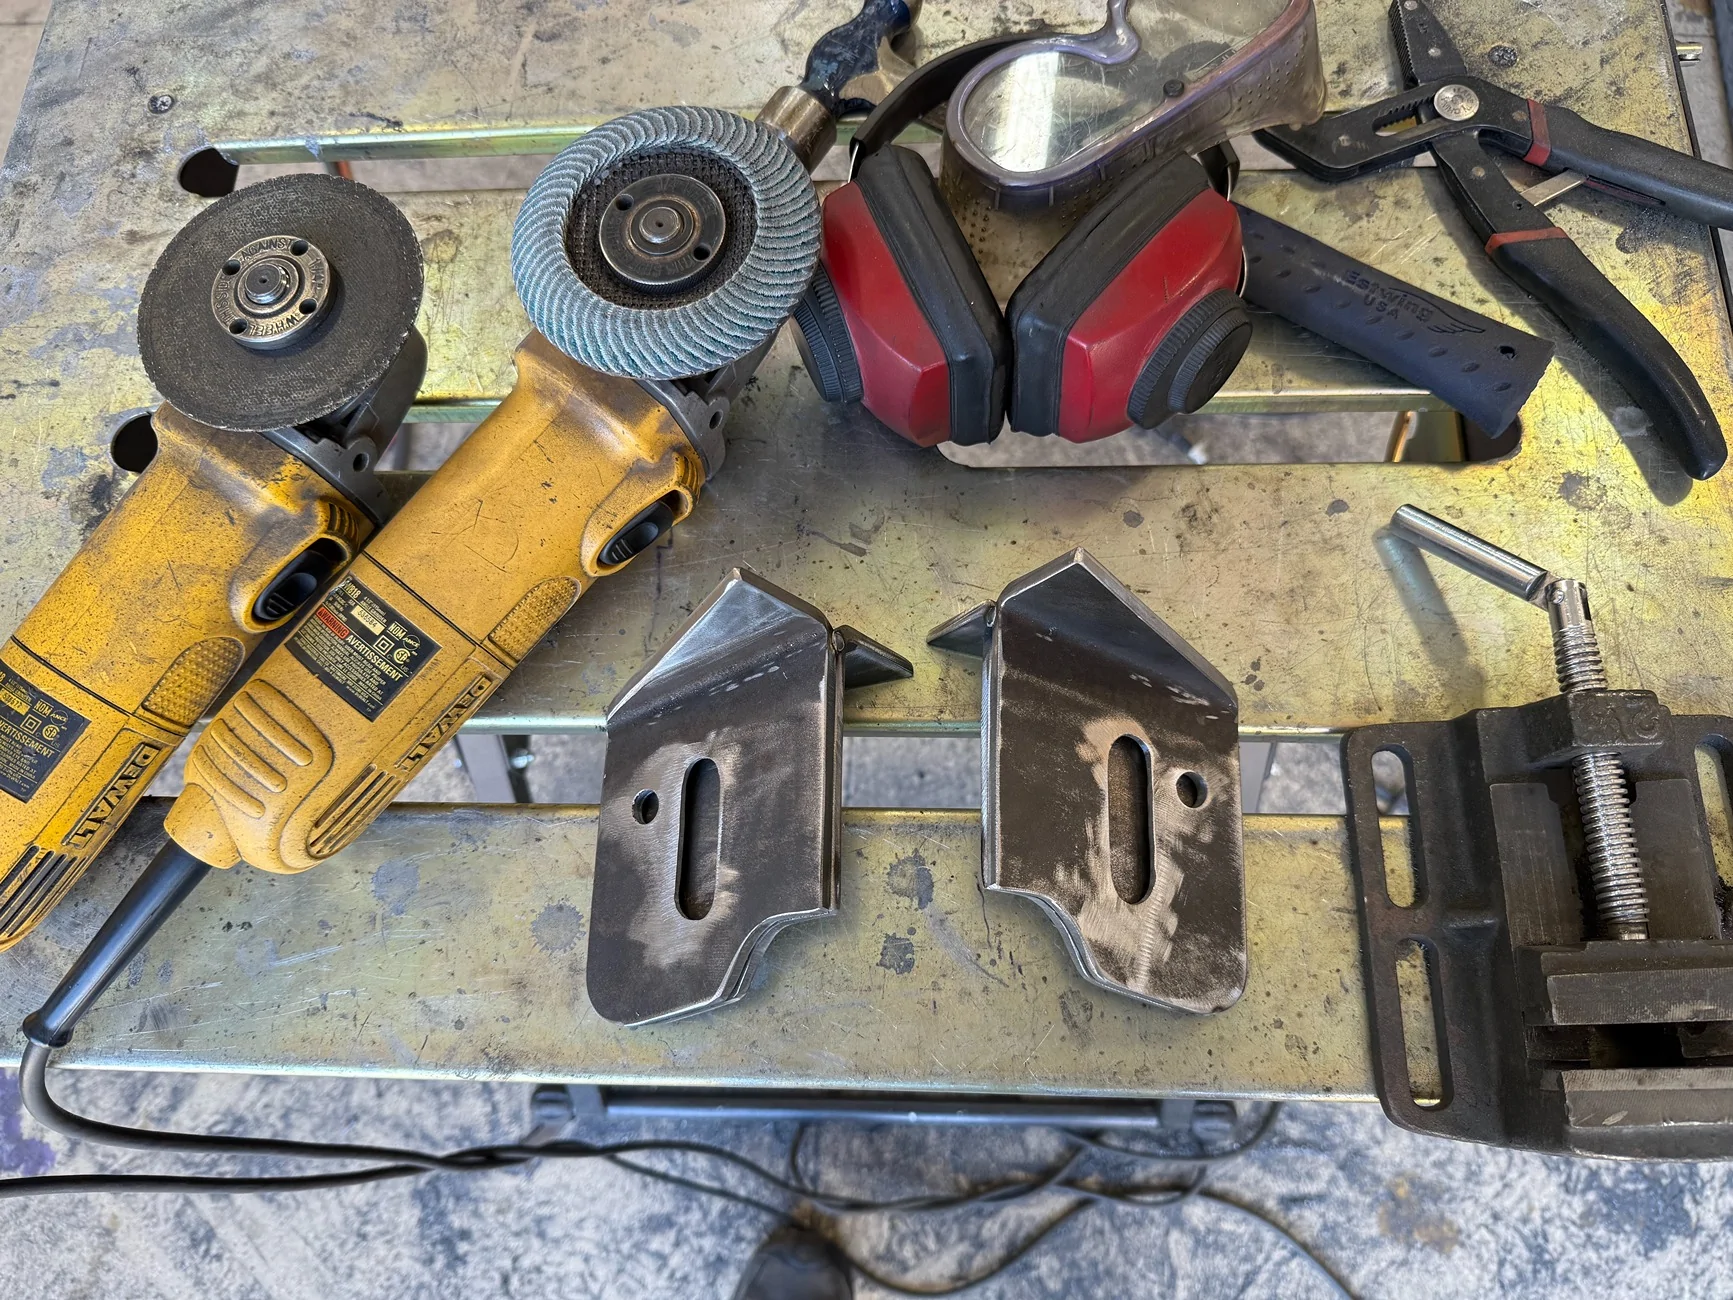
I tend to use this technique of making 2 parts at a time by tack welding them together and copying the shape and the hole pattern. Flip the second for a right/left mirror image copy.
Here's some secret sauce...
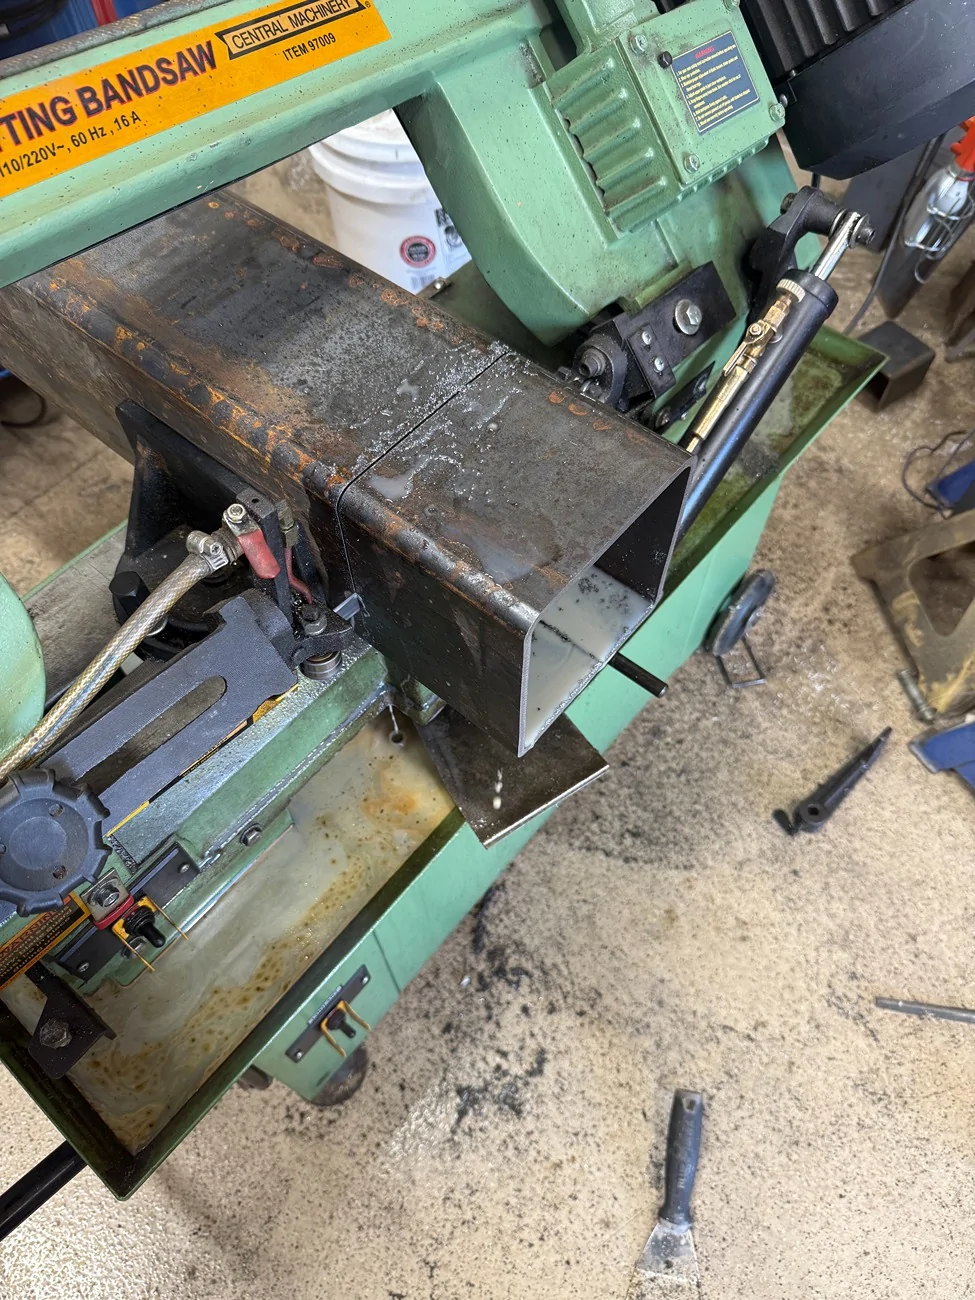
When I got this HF band saw, I did *NOT* know that I would use it as much as I do. I needed to cut some I-beams to build my garage loft, but it is by far my most accurately square cutting tool. Now, I use it a LOT. It's changed my technique.
Here, I'm cutting a 5" section of 6x6" .250 wall square tube. I'm using it to have pre-established 90 degree bends in my part, rather than cut 1/4" plate and then bend it in my press. Another option would be .250 wall angle iron but the largest piece I have is only 4x4", and I would need it to be at least 5-by to cut the part that I want. Besides... I like the rounded corner of the tube better than the hard edge in extruded angle iron.
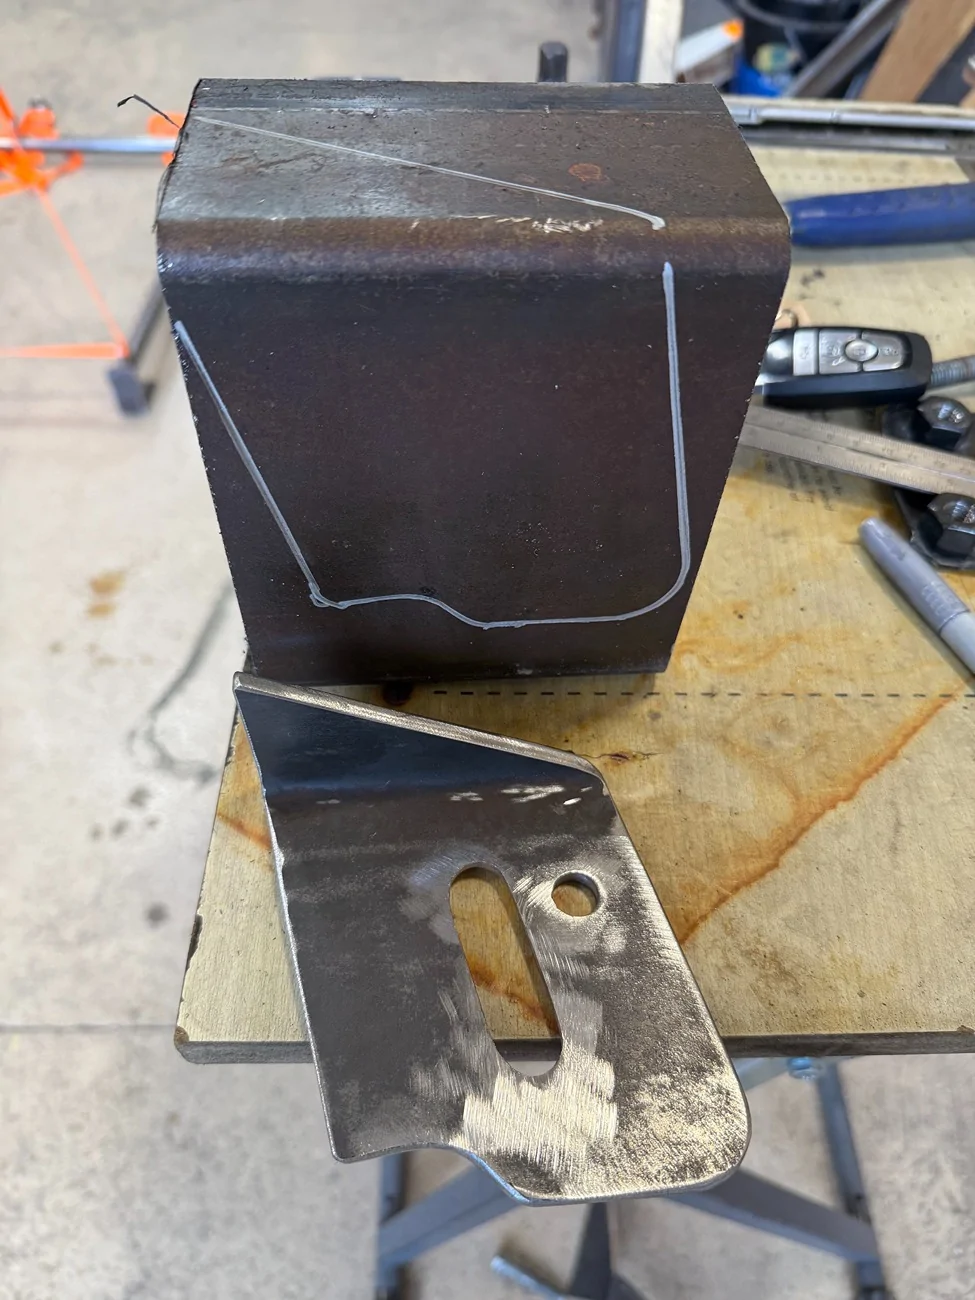
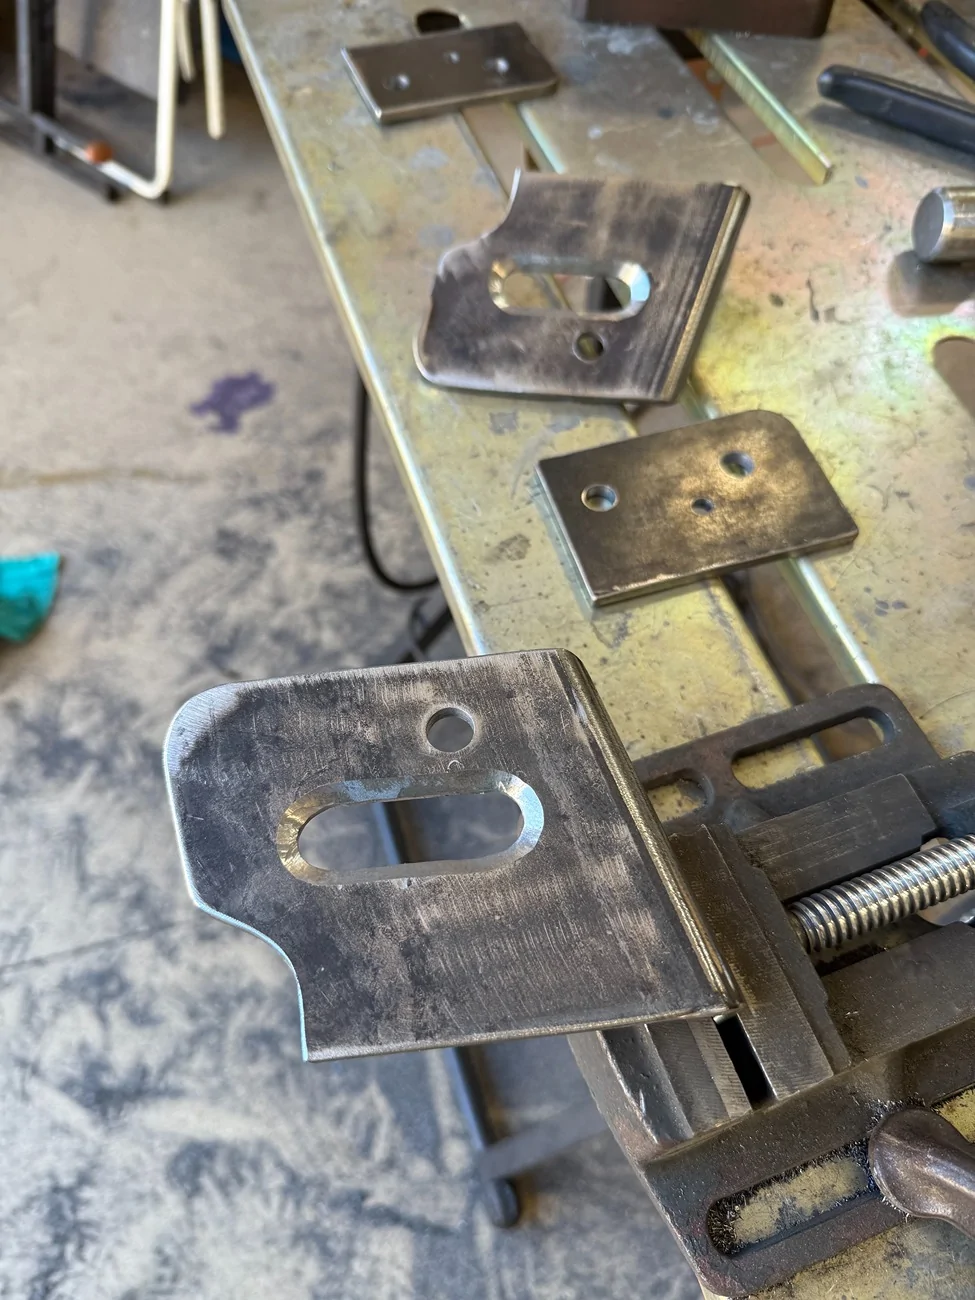
With the section of tube, I can cut out parts like this:
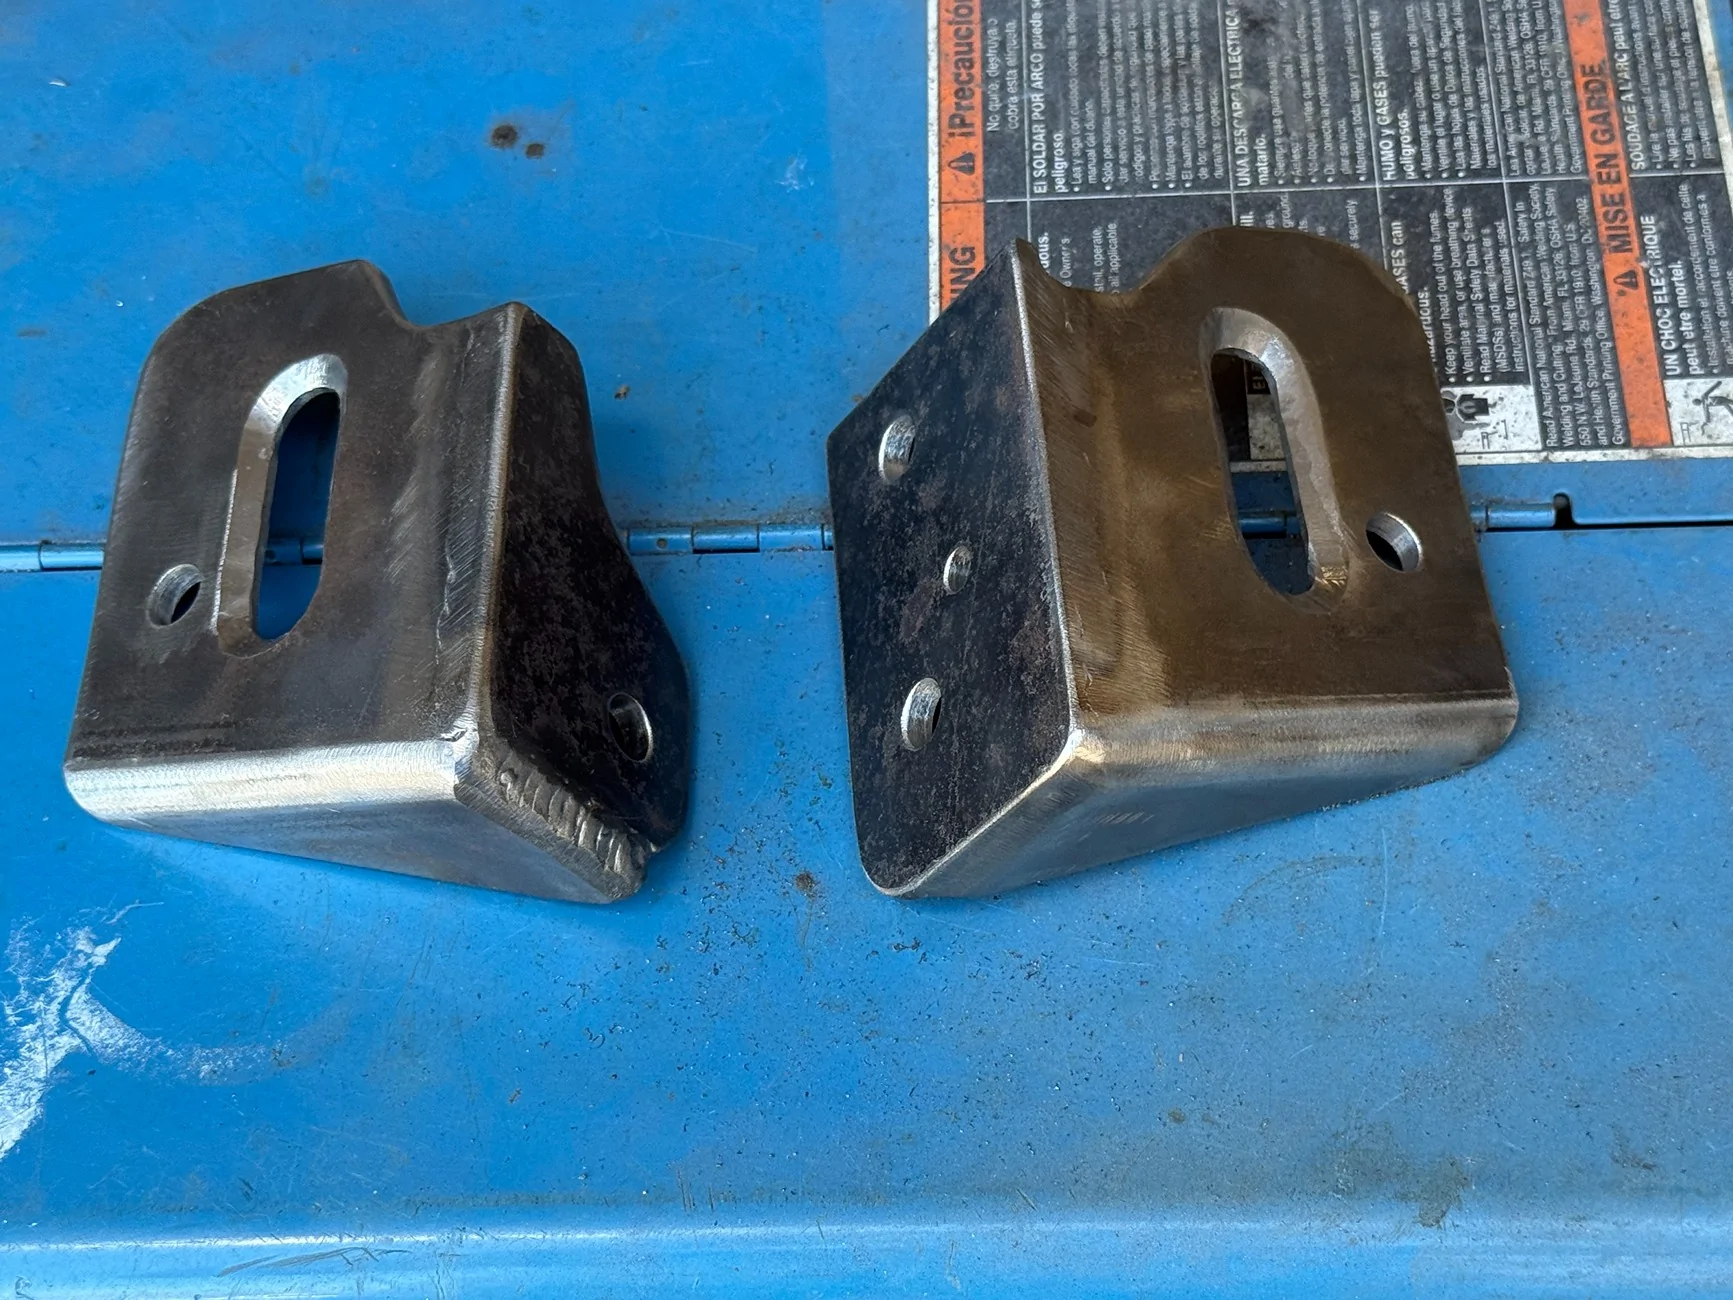
You can see another grinding effect here. I've hogged out the metal in the shape of the crumples, first by using the drill press to make a series of half inch holes, and then with a die grinder to expand it to the full shape. I'm trying to preserve as much metal as I can between the bolt hole and the oval opening.
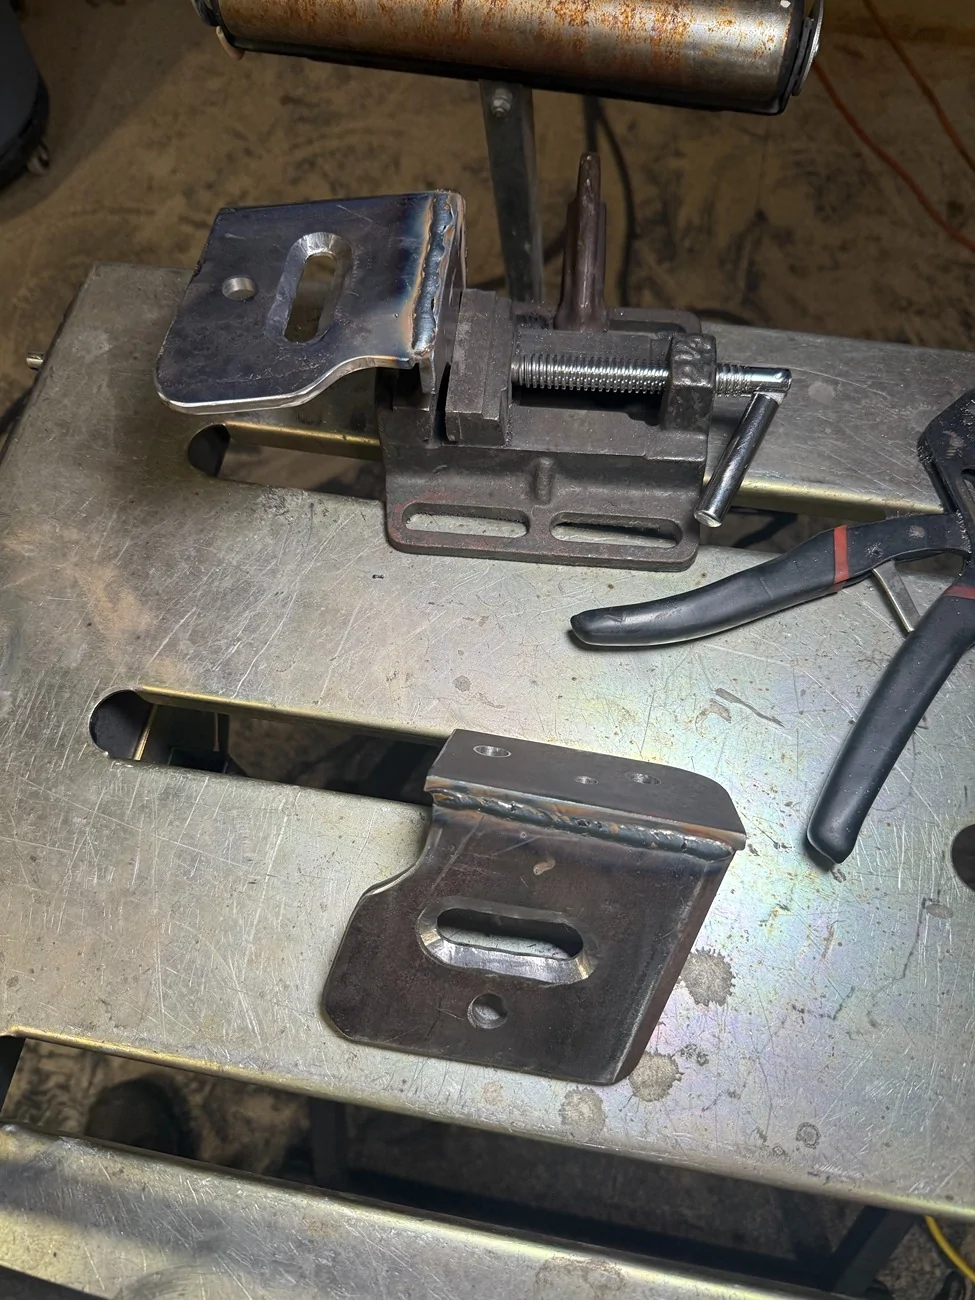
And then, having made a pair of right/left, I tack weld them back to back with blanks, copy the holes and 2 becomes 4.

After a day of crawling in and out from under the Bronco, having test-fit my parts an uncountable number of times, I've got a plan for bolting the parts in, tack welding them together on the frame (so the holes line up perfectly), and then extracting the tack welded assemblies for final welds.
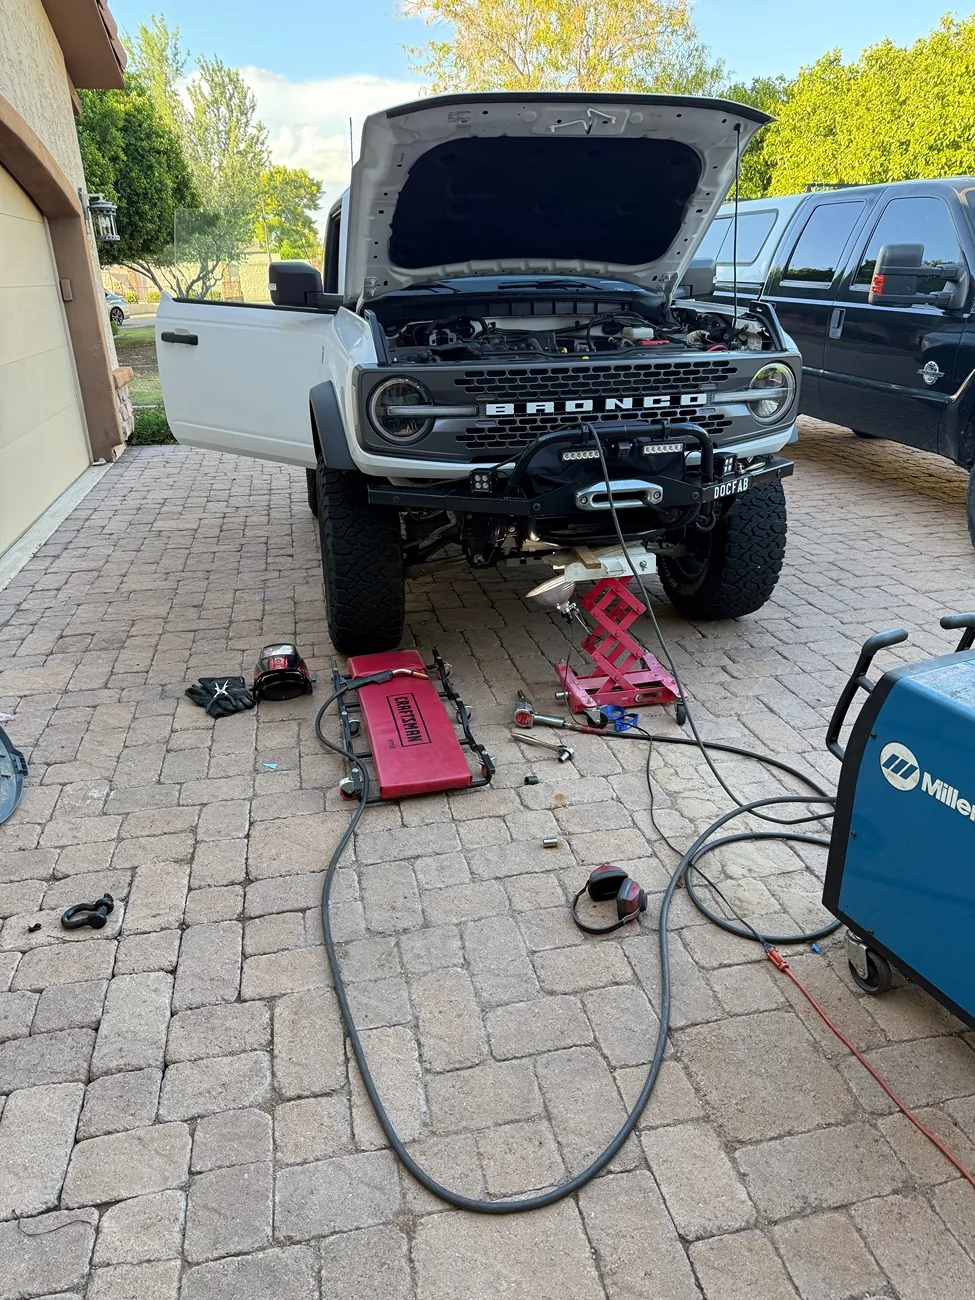
Set up is everything:
Here, I've already figured out where my light has to be, where my cables have to be, where my HANDS go, so that I can see, and I've got a plan for how to get into position without knocking everything over. The wind is zero. My battery negative lead has been disconnected and shoved into an old welding glove.
Here's the view I can get from my working position:
Done!
I got the complete brackets welded for passenger's side, but came in for dinner without pics. Tomorrow after work they'll go on unpainted, and the driver's side will get fitted/tacked/welded. The driver's side will get a coat of spray paint and wait a day before assembly. Then the passenger's side will get painted before re-assembly.