
Sponsored

TGO - The Overlander Build

OP
OP
emulous74

emulous74

Badlands
Well-Known Member
First Name
Seth
Joined
Dec 25, 2020
Threads
7
Messages
419
Reaction score
731
Location
Austin, TX (Pflugerville)
Vehicle(s)
'19 ZR2 Bison D , '23 Bronco 2DR, MT
Your Bronco Model
Badlands
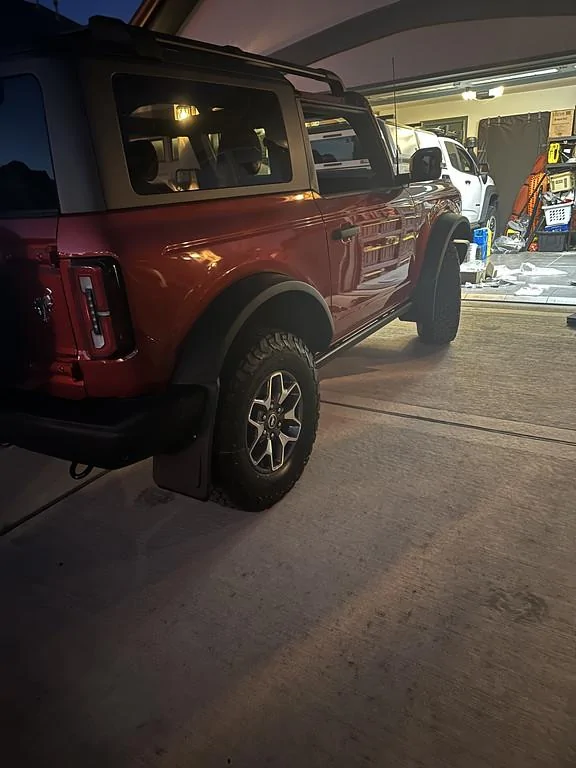
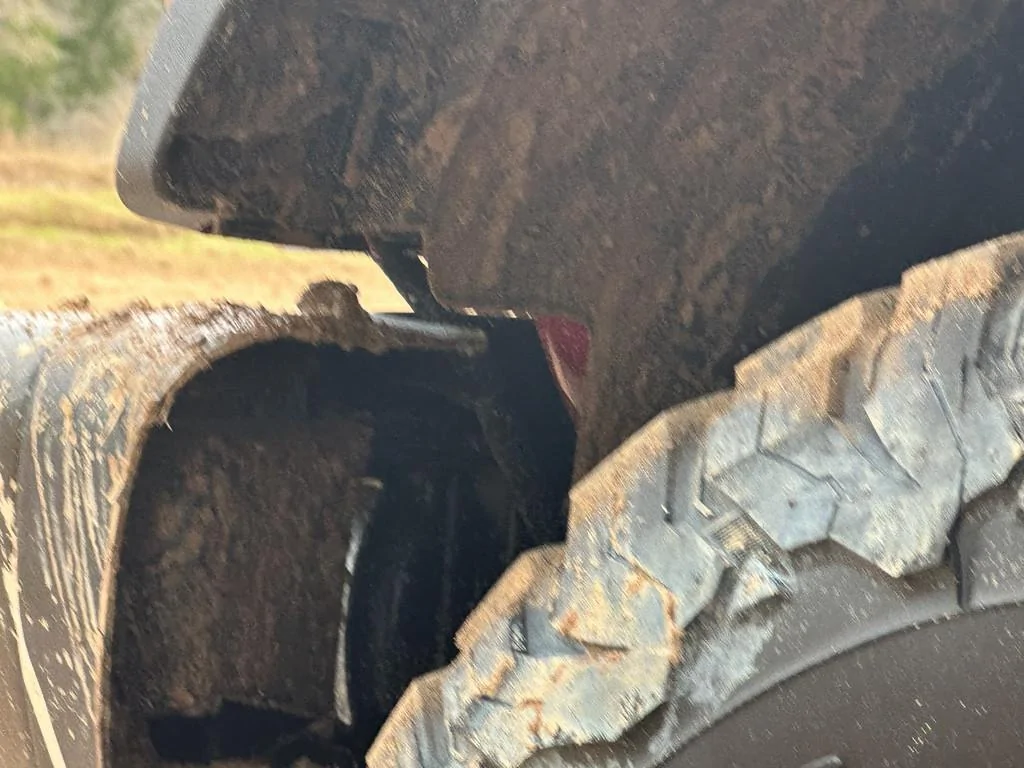
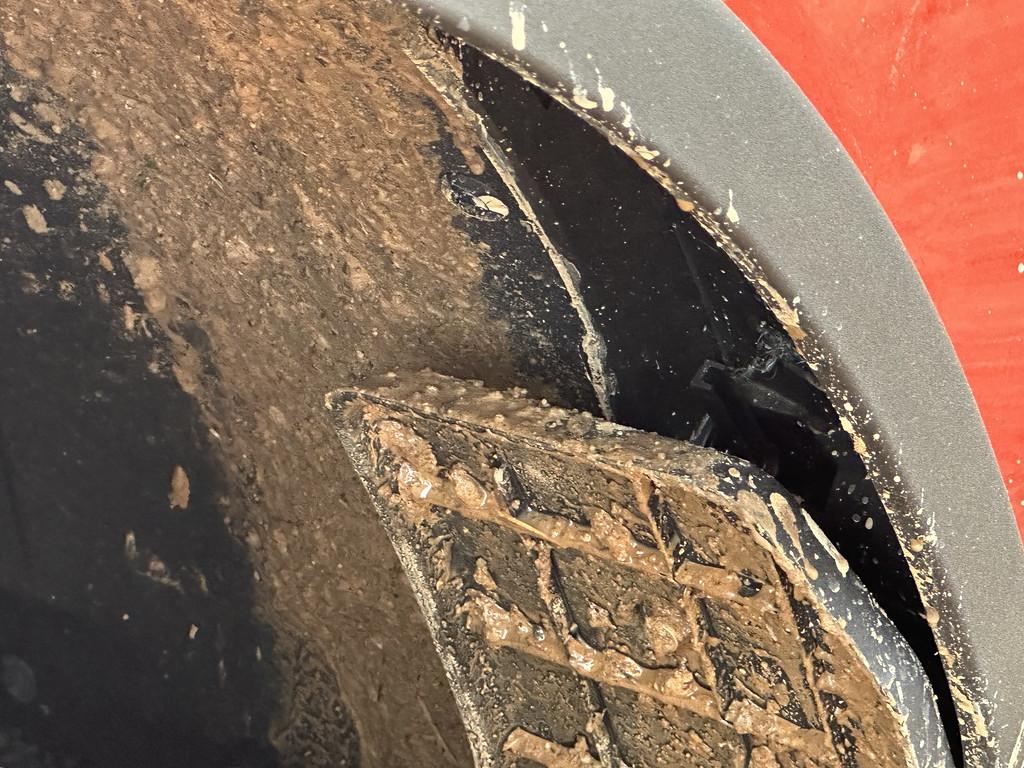
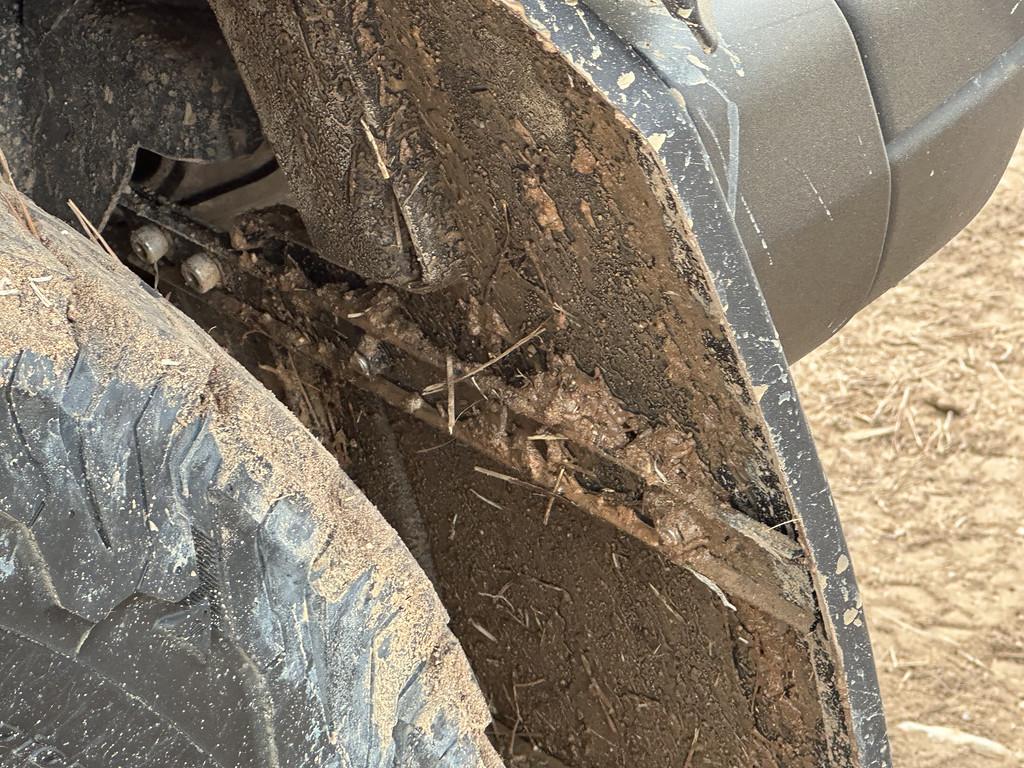
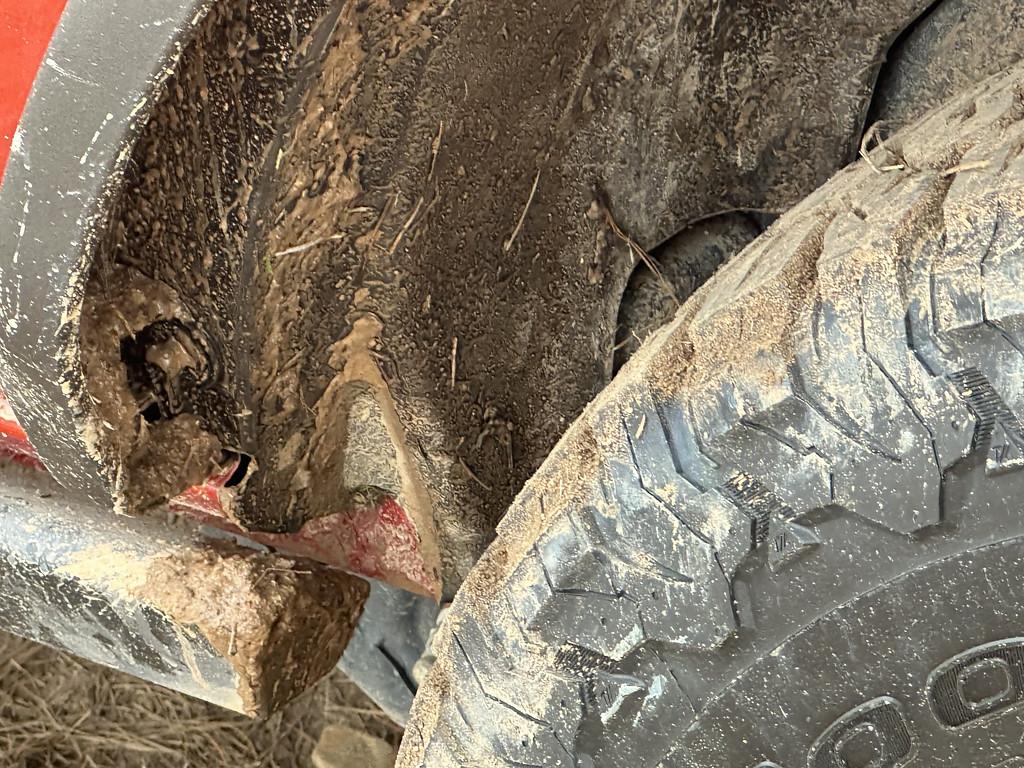
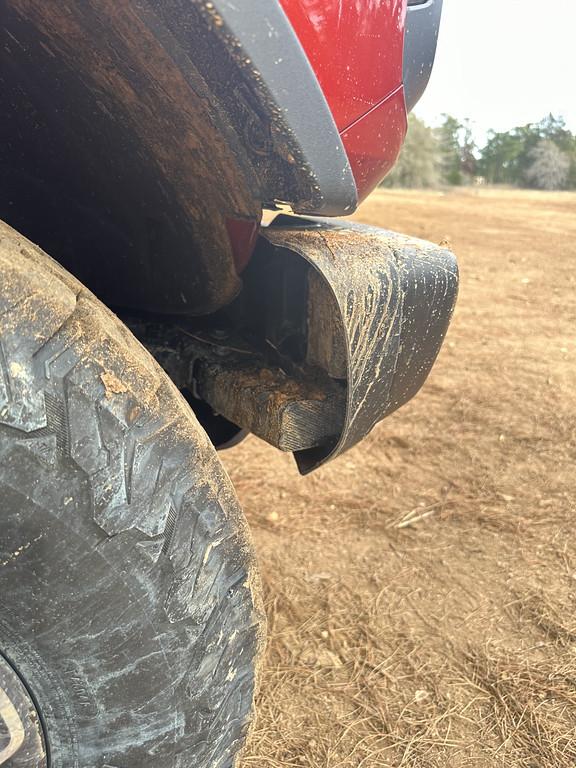
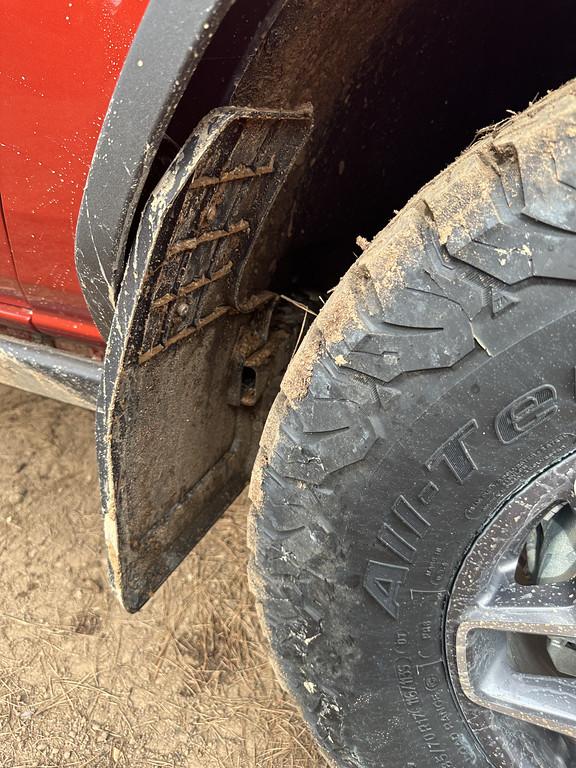
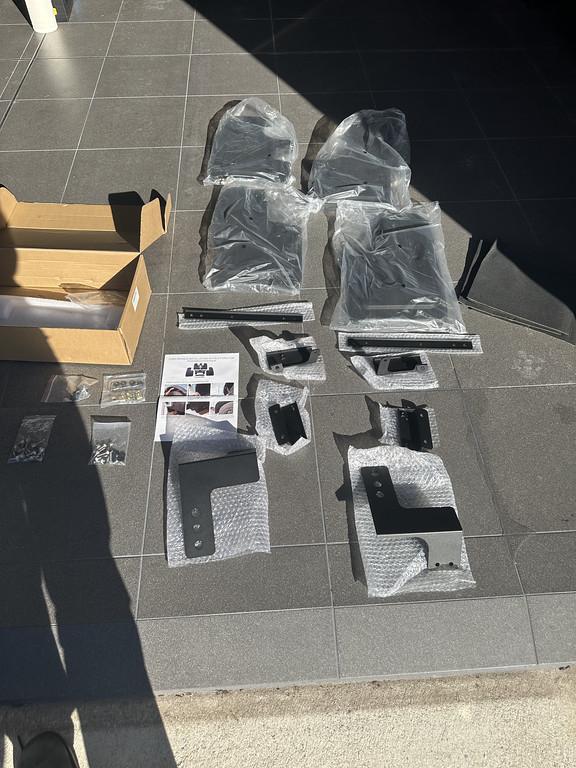
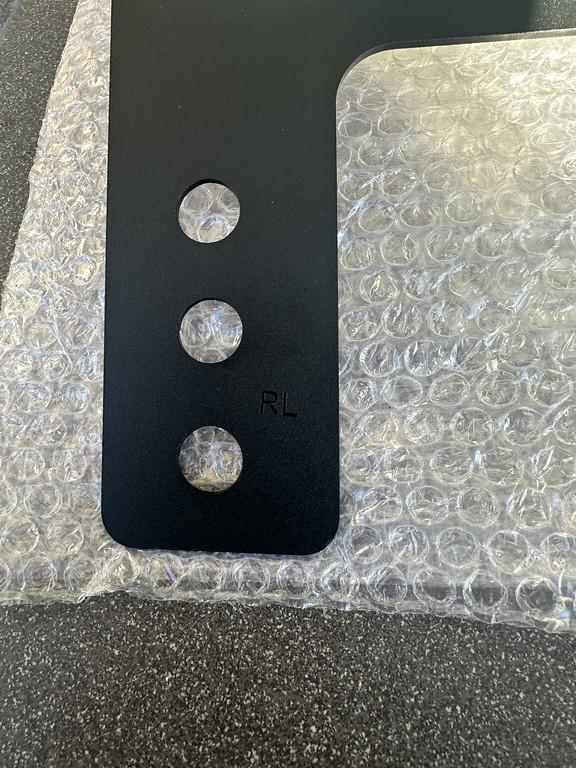
Mabett Mudflaps installed today. I really wanted to the Rockblokz but I have a habit of ripping off mudflaps when 4x4ing, so I like that you can easily remove them, but a $420.00 (XL/Long) I couldn't justify that price, especially when it leaves a gap in the rear. Enter Mabett, I picked up the set of 4 for $129.00, I can see the engineering that went into them and the pieces (and there are many) are well made, nicely marked, the cover the area decently and they do make the Sasquatch fenders over 33's look better. The biggest dislike is the flaps themselves aren't that nice, they aren't bad, they are just a bit cheap looking. I've have Rockblokz for my Bison, but they were half the price then what they are charging for the Bronco.

The bad is the instructions are limited and wrong. I knew this right off as I read the directions last night and they said to remove the trailer hitch for the rears. Why the hell would I have to remove my trailer hitch to install mudflaps? Luckily there are plenty of YouTube videos that folks have done for their Broncos. It still took about 3 hours to get all four installed. I think Ford forgot about mudflaps when designing the Bronco.

Ford Bronco TGO - The Overlander Build IMG_0835-XL


Ford Bronco TGO - The Overlander Build IMG_0836-XL


Ford Bronco TGO - The Overlander Build IMG_0844-XL


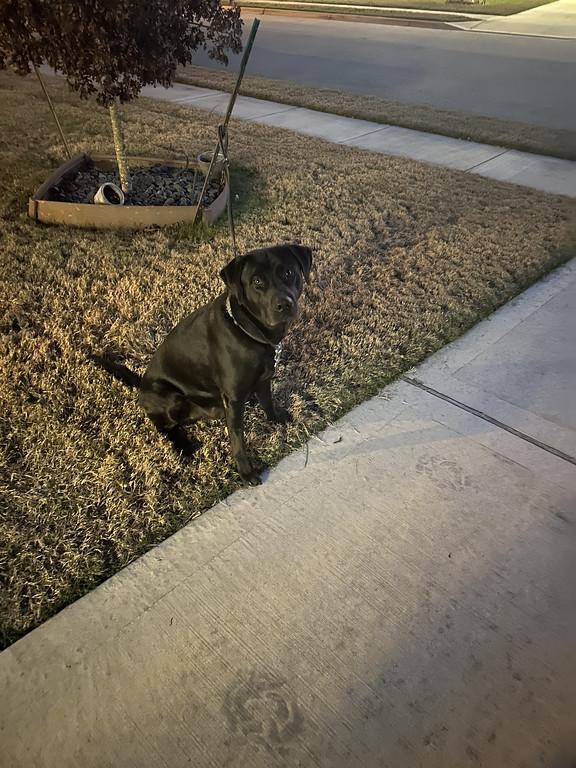
And here is my helper, he's a pandemic puppy, now 2 years old and full of energy, his name is Jackson and he's supposedly a mix between a Silver Lab and Blue Leopard Catahoula:

Ford Bronco TGO - The Overlander Build IMG_0842-XL


I'll take better pictures tomorrow, I finished up right when it got fully dark.

I do think the Mabetts would be a good deal around $80/90 dollars.
Sponsored

 
Last edited:

KABQ

Base
Well-Known Member
First Name
Aaron
Joined
Aug 16, 2021
Threads
17
Messages
2,437
Reaction score
7,555
Location
Albuquerque, NM
Vehicle(s)
'93 4Runner, '84 Vanagon, '93 Miata, '14 LittleGuy
Your Bronco Model
Base
Clubs
 
Mabett Mudflaps installed today. I really wanted to the Rockblokz but I have a habit of ripping off mudflaps when 4x4ing, so I like that you can easily remove them, but a $420.00 (XL/Long) I couldn't justify that price, especially when it leaves a gap in the rear. Enter Mabett, I picked up the set of 4 for $129.00, I can see the engineering that went into them and the pieces (and there are many) are well made, nicely marked, the cover the area decently and they do make the Sasquatch fenders over 33's look better. The biggest dislike is the flaps themselves aren't that nice, they aren't bad, they are just a bit cheap looking. I've have Rockblokz for my Bison, but they were half the price then what they are charging for the Bronco.

The bad is the instructions are limited and wrong. I knew this right off as I read the directions last night and they said to remove the trailer hitch for the rears. Why the hell would I have to remove my trailer hitch to install mudflaps? Luckily there are plenty of YouTube videos that folks have done for their Broncos. It still took about 3 hours to get all four installed. I think Ford forgot about mudflaps when designing the Bronco.
IMG_0835-XL.jpg


IMG_0836-XL.jpg


IMG_0844-XL.webp


And here is my helper, he's a pandemic puppy, now 2 years old and full of energy, his name is Jackson and he's supposedly a mix between a Silver Lab and Blue Leopard Catahoula:
IMG_0842-XL.jpg


I'll take better pictures tomorrow, I finished up right when it got fully dark.

I do think the Mabetts would be a good deal around $80/90 dollars.
I had the same feeling and experience with the Mabetts. They provide pretty decent coverage and are affordable, but the hardware is crap (rusting after just a few months in mostly dry NM) and they don't have the look I really wanted.

Also, your ND looks awesome! Please tell me you kept it. My NA hasn't been getting the attention it deserves, and it pains my heart to know I'll probably be passing it on to the next generation of enthusiasts. Thankfully I've found a 16 yo looking for his first car who wants to get into racing and wrenching, and his parents are cool with him owning a 30 year old sports car.

Good luck on your build, and take Jackson for many rides as thanks for his help!
 
OP
OP
emulous74

emulous74

Badlands
Well-Known Member
First Name
Seth
Joined
Dec 25, 2020
Threads
7
Messages
419
Reaction score
731
Location
Austin, TX (Pflugerville)
Vehicle(s)
'19 ZR2 Bison D , '23 Bronco 2DR, MT
Your Bronco Model
Badlands
I had the same feeling and experience with the Mabetts. They provide pretty decent coverage and are affordable, but the hardware is crap (rusting after just a few months in mostly dry NM) and they don't have the look I really wanted.

Also, your ND looks awesome! Please tell me you kept it. My NA hasn't been getting the attention it deserves, and it pains my heart to know I'll probably be passing it on to the next generation of enthusiasts. Thankfully I've found a 16 yo looking for his first car who wants to get into racing and wrenching, and his parents are cool with him owning a 30 year old sports car.

Good luck on your build, and take Jackson for many rides as thanks for his help!
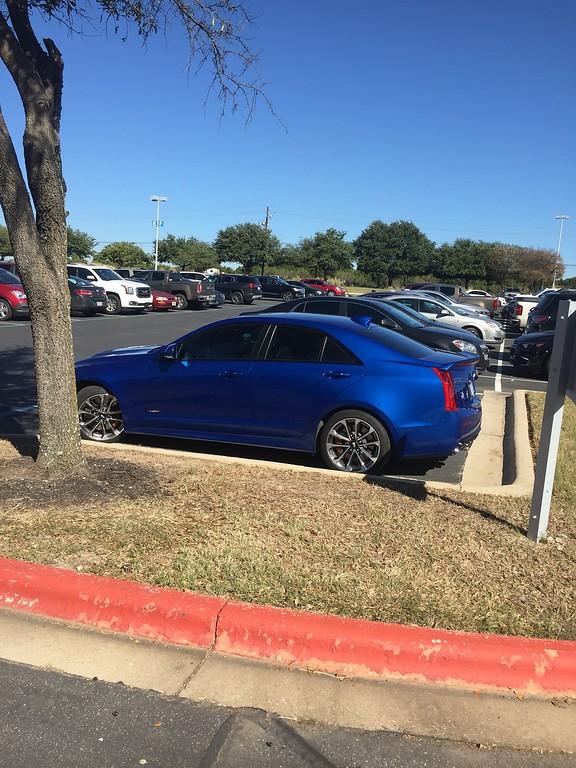
Thanks, unfortunately I traded the Miata to get the Bronco, it was never in the original plan, but I quit my job at GM and I'm taking a year off and trying to sell my second house so I can have a great year. Believe it or not I traded in a '16 Cadillac ATS-V for the Miata when they finally offered the Recaros because the standard seats hurt me. I was surprised how much more I liked the Miata. Don't get me wrong the ATS-V was awesome, but I probably would of lost my driver's license if I kept it, because it was only really fun going over the speed limits. The Miata let me have 95% of the fun, while keeping it within the speed limits every time I drove it. I'll miss it, but I'm sure I'll have another one again.

Ford Bronco TGO - The Overlander Build atsv-XL
 
OP
OP
emulous74

emulous74

Badlands
Well-Known Member
First Name
Seth
Joined
Dec 25, 2020
Threads
7
Messages
419
Reaction score
731
Location
Austin, TX (Pflugerville)
Vehicle(s)
'19 ZR2 Bison D , '23 Bronco 2DR, MT
Your Bronco Model
Badlands
Finally First Off-road.

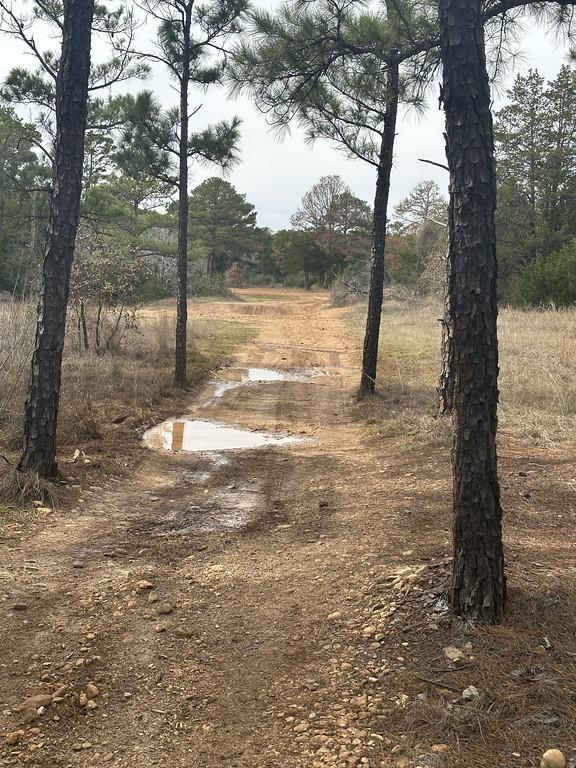
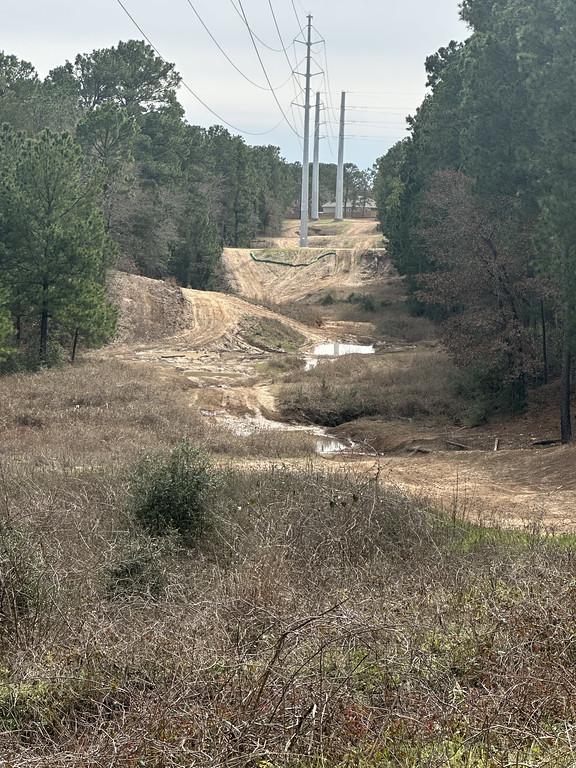
In the Austin Metro area Bastrop has a cool "unofficial" off-road area that is basically a pine forest with dirt roads through it with decent elevation changes always a ton of puddles and a just a good time and only 45 minutes drive from my home. If you're looking for it, just search for Tahitian Village and the "entrance" is a little east on the opposite side from Buc-ee's.

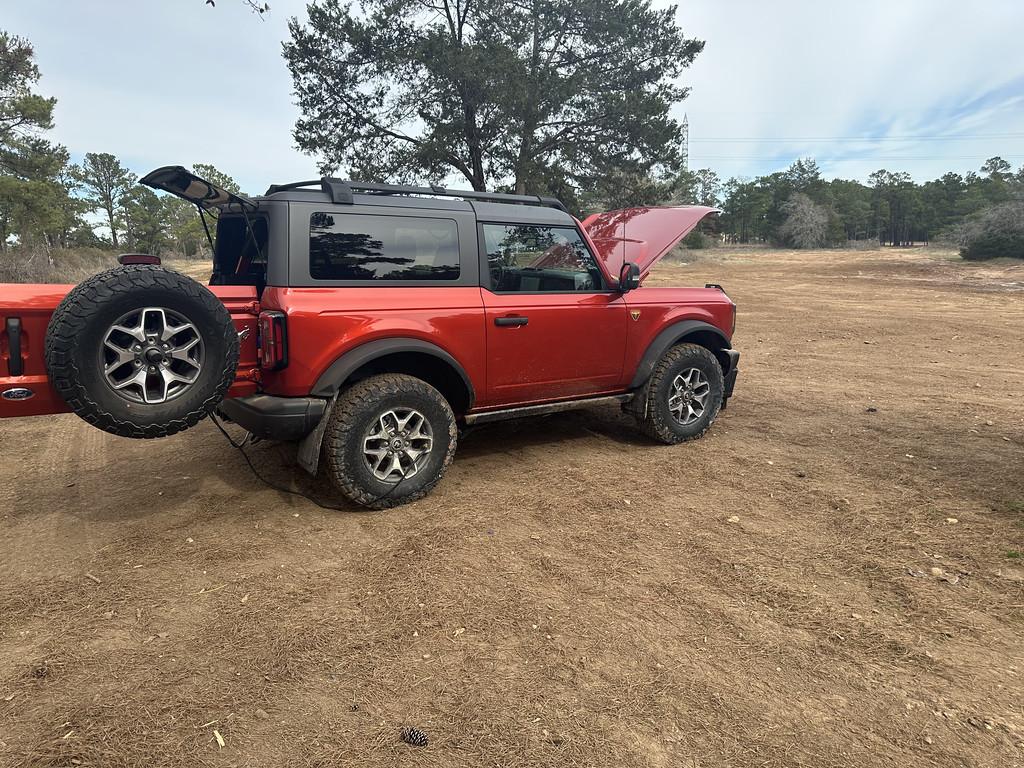
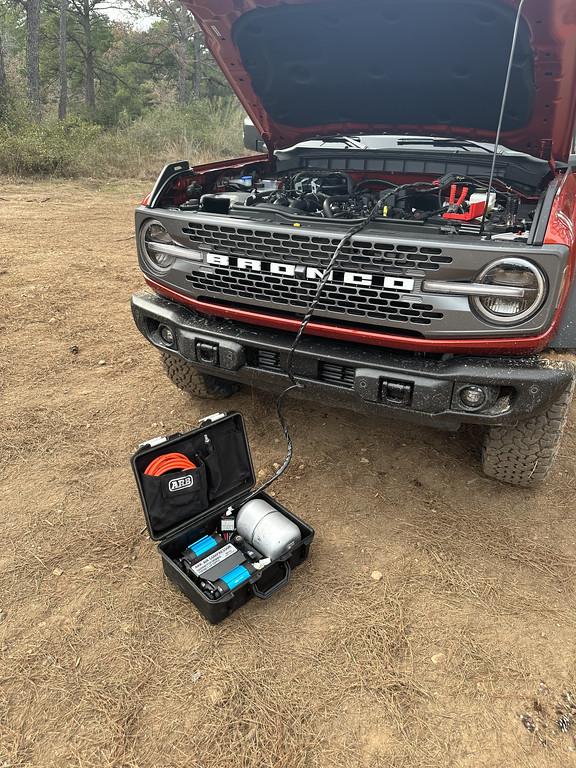
This isn't my first off-roader, but it is my first manual transmission off-roader so I knew this would be the perfect place to give it a shot. It being super bowl Sunday, I knew there would be less people, but I also couldn't find any friends that wanted to go with me. So I packed some recovery gear, tools and an air-compressor and headed off.

Ford Bronco TGO - The Overlander Build IMG_0848-XL


When I got there there were only a few folks, some side by sides, some motorcycles, and a few pickup trucks.

First off, I'm so impressed with the size of the 2-door Bronco, got through things, I don't think I would of tried with my truck, and turning and backing up are so easy. Going solo, that front and 360 camera help out immensely, especially when all you can see is the sky. What a game changer.

It doesn't look it in the pictures, but the last two trees are tight:

Ford Bronco TGO - The Overlander Build IMG_0849-XL


Ford Bronco TGO - The Overlander Build IMG_0850-XL


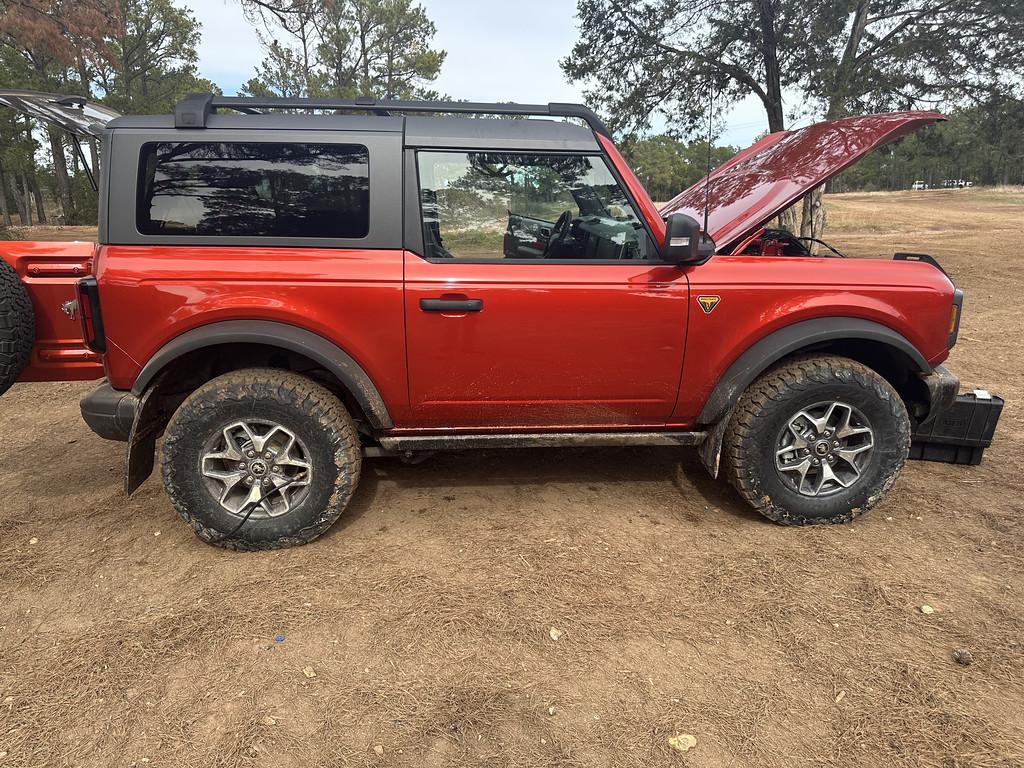
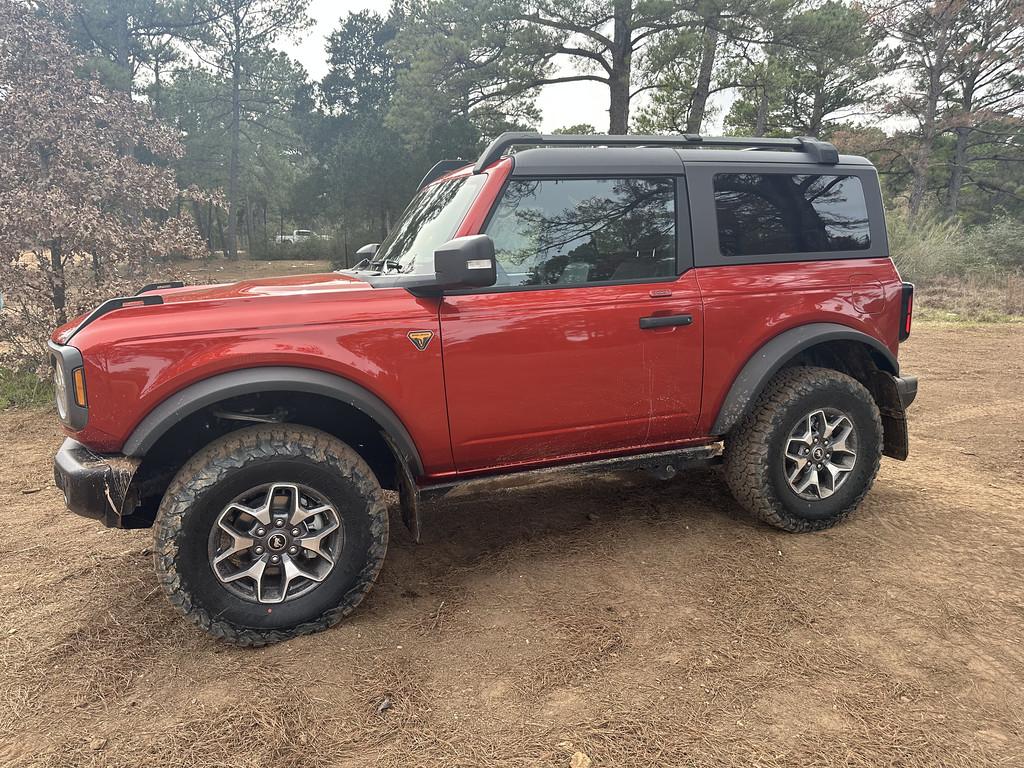
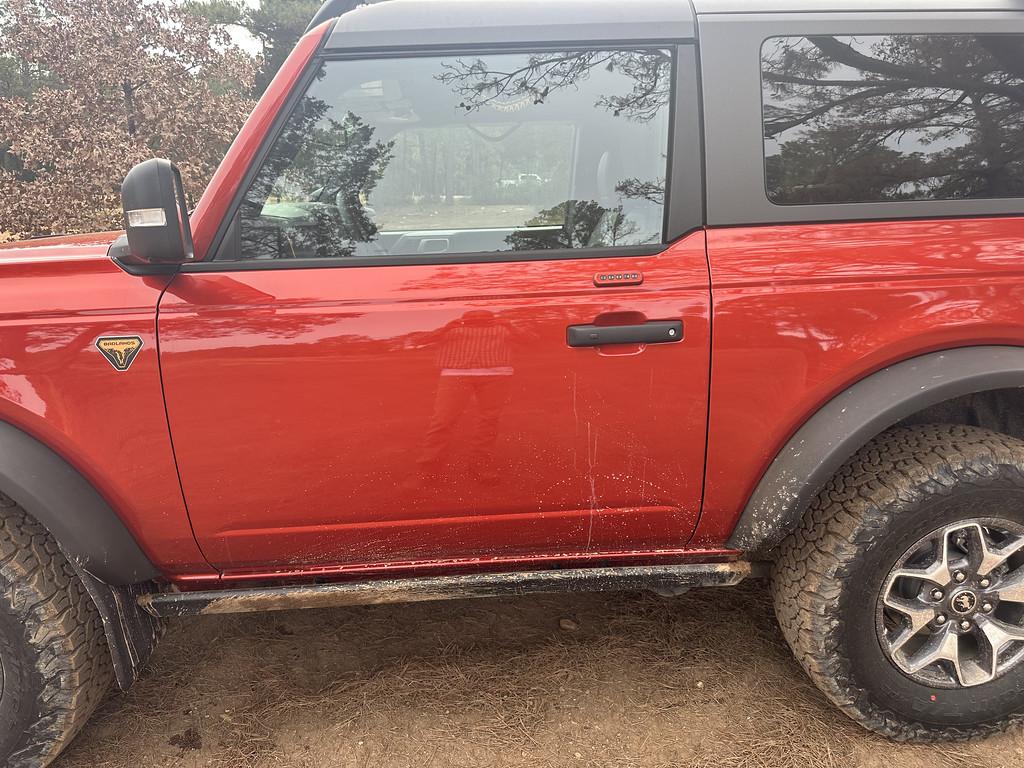
I would also say, the Sasquatch fenders and the mudflaps did the job I was just looking for, the little that is on the doors is splash back from going through big puddles.

Ford Bronco TGO - The Overlander Build IMG_0851-XL


Here's a good 3/4 pic of the fenders and mudflaps that was asked for:

Ford Bronco TGO - The Overlander Build IMG_0852-XL


I know this is a luxury, but this compressor (which can run air tools) and the Indeflate (2) makes airing up and airing down a breeze. I would like to the outside tailgate option I've seen, but I can't justify buying another one when I have this portable one.

Ford Bronco TGO - The Overlander Build IMG_0853-XL


Again, they really did their job well:

Ford Bronco TGO - The Overlander Build IMG_0854-XL


Ford Bronco TGO - The Overlander Build IMG_0855-XL


Ford Bronco TGO - The Overlander Build IMG_0856-XL


Ford Bronco TGO - The Overlander Build IMG_0857-XL


Ford Bronco TGO - The Overlander Build IMG_0858-XL


Ford Bronco TGO - The Overlander Build IMG_0859-XL


Also happy with the crashbar caps, definitely did there job.

With:

Ford Bronco TGO - The Overlander Build IMG_0862-XL


Without (You can see the mud up inside the crashbar) The mabett flaps wouldn't fit with the caps on:

Ford Bronco TGO - The Overlander Build IMG_0863-XL


I'm so happy with manual transmission off-road. Just like on-road you have so much more control of the engine and being in the right gear, means you don't have to use the brakes as much. The crawler gear is a game changer, but you have to remind yourself you don't need to push in and feather the clutch.

While this was by no means hardcore off-roading it was a fun couple of hours and I'm really happy I don't have a major wash job to do later.

Since I was solo, I didn't take a lot of pics, but if you want to see what the area is like a friend and his wife took a video 3 years ago when we want there with another one of my friends. So a crew cab Bison, my extended cab Bison and one of the nicest 2nd gen Tacomas:


peterh

Well-Known Member
Joined
Jul 15, 2020
Threads
75
Messages
1,284
Reaction score
2,150
Location
ny
Vehicle(s)
jeep wrangler jlu 2018
Your Bronco Model
Undecided
Clubs
 
that looks like a cool spot
 

Sponsored
OP
OP
emulous74

emulous74

Badlands
Well-Known Member
First Name
Seth
Joined
Dec 25, 2020
Threads
7
Messages
419
Reaction score
731
Location
Austin, TX (Pflugerville)
Vehicle(s)
'19 ZR2 Bison D , '23 Bronco 2DR, MT
Your Bronco Model
Badlands
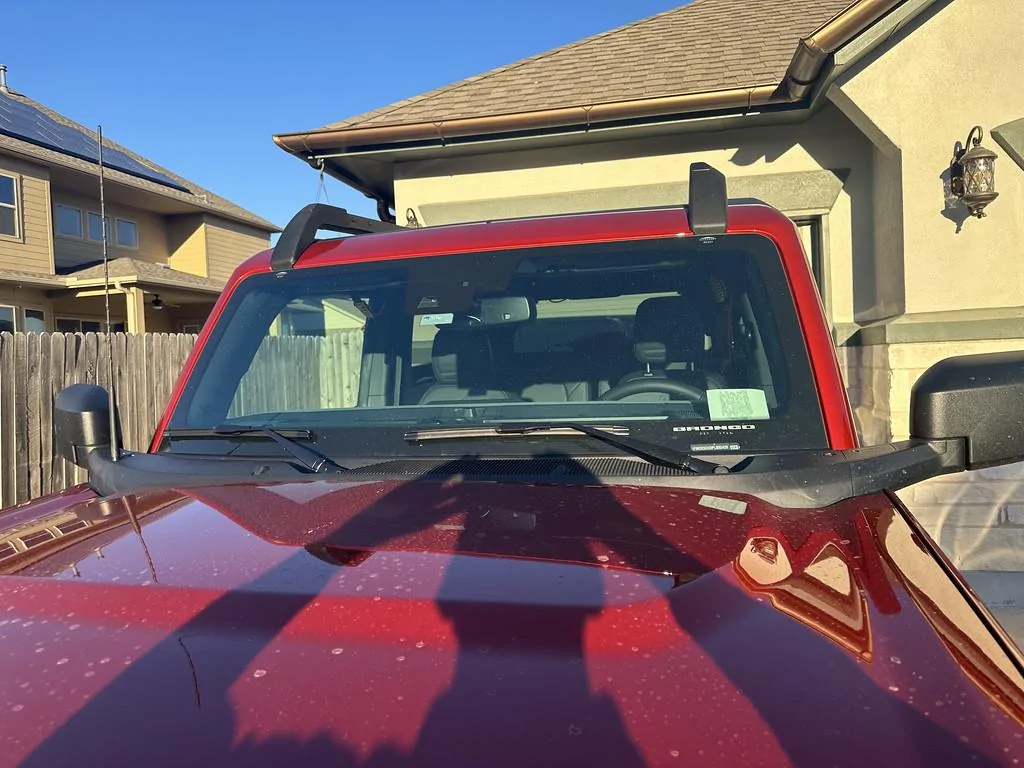
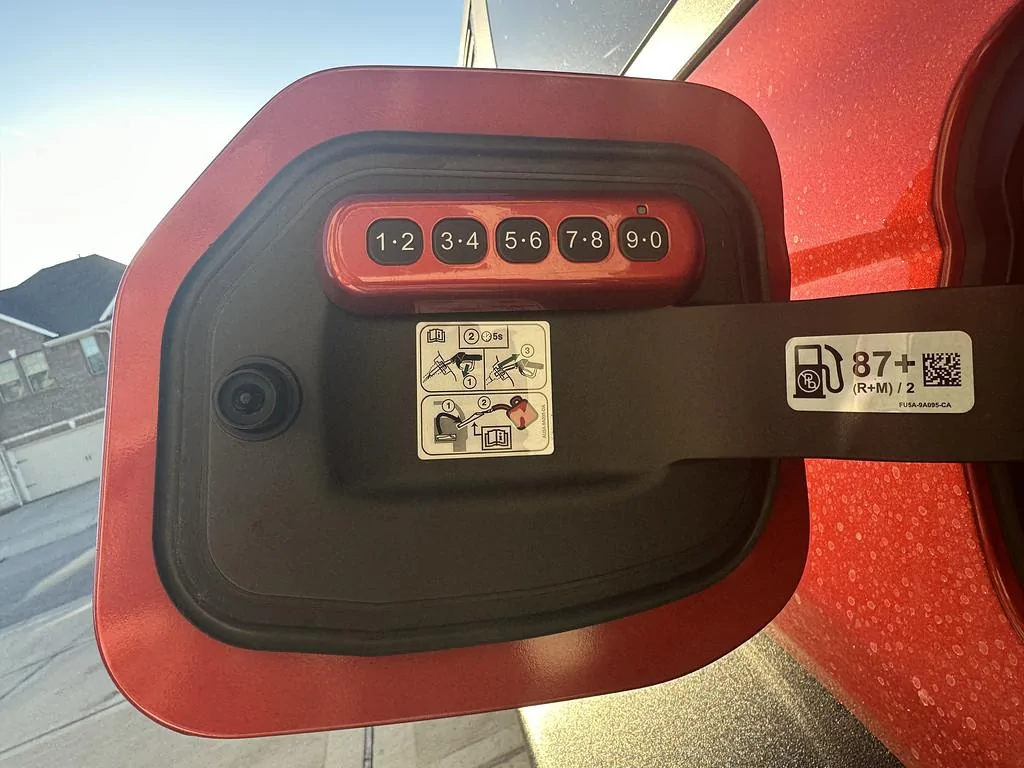
I got the windshield tinted this morning and finally moved the keyless entry pad to the gas door.
A few days ago I installed the front grab handles and a rear liner for the sunken area in the hatch floor.

I tried rinsing off the mud, but the crappy water here just left spots over everything.

Ford Bronco TGO - The Overlander Build IMG_0881-XL


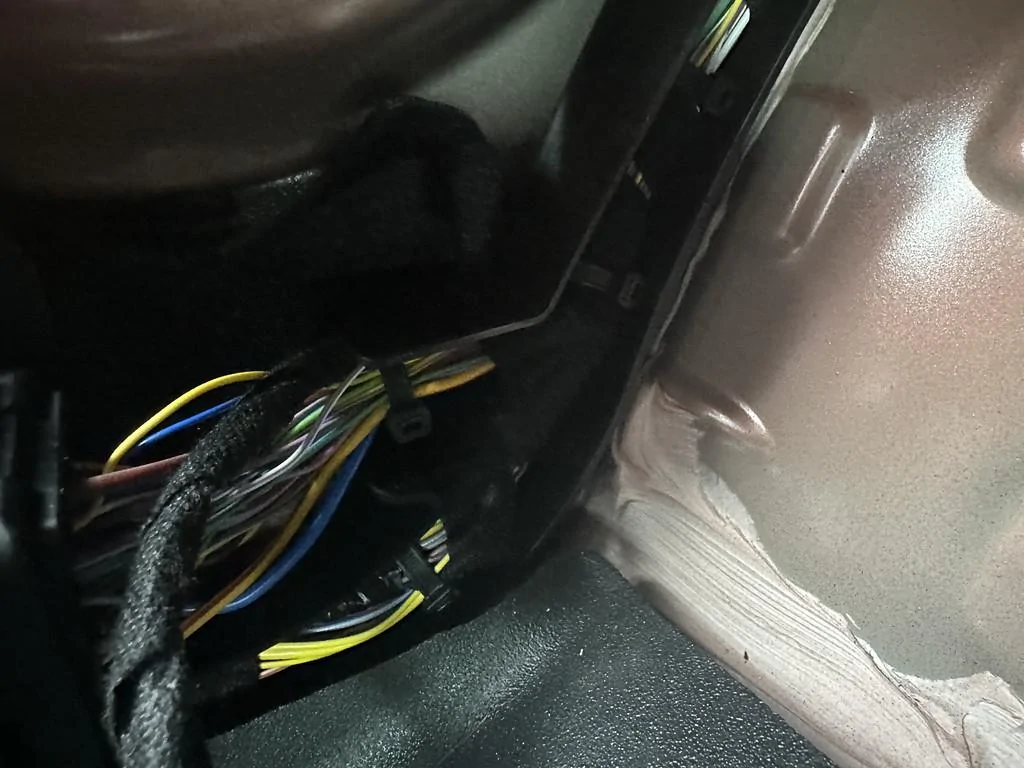
Interesting that they left the wires bare that plug into the rearview mirror. Guess I'll go buy some fabric tape and clean it up.

The reason for tinting the windshield is two fold, for one it's now legal in Texas to do so, so it helps cut out some of the heat, but I've had my windshield tinted on my Bison and I got a rock chip at the base over 4 years ago and it hasn't grown or cracked in all that time. It's decent insurance, especially since our windshields are pretty upright.

The keypad came off with a few tugs (it was sitting in the sun all day to help the tint cure) and mounted on to the gas door without any additional adhesive. There are only two rectangular blocks of double-sided adhesive tape. I suggest trying this method first before using fishing line. If you do the fishing line, you are going to cut the tape and have some adhesive to get off the door. The face cover comes off, do that first. On the inside of my face cover there was a sticker that said Hot Pepper Red and a date of 5/12/22. So obviously not painted with the vehicle.

Ford Bronco TGO - The Overlander Build IMG_0879-XL


Ford Bronco TGO - The Overlander Build IMG_0880-XL


I did get a quote to tint the front two windows, and it wasn't bad, but I'm going to postpone that to the summer, since so much cash is going out the door right now.
 
OP
OP
emulous74

emulous74

Badlands
Well-Known Member
First Name
Seth
Joined
Dec 25, 2020
Threads
7
Messages
419
Reaction score
731
Location
Austin, TX (Pflugerville)
Vehicle(s)
'19 ZR2 Bison D , '23 Bronco 2DR, MT
Your Bronco Model
Badlands
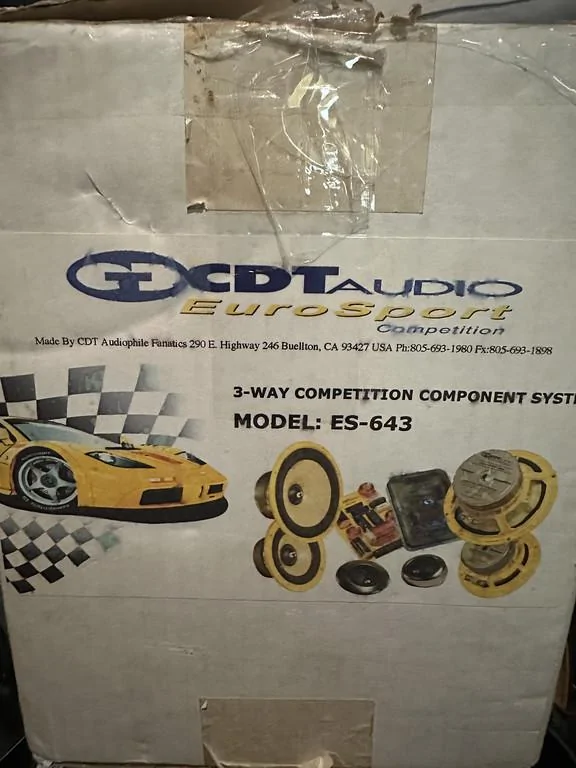
Ah, cleaning a bigger spot out in my garage last week to fit the Bronco in, I ran across a box of 3 way speakers that I've been holding since 2003 (when I was going to install them in my EVO 8). So I did a little research to see if they would somehow fit in the Bronco, and it looks like folks are starting to fabricate separate tweeter and mid mounts for the dash speakers with the B&O system in my Bronco.

I decided to wait and listen to the B&O system before I did anything, but after a week, the system is starting to hurt my ears. This has happened to me in a lot of vehicles. I was surprised in the Bison with the Bose system, while it doesn't sound great, it didn't hurt my ears, so I never bothered changing anything out.

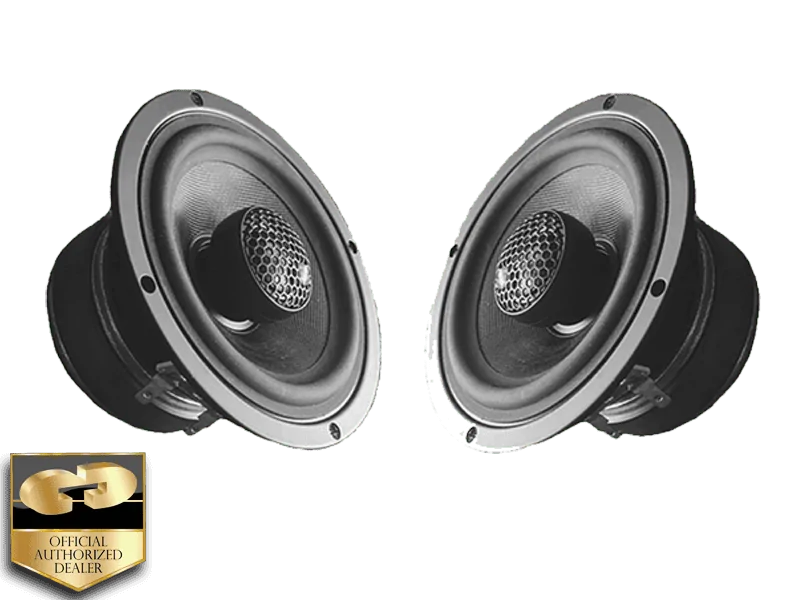
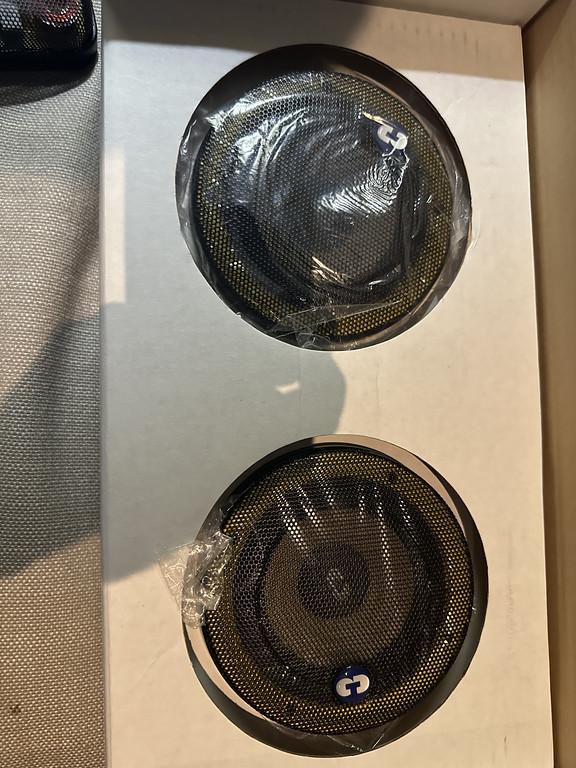
Since the dashboard speakers are coaxials (meaning the tweeter and mid are in one speaker, rather than separates). I went ahead and ordered a relatively cheap pair of CDT Audio's ES-4EX speakers:

Ford Bronco TGO - The Overlander Build es4ex_lrg


ES-4EX
1 pr 4" mid-woofer 3/4” soft dome twtr

Technical specs and contents
  • Frequency response 65Hz-20,000Hz
  • Power handling:100watt @ HP 120Hz
  • Sensitivity: 86.6dB
  • Mounting depth: 2.25”
  • Cut out diameter: 3.75”
  • Frame: OD 4.62
  • Cone: Fiberglass mix
  • Magnet weight: 10 Oz
  • Cone surround: Butyl rubber
  • Impedance: 4 ohms
  • Voice coil: 1.0” (26mm)
  • Fs: 87Hz
  • ¾” smooth soft dome tweeter
These are stop gap until I found the right mounts for the separates I have and have the money to change/add amps and get the proper processing equipment to do it right. But they won't be throw-away as I can use them as the rears.

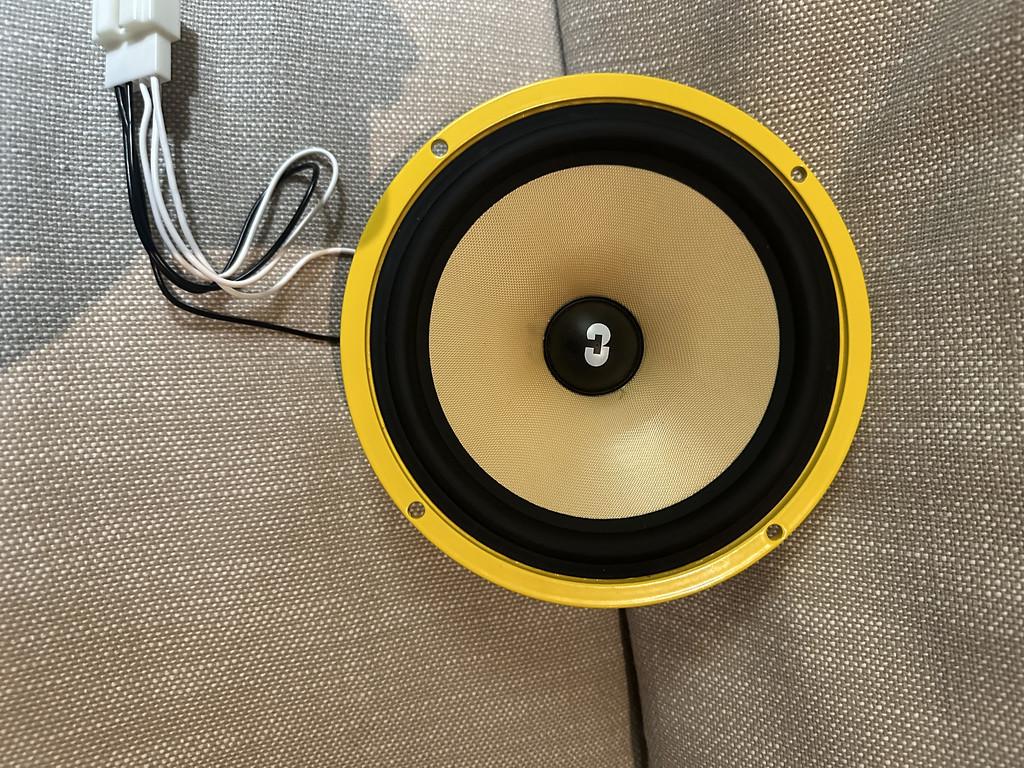
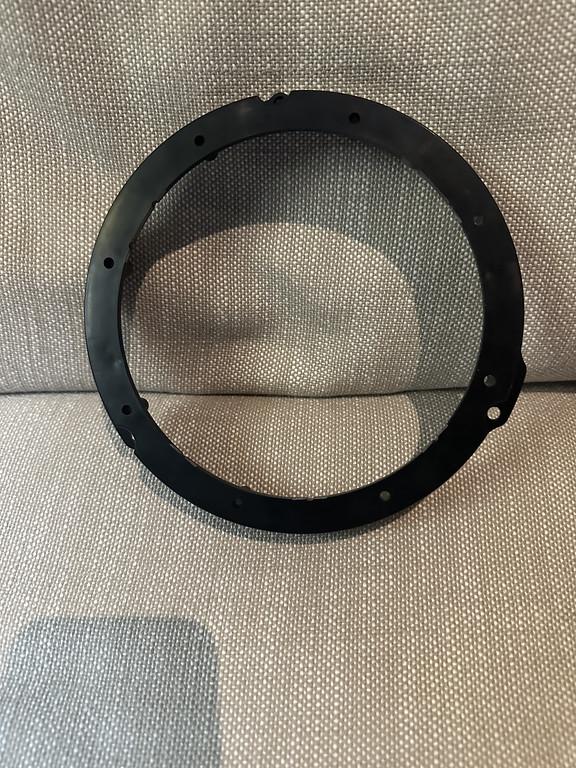
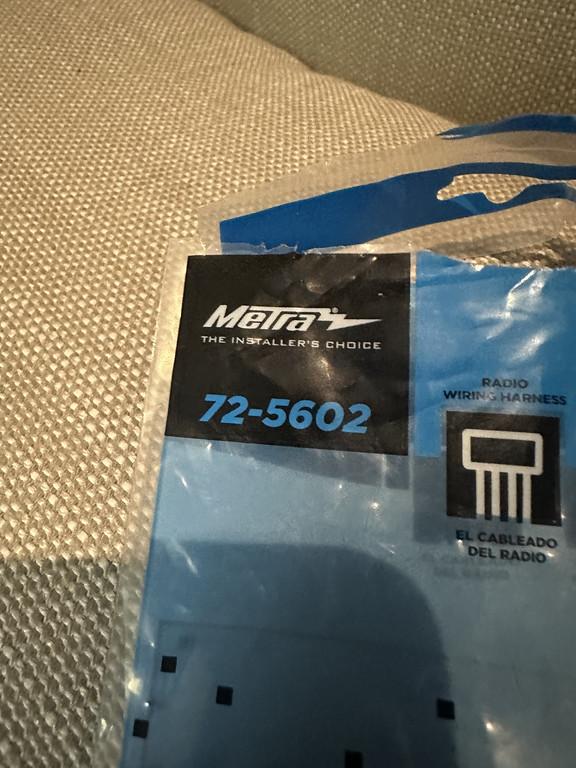
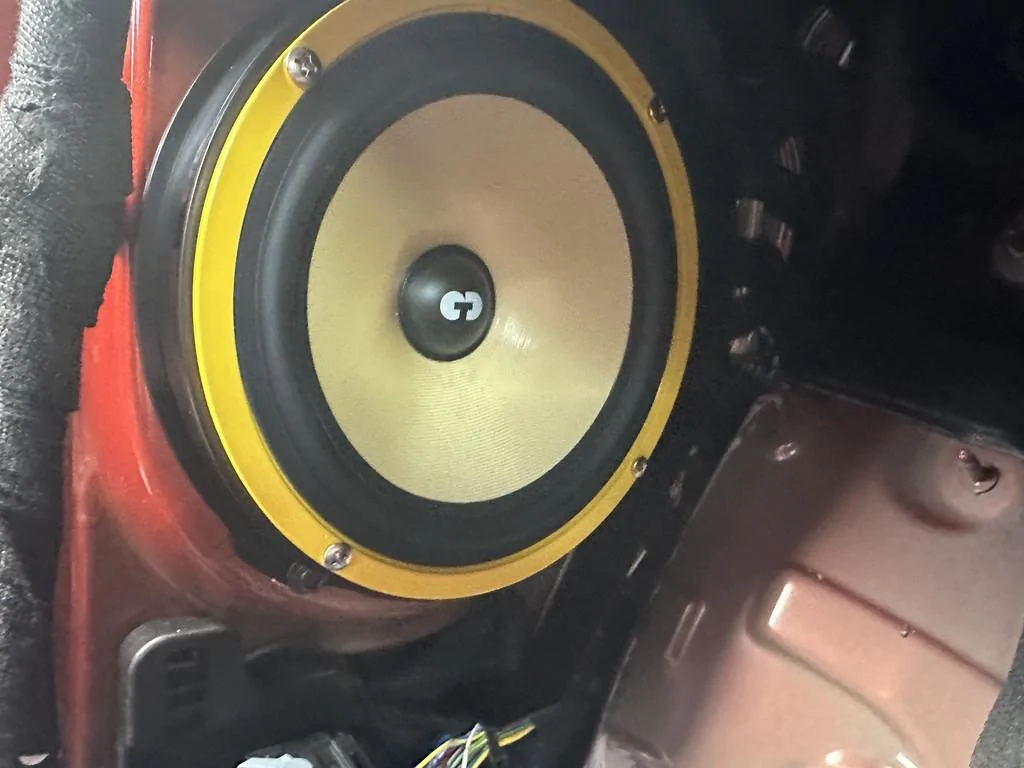
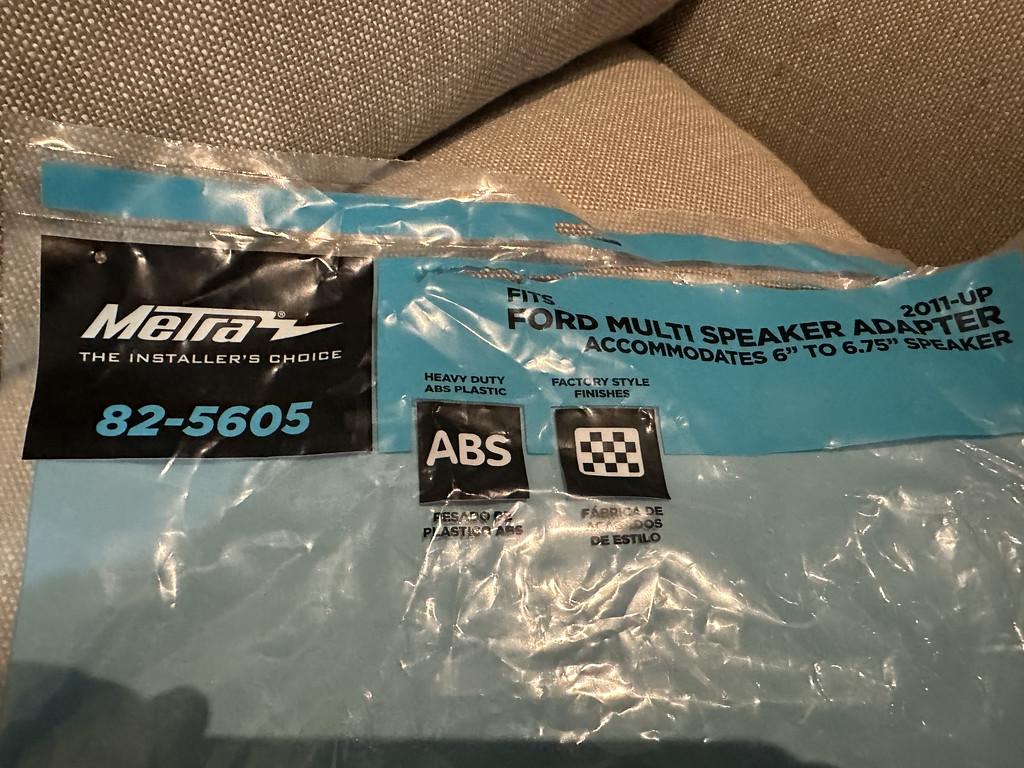
But these puppies that I found in my garage are still being sold on Amazon for $1300.00 (and they are 20 years old). So I'm able to use the woofer now, in the stock location in the front kick panels. One problem the CDT woofers are 6.75 and the stock speakers in that location are 6.5. Metra makes an adapter plate for the kick panels that work with 6.5 & 6.75" speakers, part# 82-5605, they also make a harness to connect up to the factory wiring for the kick panel speakers, part# 72-5602. They also sell these together as a kit, part#82-FD1, but I couldn't find it anywhere.

  • Mid-woofer: Cast Alloy 6.75" Fiber Fabric Kevlar cone
  • Mounting depth: 2 3/4”
  • Midrange: Cast Alloy 4" Fiber Fabric Kevlar cone
  • Mounting depth: 2 1/4”
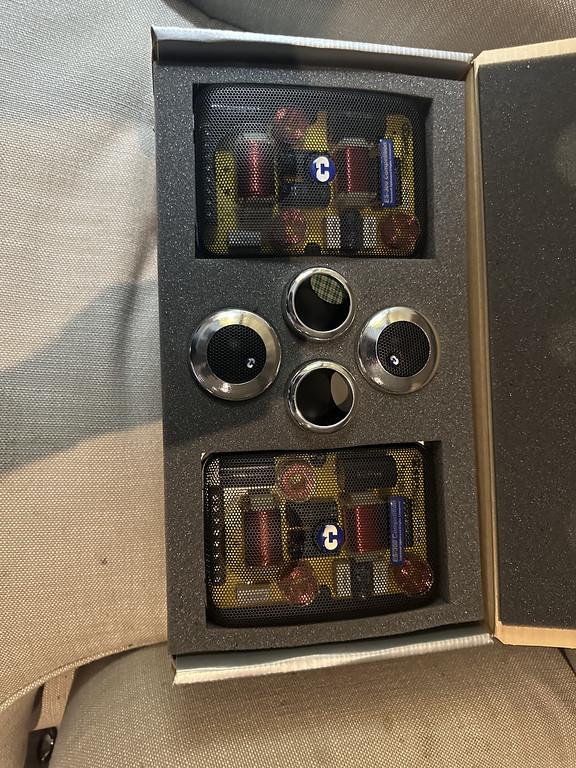
  • Crossover: ES-300CC “Transient Optimized”Elliptic 4th order 2-way
  • E.Q. 3-way xover. Read/download sep spec abt this xover
  • Tweeter: DRT-26 deluxe extended range modular 1” silk tweeter.
  • Power handling: 250 watt RMS @ 100Hz High Pass
  • Frequency response: 60-20kHz
  • Sensitivity: 92.6 dB.
  • Impedance: 4 Ohm
  • Tweeter surface mount both flat and angled &
  • flush mount both flat and angled.

Ford Bronco TGO - The Overlander Build IMG_0883-XL


Kevlar fabric cones:

Ford Bronco TGO - The Overlander Build IMG_0884-XL


Ford Bronco TGO - The Overlander Build IMG_0885-XL


Ford Bronco TGO - The Overlander Build IMG_0886-XL


Ford Bronco TGO - The Overlander Build IMG_0887-XL


There is something that digital crossovers can't seem to replicate and that's the smooth natural sound of a really good pair of analog crossovers. Helps to have silk tweeters too.

Ford Bronco TGO - The Overlander Build IMG_0889-XL


Ford Bronco TGO - The Overlander Build IMG_0890-XL


So hopefully I can install the kick panel speakers tomorrow. I'll have to wait on the dash speakers until I can find the proper wire harness for the B&O system.

Unless you are as old as I am and were into high end audio in the 90's and 2000's you've probably never heard of CDT. When a/d/s/ got bought out by Directed and killed the brand, CDT was the only company that made a comparable sounding speaker. For those of you that don't know, a/d/s/ was the first manufacturer to make high-end car audio speakers and amps and in those circles they were legendary.
 
Last edited:
OP
OP
emulous74

emulous74

Badlands
Well-Known Member
First Name
Seth
Joined
Dec 25, 2020
Threads
7
Messages
419
Reaction score
731
Location
Austin, TX (Pflugerville)
Vehicle(s)
'19 ZR2 Bison D , '23 Bronco 2DR, MT
Your Bronco Model
Badlands
Replacing the Kick Panel Speakers was much easier and a lot quicker than I thought they would be:

Ford Bronco TGO - The Overlander Build IMG_0905-XL


Tools Used:
  • 10mm Long Socket with a small extension (for the dead pedal)
  • 7mm Socket to remove the stock speakers (3 bolts for each, save them you will reuse them)
  • Flat head screwdriver (used to get the harnesses apart)
  • Phillips head screwdriver (to secure the speakers to the adapter)
  • Thin metal trim removal tool (to get the cover off the dead pedal)
Steps taken:
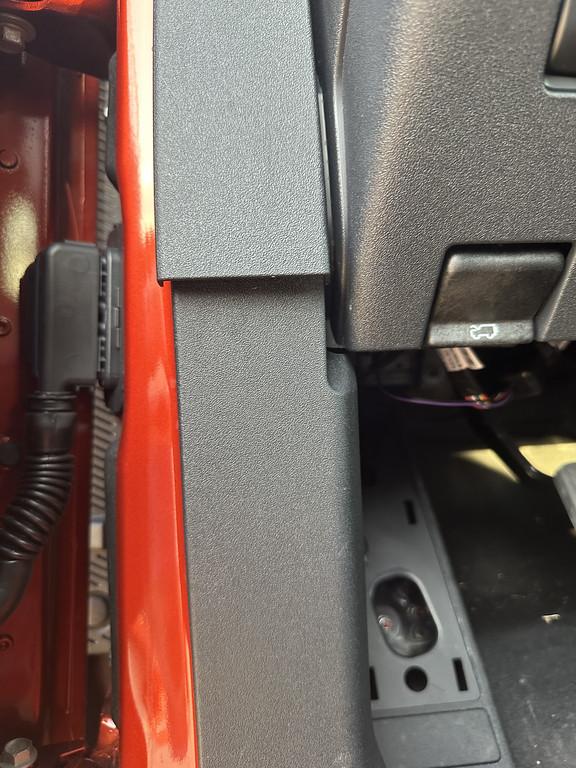
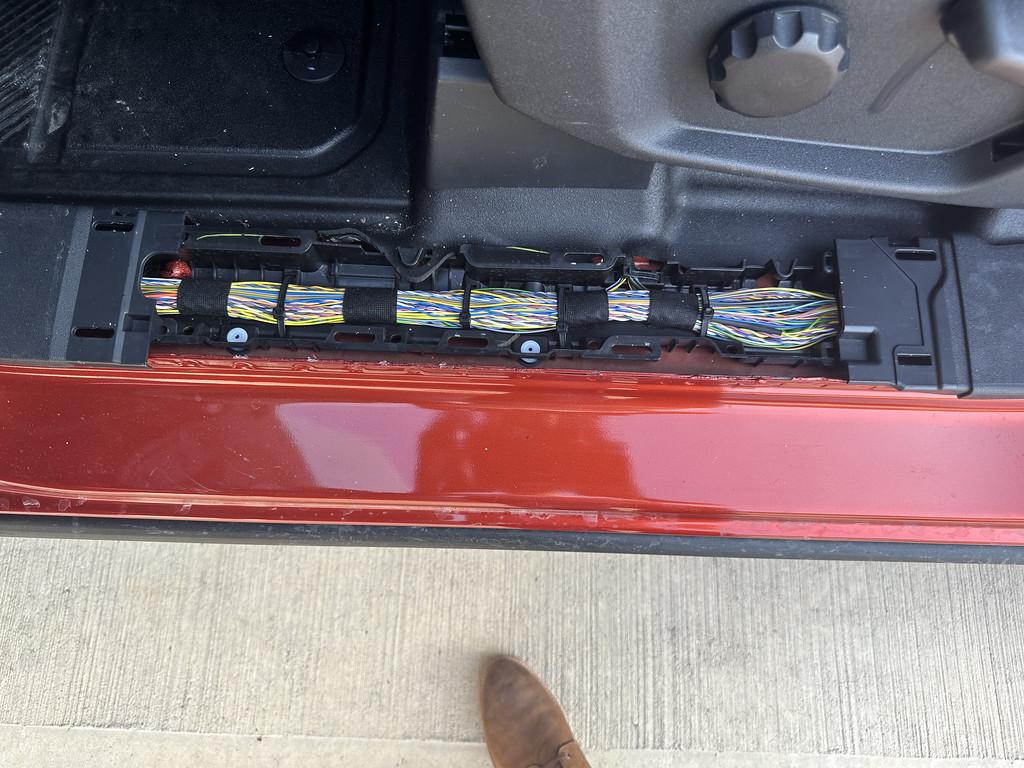
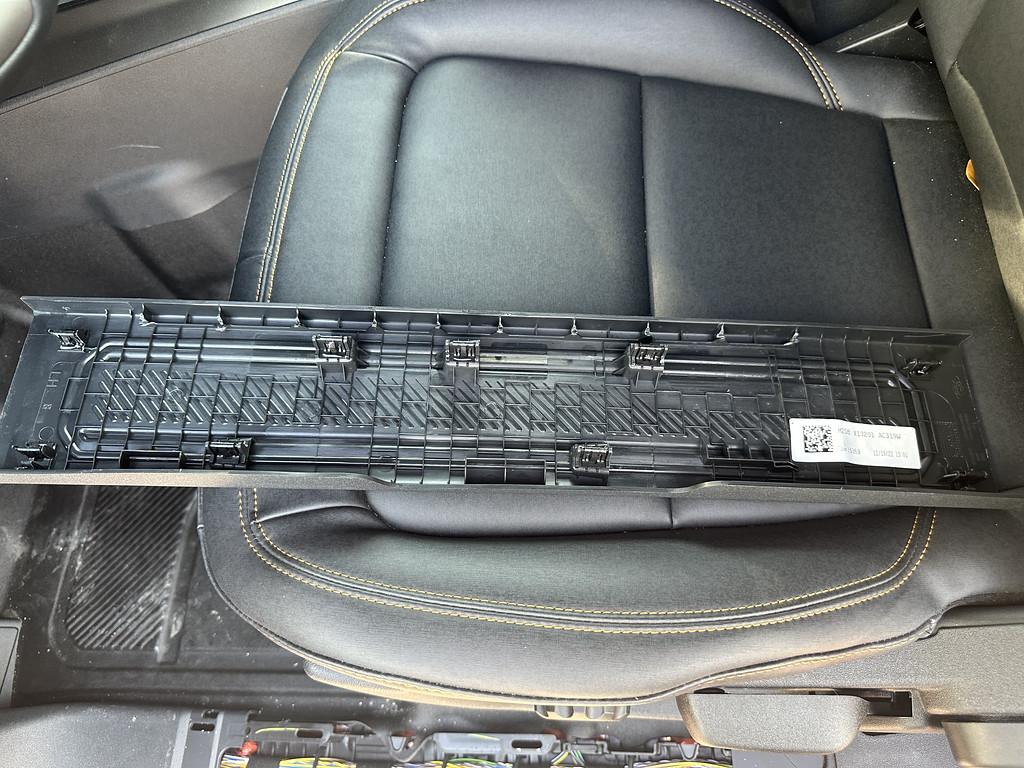
  • Remove the trim panel in the bottom of the door frame in the middle. These have 5 tabs each, you need to pull up on this piece:
Ford Bronco TGO - The Overlander Build IMG_0895-XL


Ford Bronco TGO - The Overlander Build IMG_0896-XL


  • Next Loosen the the top of the trim plate, the one that overlaps the trim panel trim plate. You only need to pull out the bottom of it as two clips hold the kick panel trim plate:
Ford Bronco TGO - The Overlander Build IMG_0901-XL


  • On the passenger side, you can then pull forward on the kick panel (there is a Plastic Slot [not a tab] at the top rear of it, so you have to pull forward until it's out of the slot, then you slightly bent it to remove.
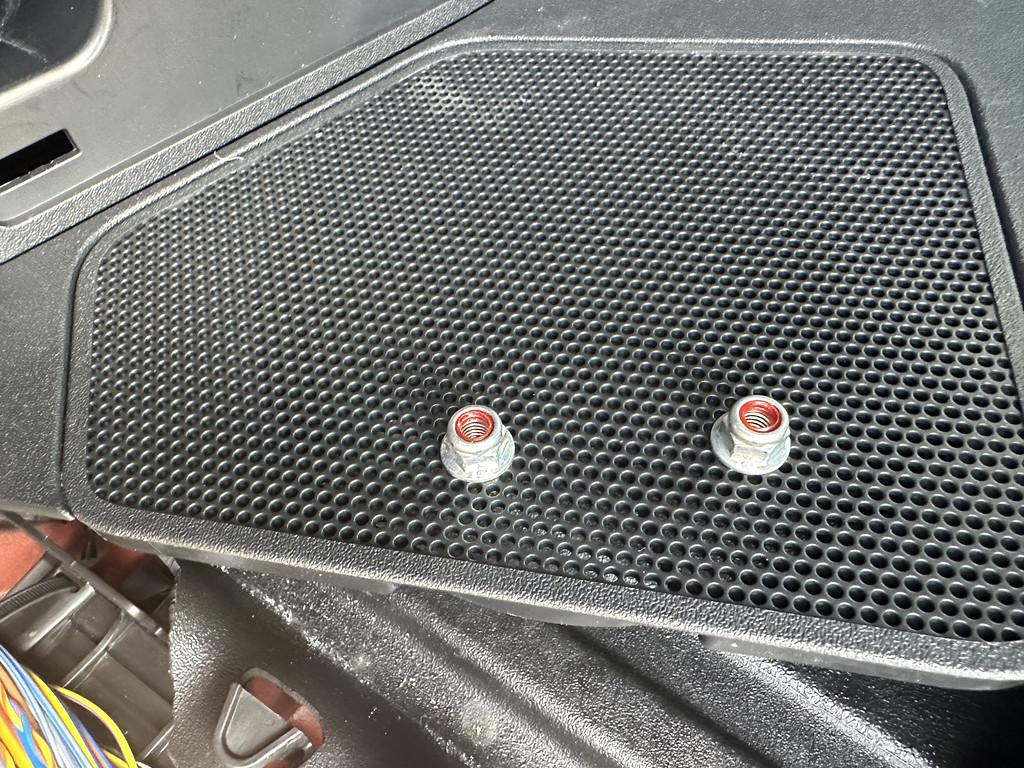
  • On the driver's side, you need to remove the cover from the dead pedal, in order to expose the two nuts, you need to remove. I used a very thin metal trim tool, to remove the embedded trim cover on the top 2/3 portion of the trim pedal.
Ford Bronco TGO - The Overlander Build IMG_0897-XL


Ford Bronco TGO - The Overlander Build IMG_0899-XL


  • Inside the base of the dead pedals, are two 10mm nuts, they are deep in there so you will need more than just a deep socket, probably a small extension. They are threaded on a long bolt, so just be patient. You probably have to leave the nuts in there, because you can't really get in there to grab it, but they fall out once removed.
Ford Bronco TGO - The Overlander Build IMG_0898-XL


  • Remove the nuts, then you can pull the kick panel off, you will need to do some minor twisting to get it out. Save the nuts
Ford Bronco TGO - The Overlander Build IMG_0902-XL

  • To remove the existing speaker, you will need to first remove the harness. You can push down on the exposed side and try to pull out, you'll see a slot, that has a raised portion on it, I used a flat head screw driver to press it down while pulling. Notice that the harness is on the outside of the speaker frame. You will need to reroute this so it goes inside the speaker frame in order to connect your speakers to it (I highly suggest the Metra Harness for these).
  • Once you remove the harness, there are 3 7mm hex head screws to remove the speaker. Save these screws.
  • Just remember speakers have big magnets in them, so careful where you set it down.
  • Since I was using the Metra Adapters for my 6.75" each speakers, I had to break off the internal tabs (those tabs are used for a 6.5" speaker) and then I used the retain hex head screws to mount the adapter to the existing holes.
  • Know you need to route the OEM harness to inside the speaker frame, at the bottom of each speaker frame, there is an opening at the bottom (covered by some soft cloth type material), move the material away and feed the OEM Harness to inside the speaker frame on the vehicle. I know this is a bad picture, but look above the colored wires and you can see the cloth that you need to move away to pass the OEM Harness through.
Ford Bronco TGO - The Overlander Build IMG_0904-XL


  • Before you mount your speaker, connect the speaker harness to the OEM harness. Then screw your speaker into the adapter.
  • Test your speaker before you put everything back together again. If everything is good, reverse steps:
    • Install the kick panel, on the passenger side, make sure that extended piece goes into the slot on the back of the firewall, in the door frame move the top of the kick panel underneath the trim piece you only took the bottom off of.
    • Install the kick panel on the driver's side, trying to get the nuts on the stem within the dead pedal is not fun, so just be patient, tighten these down, replace the dead pedal cover, and then make sure the top of the kick panel is underneath the trim piece you only the bottom off of.
Ford Bronco TGO - The Overlander Build IMG_0901-XL


  • Replace the bottom door frame trim and you are done.
 
OP
OP
emulous74

emulous74

Badlands
Well-Known Member
First Name
Seth
Joined
Dec 25, 2020
Threads
7
Messages
419
Reaction score
731
Location
Austin, TX (Pflugerville)
Vehicle(s)
'19 ZR2 Bison D , '23 Bronco 2DR, MT
Your Bronco Model
Badlands
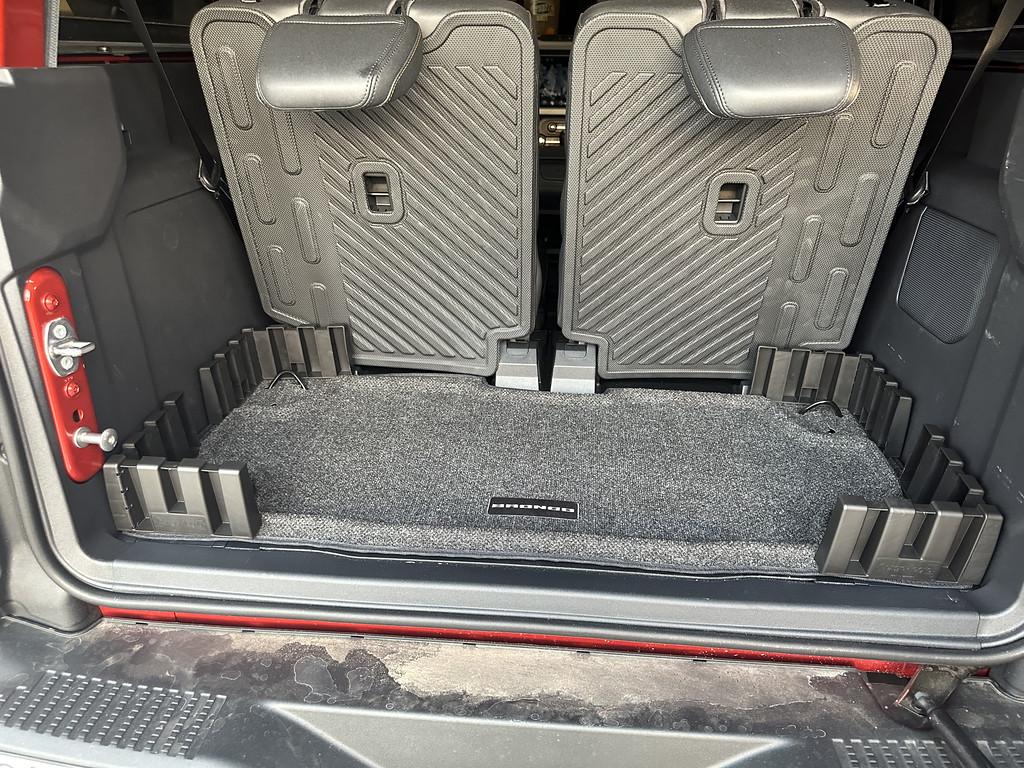
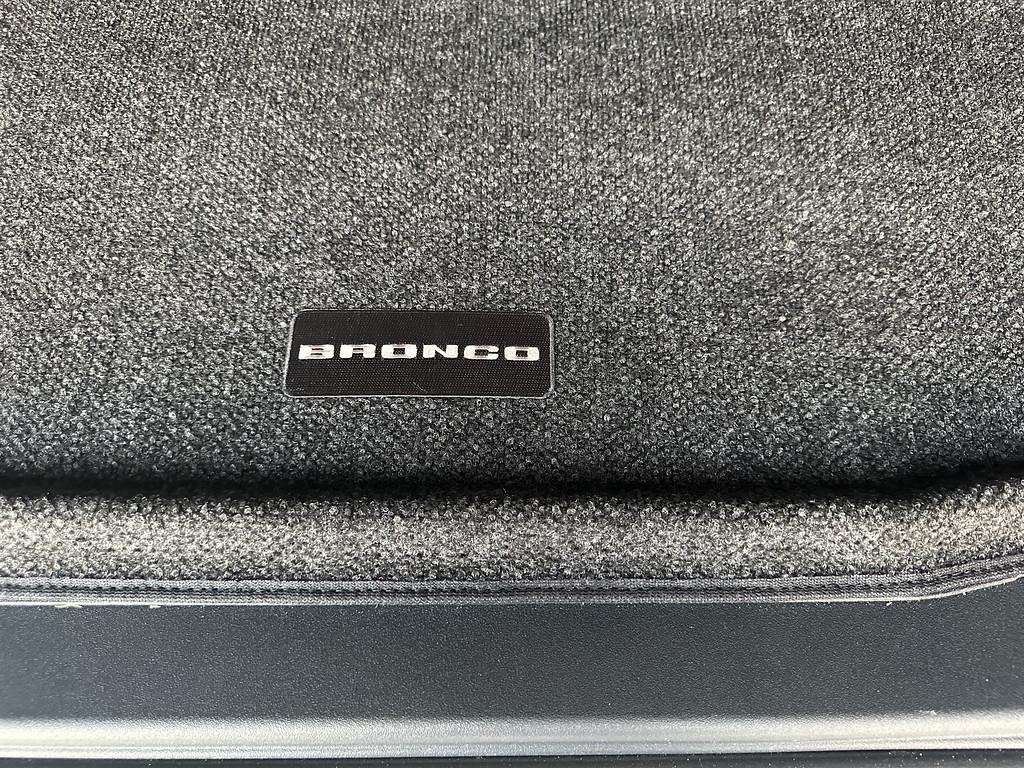
Also installed the cargo rug today. I chose this one for a few reasons, one it's soft, so my dog will prefer it, but the main reason, it's was the only cargo floor cover that left access to the tie down points.

It has the company name of Cargo Glide on the plastic pieces. These pieces can fit together to create corner pockets or you can use them all individually depending on how you want to support your cargo. I figure they will come in handy when getting groceries and the rug has some padding under it, so it should keep the cargo floor in good condition.

Ford Bronco TGO - The Overlander Build IMG_0906-XL


Ford Bronco TGO - The Overlander Build IMG_0907-XL
 

menikmati

Badlands
Well-Known Member
First Name
Mike
Joined
Sep 7, 2022
Threads
0
Messages
88
Reaction score
119
Location
Santa Cruz, CA
Vehicle(s)
2022 Bronco
Your Bronco Model
Badlands
Clubs
 
Just curious, why do you fold your headrests backwards, into the cargo area? Is the design different from the 4dr rear seat headrests that flip forward and semi-flat when in the down position?
Ford Bronco TGO - The Overlander Build PXL_20221001_213538141
 

Sponsored
OP
OP
emulous74

emulous74

Badlands
Well-Known Member
First Name
Seth
Joined
Dec 25, 2020
Threads
7
Messages
419
Reaction score
731
Location
Austin, TX (Pflugerville)
Vehicle(s)
'19 ZR2 Bison D , '23 Bronco 2DR, MT
Your Bronco Model
Badlands
Just curious, why do you fold your headrests backwards, into the cargo area? Is the design different from the 4dr rear seat headrests that flip forward and semi-flat when in the down position?
One, that's the only way the 2-door rear headrests fold (they are also unremovable). I keep them folded down so that I have better sight out the rear.
 
OP
OP
emulous74

emulous74

Badlands
Well-Known Member
First Name
Seth
Joined
Dec 25, 2020
Threads
7
Messages
419
Reaction score
731
Location
Austin, TX (Pflugerville)
Vehicle(s)
'19 ZR2 Bison D , '23 Bronco 2DR, MT
Your Bronco Model
Badlands
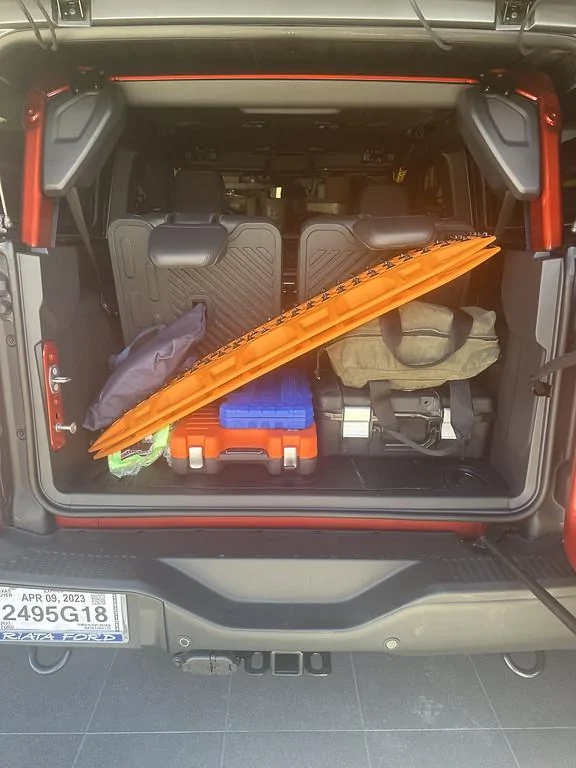
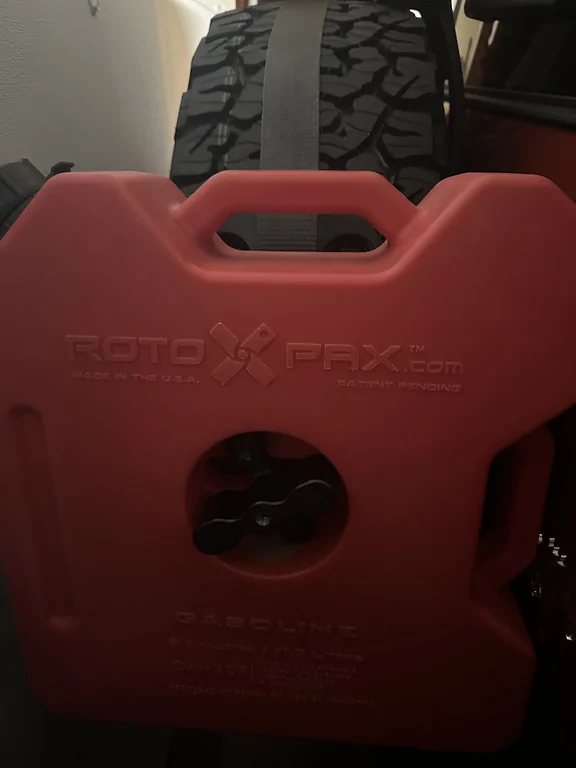
Overland Kitted Spare Tire Maxtrax and Rotopax Mounting System.

As mentioned, I'm taking a different way of modifying my Bronco vs. what I did with my Bison. Since this is going to be my daily driver, I don't want to drive around with unnecessary weight, and since the Bronco has a miserable payload, I'm trying to be very aware of how much weight I'm putting on. Since I also paid for the extended warranty, I'm trying to keep as much as stock as possible and/or use Ford Accessories when they meet my needs.

So if I had the money and didn't care about the warranty. The first thing I'd do is replace the stock roof rack with a TrailRax and the associate PaxRax. The second thing I looked at was the M.A.S.S. Spare Tire Platform Mini from American Adventure Lab, put configured to carry both maxtrax and rotopax you're looking $560.00 and you just ruined all of your real rear view vision. Then I found Overland Kitted Spare Tire Matrax system and I was intrigued, pricier than what it should be (but what isn't these days) and recommended by Maxtrax USA. I thought I could do it cheaper than the $340.00 system, because I had a Racksbrax Matrax mounting plate that I thought I could mount to their system, so I bought their accessory bracket with strap first. When that didn't work I ended up buy the Complete System so I'm into this for $440.00.

After I purchased this, I came across Rockslide Engineering EZ Rack for $110.00, that comes with two accessory plates and is intended for only Rotopax, not Maxtrax, and when I saw that they don't recommend anything bigger than a 2.5 gallon rotopax, it doesn't appear to be as strong as the Overland Kitted which says can hold up to a 3 gallon rotopax and 4 Maxtrax Extreme boards.

So I went with the Overland Kitted set:

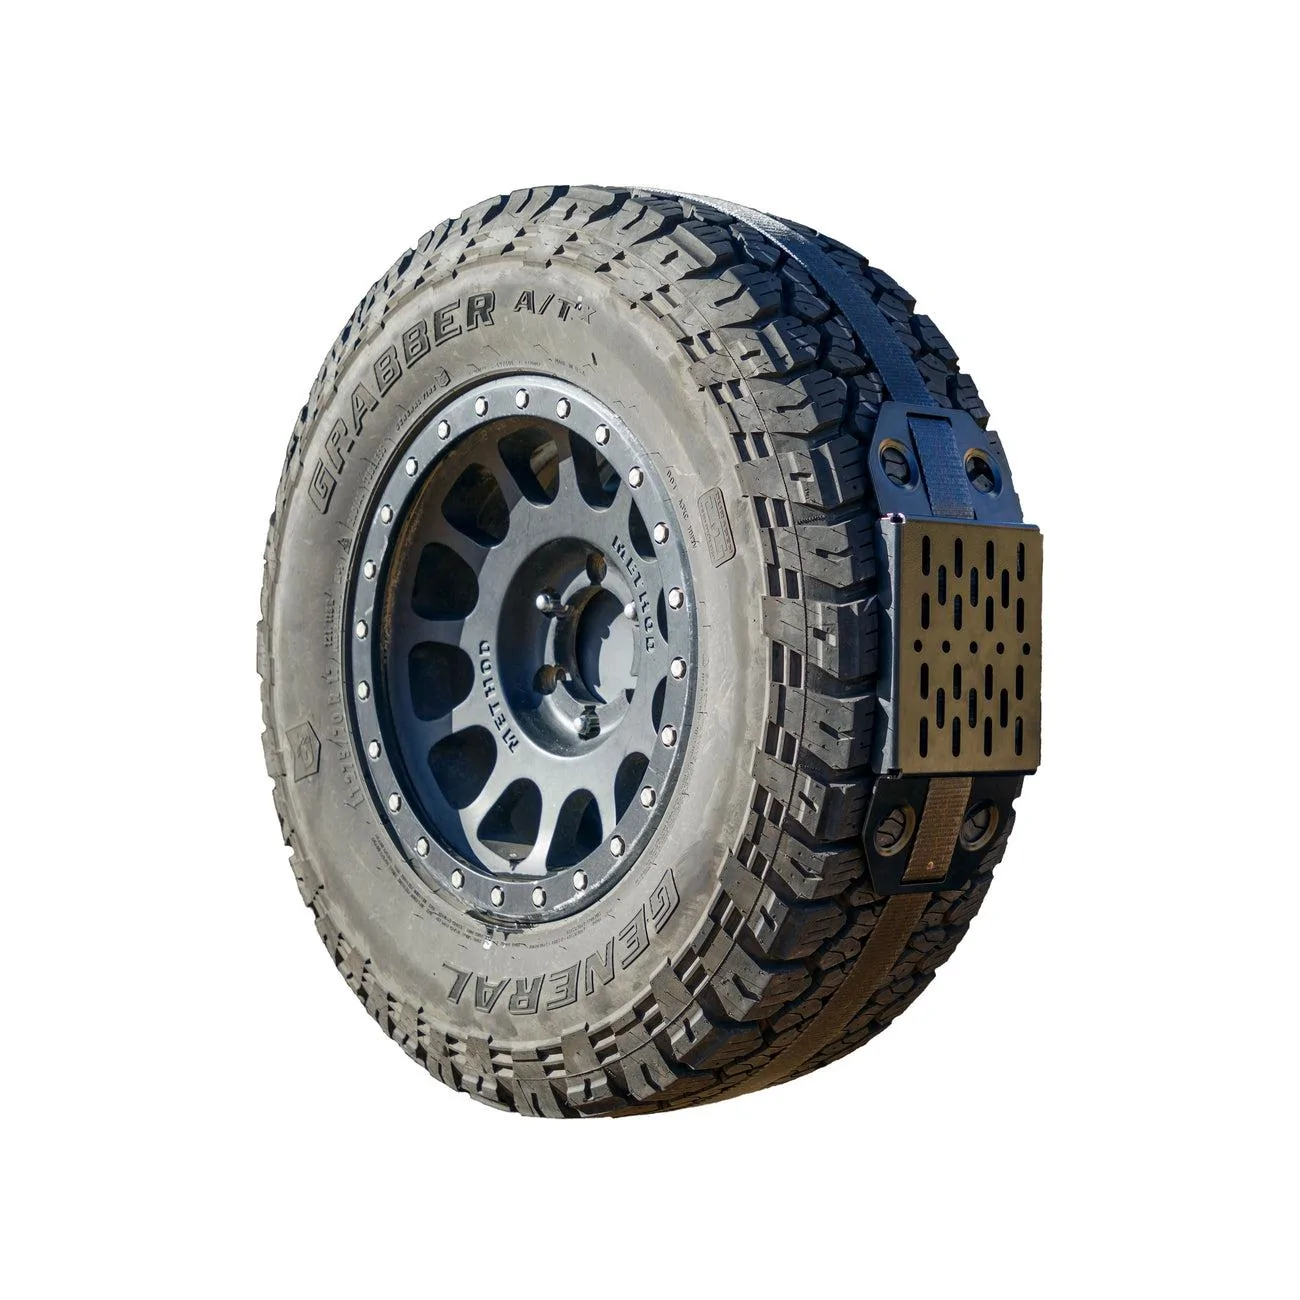
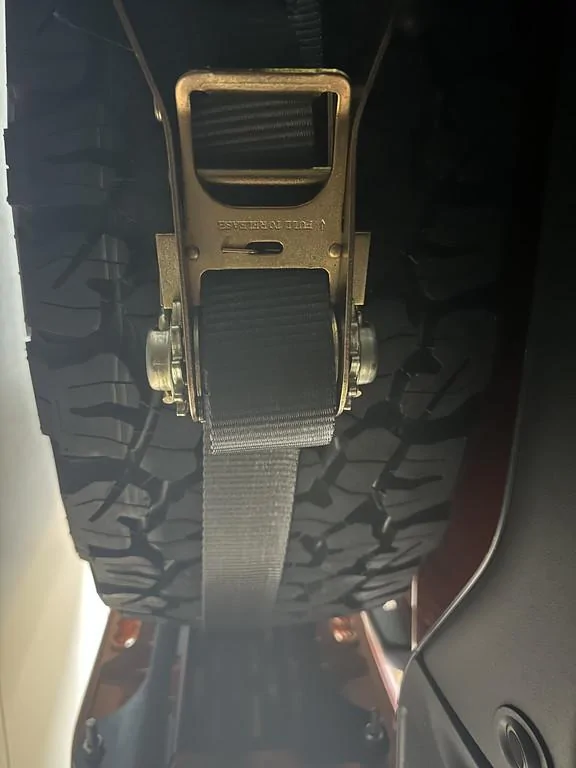
Here's the accessory bracket strapped to the tire:

Ford Bronco TGO - The Overlander Build SpareTireBracket_1300x


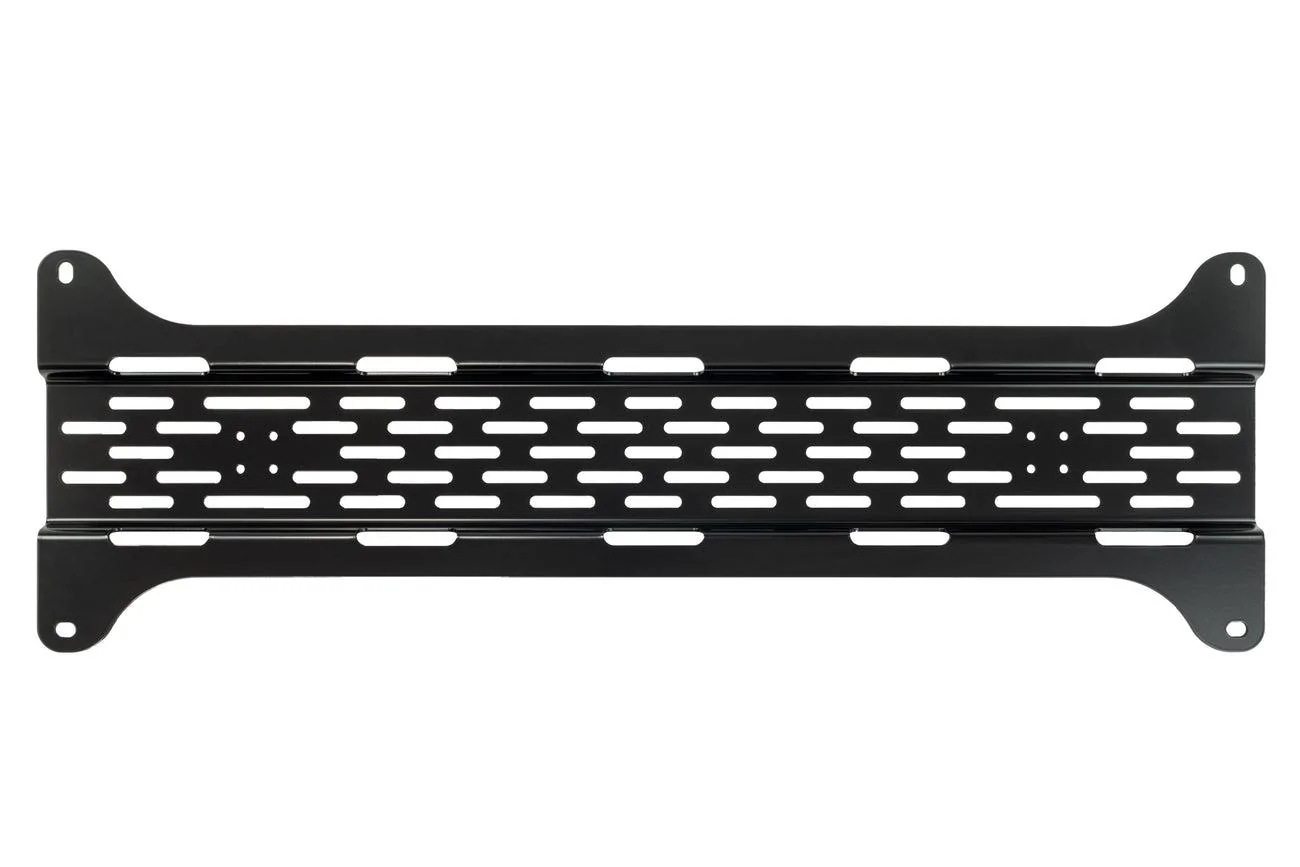
And the Rotopax mount can mount directly to that. For the maxtrax mounting you'll need to attach the Universal Maxtrax Mounting Plate. The nice thing about this plate is you can mount it to roof bars, roof racks and platforms, so I can use this on my Bison too.

Ford Bronco TGO - The Overlander Build FSPlateTop_1300x


I can't say it's fun installing with one person, things kept sliding and moving, I definitely recommend getting someone to help you install it.

Ford Bronco TGO - The Overlander Build IMG_0918-XL


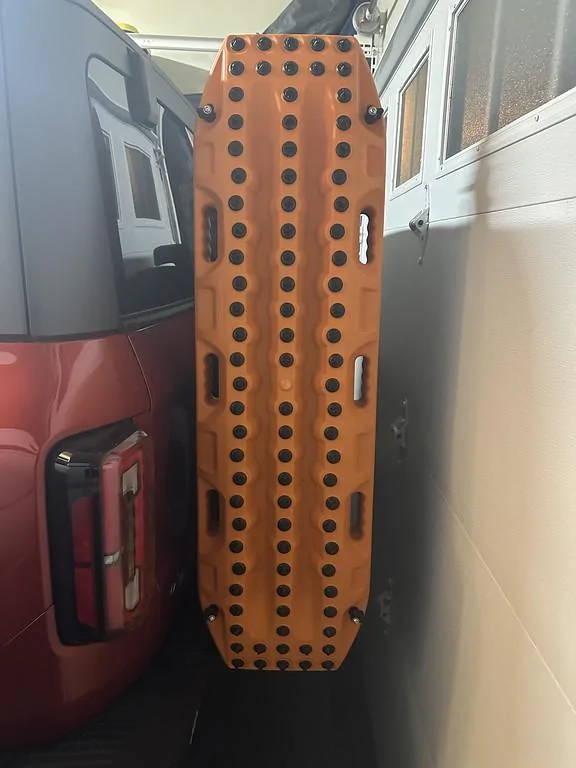
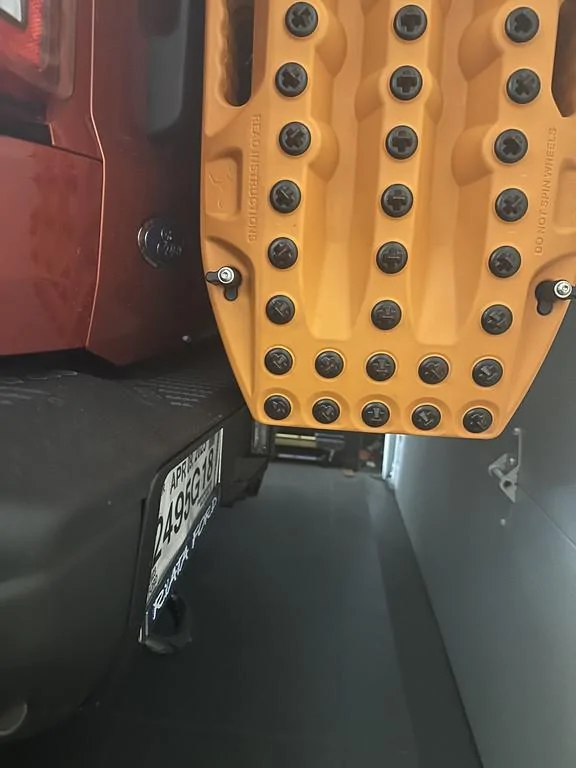
I had to mount the boards up higher, which is why they are at a slight angle, but they just clear the tailgate handle, which is still usable:

Ford Bronco TGO - The Overlander Build IMG_0919-XL


Ford Bronco TGO - The Overlander Build IMG_0922-XL


The strap, is a 2-inch MAC's Custom Tie Downs that is very beefy and smooth to use:

Ford Bronco TGO - The Overlander Build IMG_0925-XL


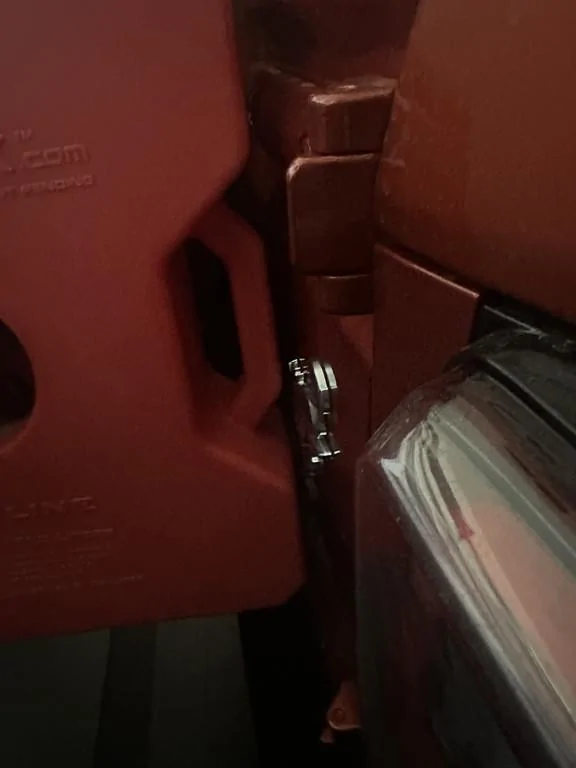
The Rotopax is close to the tailgate, but doesn't touch it (this is a 3 gallon Rotopax) and the tailgate still opens fully with this on there. I originally wanted the maxtrax on this side, but I wouldn't be able to open the tailgate fully.

Ford Bronco TGO - The Overlander Build IMG_0927-XL


Ford Bronco TGO - The Overlander Build IMG_0928-XL


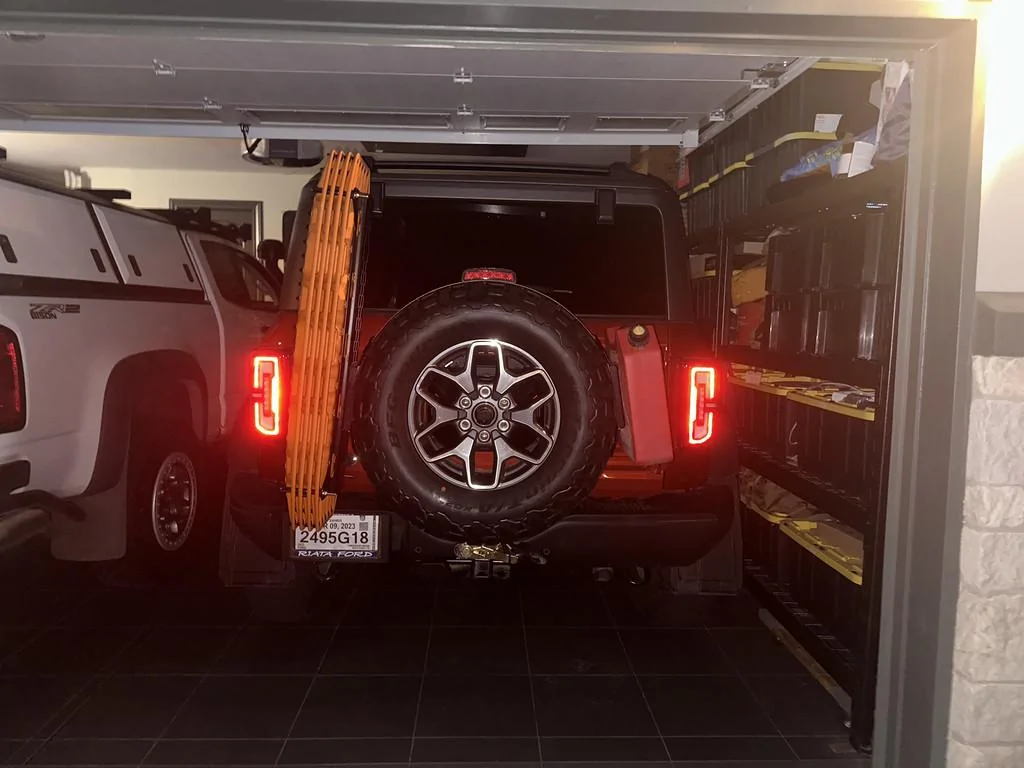
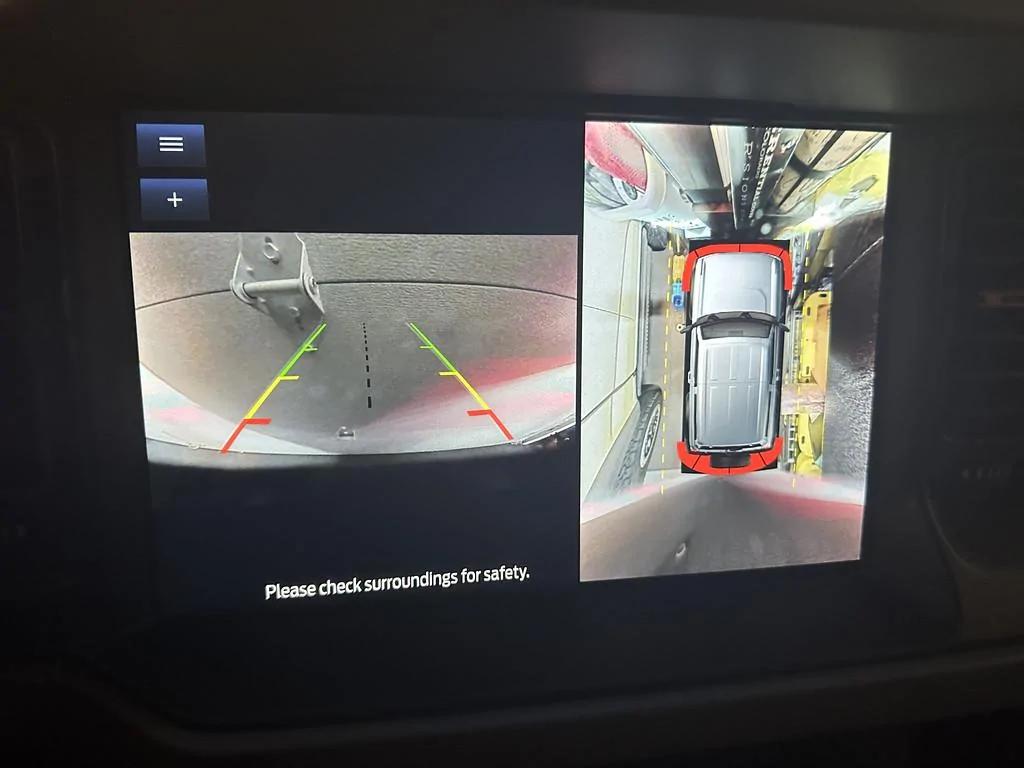
It doesn't really block the rear view all that much. It might affect the 360 degree rear view, I'll have to check it when I'm not in my garage:

Ford Bronco TGO - The Overlander Build IMG_0929-XL


While I was hoping to be able to do this for under $300.00 dollars, spending $140 more got me what I wanted. Something that can be taken on and off relatively easily, can be used on another vehicle and not impeding my rear visibility.

I'll fill up the rotopax and drive around to see how it does, the maxtrax do wobble but they are definitely securely mounted.
 
OP
OP
emulous74

emulous74

Badlands
Well-Known Member
First Name
Seth
Joined
Dec 25, 2020
Threads
7
Messages
419
Reaction score
731
Location
Austin, TX (Pflugerville)
Vehicle(s)
'19 ZR2 Bison D , '23 Bronco 2DR, MT
Your Bronco Model
Badlands
Broaddict Single Cross bar for OEM Roof Rack

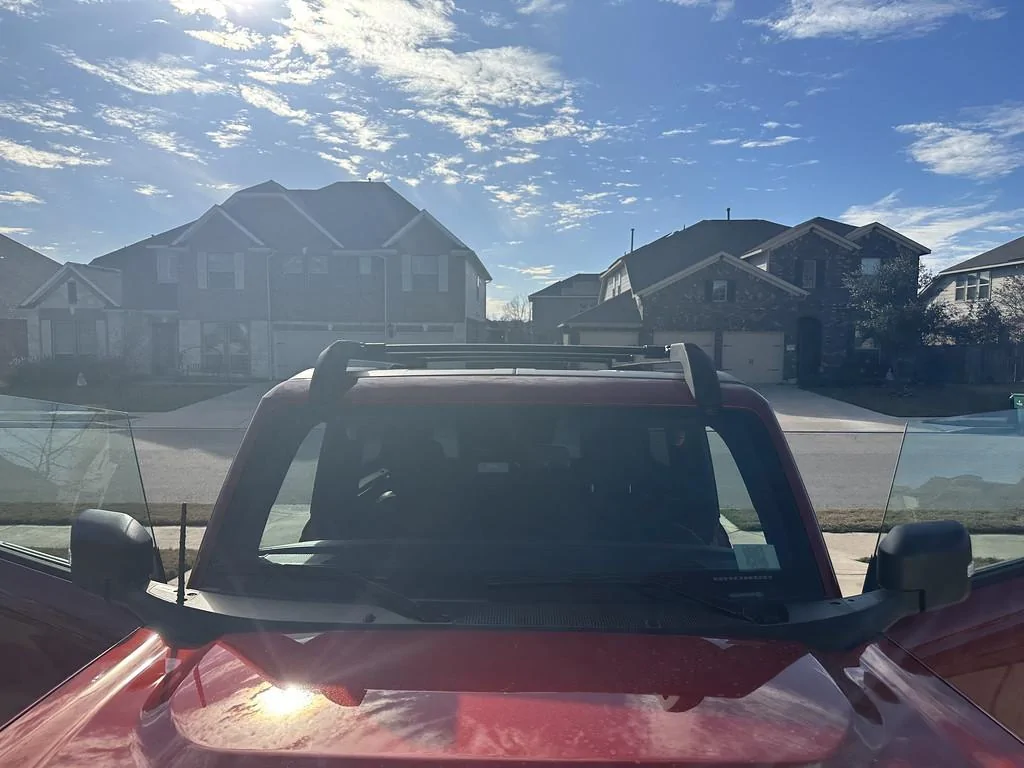
In Ford's not so bright wisdom offer's a Roof Rack from the factory as an option. However they only give you two crossbars. Normally on most roof racks, this is fine, you get one at the front and one at the rear. However with the Bronco roof rack one bar in 1/3 from the rear and one in the middle. There is no front bar and they want to charge you an additional $200.00 to put a crossbar at the front of the rack.

I found Broaddict on Amazon and saw they sold a copy of the oem bar, and on that particular day it was priced at $66.75 (Currently it's $89 on amazon with a 5% off coupon), so less than half what Ford is asking.

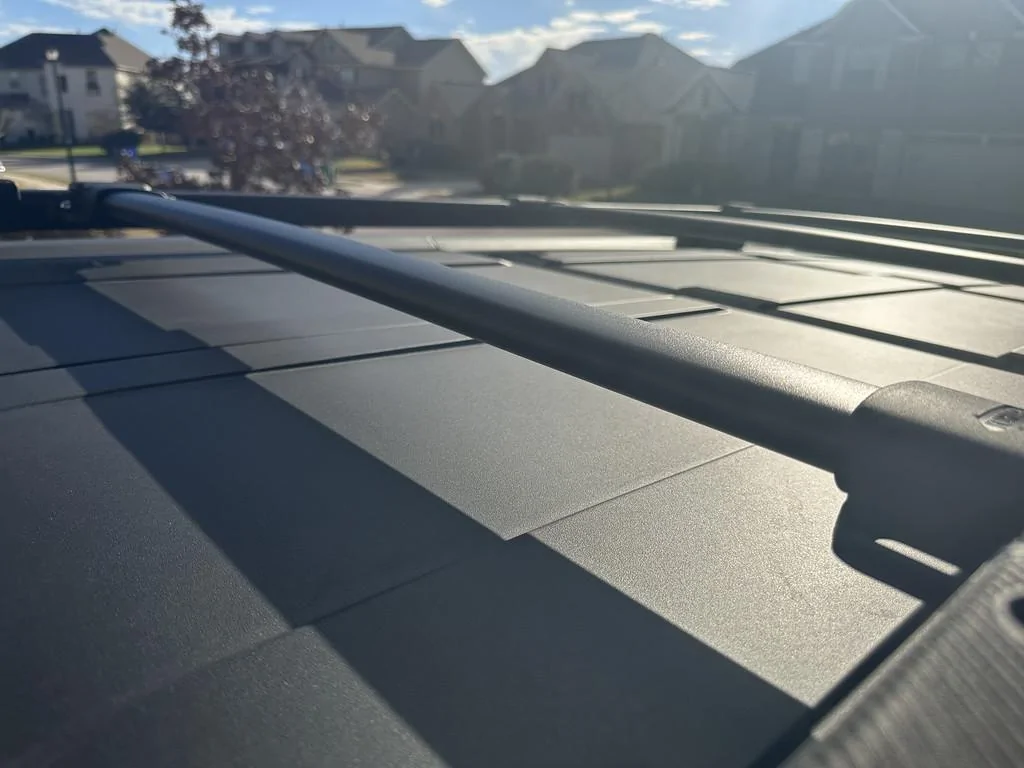
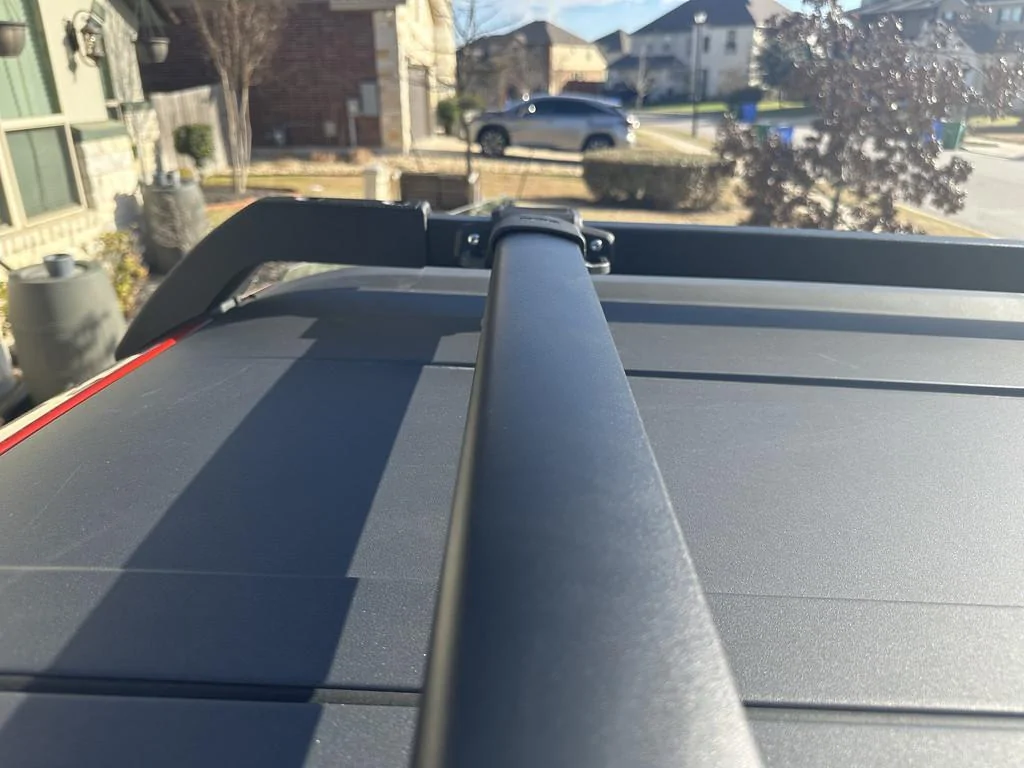
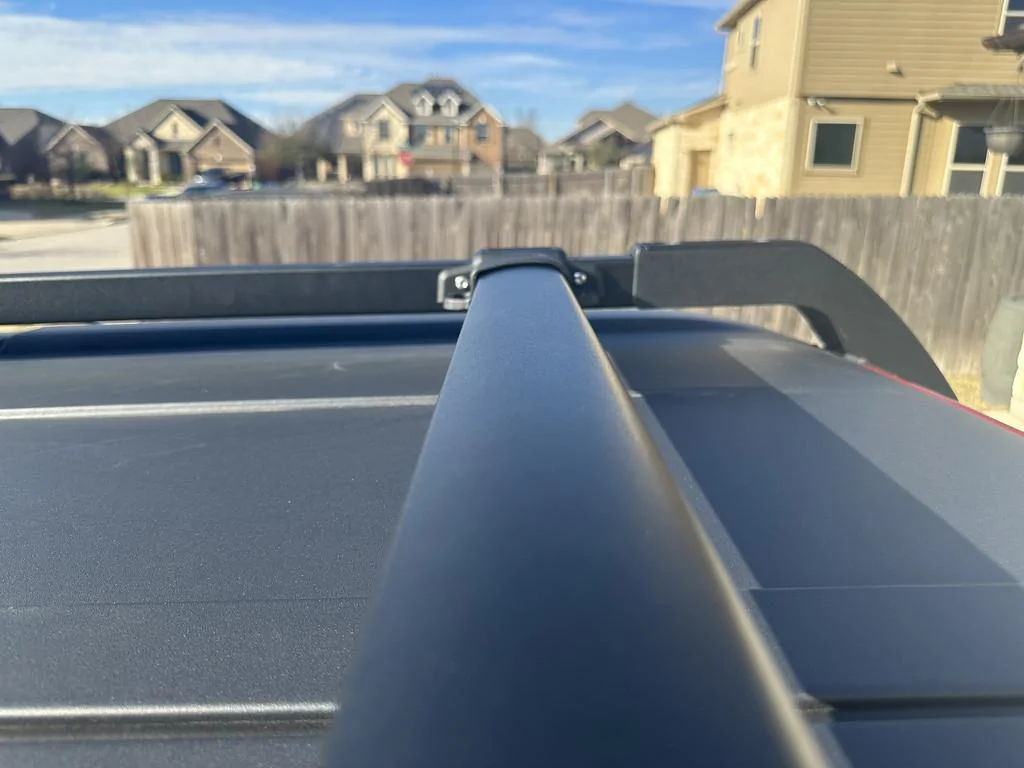
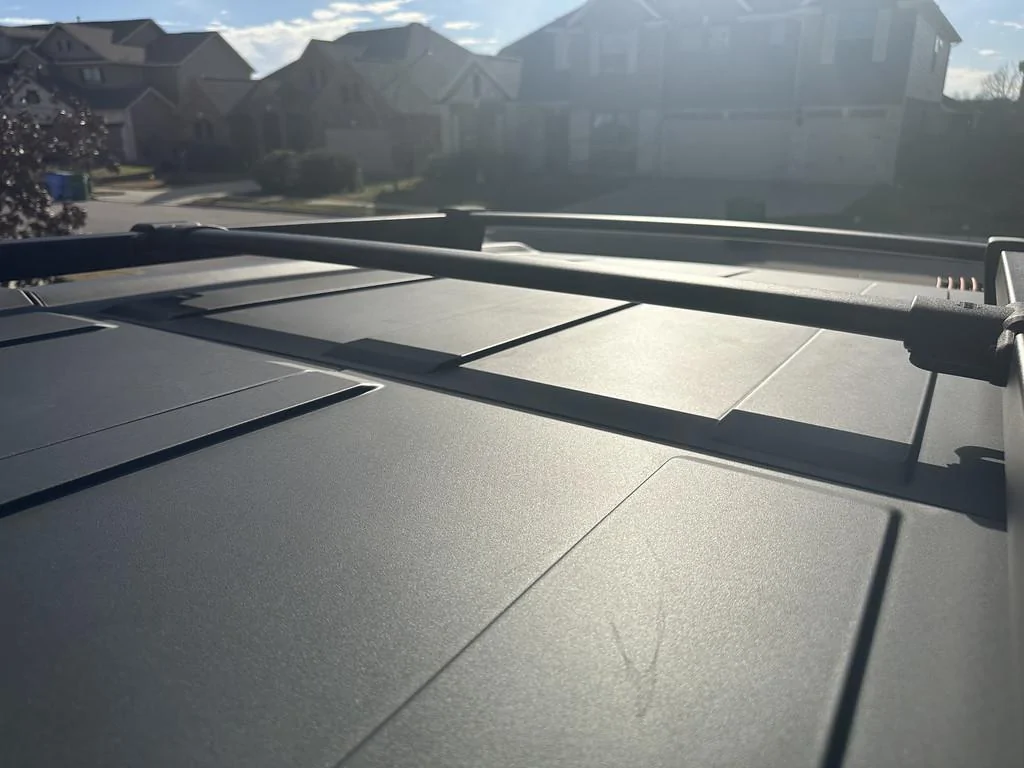
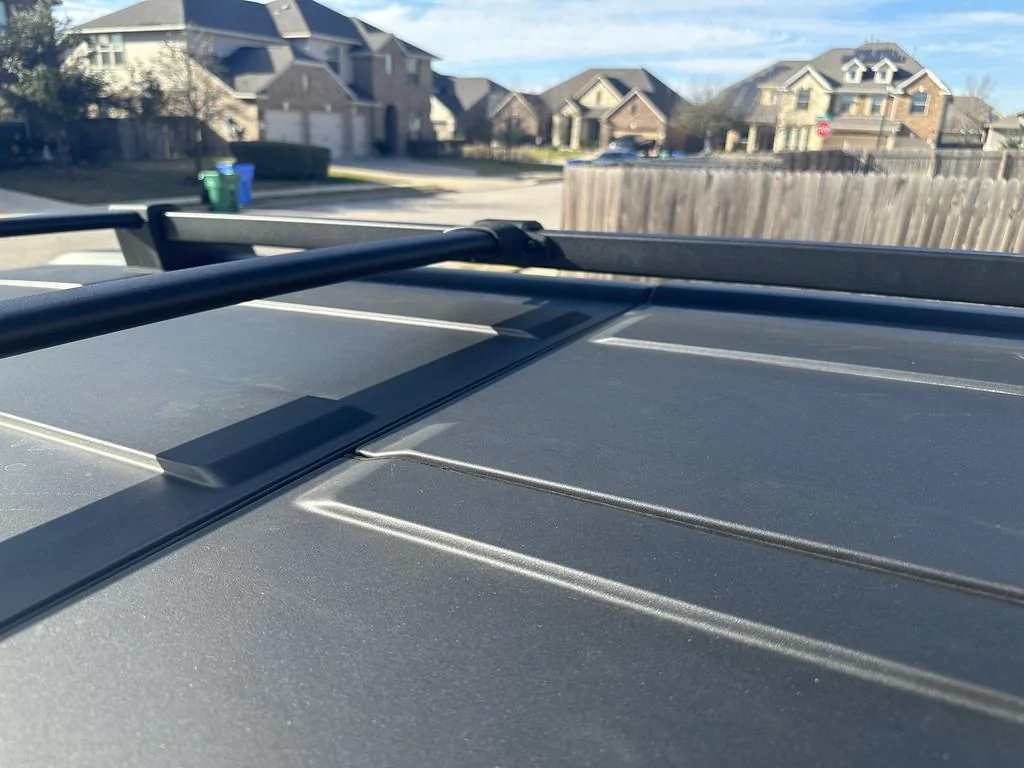
The Broaddict bar is a complete copy of the factory bar, the plastic piece doesn't form as nicely around the Broaddict bar, but seeing how tall most Bronco's are you'll never see it, the only other difference is the 4 bolts provided are silver, where the factory ones are black and branded Bronco. At least Broaddict did use the same T27 size, so you don't need to get a different tool for anything else on the rack.

Ford Bronco TGO - The Overlander Build IMG_0931-XL


The Broaddict Bar:

Ford Bronco TGO - The Overlander Build IMG_0932-XL


Ford Bronco TGO - The Overlander Build IMG_0933-XL


Ford Bronco TGO - The Overlander Build IMG_0935-XL


The Factory Bar:

Ford Bronco TGO - The Overlander Build IMG_0934-XL


Ford Bronco TGO - The Overlander Build IMG_0936-XL


Not bad for less than half the money of the real thing.
 
OP
OP
emulous74

emulous74

Badlands
Well-Known Member
First Name
Seth
Joined
Dec 25, 2020
Threads
7
Messages
419
Reaction score
731
Location
Austin, TX (Pflugerville)
Vehicle(s)
'19 ZR2 Bison D , '23 Bronco 2DR, MT
Your Bronco Model
Badlands
Ring Car Cam

I did the pre-order on this and it came in today.

Pretty easy to install, you have to install it through the Ring app, which I already have as I have Ring Doorbells and Alarms at both my houses. Because I was already subscriber I got 10% off on the preorder and all hardware I purchase.

So Ring Car Cam is a front and rear camera device that also records audio. It plugs into your OBD-II port and get's it's energy from that. During setup and through settings you can select from 3 different battery use configurations, with suggestion based on how old your battery is and how often you drive your vehicle.

You can connect it through Wi-fi although it normally communicates through cellular LTE networks (if you pay for the subscription). The problem I see is you can only tell it to connect to one Wi-fi network, it's not like your phone, where you can automatically connect to multiple wi-fi networks if they are available. Ideally I'd like it to connect to my vehicle wi-fi hotspot, but when it's in my garage or driveway and my vehicle is off, I would like it to connect to my house wi-fi. I ended up setting it up to my house wi-fi, because I figured if it couldn't get an LTE signal, neither could my Bronco.

In order to have LTE and other features such as:
  • Live View and Two-way talk over LTE
  • Notifications over LTE
  • GPS Location over LTE
  • Cloud highlights (stored for 180 days)
  • Cloud highlights for Traffic Stops
  • Rich Notifications (with a picture)
  • And you Can Download and share videos
The Subscription is $6.99 a month or $60.00 a year.

Without a subscription you get Video Recordings, Security Beacon and Traffic stops, as well as Live View and Two-way talk over Wi-fi, Notifications over Wifi and GPS Location over wi-fi

There is a privacy cover that will stop recording video and audio from inside the vehicle. You can tell Alexa to Record now and will capture video inside and out until you are moving again.

It was pretty easy to setup and hide the wire behind the dashboard and down the driver's side door frame to the OBD-II port the cable is just a thin type-c ubs plug on both sides.

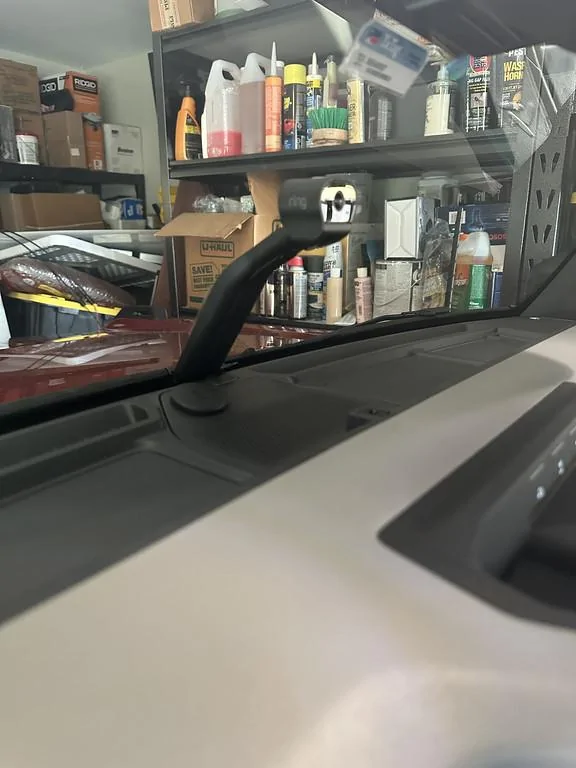
The actually camera is small, but the stalk is rather wide (I believe it has video storage onboard) and there is an adhesive sticker to mount it to the windshield. I have a tinted windshield so I mounted a sticker saver between it and the windshield. I'll let you know how it stays up.

Ford Bronco TGO - The Overlander Build IMG_0937-XL


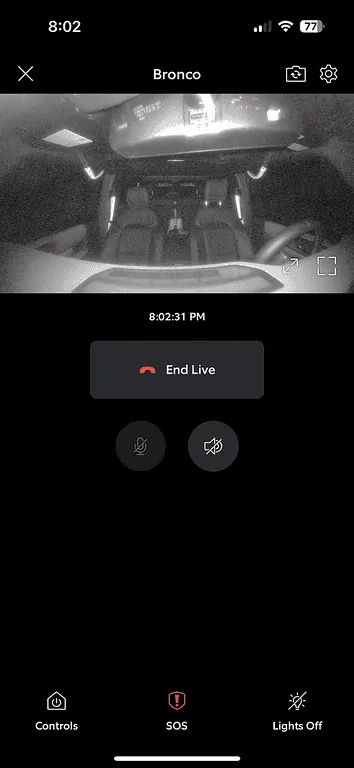
Here's a video that it captured with my vehicle turned off, but I was stepping on the rear tire and getting something off the roof rack. It notified that there was movement outside my vehicle.


And here's a screen shot from my Phone:

Ford Bronco TGO - The Overlander Build IMG_0939-XL


Overall, I'm happy with it so-far, Will be neat if I can take video while I'm driving off-road.
 
OP
OP
emulous74

emulous74

Badlands
Well-Known Member
First Name
Seth
Joined
Dec 25, 2020
Threads
7
Messages
419
Reaction score
731
Location
Austin, TX (Pflugerville)
Vehicle(s)
'19 ZR2 Bison D , '23 Bronco 2DR, MT
Your Bronco Model
Badlands
CDT ES-E4X coaxial speakers for the front dash (fail) and the rear pods (win).

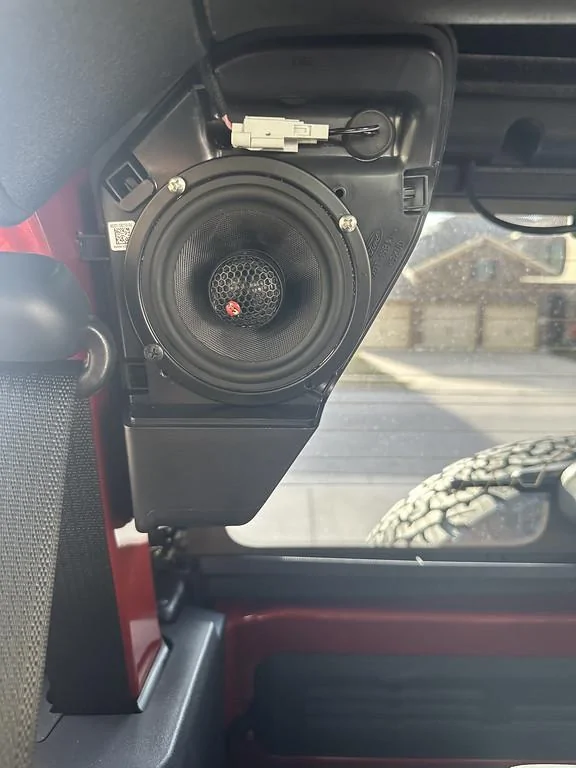
So my wire harness adapters came in today from Fast Daddy on ebay. Nice quality for the price. I got the set with 300hz blockers (to block the bass) for the front 3 speakers and no blockers for the rear. I was able to test the new speaker in the dash and wasn't as big as an improvement that I would like, but didn't have a choice, these are old school spears where there is metal mounting ring around the whole speakers, where it seems newer 4" speakers don't have this ring and just have small mounting tabs that come out from the speaker. There is also a wire harness that is at the bottom where the speakers mount, which I would need to remove if I could actually mount these speakers, but I can even get them all the way in the dash.

So I move onto the rear pods in my 2-door. I was surprised how much room there is back there for 2 people, when I checked the specs, the 2-door only looses one inch of leg r. oom and obviously the supposed middle sit, but that makes for a more airy feeling in the rear because you're not slammed up against the side plastic. Being high up it's not really ergonomic to get in out of the rear seats on a 2-door, but it's not a penalty box like I thought it would be.

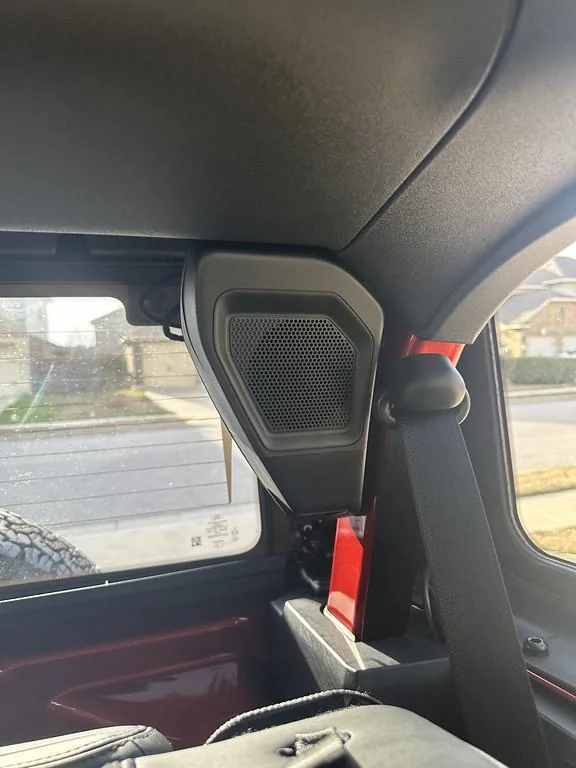
The rear pods grills come off easy enough, and I was surprised that they included an extra harness so you can detach the pod from the roll bar without having to disconnect the speaker first. I was worried that the extended tweeter on these speakers would stick out to far for the grill to go back on, but that turned out not to be a problem. I did have to drill 3 new holes to mount the speaker, I just drilled into the plastic, it was simple as could be. I did test the Fast Daddy ebay harness with the bass blocker and with out. I definitely preferred the sound with the bass blockers, than without, both sitting in the front and hearing them as fill as well as sitting in the back seats with all the sound going to back as well as centered in the default fade position, so I left them attached. Guess I'll have to get two new harnesses for the front speakers if I can get the coaxials in there.

What surprised me is using the surround mode how much fuller everything sounds, so with the 6.5 kick panel speakers replaced and the rear speakers replaced, the front stage does sound much better, but now I really want to complete the three way setup in the front.

Ford Bronco TGO - The Overlander Build IMG_0940-XL


Ford Bronco TGO - The Overlander Build IMG_0941-XL


Even the 4" separate wouldn't fit in the dash.

Ford Bronco TGO - The Overlander Build IMG_0941-XL


My license plates came in today, but my temporary tag goes until the middle of April. I need to decide what I'm going to do with the front plate, I'm kinda leaning to just zip tying it to the front grill, the stock mount blocks the front camera and you have to drill into the bottom surround of the grill, which I'm not sure if I want to do or not, plus I'll have to move if I break down and get the ARB Summit bumper.

My Sticker Fab order came in today too, so it's supposed to be in the 70's tomorrow here in Austin, so I'll probably start on all that stuff.
Sponsored


Top