
Sponsored

TGO - The Overlander Build

OP
OP
emulous74

emulous74

Badlands
Well-Known Member
First Name
Seth
Joined
Dec 25, 2020
Threads
7
Messages
419
Reaction score
731
Location
Austin, TX (Pflugerville)
Vehicle(s)
'19 ZR2 Bison D , '23 Bronco 2DR, MT
Your Bronco Model
Badlands
Another day, a few more mods/additions.

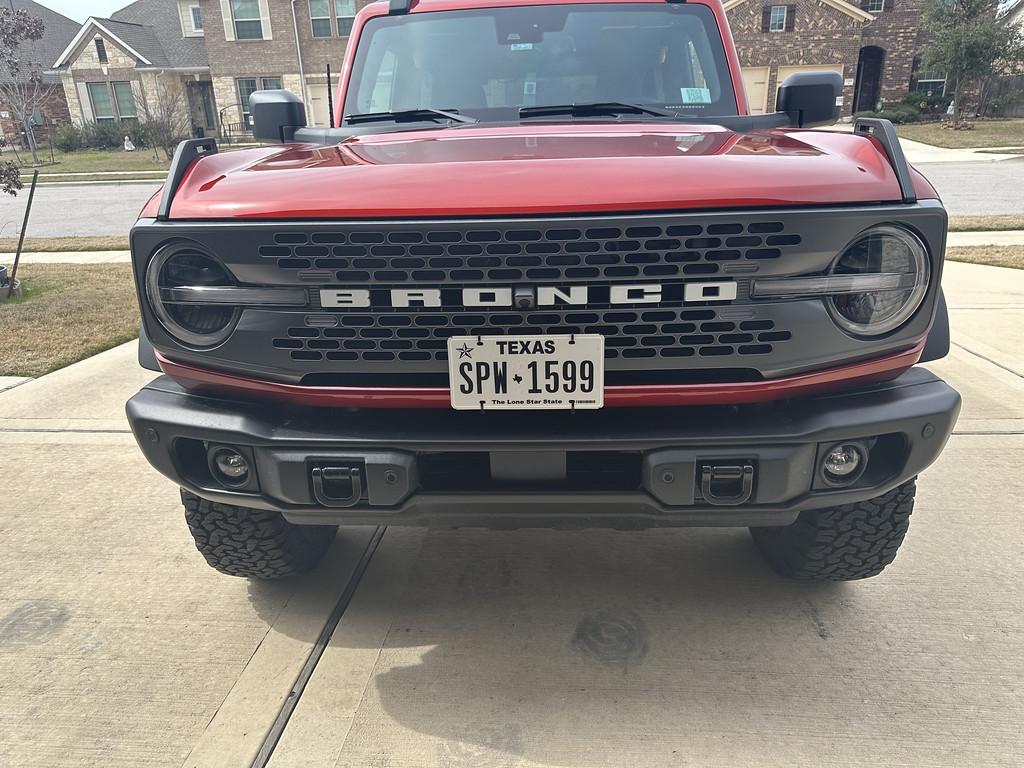
Front License plate, my dealer was nice enough to call me and ask if I wanted them to install the front license plate mount. I asked him how it was installed and he said into plastic. I told him no, that I would do it. However I found that the factory mount for it, blocked some of the front camera. The only alternate option I found was a mount that attached to the bottom of the bumper. The more I looked at the more I didn't like that ideal. Why would I put something on the vehicle that I would have to take off every time I went off-road? I did see one that mounted up from the skid plate but it covered one front tow hook and a sensor. That was a no go for me.

So the mudflaps I installed came with 4 sheets of foam with adhesive backing. I had the idea to attach the foam to the back of the plate and just zip tie the foam backed plate to the grill. Nothing permanent and if I decide to get the ARB Summit Bumper, I'd have to move it anyway. You can see the top two zip ties in the front camera, but I'm sure I won't notice it unless I look for it.

Ford Bronco TGO - The Overlander Build IMG_0945-XL


Ford Bronco TGO - The Overlander Build IMG_0946-XL


The bottom zip ties go around a lot of stuff inside the grill, it looks like there are active shutters behind the grill, those zip ties might impeded the the bottom shutter from fully closing, but I doubt living in Central Texas that they will ever be closed.

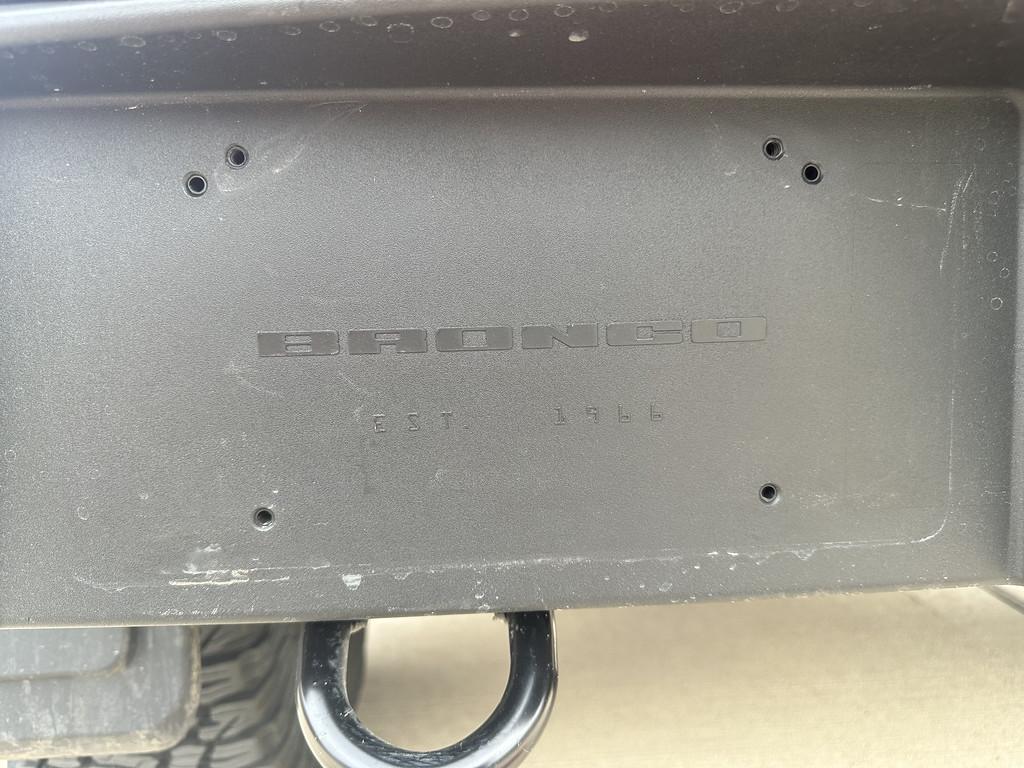
Also putting on the rear plate, I found one of the easter eggs, I didn't know about:

Ford Bronco TGO - The Overlander Build IMG_0947-XL


Sticker Fab 2-door lower door protection:

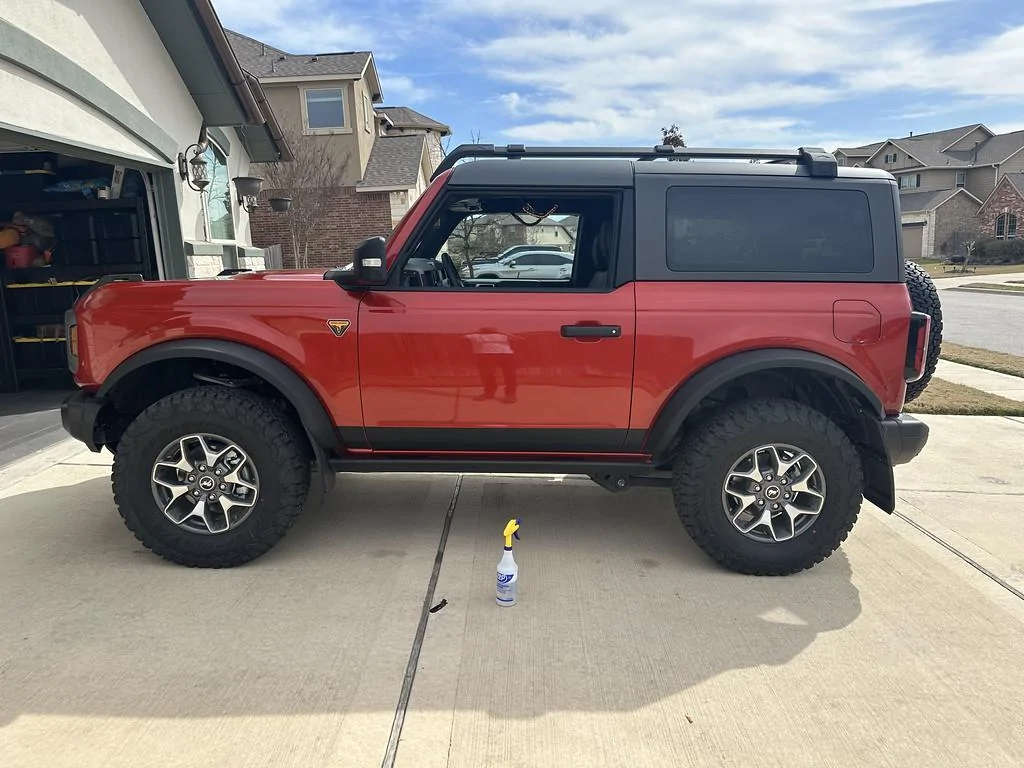
I tried to install this on the driver's side, unfortunately the door piece is meant to wrap around the bottom of the door, which is something I don't have the knowledge to do. So I used a Xacto knife and cut it, which did work well, but then I noticed that the front didn't look like and the rear piece wasn't cut right, so I just ended pulling it all off. I noticed when I started this effort that I have my first rock chip right in that area. So I'm going to search for some touch-up paint for HPR. I'm also going to find a wrap shop to do the lower doors and the hood. I plan to put the hood rock guard on and some plastic lower door pieces I just want the wrap so that I'm not mounting these things with double sided tape directly to the paint, this should allow me to either remove them or change them out without having to scrape adhesive off the vehicle.

Ford Bronco TGO - The Overlander Build IMG_0948-XL


A good friend of mine came by today to check out the Bronco since he's never been in one. I let him take it for a drive and he was really impressed. I promised him I'd let him drive it off-road.
Sponsored

 
OP
OP
emulous74

emulous74

Badlands
Well-Known Member
First Name
Seth
Joined
Dec 25, 2020
Threads
7
Messages
419
Reaction score
731
Location
Austin, TX (Pflugerville)
Vehicle(s)
'19 ZR2 Bison D , '23 Bronco 2DR, MT
Your Bronco Model
Badlands
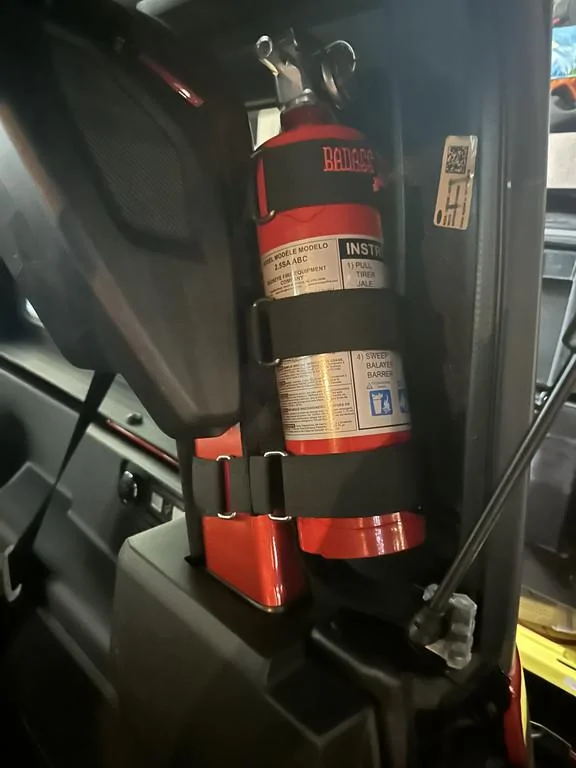
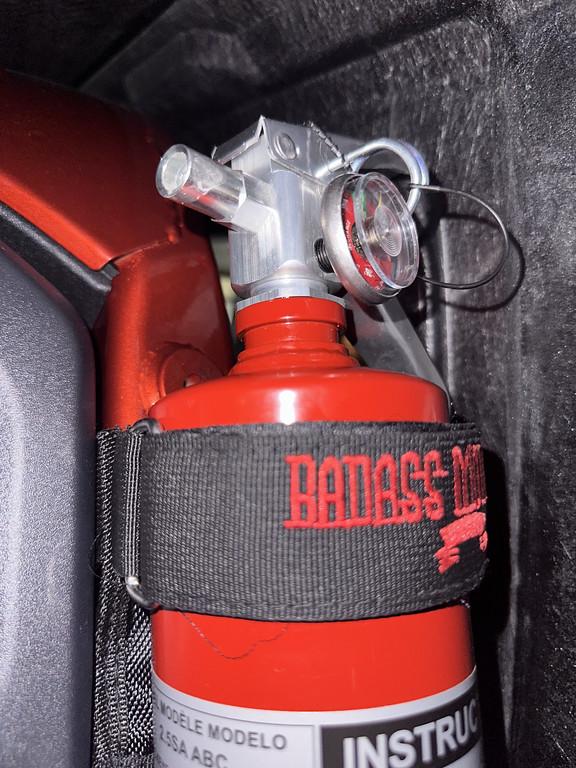
2.5lb Buckeye ABC Fire Extinguisher attached with Badass Moto for Jeep mount.

I believe that fire extinguishers are the first mod needed for every 4x4 especially if you're using it for camping/overlanding/whatever they want to call it today.

I say someone use this on YouTube for their 4-door Bronco and bought what he suggested as he said he used to be a fire fighter (thank you for your service). The 2-door roll bars are much smaller than what is in the 2-door. So I removed the passenger rear speaker pod, which doesn't sit flush to the roll bar in order to install this. I've yet to drive it around with this installed, but I think it's a perfect space for it. The plan is to have 2 Element 100's underneath the front seats as well.

Ford Bronco TGO - The Overlander Build IMG_0951-XL


Ford Bronco TGO - The Overlander Build IMG_0954-XL


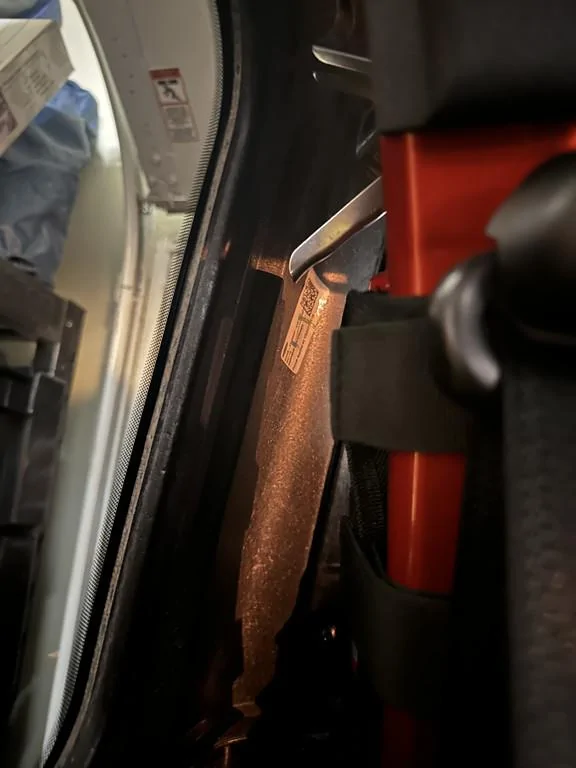
Doesn't come close to touching the hardtop:

Ford Bronco TGO - The Overlander Build IMG_0955-XL
 
OP
OP
emulous74

emulous74

Badlands
Well-Known Member
First Name
Seth
Joined
Dec 25, 2020
Threads
7
Messages
419
Reaction score
731
Location
Austin, TX (Pflugerville)
Vehicle(s)
'19 ZR2 Bison D , '23 Bronco 2DR, MT
Your Bronco Model
Badlands
Well, another audio workaround.

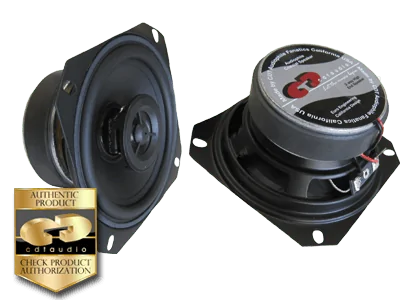
I've never in my life purchased speakers this cheap, but it was the only CDT Audio speaker that had a fighting chance to fit in the dash. They did fit without at a problem and they do sound better than the stock coaxials, however not as good as I'm looking for. But that kind of change up will happen in due time when discretionary income is available.

CDT Audio CL-4EX

Ford Bronco TGO - The Overlander Build cl4ex_lrg


Used the Fast Daddy (eBay) wire harness, one with the 300hz bass blockers and one without. The one without sounds fuller (so obviously the blockers are doing there job) but I will order more blockers.

This leaves the dash center speaker and the subwoofer as the only "stock" speakers left in my vehicle.
 

Huey22

Base
Well-Known Member
Joined
Oct 27, 2022
Threads
2
Messages
52
Reaction score
44
Location
Florida
Vehicle(s)
N/A
Your Bronco Model
Base
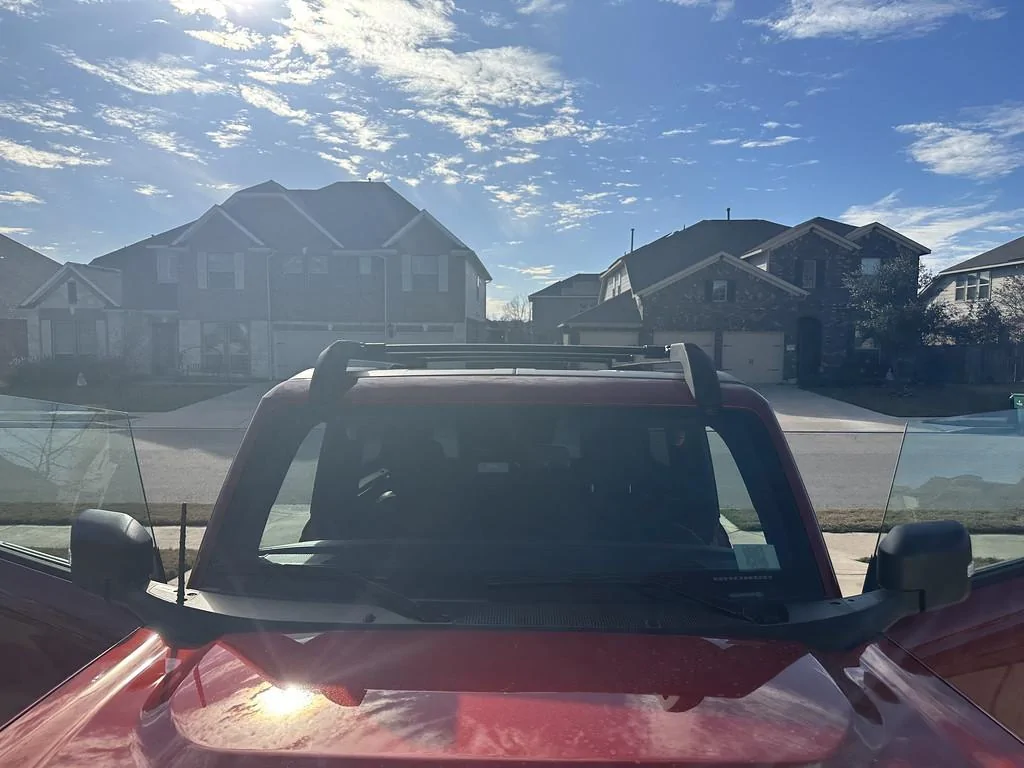
Broaddict Single Cross bar for OEM Roof Rack

In Ford's not so bright wisdom offer's a Roof Rack from the factory as an option. However they only give you two crossbars. Normally on most roof racks, this is fine, you get one at the front and one at the rear. However with the Bronco roof rack one bar in 1/3 from the rear and one in the middle. There is no front bar and they want to charge you an additional $200.00 to put a crossbar at the front of the rack.

I found Broaddict on Amazon and saw they sold a copy of the oem bar, and on that particular day it was priced at $66.75 (Currently it's $89 on amazon with a 5% off coupon), so less than half what Ford is asking.

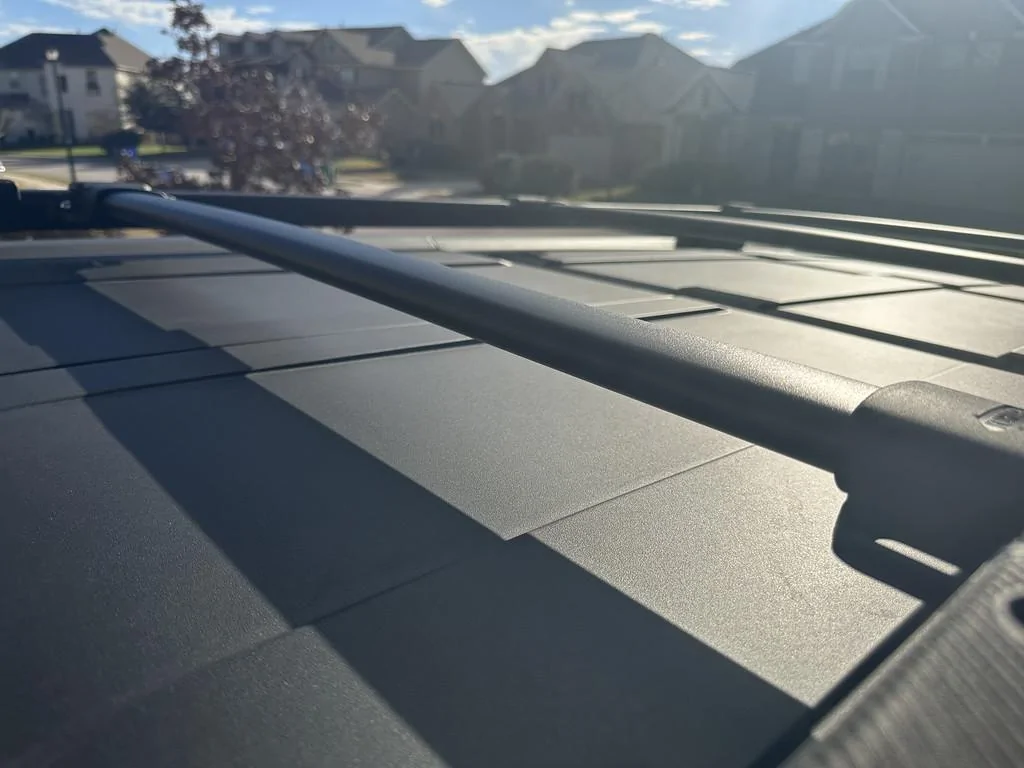
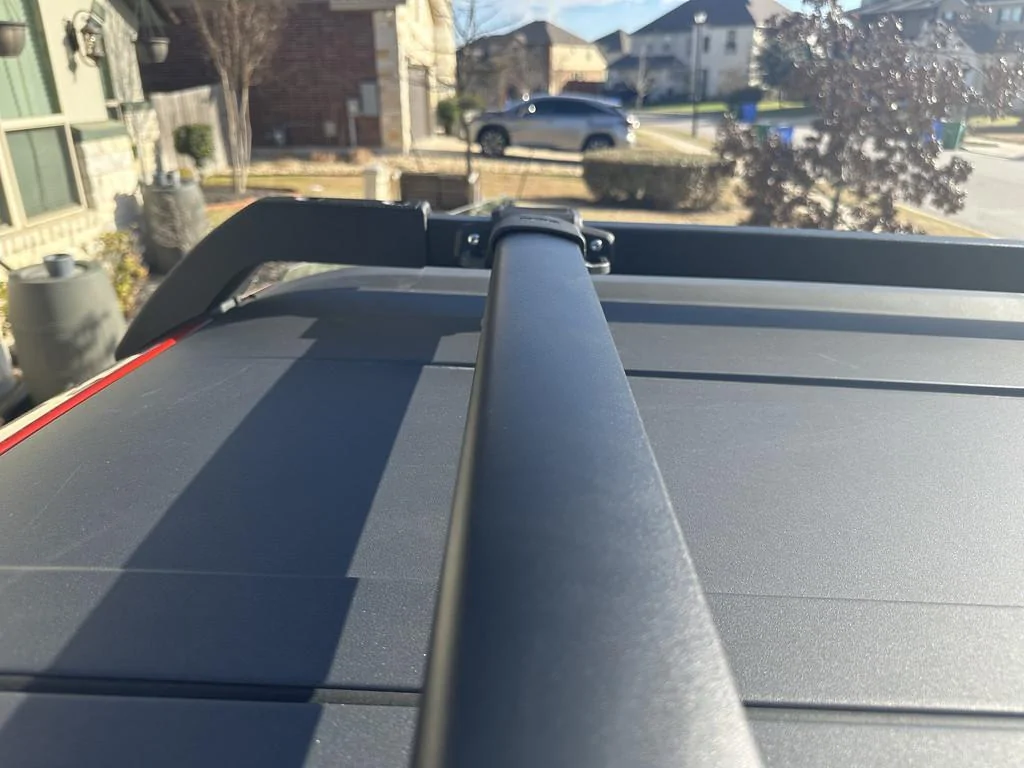
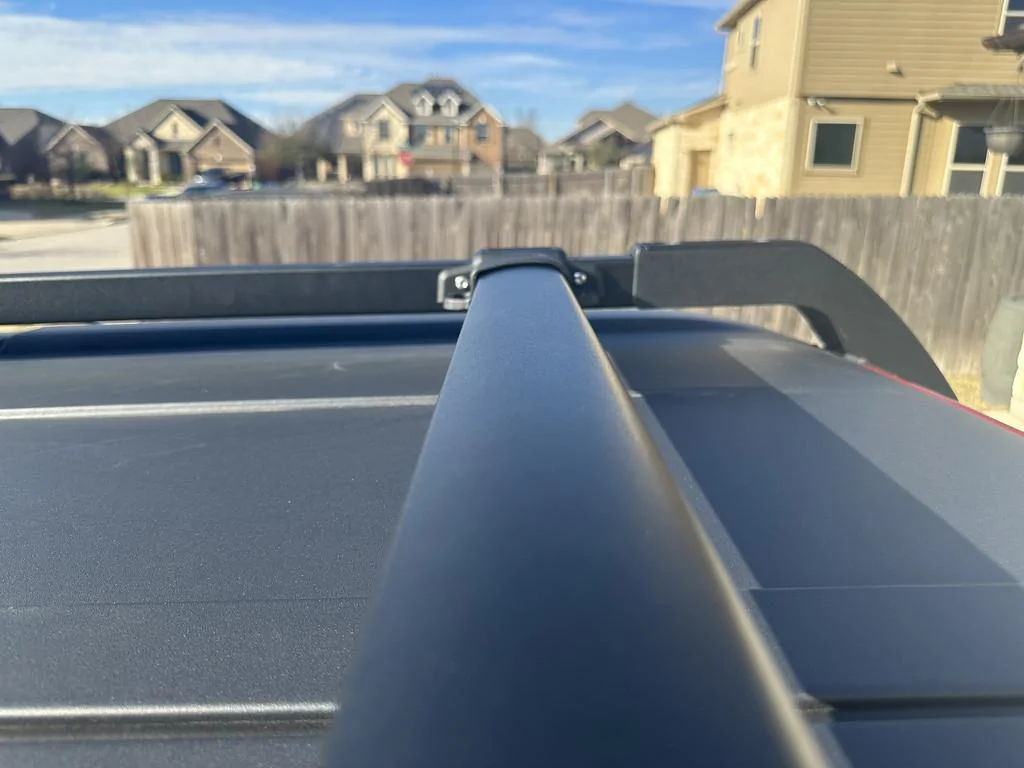
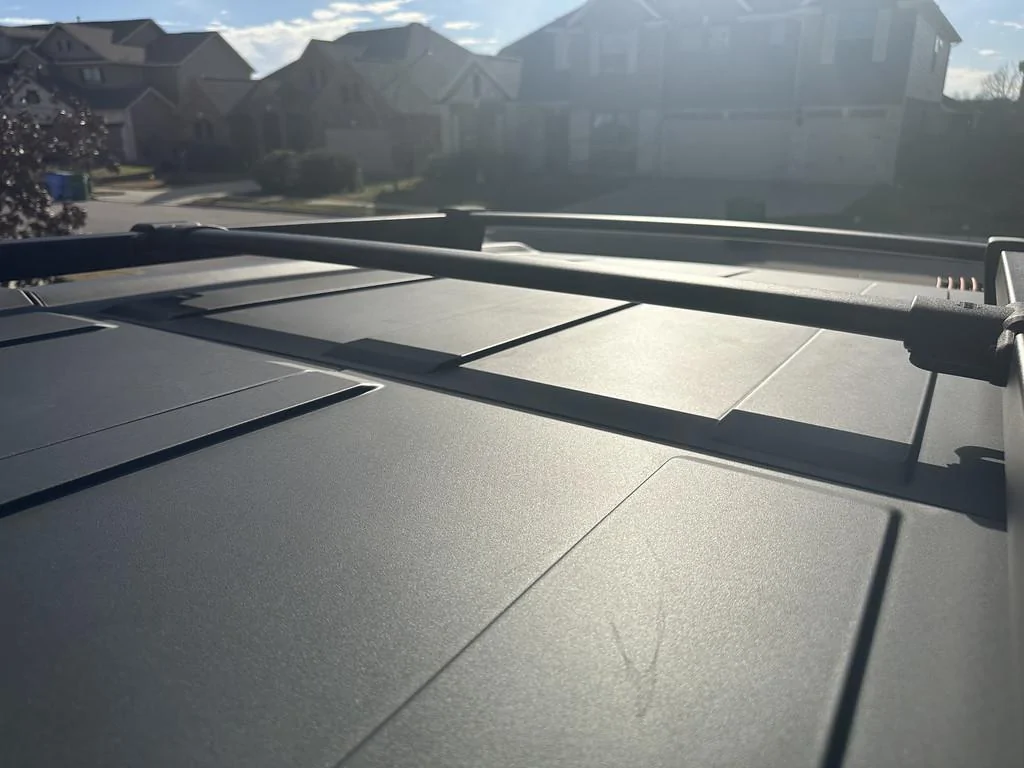
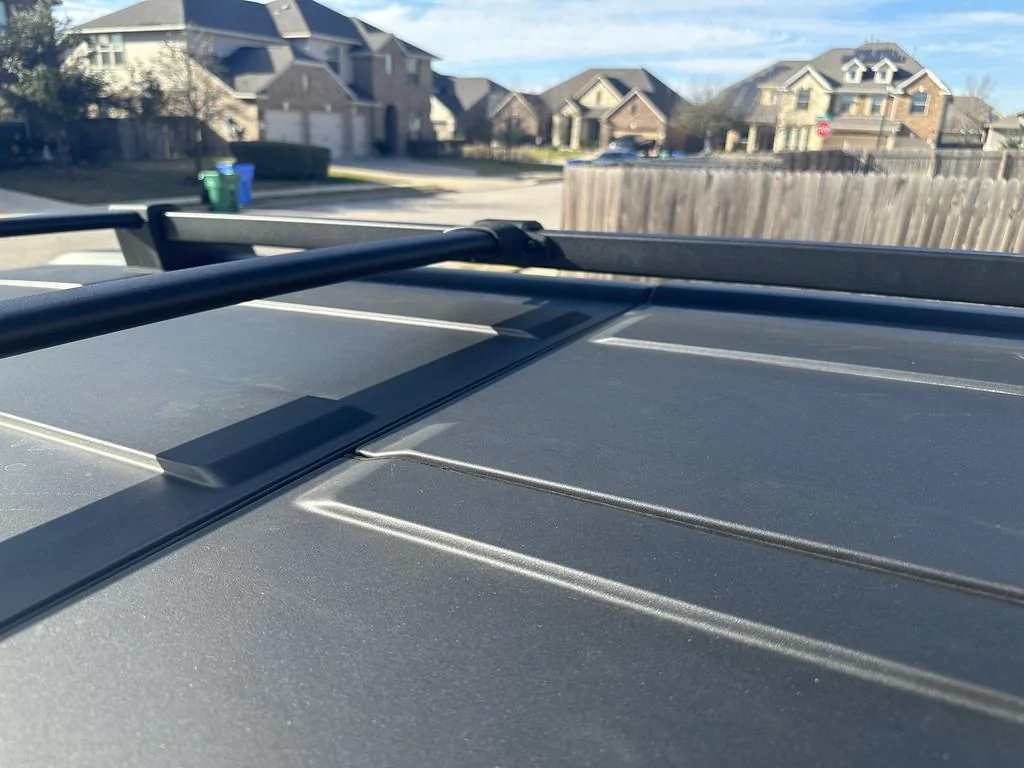
The Broaddict bar is a complete copy of the factory bar, the plastic piece doesn't form as nicely around the Broaddict bar, but seeing how tall most Bronco's are you'll never see it, the only other difference is the 4 bolts provided are silver, where the factory ones are black and branded Bronco. At least Broaddict did use the same T27 size, so you don't need to get a different tool for anything else on the rack.

IMG_0931-XL.jpg


The Broaddict Bar:

IMG_0932-XL.jpg


IMG_0933-XL.jpg


IMG_0935-XL.jpg


The Factory Bar:

IMG_0934-XL.jpg


IMG_0936-XL.jpg


Not bad for less than half the money of the real thing.
I am considering buying an additional one or two of these crossbars. My question is, do you happen to know if these help with the weight limit while driving (dynamic) of 110 pounds, and the static rating of 450? I keep finding conflicting information.
 
OP
OP
emulous74

emulous74

Badlands
Well-Known Member
First Name
Seth
Joined
Dec 25, 2020
Threads
7
Messages
419
Reaction score
731
Location
Austin, TX (Pflugerville)
Vehicle(s)
'19 ZR2 Bison D , '23 Bronco 2DR, MT
Your Bronco Model
Badlands
I am considering buying an additional one or two of these crossbars. My question is, do you happen to know if these help with the weight limit while driving (dynamic) of 110 pounds, and the static rating of 450? I keep finding conflicting information.
I am not an engineer so can't say for sure, but what I do know is it will help in evenly distribute the weight across the entire rack which is a great thing to do. I think the OEM rack can only take one additional cross bar (otherwise you will need to drill into the rack to install additional one). It will definitely help, but couldn't say if it would actually increase the weight limits of the OEM rack.
 

Sponsored

Huey22

Base
Well-Known Member
Joined
Oct 27, 2022
Threads
2
Messages
52
Reaction score
44
Location
Florida
Vehicle(s)
N/A
Your Bronco Model
Base
Thank you. Makes sense! I was thinking the OEM rack could allow for as many crossbars as you wanted, but went and looked again and see the pre-drilled holes for the one extra. Thanks again.
 

Huey22

Base
Well-Known Member
Joined
Oct 27, 2022
Threads
2
Messages
52
Reaction score
44
Location
Florida
Vehicle(s)
N/A
Your Bronco Model
Base
Thank you. Makes sense! I was thinking the OEM rack could allow for as many crossbars as you wanted, but went and looked again and see the pre-drilled holes for the one extra. Thanks again.
Also, did you have any additional wind noise?
 

Twister22

Badlands
Well-Known Member
First Name
michael
Joined
Sep 3, 2022
Threads
1
Messages
280
Reaction score
415
Location
lone jack,mo
Vehicle(s)
1965 Mustang 1968 Mustang Factory Five Cobra
Your Bronco Model
Badlands
Another day, a few more mods/additions.

Front License plate, my dealer was nice enough to call me and ask if I wanted them to install the front license plate mount. I asked him how it was installed and he said into plastic. I told him no, that I would do it. However I found that the factory mount for it, blocked some of the front camera. The only alternate option I found was a mount that attached to the bottom of the bumper. The more I looked at the more I didn't like that ideal. Why would I put something on the vehicle that I would have to take off every time I went off-road? I did see one that mounted up from the skid plate but it covered one front tow hook and a sensor. That was a no go for me.

So the mudflaps I installed came with 4 sheets of foam with adhesive backing. I had the idea to attach the foam to the back of the plate and just zip tie the foam backed plate to the grill. Nothing permanent and if I decide to get the ARB Summit Bumper, I'd have to move it anyway. You can see the top two zip ties in the front camera, but I'm sure I won't notice it unless I look for it.
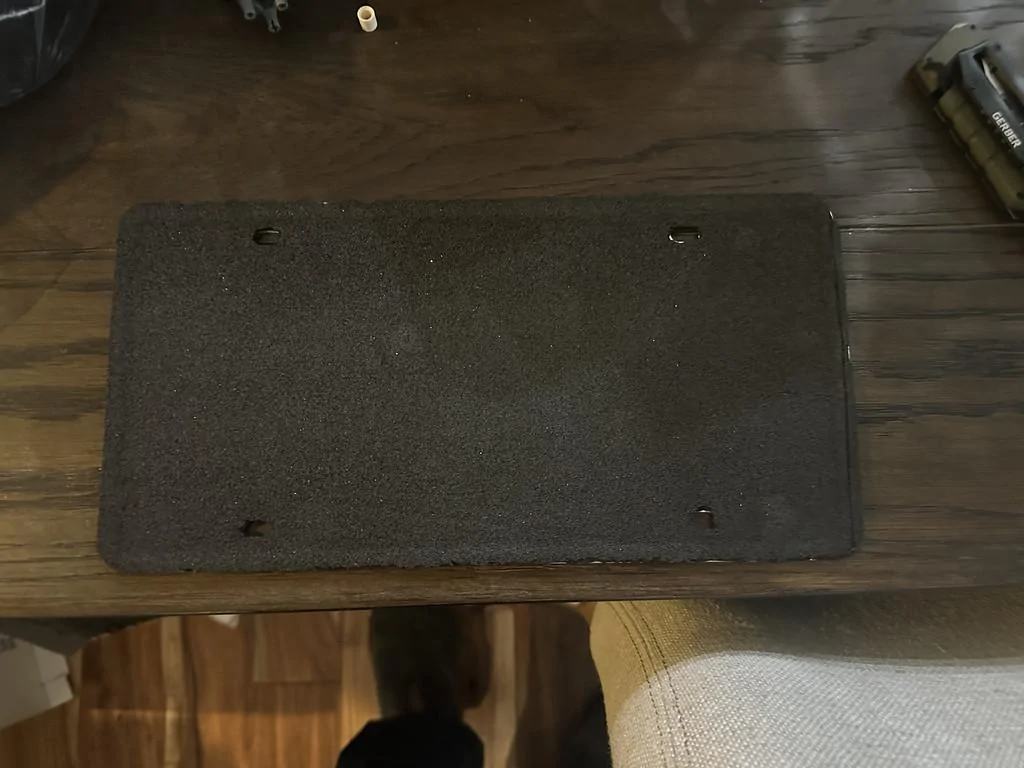
IMG_0945-XL.jpg


IMG_0946-XL.jpg


The bottom zip ties go around a lot of stuff inside the grill, it looks like there are active shutters behind the grill, those zip ties might impeded the the bottom shutter from fully closing, but I doubt living in Central Texas that they will ever be closed.

Also putting on the rear plate, I found one of the easter eggs, I didn't know about:
IMG_0947-XL.jpg


Sticker Fab 2-door lower door protection:

I tried to install this on the driver's side, unfortunately the door piece is meant to wrap around the bottom of the door, which is something I don't have the knowledge to do. So I used a Xacto knife and cut it, which did work well, but then I noticed that the front didn't look like and the rear piece wasn't cut right, so I just ended pulling it all off. I noticed when I started this effort that I have my first rock chip right in that area. So I'm going to search for some touch-up paint for HPR. I'm also going to find a wrap shop to do the lower doors and the hood. I plan to put the hood rock guard on and some plastic lower door pieces I just want the wrap so that I'm not mounting these things with double sided tape directly to the paint, this should allow me to either remove them or change them out without having to scrape adhesive off the vehicle.
IMG_0948-XL.jpg


A good friend of mine came by today to check out the Bronco since he's never been in one. I let him take it for a drive and he was really impressed. I promised him I'd let him drive it off-road.
I used this bracket for mine. just drilled two holes in bumper. Worked great.
https://dv8offroad.com/products/bro...3TCTkXBMXGIYQZaq3V5KPswUTH26ahwRoCfc0QAvD_BwE
 
OP
OP
emulous74

emulous74

Badlands
Well-Known Member
First Name
Seth
Joined
Dec 25, 2020
Threads
7
Messages
419
Reaction score
731
Location
Austin, TX (Pflugerville)
Vehicle(s)
'19 ZR2 Bison D , '23 Bronco 2DR, MT
Your Bronco Model
Badlands
Still in the process of installing my TRMR rack on my 2-door and did an exploratory purchase at McMaster-Carr to see the largest and most robust mounting hardware I can use with/on the TrailRax. Hopefully my experiment will help some other folks out in time, money and frustration.

What worked:

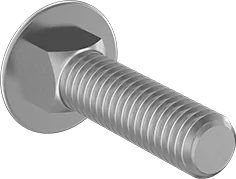
  • 93180A911- 316 Stainless Steel Square-Neck Carriage Bolt Super-Corrosion-Resistant M6 x 1 mm Thread, 20 mm Long, Packs of 10. This is a very tight fit and the tolerances of the carriage bolt are not exact, so about 1 in 10 wouldn't fit in the track:
    • 92356A628p1-b01-digitall@4x_637042398395001295.png
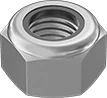
  • 94205A250- 316 Stainless Steel Nylon-Insert Locknut, M6 x 1 mm Thread, DIN 985, Packs of 50.
    • 94205a290-@halfx_637691222151272901.png
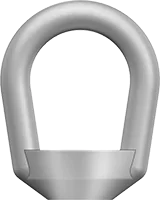
  • 3061T26- 316 Stainless Steel Oval Eye Nut - for Lifting, M6 x 1 Thread Size. I test fitted this one and seemed a little loose, I think using a washer and blue thread lock would work here. YMMV.
    • 3019t18p1-e01g-@4x_637049970629752230.png
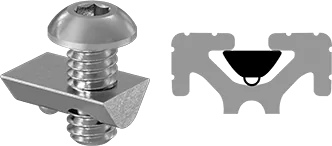
  • 47065T226 - T-slotted Framing. Drop-in Nut with Spring Loaded Ball, 1/4"-20 Thread Size. These allow you to drop these in through the top of the track (meaning you don't have to take off the side brackets and slide something in. The one caveat to this is the bolt is 9/16" which means it sticks up rather much, so you'll need something thick to get a tight fit, they do have 1/2" size that I will try out as it's 11% shorter.
    • -digital-master1570138795-p9@4x_637057359503655131.png

Did NOT Fit:

  • 3136N399 - T-slotted Framing, Drop-in Hammer Nut, Button Head, 30mm High Rail, M6 Size
  • 5537T72 - T-slotted Framing, Drop-in Hammer Nut with Button Head, 1/4"-20 Thread Size
  • 6000N312 - T-slotted Framing Fasteners, Drop-in Spring Loaded Ball Nut, Stainless Steel M6
 

Sponsored
OP
OP
emulous74

emulous74

Badlands
Well-Known Member
First Name
Seth
Joined
Dec 25, 2020
Threads
7
Messages
419
Reaction score
731
Location
Austin, TX (Pflugerville)
Vehicle(s)
'19 ZR2 Bison D , '23 Bronco 2DR, MT
Your Bronco Model
Badlands
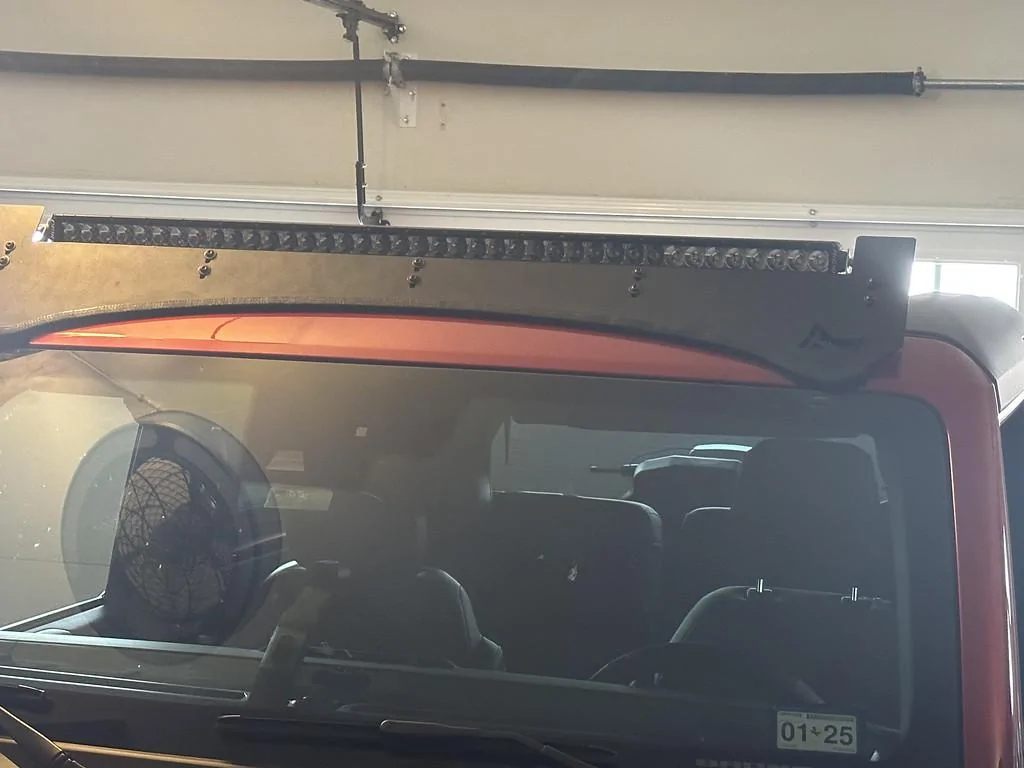
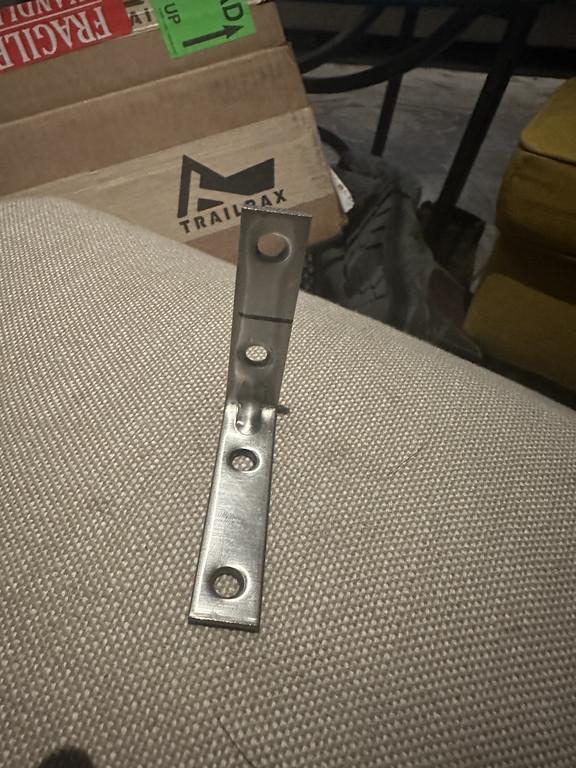
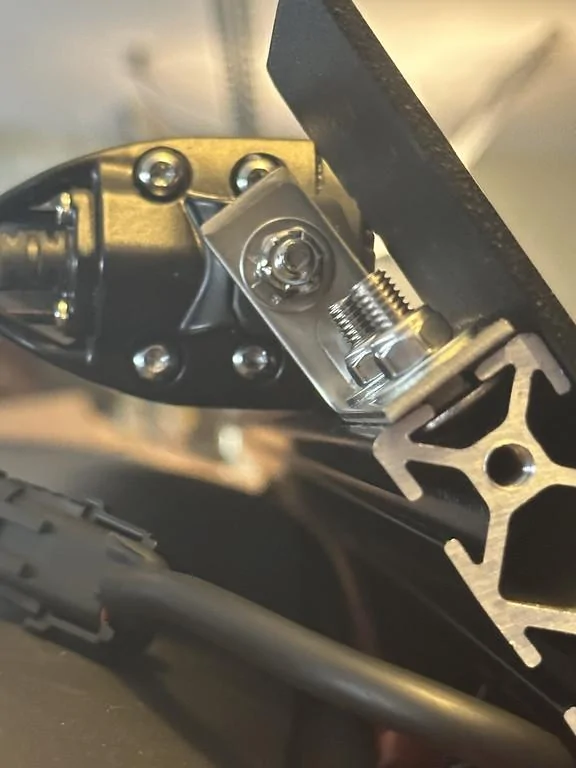
Finally got the Rigid Industries 40" SR Pro Light Bar installed on the Trailrax Front Bar with Wind Fairing. The two brackets that come with the Light Bar won't work with the wind fairing cut-out, so a trip to Lowe's I found Stainless Steel L brackets that the first vertical hole was the same height as the low bracket that came with the light bar. I had a friend cut down the vertical part since it would of gone higher than the roof rack. Followed the Ford Performance instructions for the wiring.

Ford Bronco TGO - The Overlander Build IMG_0963-XL


Ford Bronco TGO - The Overlander Build IMG_0959-XL


Ford Bronco TGO - The Overlander Build IMG_0965-XL
 
OP
OP
emulous74

emulous74

Badlands
Well-Known Member
First Name
Seth
Joined
Dec 25, 2020
Threads
7
Messages
419
Reaction score
731
Location
Austin, TX (Pflugerville)
Vehicle(s)
'19 ZR2 Bison D , '23 Bronco 2DR, MT
Your Bronco Model
Badlands
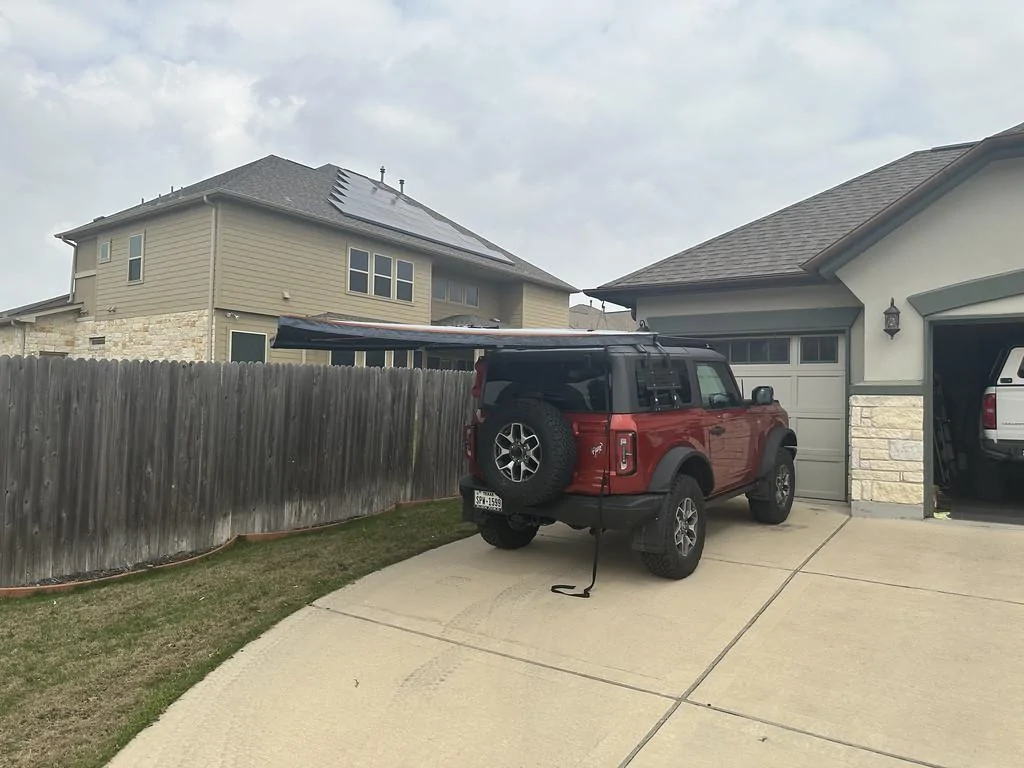
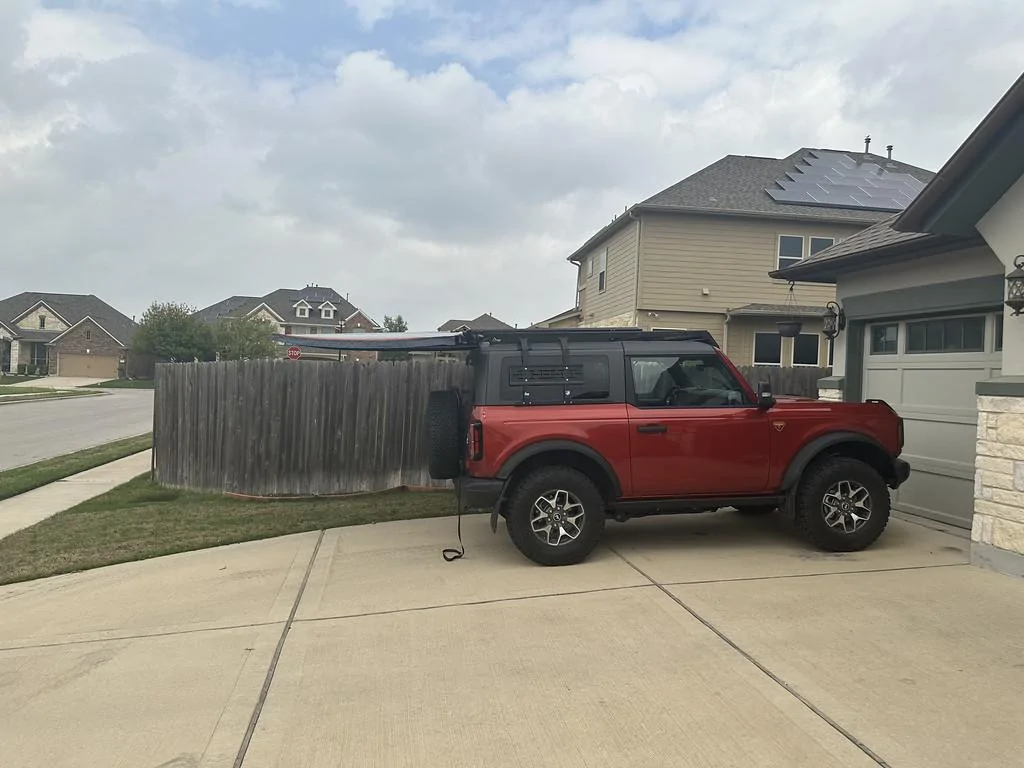
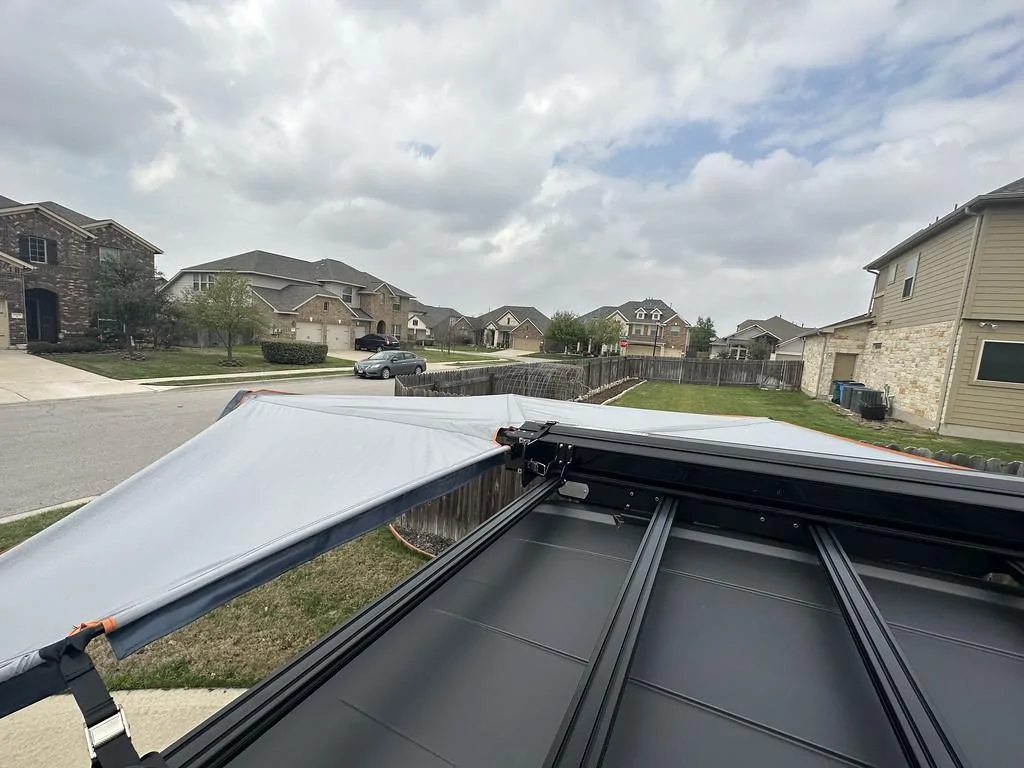
Finally got the entire TrailRax and PaxRack installed and my Roofnest Litewing Awning.

My only problem with the TrailRax Roof Rack are the instructions are wrong in some places, which TrailRax has known for a while, but they haven't updated their instructions. Luckily I looked at other install videos besides TrailRax so I was aware of them.

The first being the header brackets attached to the first bar, instructions state to use slide in nuts, based on the spacing with the header bracket holes, two slide in nuts won't match with the holes, they did supply 4 M6 Carriage Bolts and associated nylon lock nuts, but says nothing about it in the instructions.

Save yourself some time and mount the header brackets to the first bar and get the fairing on before attaching to the rest of the rack. This allowed me to take my time and install the 40" Rigid Light bar and do all the work without needing someone to help me lift the whole rack on the car multiple times.

Since I did the above, I put together the rest of the rack adding all the cross bars (they only recommend doing three), so that when my friend came by to help, I just needed his help to lift the rear roof off (instructions don't tell you about the two roof bolts that need to be undone), put the fender brackets on and reinstall the roof. He helped me lift the rack on. And that's all I needed his help with, so 30 minutes of help rather than 3 hours of putting the rack on, taking it off, putting it on, taking it off, like the instructions tell you.

I also suggest getting some name brand thread locker, what they included was a pain in the ass to use and wasn't as thick as the real stuff.

I also suggest buying drop-in hardware, taking crossbars off and on to install slide-in nuts or carriage bolts gets really old, really fast. Luckily I have an 80/20 rack on my trailer, so I pre-ordered a bunch of hardware and found what works and doesn't work. I'm a little concerned that everything is put together with 1/4" 20 bolts it doesn't appear to robust, especially when trying to mount accessories, but we'll see how well they hold up.

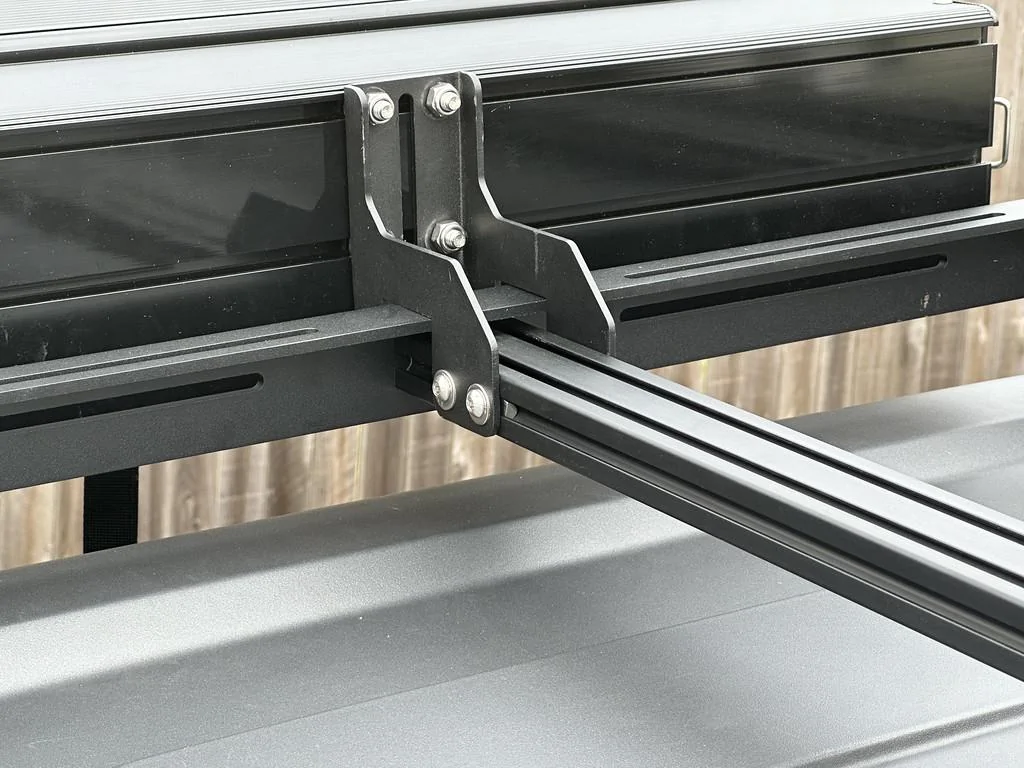
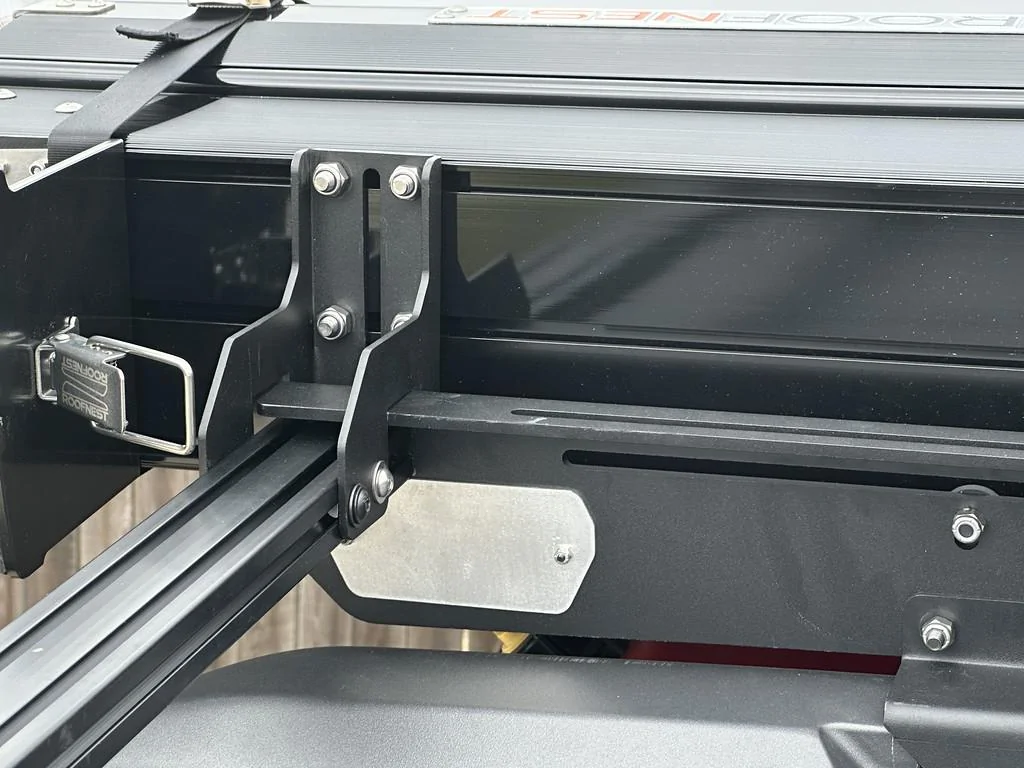
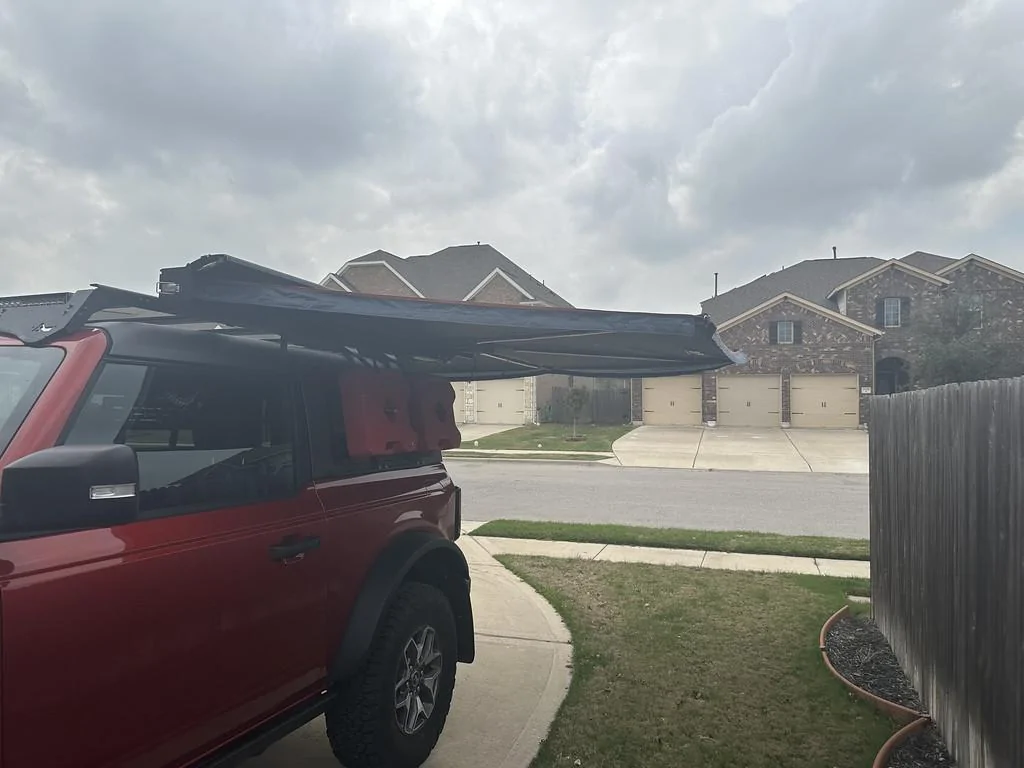
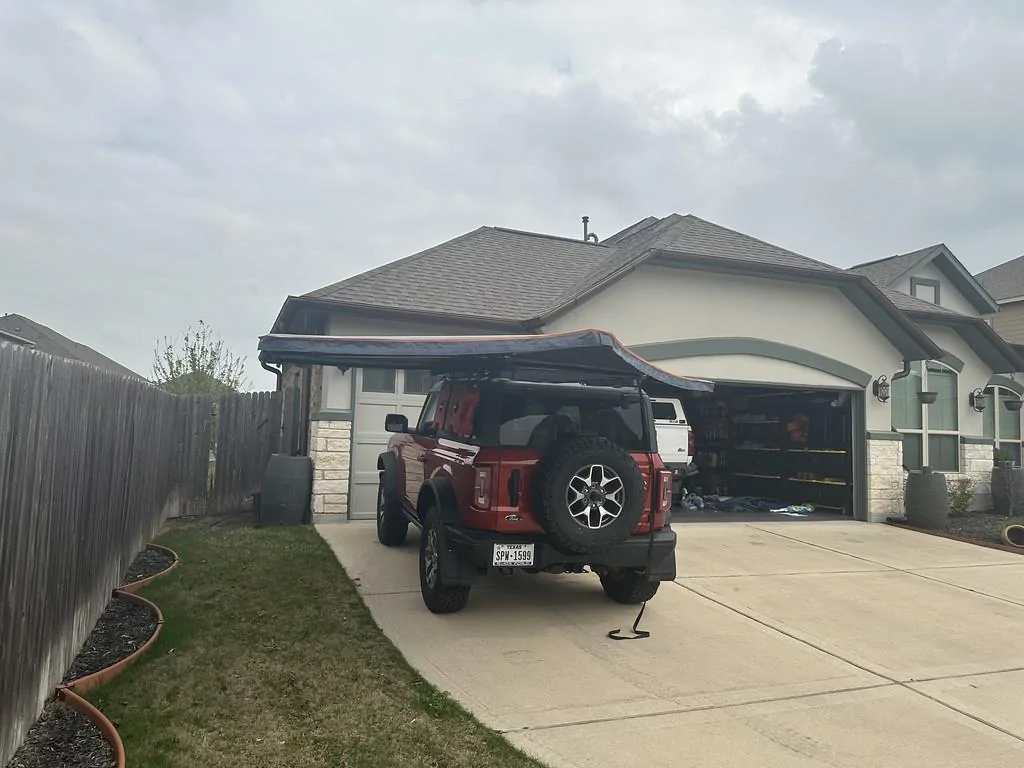
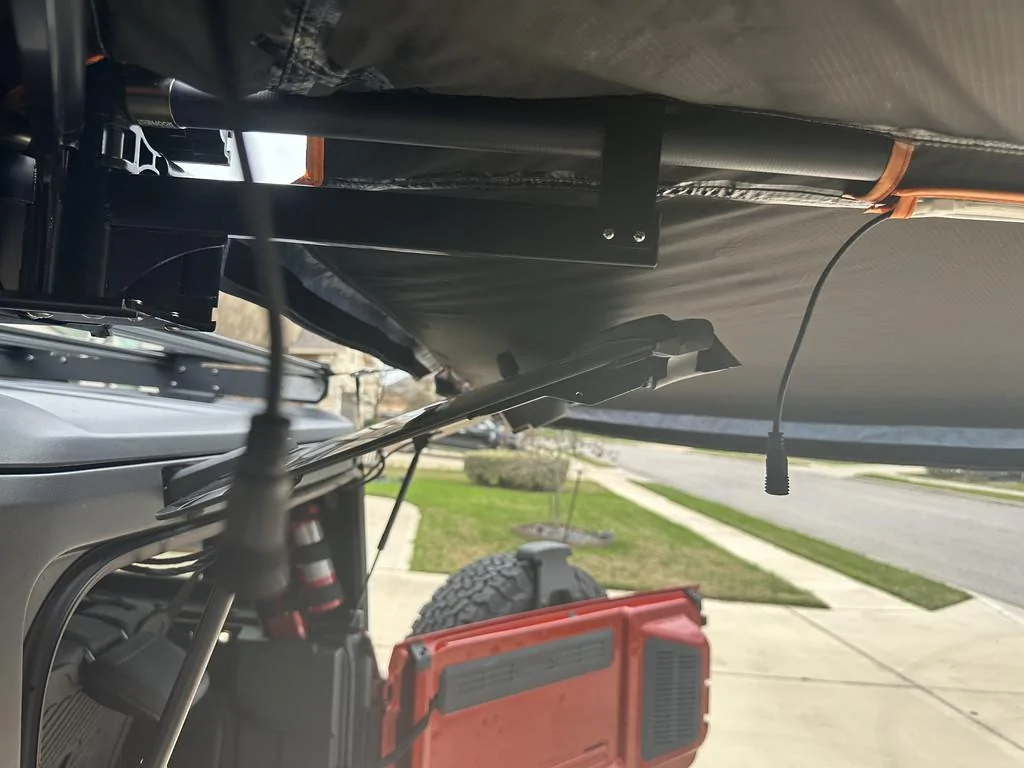
Roofnest Litewing Awning is a small 270 awning (covers about 70sq ft) but weighs under 30lbs. They accomplish this buy using Aluminum, Carbon Fibre for the arms, and Nylon for the awning itself. It has an Aluminum cover, built in LED light strips on three of the arms and is self-standing in calm winds, the brackets they send with them are the most robust ones I've ever seen and would of made it possible to attach to the oem rack, but I ended up using the TrailRax Modular Roof Rack 90 bracket, Low Profile.

I have to say, I think this and their larger one (only 40lbs) is the perfect 270 awning for the Bronco and any other vehicle where you want the least amount of weight on your roof rack.

Ford Bronco TGO - The Overlander Build IMG_0980-XL


Ford Bronco TGO - The Overlander Build IMG_0979-XL


Ford Bronco TGO - The Overlander Build IMG_0974-XL


Ford Bronco TGO - The Overlander Build IMG_0975-XL


Ford Bronco TGO - The Overlander Build IMG_0976-XL


Ford Bronco TGO - The Overlander Build IMG_0977-XL


Ford Bronco TGO - The Overlander Build IMG_0978-XL


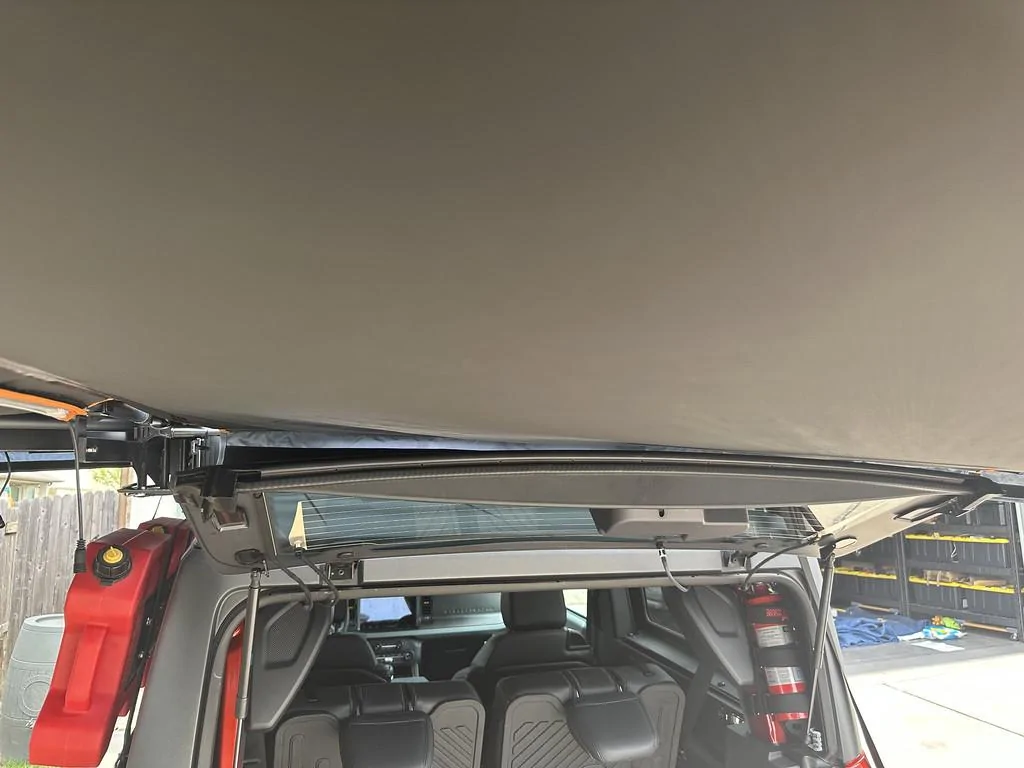
The height is perfect where the rear window can be fully opened without touching the awning:

Ford Bronco TGO - The Overlander Build IMG_0981-XL


Ford Bronco TGO - The Overlander Build IMG_0983-XL


I wish the lights had a dimmer on them, but at least the plug into a usb port and there is an on/off switch on the wire.

Ford Bronco TGO - The Overlander Build IMG_0967-XL
 

FleshTuxedo

Outer Banks
Well-Known Member
First Name
A
Joined
Jan 17, 2022
Threads
26
Messages
818
Reaction score
1,878
Location
PA
Vehicle(s)
'22 OBX 2dr.
Your Bronco Model
Outer Banks
Clubs
 
Hey!
Did you have to take off the front fender flares for your mudflaps?
I have seen videos that both do and do not do that.
Thanks!
 

NVCowboy

Big Bend
Well-Known Member
First Name
William
Joined
Jul 27, 2020
Threads
26
Messages
1,438
Reaction score
1,851
Location
Henderson, NV
Vehicle(s)
2002 F350. 2022 Big Bend (Sasquatch)
Your Bronco Model
Big Bend
Mabett Mudflaps installed today. I really wanted to the Rockblokz but I have a habit of ripping off mudflaps when 4x4ing,
I’m laughing at this based on my own experience. I lost a rear flap on my Superduty and wondered WTH. Two trips later, I was making an 18 point u turn (common when you’re wheeling a bus). I backed into a bank and watched as the bank pushed the flap into the tire, which promptly removed the flap. I’ll be damned. . .
 
OP
OP
emulous74

emulous74

Badlands
Well-Known Member
First Name
Seth
Joined
Dec 25, 2020
Threads
7
Messages
419
Reaction score
731
Location
Austin, TX (Pflugerville)
Vehicle(s)
'19 ZR2 Bison D , '23 Bronco 2DR, MT
Your Bronco Model
Badlands
Hey!
Did you have to take off the front fender flares for your mudflaps?
I have seen videos that both do and do not do that.
Thanks!
Yes, for the front I had to install flange nuts behind the fender liner.
Sponsored


Top