- First Name
- Ben
- Joined
- Jul 15, 2020
- Threads
- 21
- Messages
- 848
- Reaction score
- 2,688
- Location
- Baltimore, MD
- Vehicle(s)
- 2023 Bronco Raptor
- Your Bronco Model
- Raptor
- Thread starter
- #1
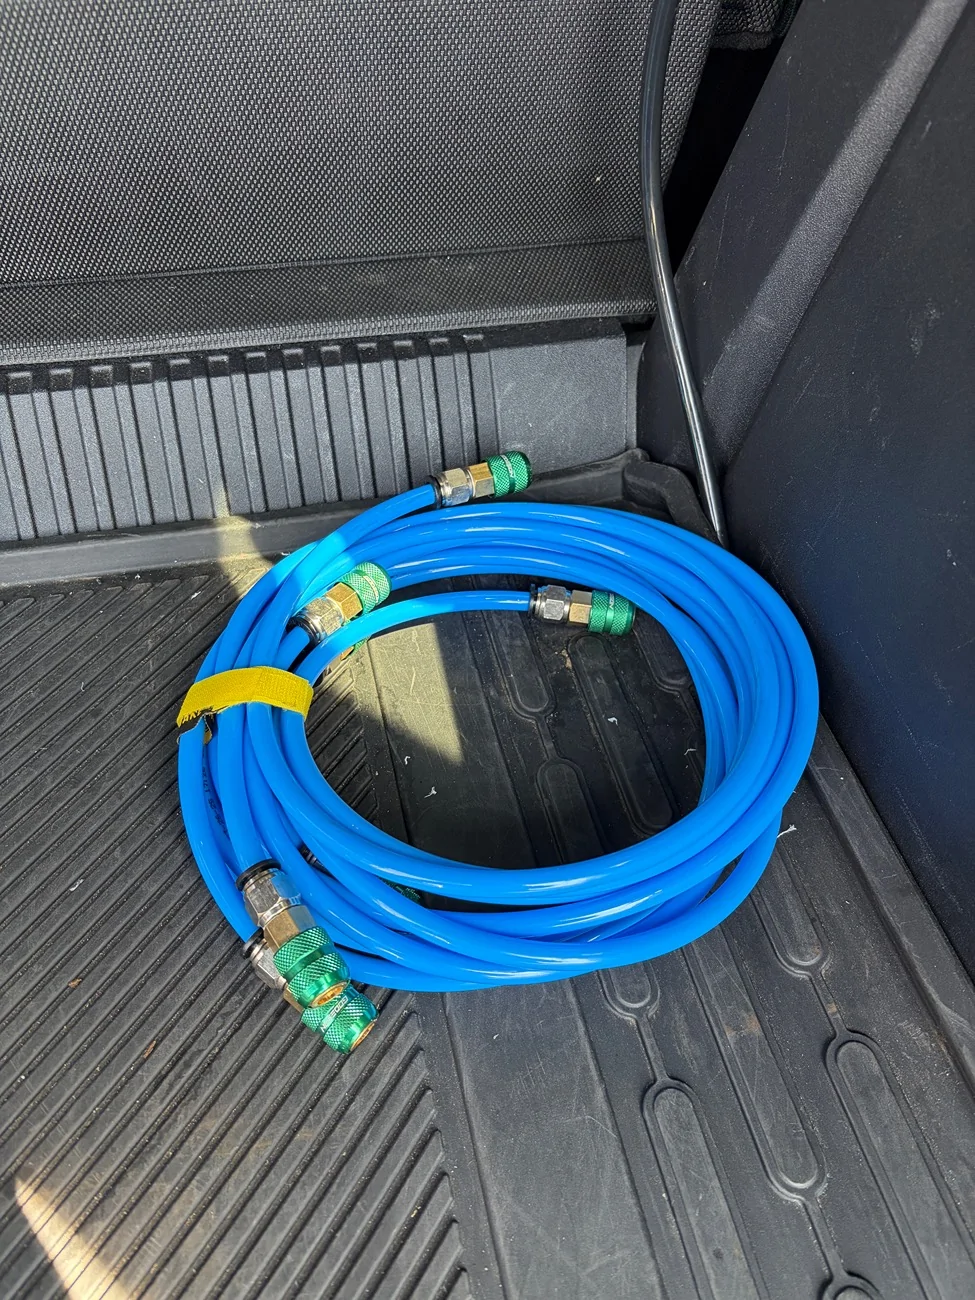
The setup includes a Schrader valve in each wheel well. I use a short, lightweight whip to connect the valve stem at each wheel. The tubing is run along the frame and the system allows inflating and deflating and then equalizing pressure to all 4 tires at the same time. Previously I had been using a 4 tire inflation/deflation hose setup that I put together but it takes up a lot of space, and can be annoying to deal with.
This was put together using the parts list from the Wifey On-Board Air System currently sold by Rago Fabrications. The system itself is nothing special or proprietary and is easily pieced together with fittings and parts from Amazon or any other vendor. Rago's kit is all-inclusive and really nice but it can be put together for a little cheaper with some nicer components. I also had some of the parts already which offset a big chunk of the cost.
I splurged on a few items and still came in overall a little cheaper than the kit. If you're looking to save money, different chucks and manifold could easily get you under $300. I have a significant amount of tubing left too so careful measuring and ordering the right amount could save even more.
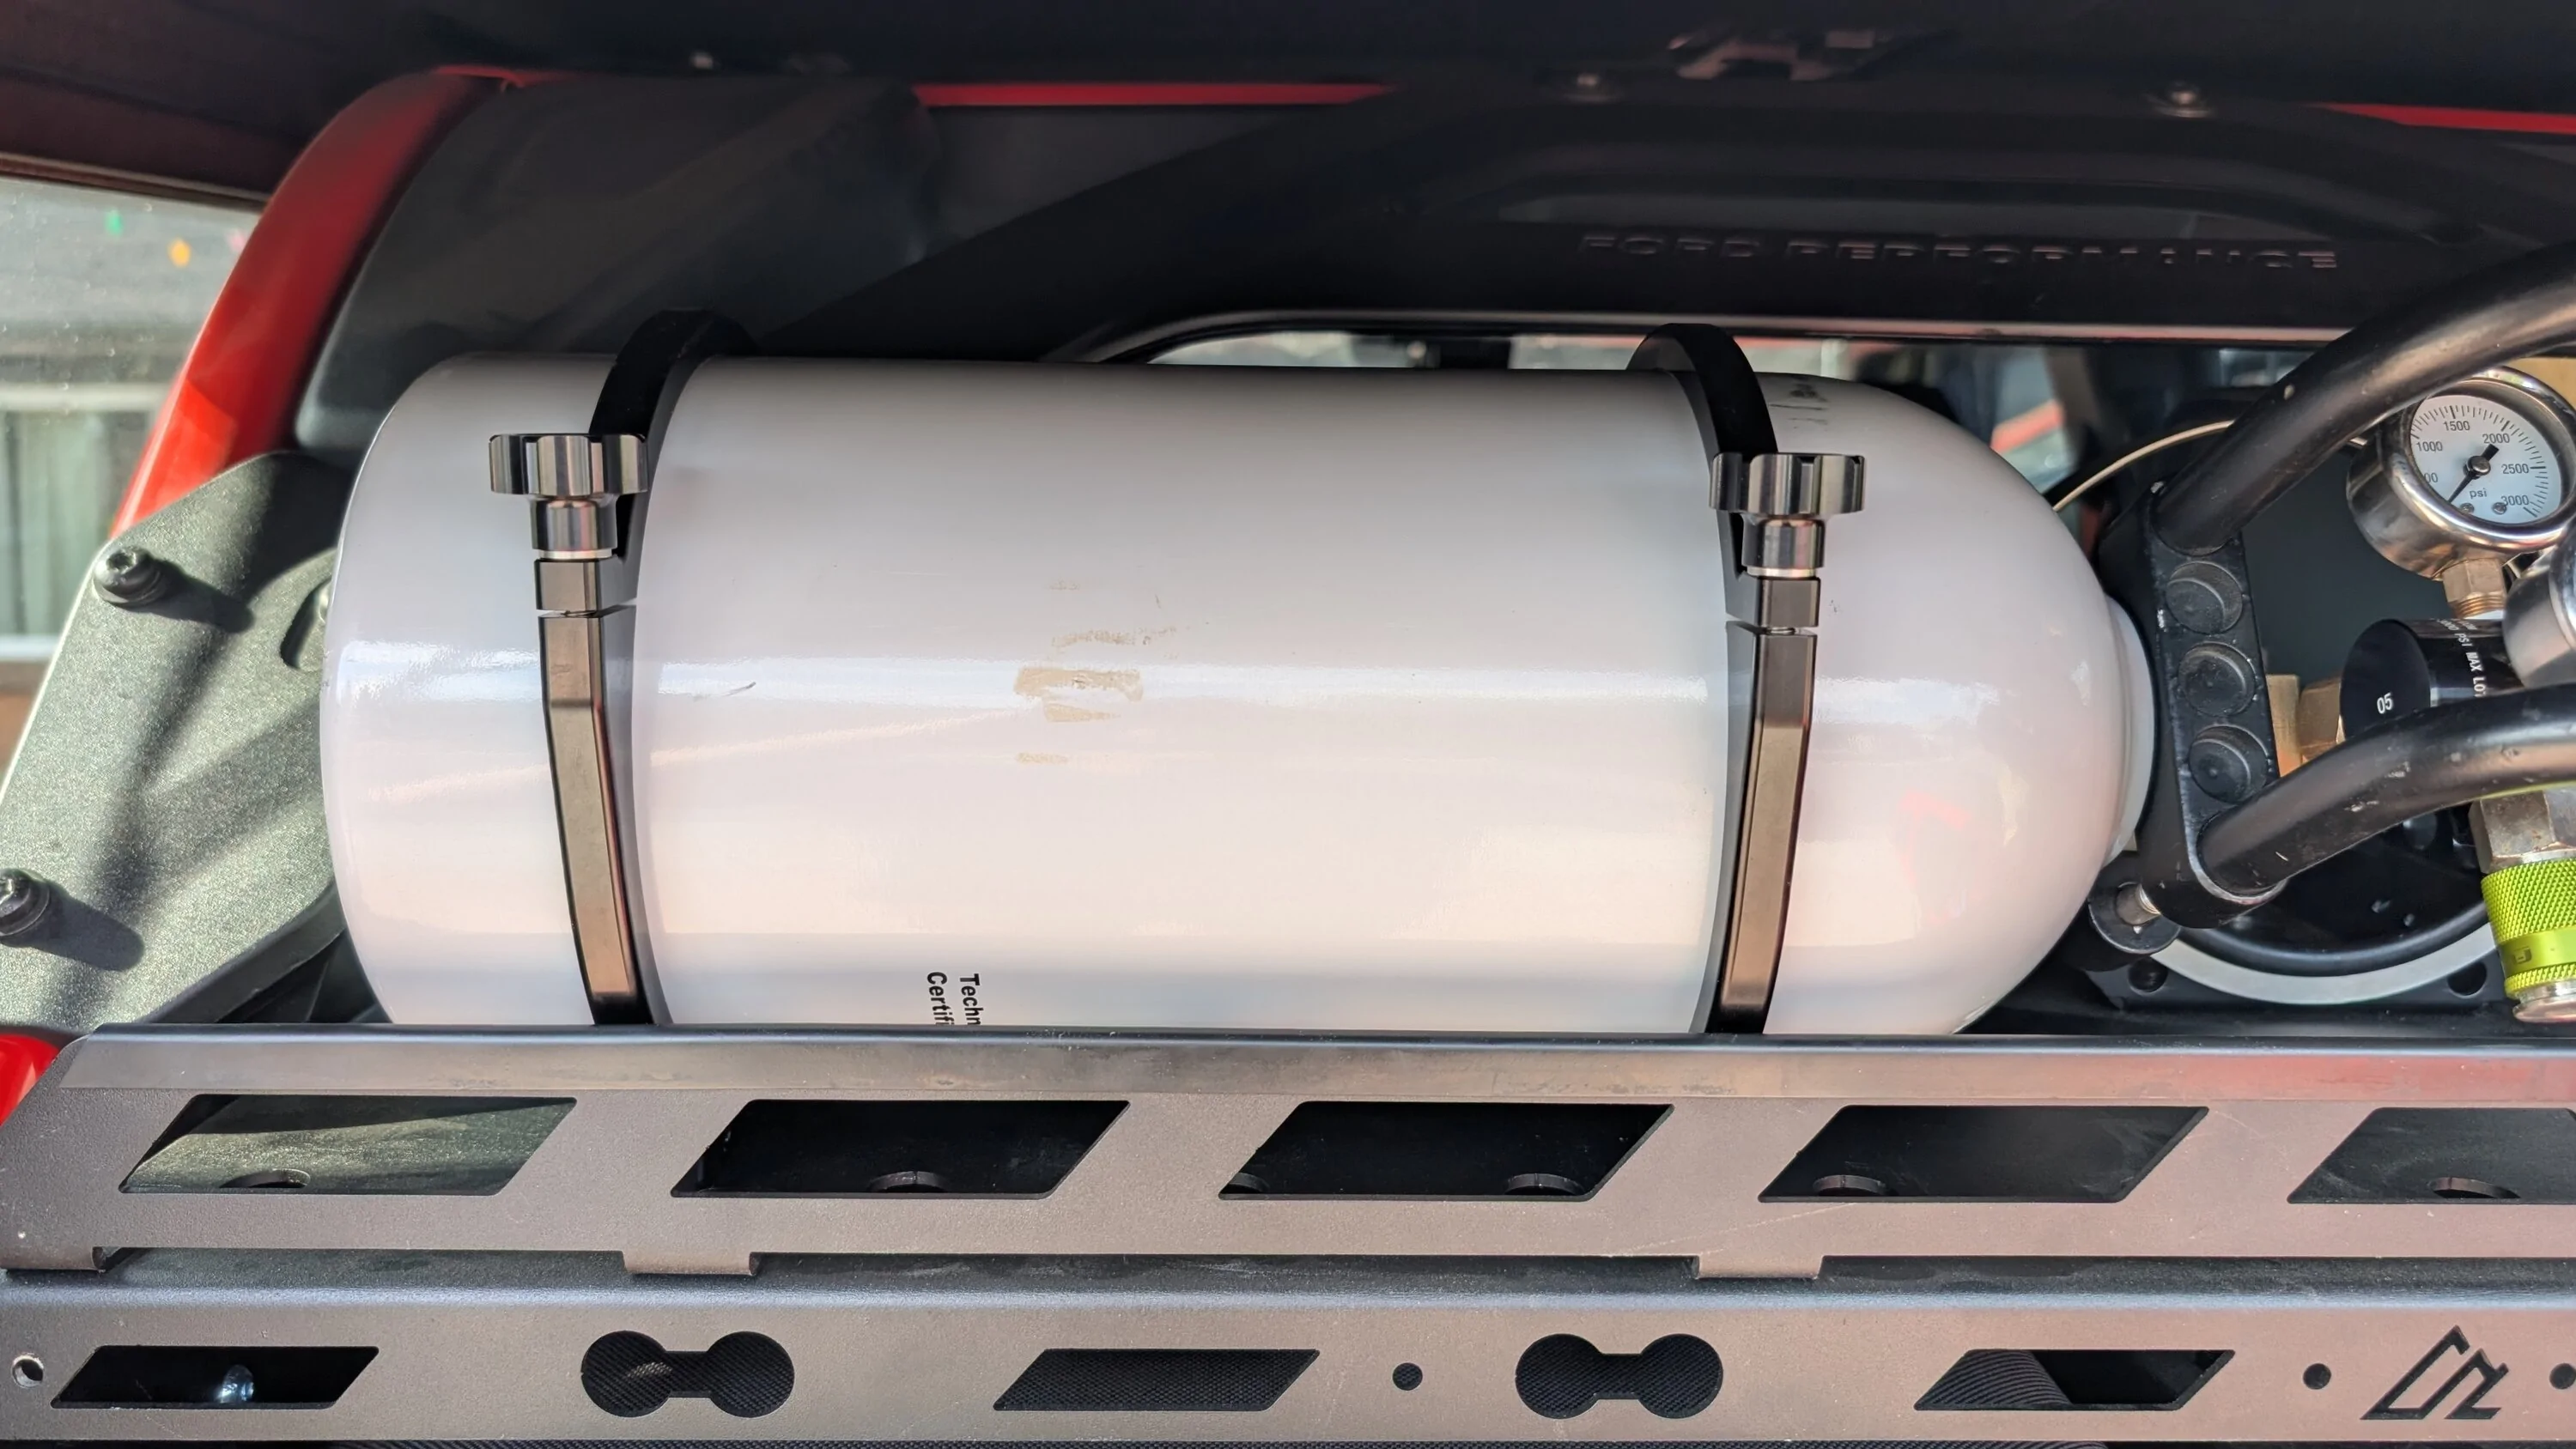
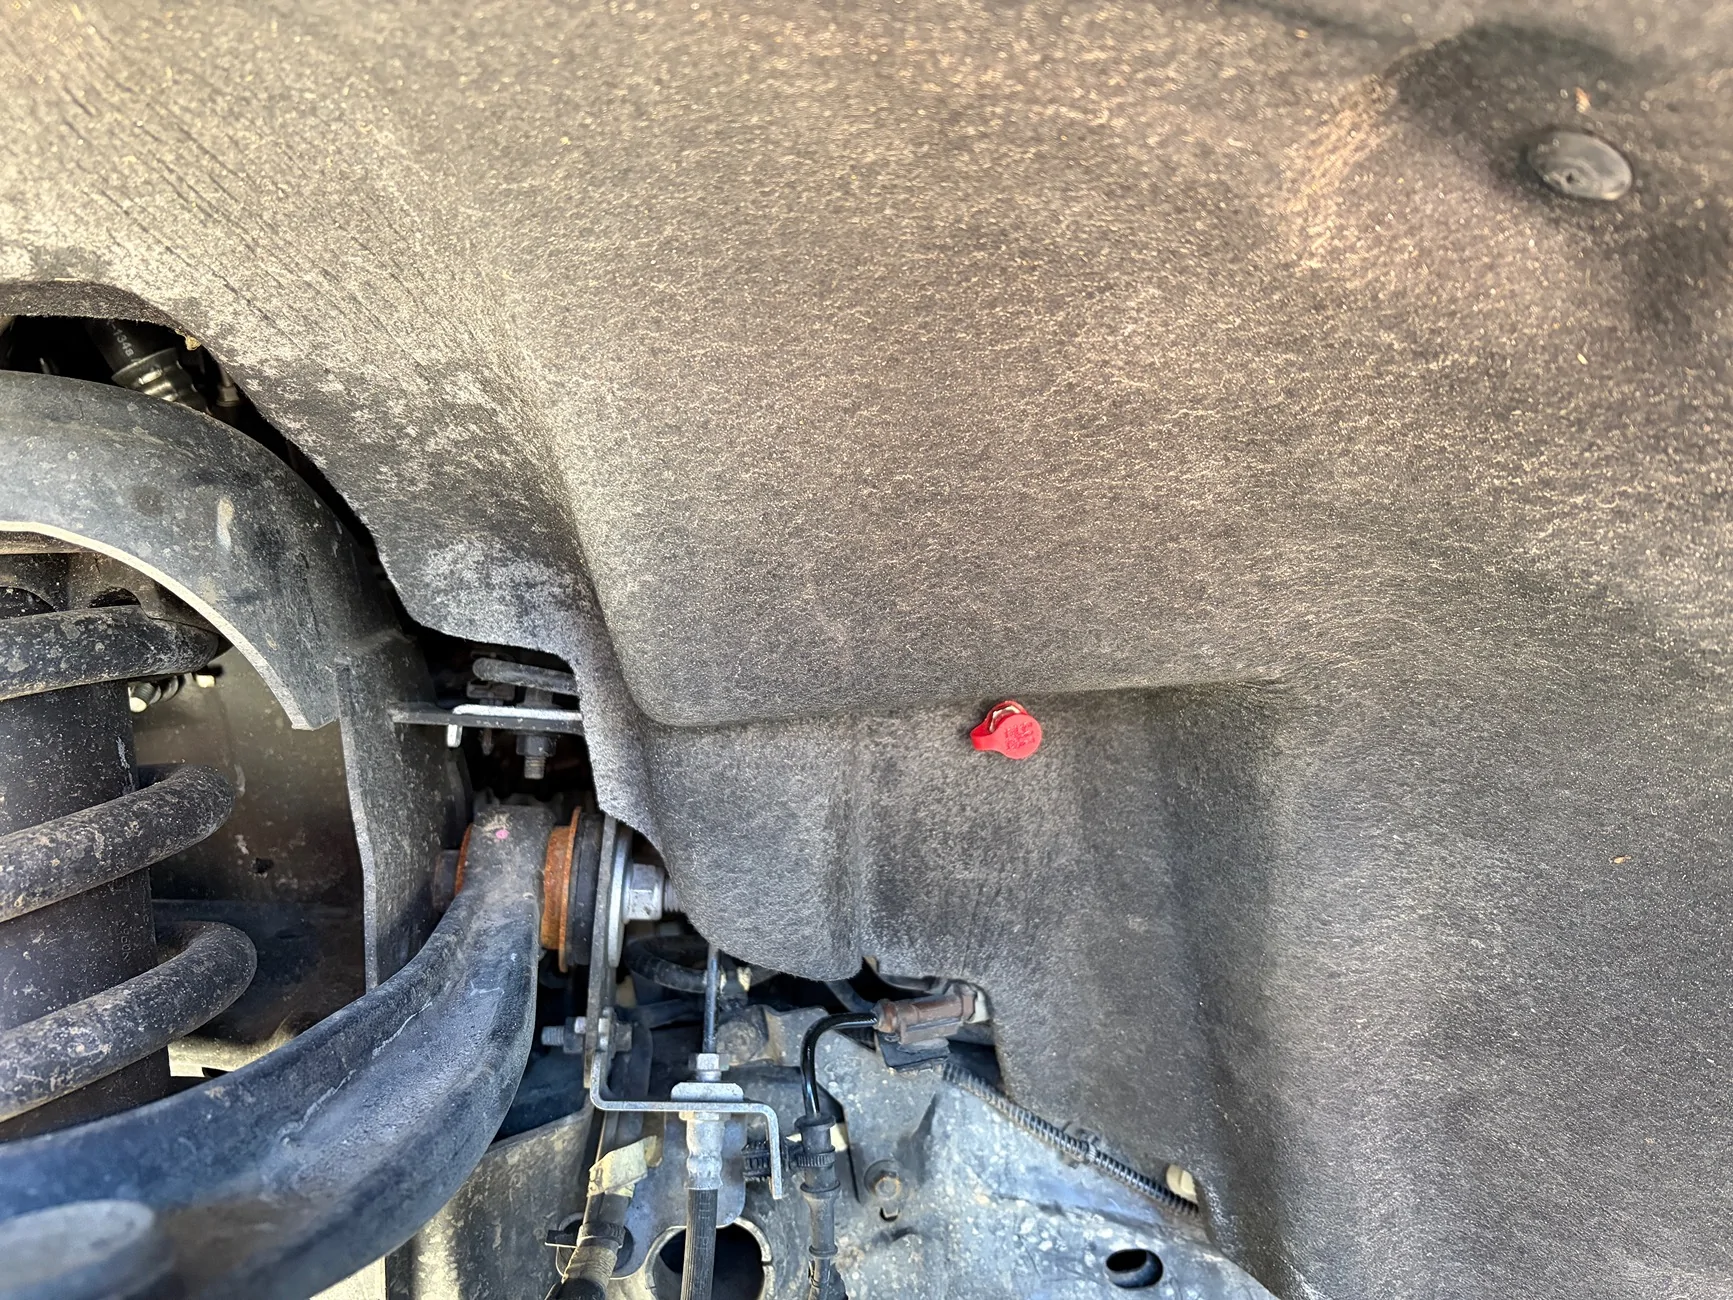
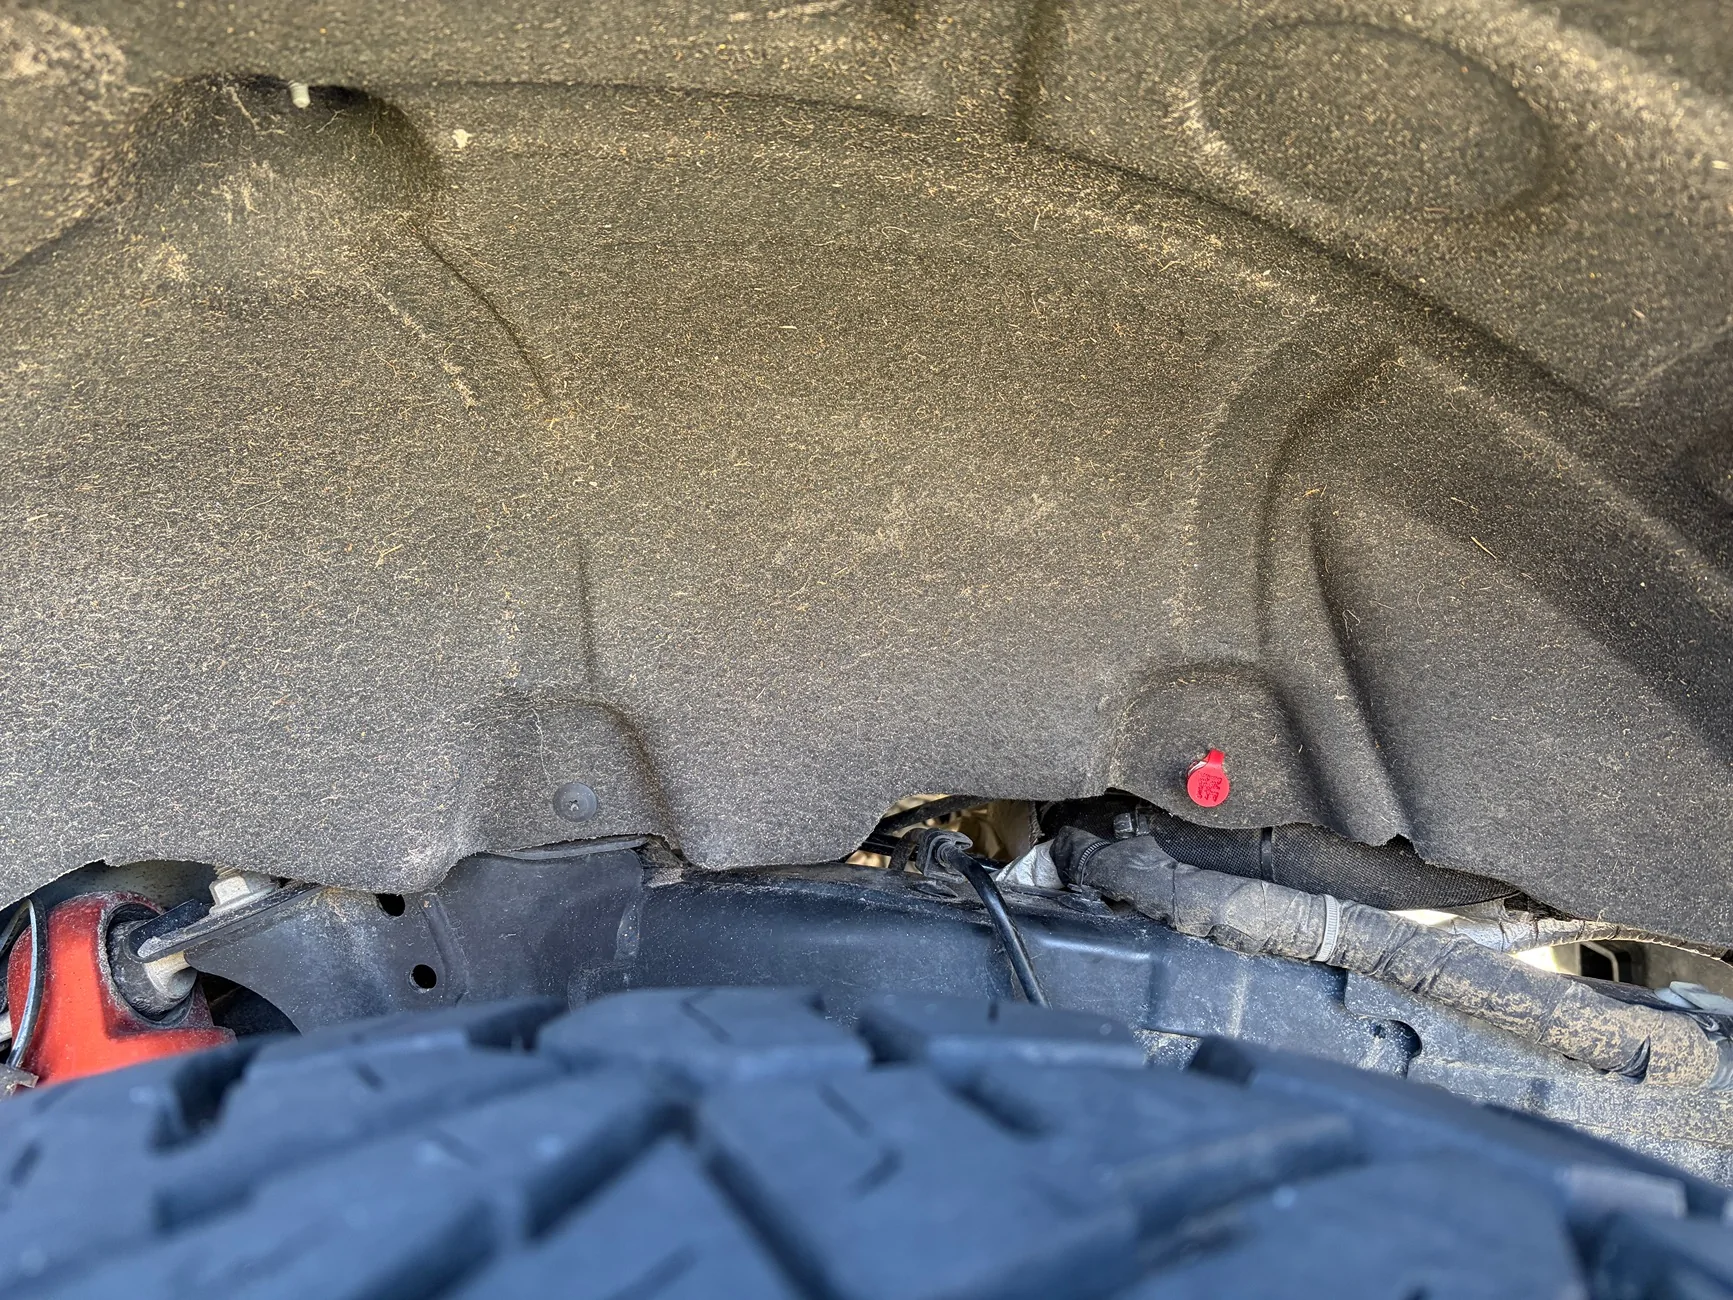
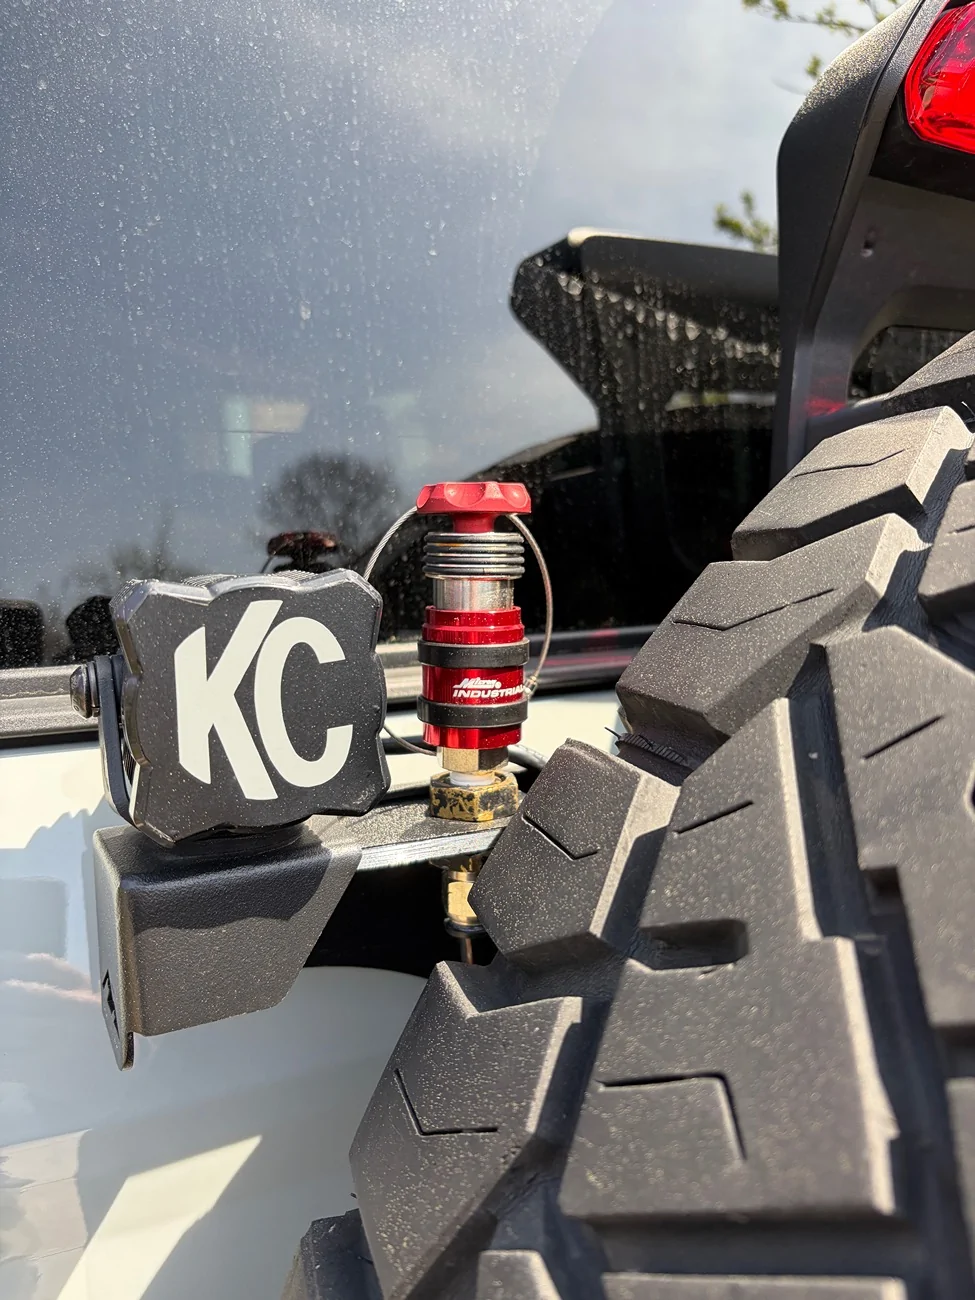
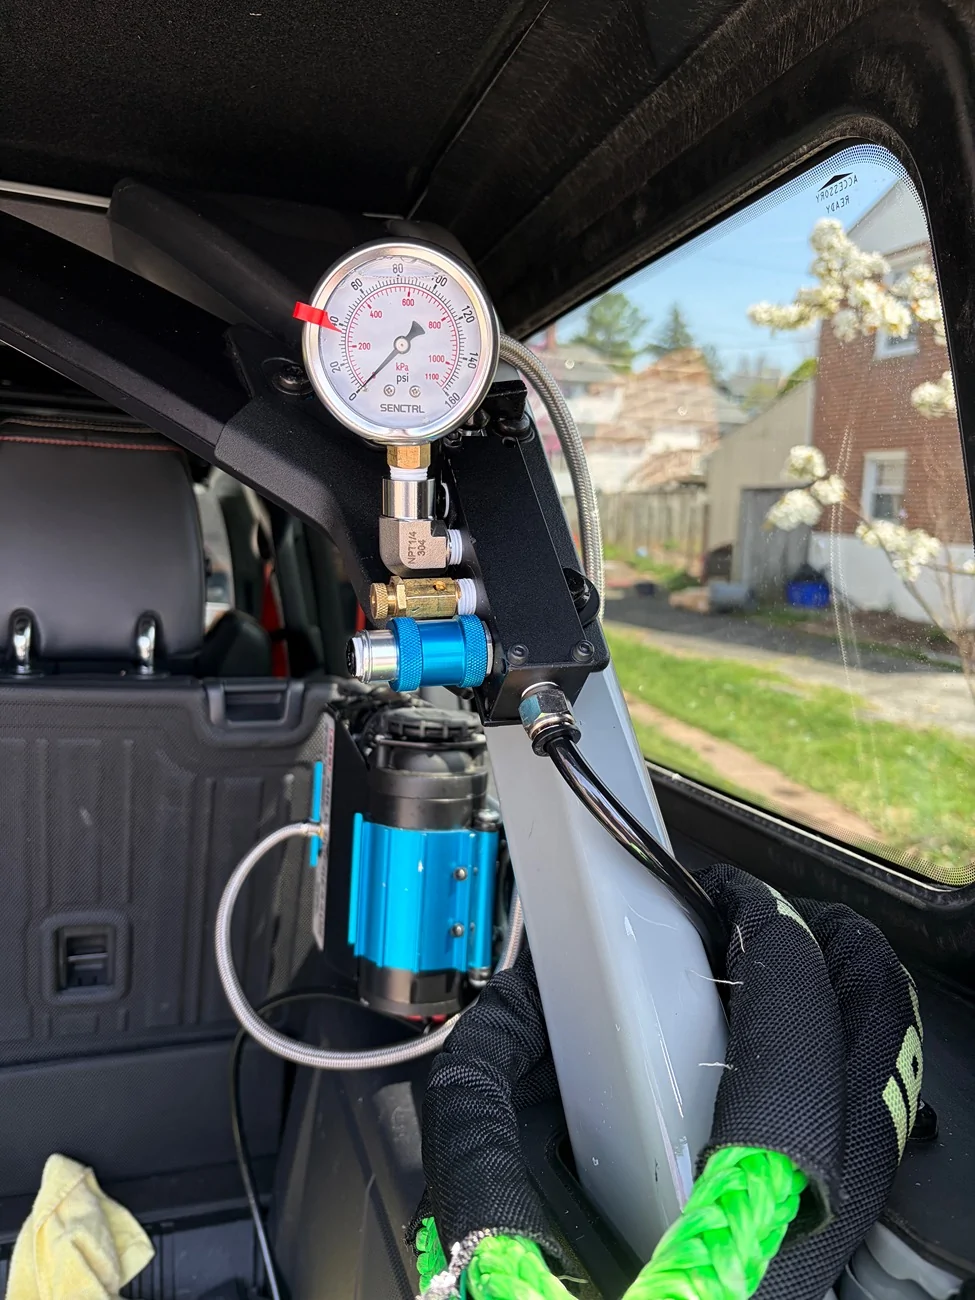
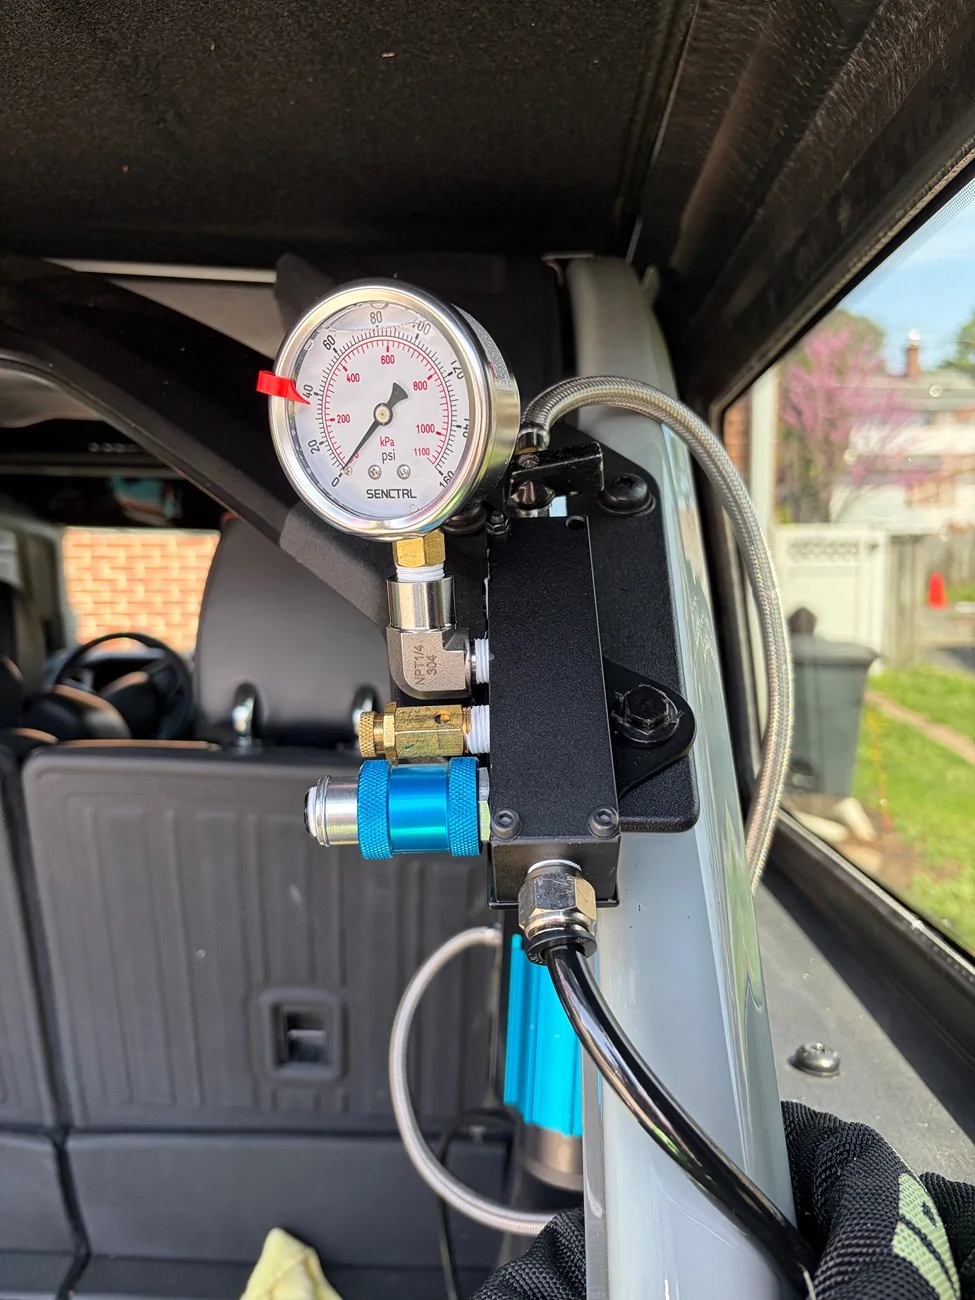
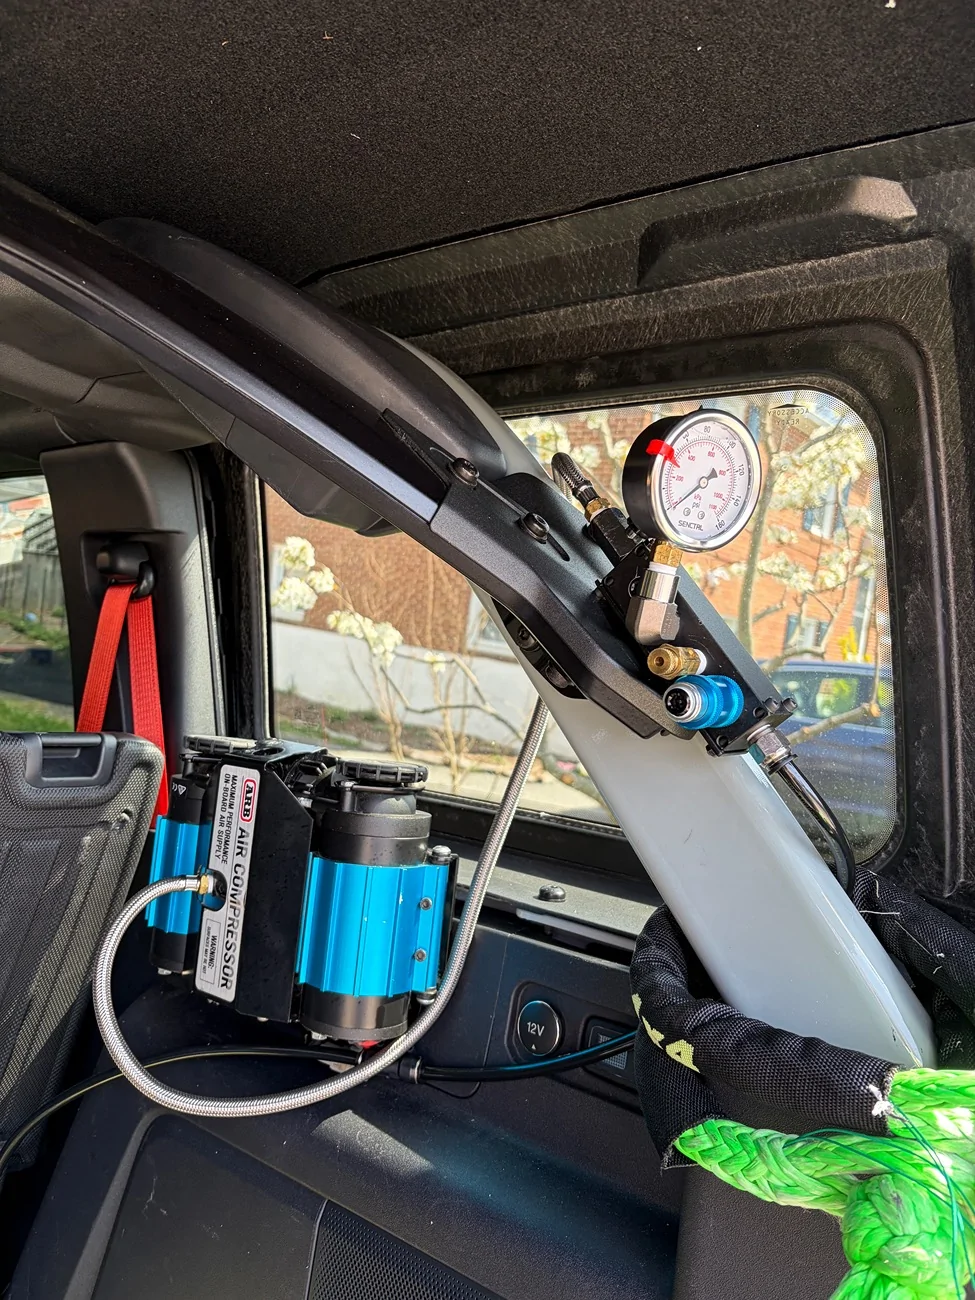
I mounted the schrader valves in existing clip holes in the fender liner and did have to enlarge the hole on the bracket. This was the only permanent modification I had to make. There's an external universal air chuck mounted to a 3d printed bracket that I attached to a Mountains to Metal antenna mount on the tailgate. The ARB twin compressor is mounted to an American Adventure Labs mount inside. The manifold is attached to an existing bolt on the roll bar.
Here's photos of where the Schrader valves are mounted. It's the same left and right. The non-Raptor fender liners may be mounted differently, I'm not sure. I simply removed an existing clip and enlarged the hole to fit the valve. It works very well. I used red caps from 41.22 Products to easily locate them when the wheel wells are covered in mud.

Here's the external universal coupler.

And here's the manifold setup itself.
This was put together using the parts list from the Wifey On-Board Air System currently sold by Rago Fabrications. The system itself is nothing special or proprietary and is easily pieced together with fittings and parts from Amazon or any other vendor. Rago's kit is all-inclusive and really nice but it can be put together for a little cheaper with some nicer components. I also had some of the parts already which offset a big chunk of the cost.
I splurged on a few items and still came in overall a little cheaper than the kit. If you're looking to save money, different chucks and manifold could easily get you under $300. I have a significant amount of tubing left too so careful measuring and ordering the right amount could save even more.
I mounted the schrader valves in existing clip holes in the fender liner and did have to enlarge the hole on the bracket. This was the only permanent modification I had to make. There's an external universal air chuck mounted to a 3d printed bracket that I attached to a Mountains to Metal antenna mount on the tailgate. The ARB twin compressor is mounted to an American Adventure Labs mount inside. The manifold is attached to an existing bolt on the roll bar.
Here's photos of where the Schrader valves are mounted. It's the same left and right. The non-Raptor fender liners may be mounted differently, I'm not sure. I simply removed an existing clip and enlarged the hole to fit the valve. It works very well. I used red caps from 41.22 Products to easily locate them when the wheel wells are covered in mud.
Here's the external universal coupler.
And here's the manifold setup itself.
Sponsored


 .
.