
- Thread starter
- #1
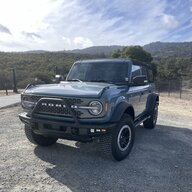
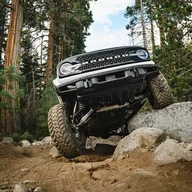
List of mods:
32 spline UD44 with 4.56 gearing
Werewolf portals
Custom 8” coilovers from Rock Krawler up front tuned for the portals and tires
Dana 60 with OX locker and 6.17 gearing
Custom 14” coilovers from Rock Krawler out back
Next Venture sliders and full belly skids
Adams Driveshaft double cardan driveline
Armadillo Hardtop
Tuning by @GooseTuned
ARB toolbox
Apex quick deflate valve stems
Milemarker 10k front winch with a remote switch in the cab
Warn 8k rear winch
Both winches ran off a relay and through a T-class fuse with 20,000 AIC.
Spare steering rack
ADV +5” fenders
40” Toyo tires with Ford Performance beadlocks

This is the third (fourth?) iteration of wifey’s build. Previously I rarely mentioned the following backstory as I had no interest in her being a sympathy case. If anyone had interest in following her progress, we wanted it to be for her growth offroading and building. That said-we have finally put her into remission, and I now feel comfortable sharing. The short story is that she was t-boned by a drunk driver years ago. The accident put her in a wheelchair for almost a year, and while she eventually regained the ability to walk, the accident left her with a debilitating nerve condition. One could imagine that driving was a source of anxiety after such a traumatic experience, and she had daily reminders of it from the nerve condition. I took her to Moab in the stock Wildtrak a couple times for the scenery, and she would get out of the car for the smallest of “obstacles.” She enjoyed the views and hanging out, but doing anything outside of flat driving was still scary for her.

We later went out with a group of Broncos and one of the female drivers was doing obstacles. She thought it was the coolest thing ever. I told her she should absolutely give it a try, and all she had to do was follow my instructions. It started off small, but she gained more and more confidence. One obstacle was a small ledge to climb, and the lady with a slightly lifted two door made it successfully while I picked a bad line and we got high centered. I brought her in on a steeper angle and she completed the obstacle, giggling and excited. On the drive home I noticed she wasn’t as “jumpy” going through intersections. Something had definitely changed. She later asked what it would take to be able to do that climb the same way the two door did. “A station wagon with the same breakover as a lifted two door? Just guessing but that will probably take 40’s.” Now, she’s never asked for anything material in our entire relationship. That’s not an exaggeration either. So when she said “can we get 40’s?” I was going to make it happen. With one requirement - she does all the work so she knows how to fix it, or at least what goes in to the repair. I wanted to build her the most capable and confidence-inspiring rig we could, while still having the ability to be daily driven and run down the interstate comfortably. It started with portals only, but the suspension needed to be adjusted and more travel was desires. Next was portals and plus aftermarket coilovers. It was now too tall and bit tippy, so the next version was a lowered ride height with additional travel and portals. With time and experience we found some issues with bolt-on portals in the rear, resulting in this “mullet build” that will be covered in this thread.

I waited to “unveil” this latest iteration until we had everything working, including ABS. For a detailed explanation as to some of the details that went into going this route, you can find that information at the following link. https://www.bronco6g.com/forum/threads/portals-realities-and-tradeoffs.129813/
The “issues” we had with the rear bolt on portals are partially how we didn’t like that the portal broncos seem to be more susceptible to bouncing. Yes, every rig is going to bounce, but if you pay attention it’s no coincidence that rigs with bolt on portals and stock suspension seems to bounce more regularly. Also, after breaking a rear axle we discovered how bad the suspension behaved with only one side of the rear receiving power while finishing the last 3/4 of the Rubicon. Our sample size is small, but another rig without portals also had a broken rear axle and did not seem to have the same “anchor effect” that our dead corner had. Also wasn’t a fan of the fact that when the axle seals start to leak, that oil goes into the axle housing. If you read the “realities and tradeoffs” post you should have a grasp on why we wanted to delete the rear portals. So the research started on if it would be possible to run portals up front and no portals out back on a street rig with ABS and all the rest of the comforts we enjoy.
First was finding out if there were gear ratios that would even get close enough with the additional reduction of the portals. With the UD44 up front, we were told the upgraded drive unit would accept gears for any Dana44 Advantek ring and pinion. This gave a starting point for what options were available for front gear ratios. After seeing the Werewolf portals in person and their being made of steel, we decided to ditch all four of the aluminum portals we previously had and ordered the Ukrainian portals. Very robust and weldable, if needed. They do have a deep 1.35 gearing reduction that would need to be accounted for and would push the rear axle into pretty deep gearing. In my research I learned that OEM front to rear gearing differences from the factory have gone as far as 1.5%, and that we need to be at no more than 2% with the ABS speed sensor readings to keep the computer happy. It was important (to me) to have any differences bias to the front diff, so that the front is “pulling” the rear rather than the rear “pushing” the front. Seems that would be the best setup to prevent bind and would be better for handling at speed if 4wd is used. Think of applying only the front brakes when driving vs the rear. Very different outcomes when trying to steer, in theory.
A spreadsheet was created that multiplied the available front ratios by the 1.35 gear reduction to give us rear ratios to look for. The axles we were looking at were Ford 9”/10”, GM 14 bolt, and the Dana 60. At first it seemed like the F9 was going to be the winner as it has triple-shear pinion support and so many gearing options available we could do whatever we wanted up front. But then without fail every set of gears was for racing and not for use on a daily. Another consideration was locker options. With the 1.35 gear reduction from the Werewolf portals, the final gearing was looking to be pretty deep, even going down to 4.10 gears up front. Ring and pinion strength was the new concern, so it was important that the locker be as robust as possible to avoid any deflection that could compromise the ring and pinion. Ultimately we found a combination that worked-Werewolf portals with a regear of the front differential to 4.56 for a final drive of 6.16. Rear axle is a Dana 60 with an OX locker and 6.17 gear ratio. 0.2% difference, biased to the front. Definitely concerned about the durability of that 6.17 ring and pinion, but it does have a higher contact ratio than a D44 with 5.38 gearing and wifey has a gentle right foot. She’d rather winch than beat up her rig, so we’ll try it out. We did drop down to a 1310 u-joint on the pinion to make that a fuse for the R&P, but I suspect that may not help. Considering a D70/D60 hybrid or D80 for the future. But we’ll see.
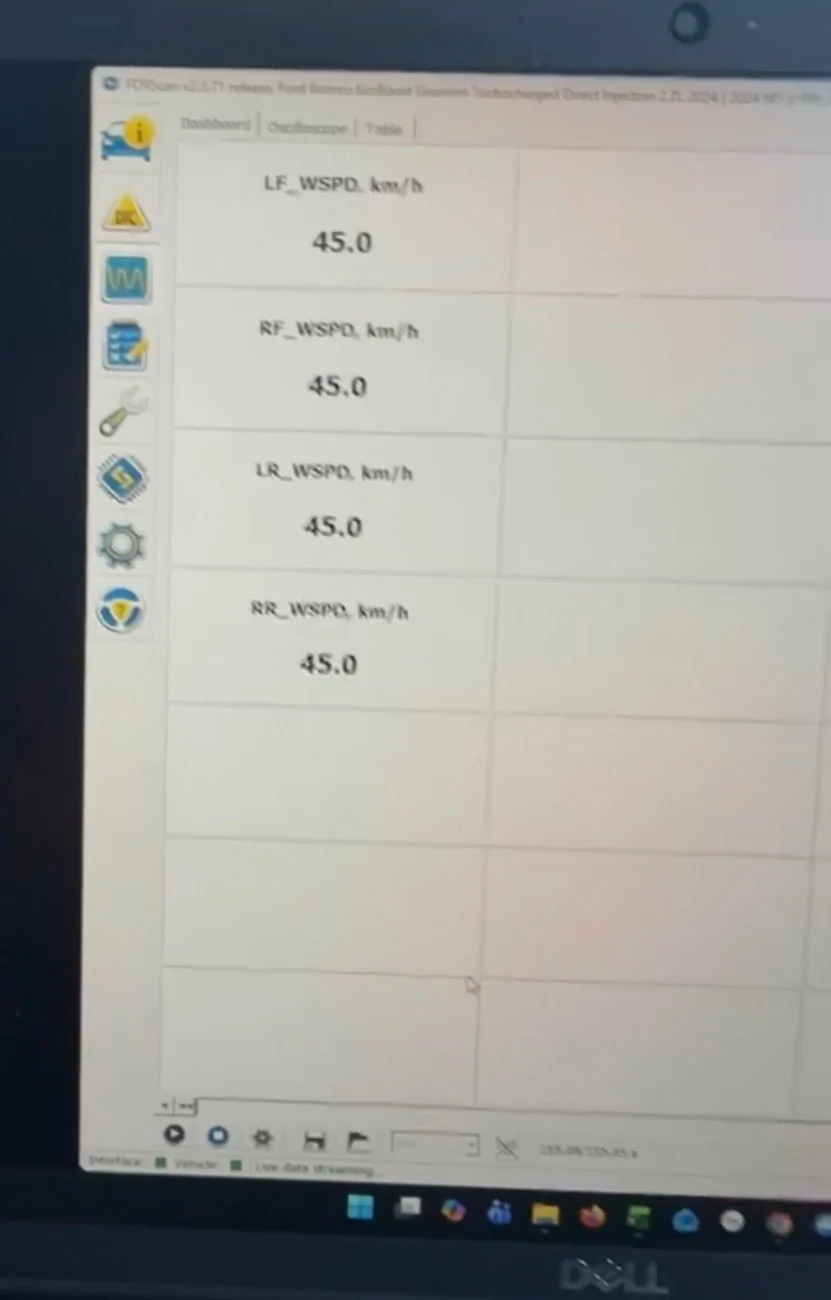
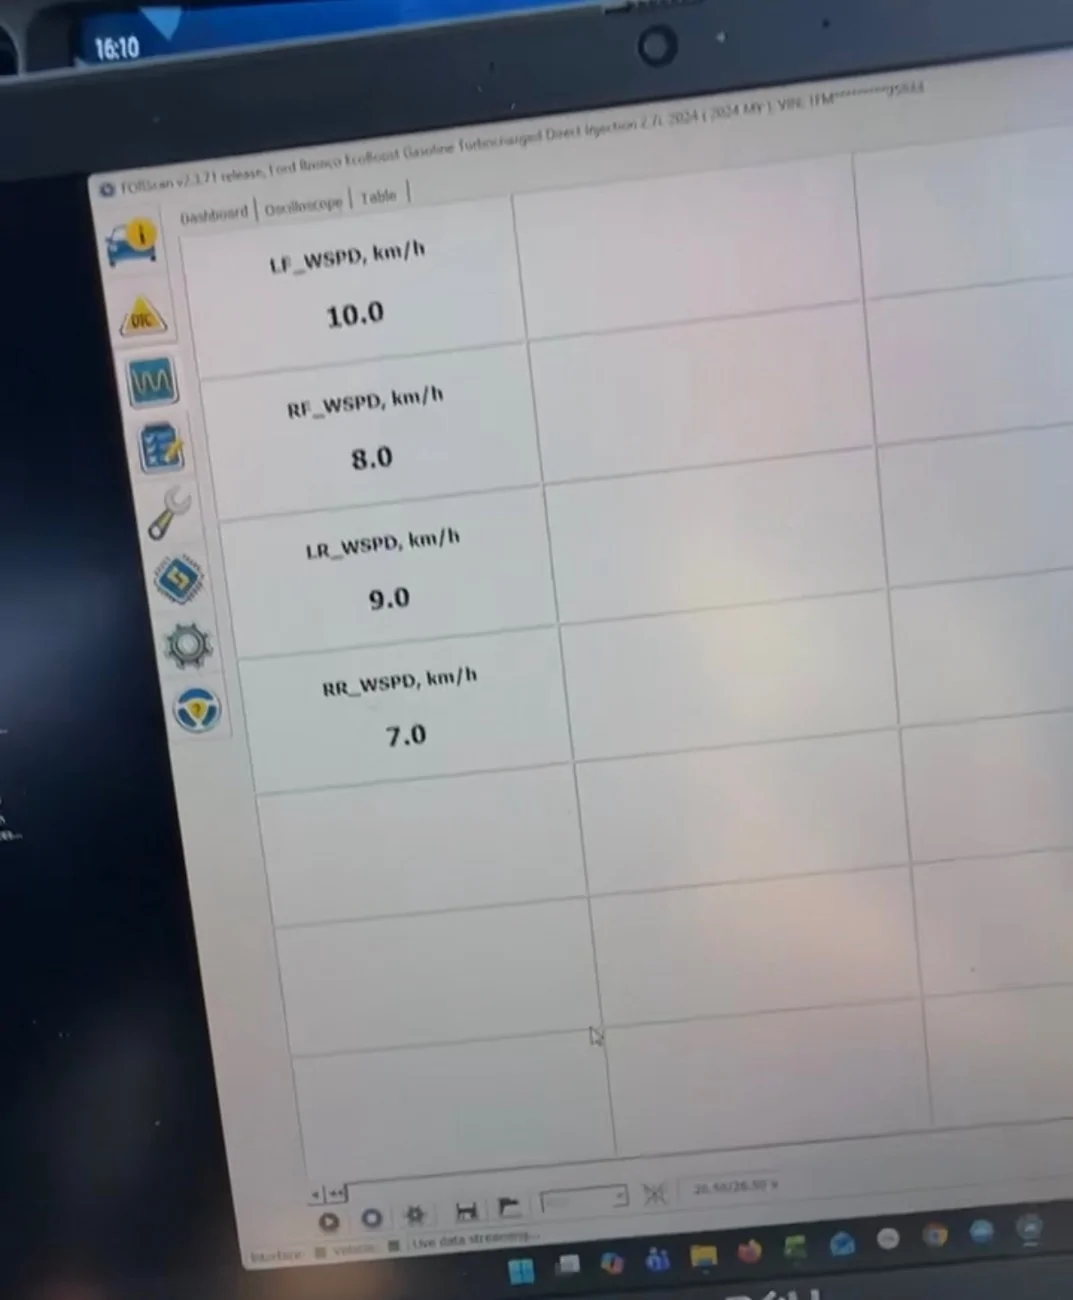
We had custom 59 tooth tone rings made for the rear, which put us about .7% off from the front. Within the 2% allowance of the ABS computers. However, it seems that with the additional width combined with the .7% difference front to rear, turning tightly at speed you can feel the ABS everrrrrrrrrr so slightly kicking in. Looking at the speed sensors we’re up to 3% off, but I’m not sure how far off those get from eachother on a regular bronco when turning.


As for the suspension, the changes up front have been covered in a previous thread so I’ll be brief. Portals provide significant lift to the vehicle and while they do increase the track width and stability, your COG is still negatively affected and the rig is much tippier in off-camber situations. We initially lowered the rig with preload, but then there is so little uptravel we’d be bottoming out over every little bump in the trail. It’s absolutely horrible and we ended up with a pretty tall ride height trying to find a balance between uptravel and not bottoming out. We ultimately modified the suspension to lower the rig while gaining uptravel. We bought some universal jeep coilover mounts, then cut up the OEM shock towers. The goal was to effectively “blend” the OEM towers with the universal towers to get a coilover mounting point that was 4” higher, maintaining the OEM shock angle. (We were within .1 degrees of OEM angle. I’ll take it) RockKrawler made us custom 8” coilovers that were tuned for the 16” 600 lb/in coils needed to accommodate the increased width from the portals, rebound changes for the additional mass from the portals and tires, and had the “bronco extension” on the bottom to clear the CV while tying in to the OEM LCA. Not only did we lower the rig, but we gained up-travel and could take advantage of it via the extra operating range from the larger 32-spline axles used with the UD44 FDU. Downtravel remained the same and limit straps were added to save the coilovers. The front suspension now has 13” of bumped/strapped travel. (With the old portals we were limited on uptravel due the additional width of the mounting surface.)

With the new Werewolf steel portals, they make up nicely with the UCA to where we were able to adjust the bump stops to gain the rest of the uptravel we were hoping for. The shock mounted bumps start to get compressed just before the hydraulic bumps are completely used up. Very happy about that.

We also drew up some bump stop mounts in CAD and sent them off to sendcutsend. The bump stops worked beautifully and we just bump against the LCA. (Had strike plates made but when trying to Tig weld them on they required too much heat. Shut the welding attempt down when the aluminum at the bushings reached 200F) We have done a significant amount of wheeling with this new setup and it is so very nice no longer bottoming out against the coilover.

Out back we worked with Vasher Design to get a trailing arm setup that ran the arms outside the frame and utilized 12” coilovers with a 1.33 motion ratio, giving us 16” of wheel travel while lowering the rear to match the front. When it came time to delete the rear portals, we had to make up for the 4” of lost lift (5.5” with Werewolf) and Rock Krawler once again came through, building us 14” coilovers tuned for this suspension. This provided us an additional 2.66” of wheel travel. With portals the lift is fixed so while you gain clearance, there is no additional travel in the suspension and again, if you lower it with preload you’ll be bottoming out. This new setup provides a total of 18.6” available vertical travel.


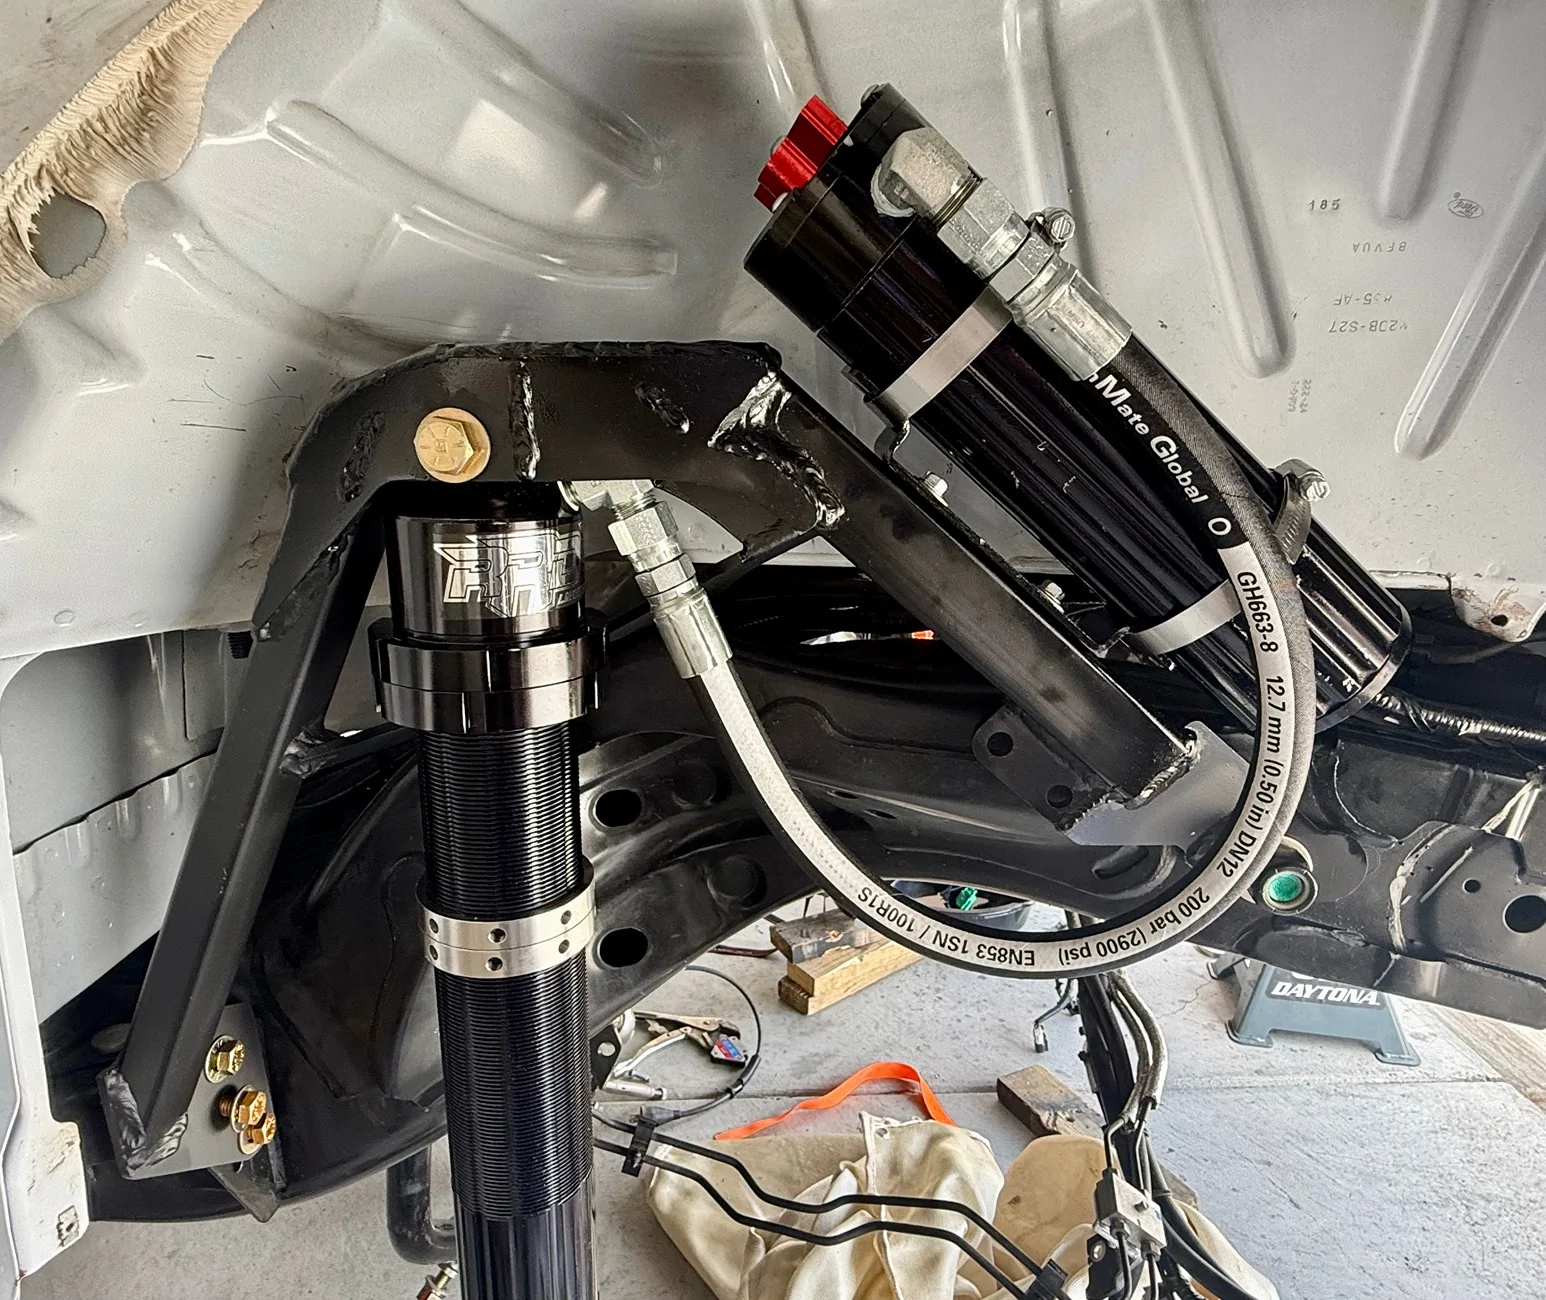
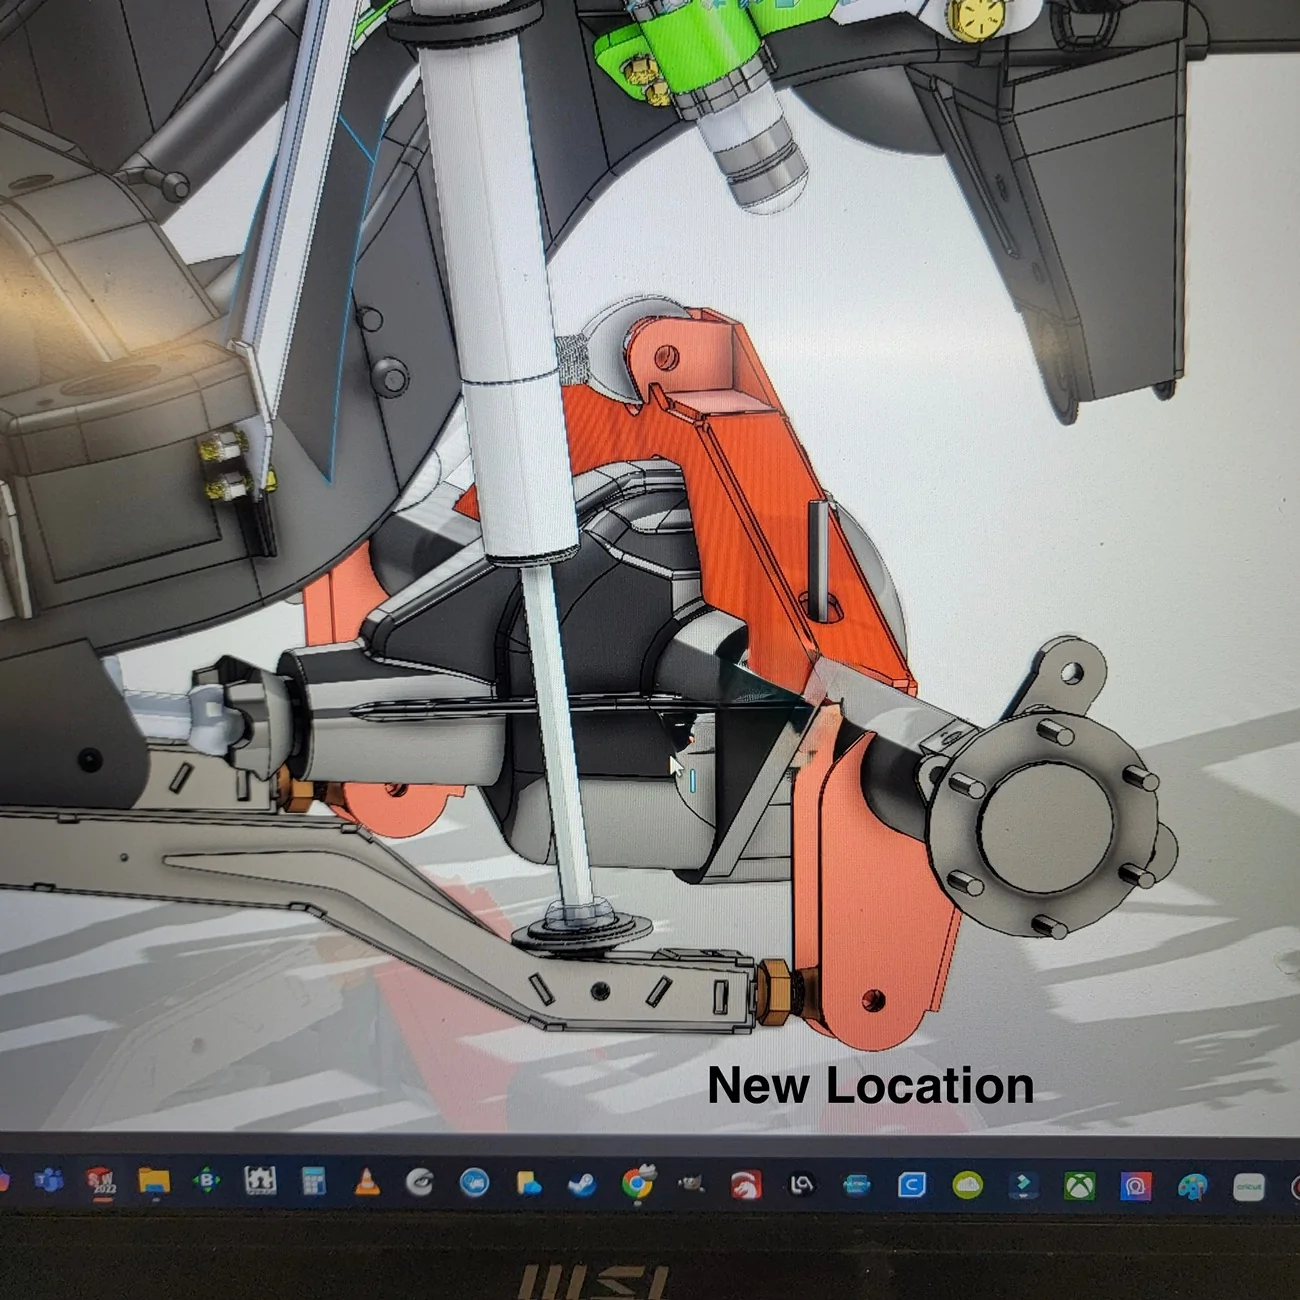
Since we were deleting the portals and going to a D60, we had a custom axle built with the 6.17 gears, OX locker, and the housing 9” wider than stock to match the WW portals. We then sent the axle to Vasher where he mounted the custom truss designed for his wishbone three link setup as well as the trailing arm mounts. We were able to utilize the trailing arms for the limit straps, as well as the swaybar mount rather than the axle. But we had to get creative on the bump stops. Vasher has a proclivity for using holes and mounting points already in place from the factory, and he does a great job doing so. Unfortunately the towers utilize a hole that is right where the bump stops need to be. His towers do come with mounting provisions for bump stops, but this build is so different from his off the shelf design I didn’t use them. The wishbone three link uses the factory upper control arm frame mounts, and this limits what you can do with the length of the lower control arms while still retaining the correct pinion angle throughout your travel range. His trailing arm design has the correct length vs the upper arms and axle mounting locations, and the pinion stays pointing at the tcase throughout the entire range of travel, ideal for a double cardan driveline like we’re running. But, there is a bit of axle steer when articulated, as expected with this setup. Which brings us back to the bumpstops. I think we spent two days getting the axle position correct to account for all that forward-back movement when articulating. The bigger openings from the fender helped, but those 40” tires still occupy a lot of space. We also ran into the issue of not having enough height in the garage to fully droop out the suspension, even with the tire off. Had to resort to using a plumb bob and measuring tape then predicting the final placement of the tires when articulated. Luckily, we got it “close enough.” As for the bump stop mounts, we used chipboard to create templates that we then cut from plate steel. (The plasma cutter is now wifey’s favorite tool in the garage.) The extra width of the axle gave us the ability to go outboard of the shock tower and still clear the tire by about 3/4” while fully stuffed. The bumps are set so the tire jusssssst kisses the fender, enough that you can hear it gently squeaking as it rubs the fiberglass. Credit to @Snacktime for the modified photo

The swaybar was briefly mentioned in the last paragraph, but how we ran the swaybar is something I’m quite proud of. The typical setup for aftermarket swaybars is to put the torsion bar by the rear bumper and attach the arms at the axle. Easy peasy. But I wanted to try something different, getting the swaybar as far forward on the frame as we could and also as high as possible.
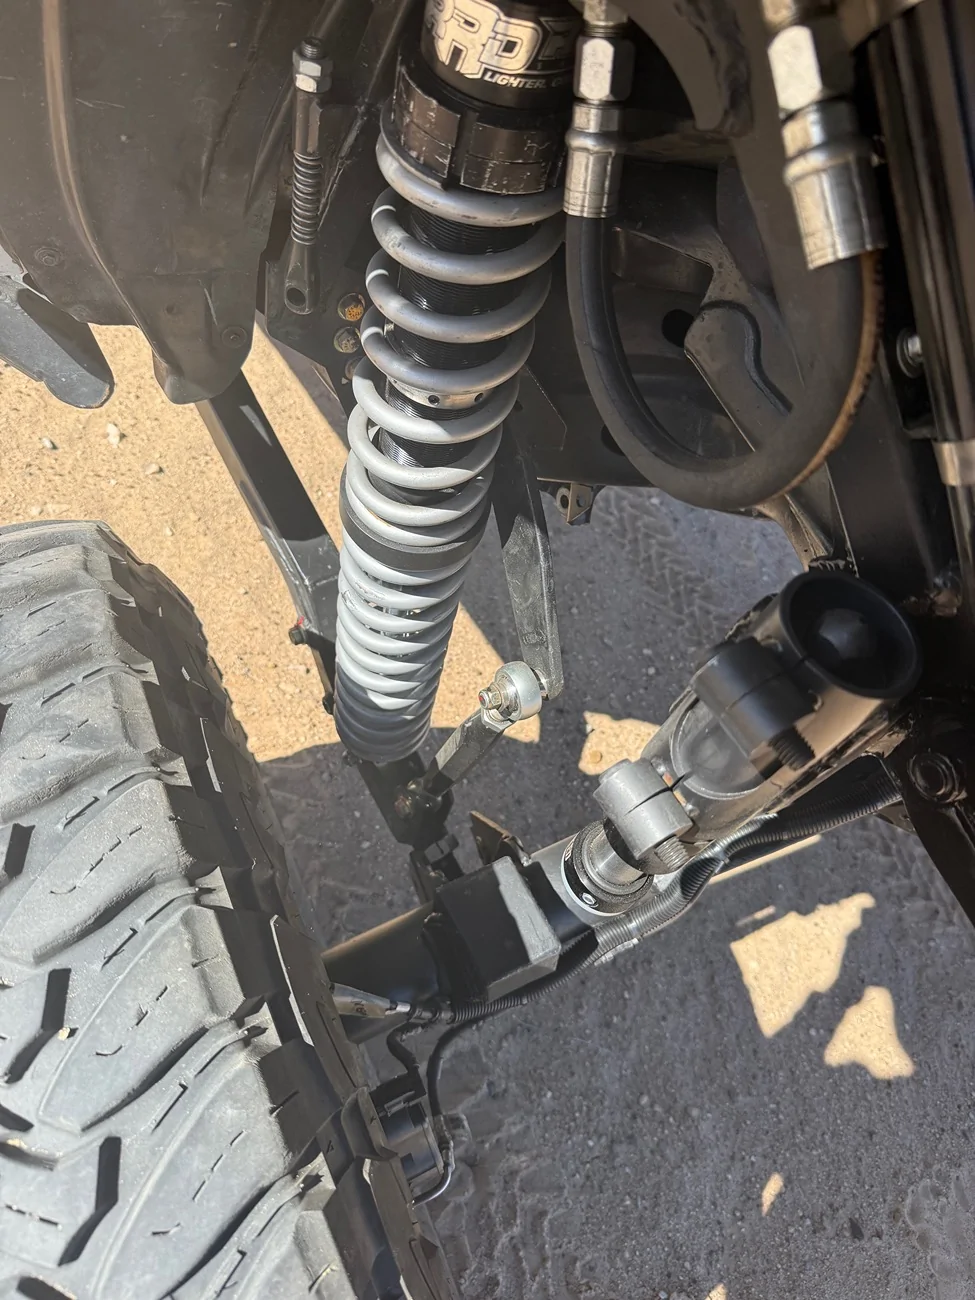
To accomplish this, we once again made custom mounts and were able to place the torsion bar right behind the body mounts and above the frame. Tolerances are very tight, requiring the torsion bar splines to be narrowed as much as we could. To accommodate the coilovers, the arms were cut apart and welded back together to fish between the frame and coilovers. Then universal mounting tabs were used to link up with the trailing arms using Rock Krawler No Limits links. The old coilover bucket needed to be clearanced slightly to get the full range of uptravel, but the motion ratio now moves the arm less and the portal delete puts the tires closer to the fender relative to the axle, so it ended up working well.
I’ll skip the details on how a friend introduced the concept to me and the subsequent thread posted on the forum detailing our findings, and simply share how one is benefiting from this setup.
The idea behind swaybars is force transfer. With a rear swaybar, when the driver side rear tire is lifted, the passenger front tire is pushed down. This is helping with the anti-roll concepts, keeping the body level, as well as traction. If you were to somehow mount the torsion bar for the rear axle at the front of the car (disregard how long the arms are, reducing the anti-roll effect. If it makes you happy we’ll say we increased torsion bar diameter to account for it) your force transfer to the front tires would be very effective. If you also raised the torsion bar from below the frame to several inches above it, it would be even more noticeable. Basically the idea is that the further forward on the frame the torsion bar is, the better. If you can raise it, better still.

Frame stiffness is another consideration. We’ve all likely seen pictures of broncos flexed out where the gap between the bumper a fascia is now closed on one side due to the frame twisting. This minor twisting does in further impacted with a rear swaybar mounted by the bumper, slightly decreasing effectiveness and further twisting the frame. Moving it forward alleviates this.
Packaging is another benefit we received as far as the arms are concerned. With all the travel, arm length, and mounting location, longer links would be needed to avoid flipping the arms backward at full droop. This presents a problem on the uptravel side as the wheel wells may be in the way. As mentioned before, using a motion ratio the arms are no longer needing to move the same distance as the axle and we have more options on link lengths without concern of hyperextending the links/arms. This also gave us the ability to do whatever we wanted with the bump stops seems how the arms are no longer in the way.
Another advantage is that the arms and axle are no longer traveling in opposing arcs, as pointed out by @87-Z28 . As the pivot points travel away from each other, the links start leveling out, losing tension on the arms. This does not happen with the current setup.

At EJS this last year Loren Healy was checking out the rig as it’s the first mullet bronco outside of his that he’s seen. When he saw the sway bar setup he said “now THAT, is clever!” And went on to point out the benefits. It was the first time someone had recognized what we were doing and he was very impressed. Wifey and her rig made a positive impression on what a bronco could do with a lot of bronco haters on that trip That was pretty cool.

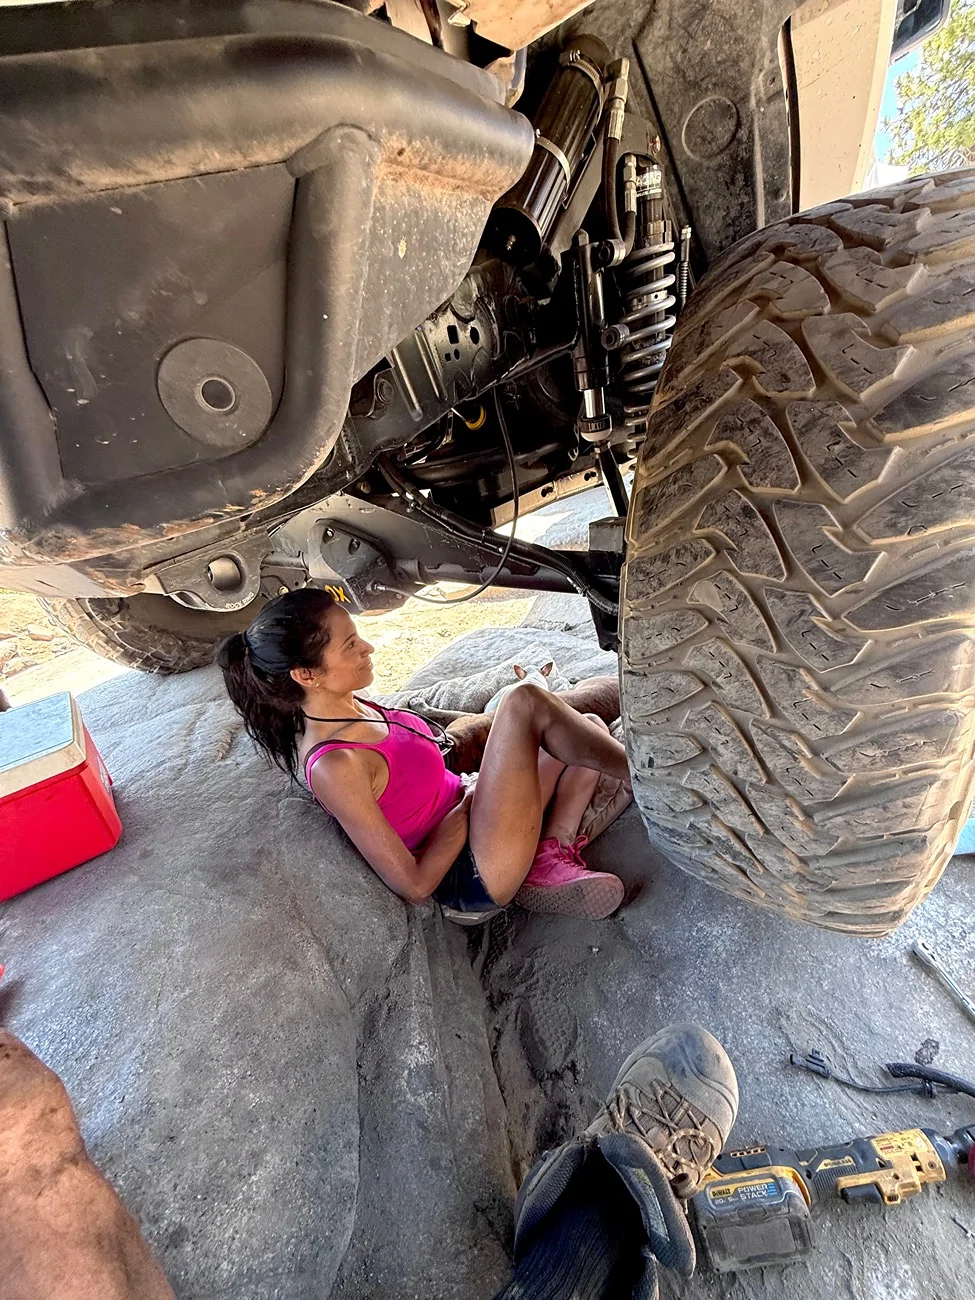
As far as performance is concerned, this is wifey’s favorite build. It has been to Sand Hollow for UBB, Moab for EJS. And the Rubicon. She absolutely loves how stable/planted it feels when wheeling. On the last trip to the Rubicon she said she felt no adrenaline rush the entire trip. I’m actually not sure if that is a good thing or not. Either way, she has come an incredibly long way. The bronco is now her safe place. She can use Forscan to clear codes, she learned how to weld on this rig, she loves the plasma cutter, and of course she’s wrenching on it herself.
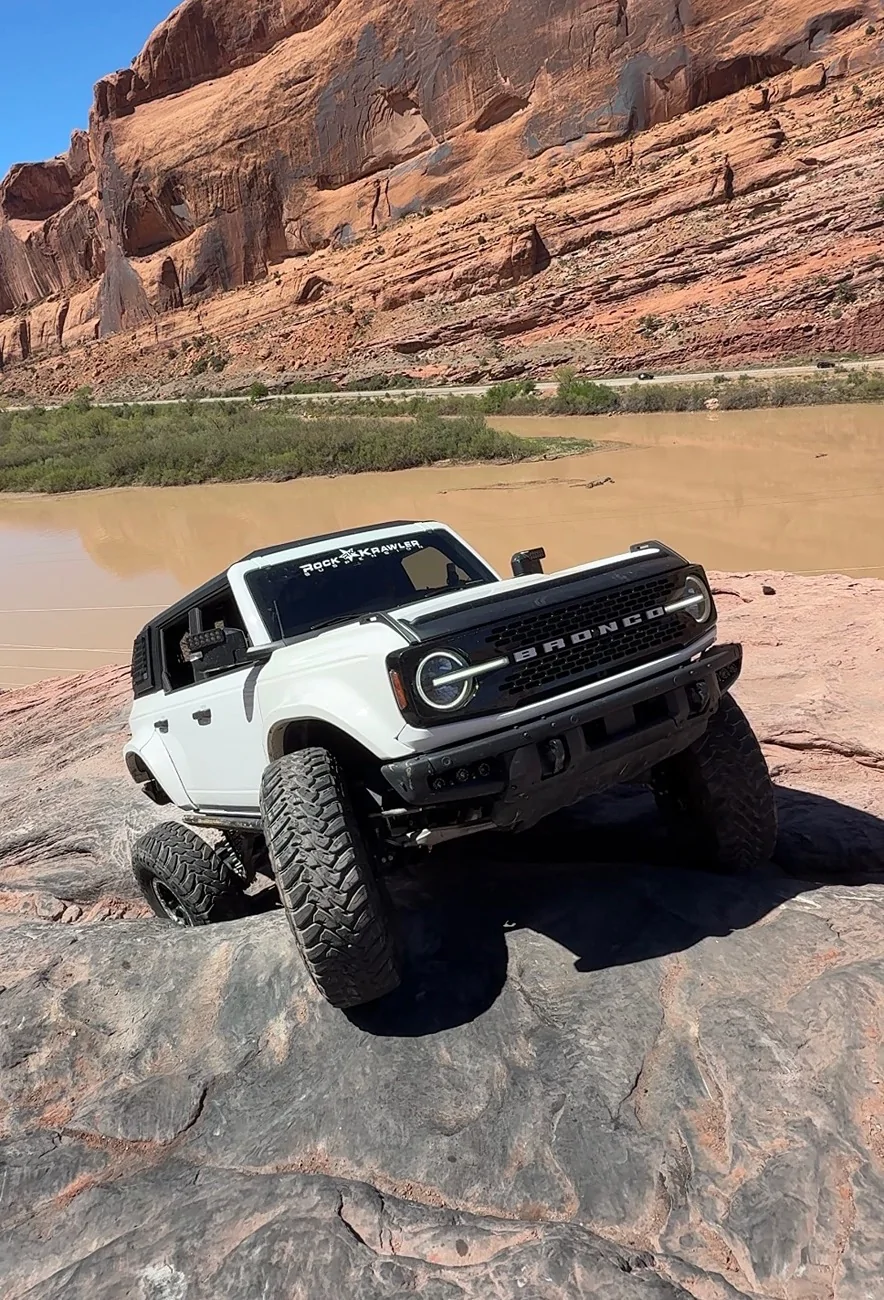
32 spline UD44 with 4.56 gearing
Werewolf portals
Custom 8” coilovers from Rock Krawler up front tuned for the portals and tires
Dana 60 with OX locker and 6.17 gearing
Custom 14” coilovers from Rock Krawler out back
Next Venture sliders and full belly skids
Adams Driveshaft double cardan driveline
Armadillo Hardtop
Tuning by @GooseTuned
ARB toolbox
Apex quick deflate valve stems
Milemarker 10k front winch with a remote switch in the cab
Warn 8k rear winch
Both winches ran off a relay and through a T-class fuse with 20,000 AIC.
Spare steering rack
ADV +5” fenders
40” Toyo tires with Ford Performance beadlocks
This is the third (fourth?) iteration of wifey’s build. Previously I rarely mentioned the following backstory as I had no interest in her being a sympathy case. If anyone had interest in following her progress, we wanted it to be for her growth offroading and building. That said-we have finally put her into remission, and I now feel comfortable sharing. The short story is that she was t-boned by a drunk driver years ago. The accident put her in a wheelchair for almost a year, and while she eventually regained the ability to walk, the accident left her with a debilitating nerve condition. One could imagine that driving was a source of anxiety after such a traumatic experience, and she had daily reminders of it from the nerve condition. I took her to Moab in the stock Wildtrak a couple times for the scenery, and she would get out of the car for the smallest of “obstacles.” She enjoyed the views and hanging out, but doing anything outside of flat driving was still scary for her.
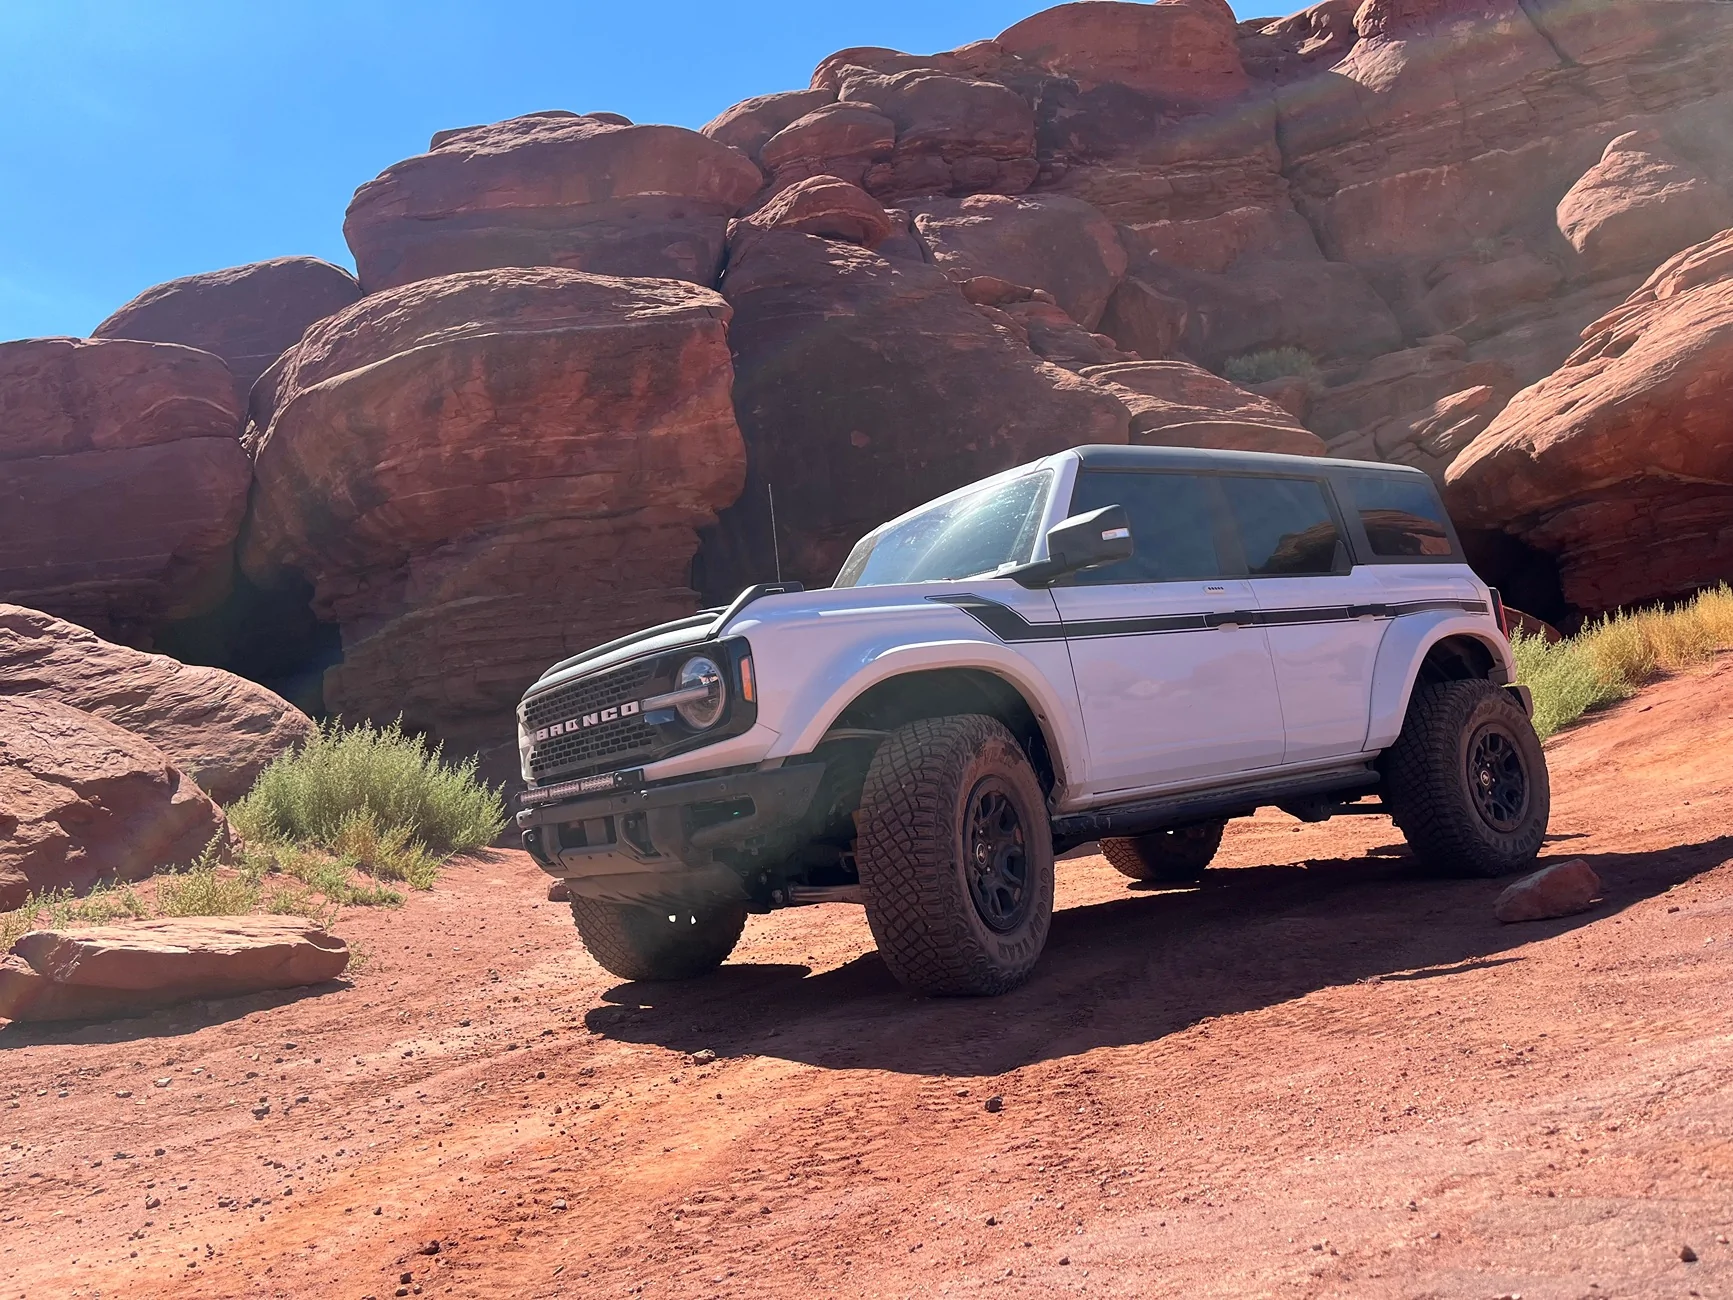
We later went out with a group of Broncos and one of the female drivers was doing obstacles. She thought it was the coolest thing ever. I told her she should absolutely give it a try, and all she had to do was follow my instructions. It started off small, but she gained more and more confidence. One obstacle was a small ledge to climb, and the lady with a slightly lifted two door made it successfully while I picked a bad line and we got high centered. I brought her in on a steeper angle and she completed the obstacle, giggling and excited. On the drive home I noticed she wasn’t as “jumpy” going through intersections. Something had definitely changed. She later asked what it would take to be able to do that climb the same way the two door did. “A station wagon with the same breakover as a lifted two door? Just guessing but that will probably take 40’s.” Now, she’s never asked for anything material in our entire relationship. That’s not an exaggeration either. So when she said “can we get 40’s?” I was going to make it happen. With one requirement - she does all the work so she knows how to fix it, or at least what goes in to the repair. I wanted to build her the most capable and confidence-inspiring rig we could, while still having the ability to be daily driven and run down the interstate comfortably. It started with portals only, but the suspension needed to be adjusted and more travel was desires. Next was portals and plus aftermarket coilovers. It was now too tall and bit tippy, so the next version was a lowered ride height with additional travel and portals. With time and experience we found some issues with bolt-on portals in the rear, resulting in this “mullet build” that will be covered in this thread.
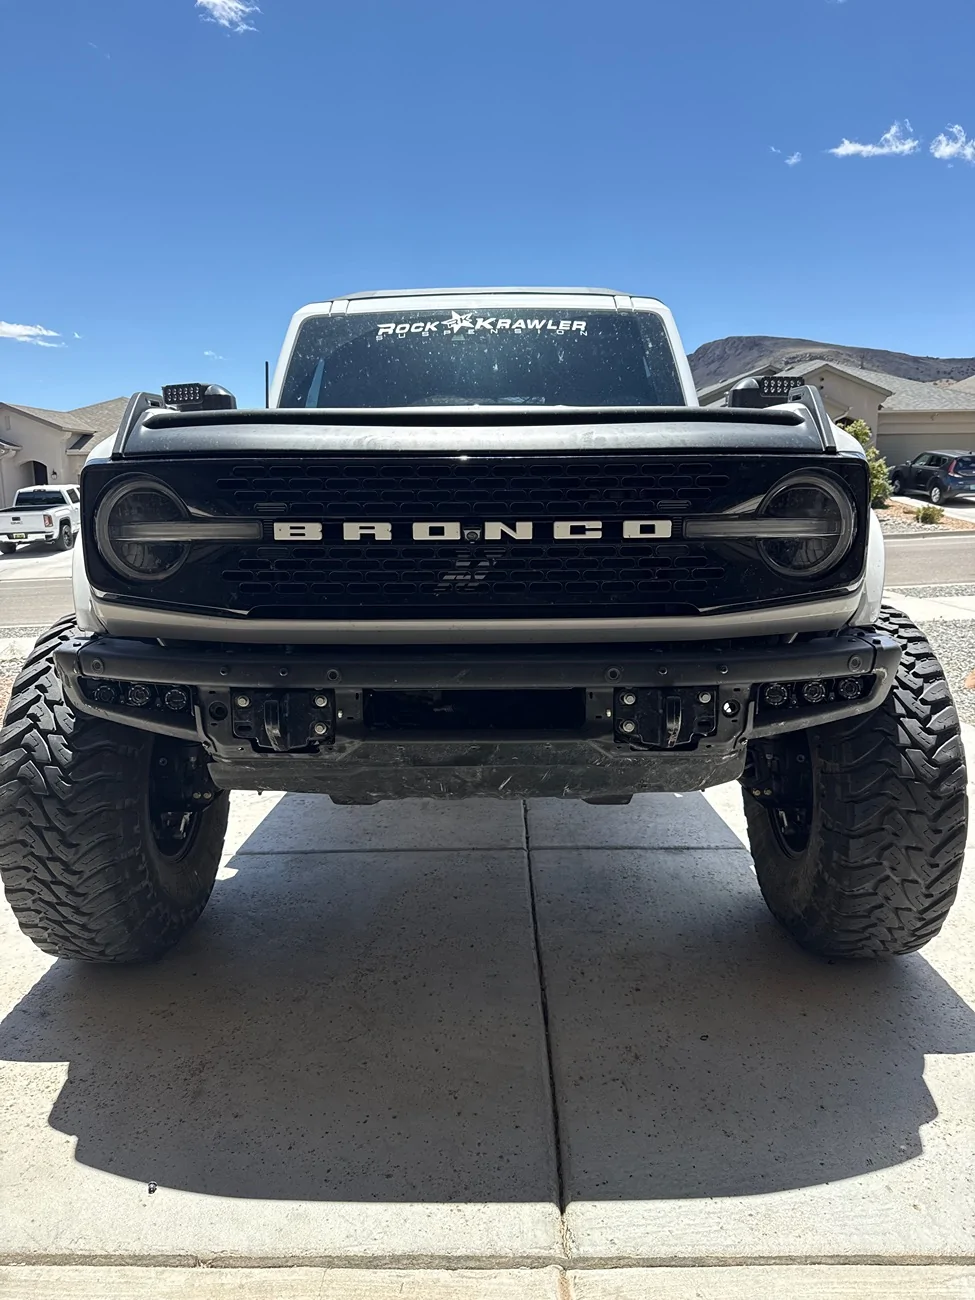
I waited to “unveil” this latest iteration until we had everything working, including ABS. For a detailed explanation as to some of the details that went into going this route, you can find that information at the following link. https://www.bronco6g.com/forum/threads/portals-realities-and-tradeoffs.129813/
The “issues” we had with the rear bolt on portals are partially how we didn’t like that the portal broncos seem to be more susceptible to bouncing. Yes, every rig is going to bounce, but if you pay attention it’s no coincidence that rigs with bolt on portals and stock suspension seems to bounce more regularly. Also, after breaking a rear axle we discovered how bad the suspension behaved with only one side of the rear receiving power while finishing the last 3/4 of the Rubicon. Our sample size is small, but another rig without portals also had a broken rear axle and did not seem to have the same “anchor effect” that our dead corner had. Also wasn’t a fan of the fact that when the axle seals start to leak, that oil goes into the axle housing. If you read the “realities and tradeoffs” post you should have a grasp on why we wanted to delete the rear portals. So the research started on if it would be possible to run portals up front and no portals out back on a street rig with ABS and all the rest of the comforts we enjoy.
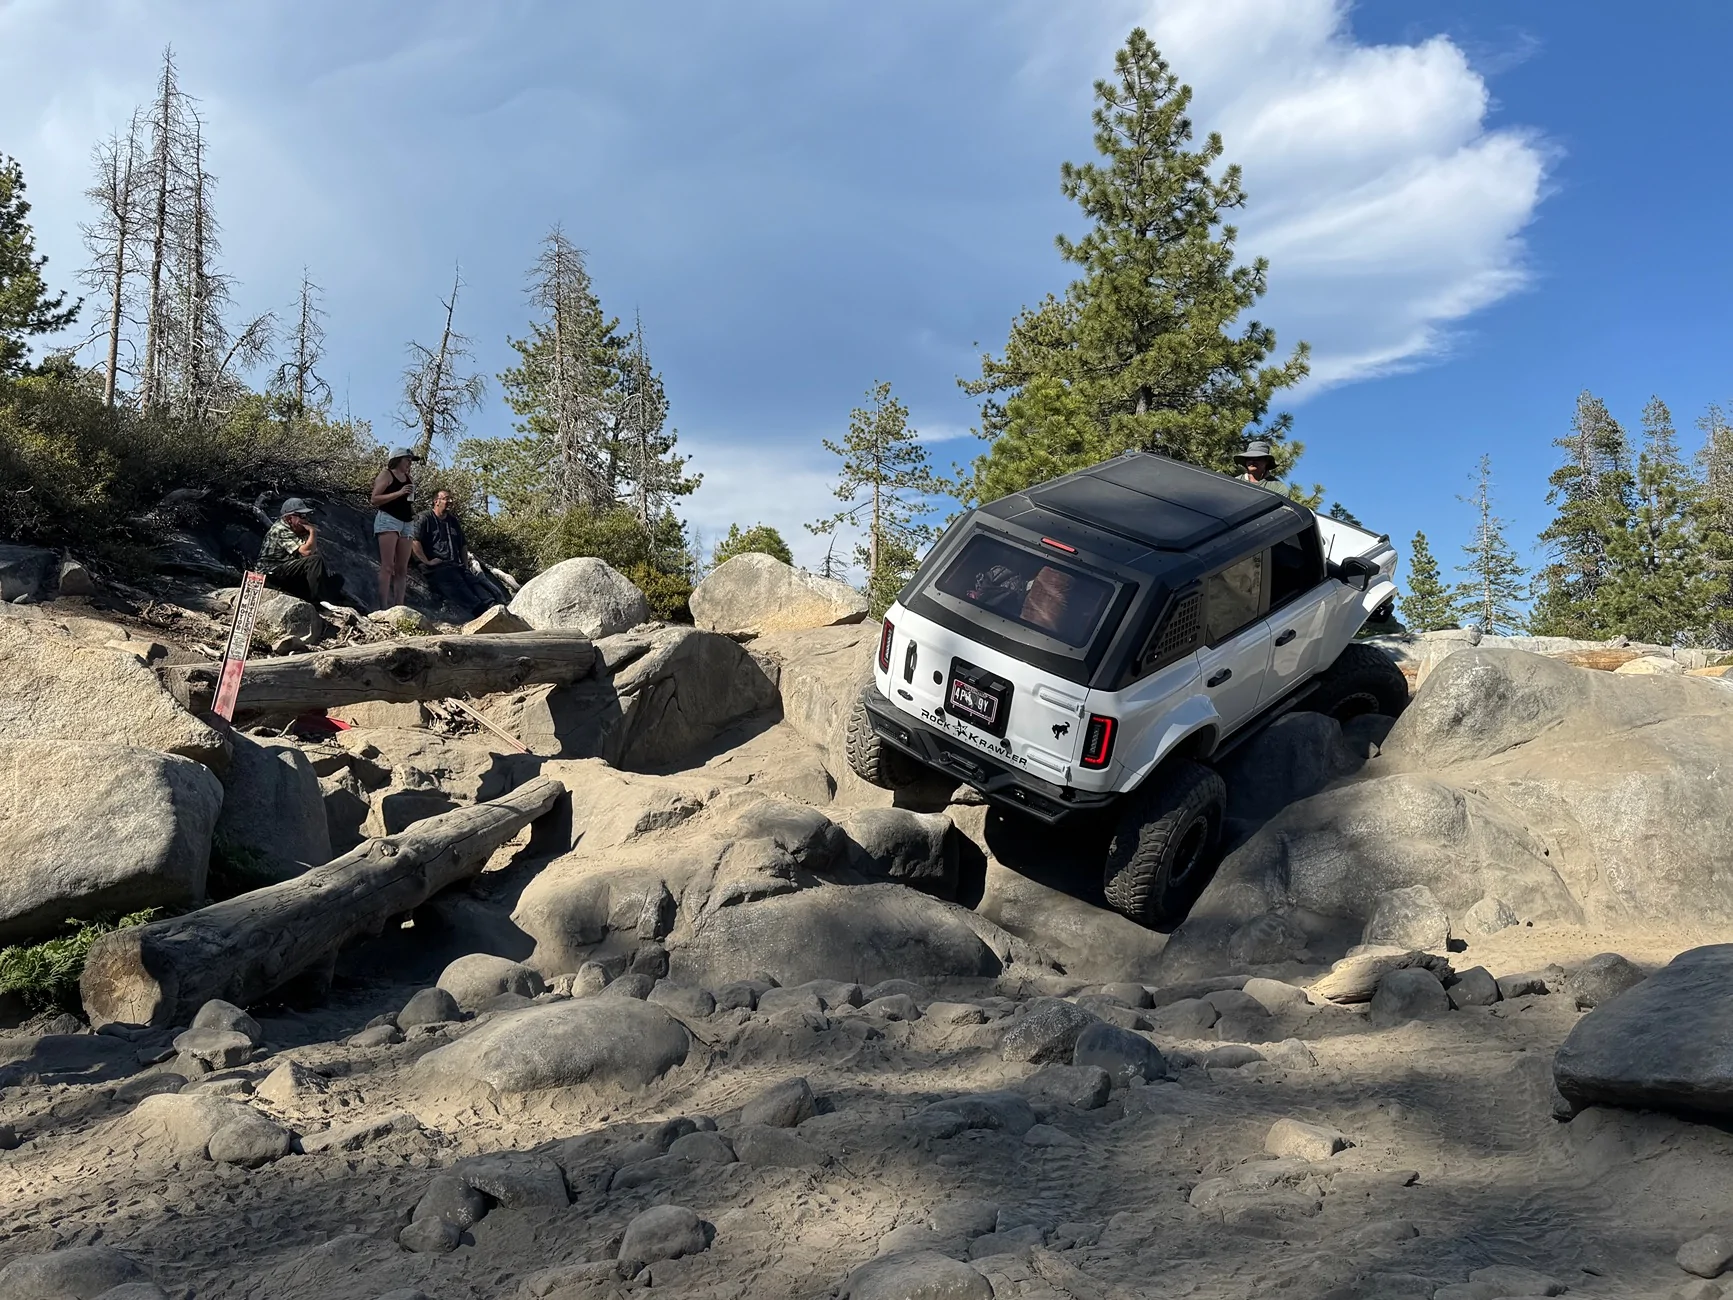
First was finding out if there were gear ratios that would even get close enough with the additional reduction of the portals. With the UD44 up front, we were told the upgraded drive unit would accept gears for any Dana44 Advantek ring and pinion. This gave a starting point for what options were available for front gear ratios. After seeing the Werewolf portals in person and their being made of steel, we decided to ditch all four of the aluminum portals we previously had and ordered the Ukrainian portals. Very robust and weldable, if needed. They do have a deep 1.35 gearing reduction that would need to be accounted for and would push the rear axle into pretty deep gearing. In my research I learned that OEM front to rear gearing differences from the factory have gone as far as 1.5%, and that we need to be at no more than 2% with the ABS speed sensor readings to keep the computer happy. It was important (to me) to have any differences bias to the front diff, so that the front is “pulling” the rear rather than the rear “pushing” the front. Seems that would be the best setup to prevent bind and would be better for handling at speed if 4wd is used. Think of applying only the front brakes when driving vs the rear. Very different outcomes when trying to steer, in theory.
A spreadsheet was created that multiplied the available front ratios by the 1.35 gear reduction to give us rear ratios to look for. The axles we were looking at were Ford 9”/10”, GM 14 bolt, and the Dana 60. At first it seemed like the F9 was going to be the winner as it has triple-shear pinion support and so many gearing options available we could do whatever we wanted up front. But then without fail every set of gears was for racing and not for use on a daily. Another consideration was locker options. With the 1.35 gear reduction from the Werewolf portals, the final gearing was looking to be pretty deep, even going down to 4.10 gears up front. Ring and pinion strength was the new concern, so it was important that the locker be as robust as possible to avoid any deflection that could compromise the ring and pinion. Ultimately we found a combination that worked-Werewolf portals with a regear of the front differential to 4.56 for a final drive of 6.16. Rear axle is a Dana 60 with an OX locker and 6.17 gear ratio. 0.2% difference, biased to the front. Definitely concerned about the durability of that 6.17 ring and pinion, but it does have a higher contact ratio than a D44 with 5.38 gearing and wifey has a gentle right foot. She’d rather winch than beat up her rig, so we’ll try it out. We did drop down to a 1310 u-joint on the pinion to make that a fuse for the R&P, but I suspect that may not help. Considering a D70/D60 hybrid or D80 for the future. But we’ll see.
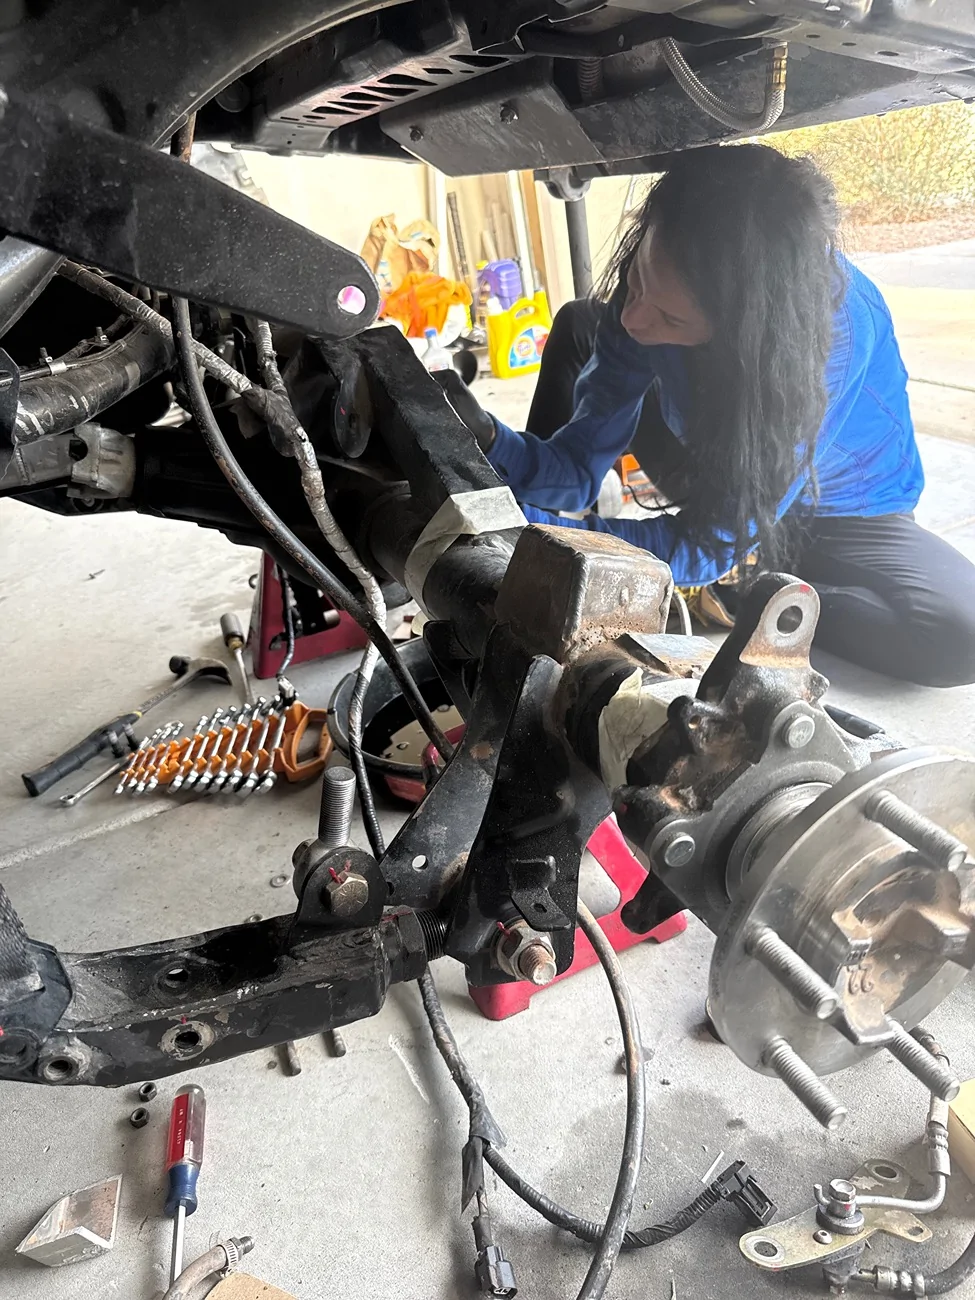
We had custom 59 tooth tone rings made for the rear, which put us about .7% off from the front. Within the 2% allowance of the ABS computers. However, it seems that with the additional width combined with the .7% difference front to rear, turning tightly at speed you can feel the ABS everrrrrrrrrr so slightly kicking in. Looking at the speed sensors we’re up to 3% off, but I’m not sure how far off those get from eachother on a regular bronco when turning.
As for the suspension, the changes up front have been covered in a previous thread so I’ll be brief. Portals provide significant lift to the vehicle and while they do increase the track width and stability, your COG is still negatively affected and the rig is much tippier in off-camber situations. We initially lowered the rig with preload, but then there is so little uptravel we’d be bottoming out over every little bump in the trail. It’s absolutely horrible and we ended up with a pretty tall ride height trying to find a balance between uptravel and not bottoming out. We ultimately modified the suspension to lower the rig while gaining uptravel. We bought some universal jeep coilover mounts, then cut up the OEM shock towers. The goal was to effectively “blend” the OEM towers with the universal towers to get a coilover mounting point that was 4” higher, maintaining the OEM shock angle. (We were within .1 degrees of OEM angle. I’ll take it) RockKrawler made us custom 8” coilovers that were tuned for the 16” 600 lb/in coils needed to accommodate the increased width from the portals, rebound changes for the additional mass from the portals and tires, and had the “bronco extension” on the bottom to clear the CV while tying in to the OEM LCA. Not only did we lower the rig, but we gained up-travel and could take advantage of it via the extra operating range from the larger 32-spline axles used with the UD44 FDU. Downtravel remained the same and limit straps were added to save the coilovers. The front suspension now has 13” of bumped/strapped travel. (With the old portals we were limited on uptravel due the additional width of the mounting surface.)
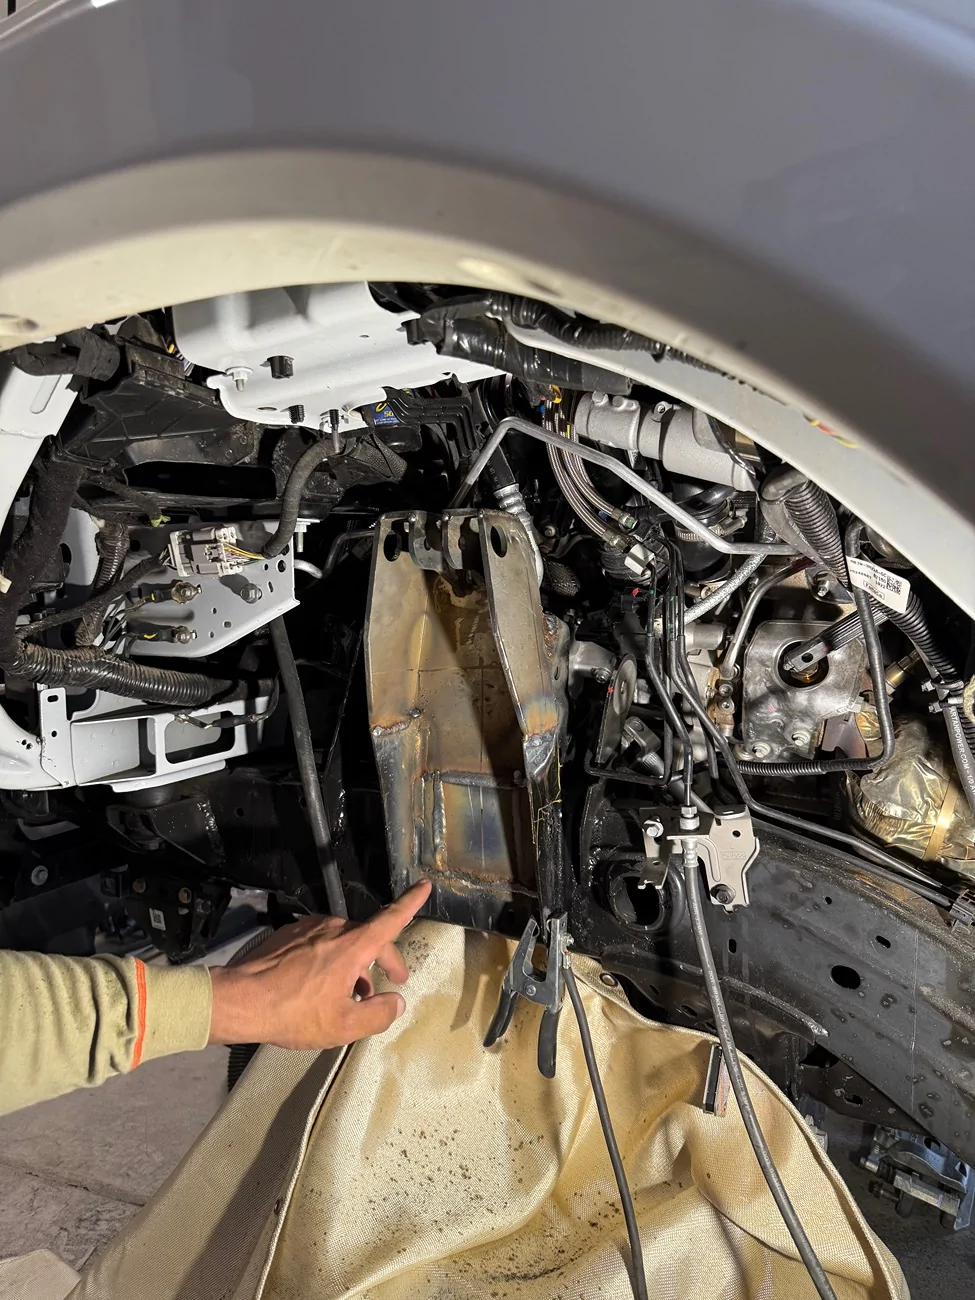
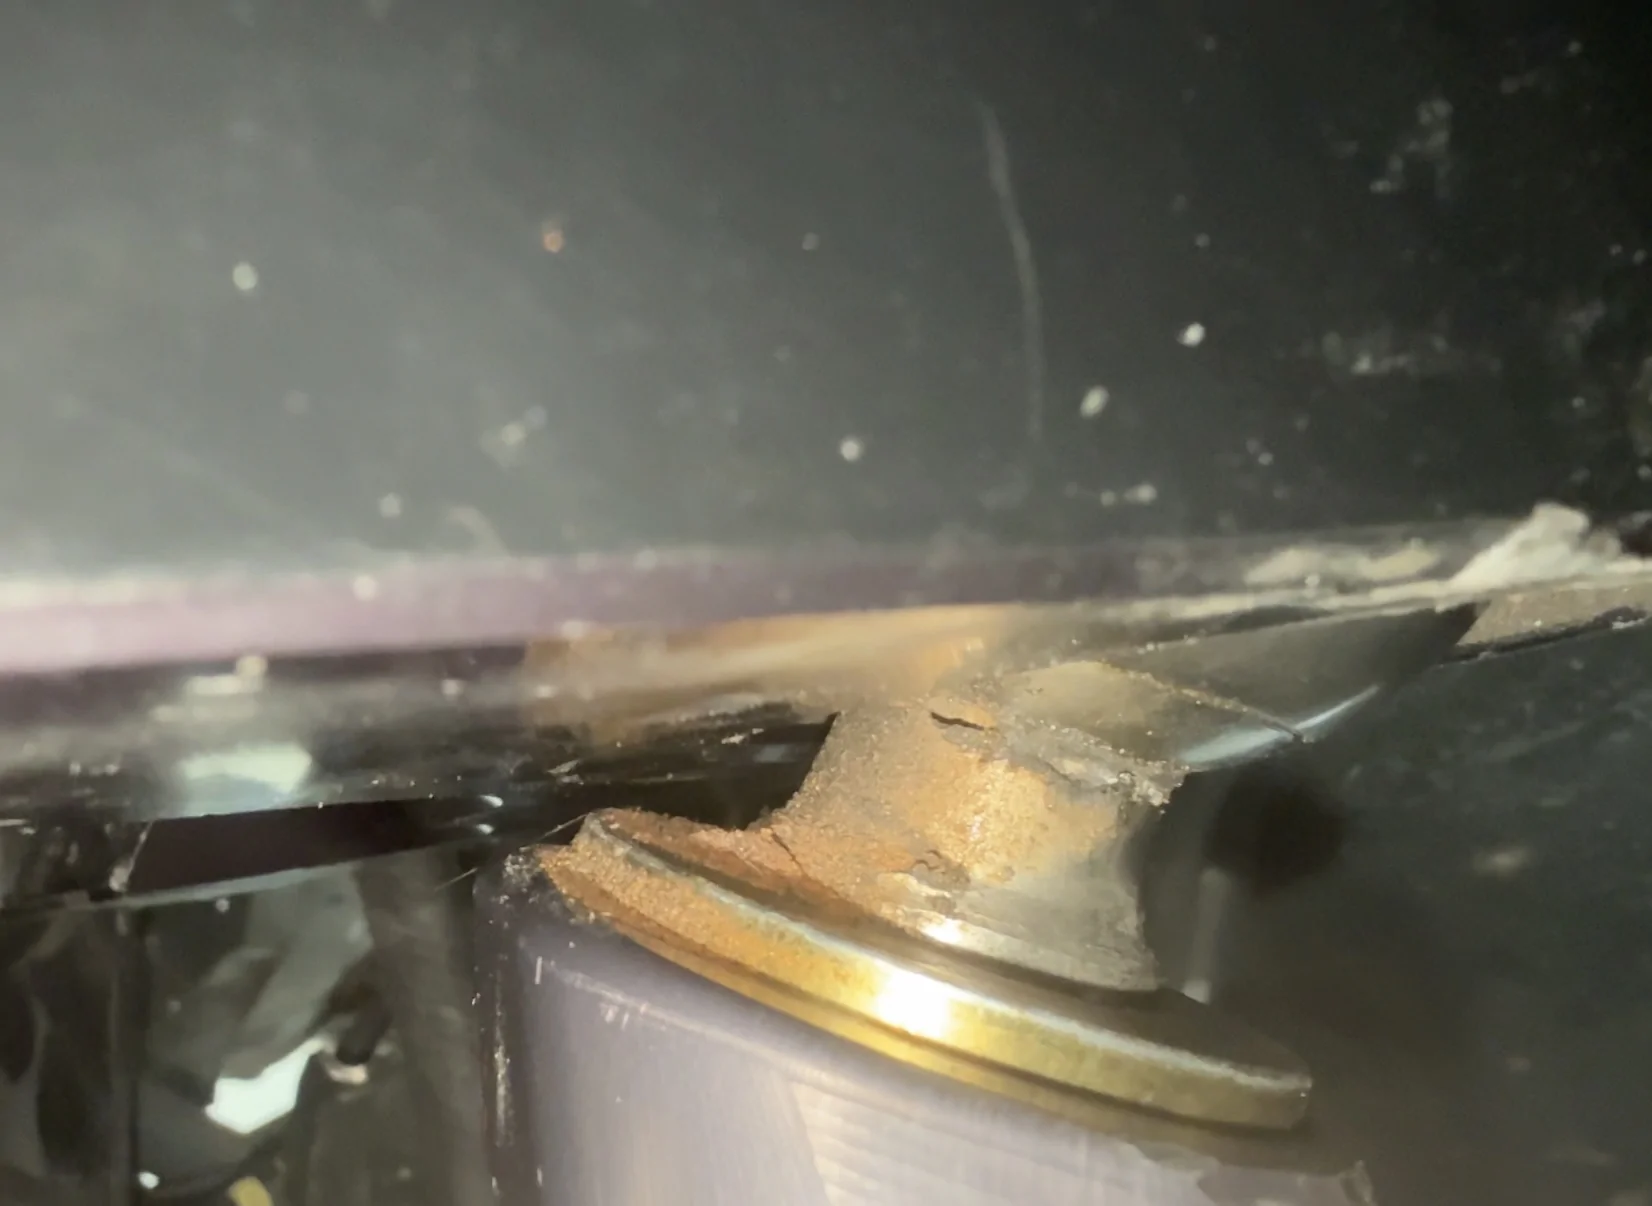
With the new Werewolf steel portals, they make up nicely with the UCA to where we were able to adjust the bump stops to gain the rest of the uptravel we were hoping for. The shock mounted bumps start to get compressed just before the hydraulic bumps are completely used up. Very happy about that.
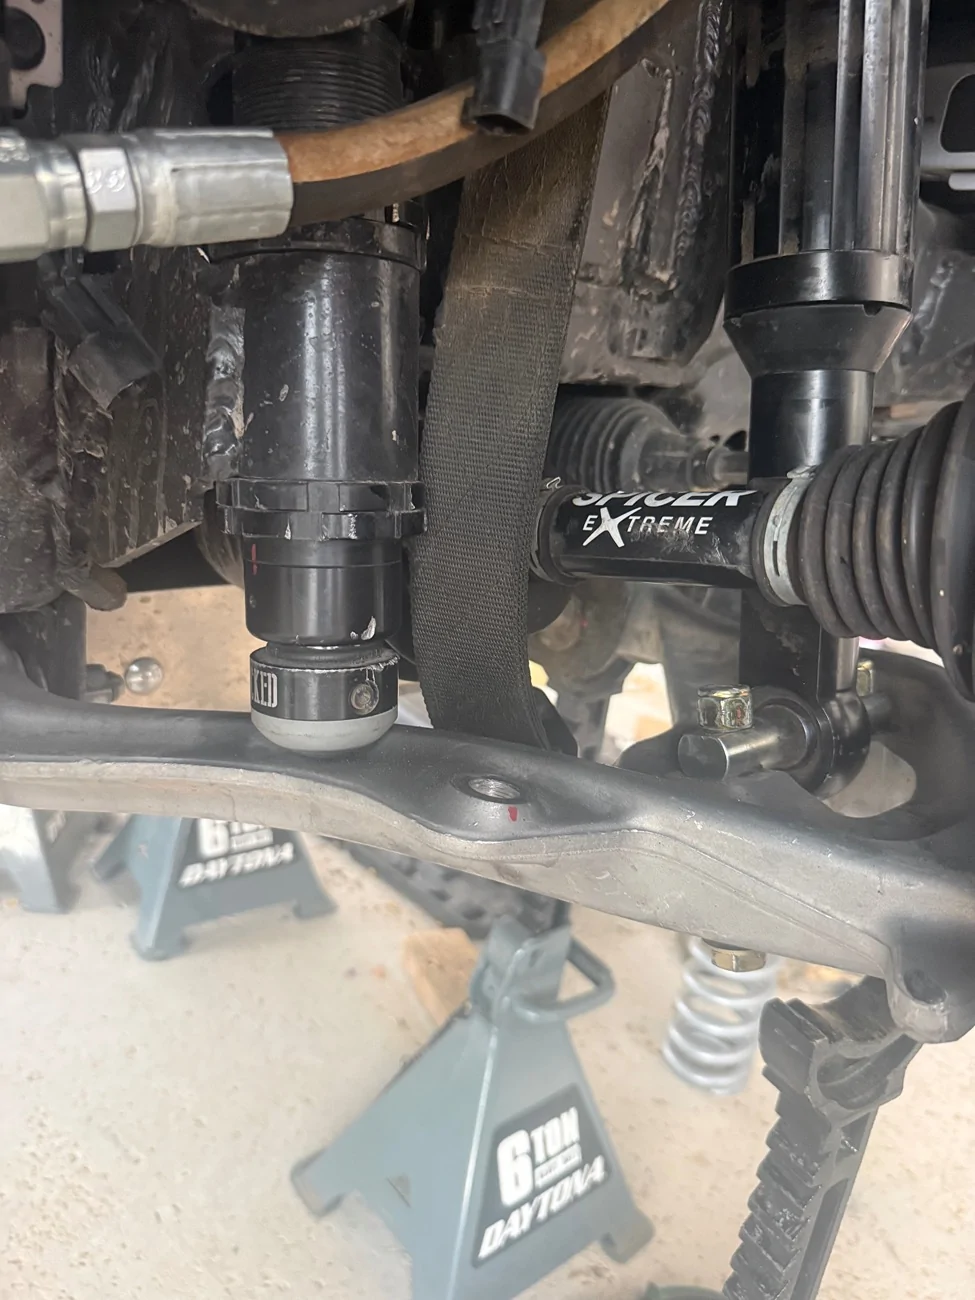
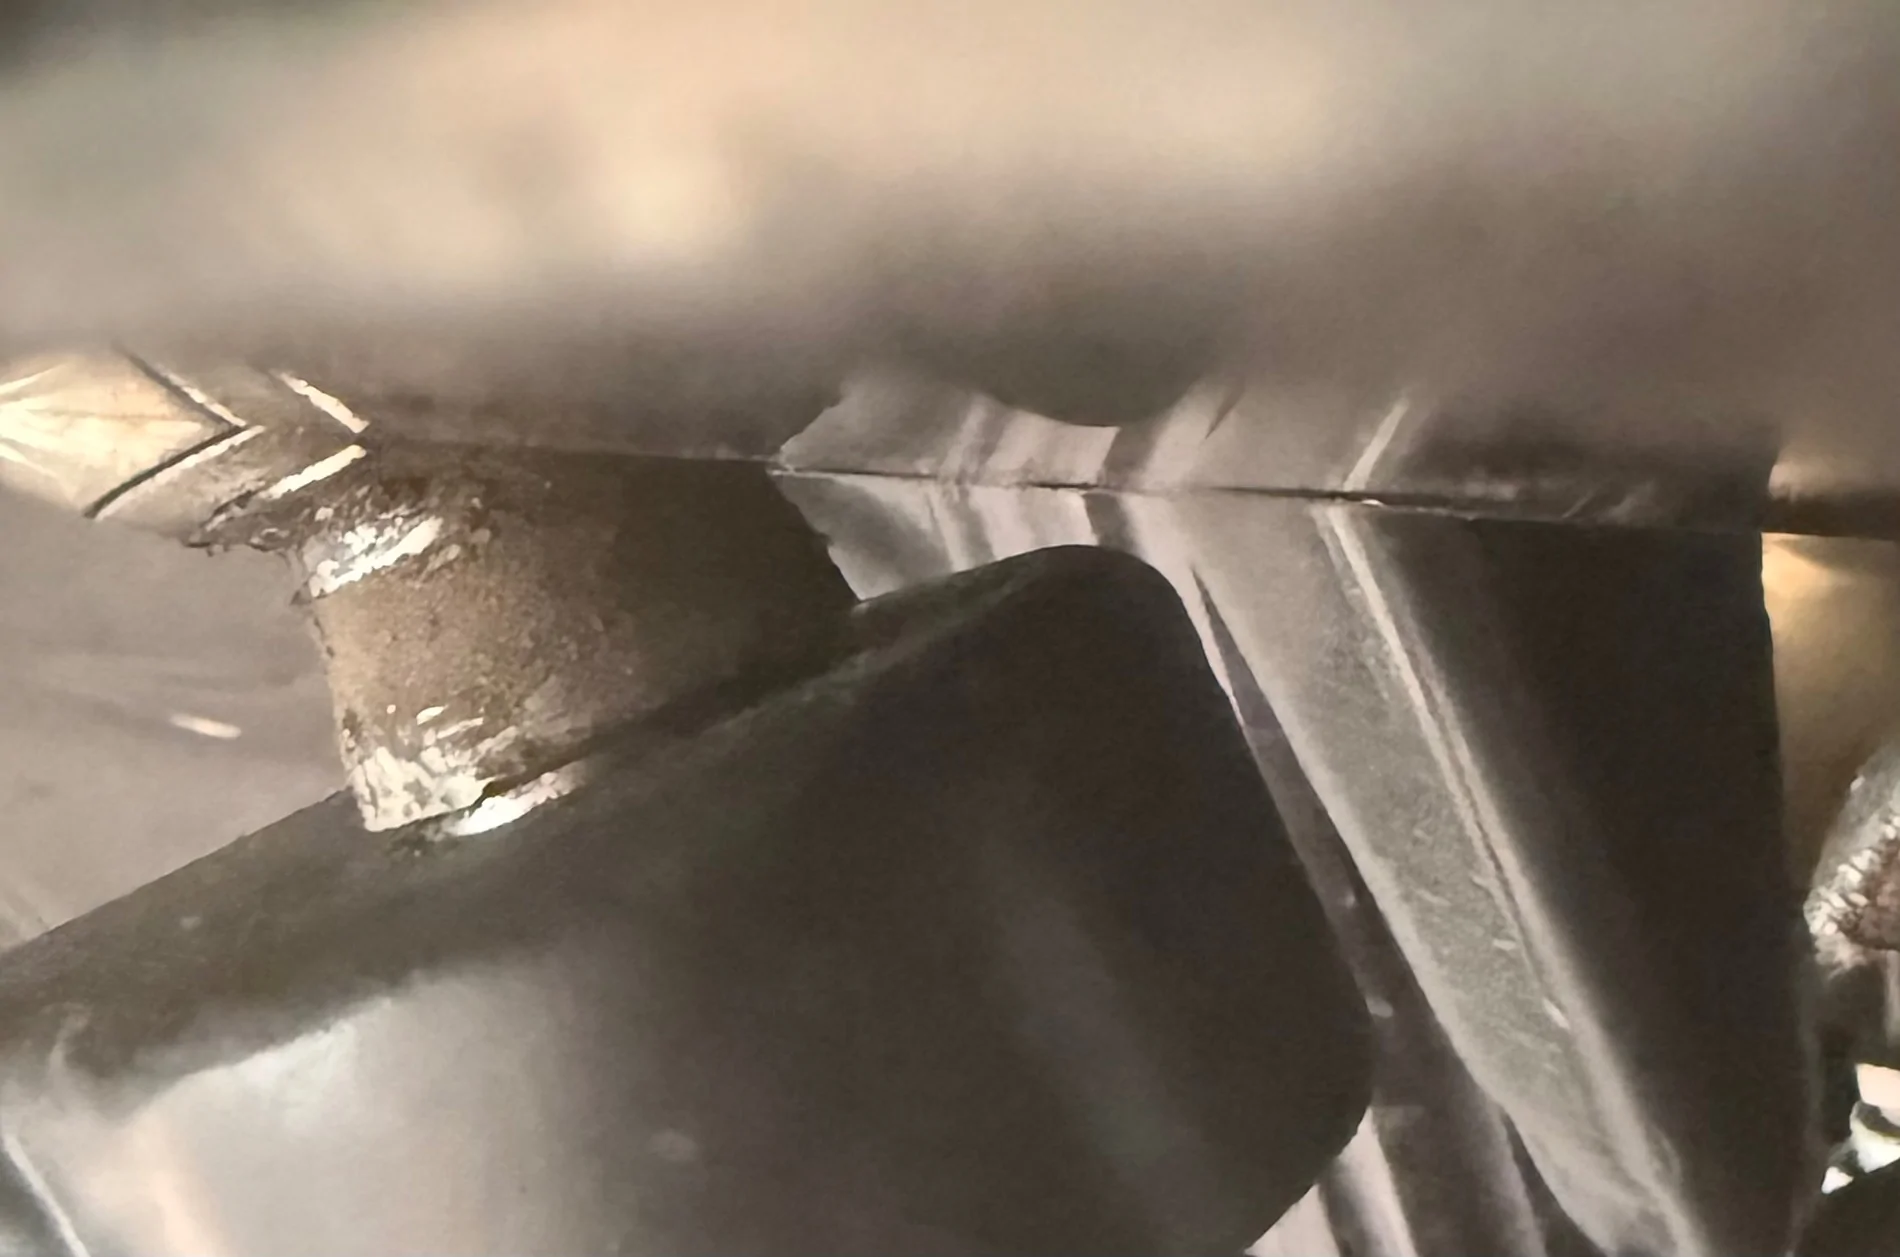
We also drew up some bump stop mounts in CAD and sent them off to sendcutsend. The bump stops worked beautifully and we just bump against the LCA. (Had strike plates made but when trying to Tig weld them on they required too much heat. Shut the welding attempt down when the aluminum at the bushings reached 200F) We have done a significant amount of wheeling with this new setup and it is so very nice no longer bottoming out against the coilover.
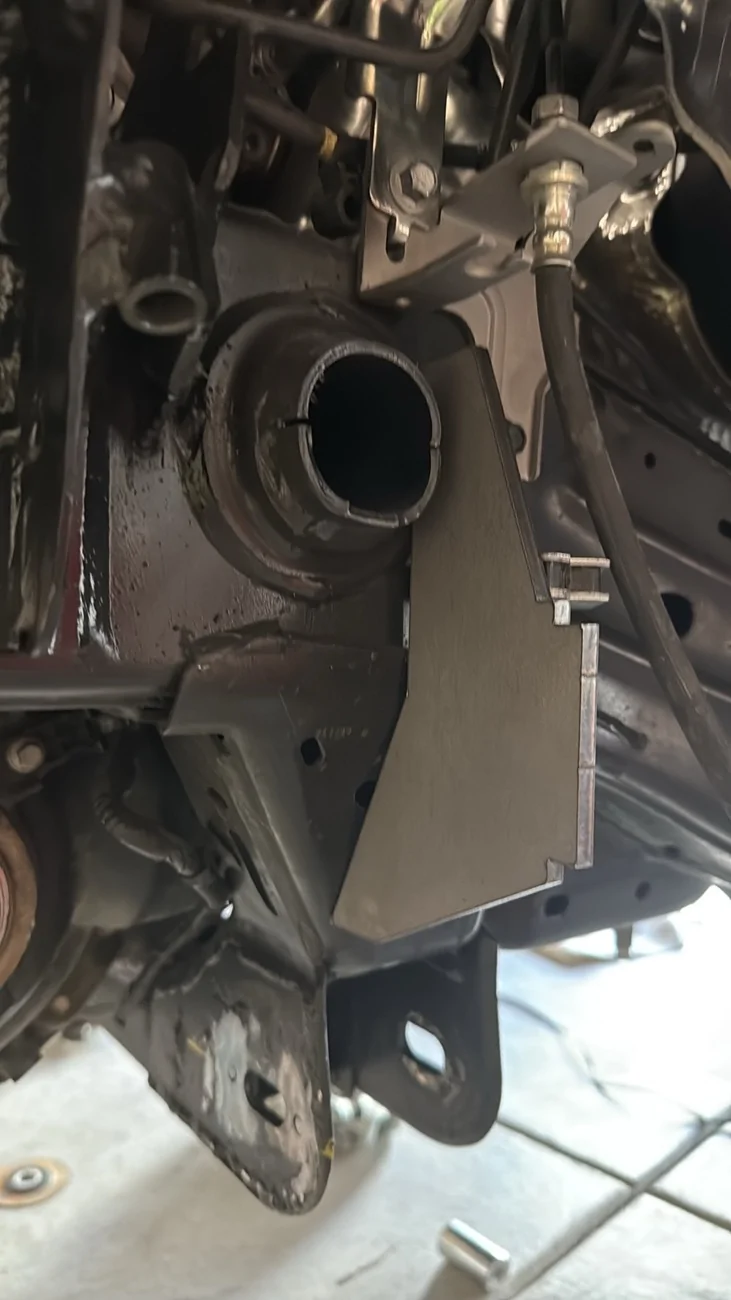
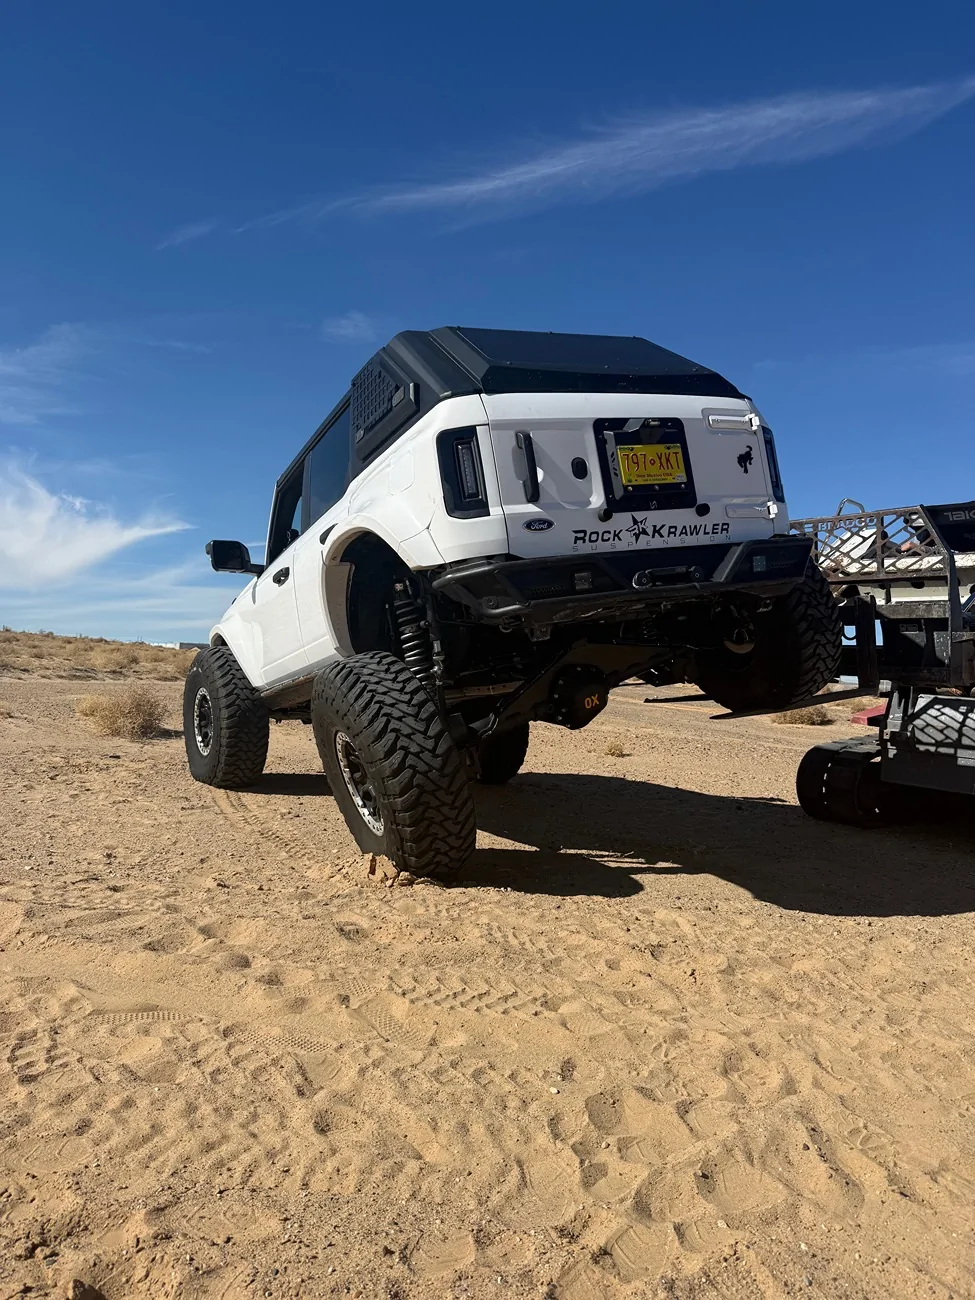
Out back we worked with Vasher Design to get a trailing arm setup that ran the arms outside the frame and utilized 12” coilovers with a 1.33 motion ratio, giving us 16” of wheel travel while lowering the rear to match the front. When it came time to delete the rear portals, we had to make up for the 4” of lost lift (5.5” with Werewolf) and Rock Krawler once again came through, building us 14” coilovers tuned for this suspension. This provided us an additional 2.66” of wheel travel. With portals the lift is fixed so while you gain clearance, there is no additional travel in the suspension and again, if you lower it with preload you’ll be bottoming out. This new setup provides a total of 18.6” available vertical travel.
Since we were deleting the portals and going to a D60, we had a custom axle built with the 6.17 gears, OX locker, and the housing 9” wider than stock to match the WW portals. We then sent the axle to Vasher where he mounted the custom truss designed for his wishbone three link setup as well as the trailing arm mounts. We were able to utilize the trailing arms for the limit straps, as well as the swaybar mount rather than the axle. But we had to get creative on the bump stops. Vasher has a proclivity for using holes and mounting points already in place from the factory, and he does a great job doing so. Unfortunately the towers utilize a hole that is right where the bump stops need to be. His towers do come with mounting provisions for bump stops, but this build is so different from his off the shelf design I didn’t use them. The wishbone three link uses the factory upper control arm frame mounts, and this limits what you can do with the length of the lower control arms while still retaining the correct pinion angle throughout your travel range. His trailing arm design has the correct length vs the upper arms and axle mounting locations, and the pinion stays pointing at the tcase throughout the entire range of travel, ideal for a double cardan driveline like we’re running. But, there is a bit of axle steer when articulated, as expected with this setup. Which brings us back to the bumpstops. I think we spent two days getting the axle position correct to account for all that forward-back movement when articulating. The bigger openings from the fender helped, but those 40” tires still occupy a lot of space. We also ran into the issue of not having enough height in the garage to fully droop out the suspension, even with the tire off. Had to resort to using a plumb bob and measuring tape then predicting the final placement of the tires when articulated. Luckily, we got it “close enough.” As for the bump stop mounts, we used chipboard to create templates that we then cut from plate steel. (The plasma cutter is now wifey’s favorite tool in the garage.) The extra width of the axle gave us the ability to go outboard of the shock tower and still clear the tire by about 3/4” while fully stuffed. The bumps are set so the tire jusssssst kisses the fender, enough that you can hear it gently squeaking as it rubs the fiberglass. Credit to @Snacktime for the modified photo

The swaybar was briefly mentioned in the last paragraph, but how we ran the swaybar is something I’m quite proud of. The typical setup for aftermarket swaybars is to put the torsion bar by the rear bumper and attach the arms at the axle. Easy peasy. But I wanted to try something different, getting the swaybar as far forward on the frame as we could and also as high as possible.
To accomplish this, we once again made custom mounts and were able to place the torsion bar right behind the body mounts and above the frame. Tolerances are very tight, requiring the torsion bar splines to be narrowed as much as we could. To accommodate the coilovers, the arms were cut apart and welded back together to fish between the frame and coilovers. Then universal mounting tabs were used to link up with the trailing arms using Rock Krawler No Limits links. The old coilover bucket needed to be clearanced slightly to get the full range of uptravel, but the motion ratio now moves the arm less and the portal delete puts the tires closer to the fender relative to the axle, so it ended up working well.
I’ll skip the details on how a friend introduced the concept to me and the subsequent thread posted on the forum detailing our findings, and simply share how one is benefiting from this setup.
The idea behind swaybars is force transfer. With a rear swaybar, when the driver side rear tire is lifted, the passenger front tire is pushed down. This is helping with the anti-roll concepts, keeping the body level, as well as traction. If you were to somehow mount the torsion bar for the rear axle at the front of the car (disregard how long the arms are, reducing the anti-roll effect. If it makes you happy we’ll say we increased torsion bar diameter to account for it) your force transfer to the front tires would be very effective. If you also raised the torsion bar from below the frame to several inches above it, it would be even more noticeable. Basically the idea is that the further forward on the frame the torsion bar is, the better. If you can raise it, better still.
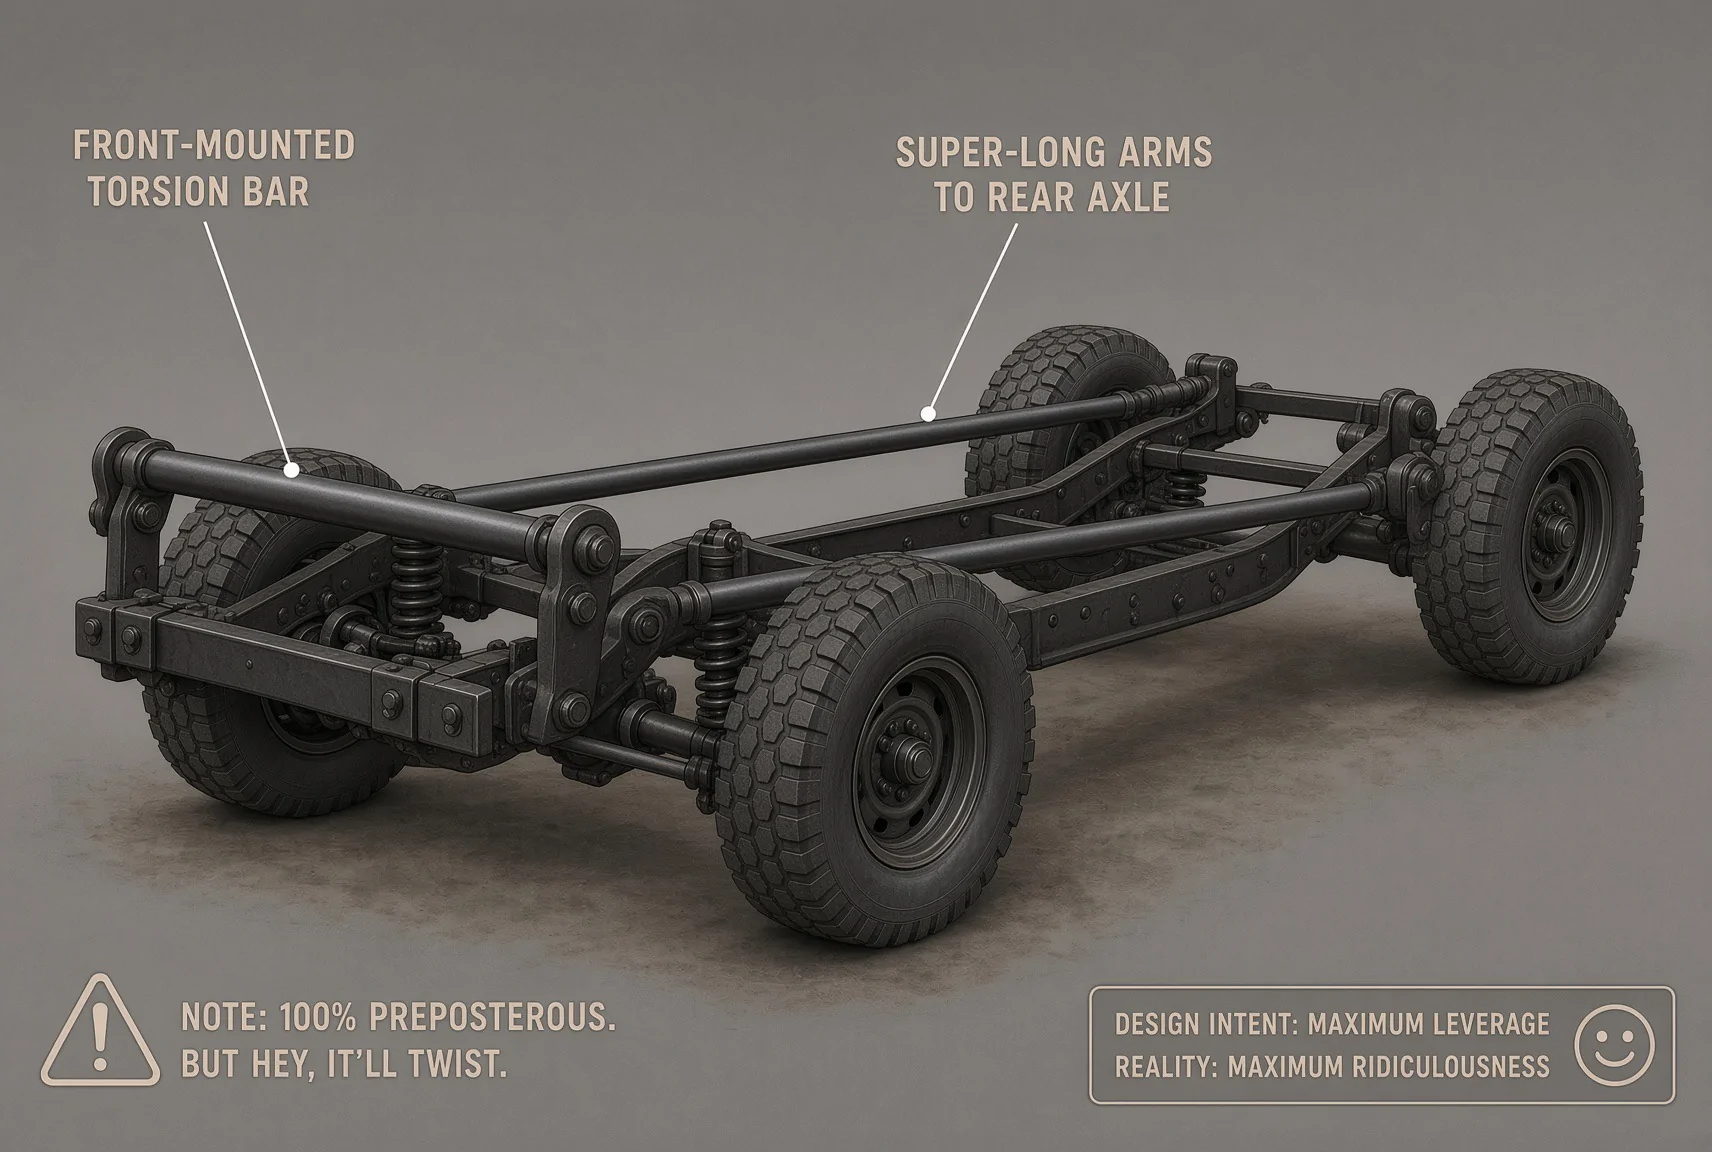
Frame stiffness is another consideration. We’ve all likely seen pictures of broncos flexed out where the gap between the bumper a fascia is now closed on one side due to the frame twisting. This minor twisting does in further impacted with a rear swaybar mounted by the bumper, slightly decreasing effectiveness and further twisting the frame. Moving it forward alleviates this.
Packaging is another benefit we received as far as the arms are concerned. With all the travel, arm length, and mounting location, longer links would be needed to avoid flipping the arms backward at full droop. This presents a problem on the uptravel side as the wheel wells may be in the way. As mentioned before, using a motion ratio the arms are no longer needing to move the same distance as the axle and we have more options on link lengths without concern of hyperextending the links/arms. This also gave us the ability to do whatever we wanted with the bump stops seems how the arms are no longer in the way.
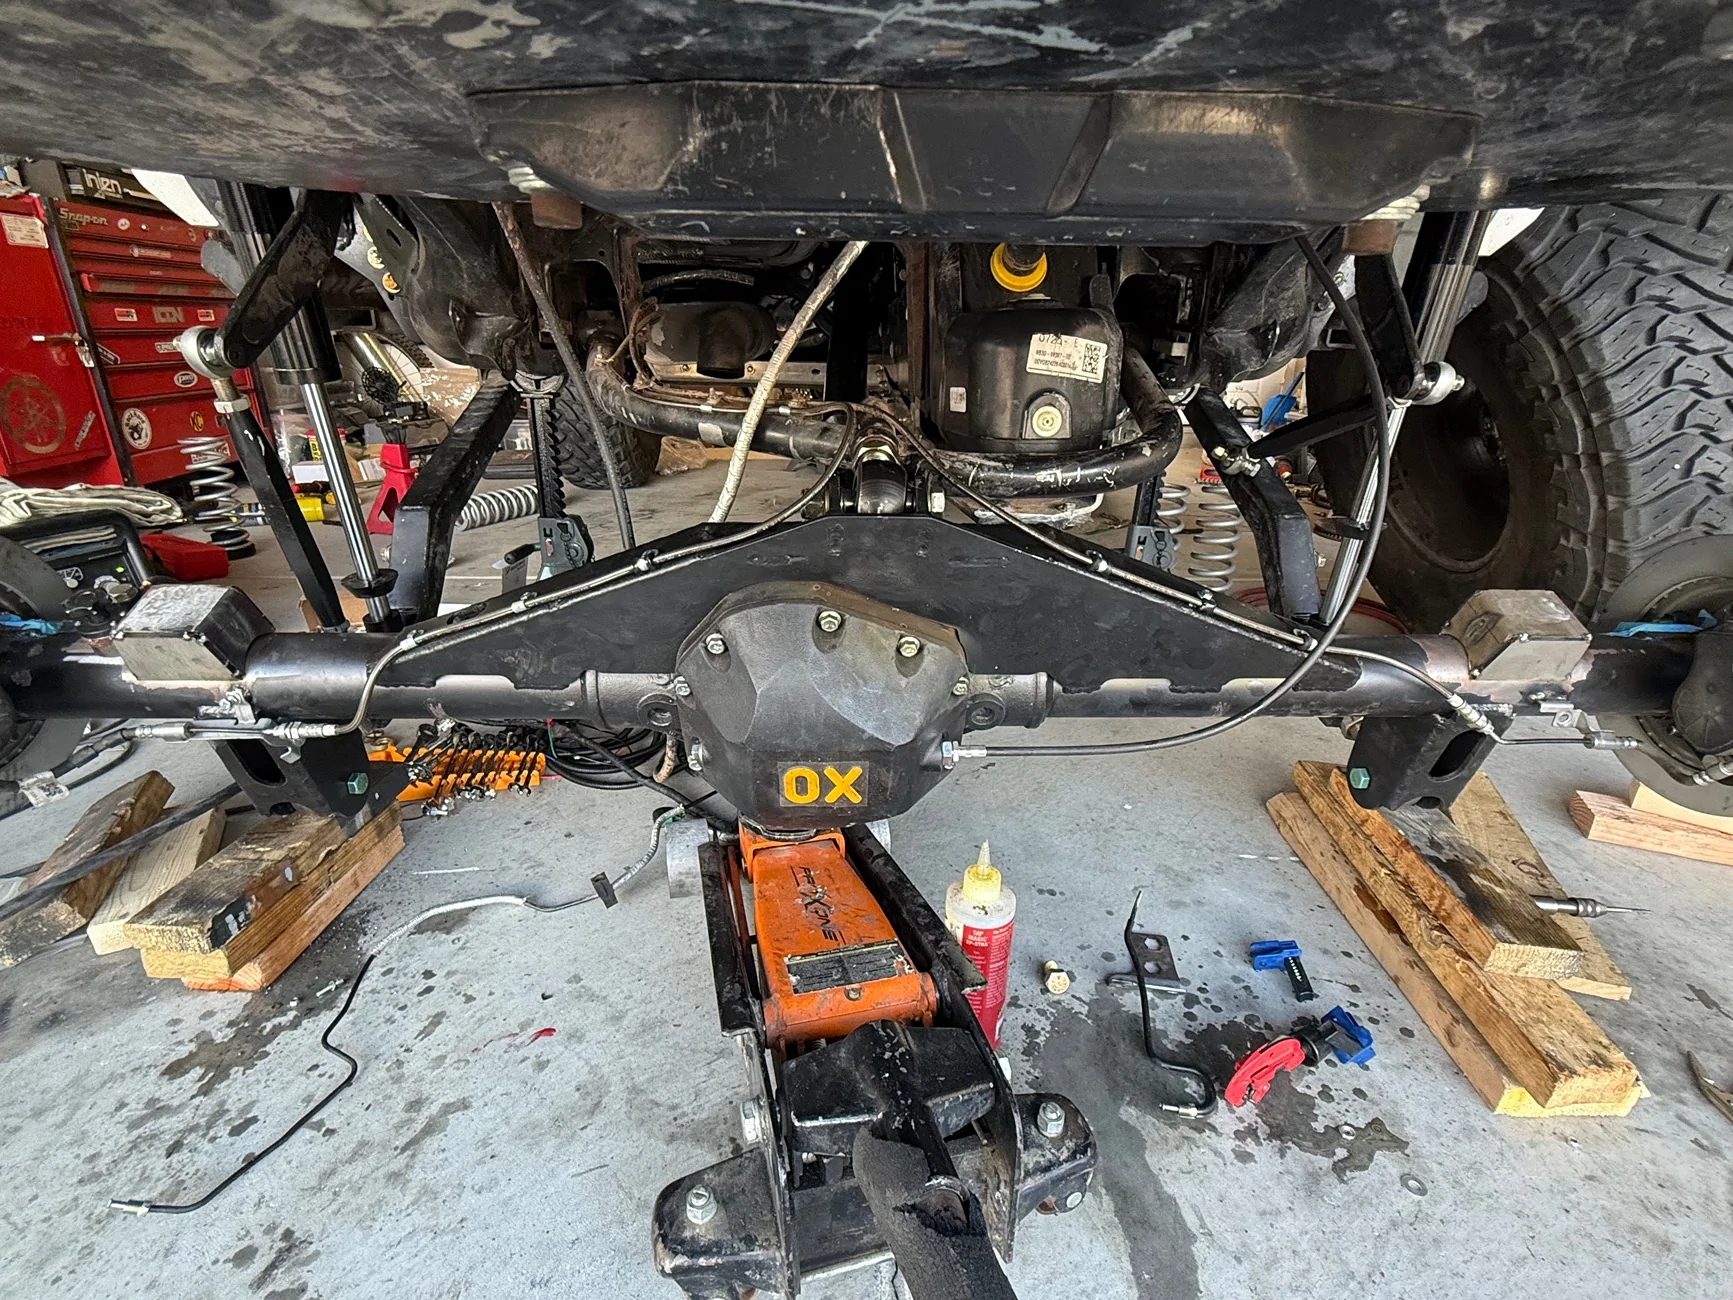
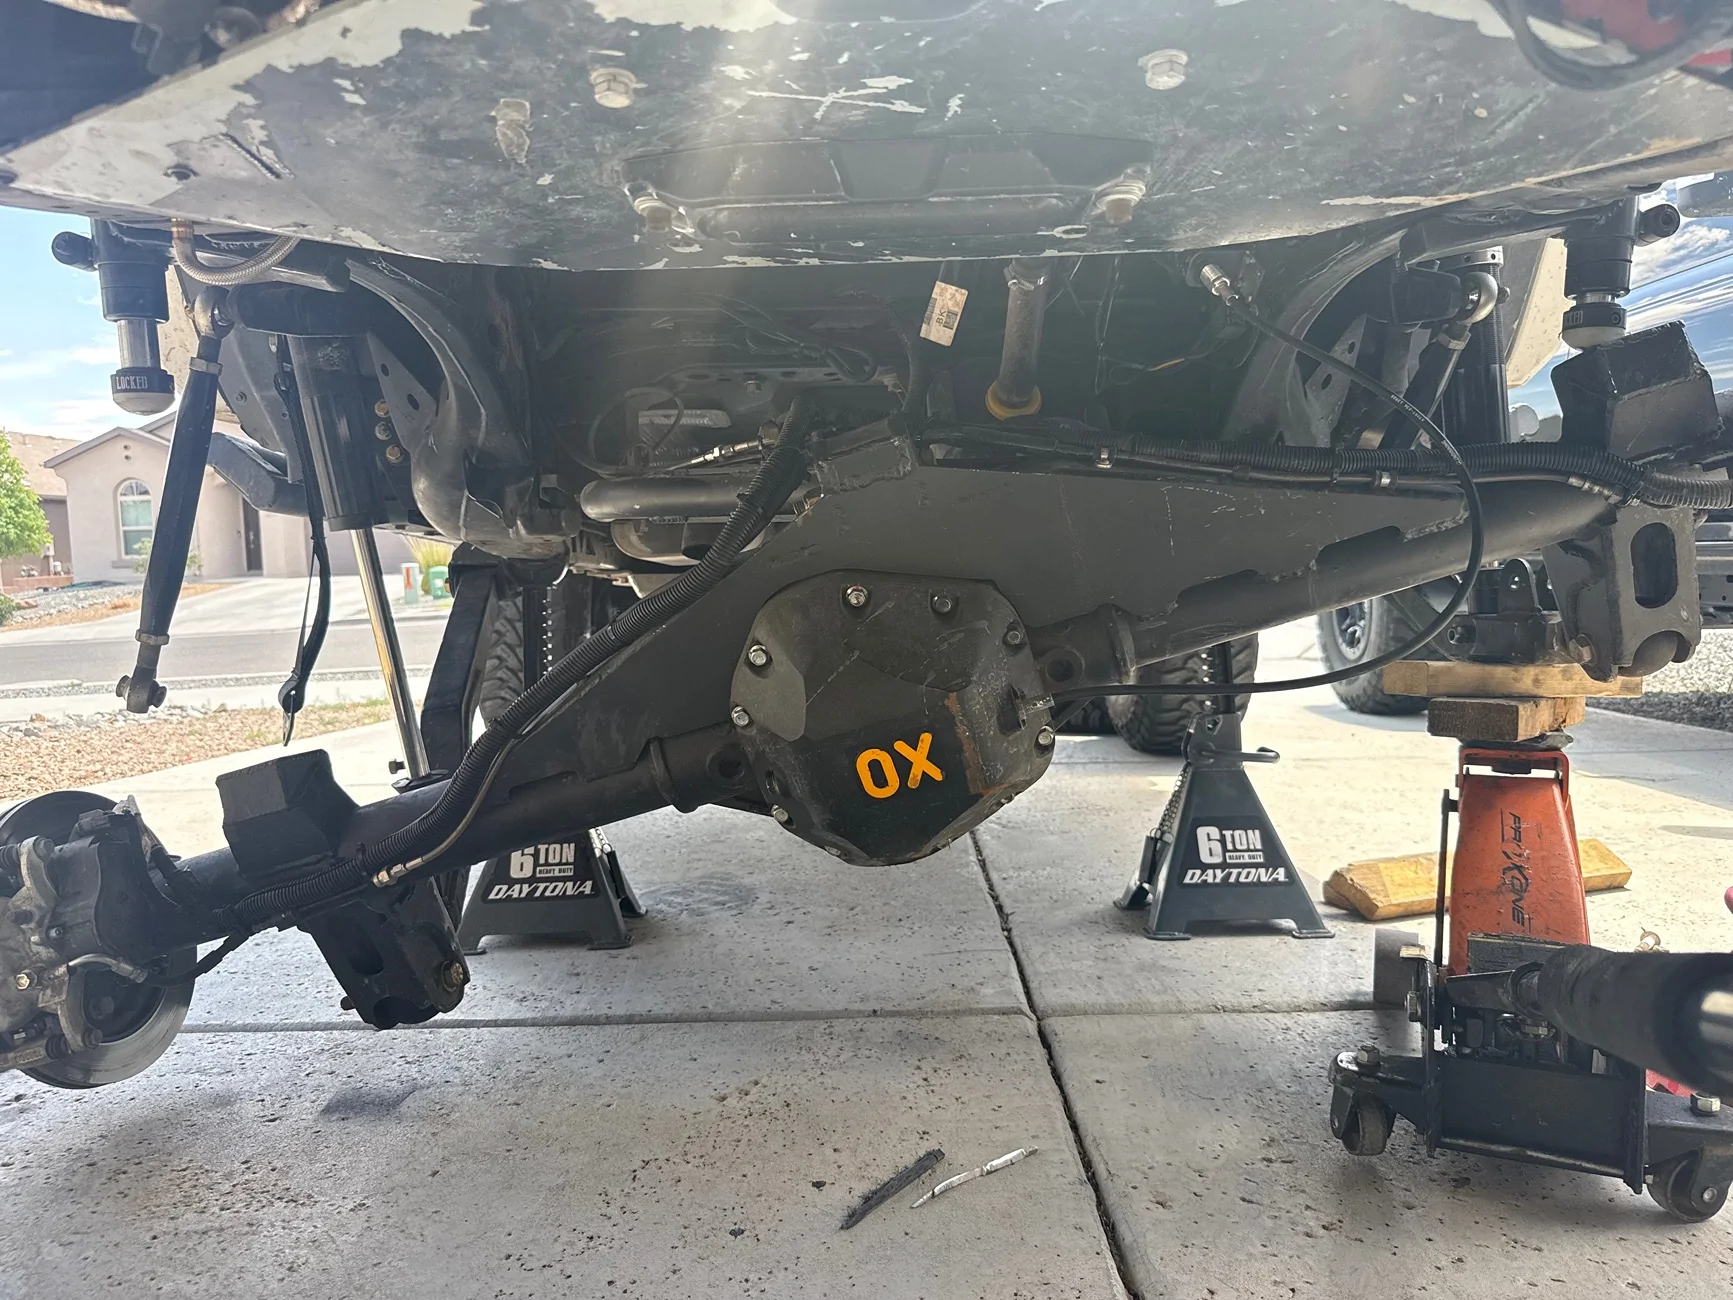
Another advantage is that the arms and axle are no longer traveling in opposing arcs, as pointed out by @87-Z28 . As the pivot points travel away from each other, the links start leveling out, losing tension on the arms. This does not happen with the current setup.
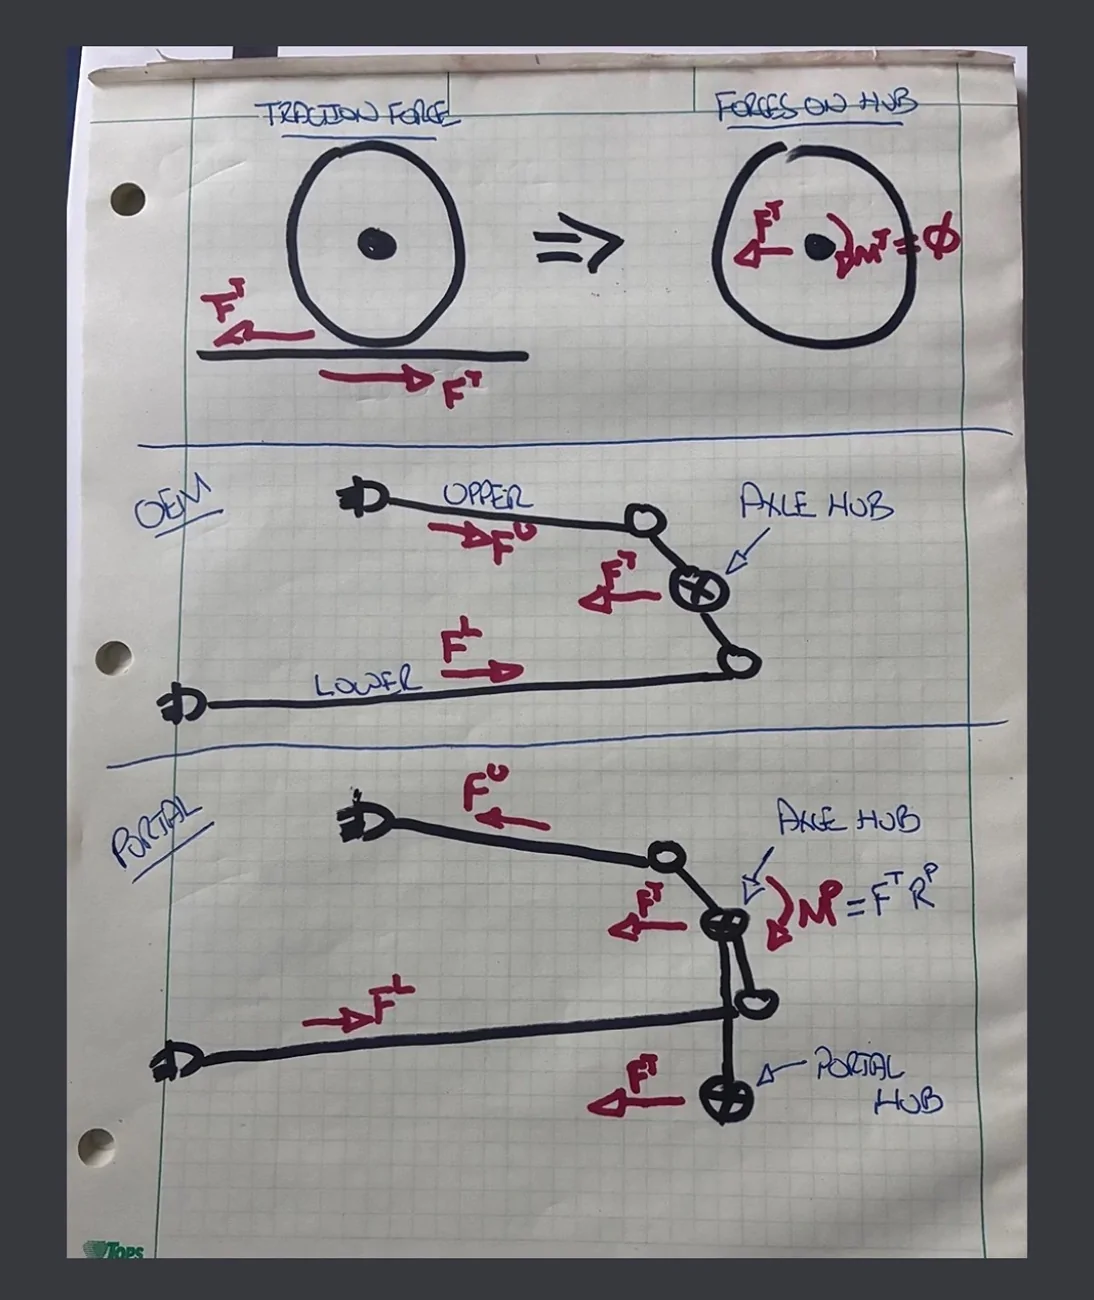
At EJS this last year Loren Healy was checking out the rig as it’s the first mullet bronco outside of his that he’s seen. When he saw the sway bar setup he said “now THAT, is clever!” And went on to point out the benefits. It was the first time someone had recognized what we were doing and he was very impressed. Wifey and her rig made a positive impression on what a bronco could do with a lot of bronco haters on that trip That was pretty cool.
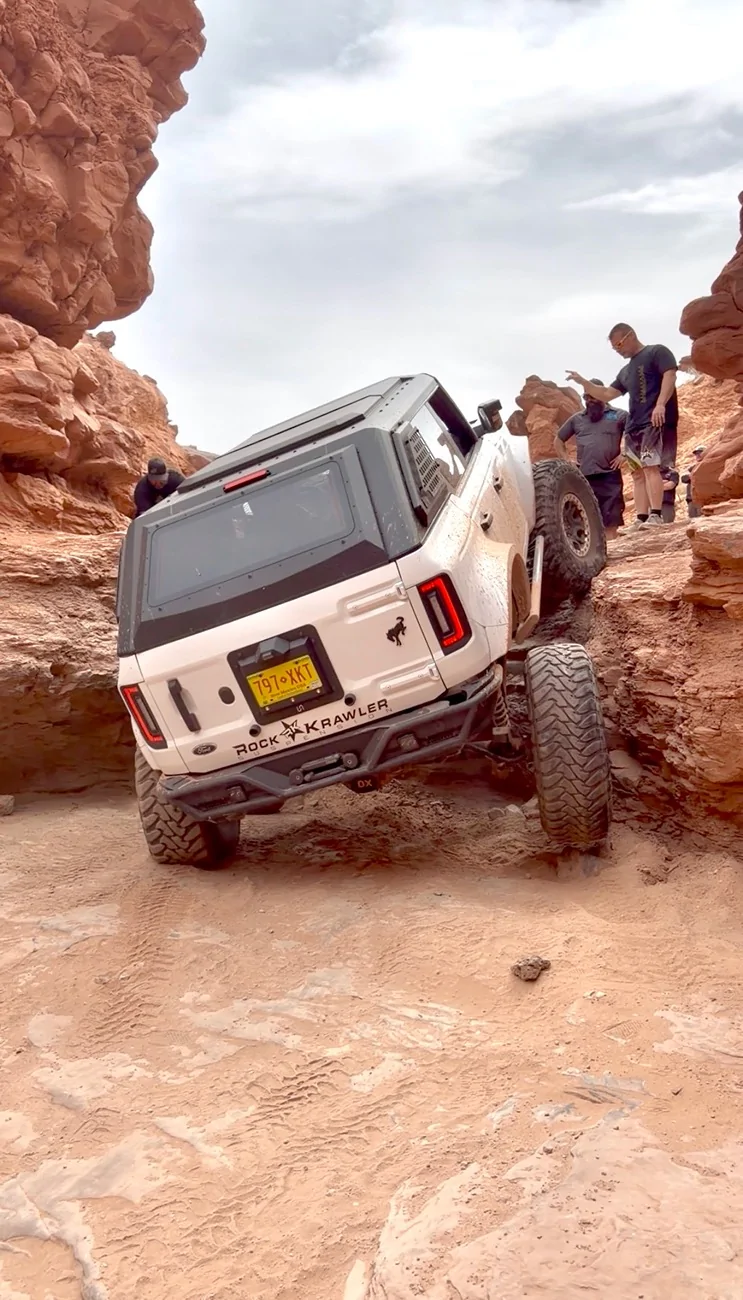
As far as performance is concerned, this is wifey’s favorite build. It has been to Sand Hollow for UBB, Moab for EJS. And the Rubicon. She absolutely loves how stable/planted it feels when wheeling. On the last trip to the Rubicon she said she felt no adrenaline rush the entire trip. I’m actually not sure if that is a good thing or not.
Either way, she has come an incredibly long way. The bronco is now her safe place. She can use Forscan to clear codes, she learned how to weld on this rig, she loves the plasma cutter, and of course she’s wrenching on it herself.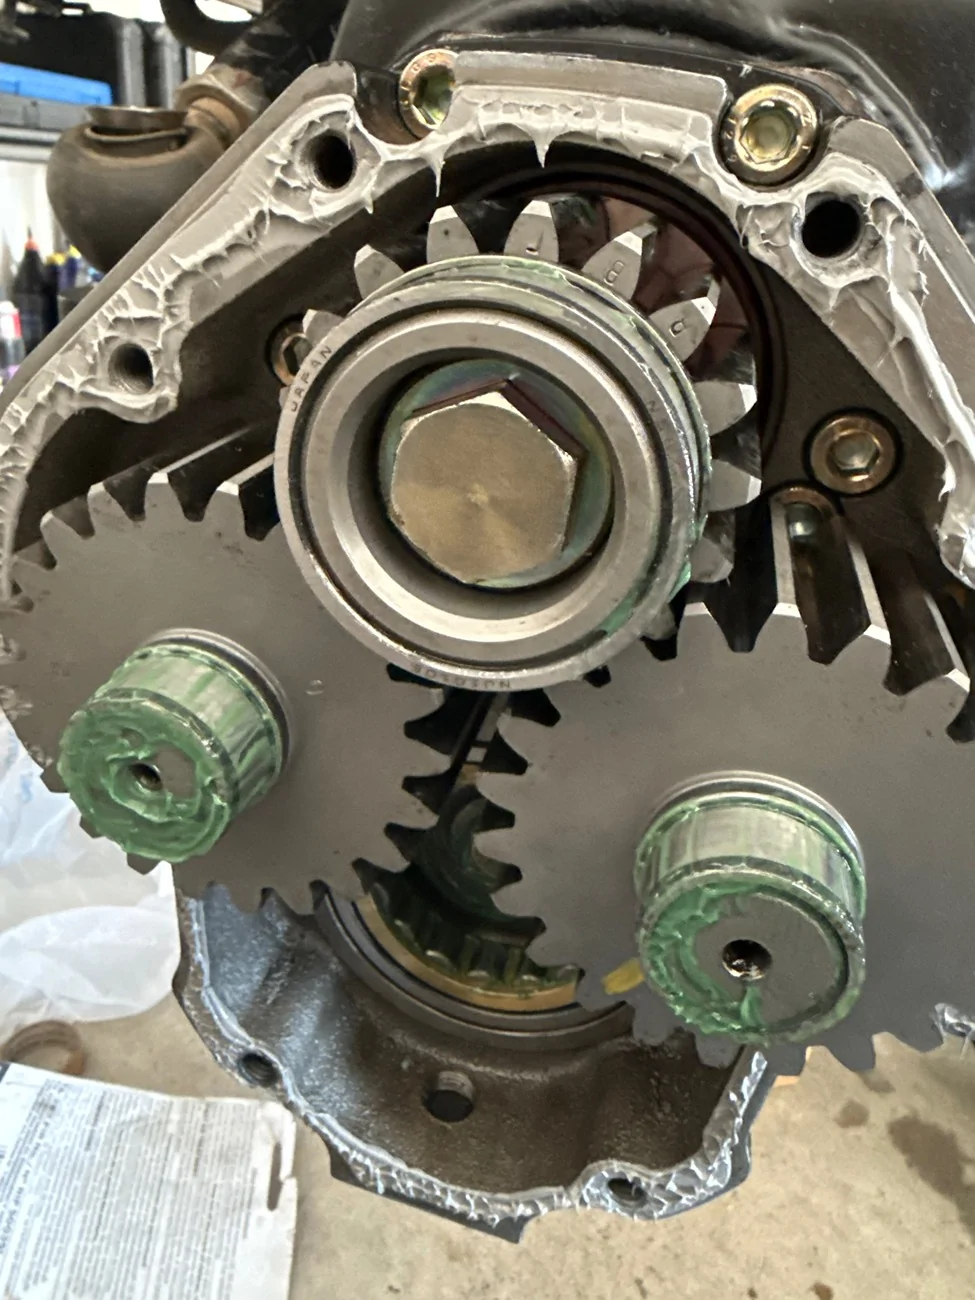
Sponsored
Last edited:




 Really interesting work and knowing some of what we've discussed, not surprised at all you're the one doing it.