- Thread starter
- #1
Working on my Bronco platform build for a Death Valley trip at the end of the month. I'm new to the Bronco (acquired in 2/28/26) and quickly realized that space is a premium. I was looking for a platform that gave me the ability to level out the back for sleeping, retain the ability to access the underfloor storage bin, have a fridge slide and cutting board, and be able to strap items down on the open side when not sleeping. Here are some pics of the current state and different parts of the build. In the end, the sleeping side is 24" wide which is plenty for me. I'm able to store my table underneath and still have access to the underfloor storage. The L Track works nicely to provide flexibility in mounting stuff. The Toughbuilt StackTech stuff fits perfect and has a pretty impressive feel. I ended up getting both the StackTech drawer and toolbox (lid on top) to see which version will work best for my use. I also added a Broaddict cargo shelf to increase usability. Works well. I may eventually get the BroAddict Traildeck but need to make sure I can mount a fridge slide to it.
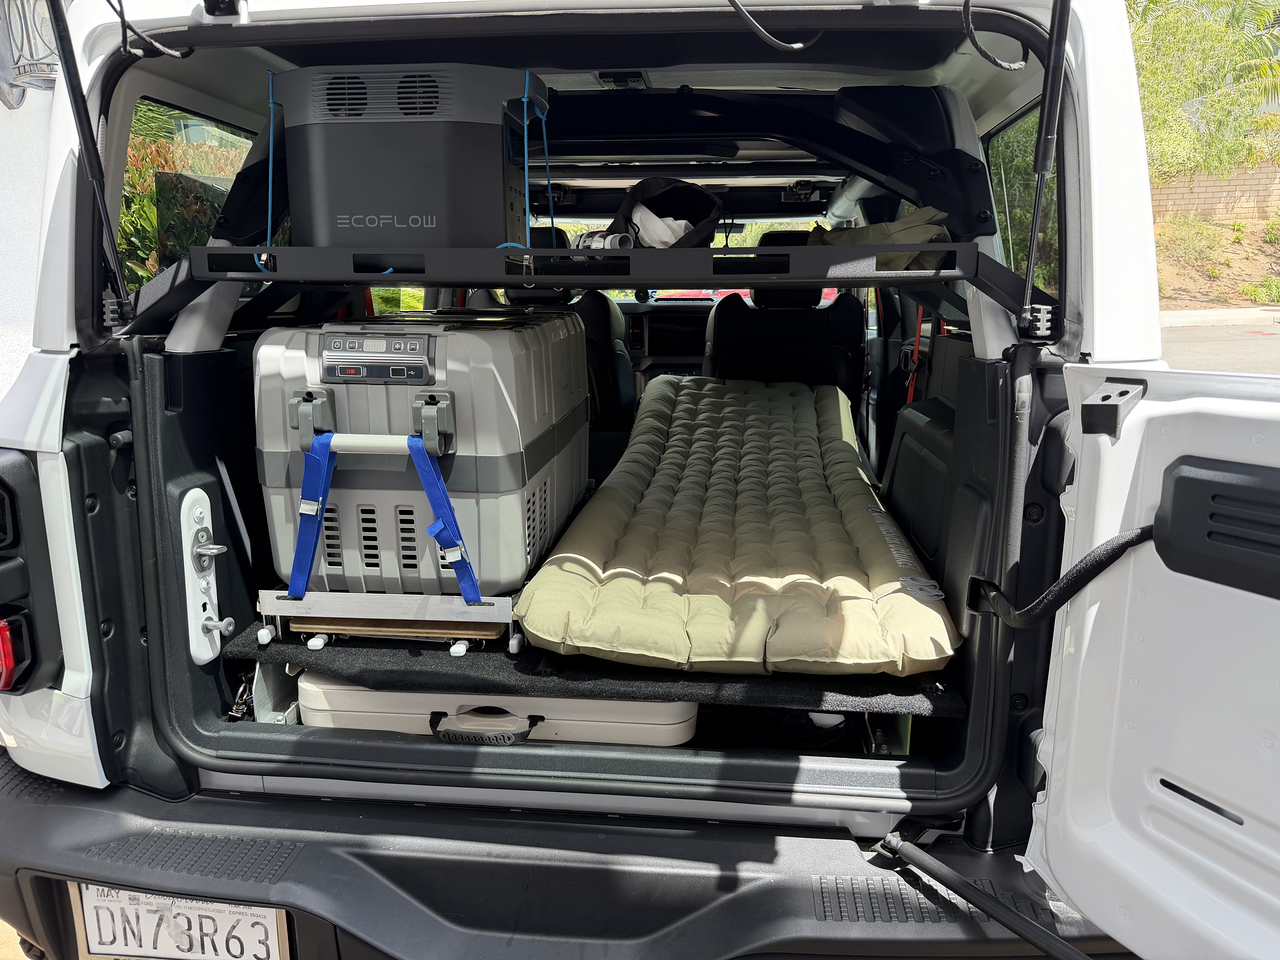
Here's the finished product with toolbox.

How it started. I needed a 3" opening to be able to fit a table underneath the platform.
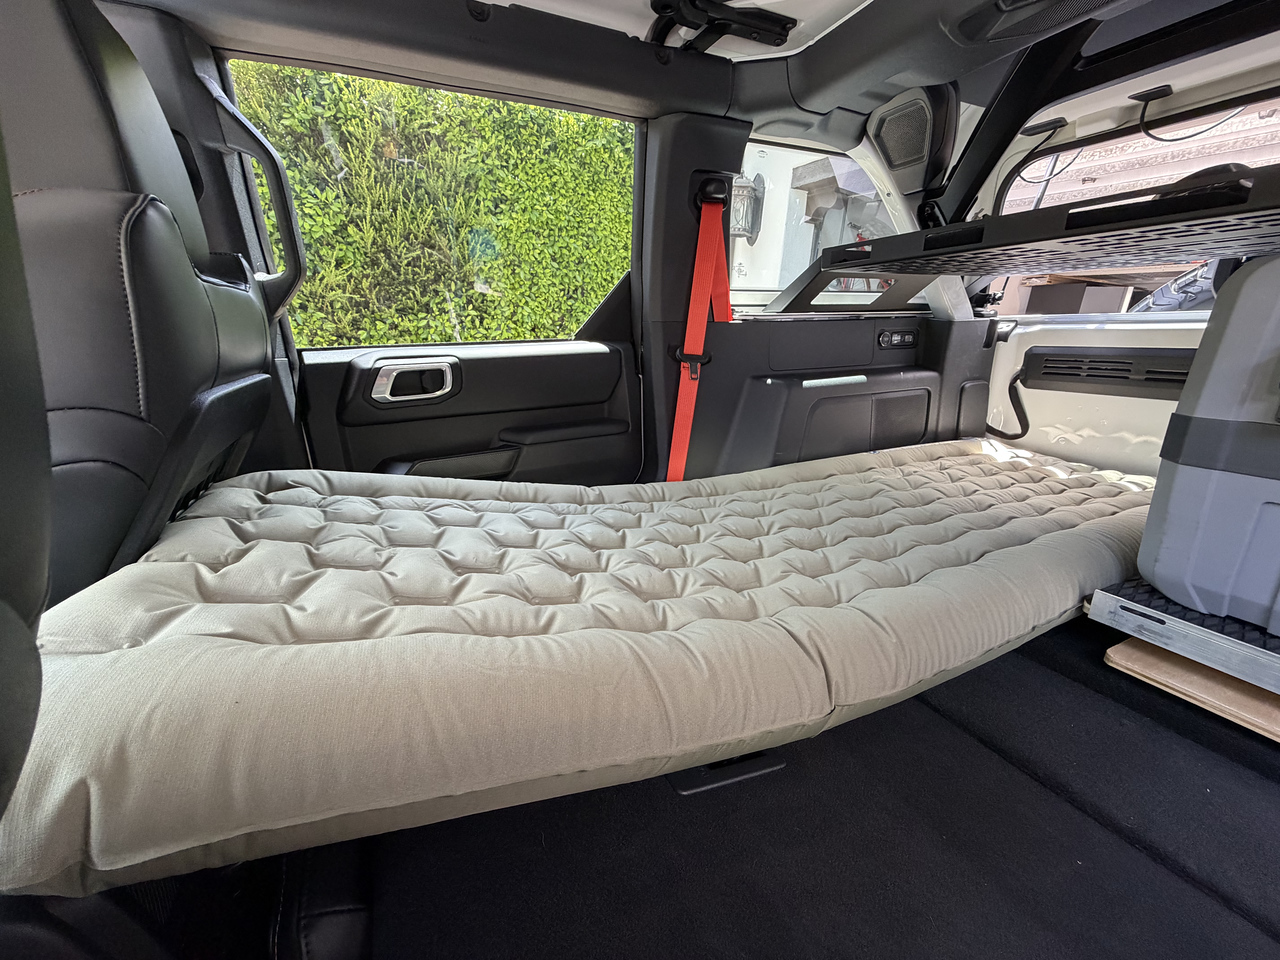
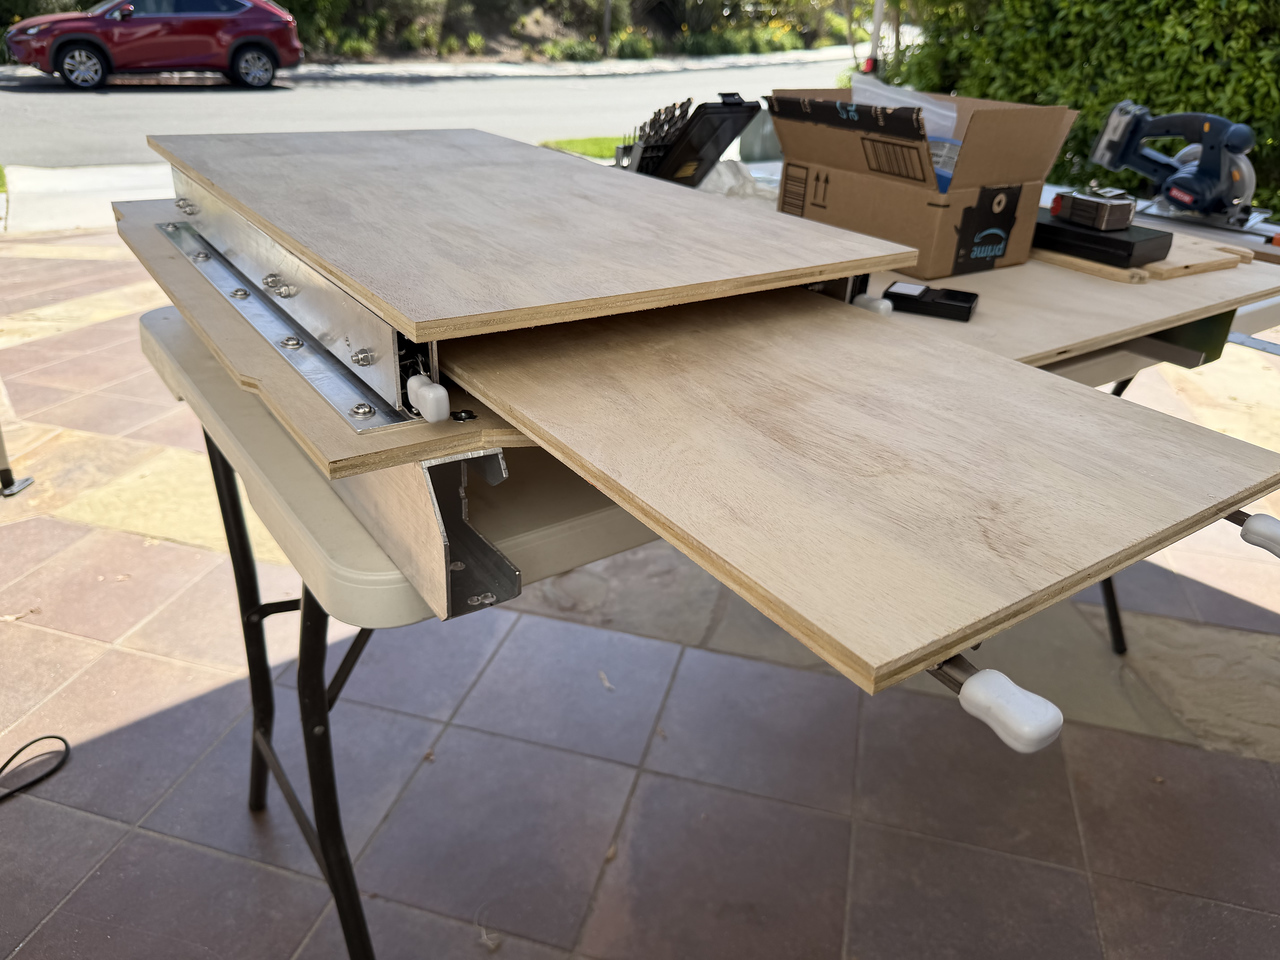
Test fitting table and seeing how flat the sleeping surface will be.
I wanted to make the support rails from wood but I couldn't think of a good way to be able to secure to the floor and platform at the same time. I was going to use aluminum C-channel extrusion but found rectangular channel in the scrap bin which was only $3/lb.
Top view of the cargo area. I ended up putting the table on the driver side as I wanted to add a leg support under the sleeping side.
My ultra expensive CAD system layout
Seeing what the cargo floor would look like.
Top plate complete. Working on mounting the slides and checking clearance with the door mechanism.
Slides installed. Need to install tray and fridge top.
Added fridge tie down end pieces, carpet and EVA boat decking.
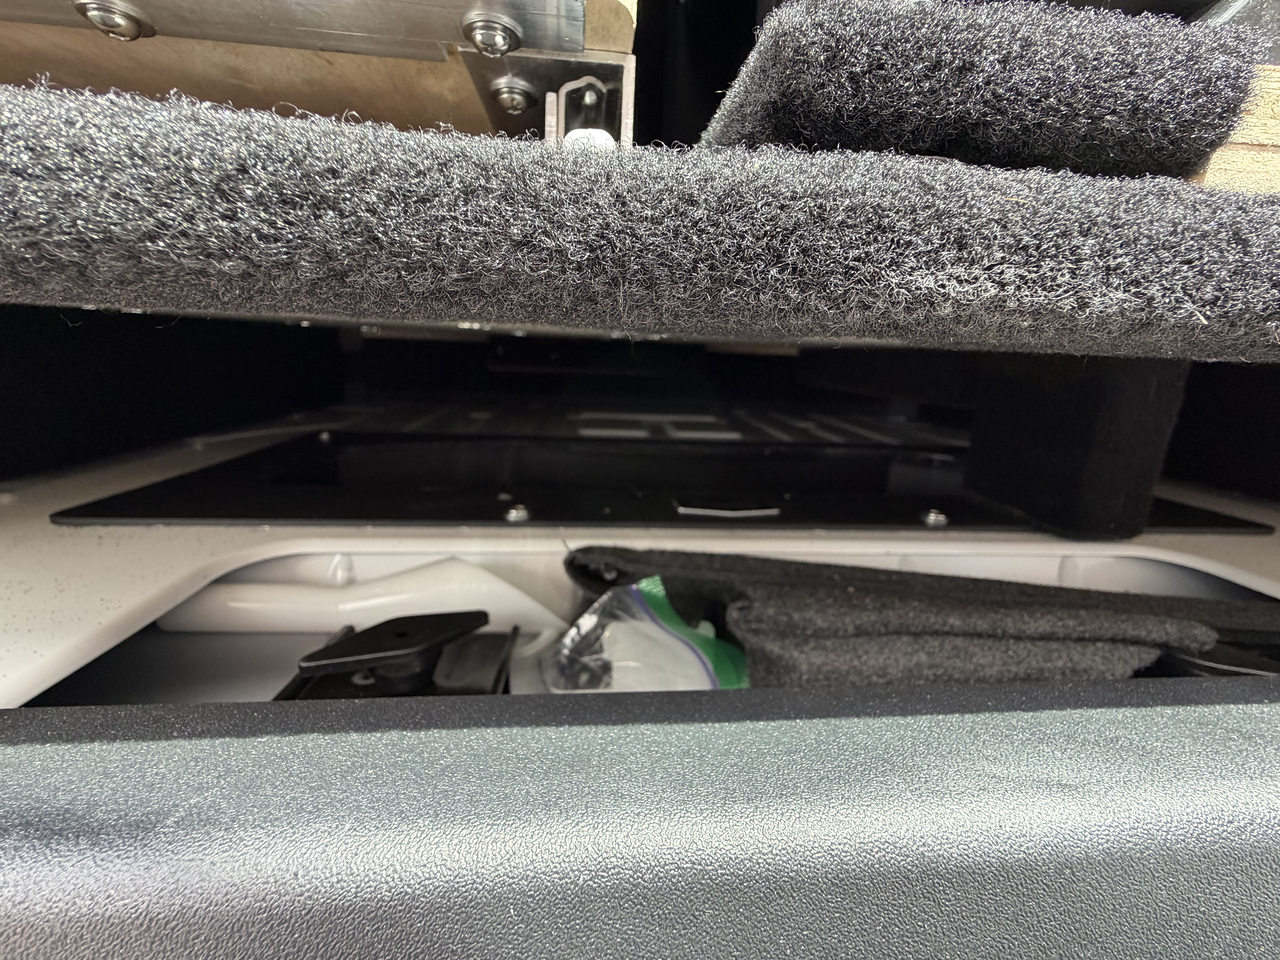
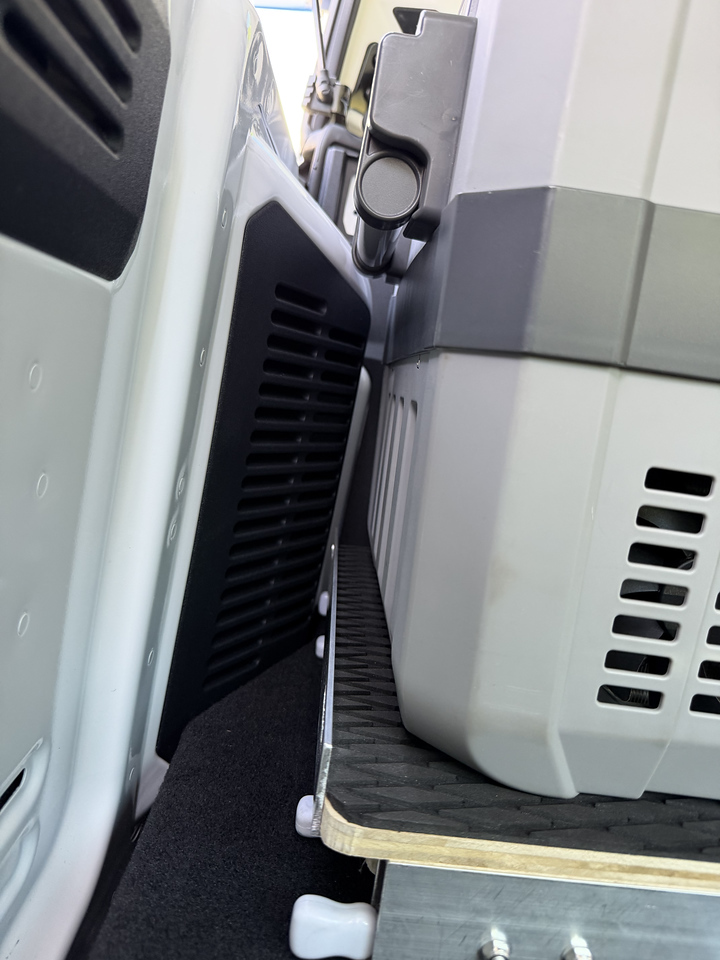
The clearance of door to fridge slide and fridge. Measure 20 times, cut once....

Installed L-track and table guides underneath the platform.
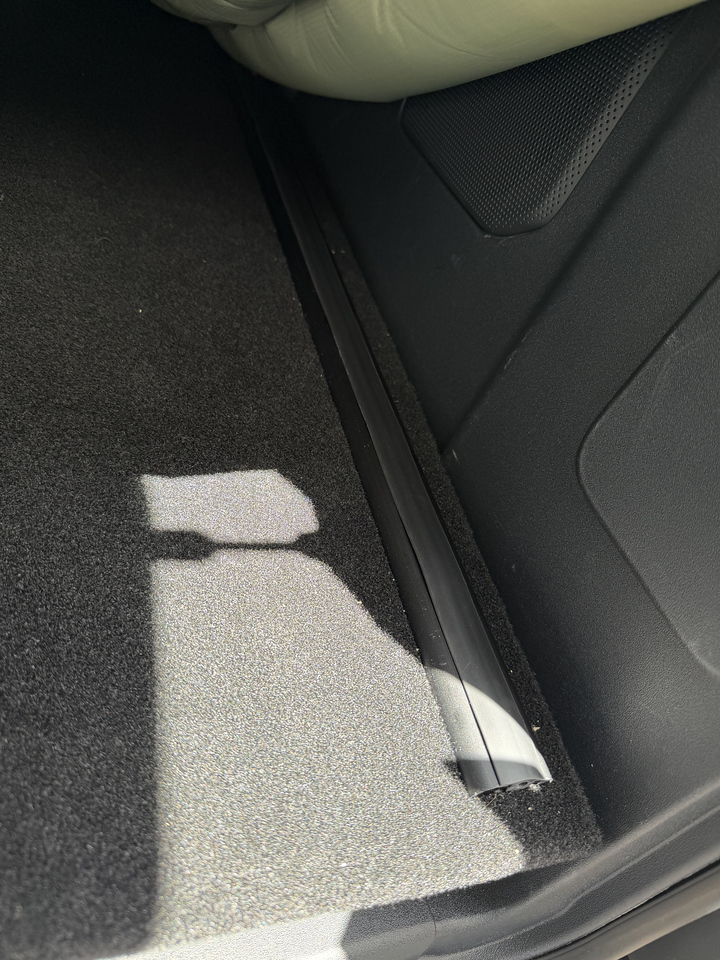
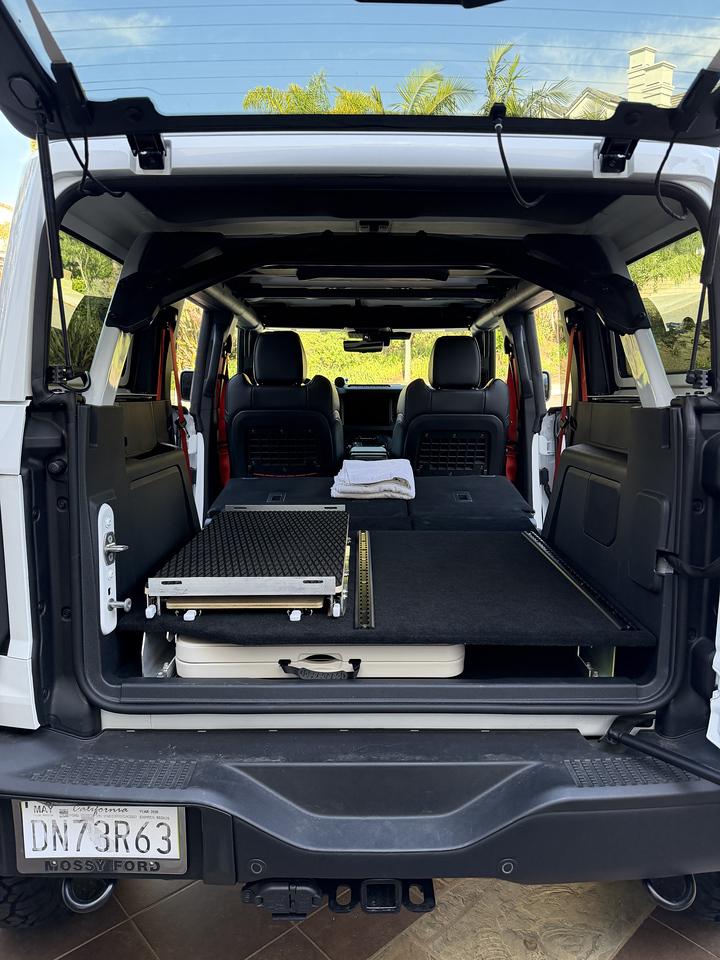
Initial install and fit checks. I also added carpet runners on the cargo floor to cover all the exposed body.
Test fitting L-track. The StackTech is a little too wide to easily access the L-track. Will need to build a quick connect base for the StackTech stuff.
The fridge slide is 26" and the tray slide is 30". I was limited on the fridge slide because of the access points to the main rails which attach the platform to the chassis.
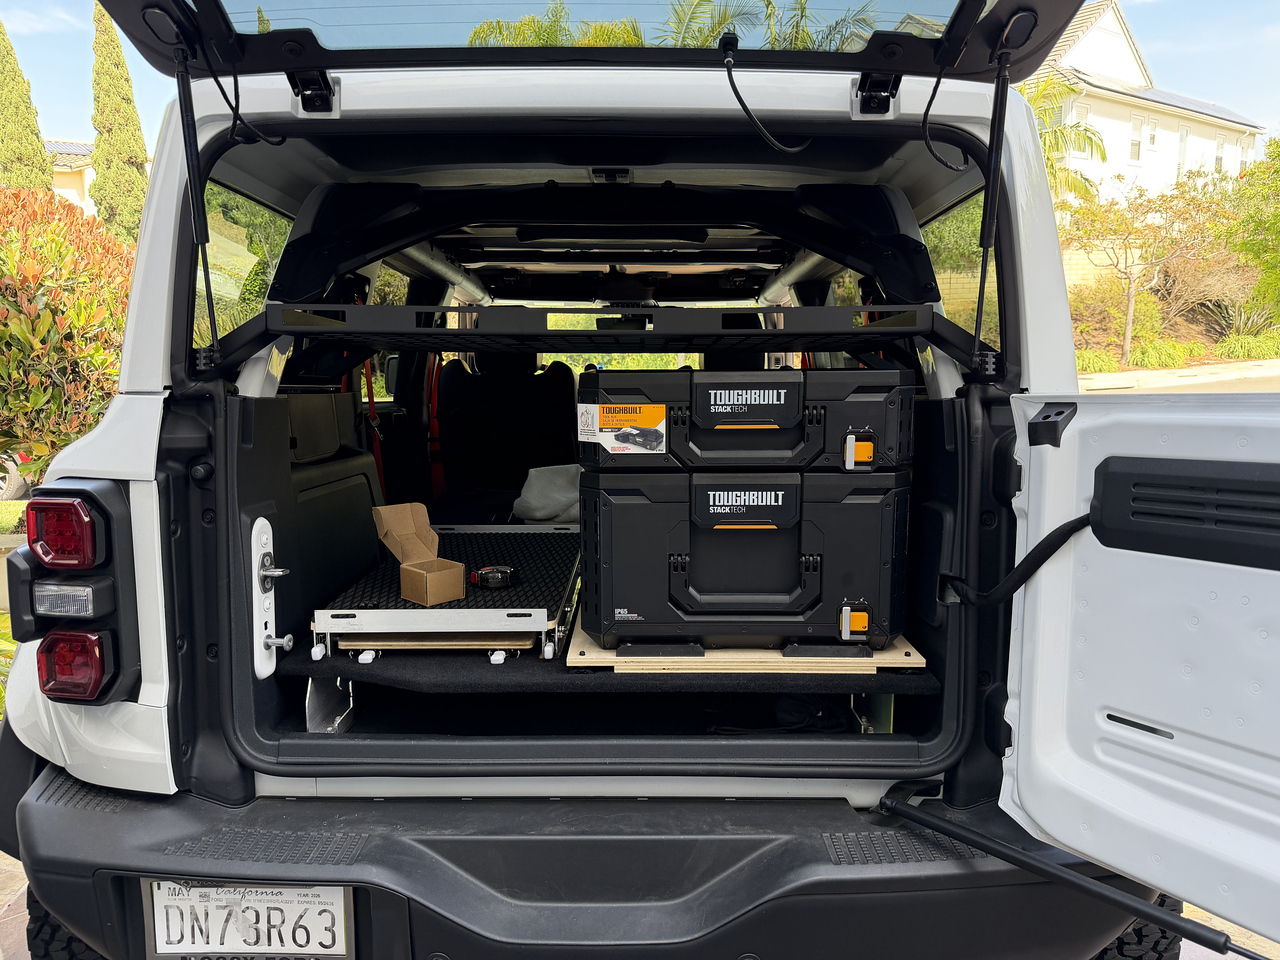
Installed the BroAddict cargo shelf. The fridge and StackTech boxes fit well. **whew**
Because I had issues accessing the L-track to strap the StackTech cases down, I made a mounting platform that mimic'd the StackTech base.
Test fitting new mounting solution.
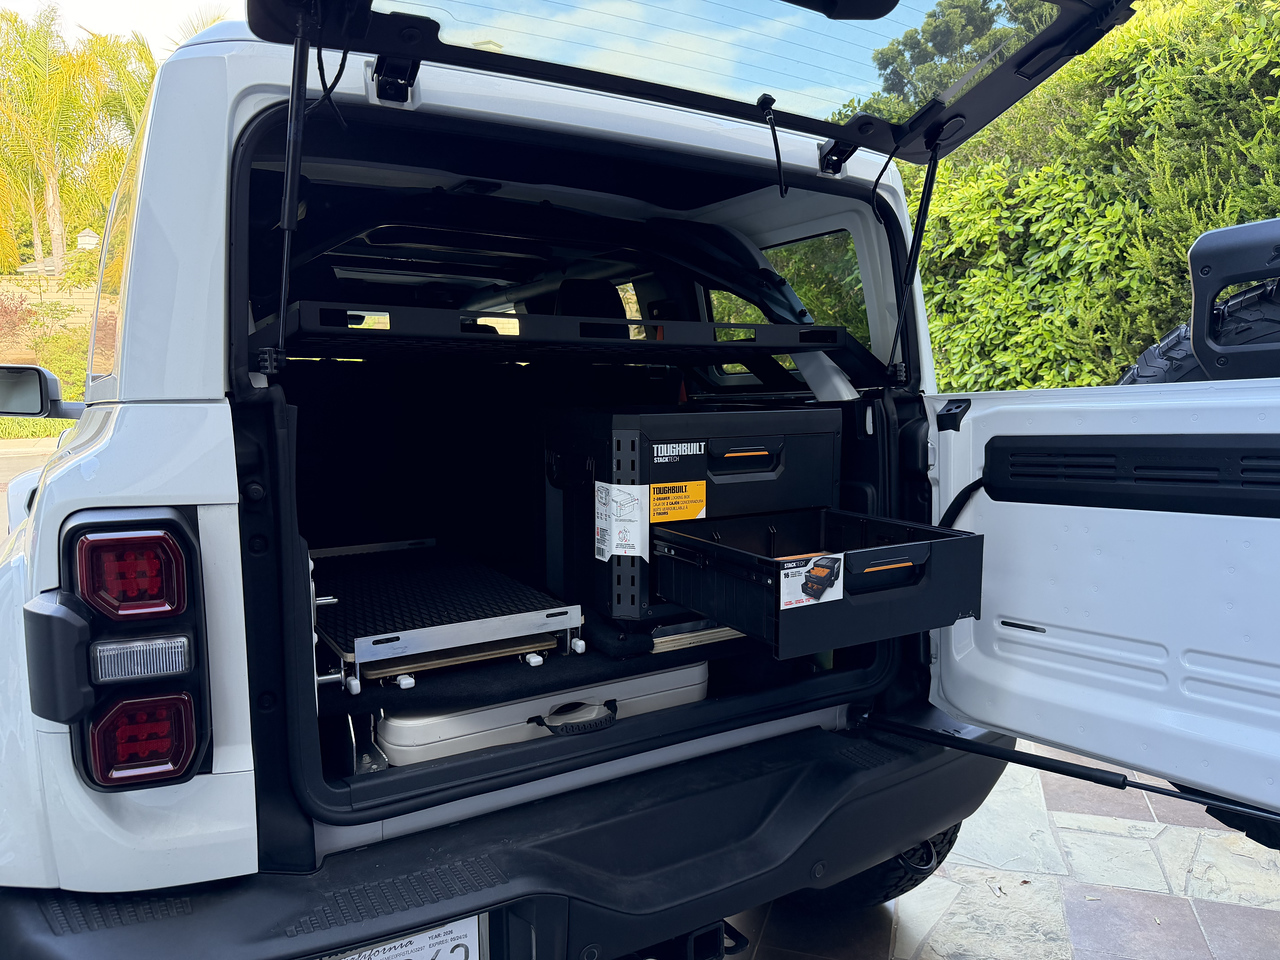
Ended up buying the dual drawer as well to see if it worked better.
Overall, I'm happy with the results. I'm not sure if I'm going to use the StackTech drawer or toolbox. The drawer has a total capacity of 32L (16L per drawer). The medium tool box has a capacity of 40L, the small toolbox 22L. The large toolbox has 57L capacity but I did not buy that one as I thought I was going to run the small over medium together. As it turns out, it's a pain to have lids because they're stacked.
Once TrailRax gets the brackets complete for the painted roof, I'll be able to add a cargo box to the top which should alleviate some of the storage issues.
Here's the finished product with toolbox.

How it started. I needed a 3" opening to be able to fit a table underneath the platform.

Test fitting table and seeing how flat the sleeping surface will be.

I wanted to make the support rails from wood but I couldn't think of a good way to be able to secure to the floor and platform at the same time. I was going to use aluminum C-channel extrusion but found rectangular channel in the scrap bin which was only $3/lb.

Top view of the cargo area. I ended up putting the table on the driver side as I wanted to add a leg support under the sleeping side.

My ultra expensive CAD system layout

Seeing what the cargo floor would look like.

Top plate complete. Working on mounting the slides and checking clearance with the door mechanism.

Slides installed. Need to install tray and fridge top.
Added fridge tie down end pieces, carpet and EVA boat decking.

The clearance of door to fridge slide and fridge. Measure 20 times, cut once....
Installed L-track and table guides underneath the platform.

Initial install and fit checks. I also added carpet runners on the cargo floor to cover all the exposed body.
Test fitting L-track. The StackTech is a little too wide to easily access the L-track. Will need to build a quick connect base for the StackTech stuff.

The fridge slide is 26" and the tray slide is 30". I was limited on the fridge slide because of the access points to the main rails which attach the platform to the chassis.

Installed the BroAddict cargo shelf. The fridge and StackTech boxes fit well. **whew**

Because I had issues accessing the L-track to strap the StackTech cases down, I made a mounting platform that mimic'd the StackTech base.

Test fitting new mounting solution.
Ended up buying the dual drawer as well to see if it worked better.
Overall, I'm happy with the results. I'm not sure if I'm going to use the StackTech drawer or toolbox. The drawer has a total capacity of 32L (16L per drawer). The medium tool box has a capacity of 40L, the small toolbox 22L. The large toolbox has 57L capacity but I did not buy that one as I thought I was going to run the small over medium together. As it turns out, it's a pain to have lids because they're stacked.
Once TrailRax gets the brackets complete for the painted roof, I'll be able to add a cargo box to the top which should alleviate some of the storage issues.
Sponsored