- Thread starter
- #1
I've posted a couple things in a few different threads, but thought I would consolidate some of my notes / thoughts in one place. There are a lot of good install threads with pictures, this is more tips/insights that some may find useful.
Like many, I was pretty underwhelmed with the B&O system. I didn't have high expectations for a factory radio, but for a "premium" system, it's pretty mediocre. I plan to trade my truck in for a raptor at some point, so I didn't want to sink a ton of money into a stereo and wanted to avoid cutting, splicing, removing anything that would be difficult to undo or jeopardize the function of the factory radio/cameras/etc.
After doing a fair amount of reading here, I decided a good first step was to replace the front corner dash speakers with Focal ACX 100s using the harness from amazon. Thought this would determine whether if it was worth doing anymore speaker replacements, since I had no intention of spending $800 on the NAV TV unit to replace the factory amp with an aftermarket amp for the mids/highs.
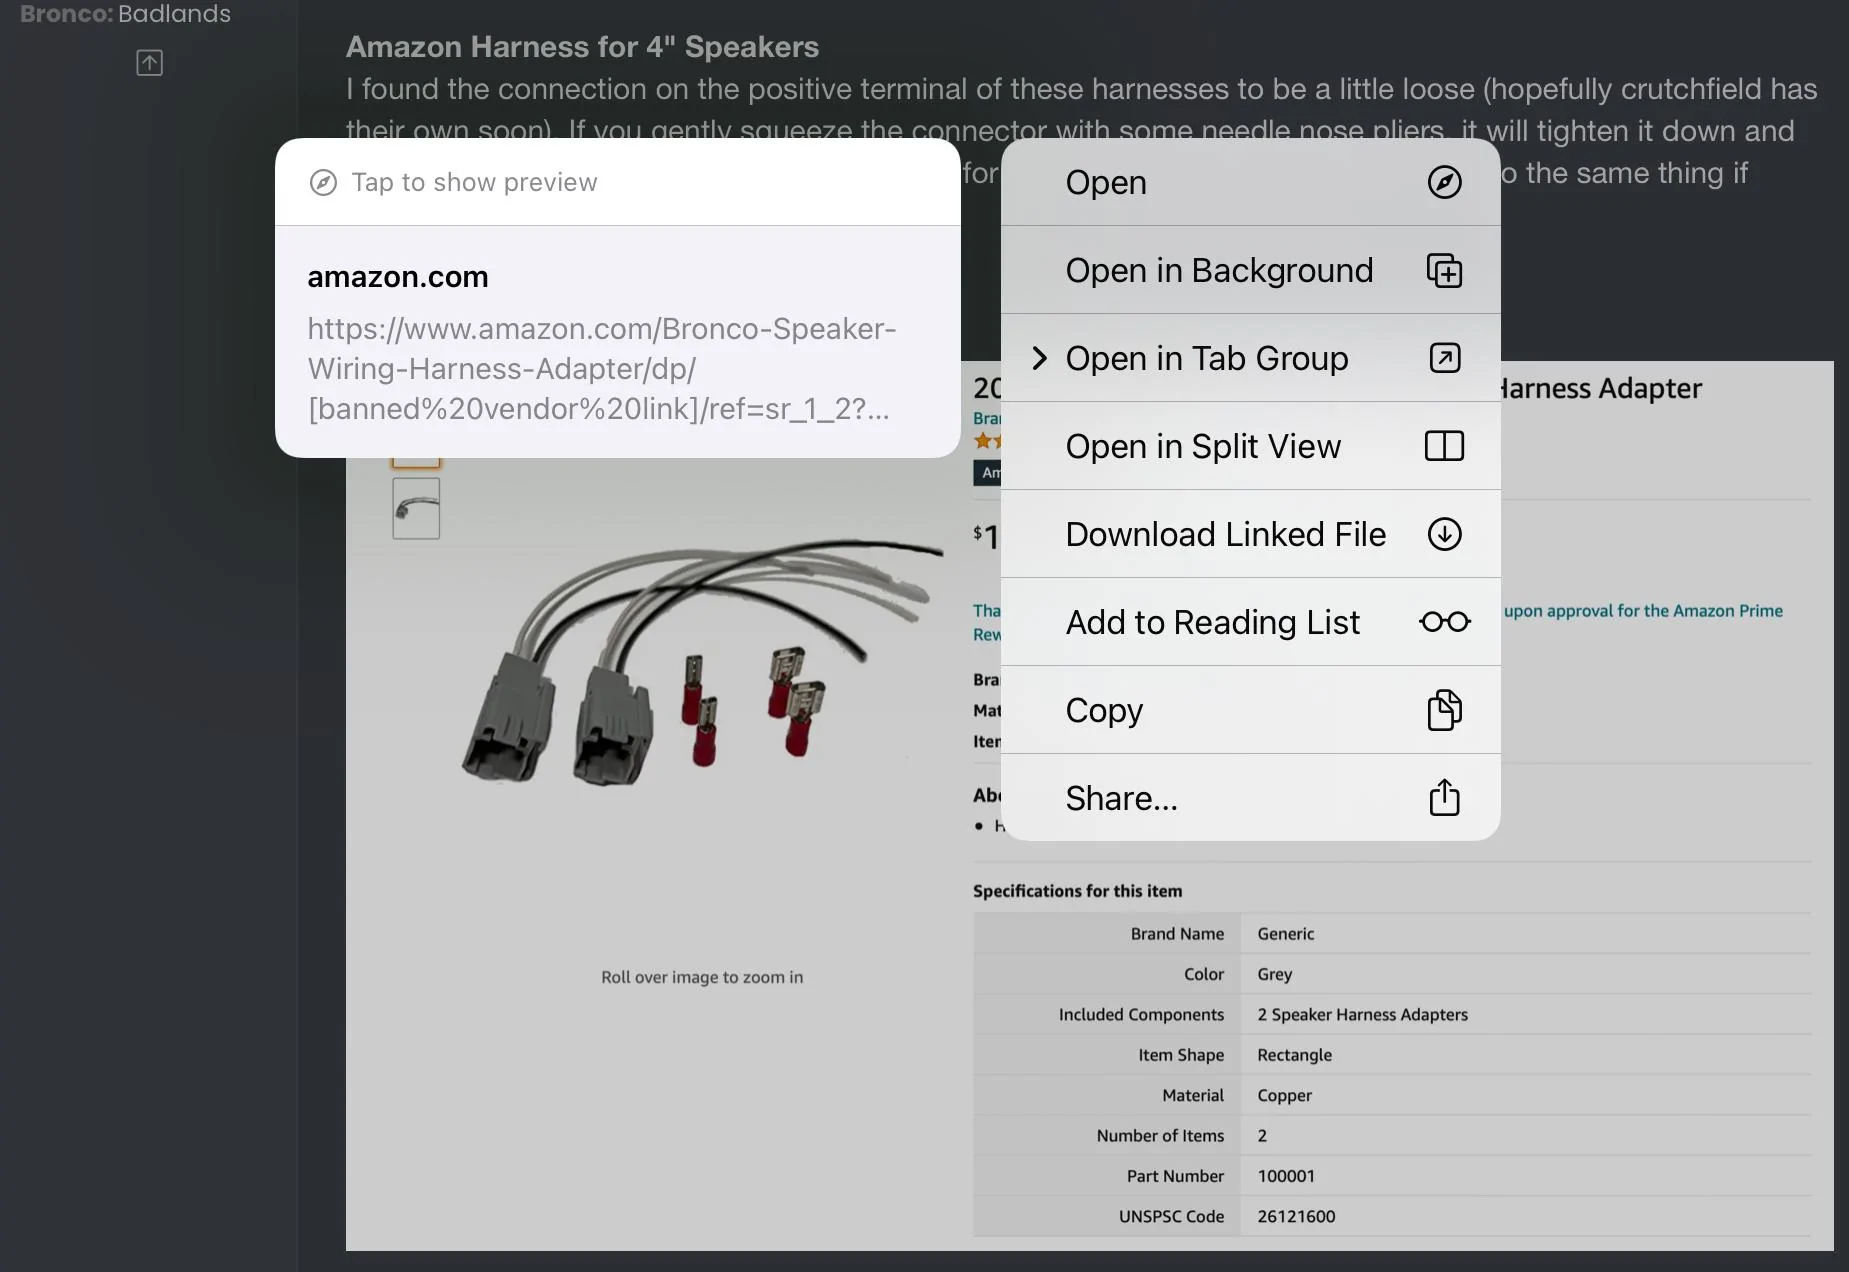
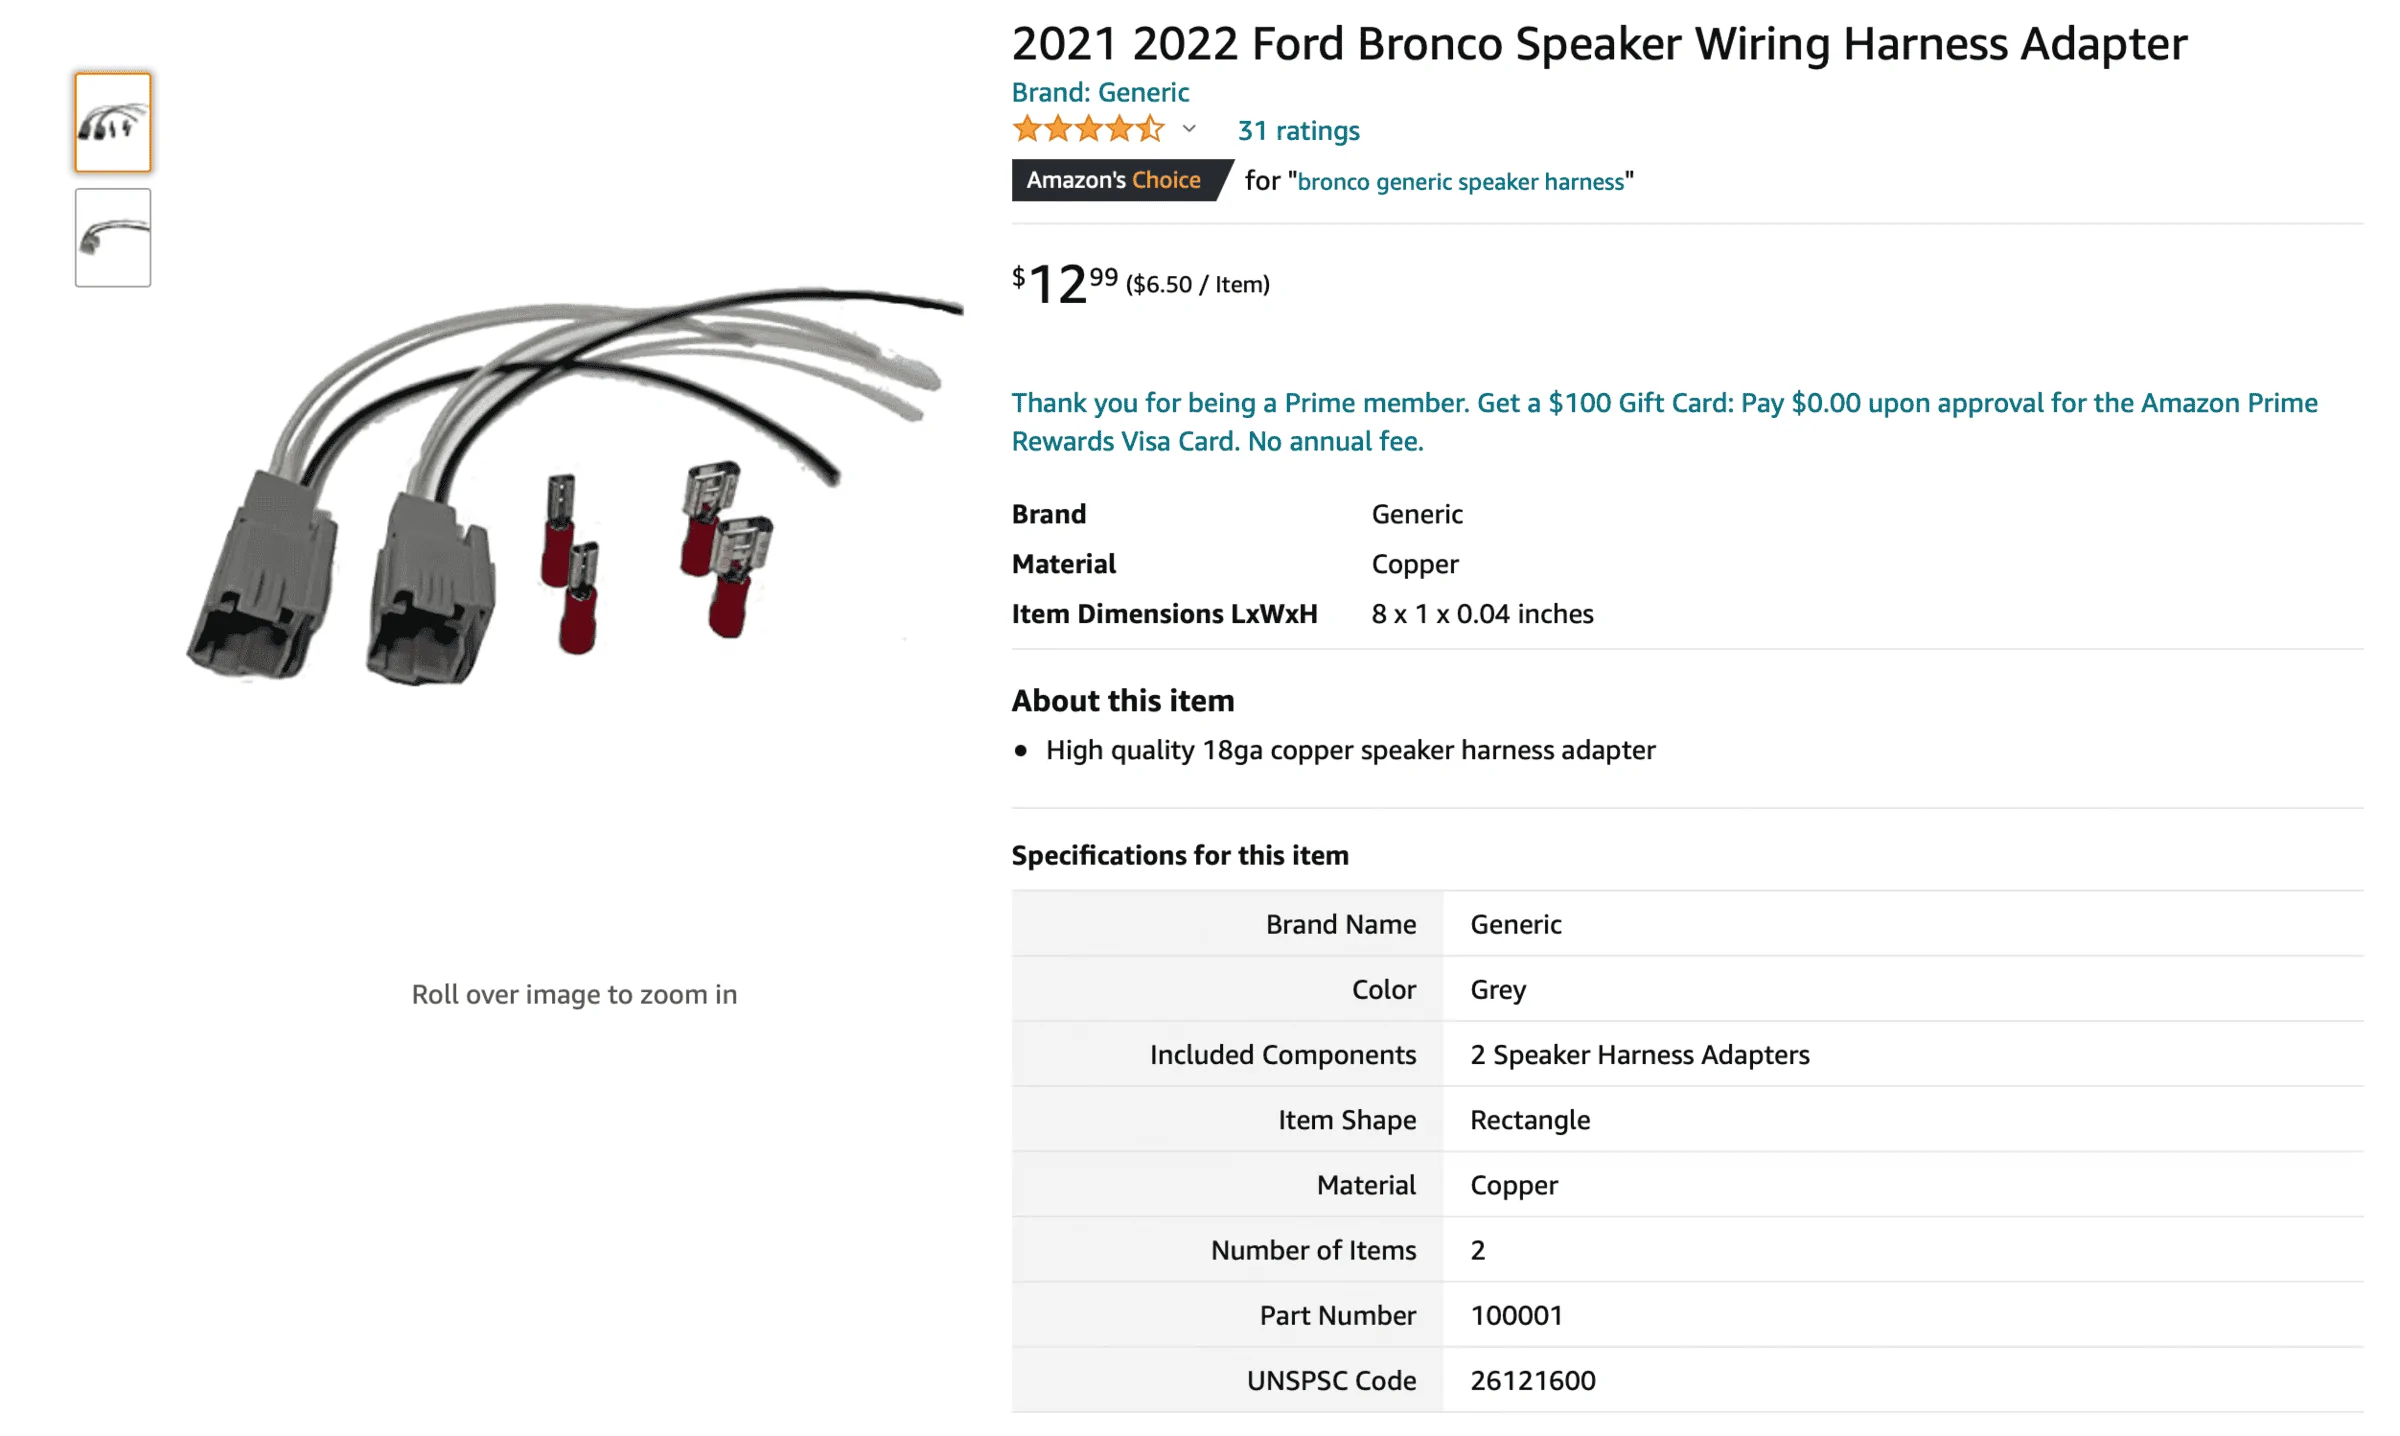
Amazon Harness for 4" Speakers
I found the connection on the positive terminal of these harnesses to be a little loose (hopefully Crutchfield has their own harness soon). If you gently squeeze the connector with some needle nose pliers, it will tighten it down and form a good fit. The negative terminal fit snug for me on all 5 harnesses, but you can do the same thing one that one if needed.

Dash Corner Speakers
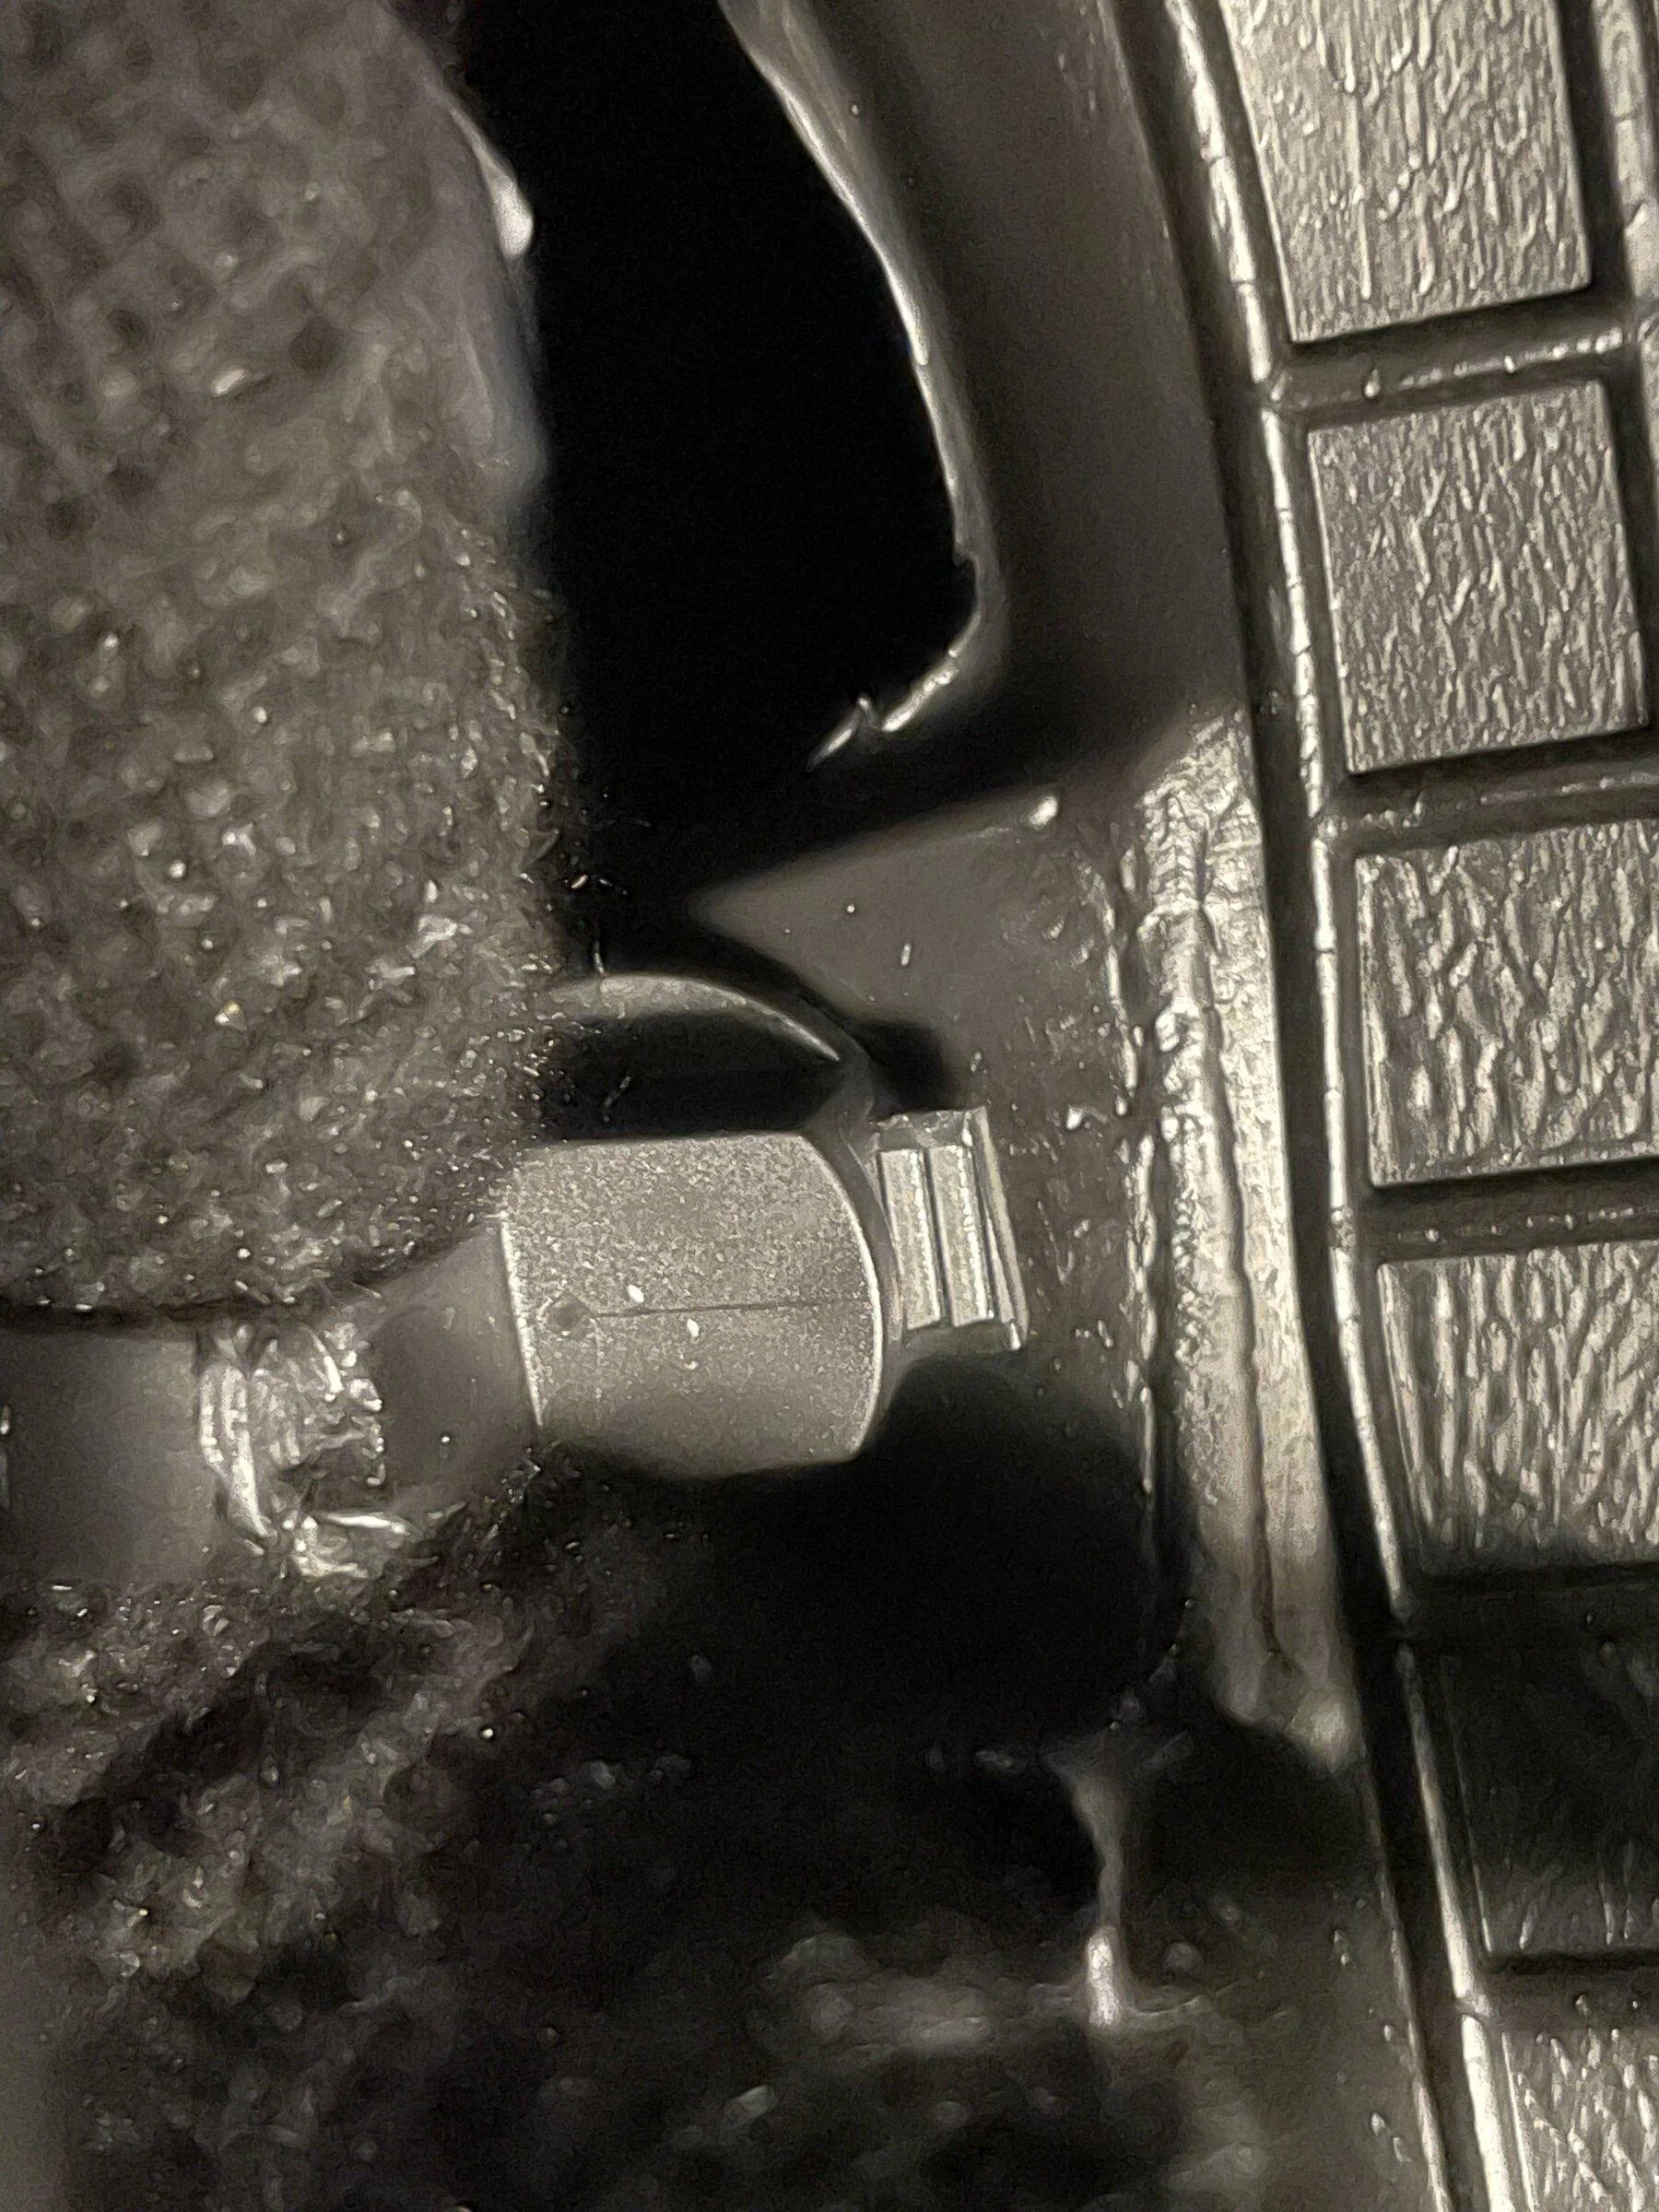
These were pretty straight forward to swap out. The passenger side was a bit easier, because on the driver side, the factory speaker cable was zip tied to a plastic screw directly below the speaker that prevented the focal speaker from "seating" until I removed the zip tie and screw. The amazon trim kit toolset I ordered didn't have a thin enough edge to pry the speaker covers off and I ended up using a tool on a leatherman (you can wrap a piece of painters tape around the edge it to avoid scratching the plastic).
This speaker swap made a pretty significant difference. I wouldn't call it night and day, but it was way more clear and crisp. Not any louder, but convinced me enough to swap the other 4" speakers.
Link to Focal ACX 100 Speakers
Should take 30-45 minutes to swap both speakers. You'll need a pry tool and 7mm socket.
[Zip tie / screw I removed on the driver side]

Center Speaker
This speaker was a bit more challenging to replace than the corners. First, you have to remember to remove the accessory rail with the two factory torx bolts (t-20 or t-25). They're hard to see, so it takes a little feeling around to get them undone. This speaker cover was harder to remove compared to the corners. I pulled from the windshield back and it took a bit of force to get the back off.
You'll also have to be cognizant of the USB plug (in the front) and gently bend that as you remove the cover (it is attached). After removing the cover, you may need to move the factory cable inside the console to the side to get the new speaker to seat properly. Between the center channel speaker cable and USB cable, it is more crowded than the corner speakers.
Getting the cover back on took a little more effort to get the rear clips (closest to the dash) to seat. I used a trim tool to push the clips back horizontally into place (the back gets put in first) while putting downward pressure to get them to snap down. Once the back is properly seated, just work the usb plug back in its spot and the front clips in easily. Nice improvement in SQ and a must, IMO, if you are going to replace the corner dash speakers.
Should take 30 minutes. You'll need a pry tool, torx (t-20 or t-25) driver and 7mm socket.
Rear Speakers
These are by far the easiest to replace. You don't need a pry tool to remove the covers, just squeeze either side and it pops off. Speakers come out with two phillips screws. Not a huge improvement in SQ, but it's a little more clear and it rounds out the highs. If you wanted to skip replacing these to save a little money, I would go right to a sub replacement.
Should take 15 minutes and you just need a phillips head screw driver.
Kick Panels
I read a lot of mixed things on replacing these speakers. I went with the Focal ACX 165s (with the free installation kit from crutchfield). Bottom line is the factory amp doesn't have enough power to drive a good set of aftermarket 6.5" speakers and since the factory amp filters out highs, 2-way speakers don't add anything.
I think I lost a hair of volume with the focals but maybe picked up a little crispness in the bass. I did a lot of back and forth testing (passenger speaker swapped, driver speaker stock) and this is one you can skip. I already had one speaker installed and for $135, it wasn't worth uninstalling it and returning them. I also added an aftermarket sub, so I figured whatever little bit I lost in mid volume will be replaced by the new sub.
EDIT: After some more listening, I would skip replacing these if you're keeping the factory B&O amp. Confirmed no noticeable improvement in SQ and you may even lose a little volume.
The installation on these was a bit more challenging. The screws that come with the Focal ACX 165 speakers will not fit in the Bronco. They are 1.5" screws and the metra extension plate is 1". Go to Home Depot and buy two packs of these #6 x 1" screws w/nuts (each speaker takes 8 screws). You can also do #6 x 3/4" screws, but you cannot do 1.25" or #8 screws (any length) since the #8 screw head is too big for the focal speakers.
Link to Home Depot Screws
Once I got the right screws, the speakers mounted to the brackets easily and installation was straight forward (it's an awkward position to work in, but everything else is easy).
I highly suggest watching this YouTube video before doing it. They have a lot of great tips that makes this swap easier. Thanks! @1Five1 Garage.
Link to Focal ACX 165 Speakers
Should take about an hour for both (assuming you don't need to go to Home Depot 3 times for screws). You'll need a pry tool (for the driver side foot rest cover), razor blade (to cut a hole in the foam to snake the new harness out of the speaker enclosure (watch the video below for an example), a 7mm socket (for the speakers) and a 10mm socket (for the driver side only to remove the foot rest).
Subwoofer
Probably the weakest link in the B&O stereo and almost every factory stereo is the sub. Subs require the most power to drive and are often jammed into awkward spaces to preserve trunk space. The Bronco is no exception. I know a few people have tried to make the factory enclosure work with an aftermarket sub/amp, but IMO, you will be chasing a never ending stream of rattles. Those enclosures are not designed for acoustics and running any meaningful amount of power through them with an aftermarket sub will just result in even more plastic rattling and you'll constantly be trying to figure out a place to put dynamat/fill.
That said, this is a car I use every day and maintaining trunk space was important. I ordered a Kicker down firing 10" enclosure, Kicker Key 500.1 amp, Kicker bass control knob, Kicker amp installation kit and harness/rca connector from Sounds Good Stereo (which allows you to plug right into the factory sub harness when you remove the factory speaker).
I didn't think it is worth putting in anything more powerful, as it would overwhelm the mids/highs that are still powered by the factory B&O amp and I want something "tight" enough to still be musical, so a single sealed 10" was sufficient for me. Note the 12” version of this box is too deep and will interfere with the lid to the washout tray underneath the trunk. Kicker makes a 10” version with a passive radiator that will sound more like a ported box if you want more volume.
Link to Kicker Sub/Enclosure
Link to Kicker Amp
Link to Kicker Bass Control Knob
Sounds Good Stereo Sub Harness
Scosche Kwik Plug for Power/Ground
I lost minimal trunk space with this setup and can stack things on top of the box without fear of damaging the speaker. In a pinch I can unplug the power and RCAs and remove the enclosure and amp.
THE POWER AND GROUND WIRES IN MOST AMP KITS ARE BARELY LONG ENOUGH FOR THE BRONCO. YOU'RE BETTER OFF BUYING YOUR OWN POWER/GROUND CABLES. The kicker power cable is 17', which is enough to get to the middle of the trunk. If you want to mount on the passenger side panel, I'd order 25'. Ground I would go with 10'. That is more then enough for both; cable is cheap and I'd rather have a little extra.
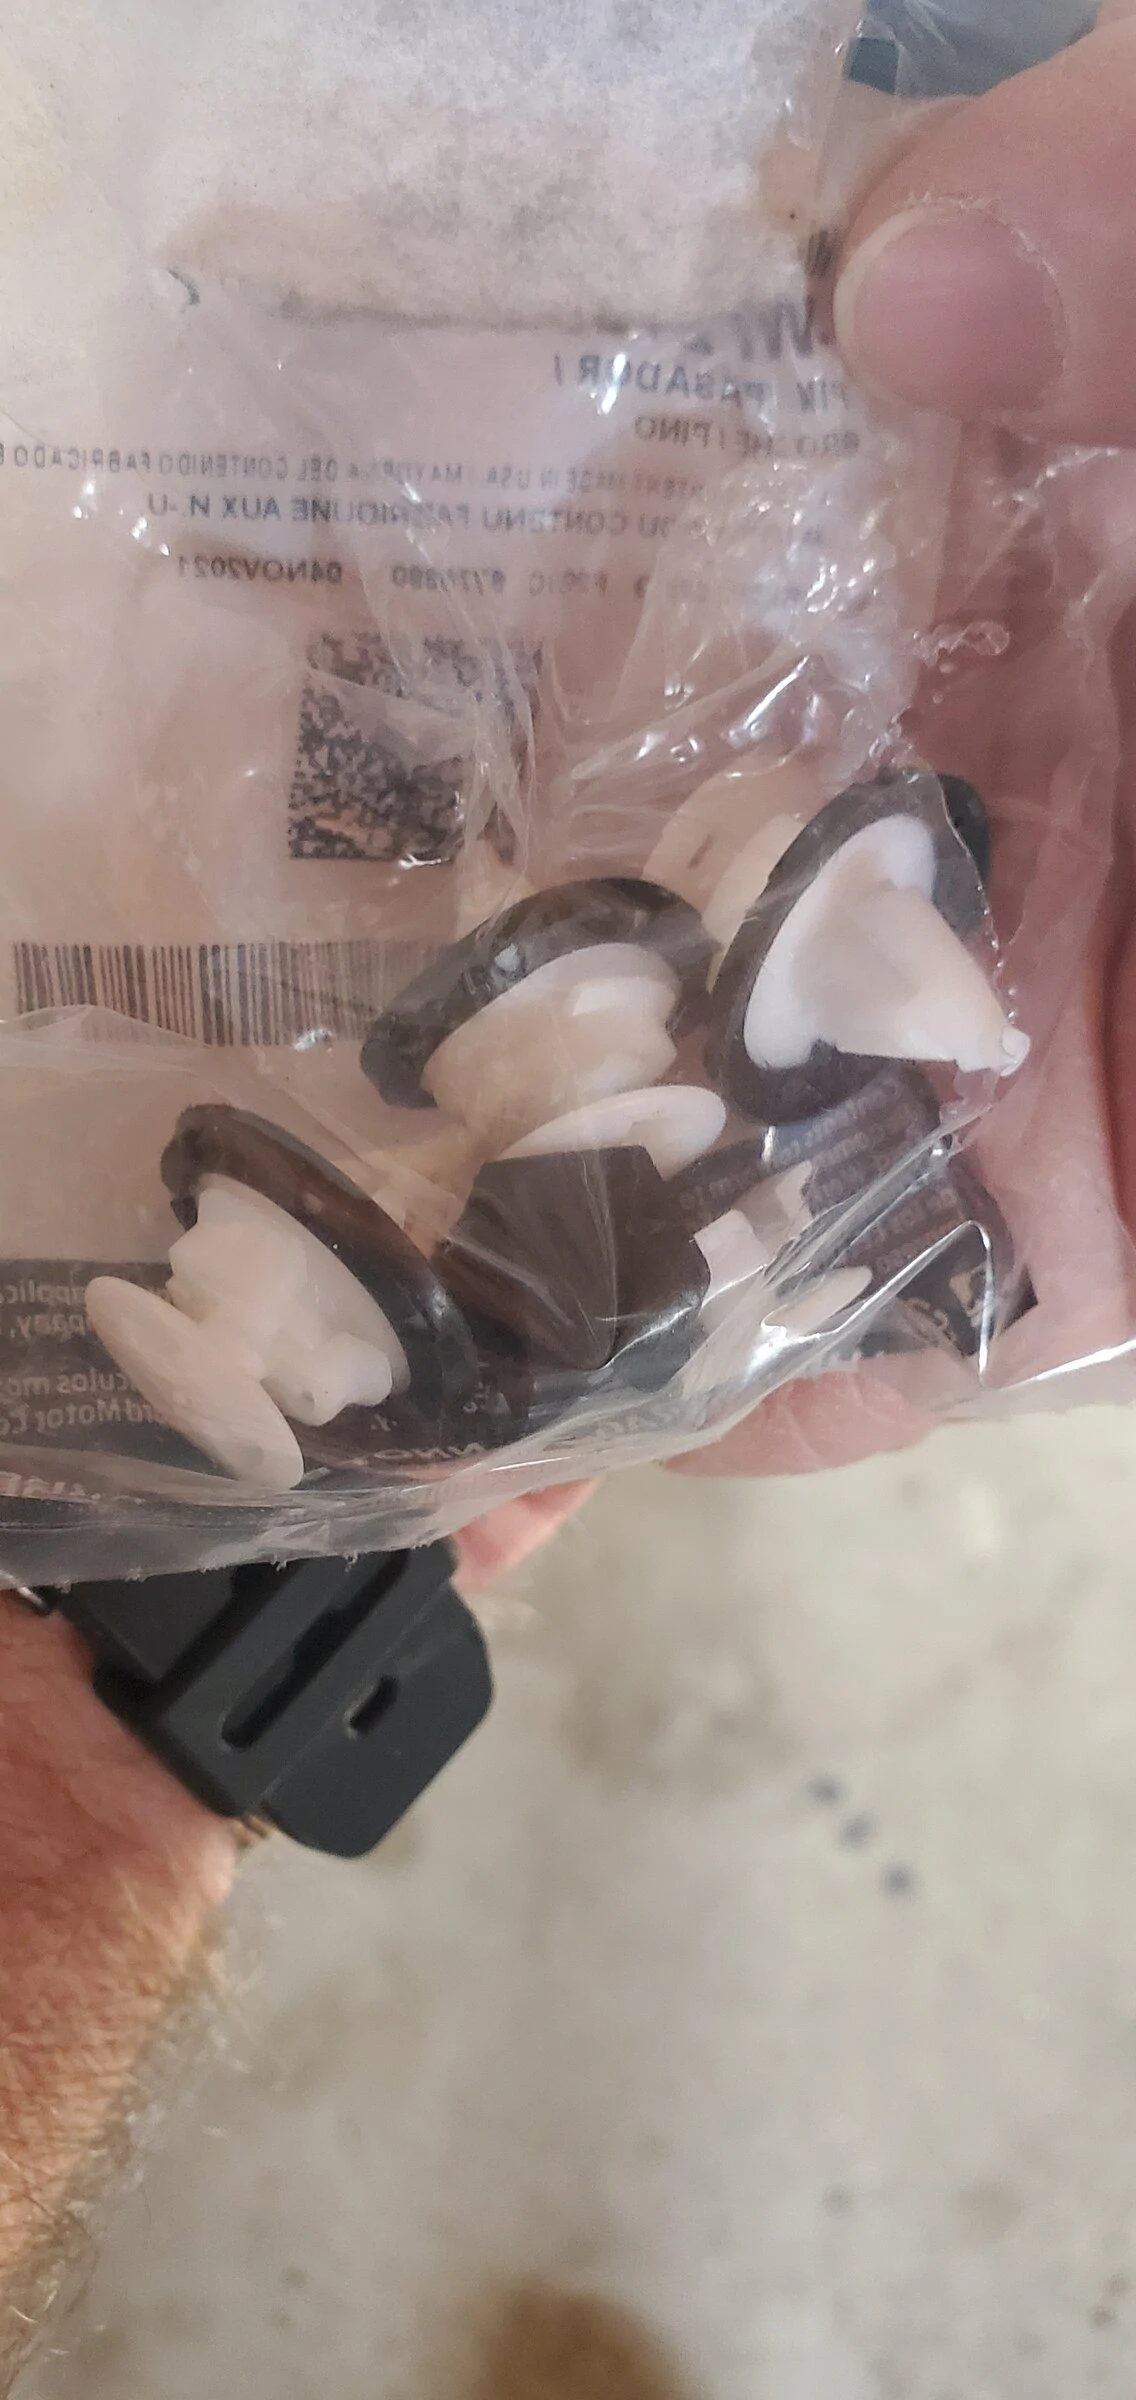
EDIT #1: I decided to remove the trunk panels myself for the sub install. Between the good instructions (attached) and some patience, I figured I would do a more careful job than the stereo shop. It isn't particularly hard, just take your time and use a good set of interior trim removal tools. You WILL snap a couple of these two piece clips no matter how careful you are, order TWO sets (they come in packs of 4). Most online retailers sell them for $5 a pack. Your dealer will charge you $30")
[Factory 2-piece clips]

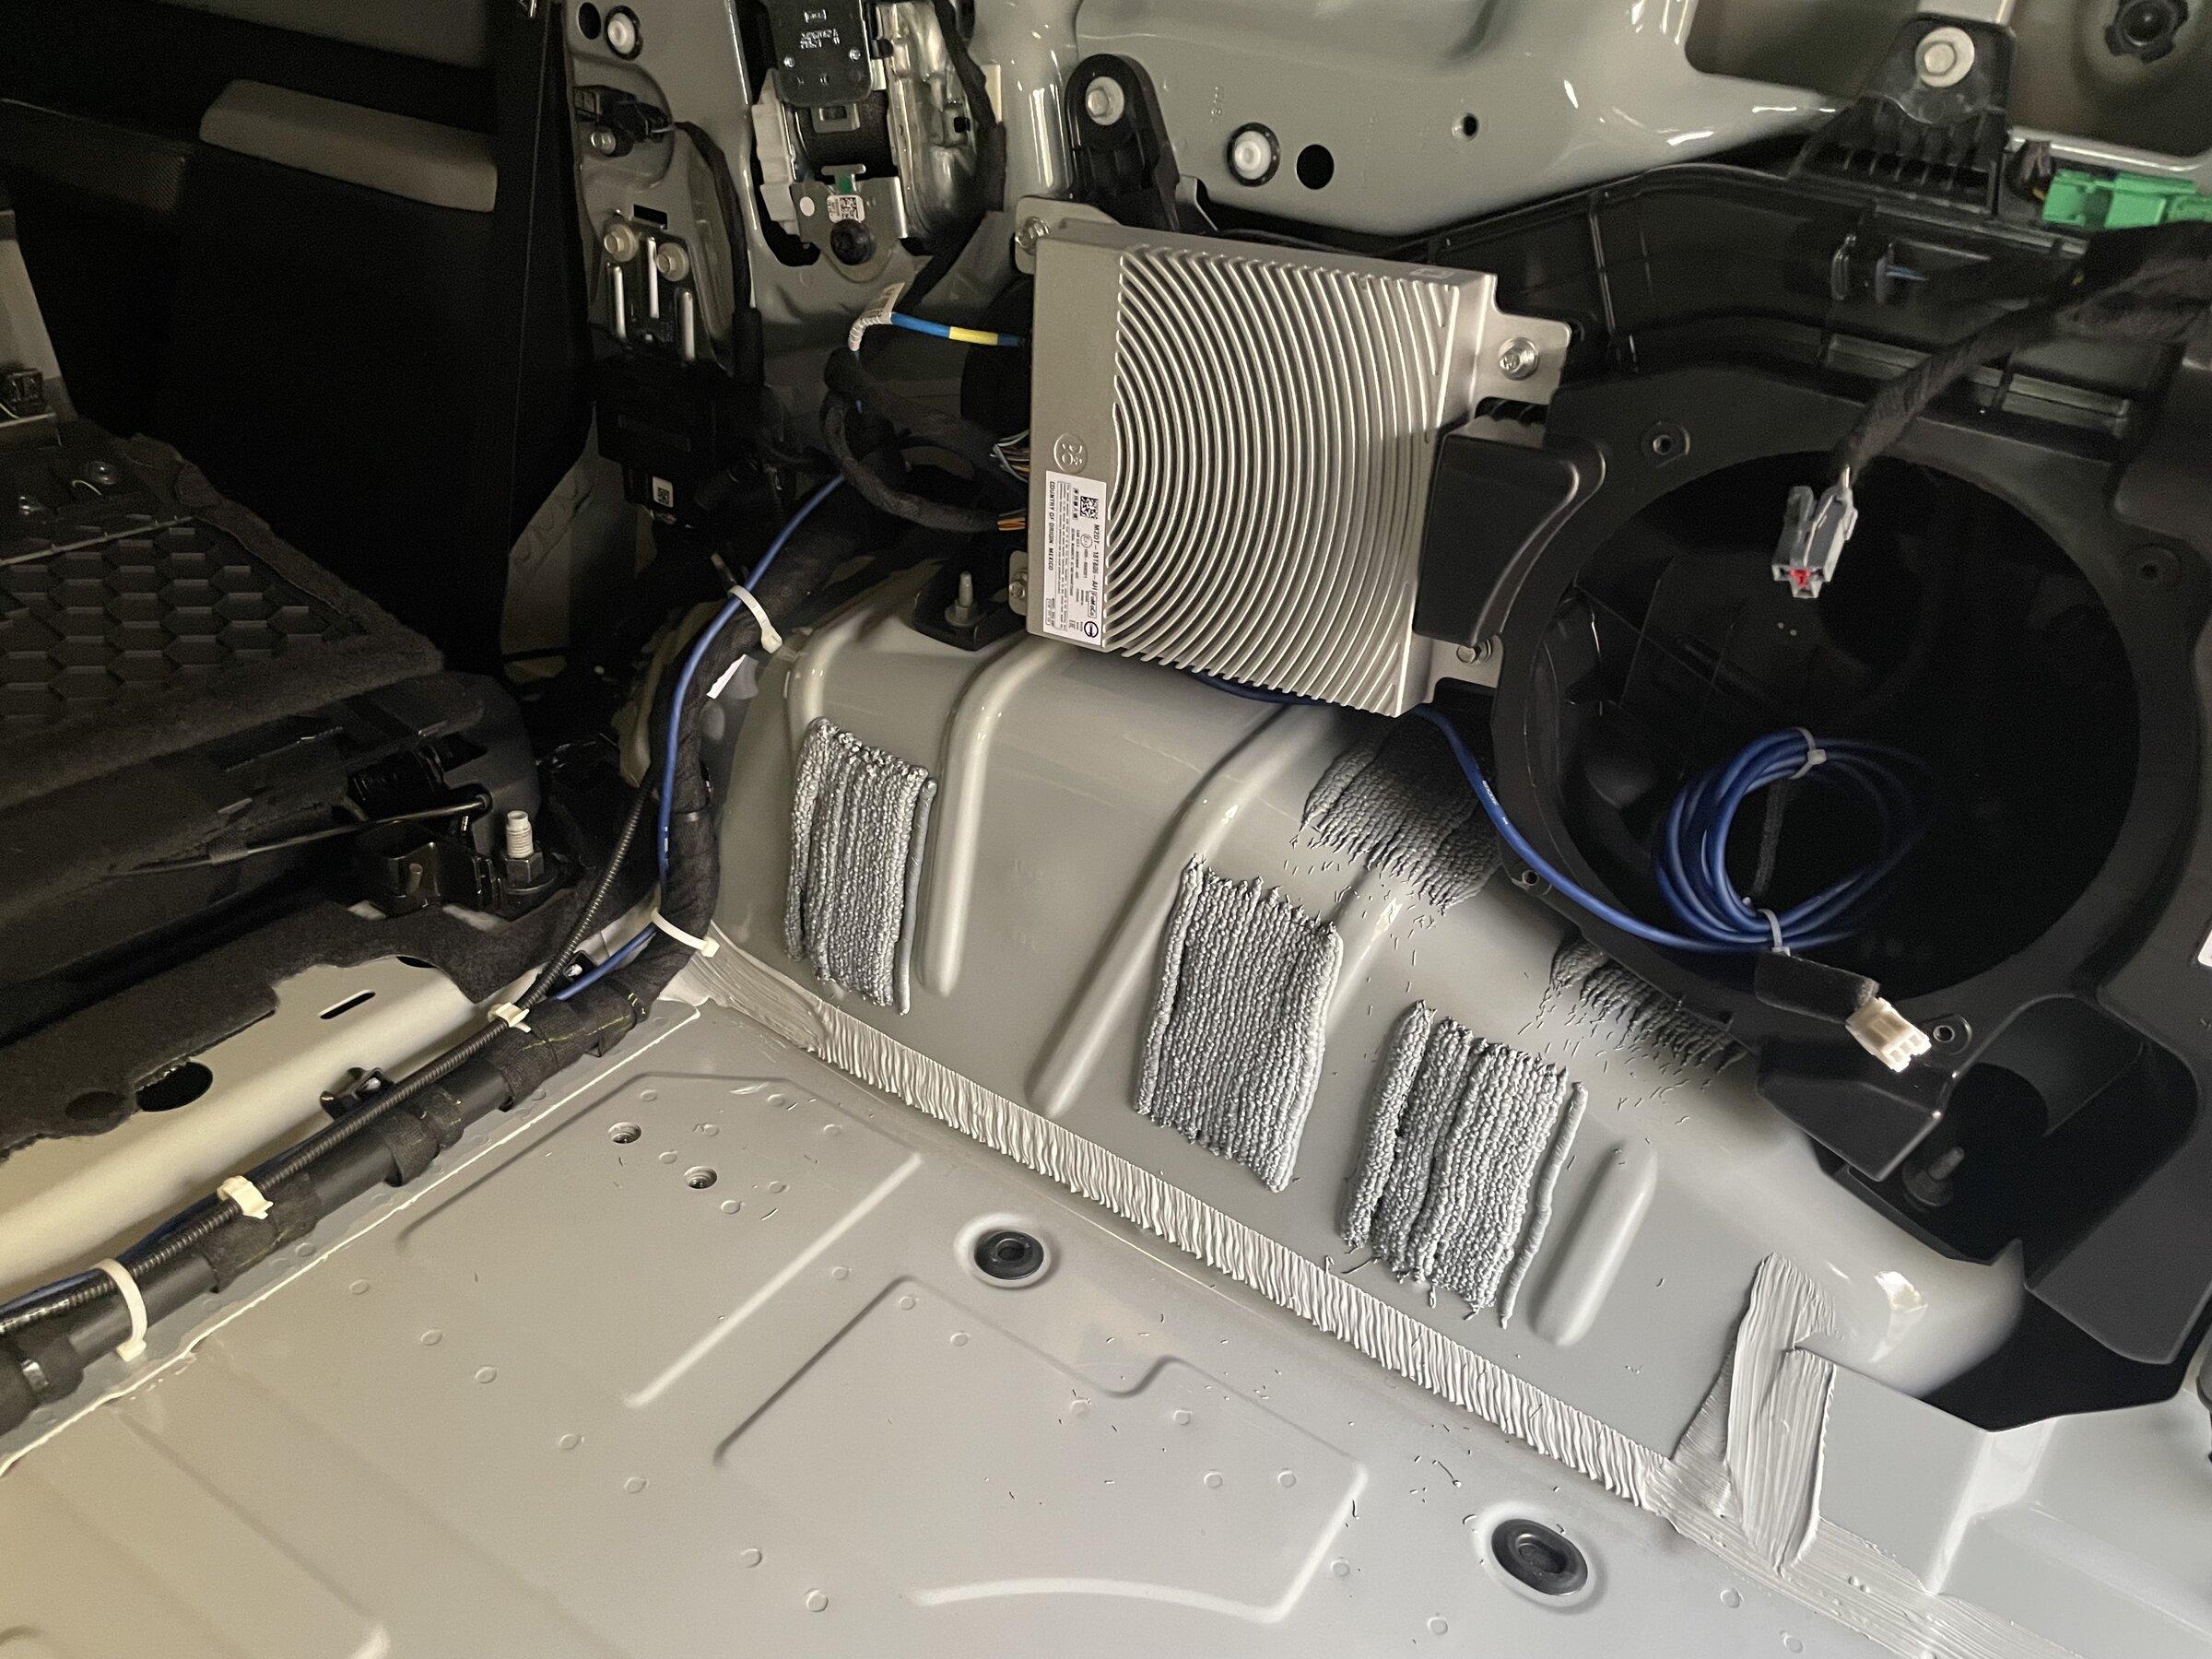
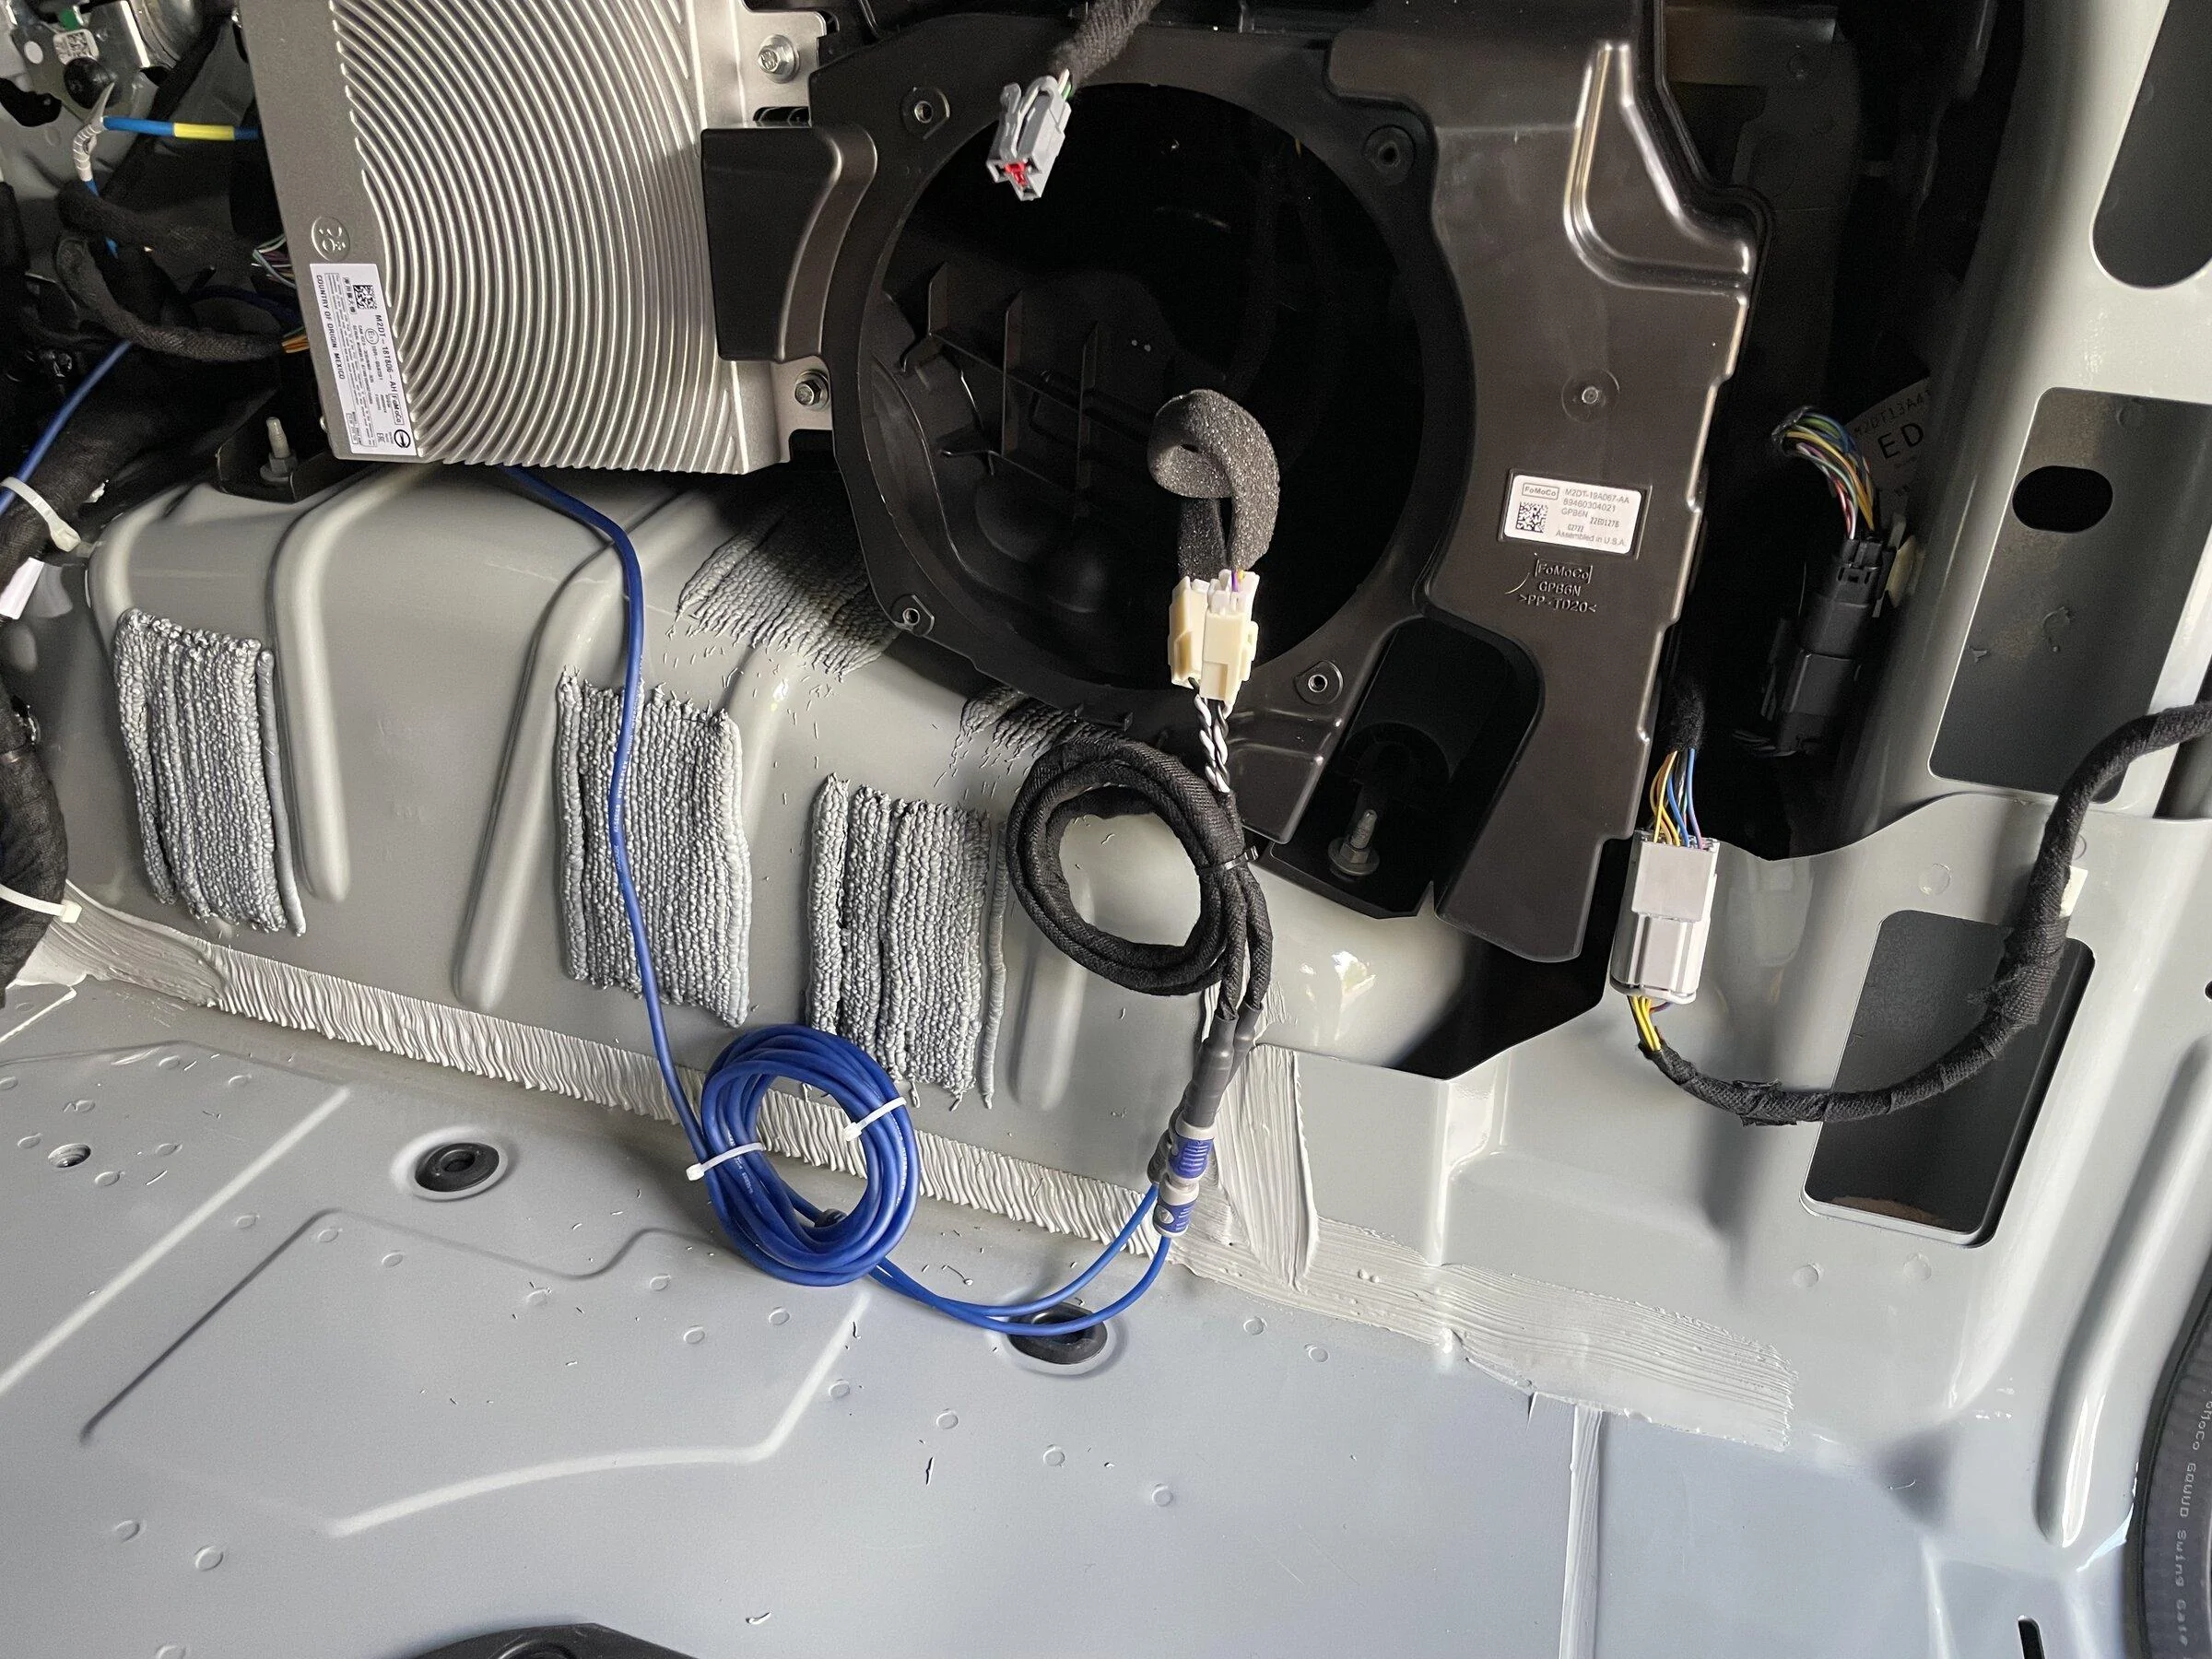
Since I still had the front driver kick panel off from replacing the 6.5" speakers, I figured I might as well pull the power and bass control remote knob wires myself. Once you have the trunk panels and driver kick panel off, it's very easy. Cut a hole in the grommet to the engine bay and it is easy enough to snake them along the driver side channel. I used a coat hanger to pull the wires between the front driver door and rear driver door to avoid having to pull that A-pillar.
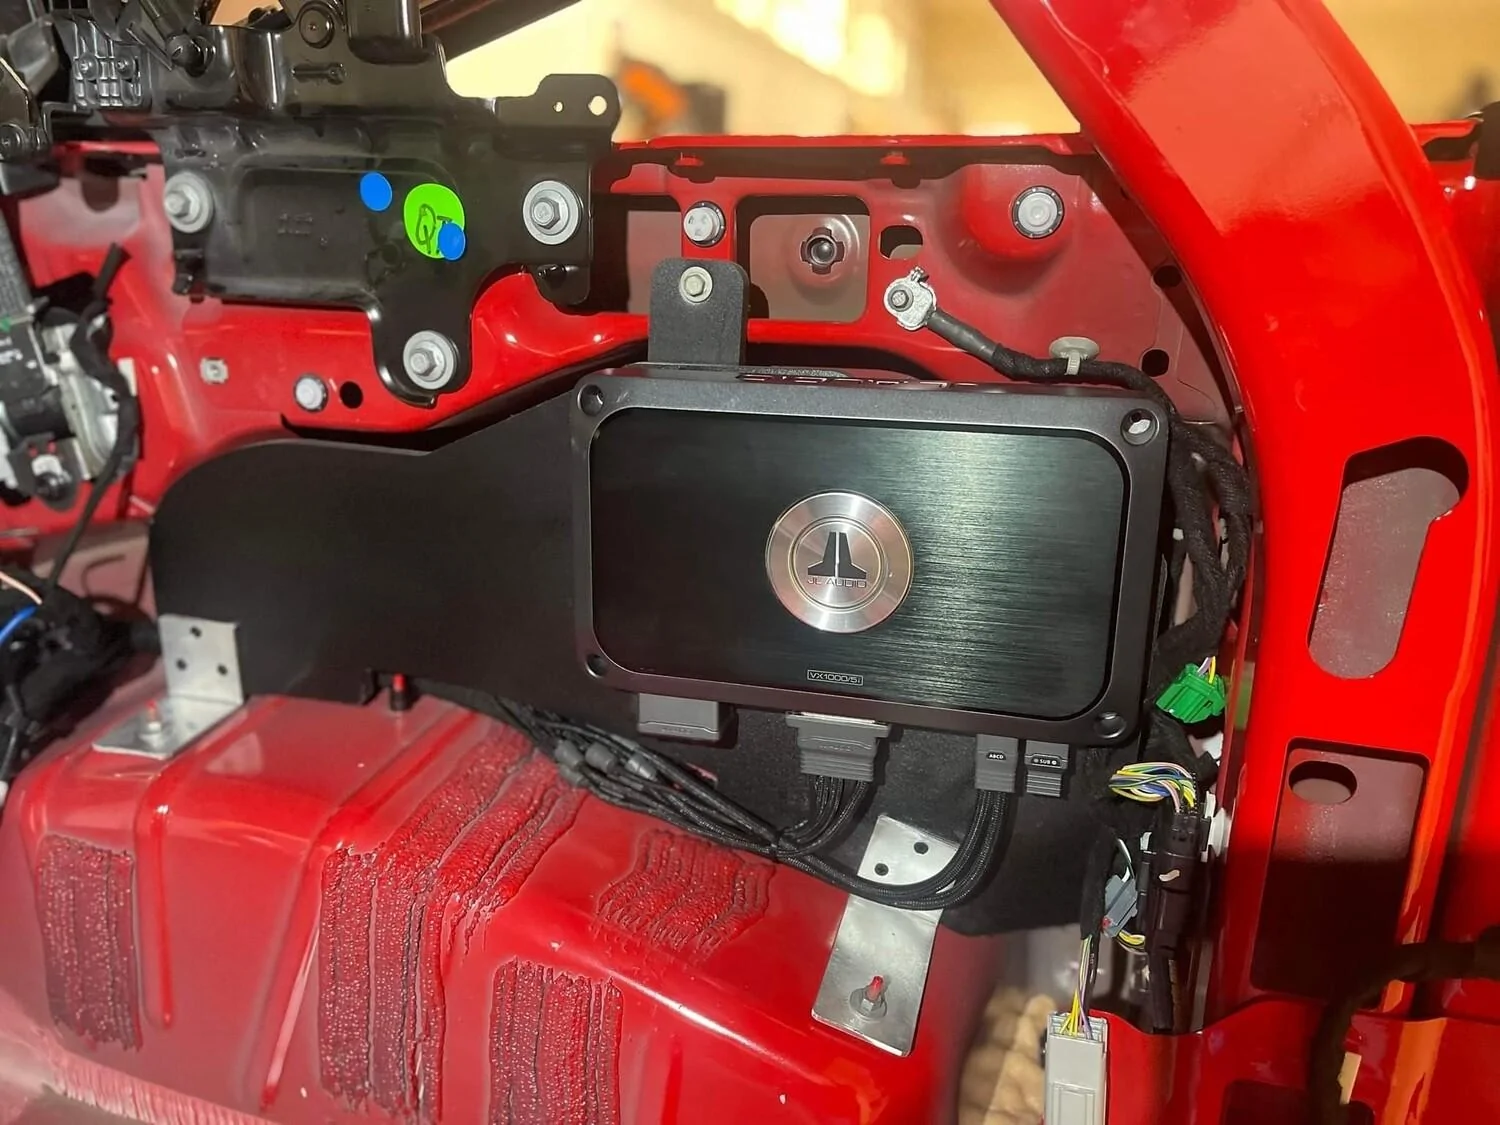
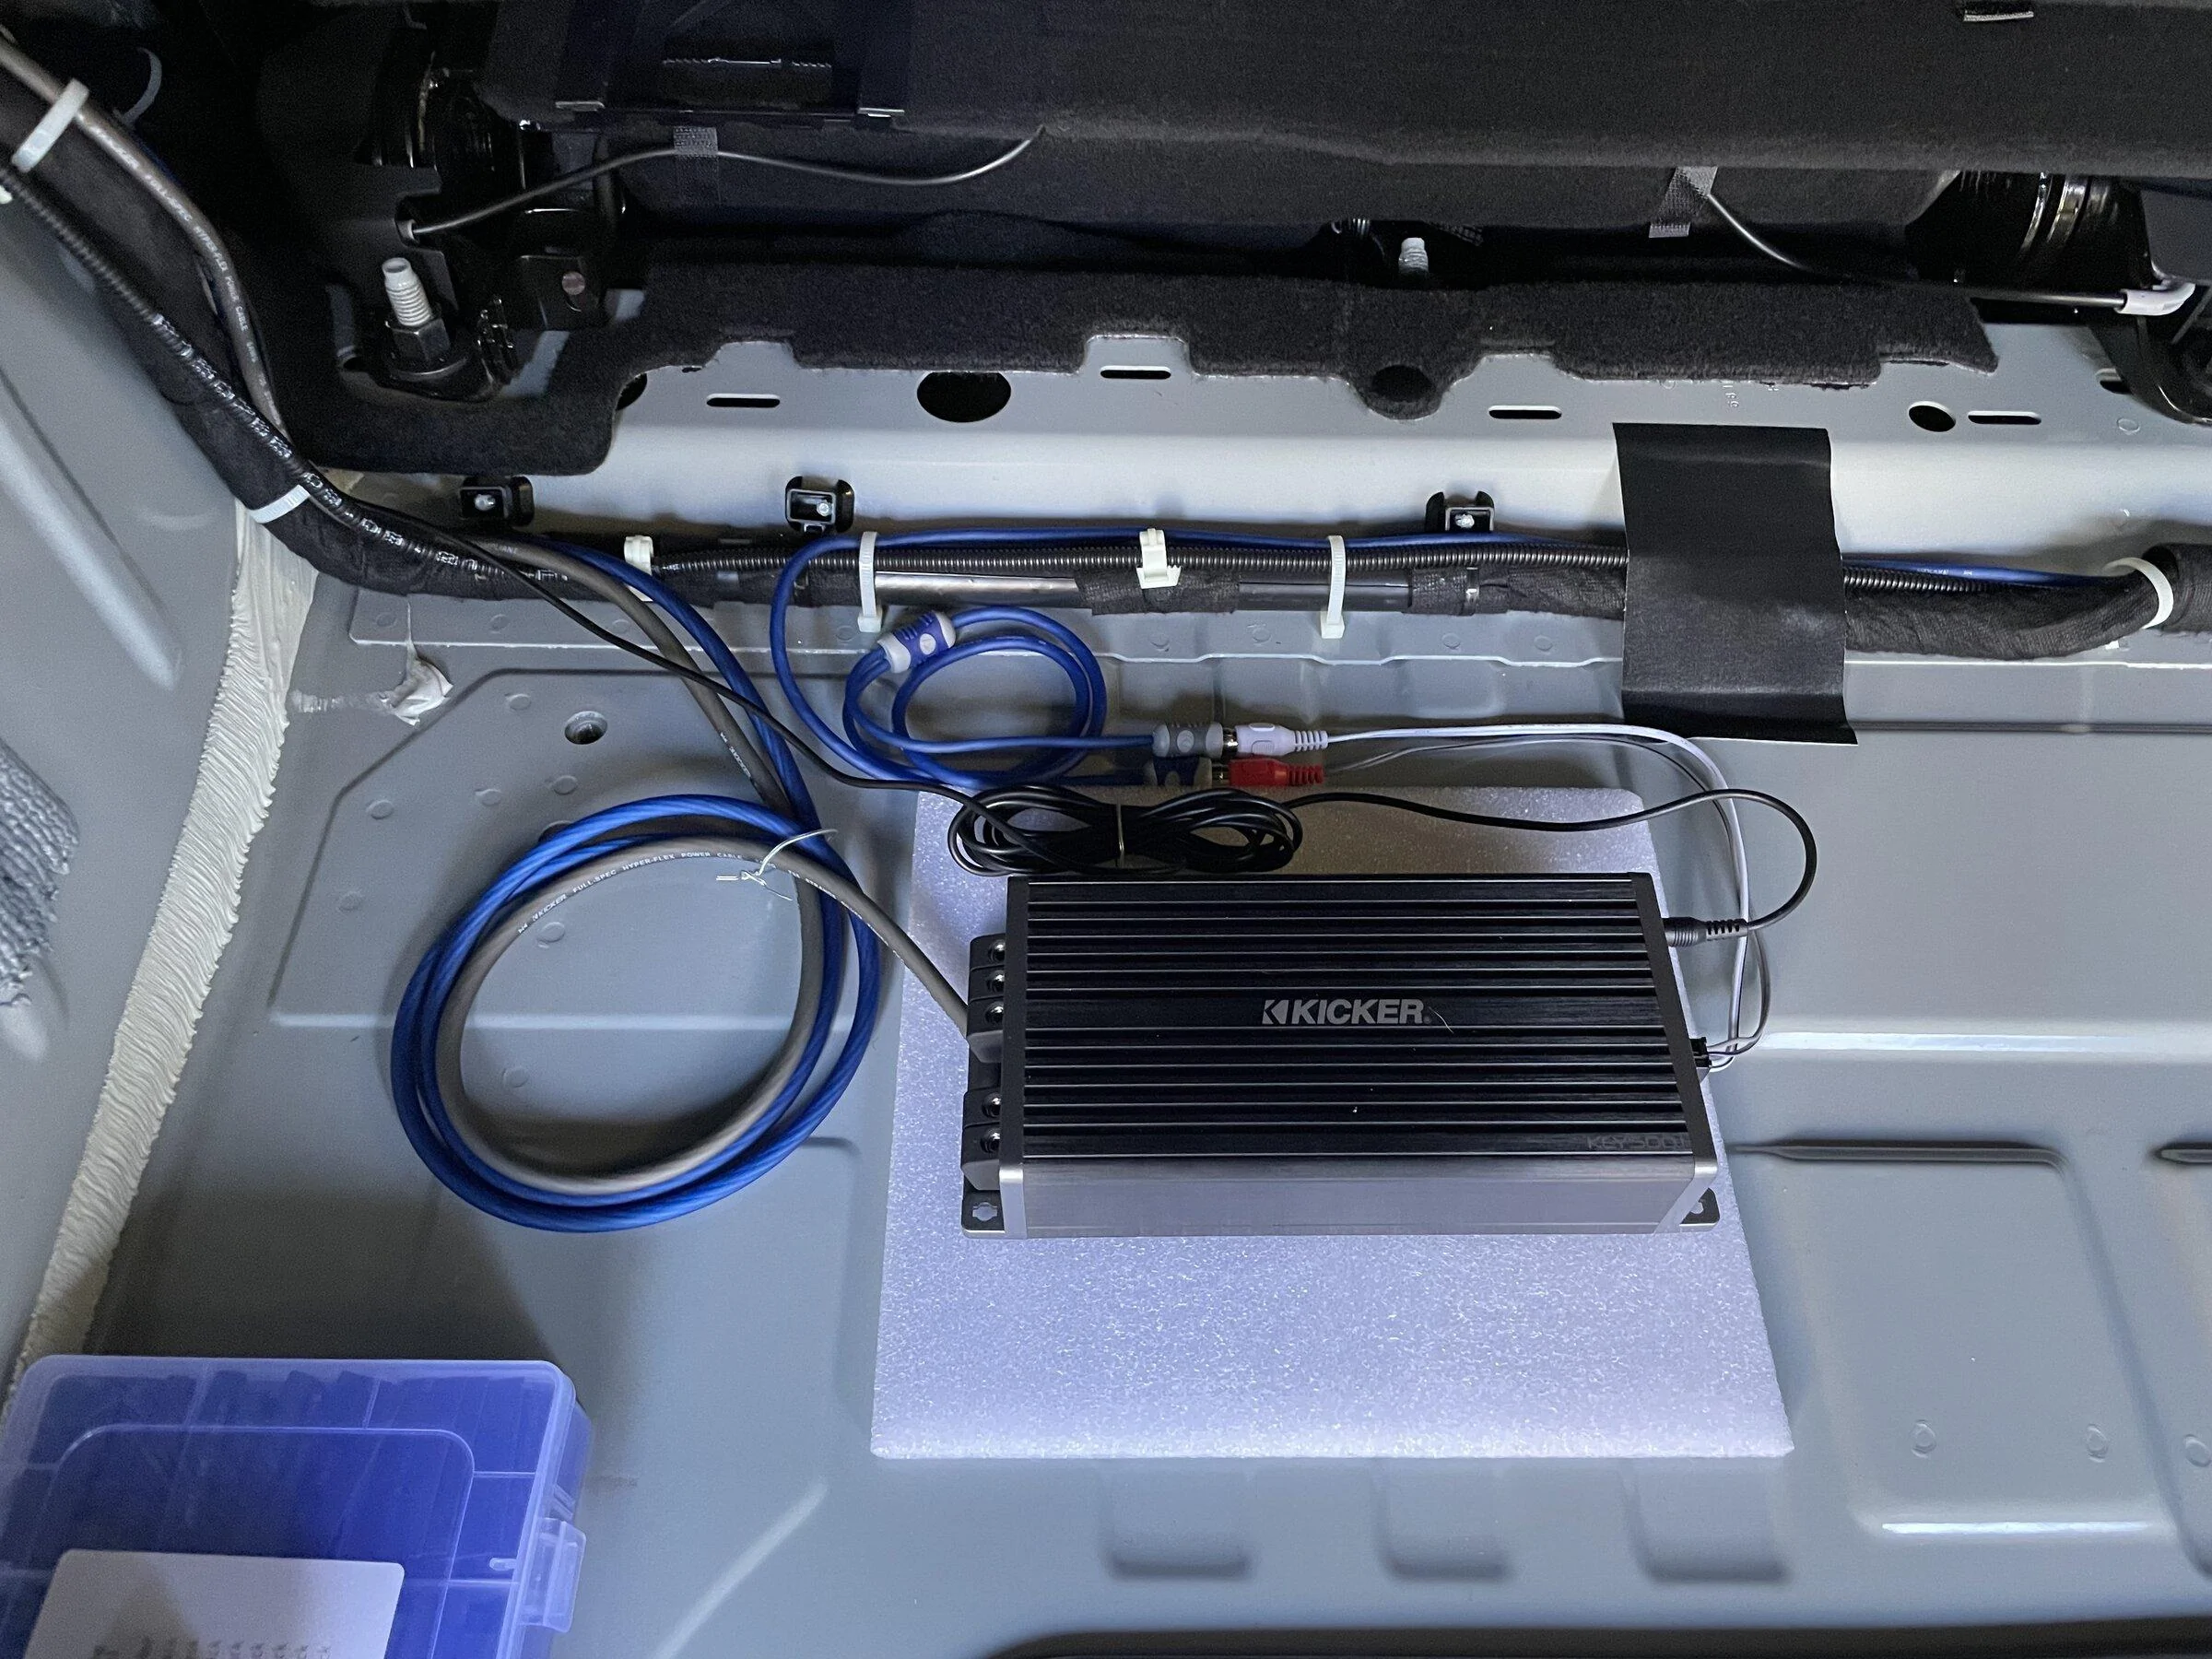
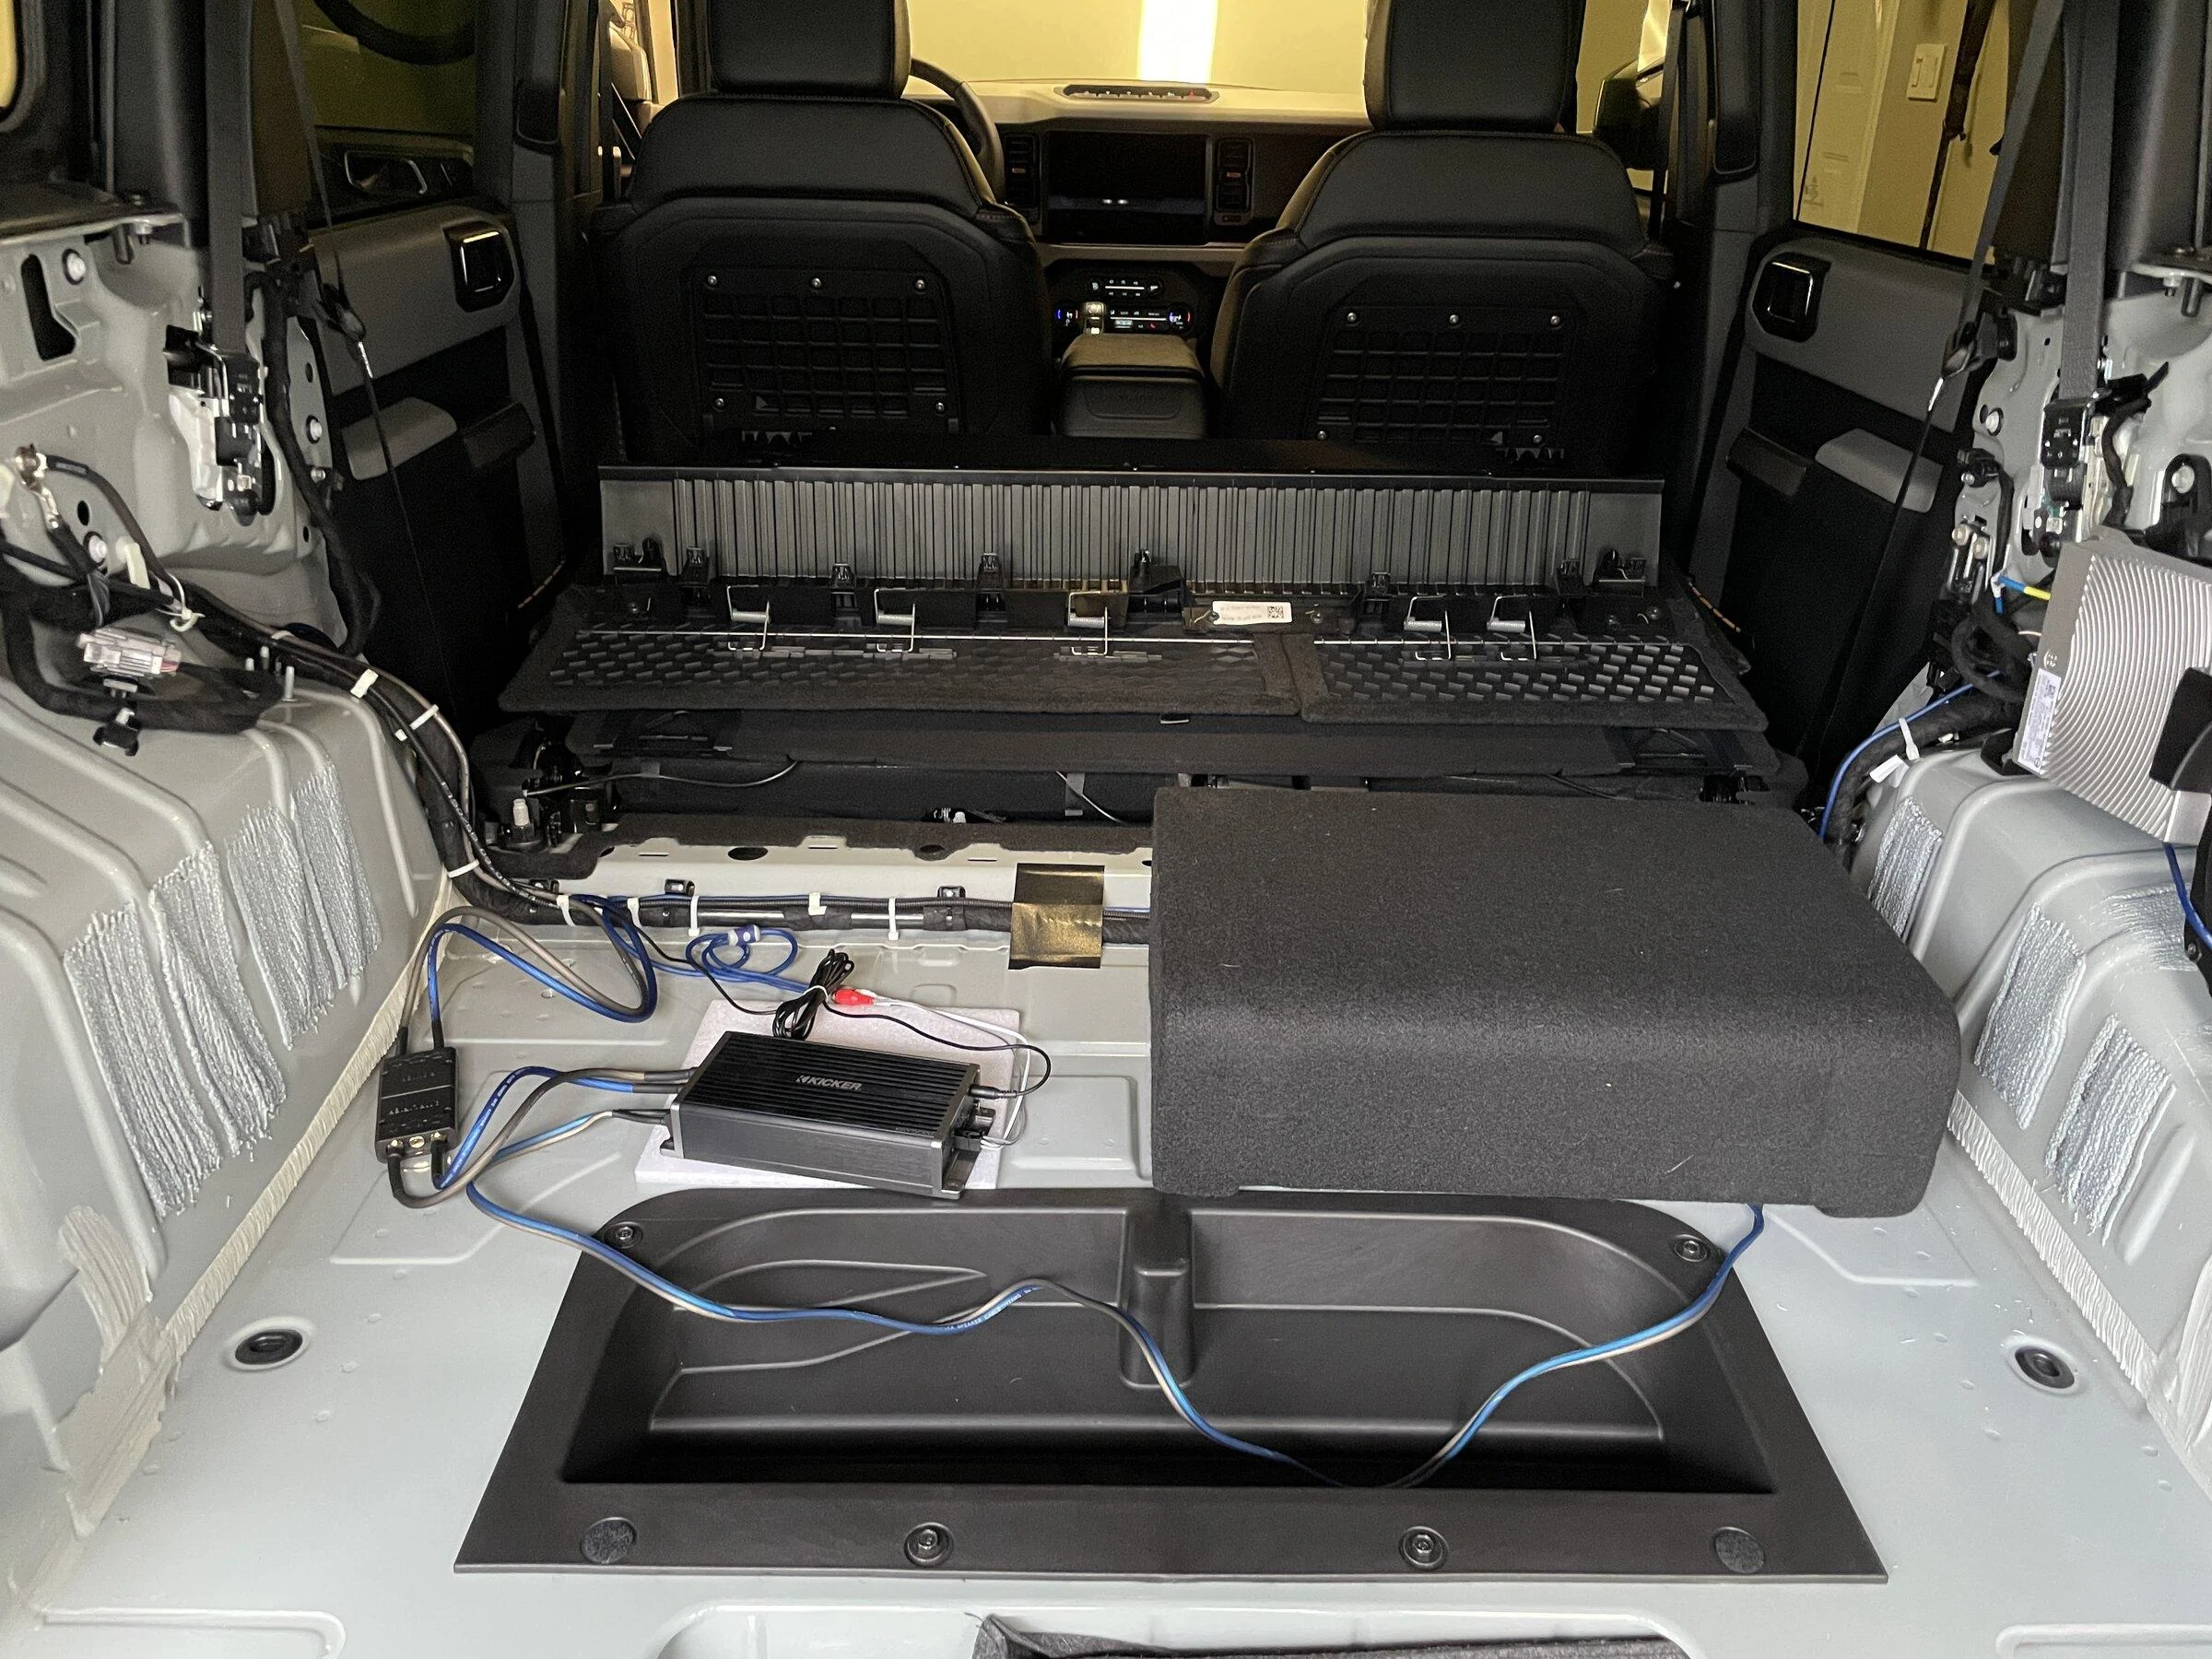
After I got the power/remote cables pulled to the trunk and zip tied up, I started looking for a good place to mount the Kicker amp. Surprisingly, there aren't a lot of good hidden places if you're leaving the factory sub enclosure in place. Under the rear seats doesn't fit when you fold them down. Behind the driver side trunk panel doesn't have anything besides an area all the way in the rear by the tail light but that wasn't ideal. The passenger side trunk panel doesn't work unless you remove the factory sub enclosure (which I didn't want to do because the harness I am using to tap the signal requires the factory connectors inside the sub enclosure and since the B&O amp is mounted to the sub enclosure, you'd have to fab something up to mount that amp as well). I also thought about putting the amp inside the empty sub enclosure but worried it would be difficult to secure and could rattle. Finally, anything behind one of the side panels would be difficult to access. While you shouldn't have to tinker with the amp after getting it set up, I am sure something would come loose eventually and I would be stuck tearing the trunk apart to access it.
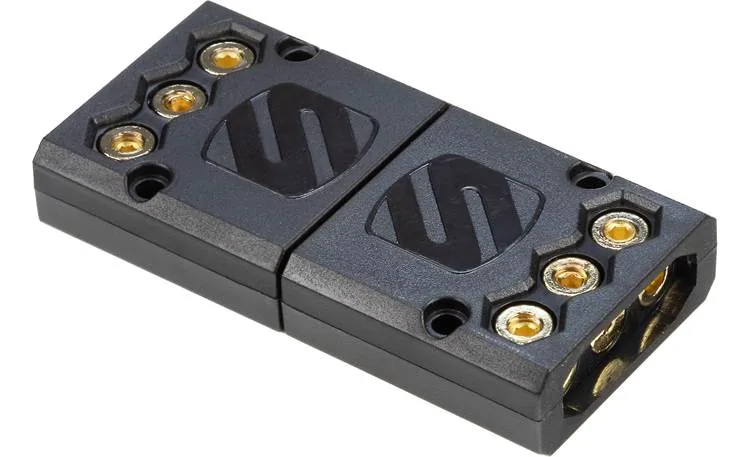
My next thought was to mount it in the washout container beneath the trunk floor. After getting the wires run back to the trunk, the power and ground (even 8 gauge) is too thick to run beneath the carpeted floor without it buckling up. Possible, but not ideal. So I decided to use a Schosche kwikplug to create a quick disconnect system and mount the amp in the trunk next to or possibly attached to the sub enclosure).
[Schosche kwikplug]

[Ground on driver side I used]

[RCAs to factory sub enclosure for signal]
EDIT #2: A little more progress over the weekend. The Sounds Good Stereo adapter came (fits perfectly to factory harnesses -- note you'll need female to female RCA adapters (assuming both ends of your RCA cables are male).
Two pictures below, one with the cables/connector out of the sub enclosure so you can see them and one with everything tucked back in. I put a little electrical tape over them to keep them in place, but with the panels back on, they won't go anywhere and reversing it is as simple as unplugging the harnesses and plugging them back onto the factory sub. Nothing in this install involved cutting or tapping a single wire / part in the car.
Amp set and ready for the power, ground and speaker cables (just waiting for some ferrules and the scosche quick disconnect kit).
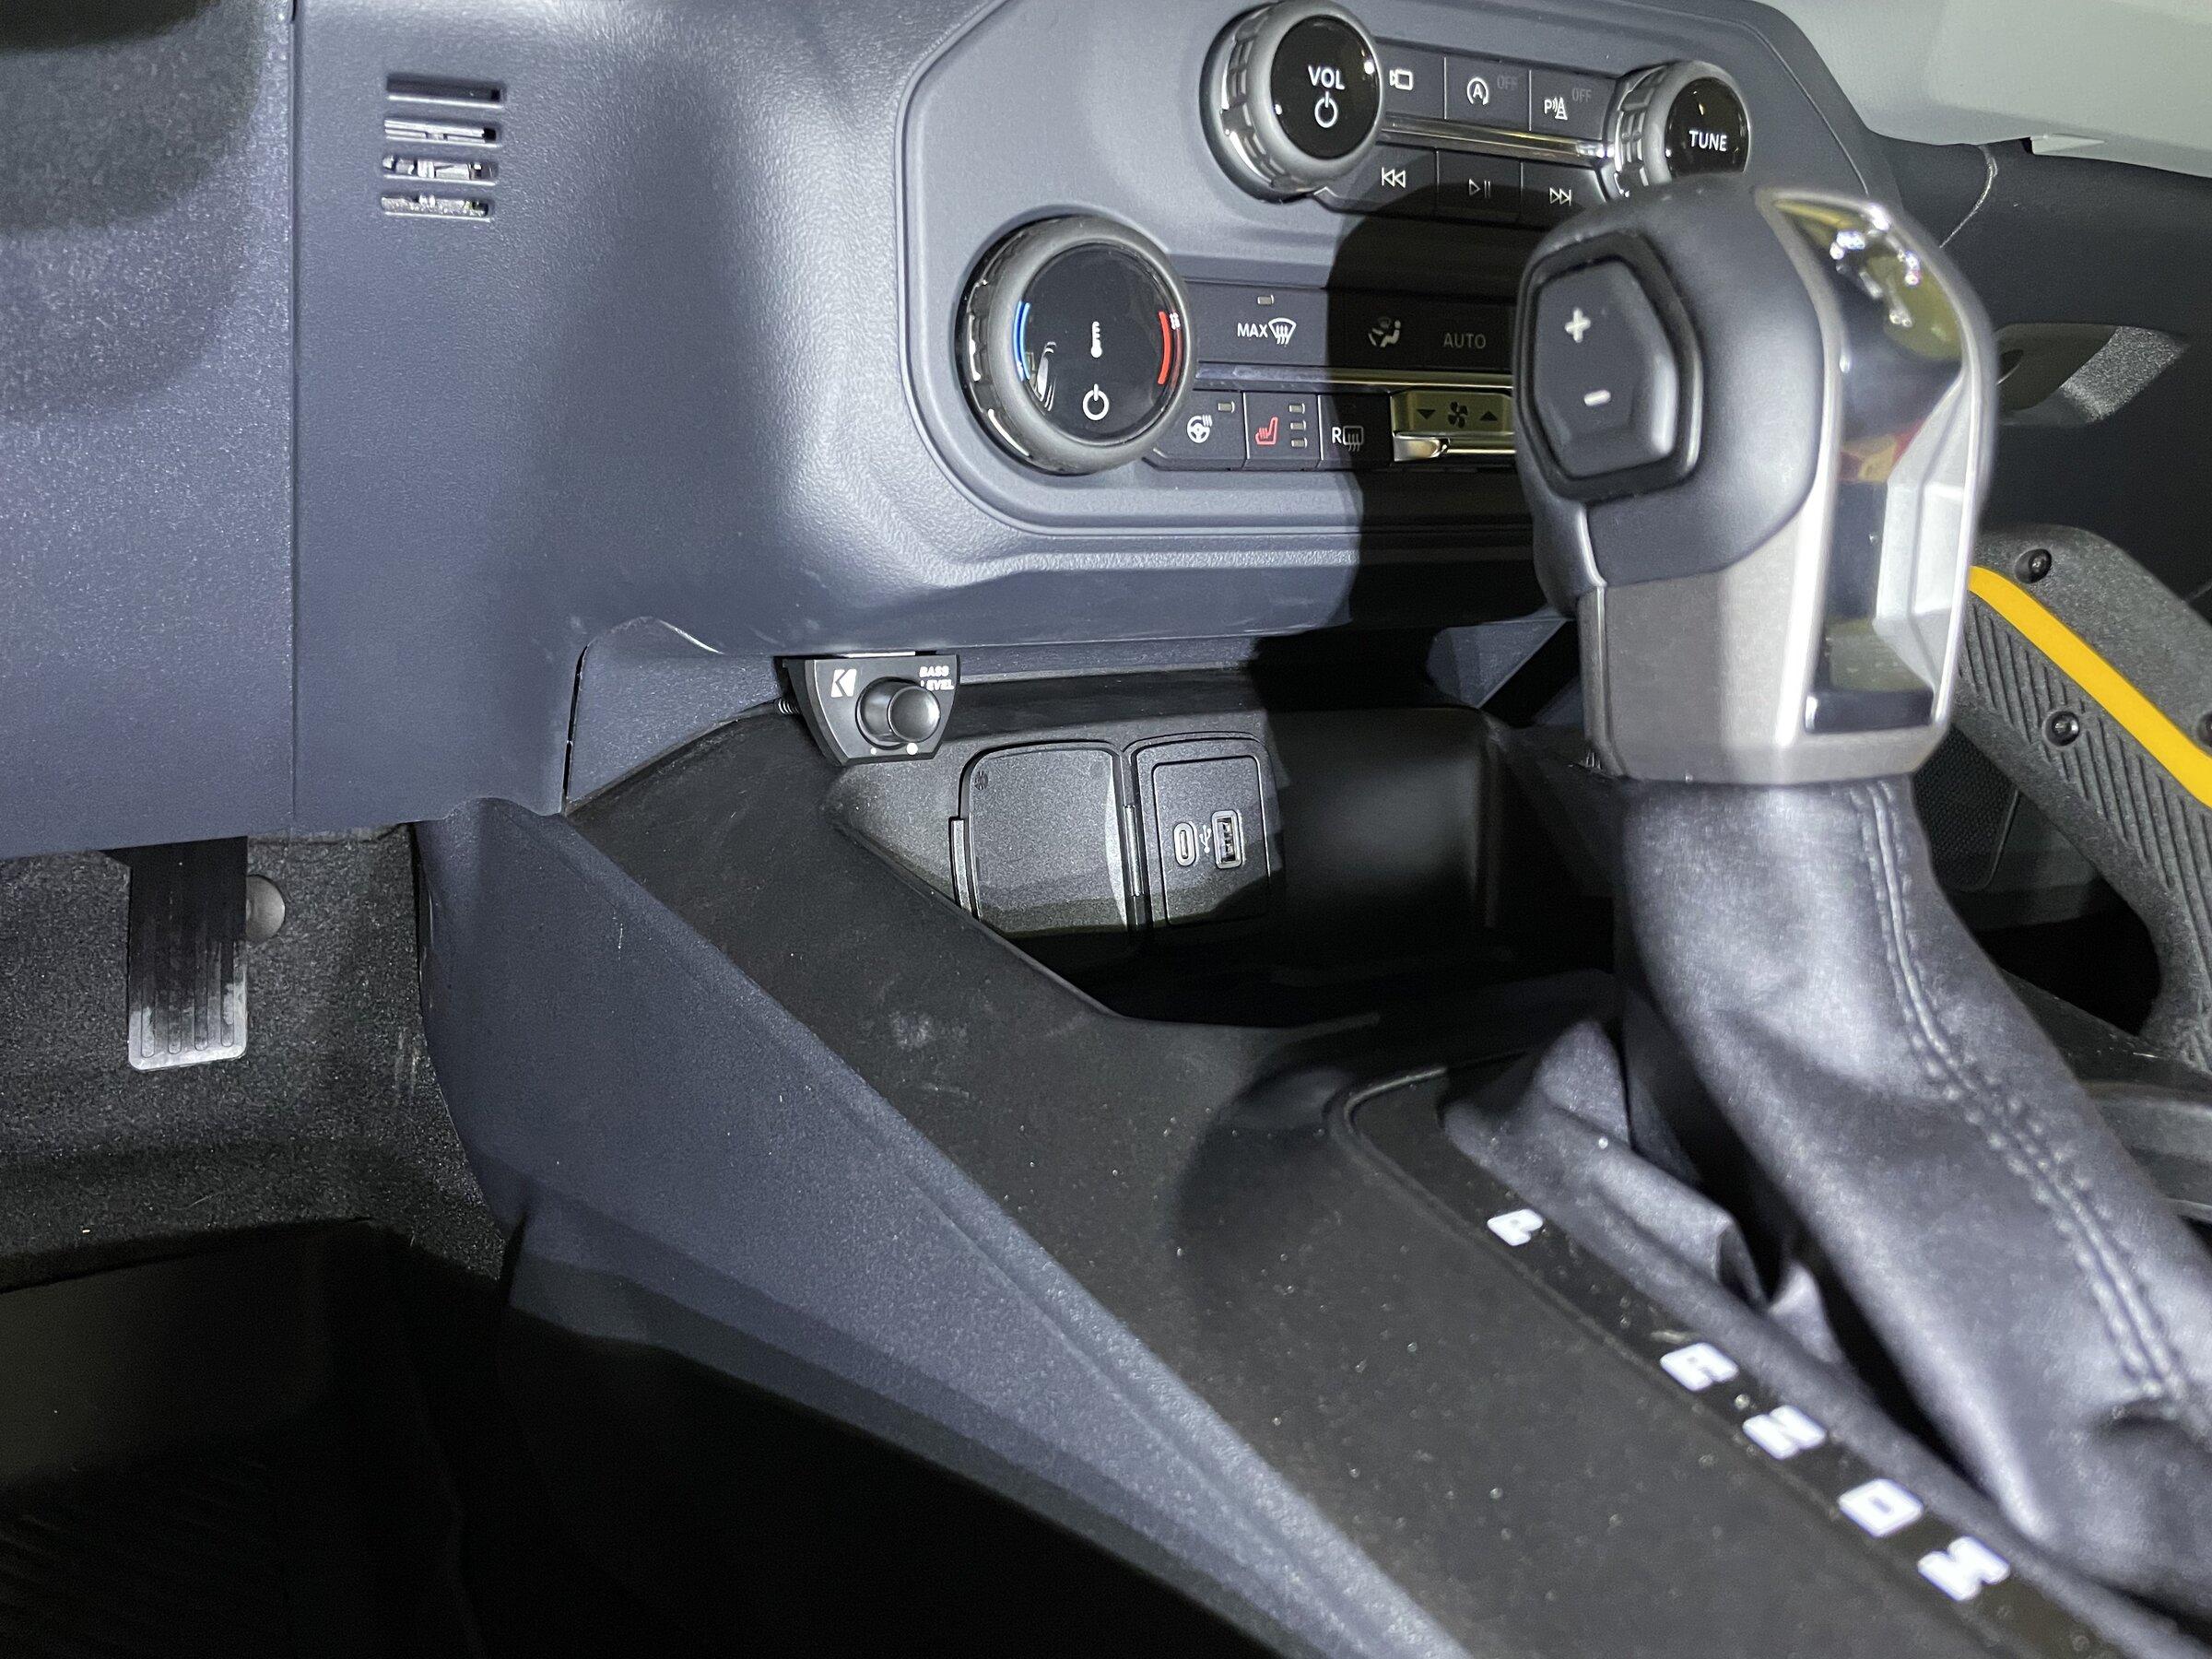
Bass knob mounted up front with gorilla glue 2-sided tape (I tried a number of thinner tape alternatives and none held up more than 24 hours):
EDIT #3:
Sub install wrapped up. I ended up doing the entire thing myself, which is somewhat impressive (for me) since I haven't changed the oil on a car in 20+ years. I still need to trim the speaker wire and ordered some cable sleeve for the power, ground, rca's and remote wire. Very happy with the quick disconnect power/ground adapter from Schosche. My first time using ferrules and I highly recommend them. Makes a much cleaner fit and no loose strands sticking out. I used some heat shrink tubing to form an even tighter connection.
Crutchfield Ferrules
Amazon Heat Shrink
Banana Plugs (sub enclosure connection)
Still not sure how I want to "mount" the amp.
Before putting the interior back together:
Interior back together (snapped another one of those cheap two piece clips putting the passenger side panel on):
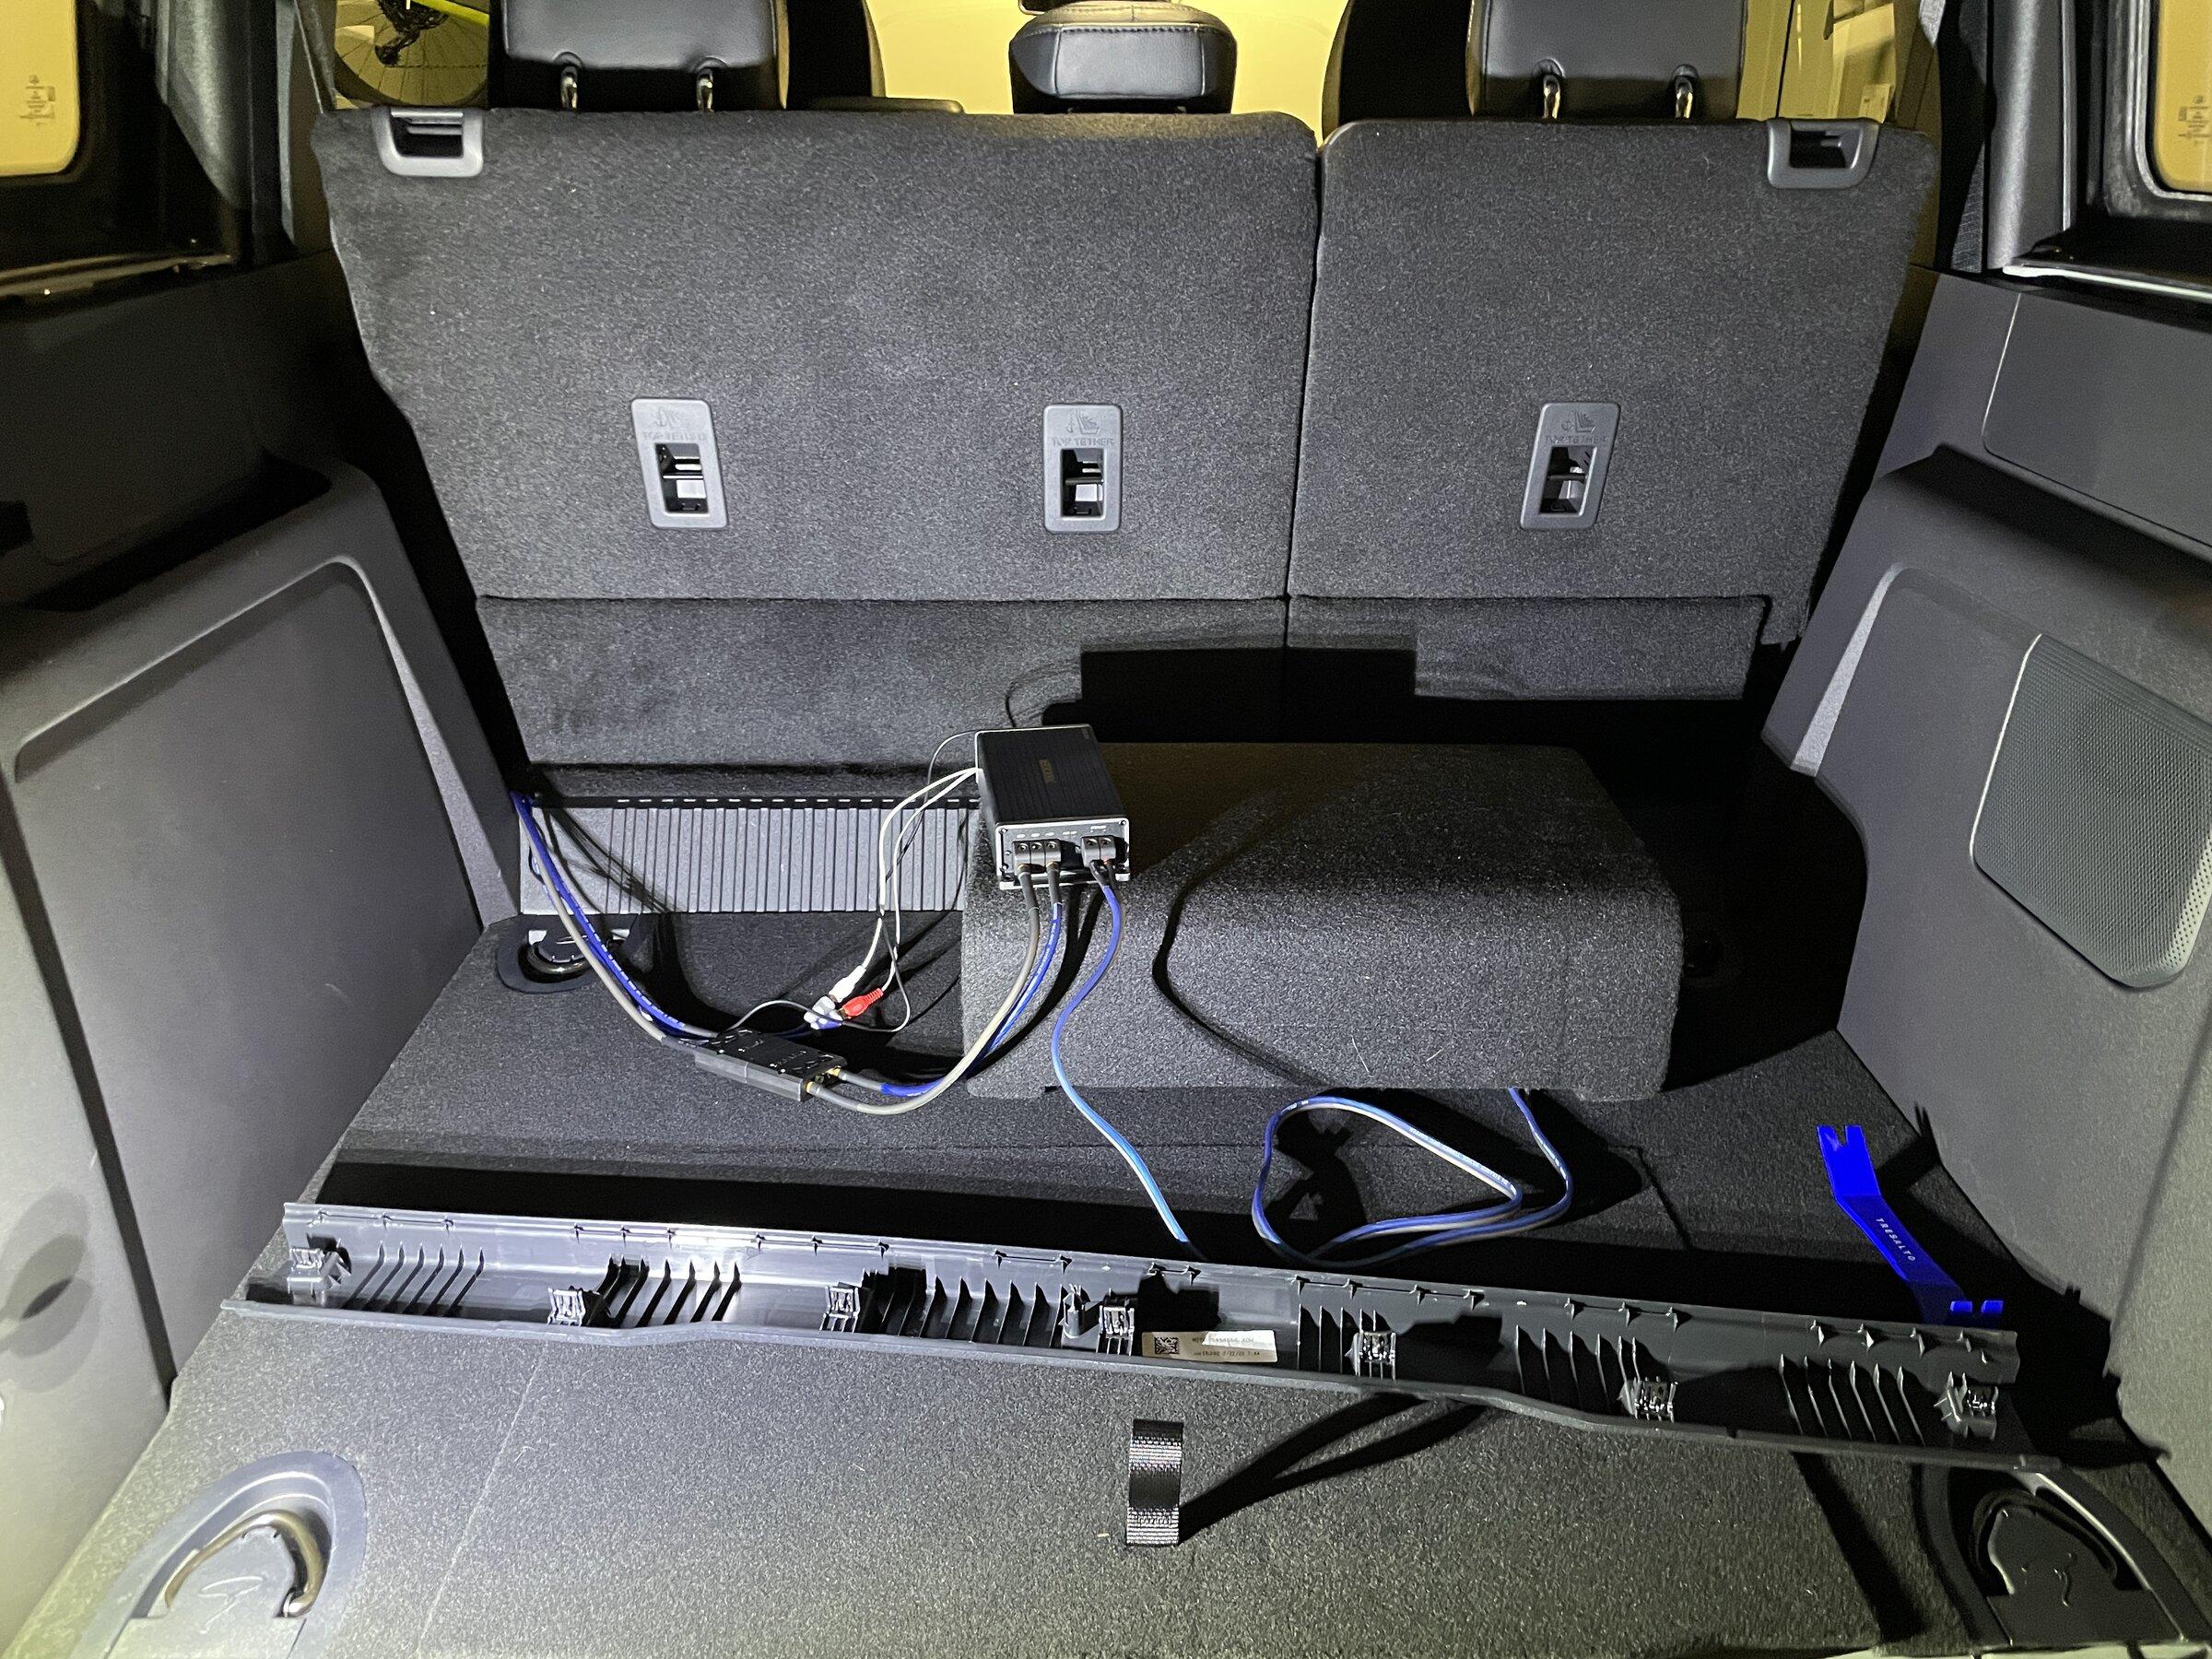
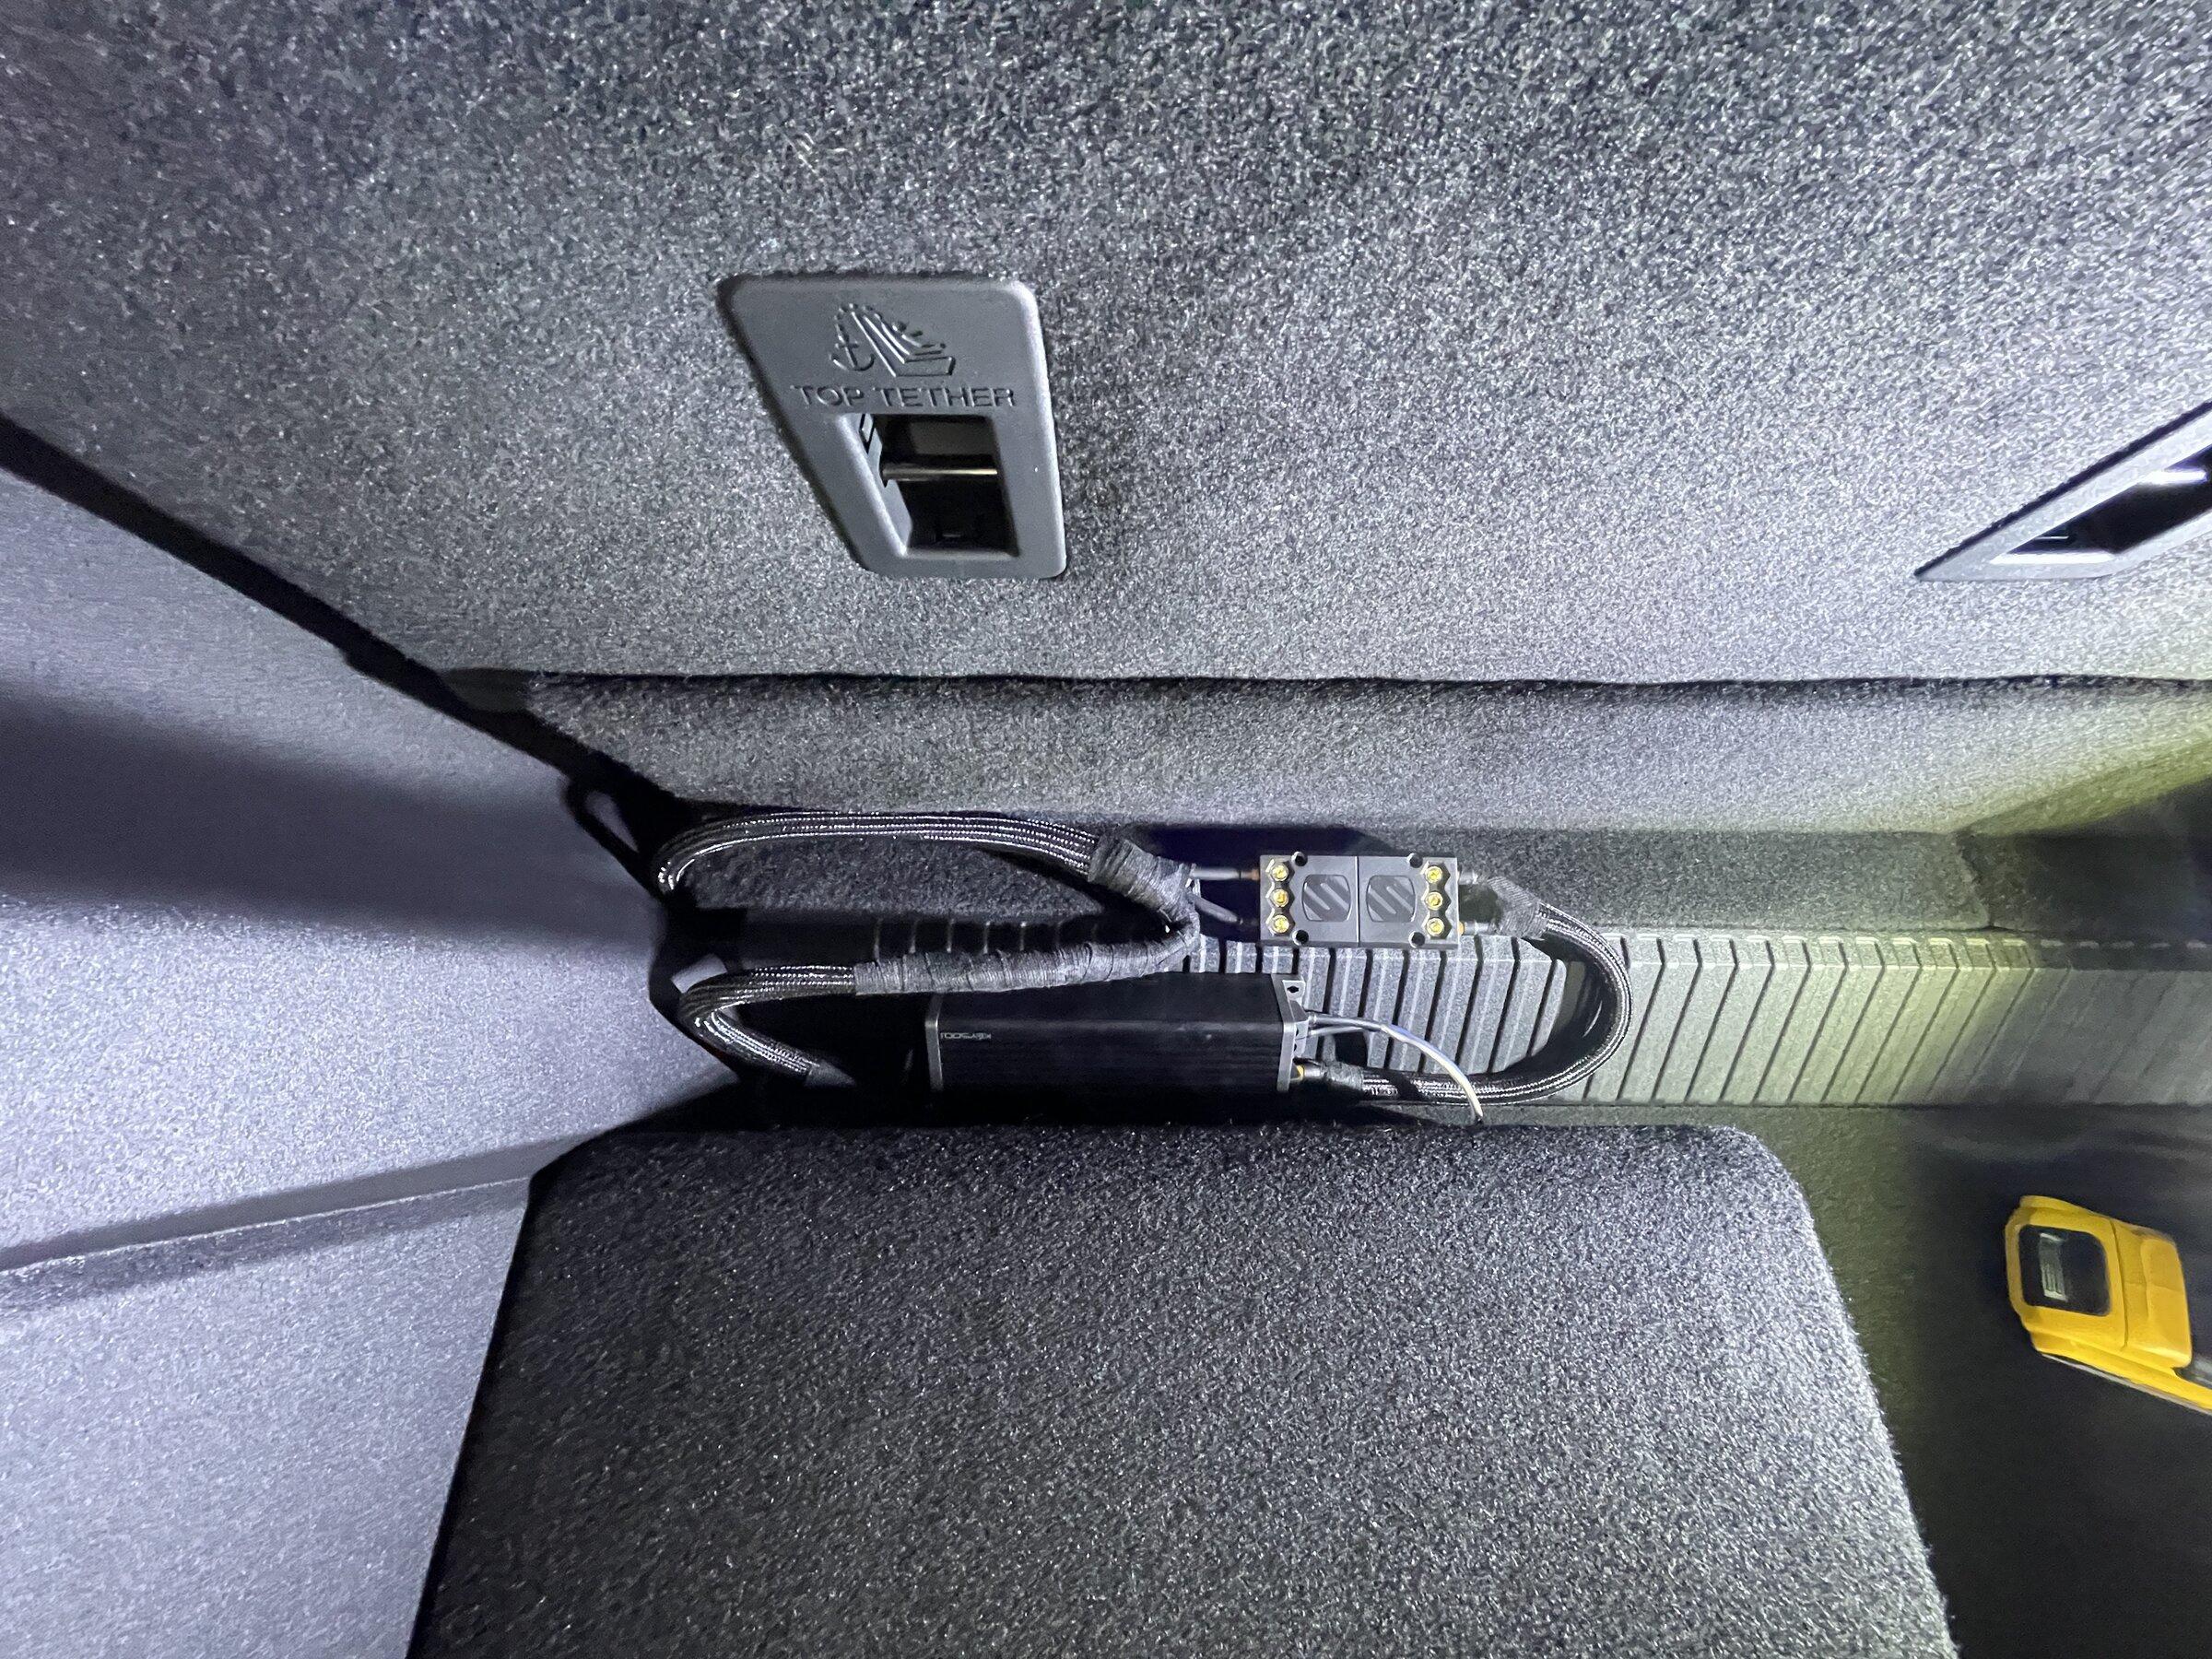
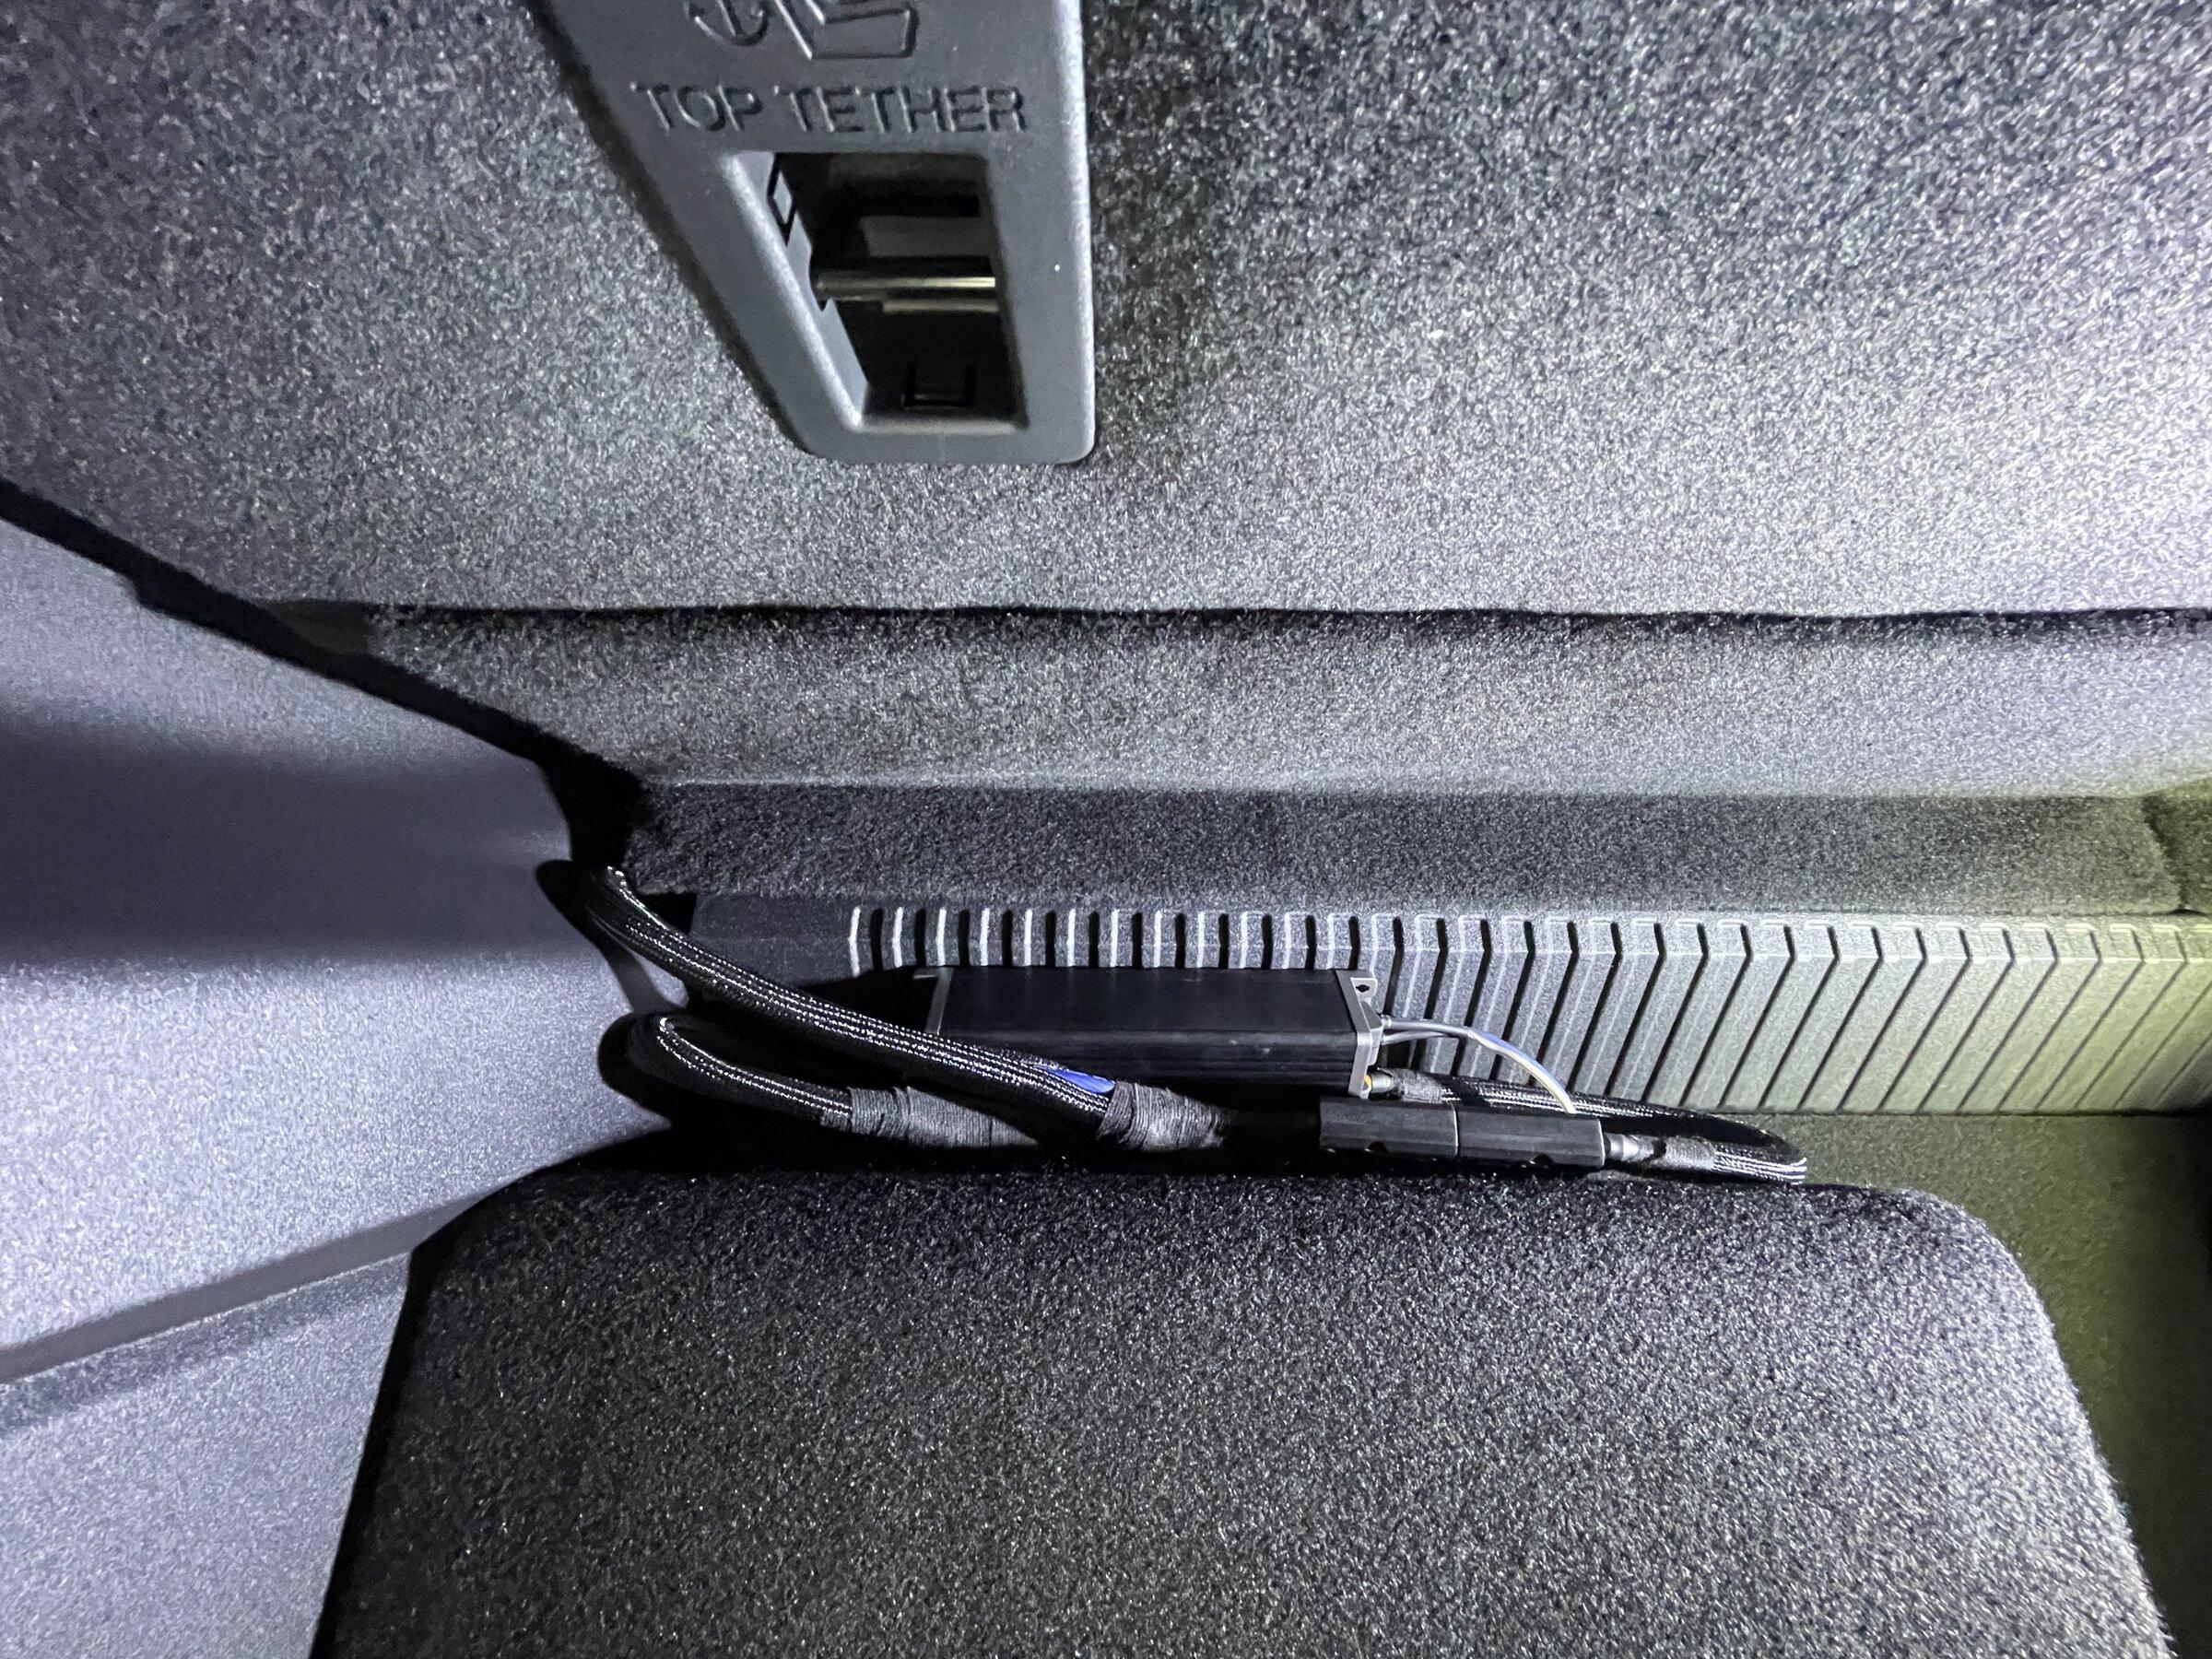
Final sub install pics:
[Quick disconnect harness for power / ground. The other wire that splits off from it is the RCAs and remote wire concealed in the cable sleeve.]
[Harness/wires tucked behind the box:]
[View from the back of the truck:]
Conclusion
Someone looking for a more budget friendly alternative could replace only the front three 4" speakers and add a Kicker HS10 powered sub. For ~$500 that stereo would satisfy most and probably be 90% as good as what I did.
I hope some of this is helpful to other people. While annoying that the factory radio is as underwhelming as it is, for between $500 and $1,500 you can turn it into something that most will be happy with without replacing the factory amp. Anything more than this will require a significant jump in budget as you'd need the $800 NavTV unit to replace the B&O amp and a 4-channel amp for the mids/highs which goes beyond the DIY scope for most people.
For those that don't want to read the entire post. The front 3 dash speakers are a must, the rear pod 4" speakers are optional, the front 6.5" speakers I would not replace and the sub I highly recommend replacing. All just my 2 cents.
Like many, I was pretty underwhelmed with the B&O system. I didn't have high expectations for a factory radio, but for a "premium" system, it's pretty mediocre. I plan to trade my truck in for a raptor at some point, so I didn't want to sink a ton of money into a stereo and wanted to avoid cutting, splicing, removing anything that would be difficult to undo or jeopardize the function of the factory radio/cameras/etc.
After doing a fair amount of reading here, I decided a good first step was to replace the front corner dash speakers with Focal ACX 100s using the harness from amazon. Thought this would determine whether if it was worth doing anymore speaker replacements, since I had no intention of spending $800 on the NAV TV unit to replace the factory amp with an aftermarket amp for the mids/highs.
Amazon Harness for 4" Speakers
I found the connection on the positive terminal of these harnesses to be a little loose (hopefully Crutchfield has their own harness soon). If you gently squeeze the connector with some needle nose pliers, it will tighten it down and form a good fit. The negative terminal fit snug for me on all 5 harnesses, but you can do the same thing one that one if needed.
Dash Corner Speakers
These were pretty straight forward to swap out. The passenger side was a bit easier, because on the driver side, the factory speaker cable was zip tied to a plastic screw directly below the speaker that prevented the focal speaker from "seating" until I removed the zip tie and screw. The amazon trim kit toolset I ordered didn't have a thin enough edge to pry the speaker covers off and I ended up using a tool on a leatherman (you can wrap a piece of painters tape around the edge it to avoid scratching the plastic).
This speaker swap made a pretty significant difference. I wouldn't call it night and day, but it was way more clear and crisp. Not any louder, but convinced me enough to swap the other 4" speakers.
Link to Focal ACX 100 Speakers
Should take 30-45 minutes to swap both speakers. You'll need a pry tool and 7mm socket.
[Zip tie / screw I removed on the driver side]
Center Speaker
This speaker was a bit more challenging to replace than the corners. First, you have to remember to remove the accessory rail with the two factory torx bolts (t-20 or t-25). They're hard to see, so it takes a little feeling around to get them undone. This speaker cover was harder to remove compared to the corners. I pulled from the windshield back and it took a bit of force to get the back off.
You'll also have to be cognizant of the USB plug (in the front) and gently bend that as you remove the cover (it is attached). After removing the cover, you may need to move the factory cable inside the console to the side to get the new speaker to seat properly. Between the center channel speaker cable and USB cable, it is more crowded than the corner speakers.
Getting the cover back on took a little more effort to get the rear clips (closest to the dash) to seat. I used a trim tool to push the clips back horizontally into place (the back gets put in first) while putting downward pressure to get them to snap down. Once the back is properly seated, just work the usb plug back in its spot and the front clips in easily. Nice improvement in SQ and a must, IMO, if you are going to replace the corner dash speakers.
Should take 30 minutes. You'll need a pry tool, torx (t-20 or t-25) driver and 7mm socket.
Rear Speakers
These are by far the easiest to replace. You don't need a pry tool to remove the covers, just squeeze either side and it pops off. Speakers come out with two phillips screws. Not a huge improvement in SQ, but it's a little more clear and it rounds out the highs. If you wanted to skip replacing these to save a little money, I would go right to a sub replacement.
Should take 15 minutes and you just need a phillips head screw driver.
Kick Panels
I read a lot of mixed things on replacing these speakers. I went with the Focal ACX 165s (with the free installation kit from crutchfield). Bottom line is the factory amp doesn't have enough power to drive a good set of aftermarket 6.5" speakers and since the factory amp filters out highs, 2-way speakers don't add anything.
I think I lost a hair of volume with the focals but maybe picked up a little crispness in the bass. I did a lot of back and forth testing (passenger speaker swapped, driver speaker stock) and this is one you can skip. I already had one speaker installed and for $135, it wasn't worth uninstalling it and returning them. I also added an aftermarket sub, so I figured whatever little bit I lost in mid volume will be replaced by the new sub.
EDIT: After some more listening, I would skip replacing these if you're keeping the factory B&O amp. Confirmed no noticeable improvement in SQ and you may even lose a little volume.
The installation on these was a bit more challenging. The screws that come with the Focal ACX 165 speakers will not fit in the Bronco. They are 1.5" screws and the metra extension plate is 1". Go to Home Depot and buy two packs of these #6 x 1" screws w/nuts (each speaker takes 8 screws). You can also do #6 x 3/4" screws, but you cannot do 1.25" or #8 screws (any length) since the #8 screw head is too big for the focal speakers.
Link to Home Depot Screws

Once I got the right screws, the speakers mounted to the brackets easily and installation was straight forward (it's an awkward position to work in, but everything else is easy).
I highly suggest watching this YouTube video before doing it. They have a lot of great tips that makes this swap easier. Thanks! @1Five1 Garage.
Link to Focal ACX 165 Speakers
Should take about an hour for both (assuming you don't need to go to Home Depot 3 times for screws). You'll need a pry tool (for the driver side foot rest cover), razor blade (to cut a hole in the foam to snake the new harness out of the speaker enclosure (watch the video below for an example), a 7mm socket (for the speakers) and a 10mm socket (for the driver side only to remove the foot rest).
Subwoofer
Probably the weakest link in the B&O stereo and almost every factory stereo is the sub. Subs require the most power to drive and are often jammed into awkward spaces to preserve trunk space. The Bronco is no exception. I know a few people have tried to make the factory enclosure work with an aftermarket sub/amp, but IMO, you will be chasing a never ending stream of rattles. Those enclosures are not designed for acoustics and running any meaningful amount of power through them with an aftermarket sub will just result in even more plastic rattling and you'll constantly be trying to figure out a place to put dynamat/fill.
That said, this is a car I use every day and maintaining trunk space was important. I ordered a Kicker down firing 10" enclosure, Kicker Key 500.1 amp, Kicker bass control knob, Kicker amp installation kit and harness/rca connector from Sounds Good Stereo (which allows you to plug right into the factory sub harness when you remove the factory speaker).
I didn't think it is worth putting in anything more powerful, as it would overwhelm the mids/highs that are still powered by the factory B&O amp and I want something "tight" enough to still be musical, so a single sealed 10" was sufficient for me. Note the 12” version of this box is too deep and will interfere with the lid to the washout tray underneath the trunk. Kicker makes a 10” version with a passive radiator that will sound more like a ported box if you want more volume.
Link to Kicker Sub/Enclosure
Link to Kicker Amp
Link to Kicker Bass Control Knob
Sounds Good Stereo Sub Harness
Scosche Kwik Plug for Power/Ground
I lost minimal trunk space with this setup and can stack things on top of the box without fear of damaging the speaker. In a pinch I can unplug the power and RCAs and remove the enclosure and amp.
THE POWER AND GROUND WIRES IN MOST AMP KITS ARE BARELY LONG ENOUGH FOR THE BRONCO. YOU'RE BETTER OFF BUYING YOUR OWN POWER/GROUND CABLES. The kicker power cable is 17', which is enough to get to the middle of the trunk. If you want to mount on the passenger side panel, I'd order 25'. Ground I would go with 10'. That is more then enough for both; cable is cheap and I'd rather have a little extra.
EDIT #1: I decided to remove the trunk panels myself for the sub install. Between the good instructions (attached) and some patience, I figured I would do a more careful job than the stereo shop. It isn't particularly hard, just take your time and use a good set of interior trim removal tools. You WILL snap a couple of these two piece clips no matter how careful you are, order TWO sets (they come in packs of 4). Most online retailers sell them for $5 a pack. Your dealer will charge you $30
[Factory 2-piece clips]
Since I still had the front driver kick panel off from replacing the 6.5" speakers, I figured I might as well pull the power and bass control remote knob wires myself. Once you have the trunk panels and driver kick panel off, it's very easy. Cut a hole in the grommet to the engine bay and it is easy enough to snake them along the driver side channel. I used a coat hanger to pull the wires between the front driver door and rear driver door to avoid having to pull that A-pillar.
After I got the power/remote cables pulled to the trunk and zip tied up, I started looking for a good place to mount the Kicker amp. Surprisingly, there aren't a lot of good hidden places if you're leaving the factory sub enclosure in place. Under the rear seats doesn't fit when you fold them down. Behind the driver side trunk panel doesn't have anything besides an area all the way in the rear by the tail light but that wasn't ideal. The passenger side trunk panel doesn't work unless you remove the factory sub enclosure (which I didn't want to do because the harness I am using to tap the signal requires the factory connectors inside the sub enclosure and since the B&O amp is mounted to the sub enclosure, you'd have to fab something up to mount that amp as well). I also thought about putting the amp inside the empty sub enclosure but worried it would be difficult to secure and could rattle. Finally, anything behind one of the side panels would be difficult to access. While you shouldn't have to tinker with the amp after getting it set up, I am sure something would come loose eventually and I would be stuck tearing the trunk apart to access it.
My next thought was to mount it in the washout container beneath the trunk floor. After getting the wires run back to the trunk, the power and ground (even 8 gauge) is too thick to run beneath the carpeted floor without it buckling up. Possible, but not ideal. So I decided to use a Schosche kwikplug to create a quick disconnect system and mount the amp in the trunk next to or possibly attached to the sub enclosure).
[Schosche kwikplug]
[Ground on driver side I used]

[RCAs to factory sub enclosure for signal]
EDIT #2: A little more progress over the weekend. The Sounds Good Stereo adapter came (fits perfectly to factory harnesses -- note you'll need female to female RCA adapters (assuming both ends of your RCA cables are male).
Two pictures below, one with the cables/connector out of the sub enclosure so you can see them and one with everything tucked back in. I put a little electrical tape over them to keep them in place, but with the panels back on, they won't go anywhere and reversing it is as simple as unplugging the harnesses and plugging them back onto the factory sub. Nothing in this install involved cutting or tapping a single wire / part in the car.

Amp set and ready for the power, ground and speaker cables (just waiting for some ferrules and the scosche quick disconnect kit).
Bass knob mounted up front with gorilla glue 2-sided tape (I tried a number of thinner tape alternatives and none held up more than 24 hours):
EDIT #3:
Sub install wrapped up. I ended up doing the entire thing myself, which is somewhat impressive (for me) since I haven't changed the oil on a car in 20+ years. I still need to trim the speaker wire and ordered some cable sleeve for the power, ground, rca's and remote wire. Very happy with the quick disconnect power/ground adapter from Schosche. My first time using ferrules and I highly recommend them. Makes a much cleaner fit and no loose strands sticking out. I used some heat shrink tubing to form an even tighter connection.
Crutchfield Ferrules
Amazon Heat Shrink
Banana Plugs (sub enclosure connection)
Still not sure how I want to "mount" the amp.
Before putting the interior back together:
Interior back together (snapped another one of those cheap two piece clips putting the passenger side panel on):
Final sub install pics:
[Quick disconnect harness for power / ground. The other wire that splits off from it is the RCAs and remote wire concealed in the cable sleeve.]
[Harness/wires tucked behind the box:]
[View from the back of the truck:]

Conclusion
Someone looking for a more budget friendly alternative could replace only the front three 4" speakers and add a Kicker HS10 powered sub. For ~$500 that stereo would satisfy most and probably be 90% as good as what I did.
I hope some of this is helpful to other people. While annoying that the factory radio is as underwhelming as it is, for between $500 and $1,500 you can turn it into something that most will be happy with without replacing the factory amp. Anything more than this will require a significant jump in budget as you'd need the $800 NavTV unit to replace the B&O amp and a 4-channel amp for the mids/highs which goes beyond the DIY scope for most people.
For those that don't want to read the entire post. The front 3 dash speakers are a must, the rear pod 4" speakers are optional, the front 6.5" speakers I would not replace and the sub I highly recommend replacing. All just my 2 cents.
Sponsored
Attachments
-
1.8 MB Views: 202
Last edited: