- First Name
- Brian
- Joined
- Sep 14, 2023
- Threads
- 62
- Messages
- 8,413
- Reaction score
- 14,873
- Location
- Central CA
- Vehicle(s)
- '23 BB 4dr 7MT, '22 BSport OBX, '87 B-II XL
- Your Bronco Model
- Big Bend
- Thread starter
- #1
https://performanceparts.ford.com/part/M-1830-BRC
So I burned my 20% Bronco code, and some Ford Pass points I had laying around.
This is not the new brushless system, but the older dual motor setup.
I just got it delivered today, I have some notes. Haven't powered it up quite yet, but will update once I get it running
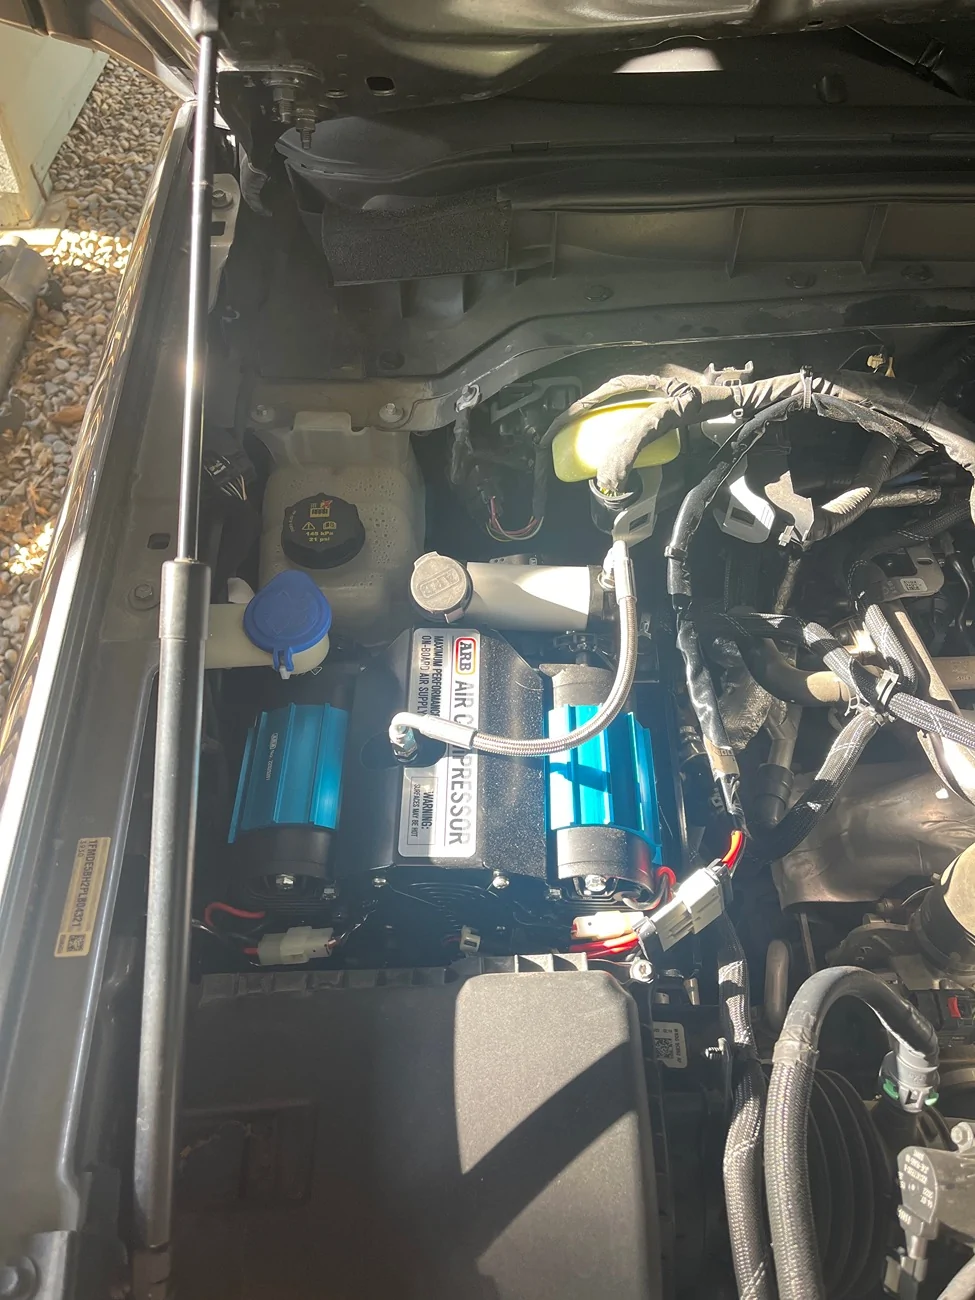
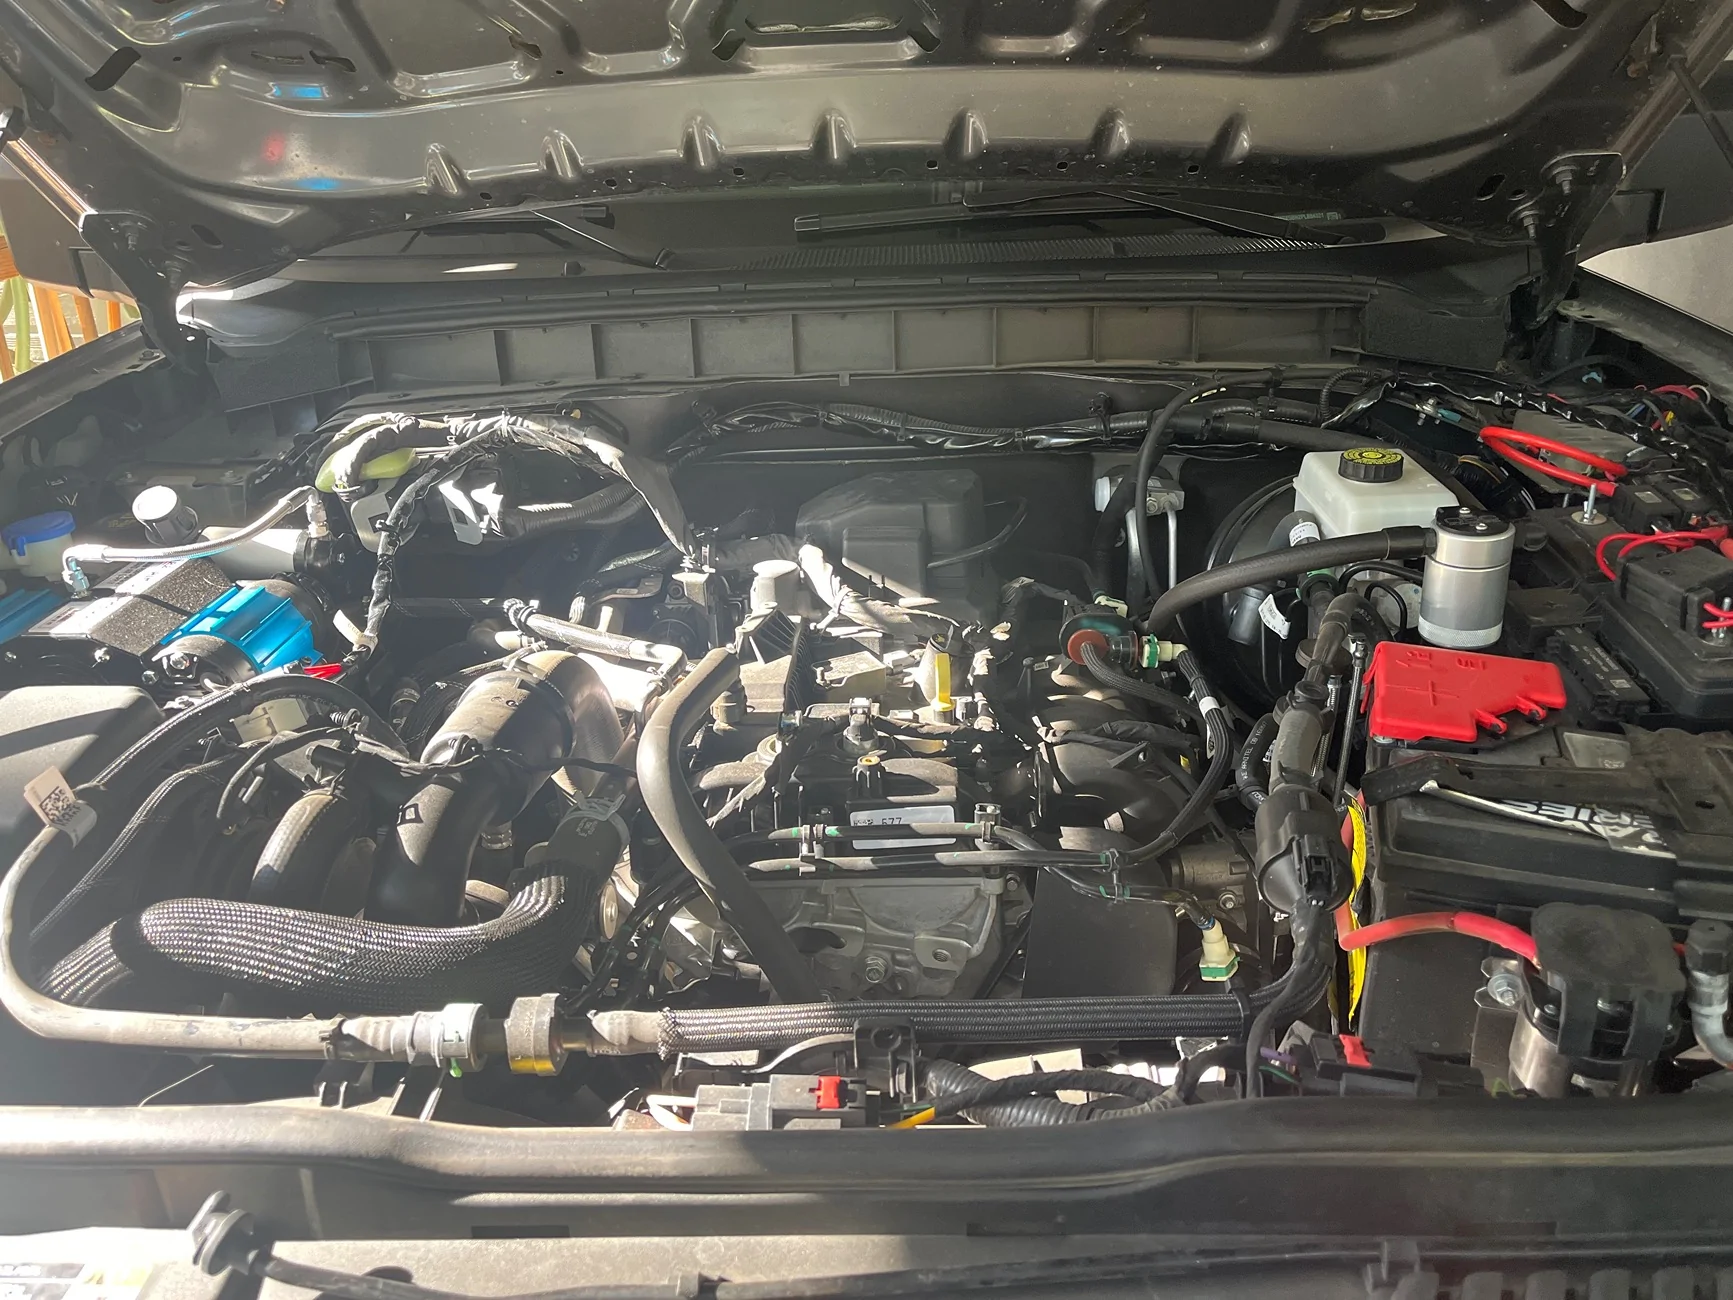
The kit includes the twin compressor, underhood mounting bracket, the manifold kit, a high temp air hose kit, and standard wiring harnesses.
The mounting bracket is pretty stout. It replaces the existing AWD module mounting bracket behind the air filter. Installation isn't too bad but the instructions do gloss over a few steps, and the included photographs are pretty hard to decipher. Once you start digging into it though, the only thing I missed was a bracket on the firewall that helps hold the fender liner in - the kit came with a new one, but I missed where it said to replace the factory bracket with the included bracket. With the factory bracket the hole ends up a bit out of place, I had re-drilled a new hole in the factory bracket to line things back up, and once I was done was looking at this extra bracket trying to figure out wtf.
Also it doesn't exactly tell you to re-land the ground for the AWD module when you re-install it, which seems fairly important.
Some of the brackets are a bit awkward to get at the bolts, but everything fitted up relatively well once you get through the awful pictures.
I was missing 1 m6 bolt, but had extra flange nuts, so... I guess that all works out? Fortunately there are m6 bolts from the AWD bracket that I could just throw in there, so no harm no foul I guess.
The wiring. The kit comes with the "official Ford Performance" instructions, the standard dual compressor instructions, and the manifold kit instructions. It's clear as mud exactly how they want you to wire this thing, and it comes with 3 different harnesses and a switch that all look like octopi during mating season.
There is, fortunately, a decent overall diagram inside the Compressor instructions. Once I got that, what the Ford Performance instructions were asking me to do made more sense - basically, you throw out 2/3 of the harnesses. it comes with the wiring for front/rear locker solenoids and their associated activation switches, and one of the harnesses isn't pinned in the plug so you can more easily route it via the firewall.
Well, you throw all of that out anyway (unless you have air lockers...). You end up cutting one of the harnesses up, and one harness just doesn't get used at all, and you still have to provide a +12V ACC wire and add-a-tap of your own - which isn't exactly clear in the instructions. They do tell you which fuse you should tap into for +12 ACC, but the do not provide the wire or an Add-A-Tap fuse adapter.
The main power leads are a bit concerning. It has dual power 8AWG +12V lines, each with a 40A fuse. I presume one for each motor. But it only has a single 8AWG main ground line and a #18 ground for the switch, which is run with the main power lines, and Ford Performance instructs you to crimp on a fitting and install them on the battery terminals (both + and -). But they didn't provide any lugs. So ... that's why I don't have this thing running yet. I had #6 and #4 and #10 and #12, but no #8 lugs. So I have to get some #8 lugs, and then figure out where to land these amongst all my other wiring messes.
So... 8/10 for mechanical. The bracket went together fairly well, there were some bolts/nuts that were pretty awkward to get at, and 1 missing bolt - but about 3 hours and I had everything mounted.
But.. 2/10 for electrical. This kit is entirely half-assed on the electrical side, and missing many pieces you need to make it work out of the box. It would almost have been easier if they just had a terminal strip and told you to just provide your own wire and a diagram that showed you where to land it.
Thankfully, between the discount and Ford Pass points, it was just under $400, but I haven't exactly seen it run yet to tell if it was worth even that or not. Keeping my fingers crossed once I get the appropriate lugs to finish up the wiring.
So I burned my 20% Bronco code, and some Ford Pass points I had laying around.
This is not the new brushless system, but the older dual motor setup.
I just got it delivered today, I have some notes. Haven't powered it up quite yet, but will update once I get it running
The kit includes the twin compressor, underhood mounting bracket, the manifold kit, a high temp air hose kit, and standard wiring harnesses.
The mounting bracket is pretty stout. It replaces the existing AWD module mounting bracket behind the air filter. Installation isn't too bad but the instructions do gloss over a few steps, and the included photographs are pretty hard to decipher. Once you start digging into it though, the only thing I missed was a bracket on the firewall that helps hold the fender liner in - the kit came with a new one, but I missed where it said to replace the factory bracket with the included bracket. With the factory bracket the hole ends up a bit out of place, I had re-drilled a new hole in the factory bracket to line things back up, and once I was done was looking at this extra bracket trying to figure out wtf.
Also it doesn't exactly tell you to re-land the ground for the AWD module when you re-install it, which seems fairly important.
Some of the brackets are a bit awkward to get at the bolts, but everything fitted up relatively well once you get through the awful pictures.
I was missing 1 m6 bolt, but had extra flange nuts, so... I guess that all works out? Fortunately there are m6 bolts from the AWD bracket that I could just throw in there, so no harm no foul I guess.
The wiring. The kit comes with the "official Ford Performance" instructions, the standard dual compressor instructions, and the manifold kit instructions. It's clear as mud exactly how they want you to wire this thing, and it comes with 3 different harnesses and a switch that all look like octopi during mating season.
There is, fortunately, a decent overall diagram inside the Compressor instructions. Once I got that, what the Ford Performance instructions were asking me to do made more sense - basically, you throw out 2/3 of the harnesses. it comes with the wiring for front/rear locker solenoids and their associated activation switches, and one of the harnesses isn't pinned in the plug so you can more easily route it via the firewall.
Well, you throw all of that out anyway (unless you have air lockers...). You end up cutting one of the harnesses up, and one harness just doesn't get used at all, and you still have to provide a +12V ACC wire and add-a-tap of your own - which isn't exactly clear in the instructions. They do tell you which fuse you should tap into for +12 ACC, but the do not provide the wire or an Add-A-Tap fuse adapter.
The main power leads are a bit concerning. It has dual power 8AWG +12V lines, each with a 40A fuse. I presume one for each motor. But it only has a single 8AWG main ground line and a #18 ground for the switch, which is run with the main power lines, and Ford Performance instructs you to crimp on a fitting and install them on the battery terminals (both + and -). But they didn't provide any lugs. So ... that's why I don't have this thing running yet. I had #6 and #4 and #10 and #12, but no #8 lugs. So I have to get some #8 lugs, and then figure out where to land these amongst all my other wiring messes.
So... 8/10 for mechanical. The bracket went together fairly well, there were some bolts/nuts that were pretty awkward to get at, and 1 missing bolt - but about 3 hours and I had everything mounted.
But.. 2/10 for electrical. This kit is entirely half-assed on the electrical side, and missing many pieces you need to make it work out of the box. It would almost have been easier if they just had a terminal strip and told you to just provide your own wire and a diagram that showed you where to land it.
Thankfully, between the discount and Ford Pass points, it was just under $400, but I haven't exactly seen it run yet to tell if it was worth even that or not. Keeping my fingers crossed once I get the appropriate lugs to finish up the wiring.
Sponsored