- Joined
- Apr 14, 2023
- Threads
- 1
- Messages
- 382
- Reaction score
- 475
- Location
- Fullerton CA
- Vehicle(s)
- Bronco
- Your Bronco Model
- Black Diamond
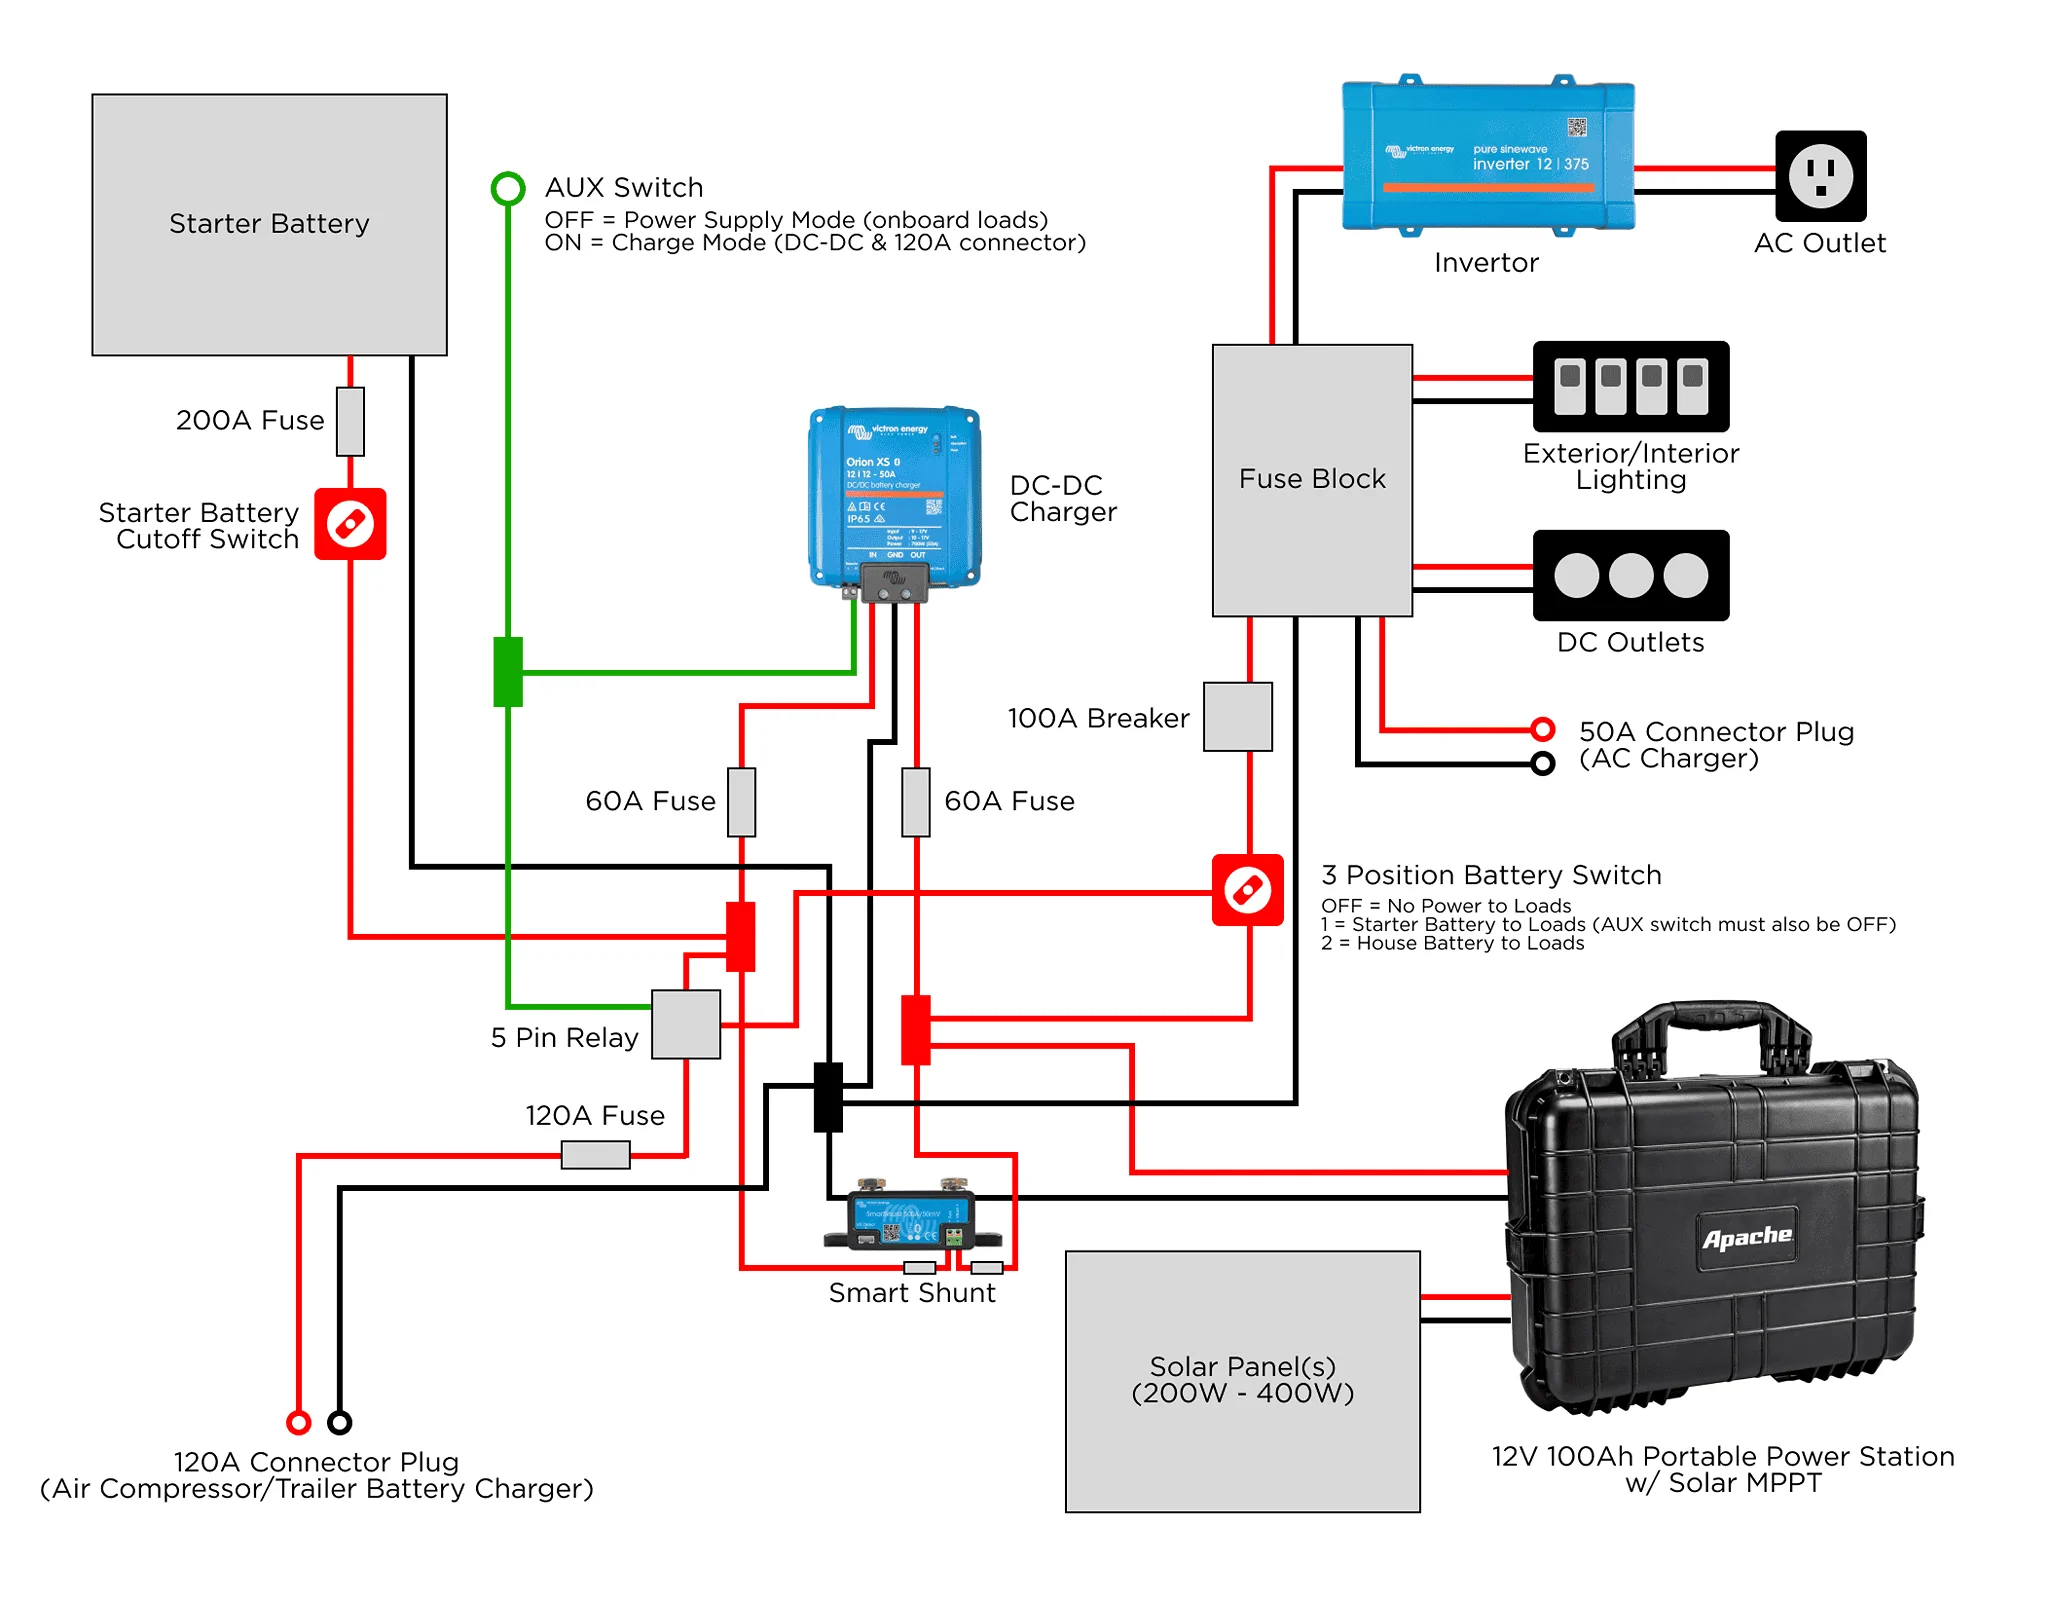
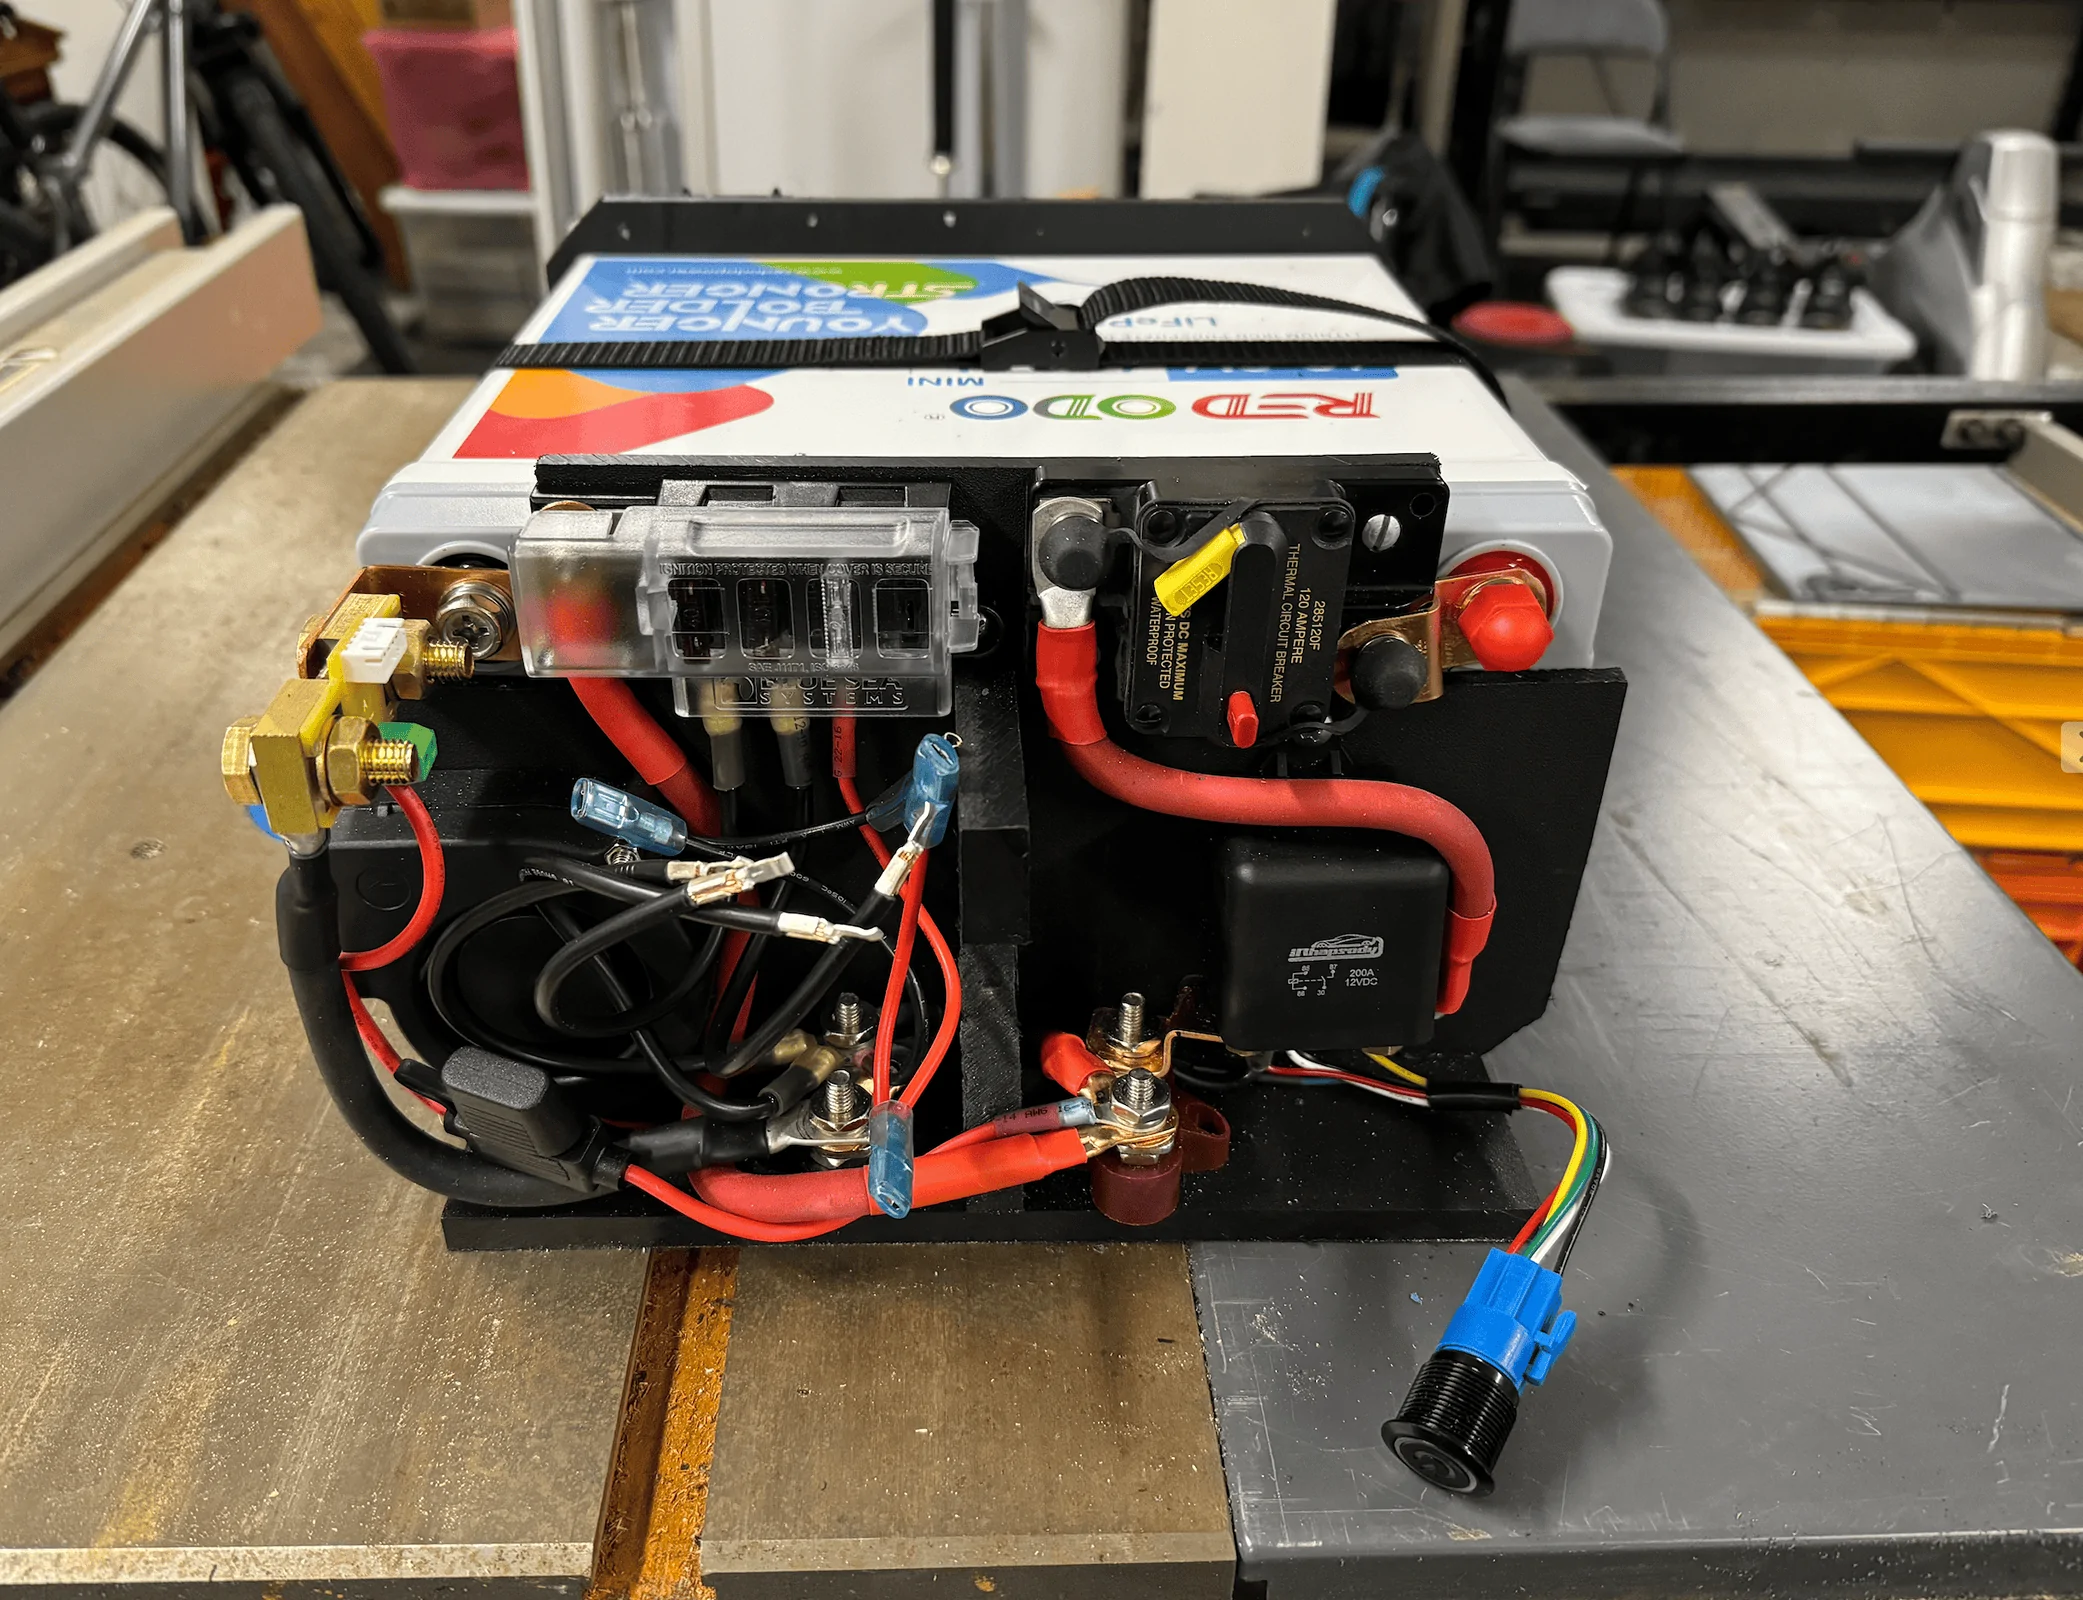
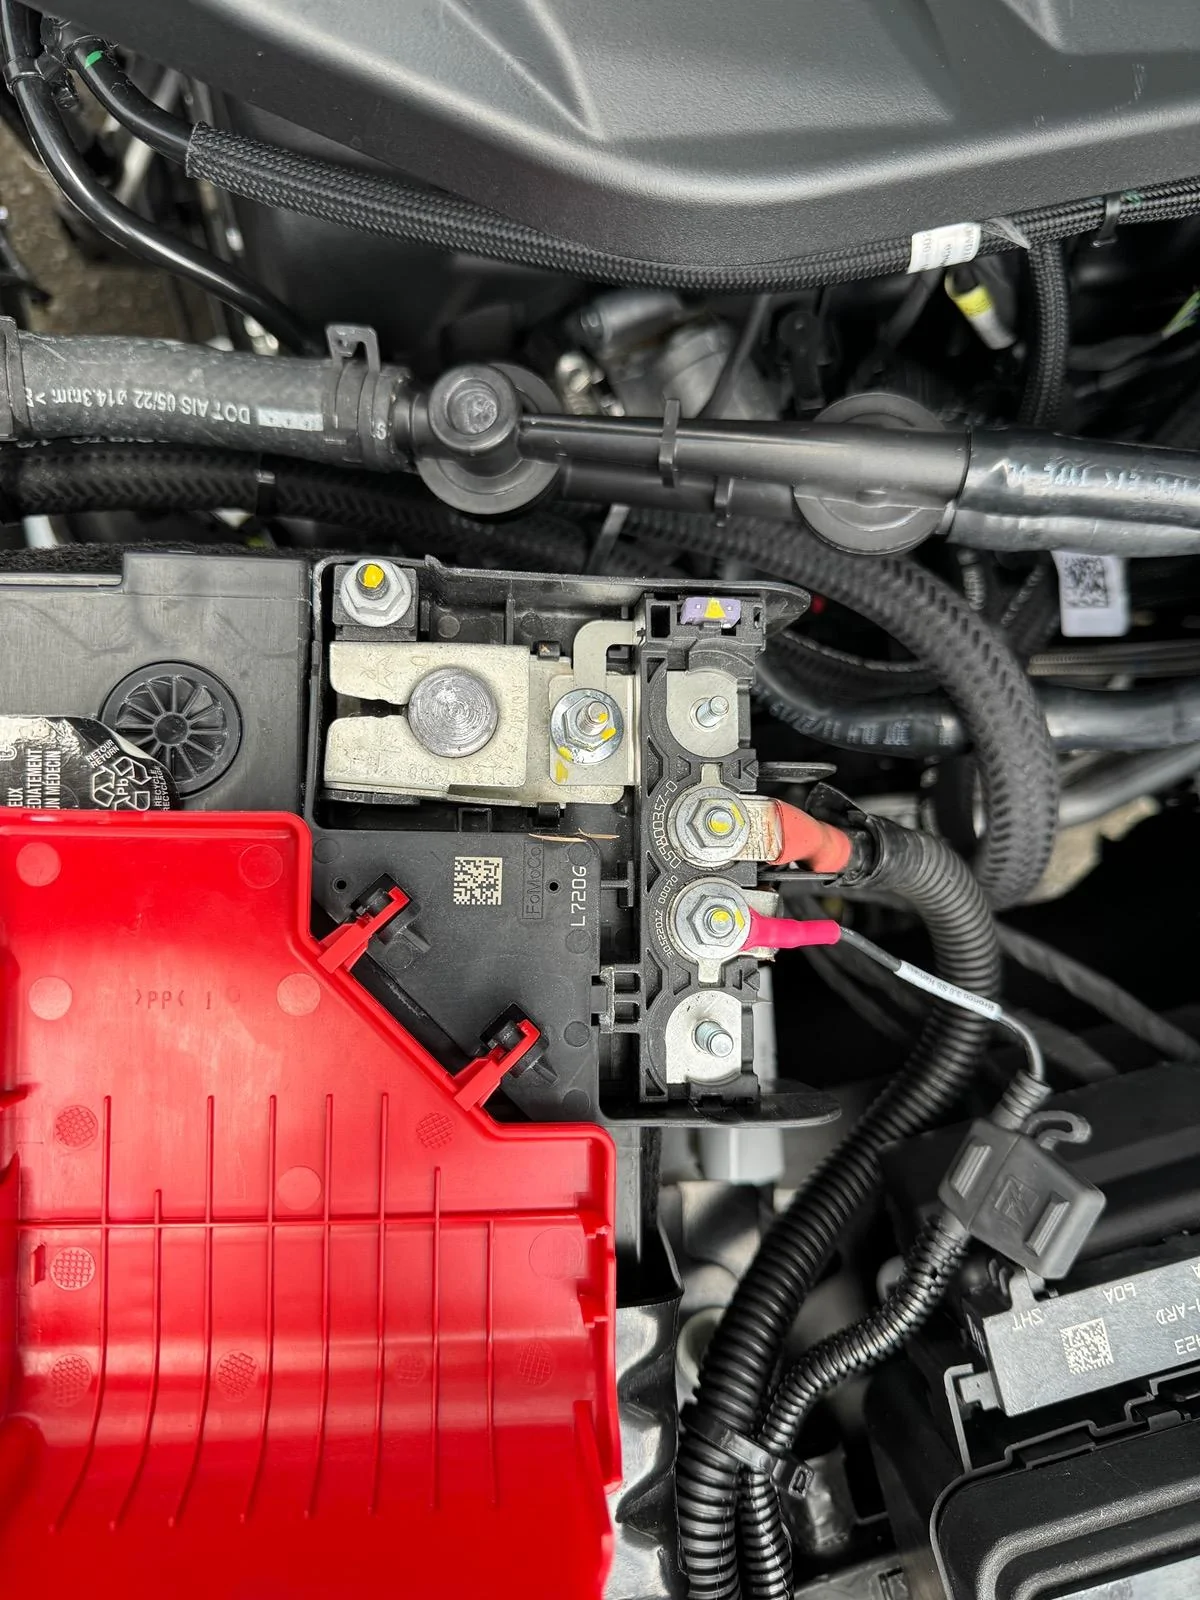
Aw cool, didn't know that rule of thumb...just know that the alternator can be stressed out.Good rule of thumb is to size the DC-DC charger at 25% of your alternator's max rating. At 50A, that's well below the 25% threshold of the 250A alternator that came with the Bronco.
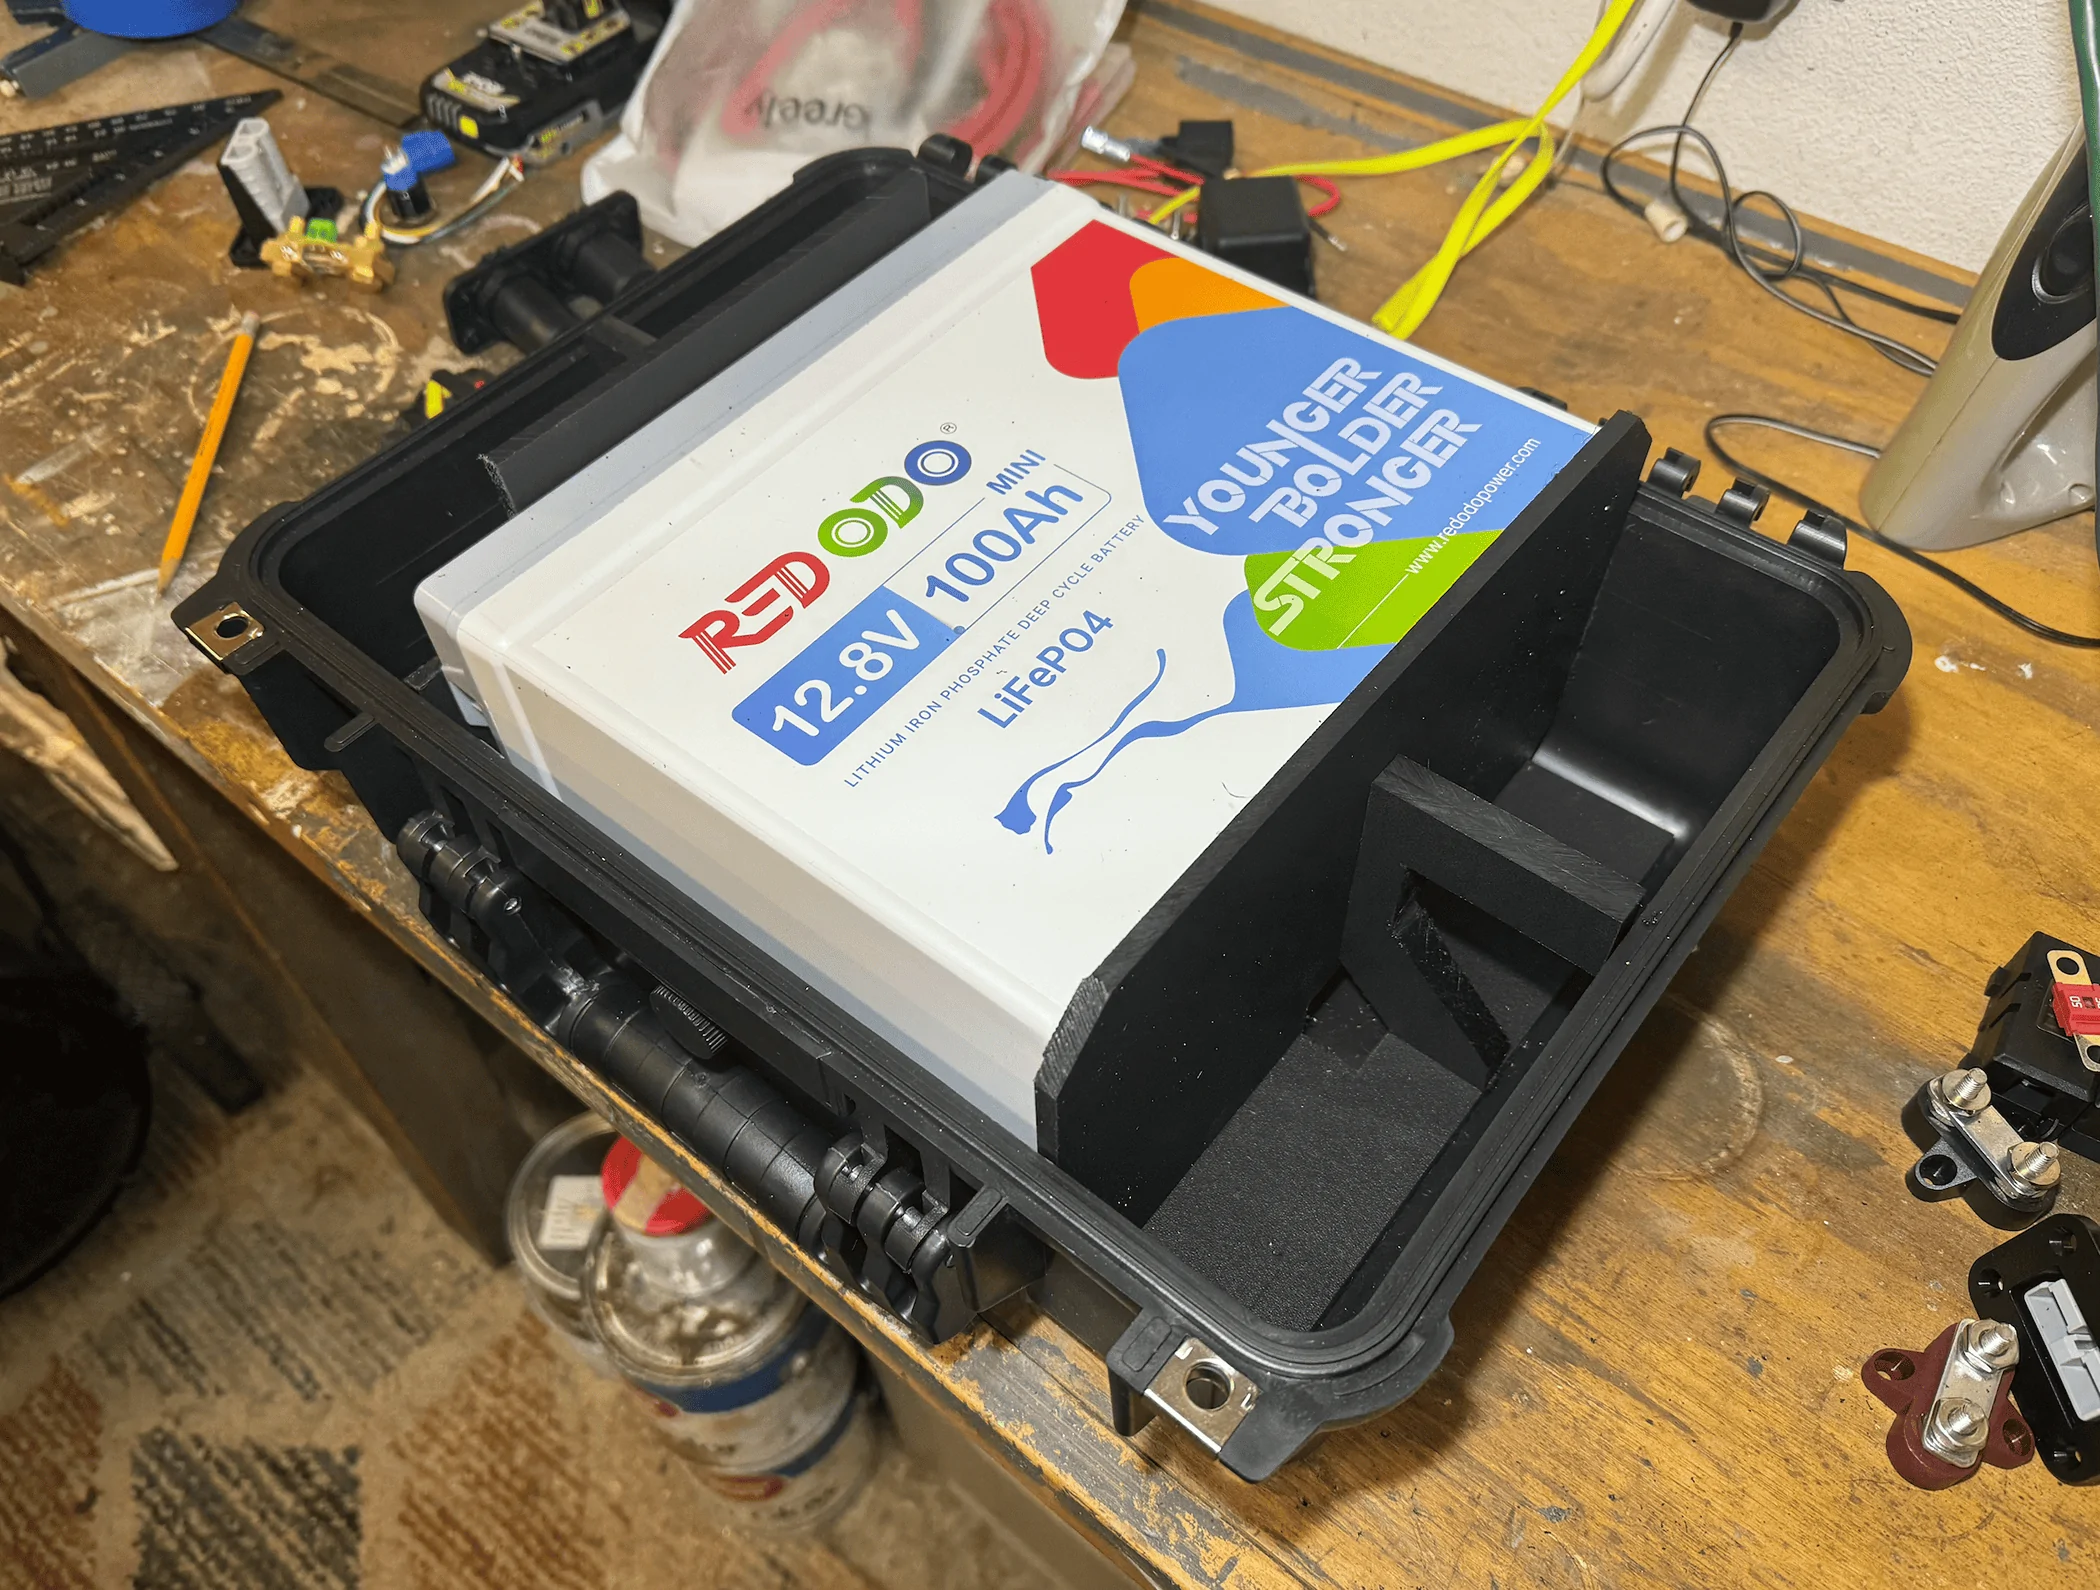
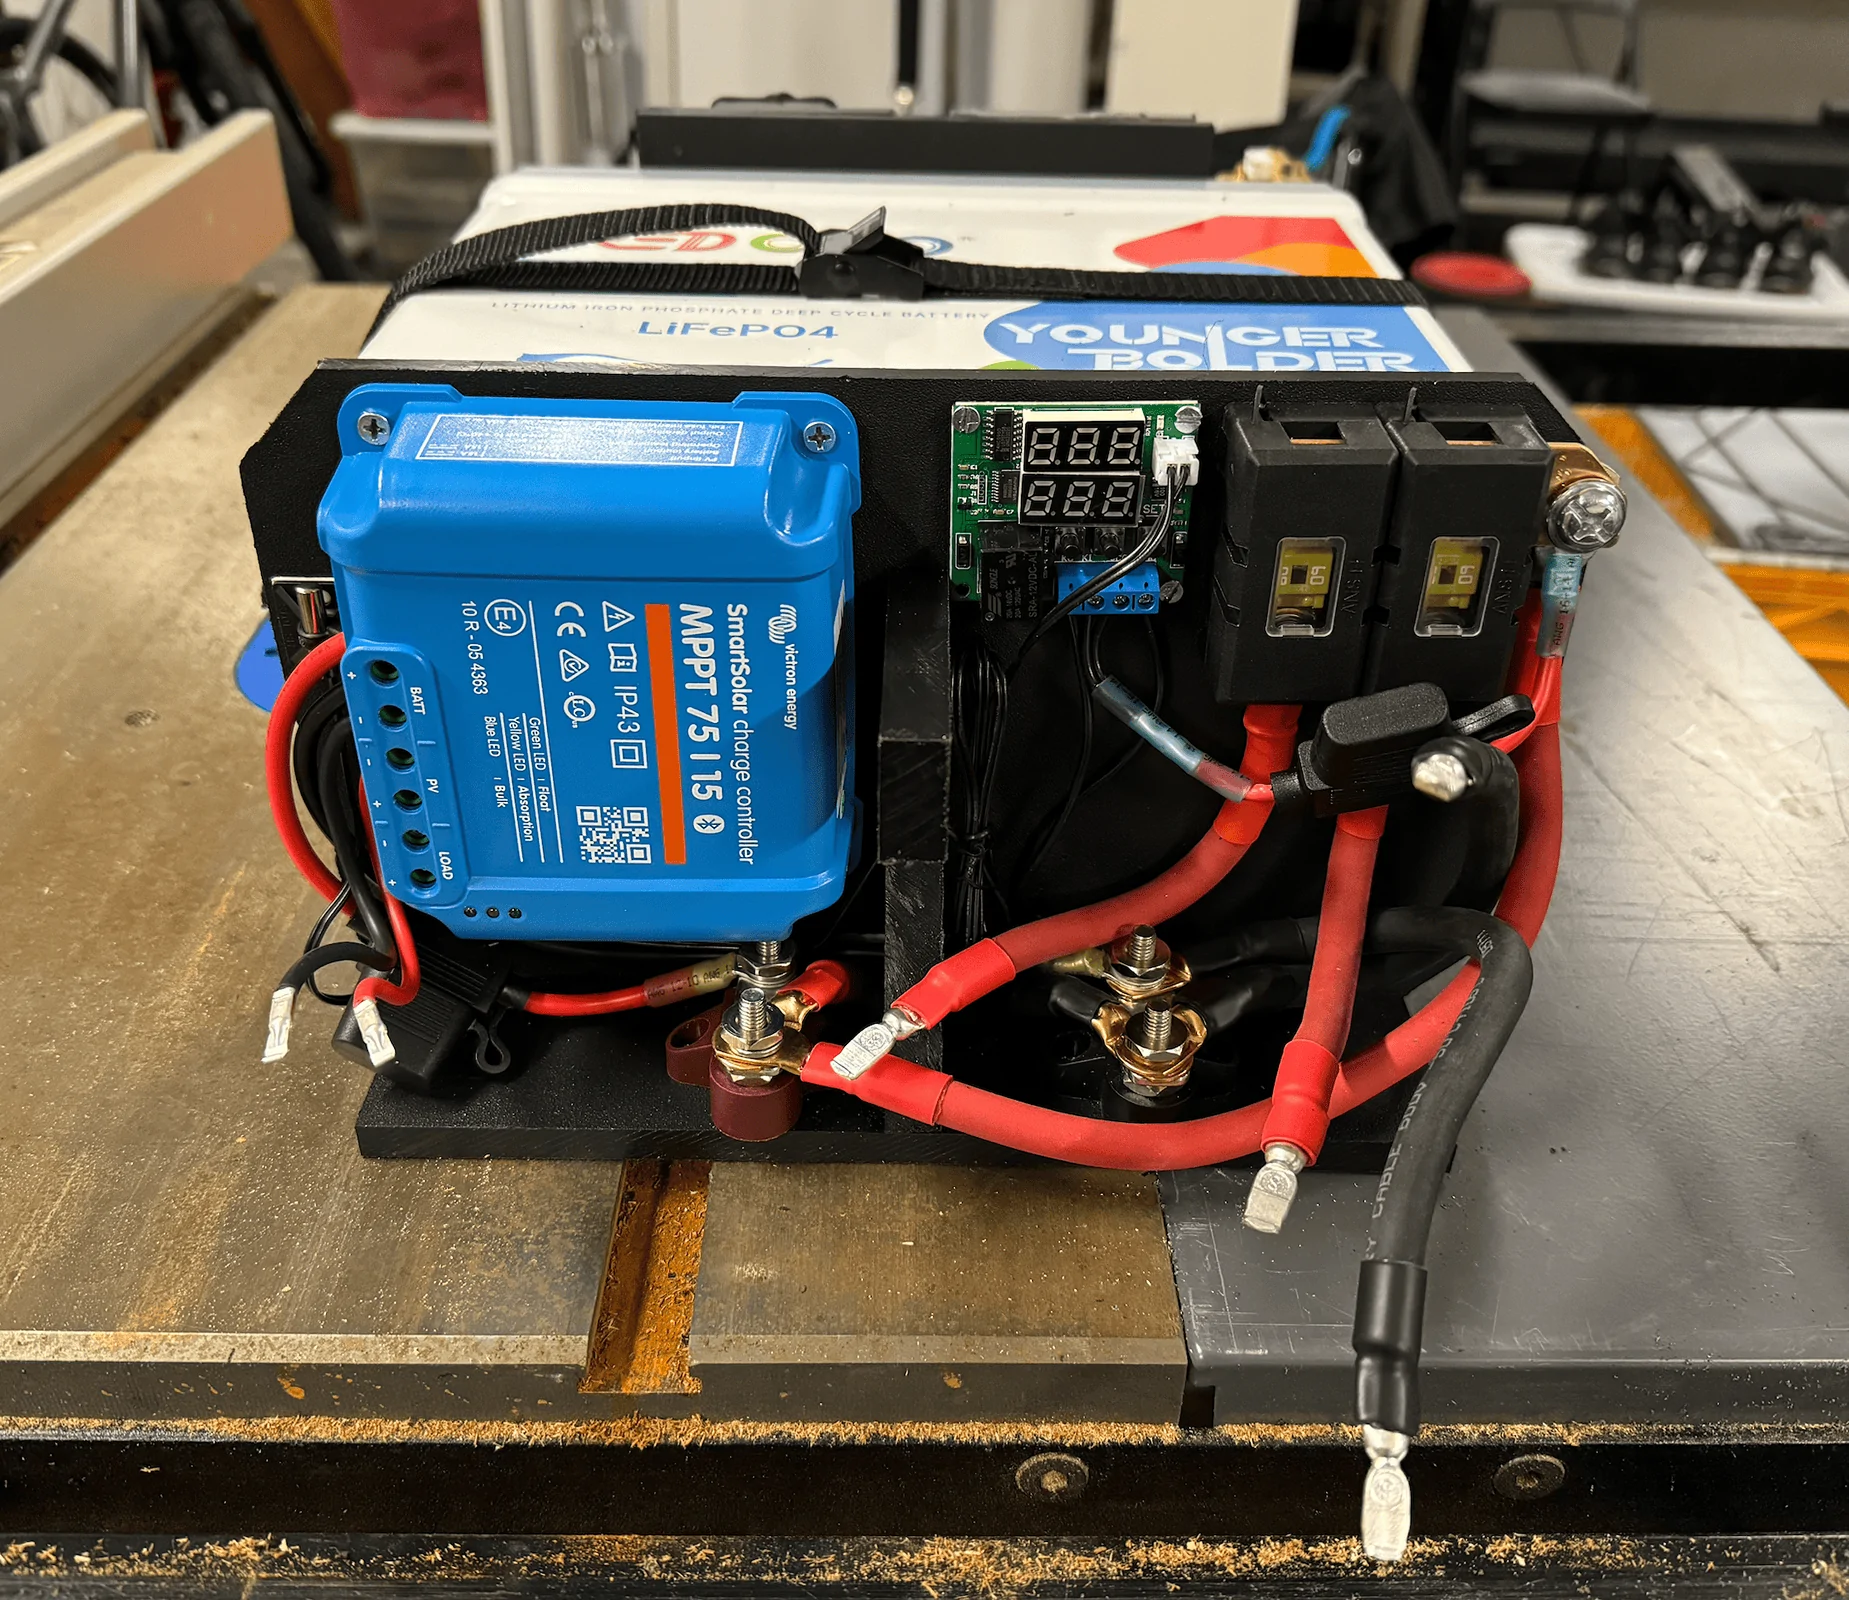
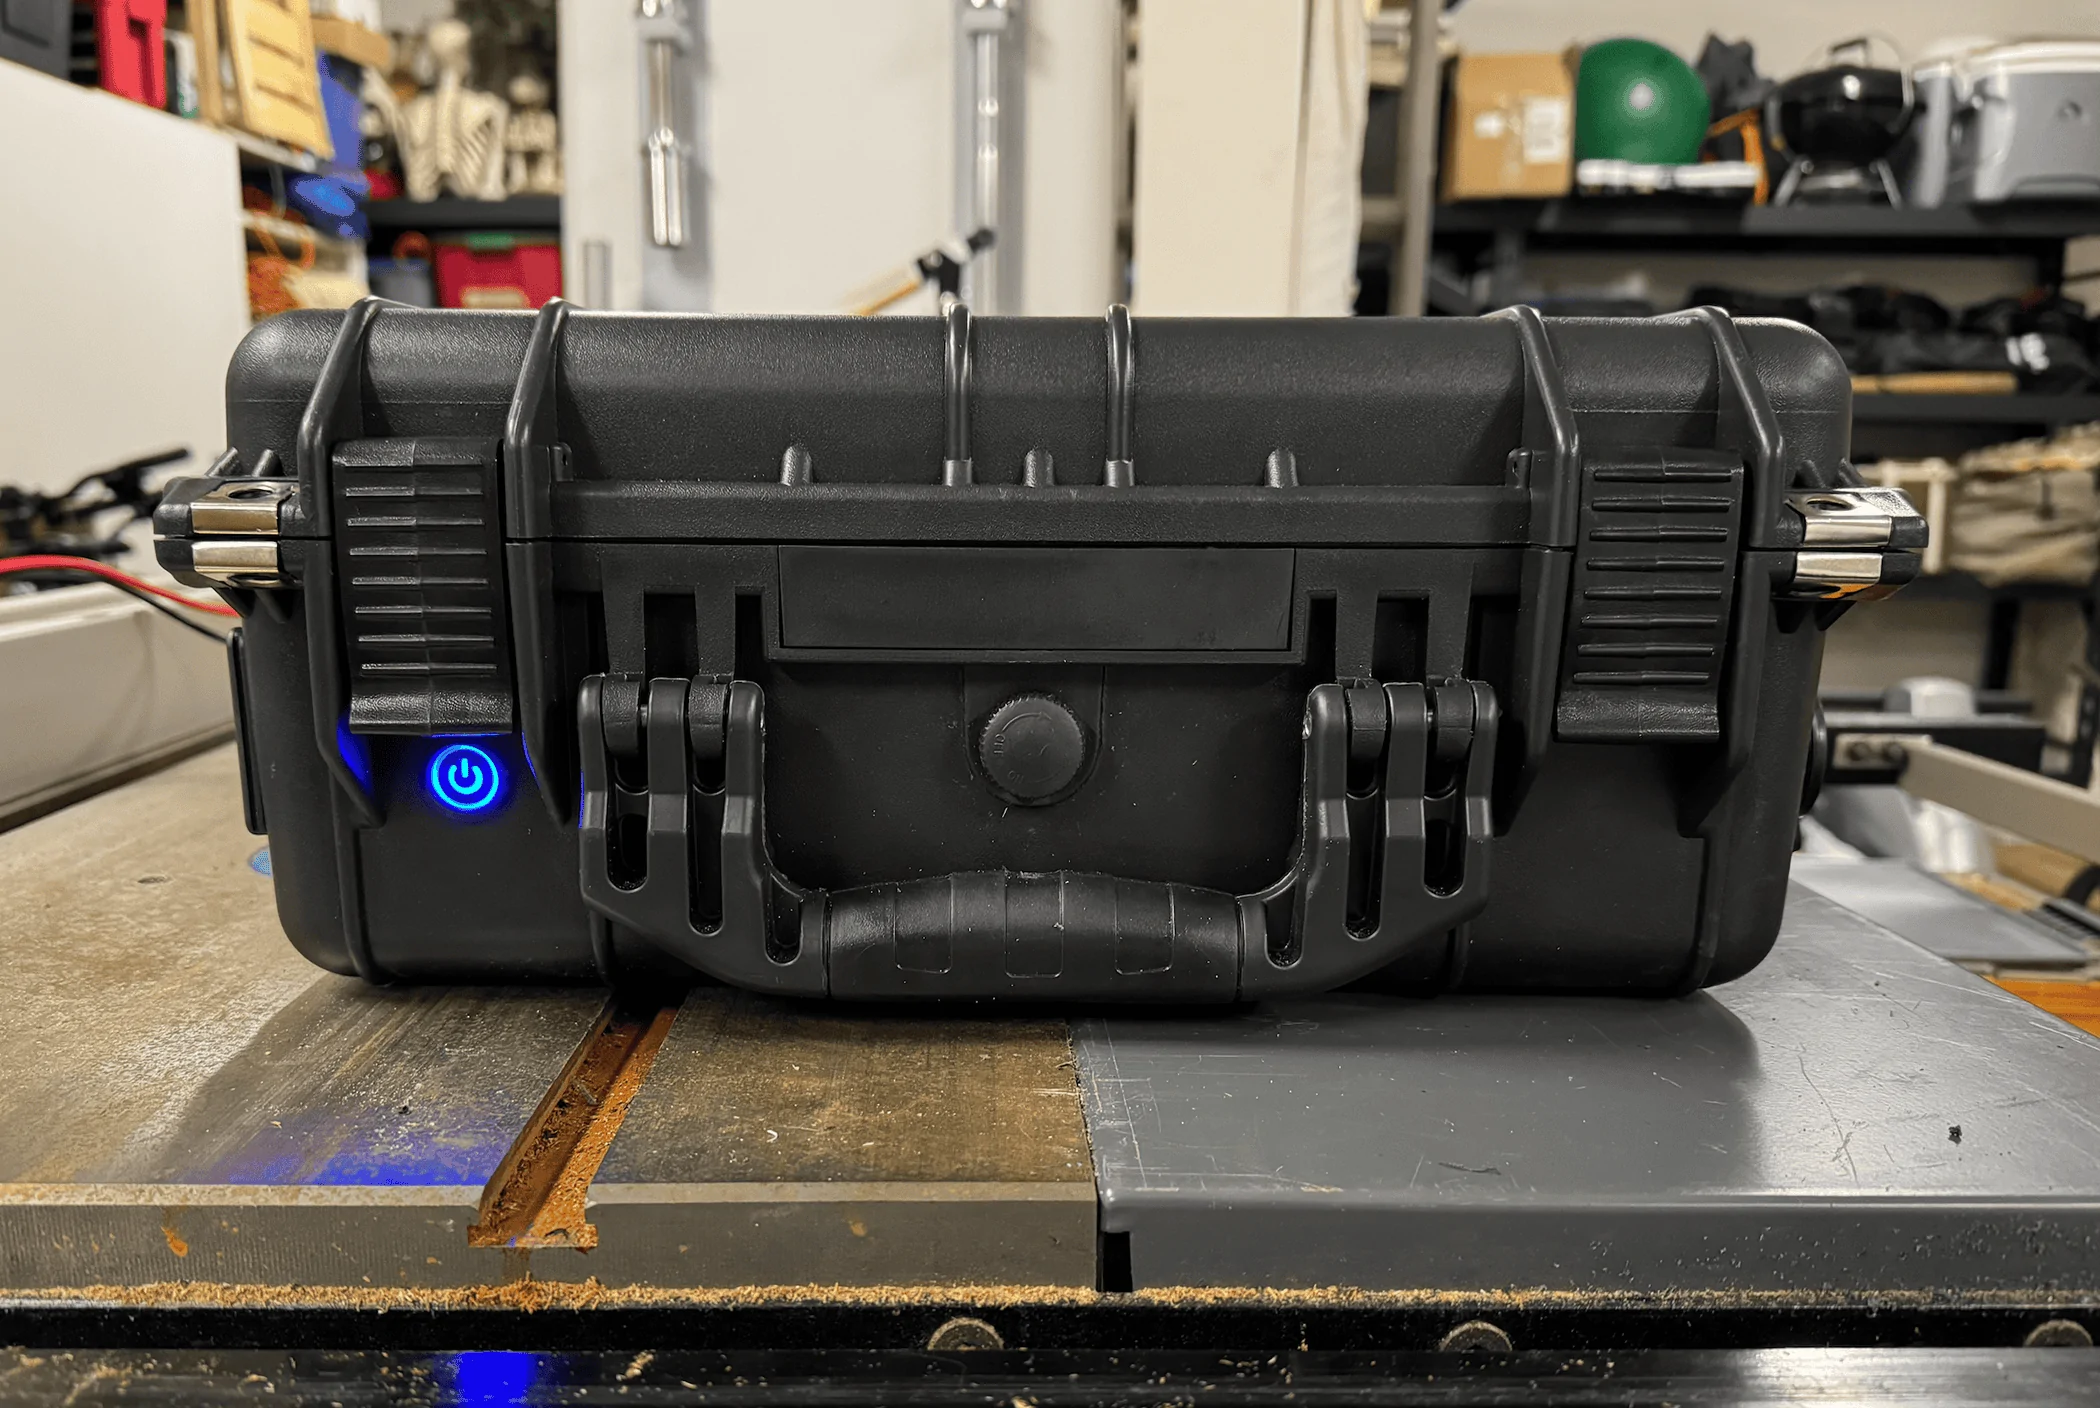
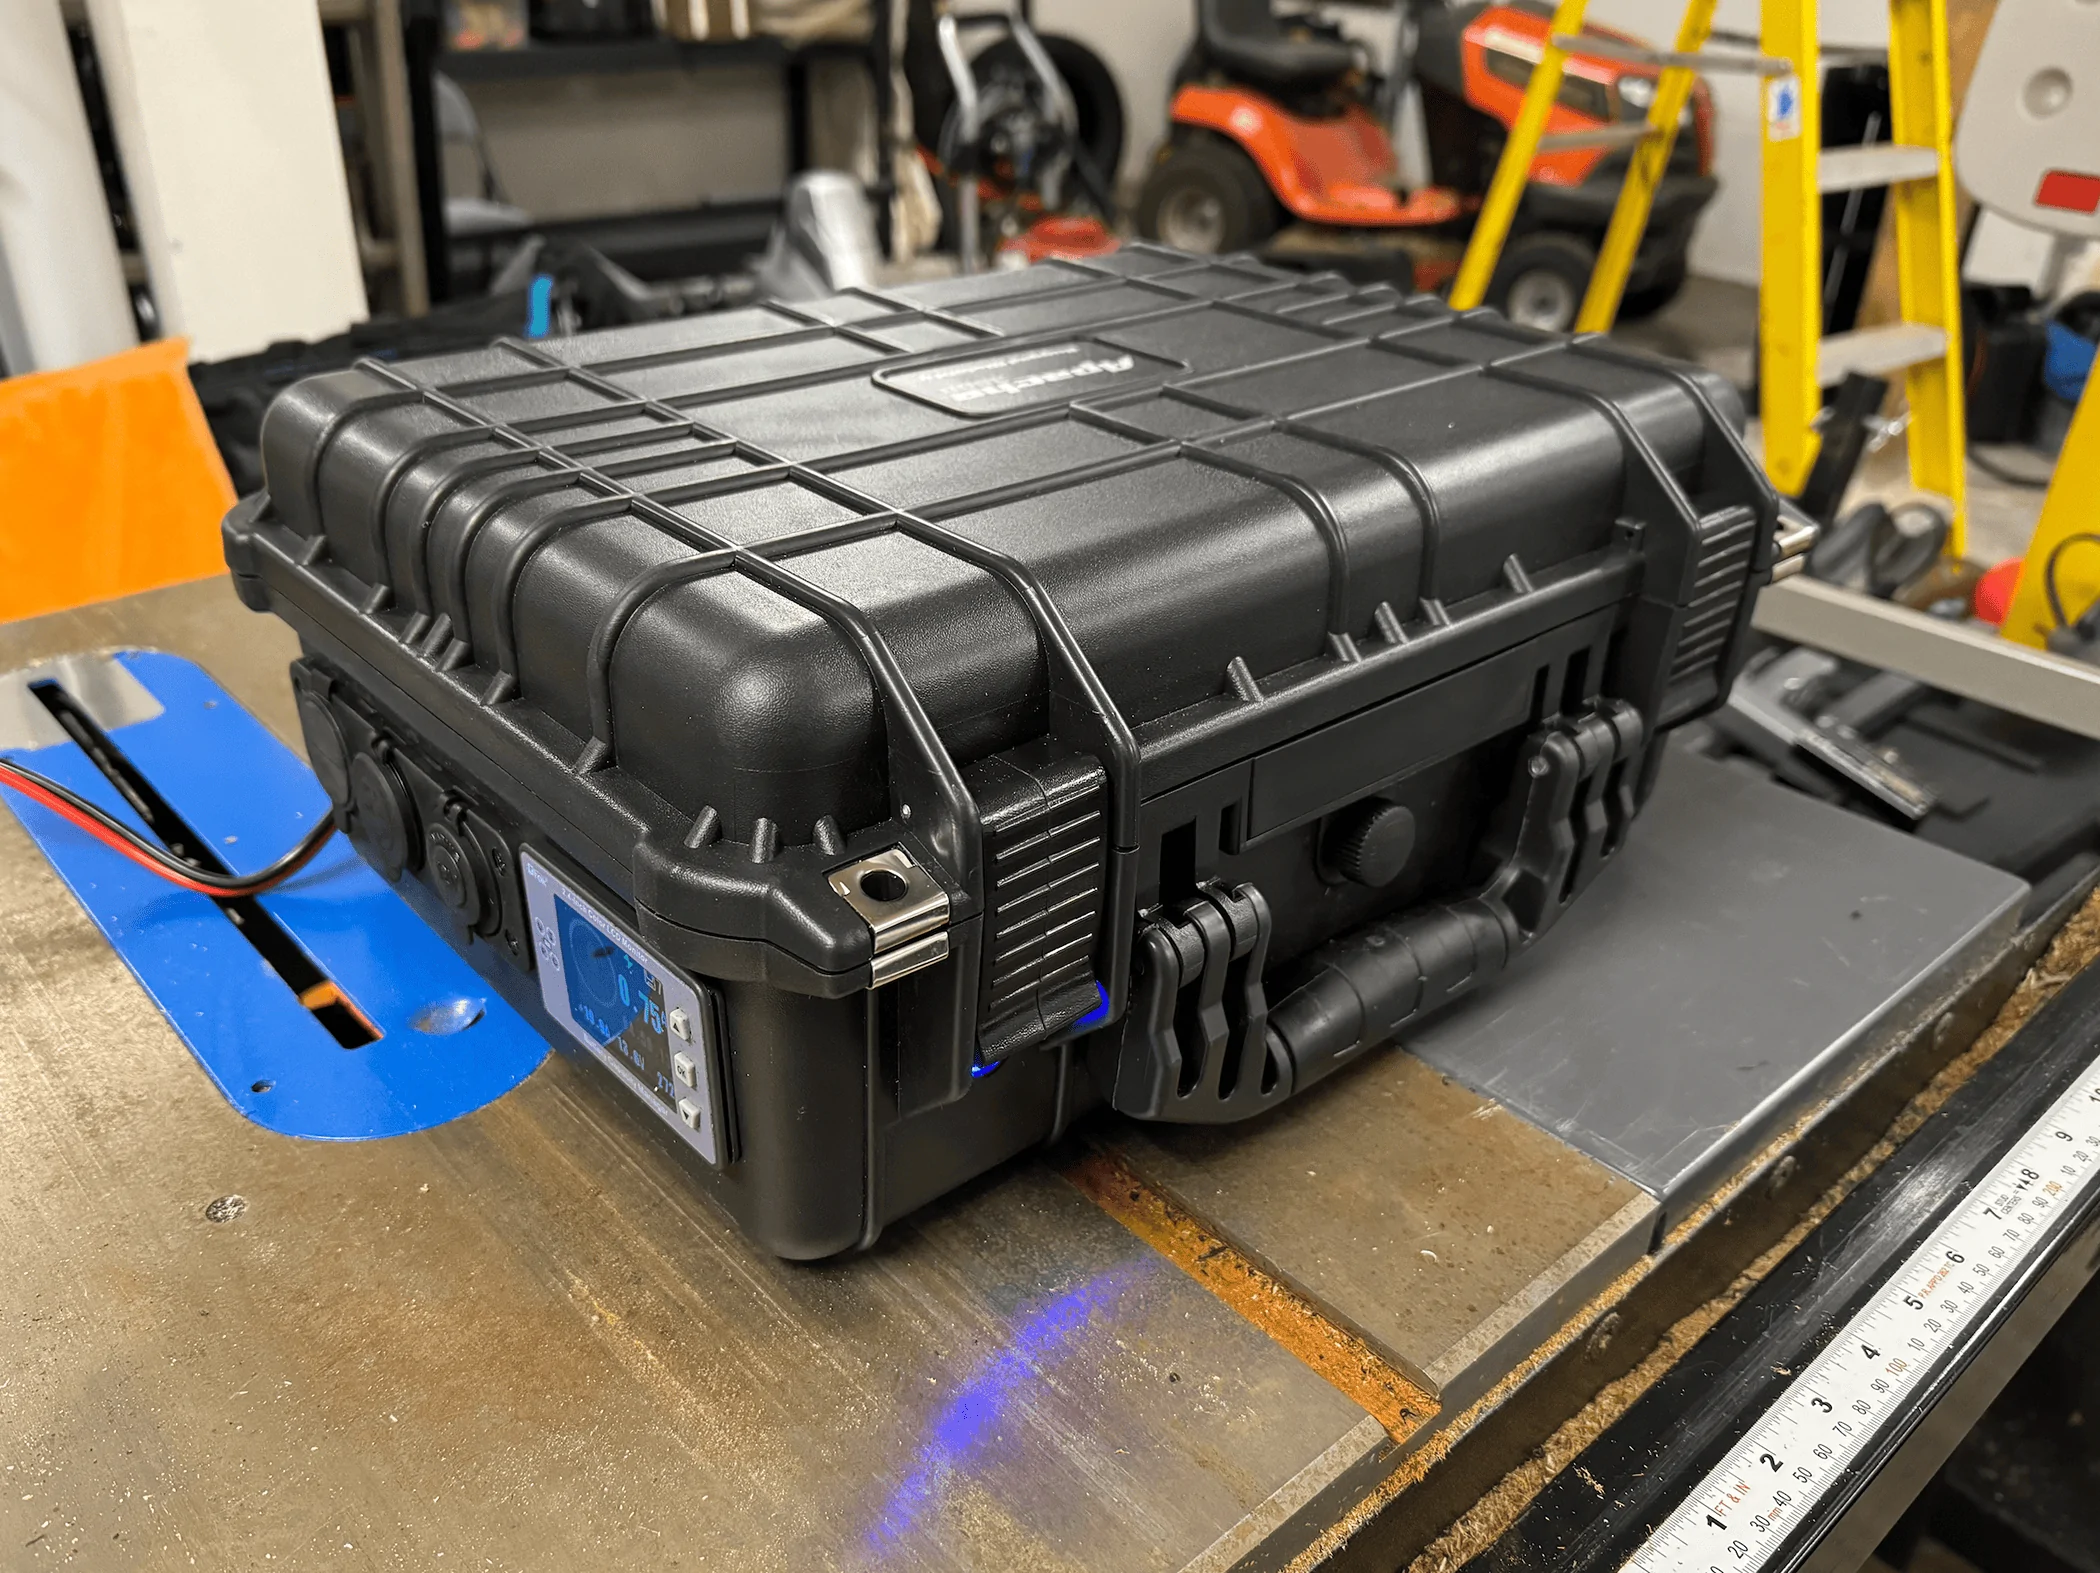
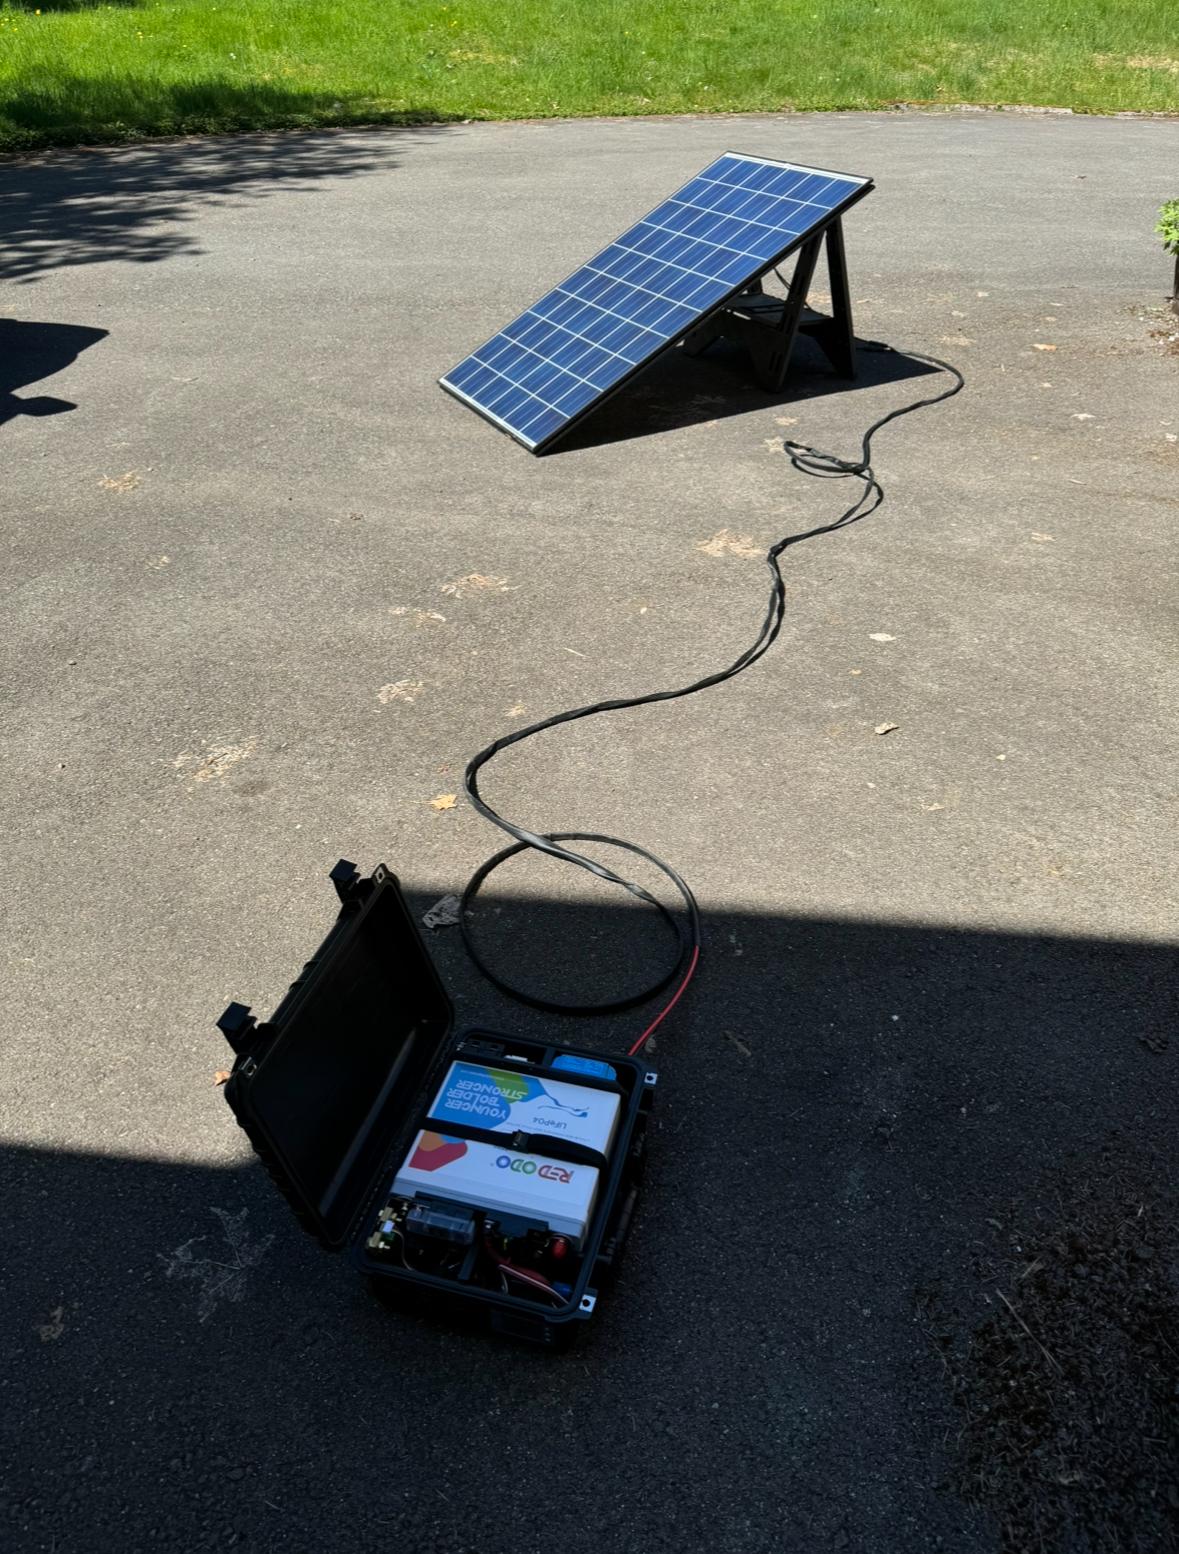
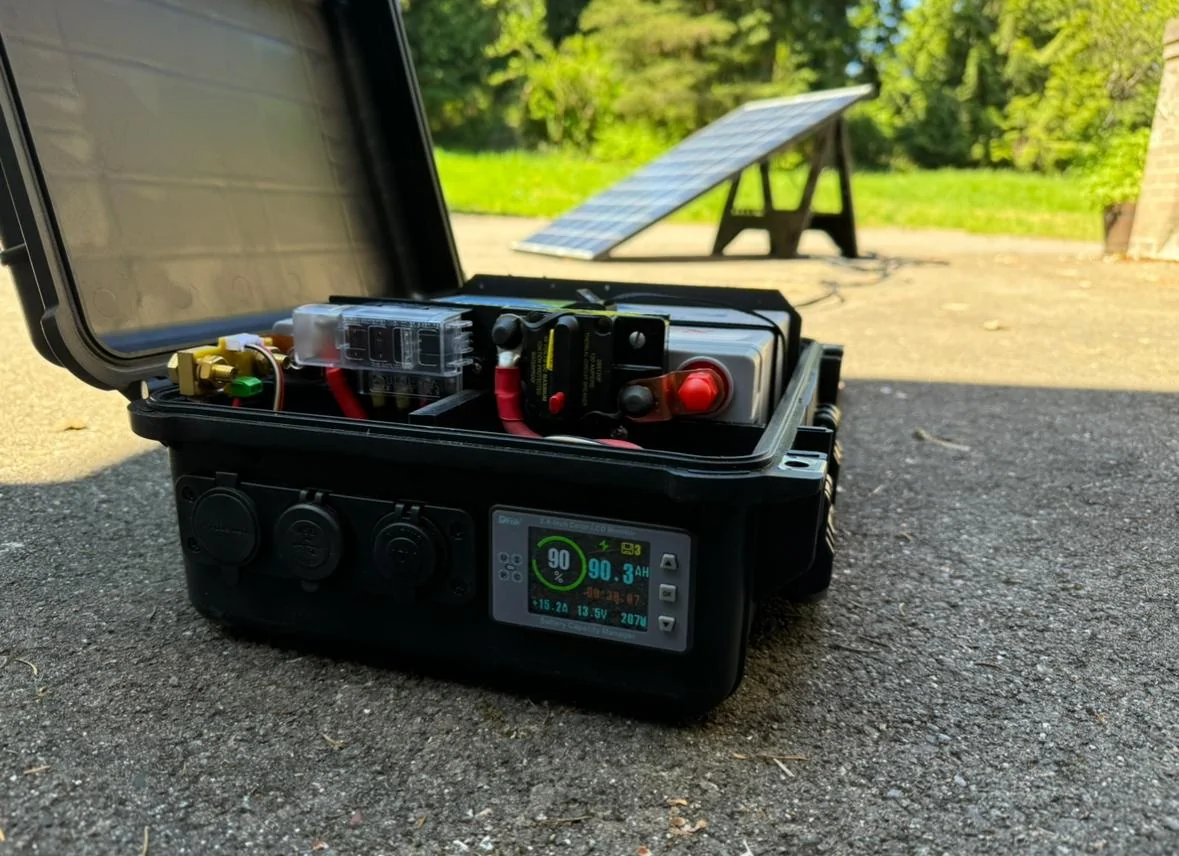
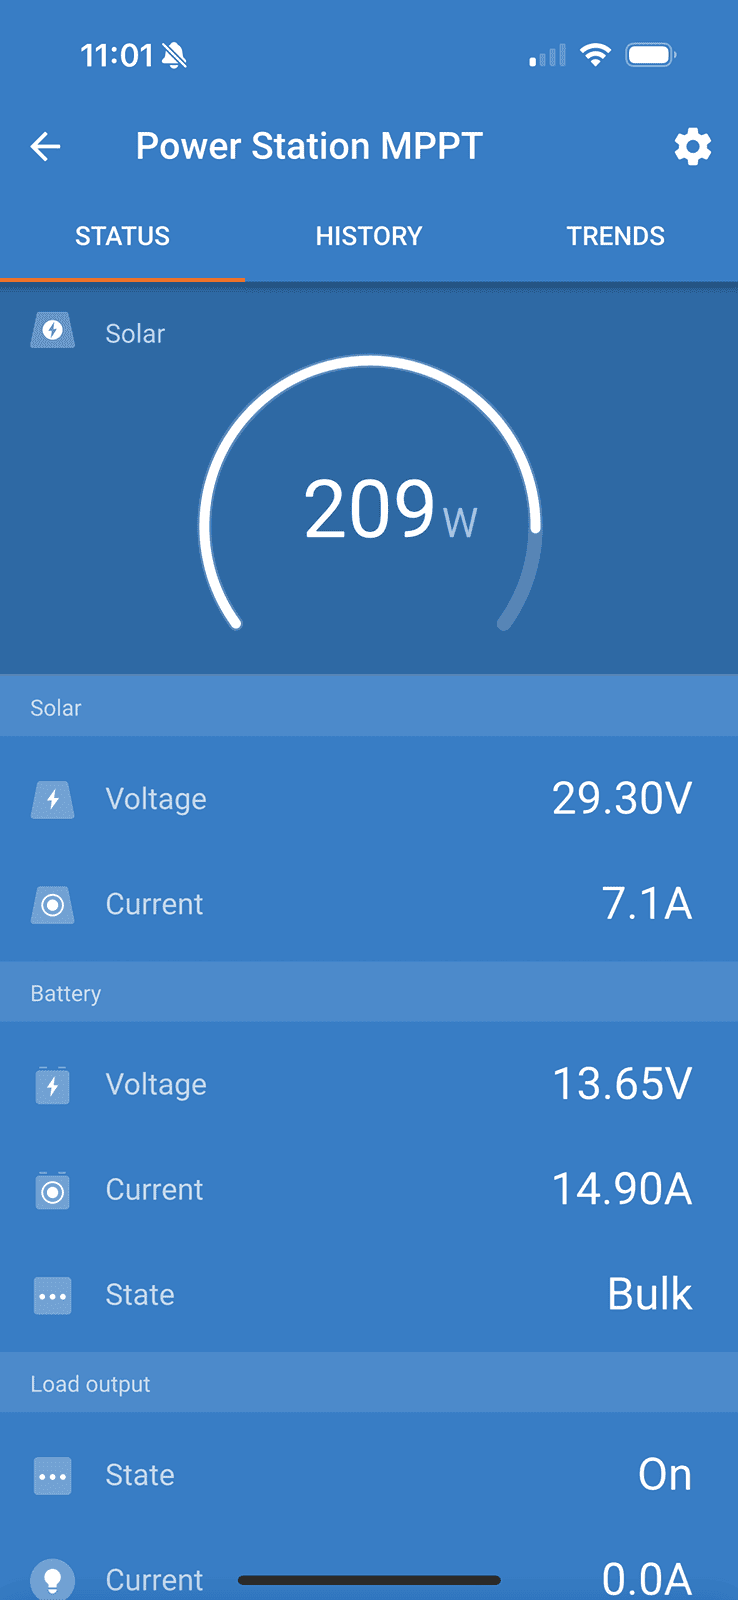
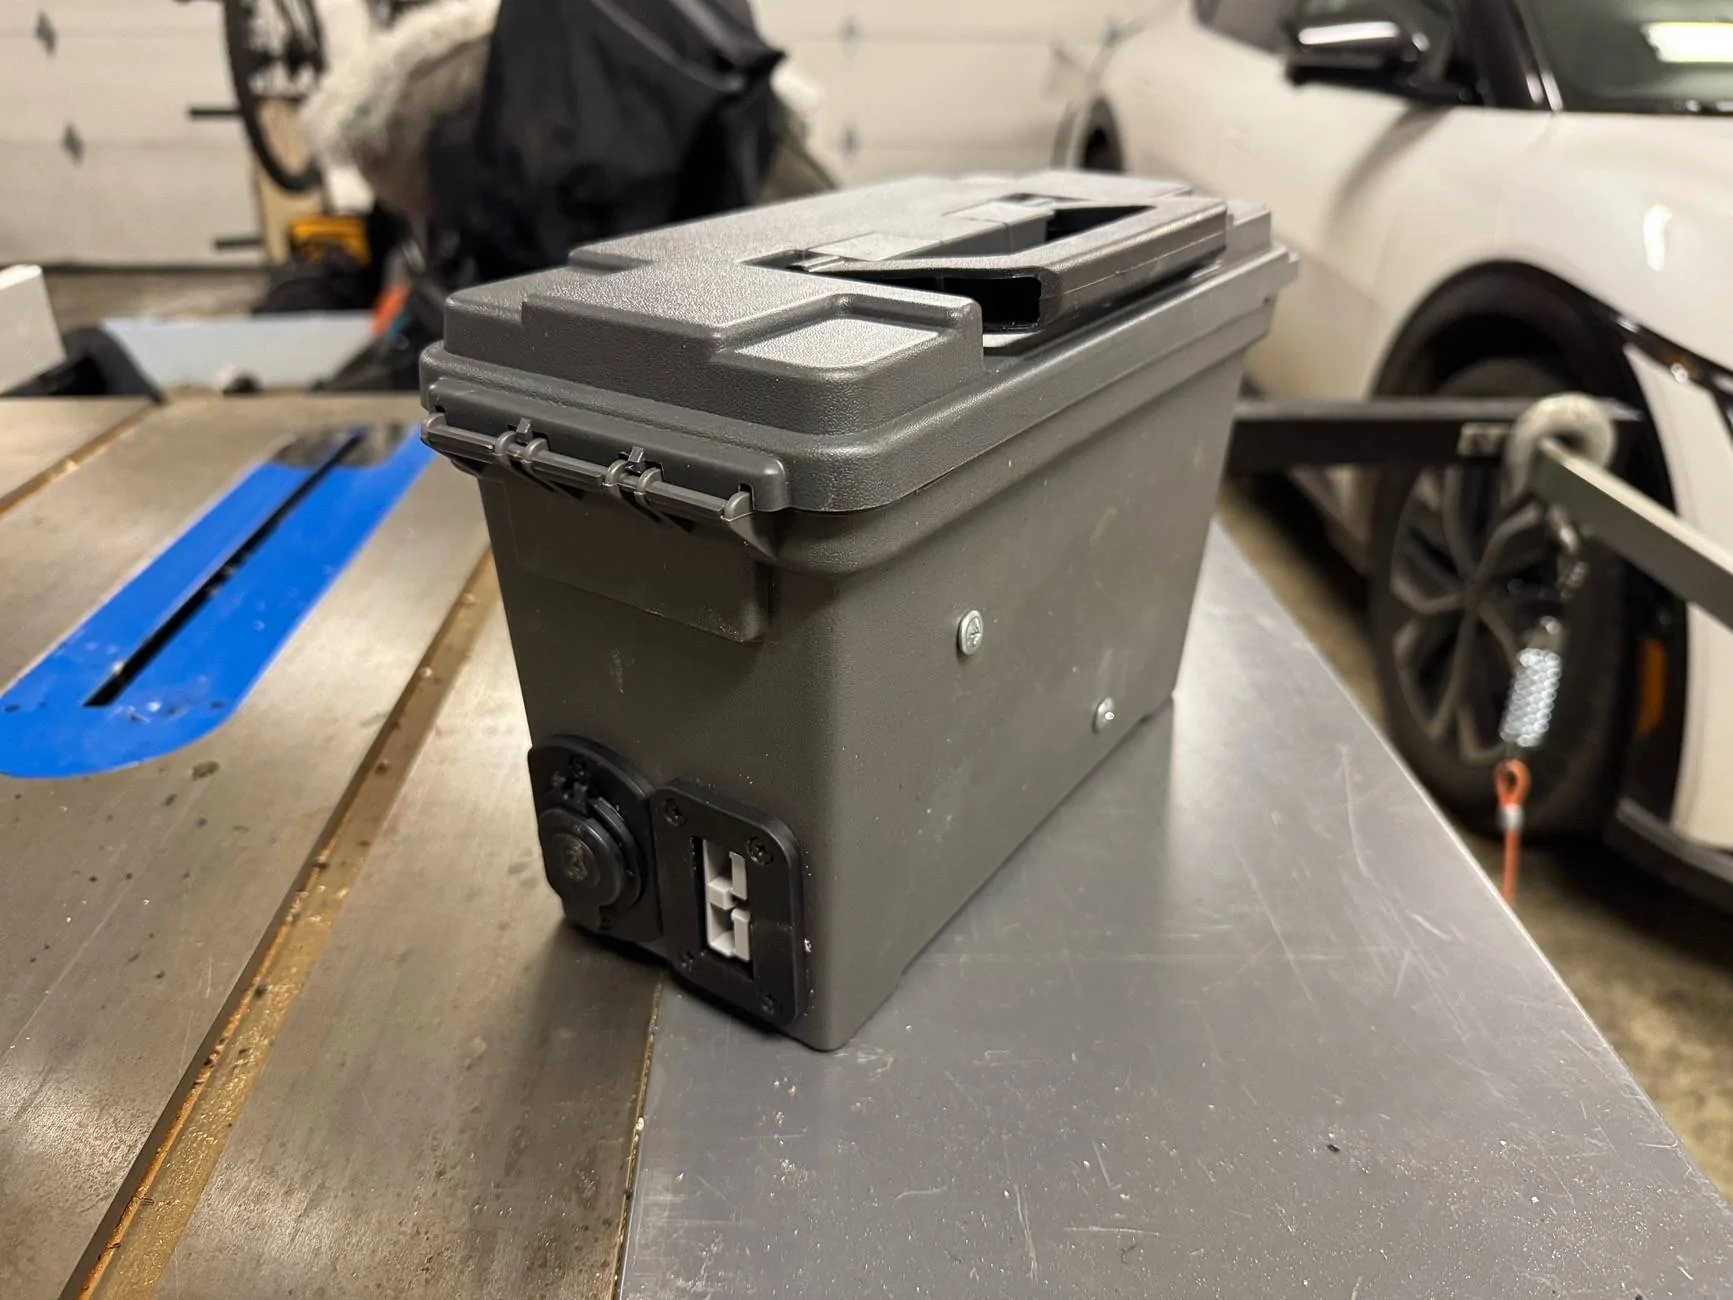
The nice thing about the DC-DC charger I'm planning on using (this one) is I'd be able to control the charging amperage going to my aux battery. I'll probably usually set it at 30A to keep the load on the alternator low while still being able to completely recharge my battery from 0-100% in around 3.5 hours of driving time.
3.5 hrs to charge 100ah sounds awesome!
Sponsored