
- First Name
- Jared
- Joined
- Feb 20, 2023
- Threads
- 45
- Messages
- 6,740
- Reaction score
- 13,001
- Location
- Denton, TX
- Vehicle(s)
- 2023 2dr Badsquatch
- Your Bronco Model
- Badlands
- Thread starter
- #1
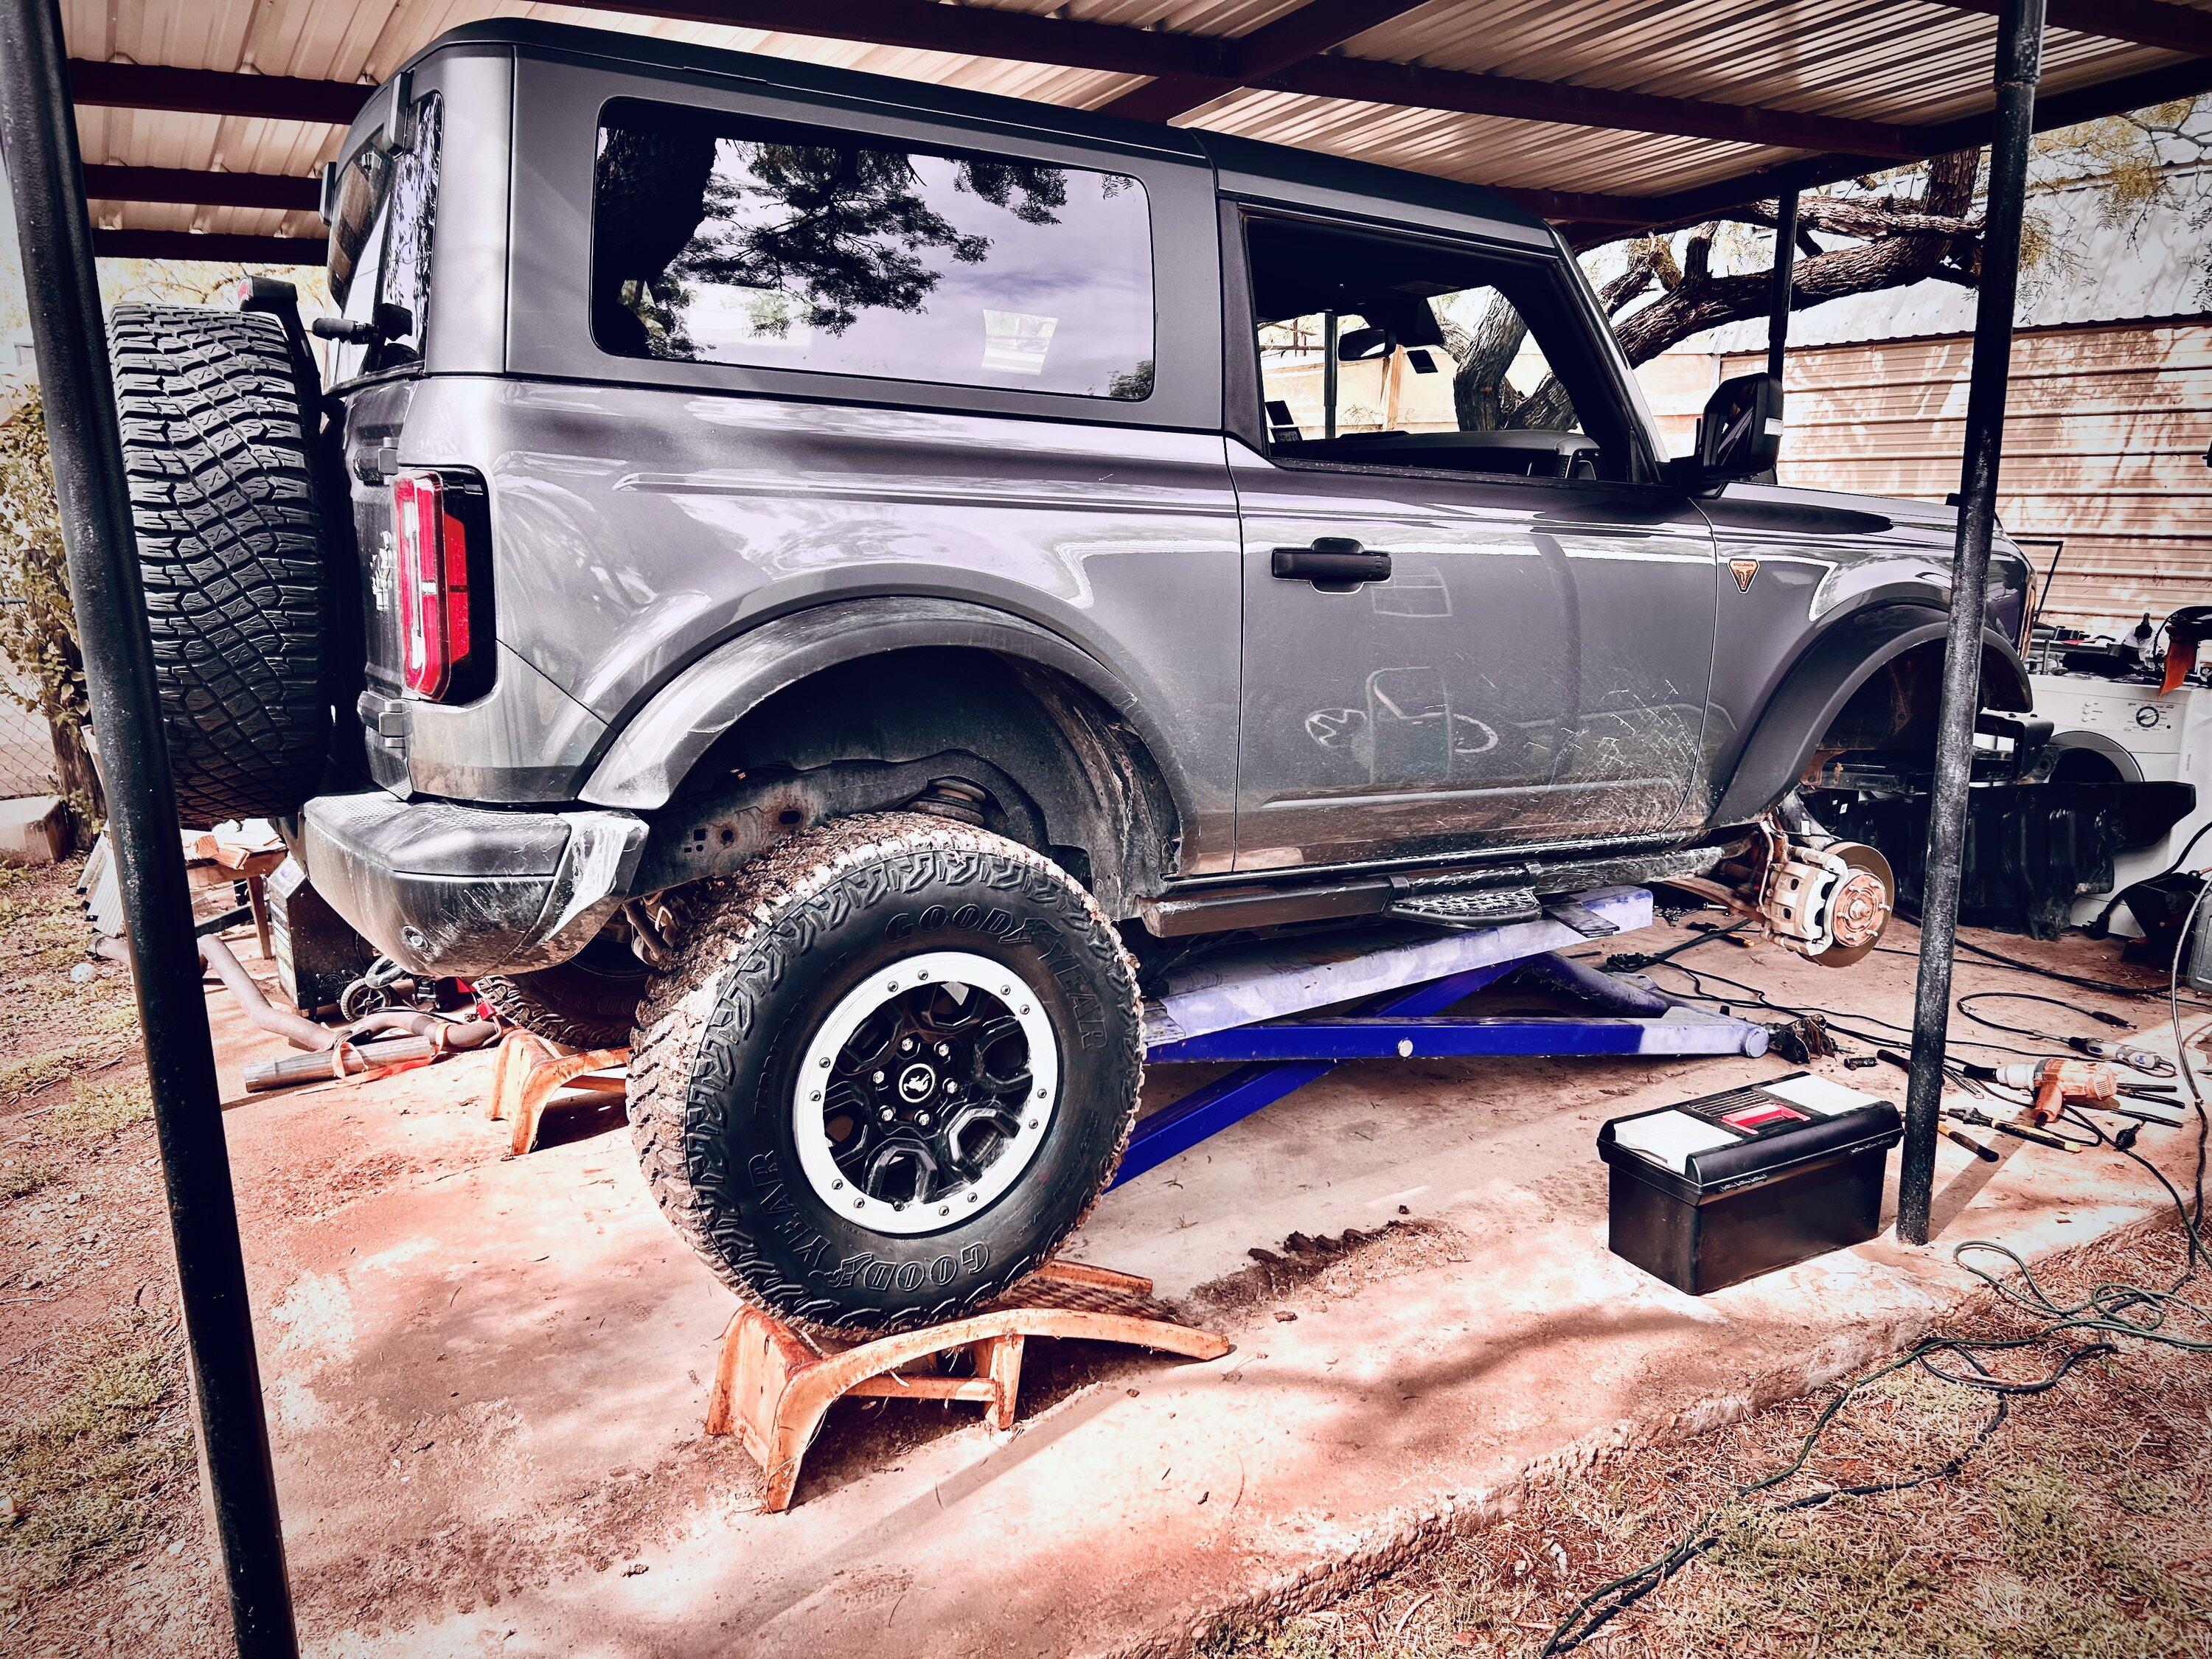
I decided couple weeks ago the better part of valor was to spend the cash and upgrade my steering rack. Based on the increasing difficulty of what I'm up to off road, it seemed prudent to get the 74Weld rack.
I huge thank you and shout out to @mpeugeot. It would have been mind boggling to get this done myself. Also props to San Angelo, which is a very nice little town. The Angry Cactus is very tasty. Try the prickly pear margarita. And also, @Bmadda who got me into this in the first place. lol
Tools Used
- Safety glasses (do not omit!)
- Ratcheting strap, for immobilizing the steering wheel (you can also use the seatbelt)
- Impact drill
- Breaker bars
- We used two torque wrenches, one went up to ~190psi
- Ratchet set with extensions, including a 10mm up to 21mm (on the latter I believe that was the biggest...)
- Two larger adjustable crescent wrenches for adjusting the tie rod lengths
- Blue loctite
- Measuring tape or ruler, for installing the tie rod arms, which the outers are slightly longer on the HD set
- Flashlight for tightening the steering column set screw
- Lift and/or ramps or jack stands w/jack (wheel chalks if you're using ramps or jack stands)
- We used a Dremel to cut the boot clamps off
- Hammer and torch to heat/coerce the tie rod seat on the wheel assembly
- (You might consider padding to lay on and knee pads if you're on the ground)
Setup
- 74Weld's rack did not take long to receive. I would've had it in four days if UPS hadn't had a broke down truck.
- Consider, if you are going with 74Weld's rack and you don't have a HOSS 3.0 yet, it could very well be cheaper to just buy their packaged Stage 3. Especially consider at least right now they have an OnX Elite discount that is substantial, as well.
- If you do have a HOSS 3.0 rack already, get the Stage 2 and get it programmed. mpeugeot does them at least in Texas. You might ask him if you're looking for programming.
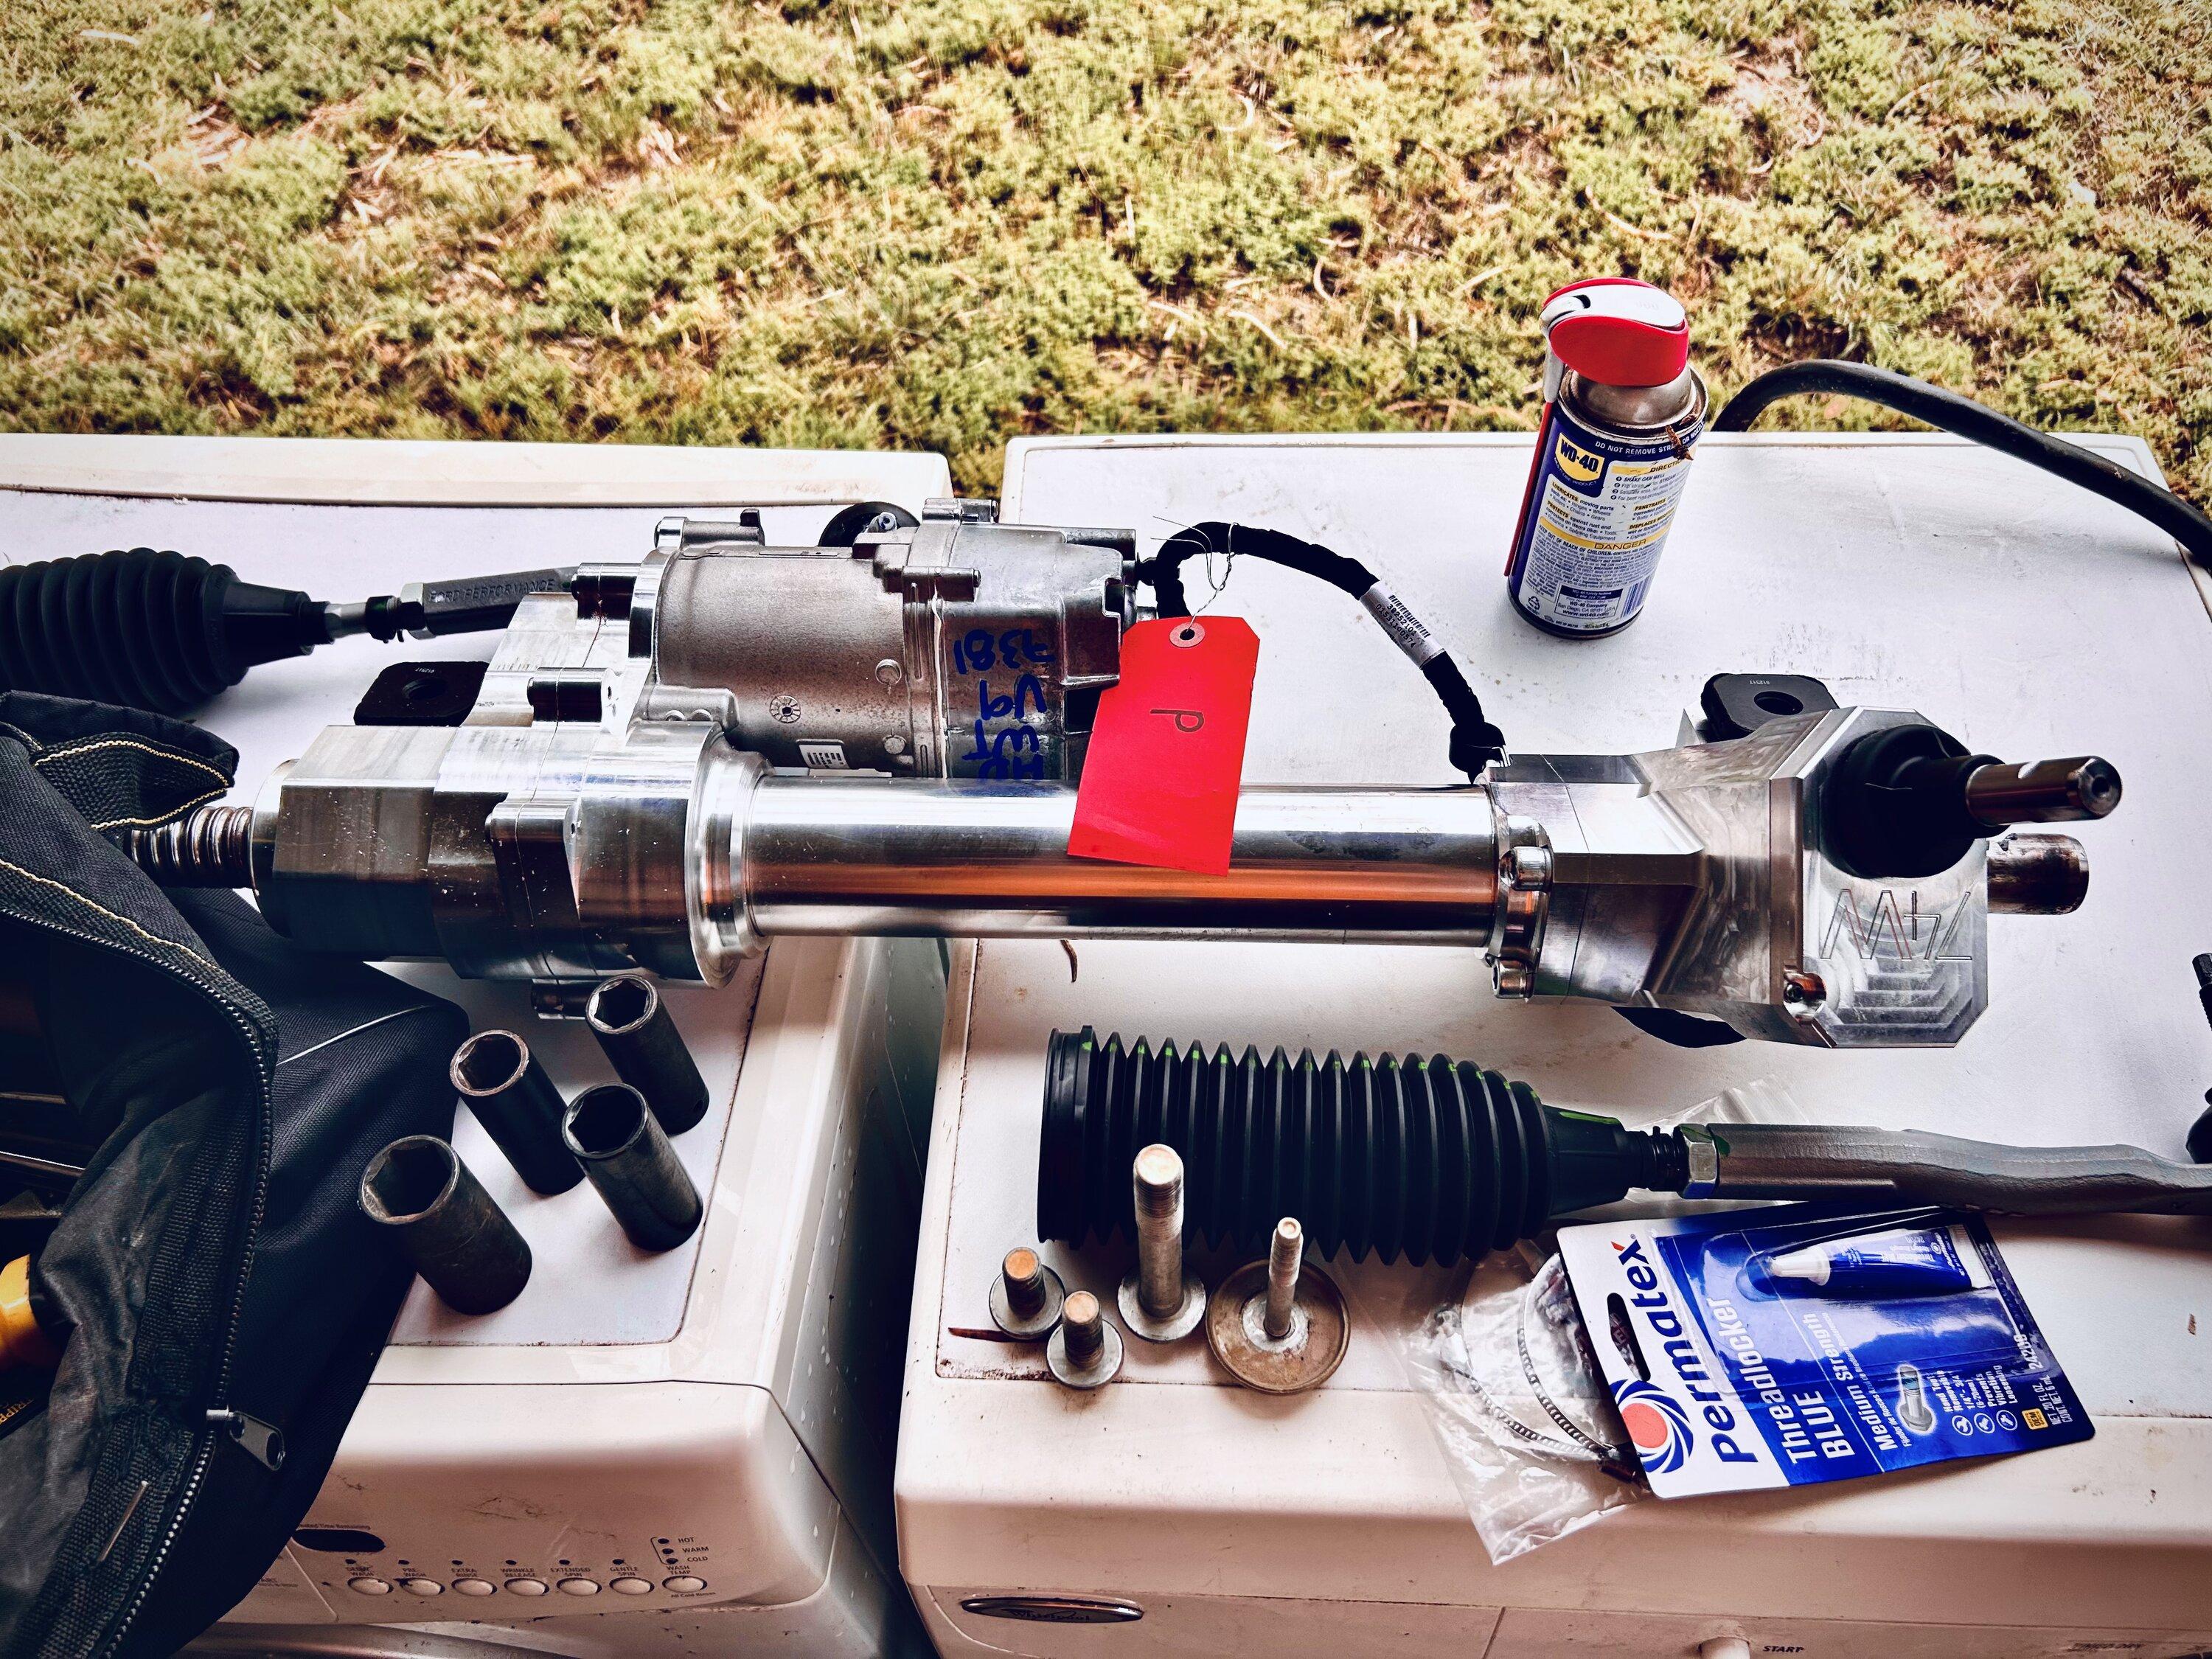
- The box 74Weld's rack comes in is small enough to fit in the back of my 2dr. The tie rods are not installed, in other words.
- If you don't have a shop manual, consider you'll need to know the torque amounts for most of the bolts you remove, so you can put them back on correctly.
- You can probably do it all yourself, but it's much easier if you have an extra set of hands.
- Start early and budget an extra day. Especially if you don't have a lift you can walk under. Overall I think we spent about 10hrs over two days with some mitigating circumstances.
The Job
- Important: Immobilize the steering wheel from turning FIRST. A slight turn is not bad, but a quarter or half turn can mess up your clock spring, which I hear is a Bad Thing. We used a ratcheting strap, wrapped around the bottom of the steering wheel, then fed under the seat and hooked one end to the headrest post, then ratcheted down. This worked pretty well.
- Watch the 74Weld install video and note that they do not at all show disconnecting the steering column from the rack. Completely omitted, probably because it's hard to show it.
- The order that the bolts are removed and put back matter in making it easier to take care of. The order in the video and reversing the order to reinstall is probably a good starting point.
- Make sure and pay attention to the direction the steering column set screw points. lol Not a big mistake, but if you have slip in your steering, check this screw is too loose or is reversed from how it should be.
- Take the front tires off once you've got it jacked and secured. You see this in the video.
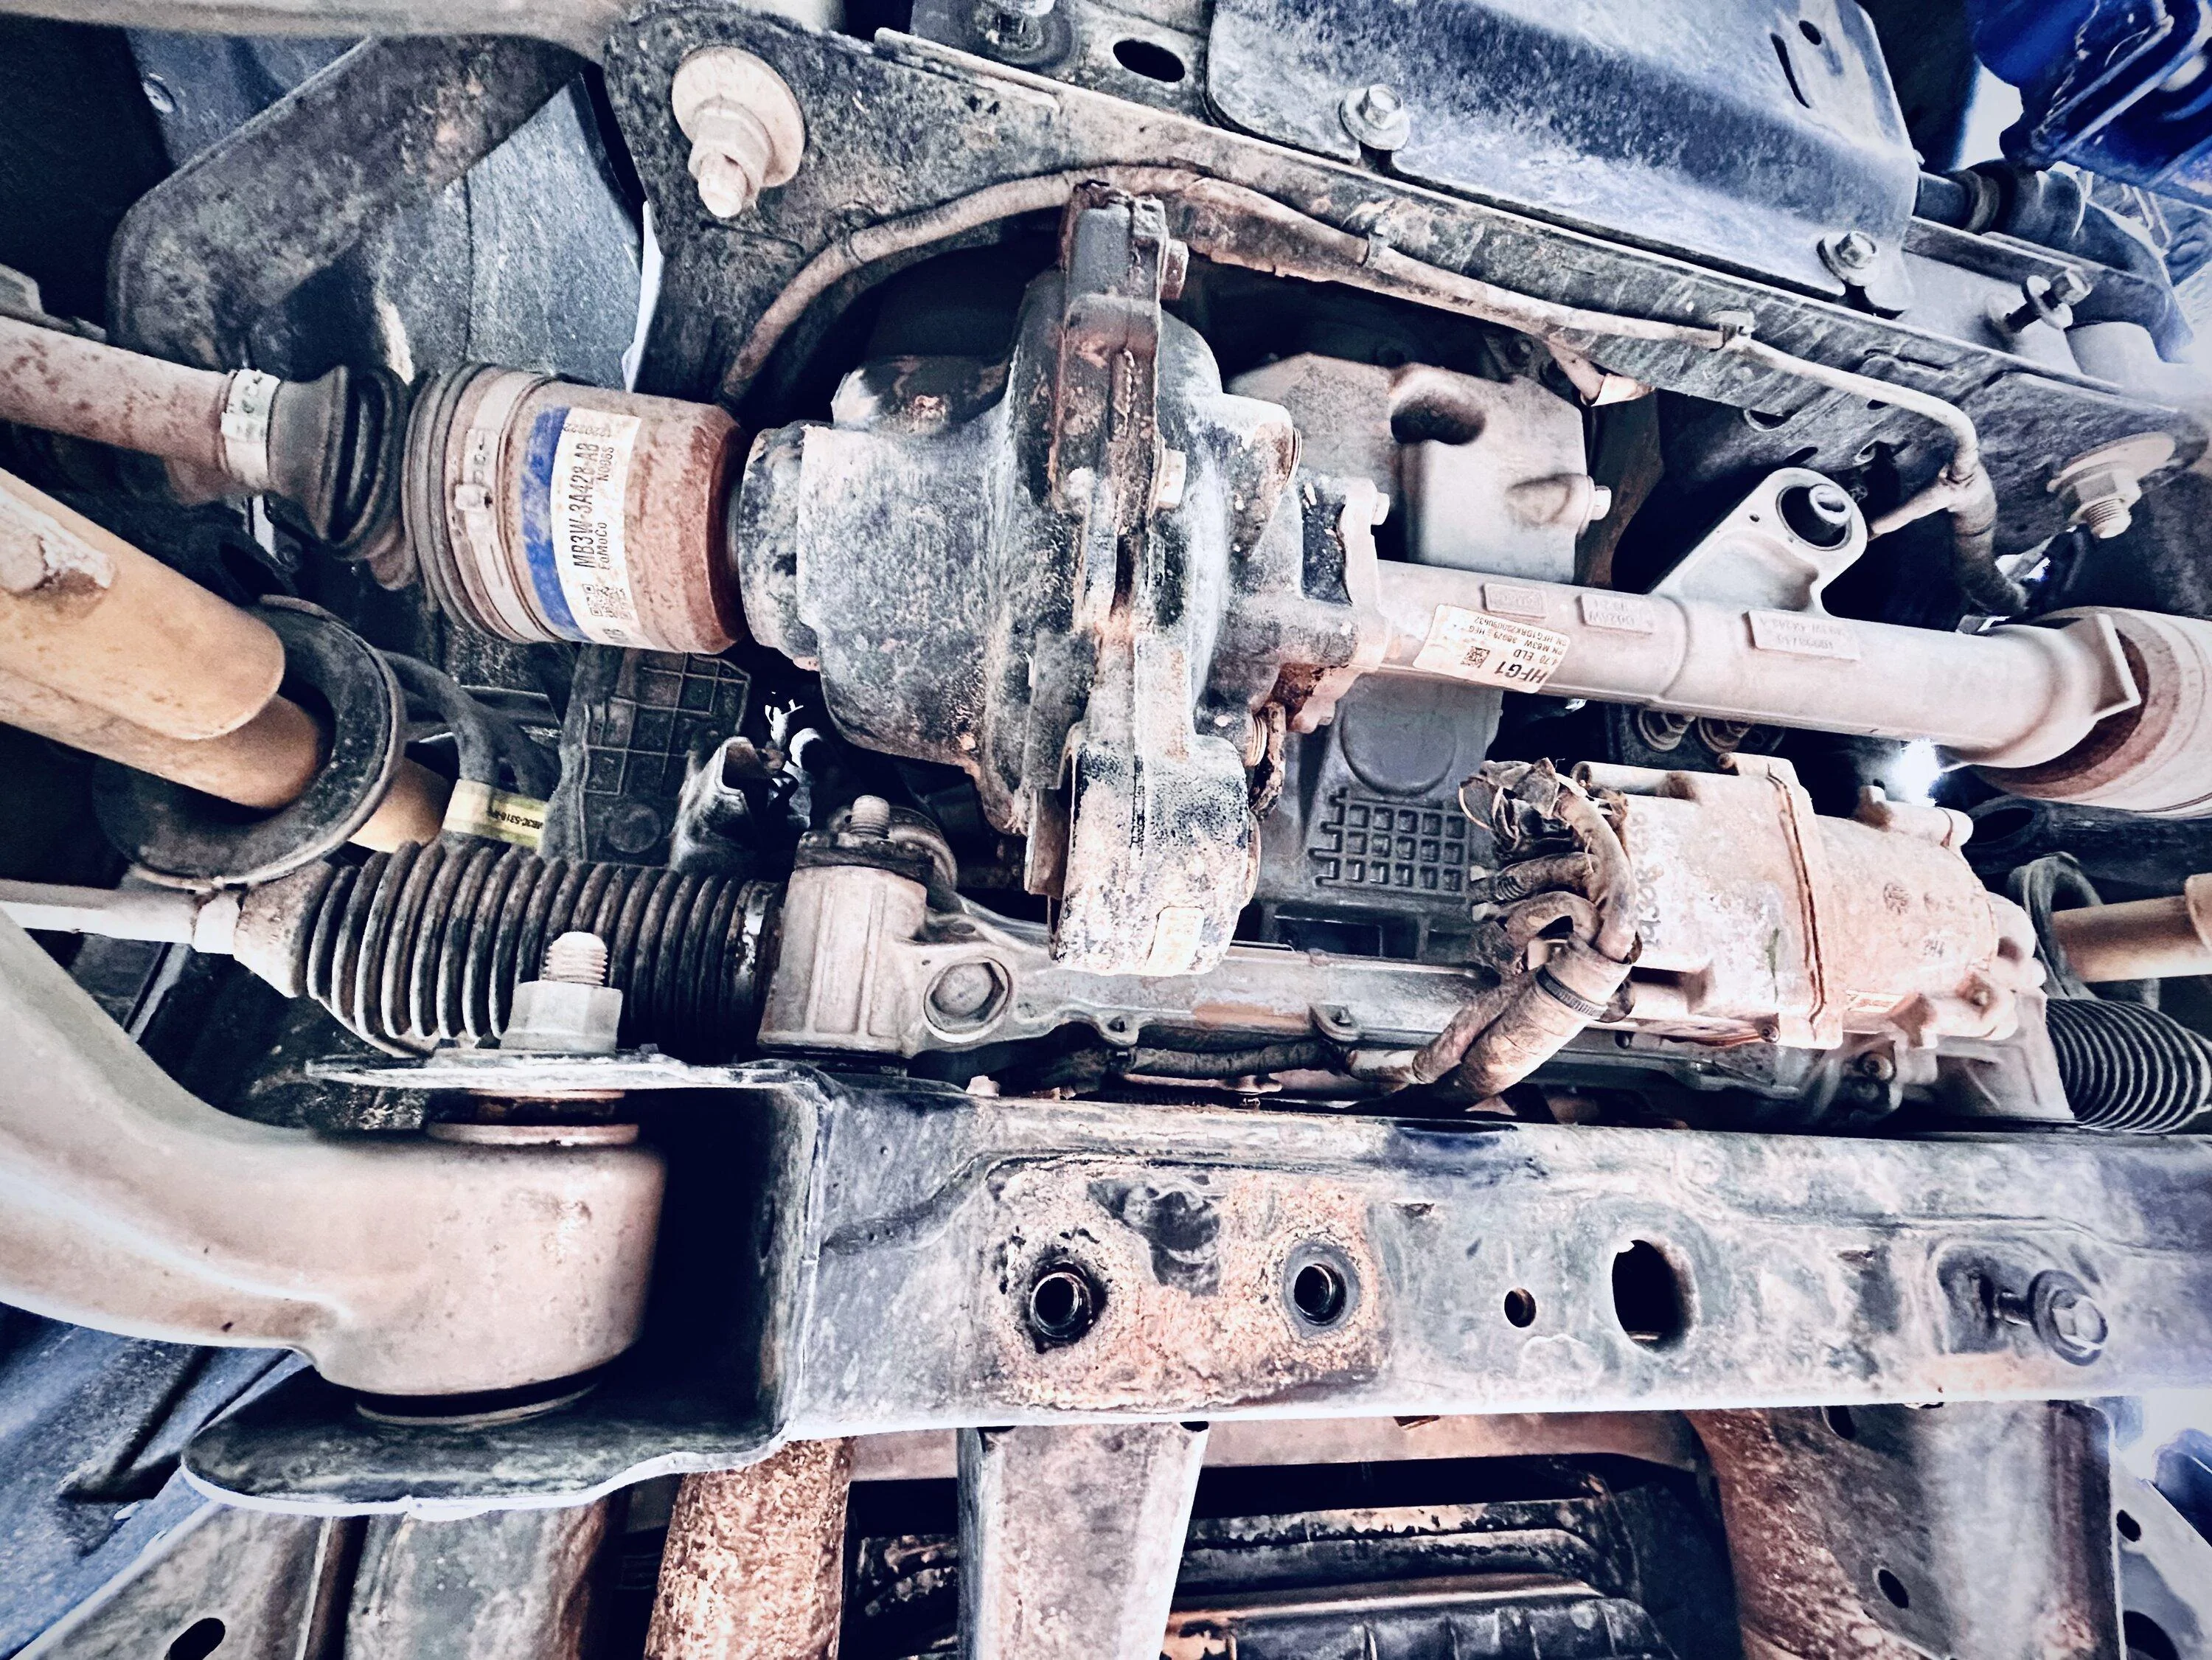
- We took the inner tie rods off the rack while the rack was still in place. I guess you could leave them on, but I don't know how you get the rack out.
- Other than the hassle of breaking the bolts out of their loctitedness, the first big hurdle is getting the tie rods off the wheel. We ended up heating the mount the outer tie rods sit/drop in, hitting the seat with a hammer, then heating some more. They eventually come out but expect they will be wedged in there pretty good.
- Wrangling the HOSS 2.0 steering rack out of it's cozy little spot is a lot of fun! Not really. I have the front lockers, so getting around that is where the snag happened for us. We pushed, pulled, crushed my hand and finger, and eventually wended it around somehow (pull passenger and push up and twist!!!). It was a good feeling when it finally came out.
- Reassembly is much easier than the first time you take this all apart.
- The 74Weld rack is easier to get in. It didn't slide right in, but we didn't really struggle.
- Pay attention to the direction of the steering column clamp bolt.")
- Measure the lengths of the tie rods when you have them both out. Make sure you compare the left and right side with their matching new tie rods. They should have stickers to designate the left or right side when reinstalling.
- You don't have to loctite every bolt, but make sure and do the big bolts on the frame.
- Make sure and follow the torque requirements listed in the shop manual. There are members on the forum who can help with that.
- When putting the bolts on the front differential, if you have one, note that you'll need to push it up and wrangle it a little to get bolts in place. You may need a jack or otherwise something or someone to help with this part. Also, tightening the bolts down too quickly can make it hard to move it around.
- Note that Ford recommends replacing most of the bolts you remove. You can see the recommendations in this TSB. We did not replace any, although I might replace the steering column clamp bolt eventually.
Post-Install
- Once the rack is installed and connected to the wheels, start the engine to see if you get error messages. If you do and don't know what to do, start a thread.
- Put the wheels back on and then take it out onto a quiet street to see how it performs. Note that measuring the tie rod arms will get you close but you'll need to get an alignment soon.
- Your steering wheel may not be straight. When you get your alignment, they should fix this. I drove 300m with a steering wheel cocked about 1/6 turn driver.
- If you feel slack or anything other than what you felt with your steering before, take it back and investigate. As stated, we put the steering column clamp bolt in backwards and it slipped at first when turning. It was obvious we needed to fix something.
- Try to find a non-busy road that's straight, then steer straight and let go of the wheel, ready to grab the wheel. You should generally drive straight-ish. If it darts to the side or does anything unusual, take it to get an alignment ASAP or back to double check your install is correct and complete. Be safe out there.
- Now get an alignment. Note that if you have lane assist/advanced cruise control, it costs more. I was not able to get an alignment since San Angelo didn't have any working techs or machines at Firestone on Sunday, so I drove it home 280 miles at 57-62mph. It drove like a Jeep at any higher speed, which is to say not a lot of fun.
Final Words
Overall, it was a bit of an ordeal at times and without Mark's friendly help and knowledge (and better physical shape... lol), it would have been challenging. It certainly would've taken a LOT longer and I would've been lucky to get a lot of it right, at least at first. Big thanks again and keep wheelin'!


I huge thank you and shout out to @mpeugeot. It would have been mind boggling to get this done myself. Also props to San Angelo, which is a very nice little town. The Angry Cactus is very tasty. Try the prickly pear margarita. And also, @Bmadda who got me into this in the first place. lol
Tools Used
- Safety glasses (do not omit!)
- Ratcheting strap, for immobilizing the steering wheel (you can also use the seatbelt)
- Impact drill
- Breaker bars
- We used two torque wrenches, one went up to ~190psi
- Ratchet set with extensions, including a 10mm up to 21mm (on the latter I believe that was the biggest...)
- Two larger adjustable crescent wrenches for adjusting the tie rod lengths
- Blue loctite
- Measuring tape or ruler, for installing the tie rod arms, which the outers are slightly longer on the HD set
- Flashlight for tightening the steering column set screw
- Lift and/or ramps or jack stands w/jack (wheel chalks if you're using ramps or jack stands)
- We used a Dremel to cut the boot clamps off
- Hammer and torch to heat/coerce the tie rod seat on the wheel assembly
- (You might consider padding to lay on and knee pads if you're on the ground)
Setup
- 74Weld's rack did not take long to receive. I would've had it in four days if UPS hadn't had a broke down truck.
- Consider, if you are going with 74Weld's rack and you don't have a HOSS 3.0 yet, it could very well be cheaper to just buy their packaged Stage 3. Especially consider at least right now they have an OnX Elite discount that is substantial, as well.
- If you do have a HOSS 3.0 rack already, get the Stage 2 and get it programmed. mpeugeot does them at least in Texas. You might ask him if you're looking for programming.
- The box 74Weld's rack comes in is small enough to fit in the back of my 2dr. The tie rods are not installed, in other words.
- If you don't have a shop manual, consider you'll need to know the torque amounts for most of the bolts you remove, so you can put them back on correctly.
- You can probably do it all yourself, but it's much easier if you have an extra set of hands.
- Start early and budget an extra day. Especially if you don't have a lift you can walk under. Overall I think we spent about 10hrs over two days with some mitigating circumstances.
The Job
- Important: Immobilize the steering wheel from turning FIRST. A slight turn is not bad, but a quarter or half turn can mess up your clock spring, which I hear is a Bad Thing. We used a ratcheting strap, wrapped around the bottom of the steering wheel, then fed under the seat and hooked one end to the headrest post, then ratcheted down. This worked pretty well.
- Watch the 74Weld install video and note that they do not at all show disconnecting the steering column from the rack. Completely omitted, probably because it's hard to show it.
- The order that the bolts are removed and put back matter in making it easier to take care of. The order in the video and reversing the order to reinstall is probably a good starting point.
- Make sure and pay attention to the direction the steering column set screw points. lol Not a big mistake, but if you have slip in your steering, check this screw is too loose or is reversed from how it should be.
- Take the front tires off once you've got it jacked and secured. You see this in the video.
- We took the inner tie rods off the rack while the rack was still in place. I guess you could leave them on, but I don't know how you get the rack out.
- Other than the hassle of breaking the bolts out of their loctitedness, the first big hurdle is getting the tie rods off the wheel. We ended up heating the mount the outer tie rods sit/drop in, hitting the seat with a hammer, then heating some more. They eventually come out but expect they will be wedged in there pretty good.
- Wrangling the HOSS 2.0 steering rack out of it's cozy little spot is a lot of fun! Not really. I have the front lockers, so getting around that is where the snag happened for us. We pushed, pulled, crushed my hand and finger, and eventually wended it around somehow (pull passenger and push up and twist!!!). It was a good feeling when it finally came out.
- Reassembly is much easier than the first time you take this all apart.
- The 74Weld rack is easier to get in. It didn't slide right in, but we didn't really struggle.
- Pay attention to the direction of the steering column clamp bolt.
- Measure the lengths of the tie rods when you have them both out. Make sure you compare the left and right side with their matching new tie rods. They should have stickers to designate the left or right side when reinstalling.
- You don't have to loctite every bolt, but make sure and do the big bolts on the frame.
- Make sure and follow the torque requirements listed in the shop manual. There are members on the forum who can help with that.
- When putting the bolts on the front differential, if you have one, note that you'll need to push it up and wrangle it a little to get bolts in place. You may need a jack or otherwise something or someone to help with this part. Also, tightening the bolts down too quickly can make it hard to move it around.
- Note that Ford recommends replacing most of the bolts you remove. You can see the recommendations in this TSB. We did not replace any, although I might replace the steering column clamp bolt eventually.
Post-Install
- Once the rack is installed and connected to the wheels, start the engine to see if you get error messages. If you do and don't know what to do, start a thread.
- Put the wheels back on and then take it out onto a quiet street to see how it performs. Note that measuring the tie rod arms will get you close but you'll need to get an alignment soon.
- Your steering wheel may not be straight. When you get your alignment, they should fix this. I drove 300m with a steering wheel cocked about 1/6 turn driver.
- If you feel slack or anything other than what you felt with your steering before, take it back and investigate. As stated, we put the steering column clamp bolt in backwards and it slipped at first when turning. It was obvious we needed to fix something.
- Try to find a non-busy road that's straight, then steer straight and let go of the wheel, ready to grab the wheel. You should generally drive straight-ish. If it darts to the side or does anything unusual, take it to get an alignment ASAP or back to double check your install is correct and complete. Be safe out there.
- Now get an alignment. Note that if you have lane assist/advanced cruise control, it costs more. I was not able to get an alignment since San Angelo didn't have any working techs or machines at Firestone on Sunday, so I drove it home 280 miles at 57-62mph. It drove like a Jeep at any higher speed, which is to say not a lot of fun.
Final Words
Overall, it was a bit of an ordeal at times and without Mark's friendly help and knowledge (and better physical shape... lol), it would have been challenging. It certainly would've taken a LOT longer and I would've been lucky to get a lot of it right, at least at first. Big thanks again and keep wheelin'!
Sponsored
Last edited:


