- Thread starter
- #1
Short read: Good product, I like it and am happy with it
Long Read:
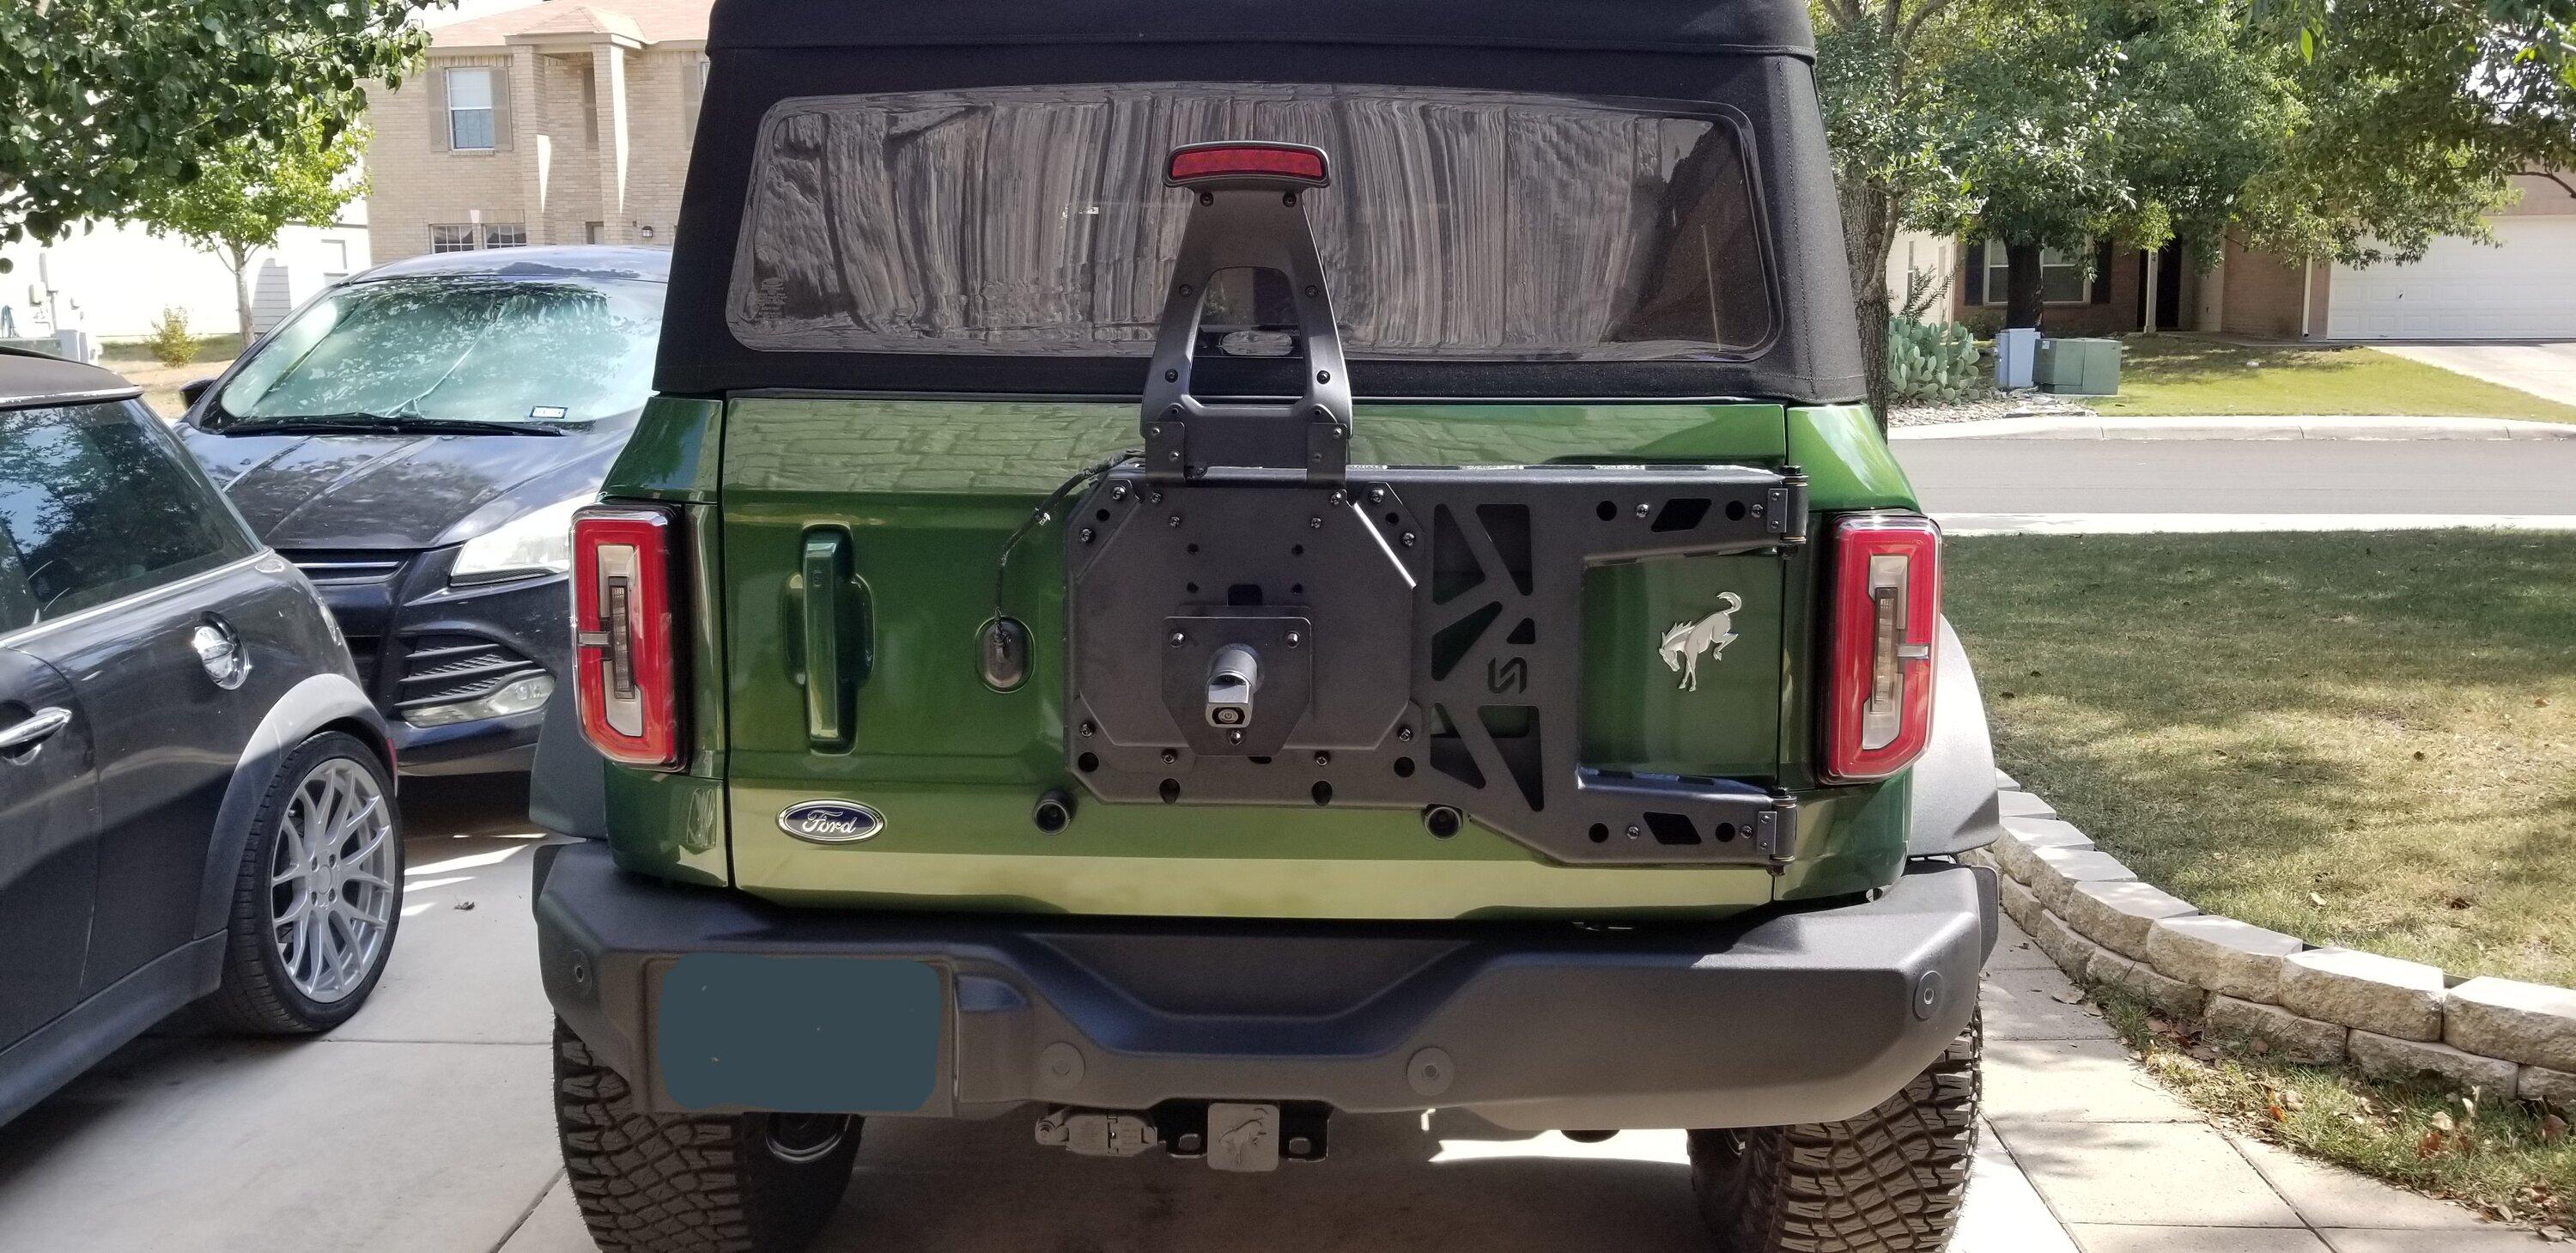
I have wanted a bumper mounted swing gate, much like what BAMF makes for Toyotas and have been waiting for a product that met all my wants and needs. So far there are a few on the market I kinda liked, but not enough to pull the trigger.
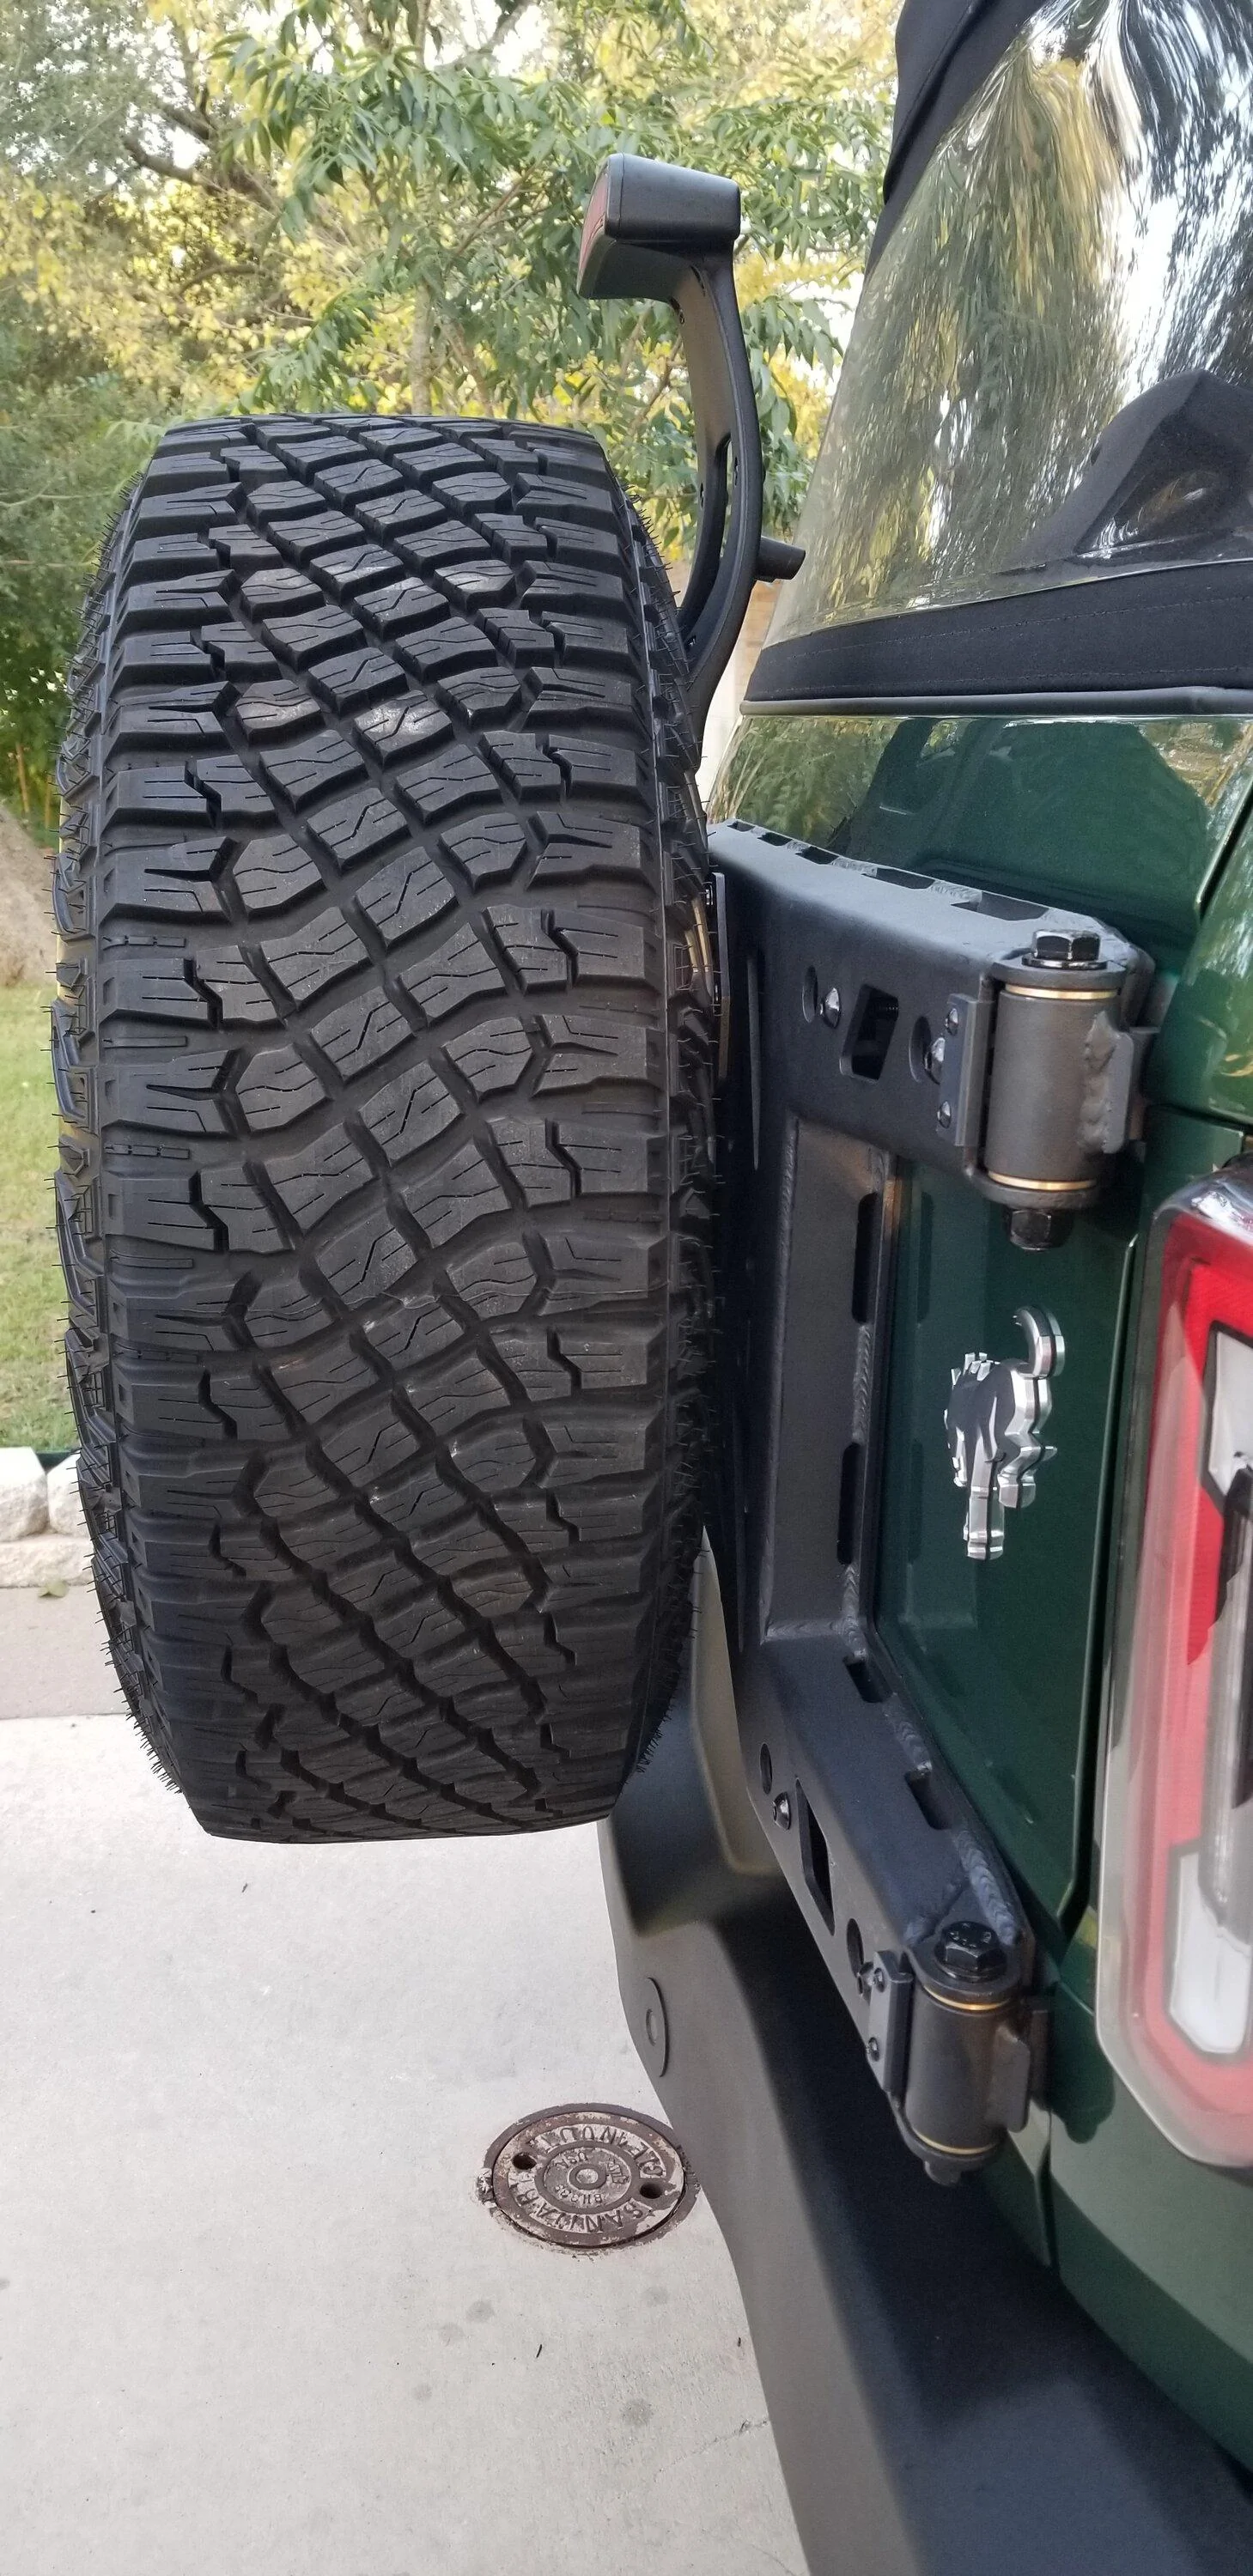
For my current needs, the Turn reinforcement does almost everything by taking all the weight off the tailgate. Many supports just stiffen the tailgate, but the weight is still carried through the gate and the hinges. Turns product puts all the weight on the reinforcement and much larger hinges. The tub still carries the weight, so we'll see 10 years down the road how that works out.
I was impressed with the packaging. I can't tell you how many boxes I get that are nothing more than Kleenex and brown paper wrapping. Boxes with holes and missing or damaged items. It's frustrating ordering things these days. Well, Turn uses extremely heavy cardboard, plus plastic straps, plus tape to keep things tight. Inside the box it was packaged better than I would have. Wrapped in a cloth type thing and foam filled to conform to the box. Nothing was getting scratched, damaged, or lost in that box. Well done.
As far as instructions. Are there any? I don't know. I watched the video. There were no written instructions in the box and I didn't see a pdf anywhere on the website. Fairly self explanatory, but there were two different lengths of the same size bolts and it would have been nice to know where to use the long ones and the short ones. Sometimes it's obvious. It wasn't in this case, so I just used the long ones on the 4 upper holes and the short ones on the 4 lower holes. Seemed to work out fine, so maybe I guessed right or it doesn't matter. I am pretty old school and still like written instructions though, even if I don't read them first.
I installed it by myself in a garage that was over 90 degrees, so I can't say I was at my best, but everything went well enough. All the holes lined up easily except for one, and it was like 99% there. The bolt went in with a bit of resistance, but it's in there. The hinges have 2 piece brass bushings and a steel bushing. In the install video, the bushings stayed in the hinge. Gravity must have been a bit higher in my garage, because neither wanted to stay in. Would have been pretty easy with a second person, but I had to get the support started just enough on the hinges to hold the brass bushings in and then put the steel bushings in and slide it over to keep them in. Sounds easier than it was, holding a 50+lb support in one hand and trying to keep bushings in on two different hinges. After a few trail and error approaches I got it, but would have been much easier with a second person.
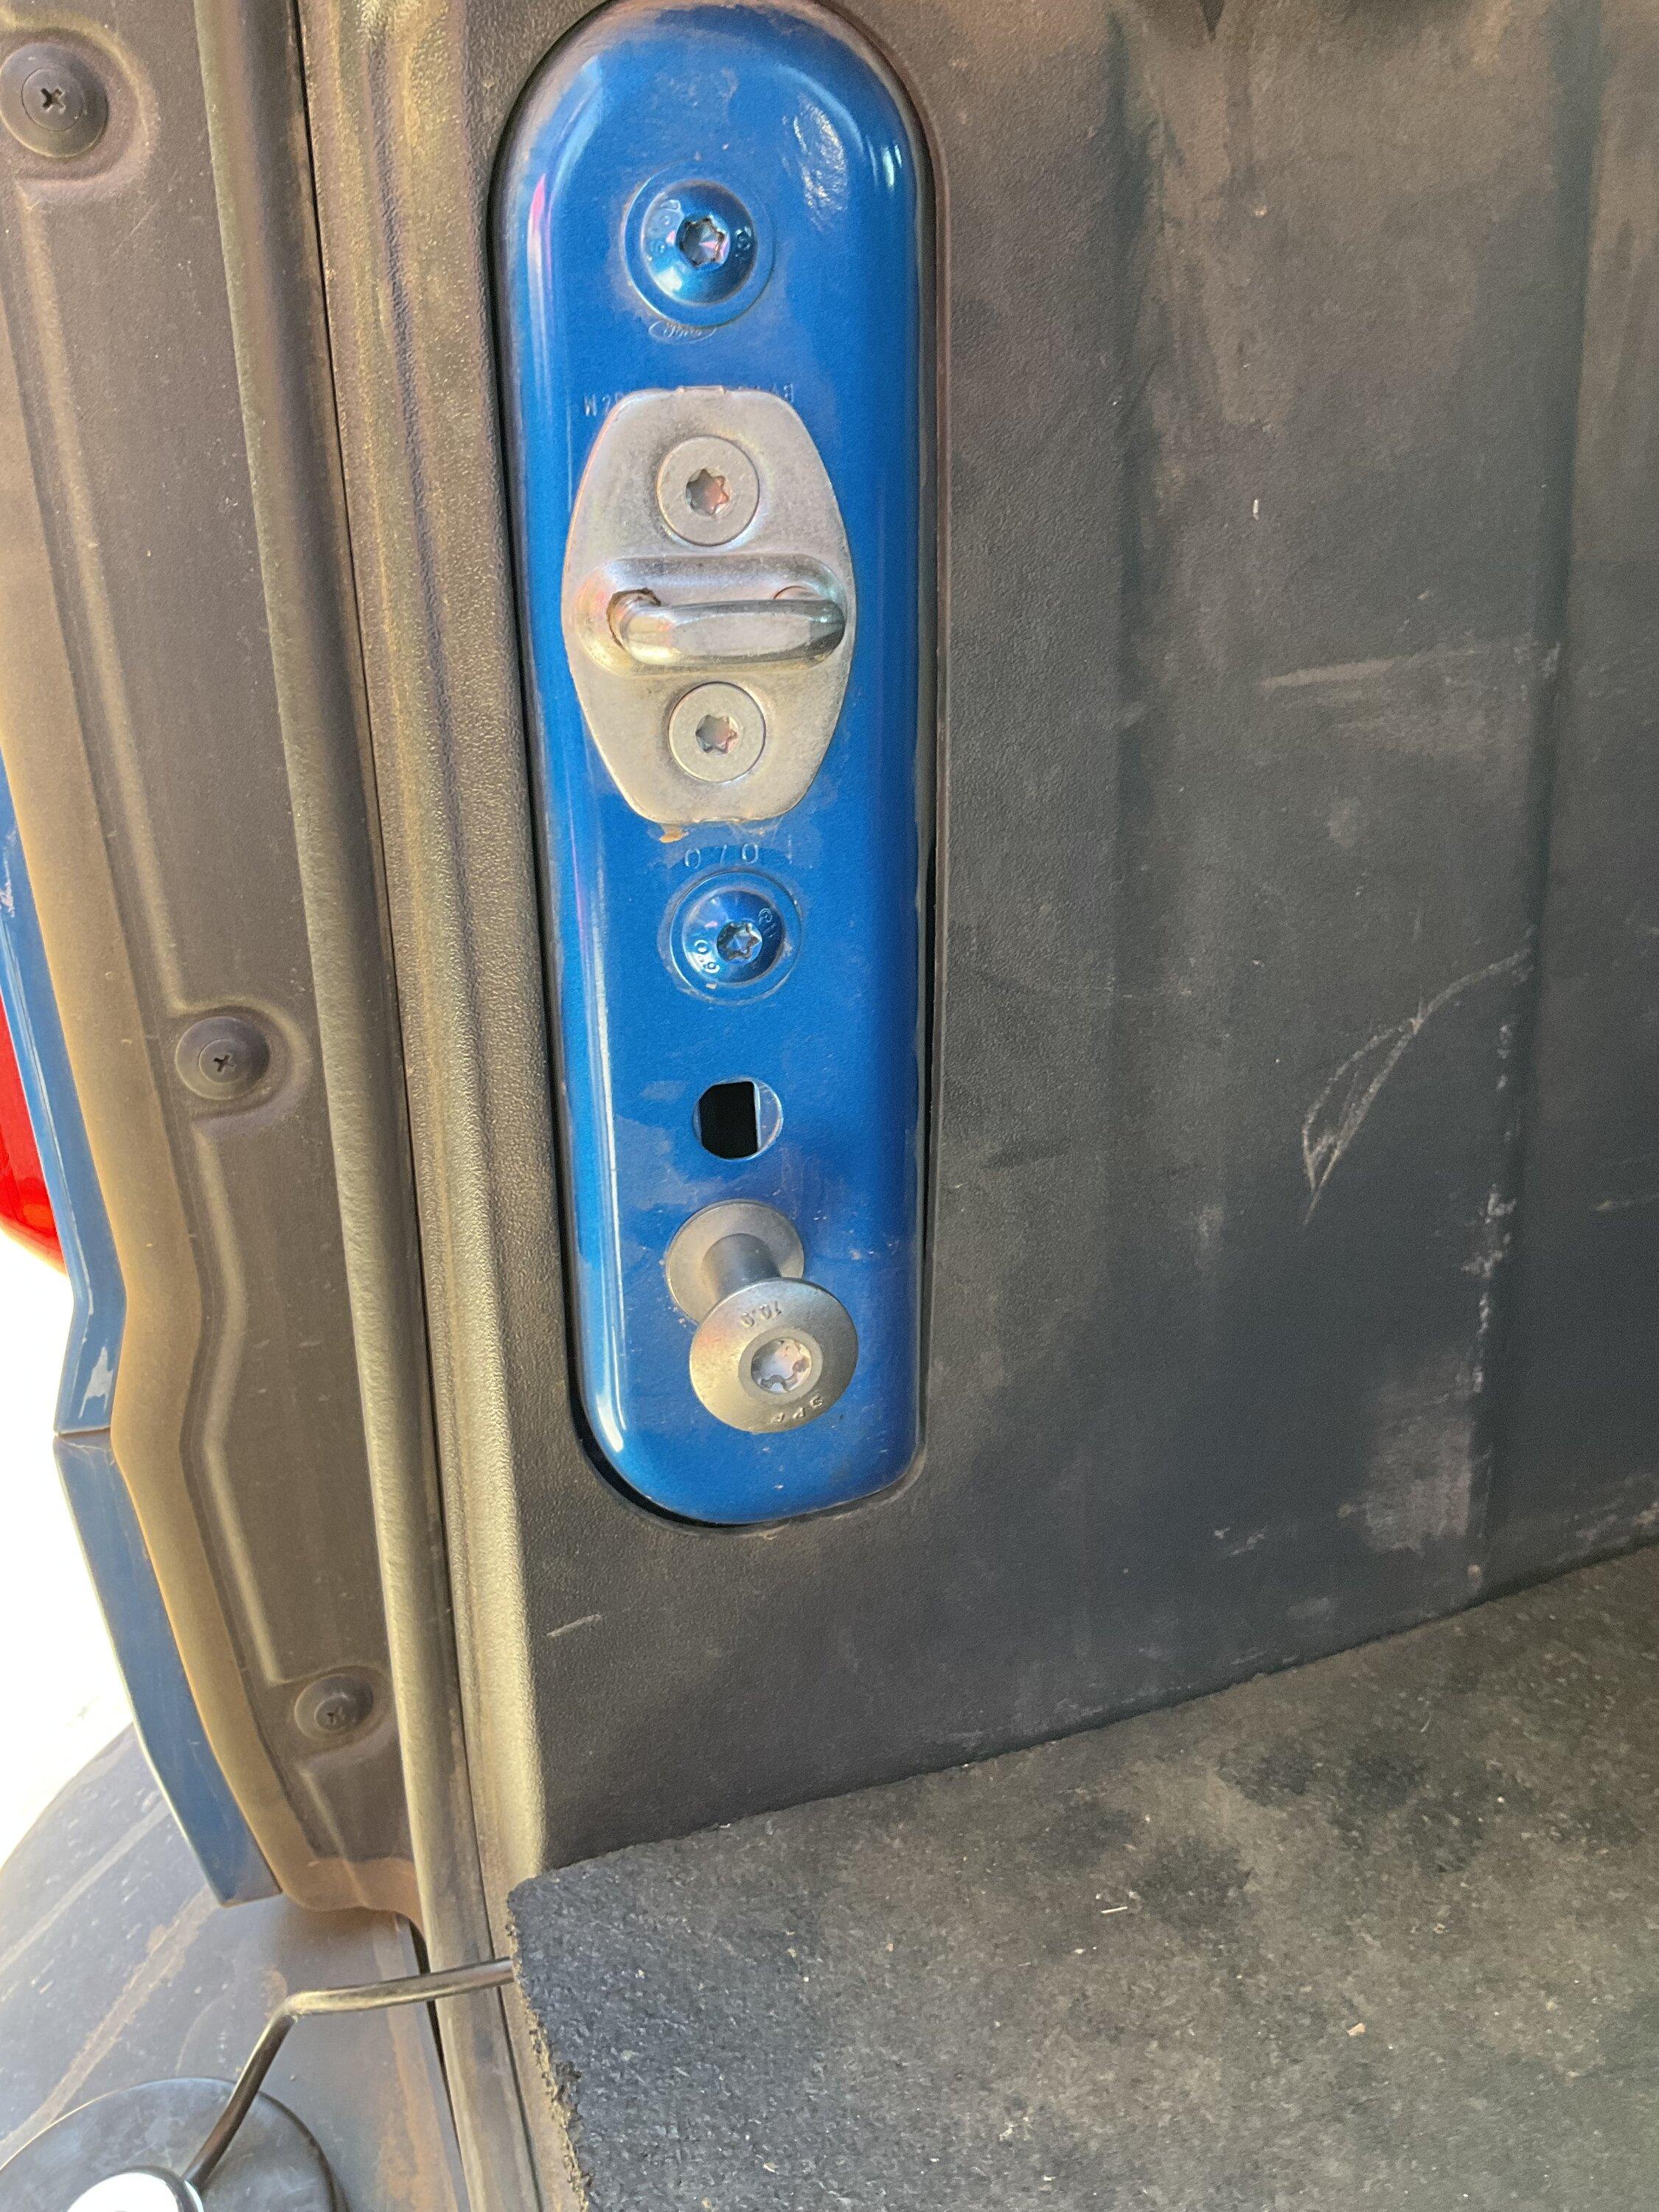
I did have to align my hinges slightly off from the factory hinges to maintain body lines. Honestly, I didn't look too closely before taking the gate off, so maybe it wasn't aligned that well to begin with. Once I got everything bolted on, I checked the fitment by opening and closing several times. Perfect. Then I put the spare on. Now the gate was hitting the latch and having to bump up to close. Looking at the service manual, that's to be expected with the extra weight of the spare. The Ford service manual tells you to account for the movement from adding the spare when adjusting the hinges.
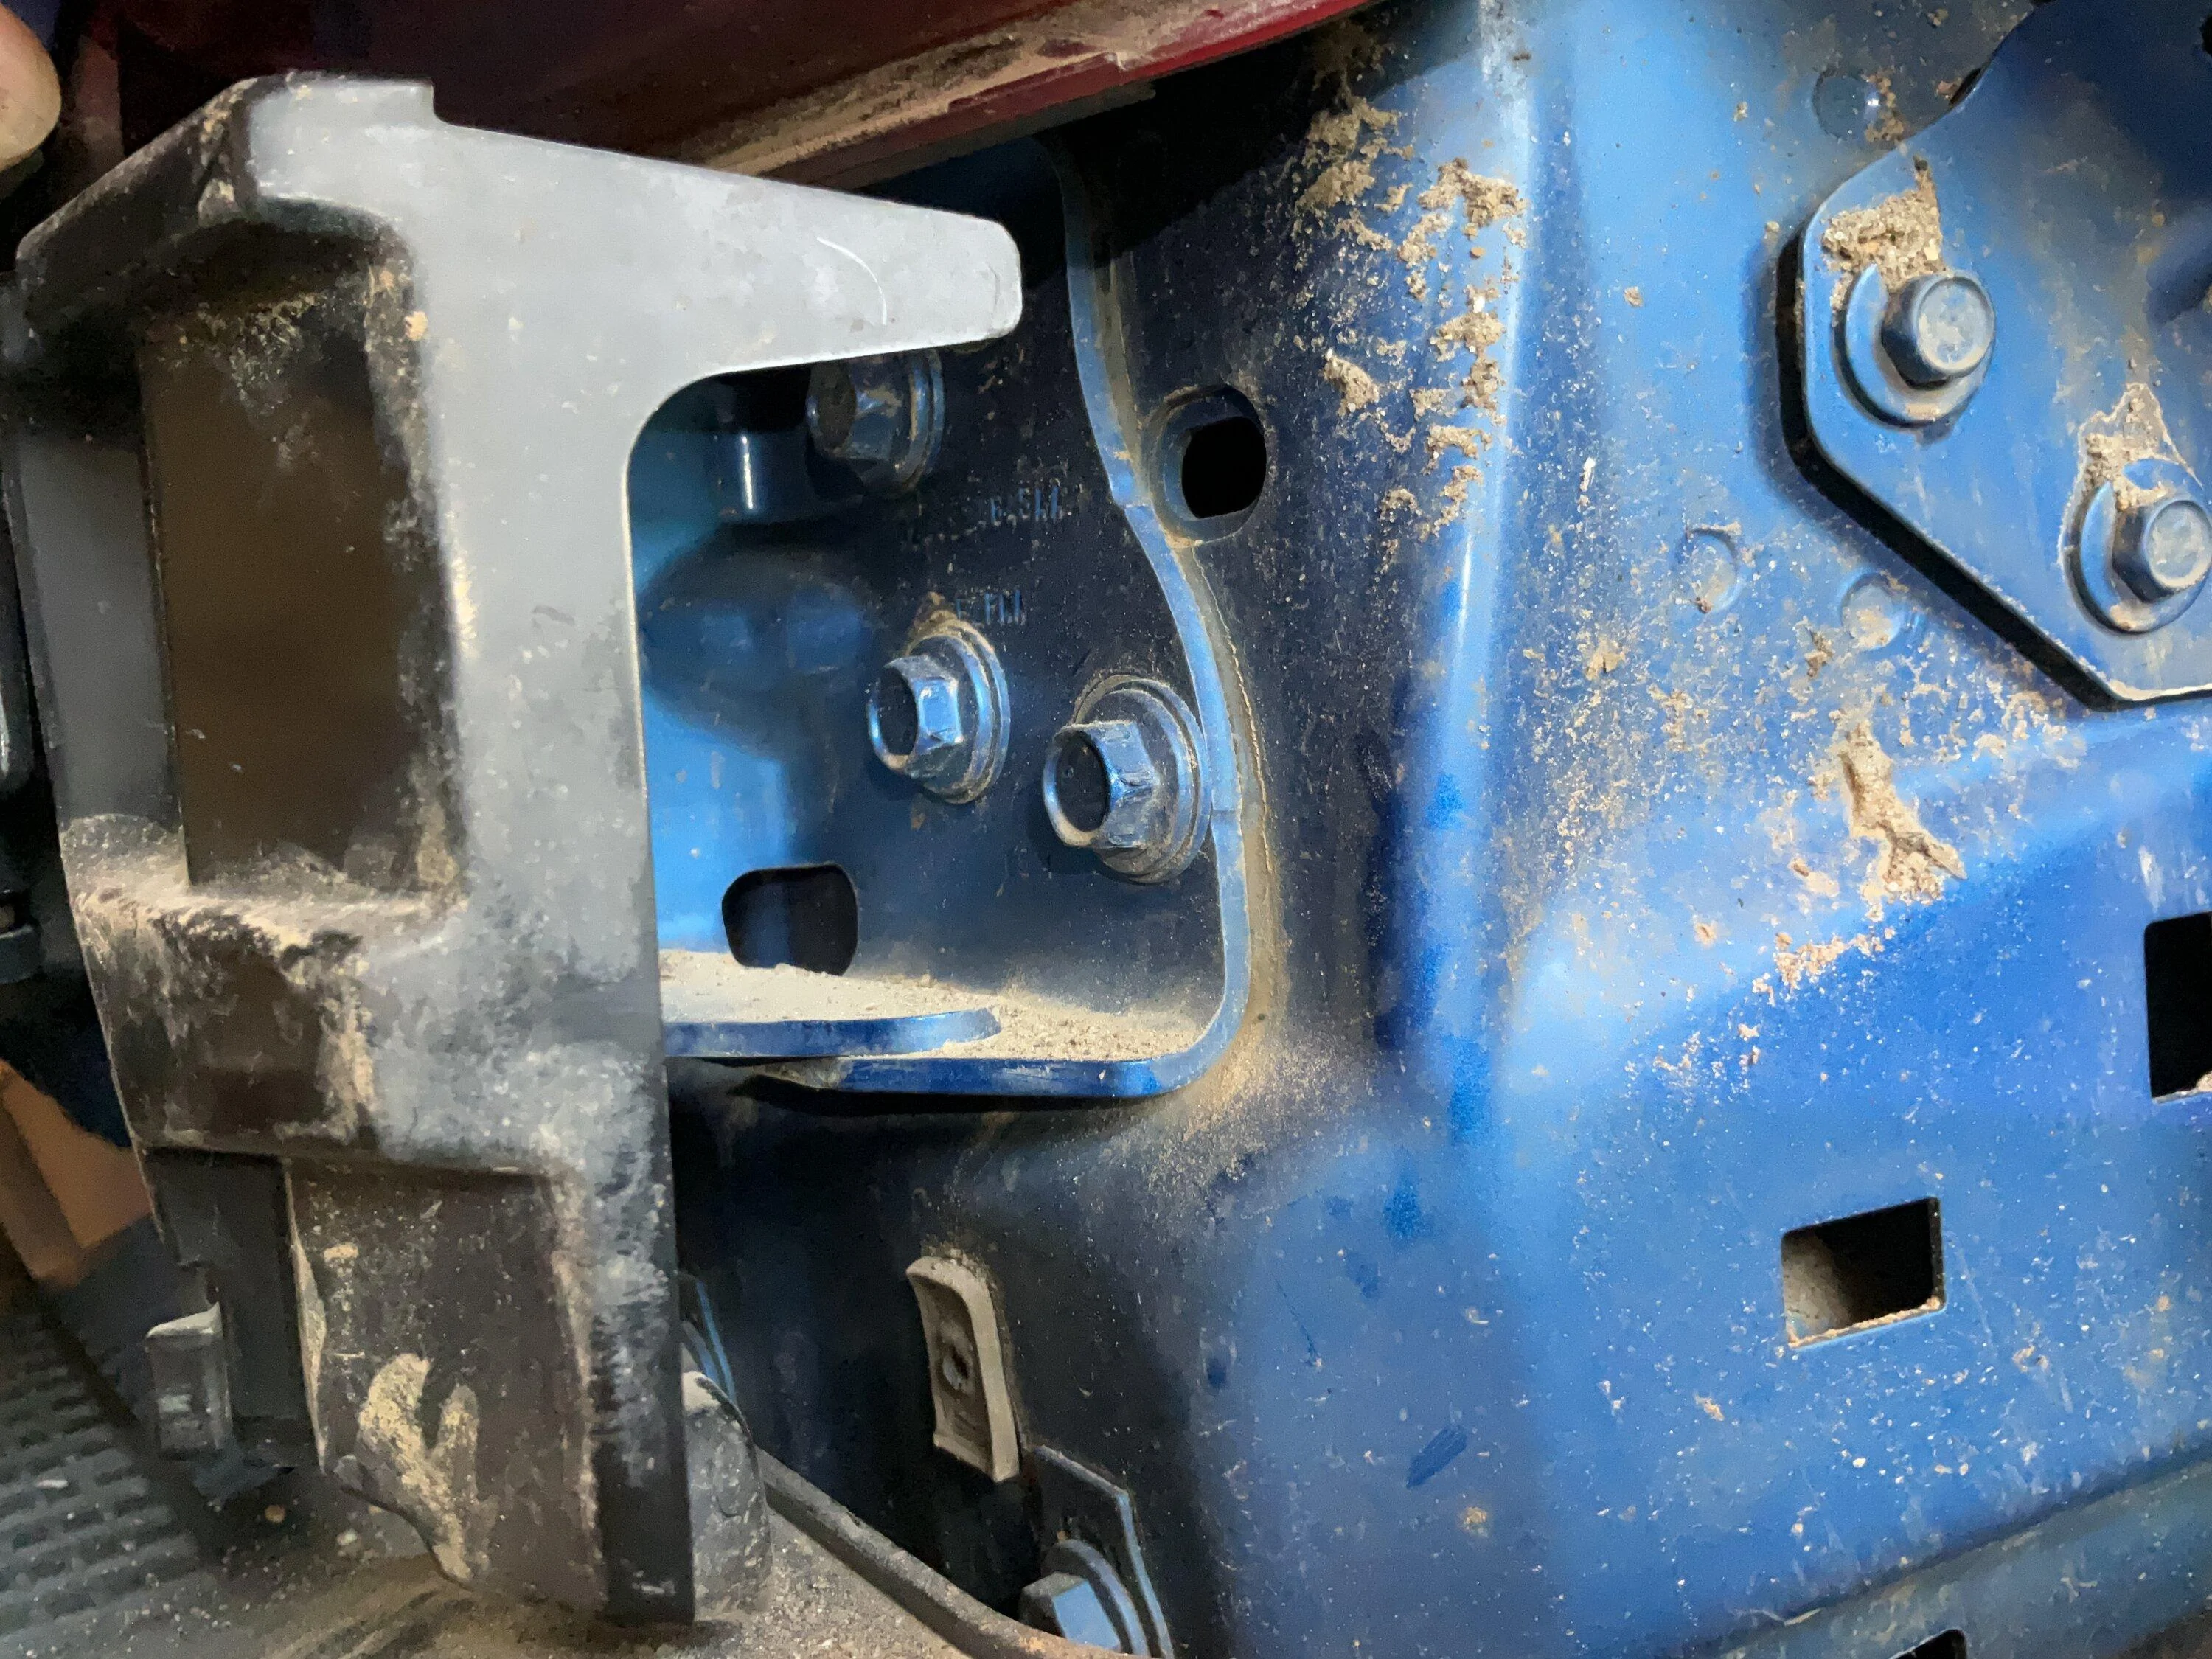
OK, so no problem, all I needed to do was adjust the mounts on the tub that the hinges bolt to. Easy enough as I have removed the tail lights before and knew the drill. Well, not so fast. Those big hinges with the door stop make removing those plastic pieces a bit difficult. It can be done, just be careful and don't scratch anything. Luckily, I only needed to adjust the lower mount by moving it in about 1/16 inch or so. That was enough to kick the door up at a slight angle that leveled out perfect with the weight of the spare.
Alright, everything is done and looks good enough for me. I drive down the road and it sounded like I picked up a squirrel with a hammer looking for his nuts.
Son of a.... I had a perfectly quiet tailgate before all this. No way can I tolerate that noise. Looked over my options for adjustment and decided to remove the lower stop to see if that made a change. Immediately quiet again. OK, then I drove briskly over rough dirt roads for 3 hours. Still quiet. So I am convinced it was that stop causing all the noise. Look it over and don't see any adjustment, so I shimmed the rubber/plastic piece in the gate to make it fit tighter. That did it. We'll see how long term that is, but for now it's quiet.
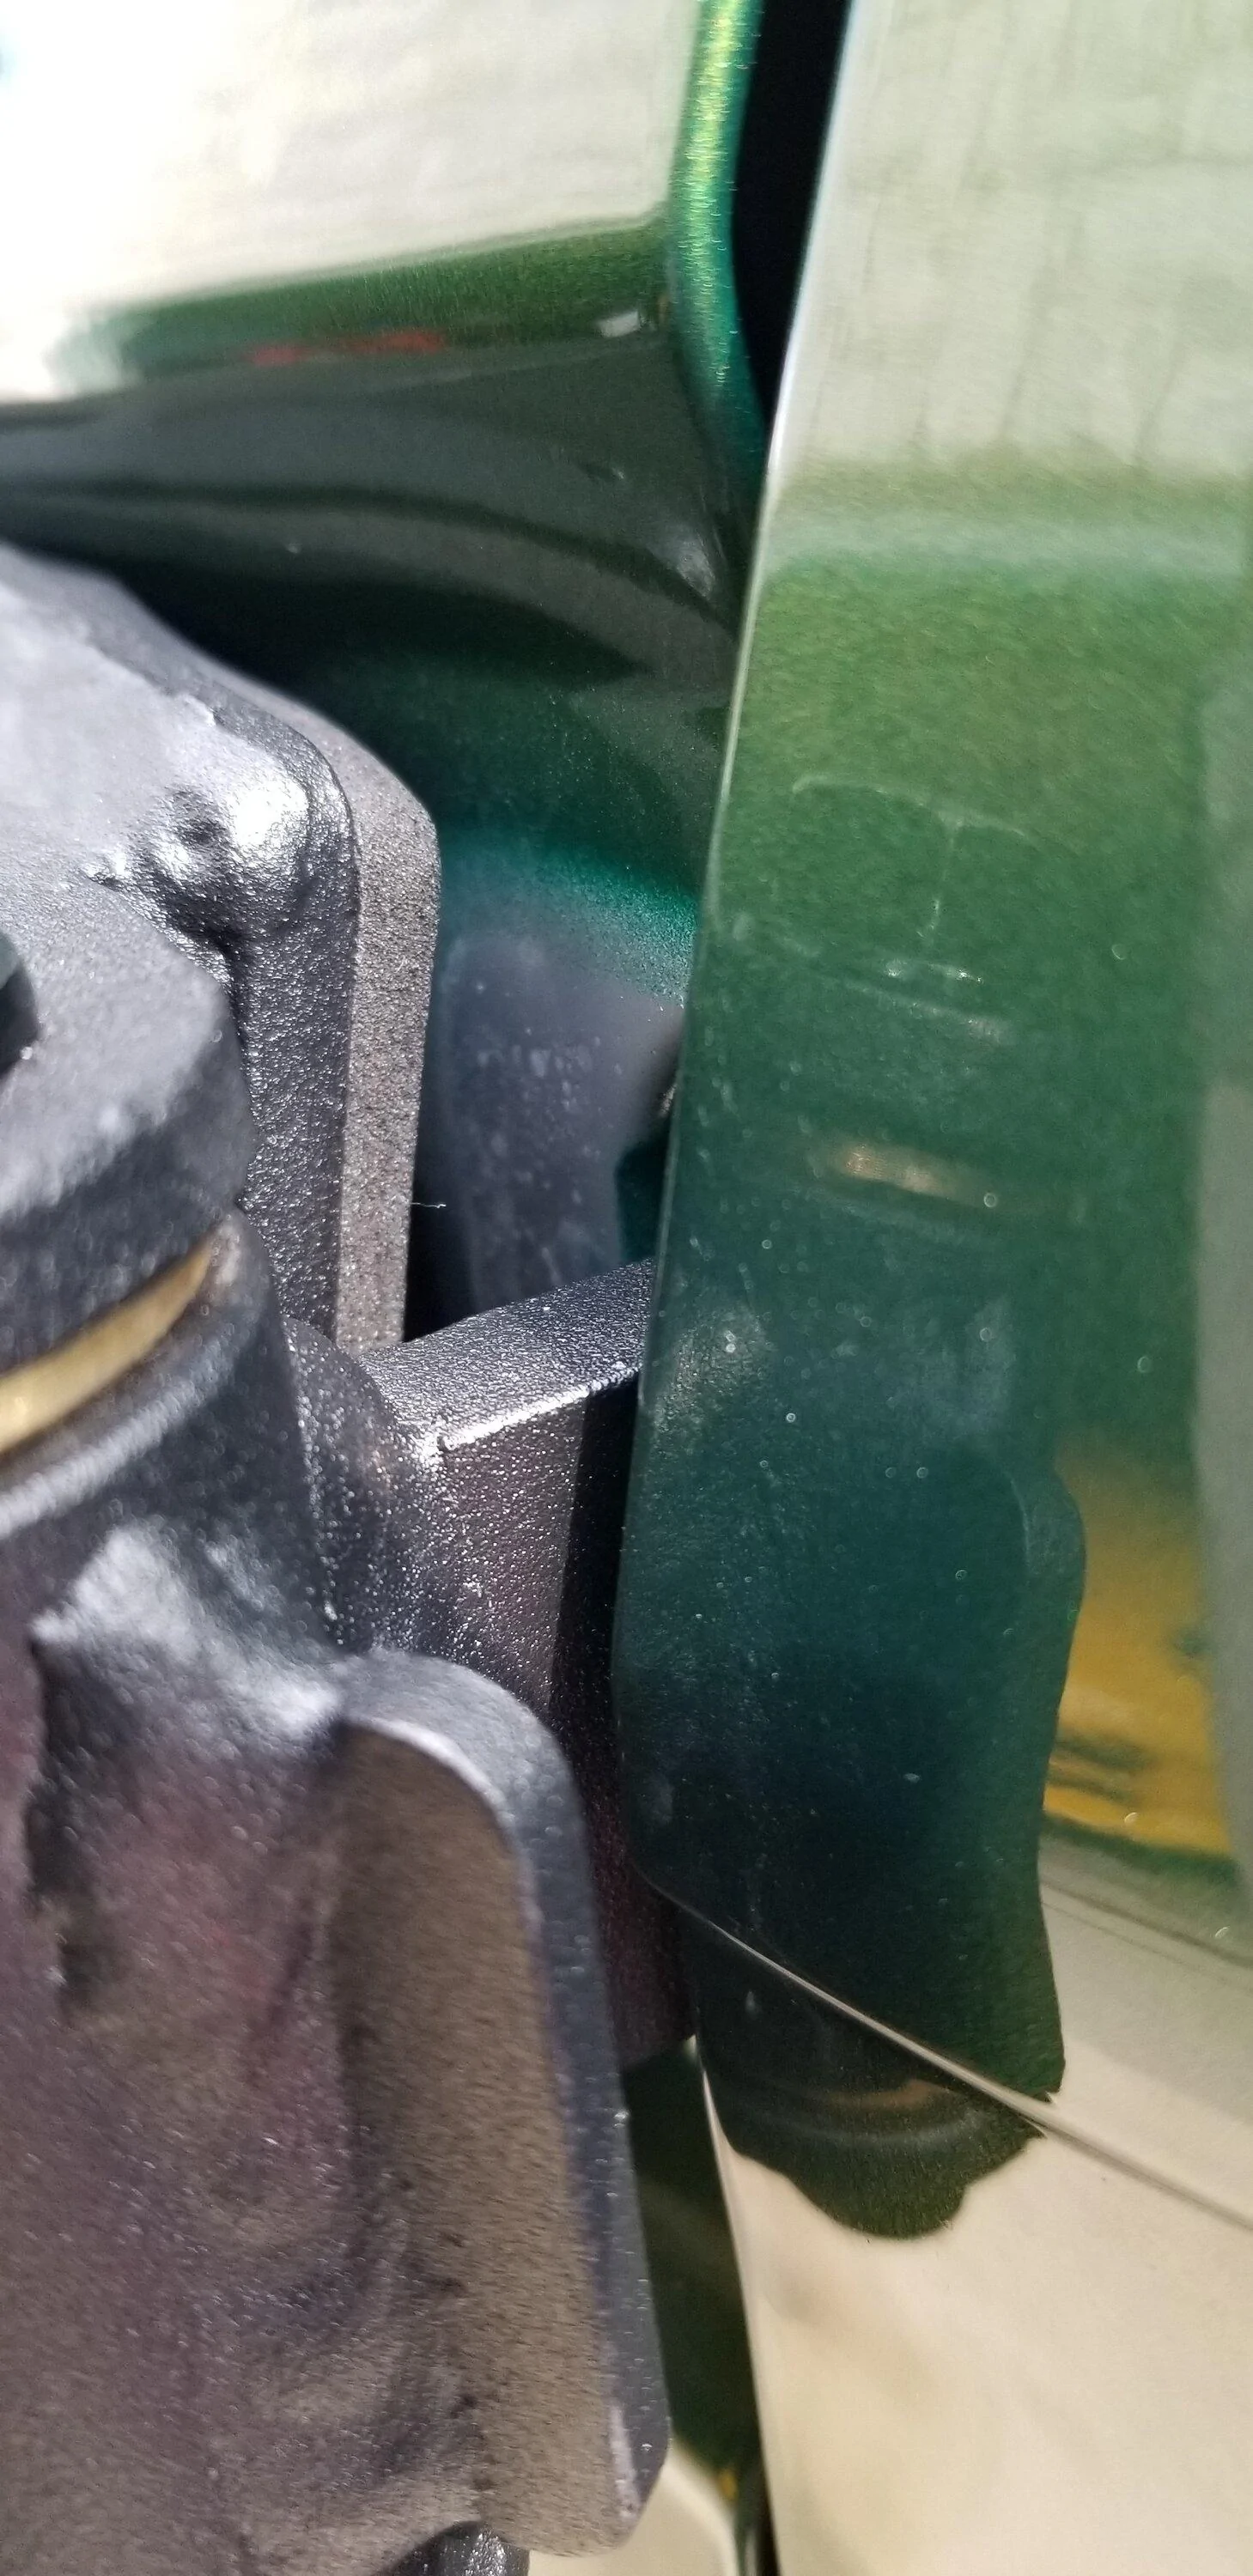
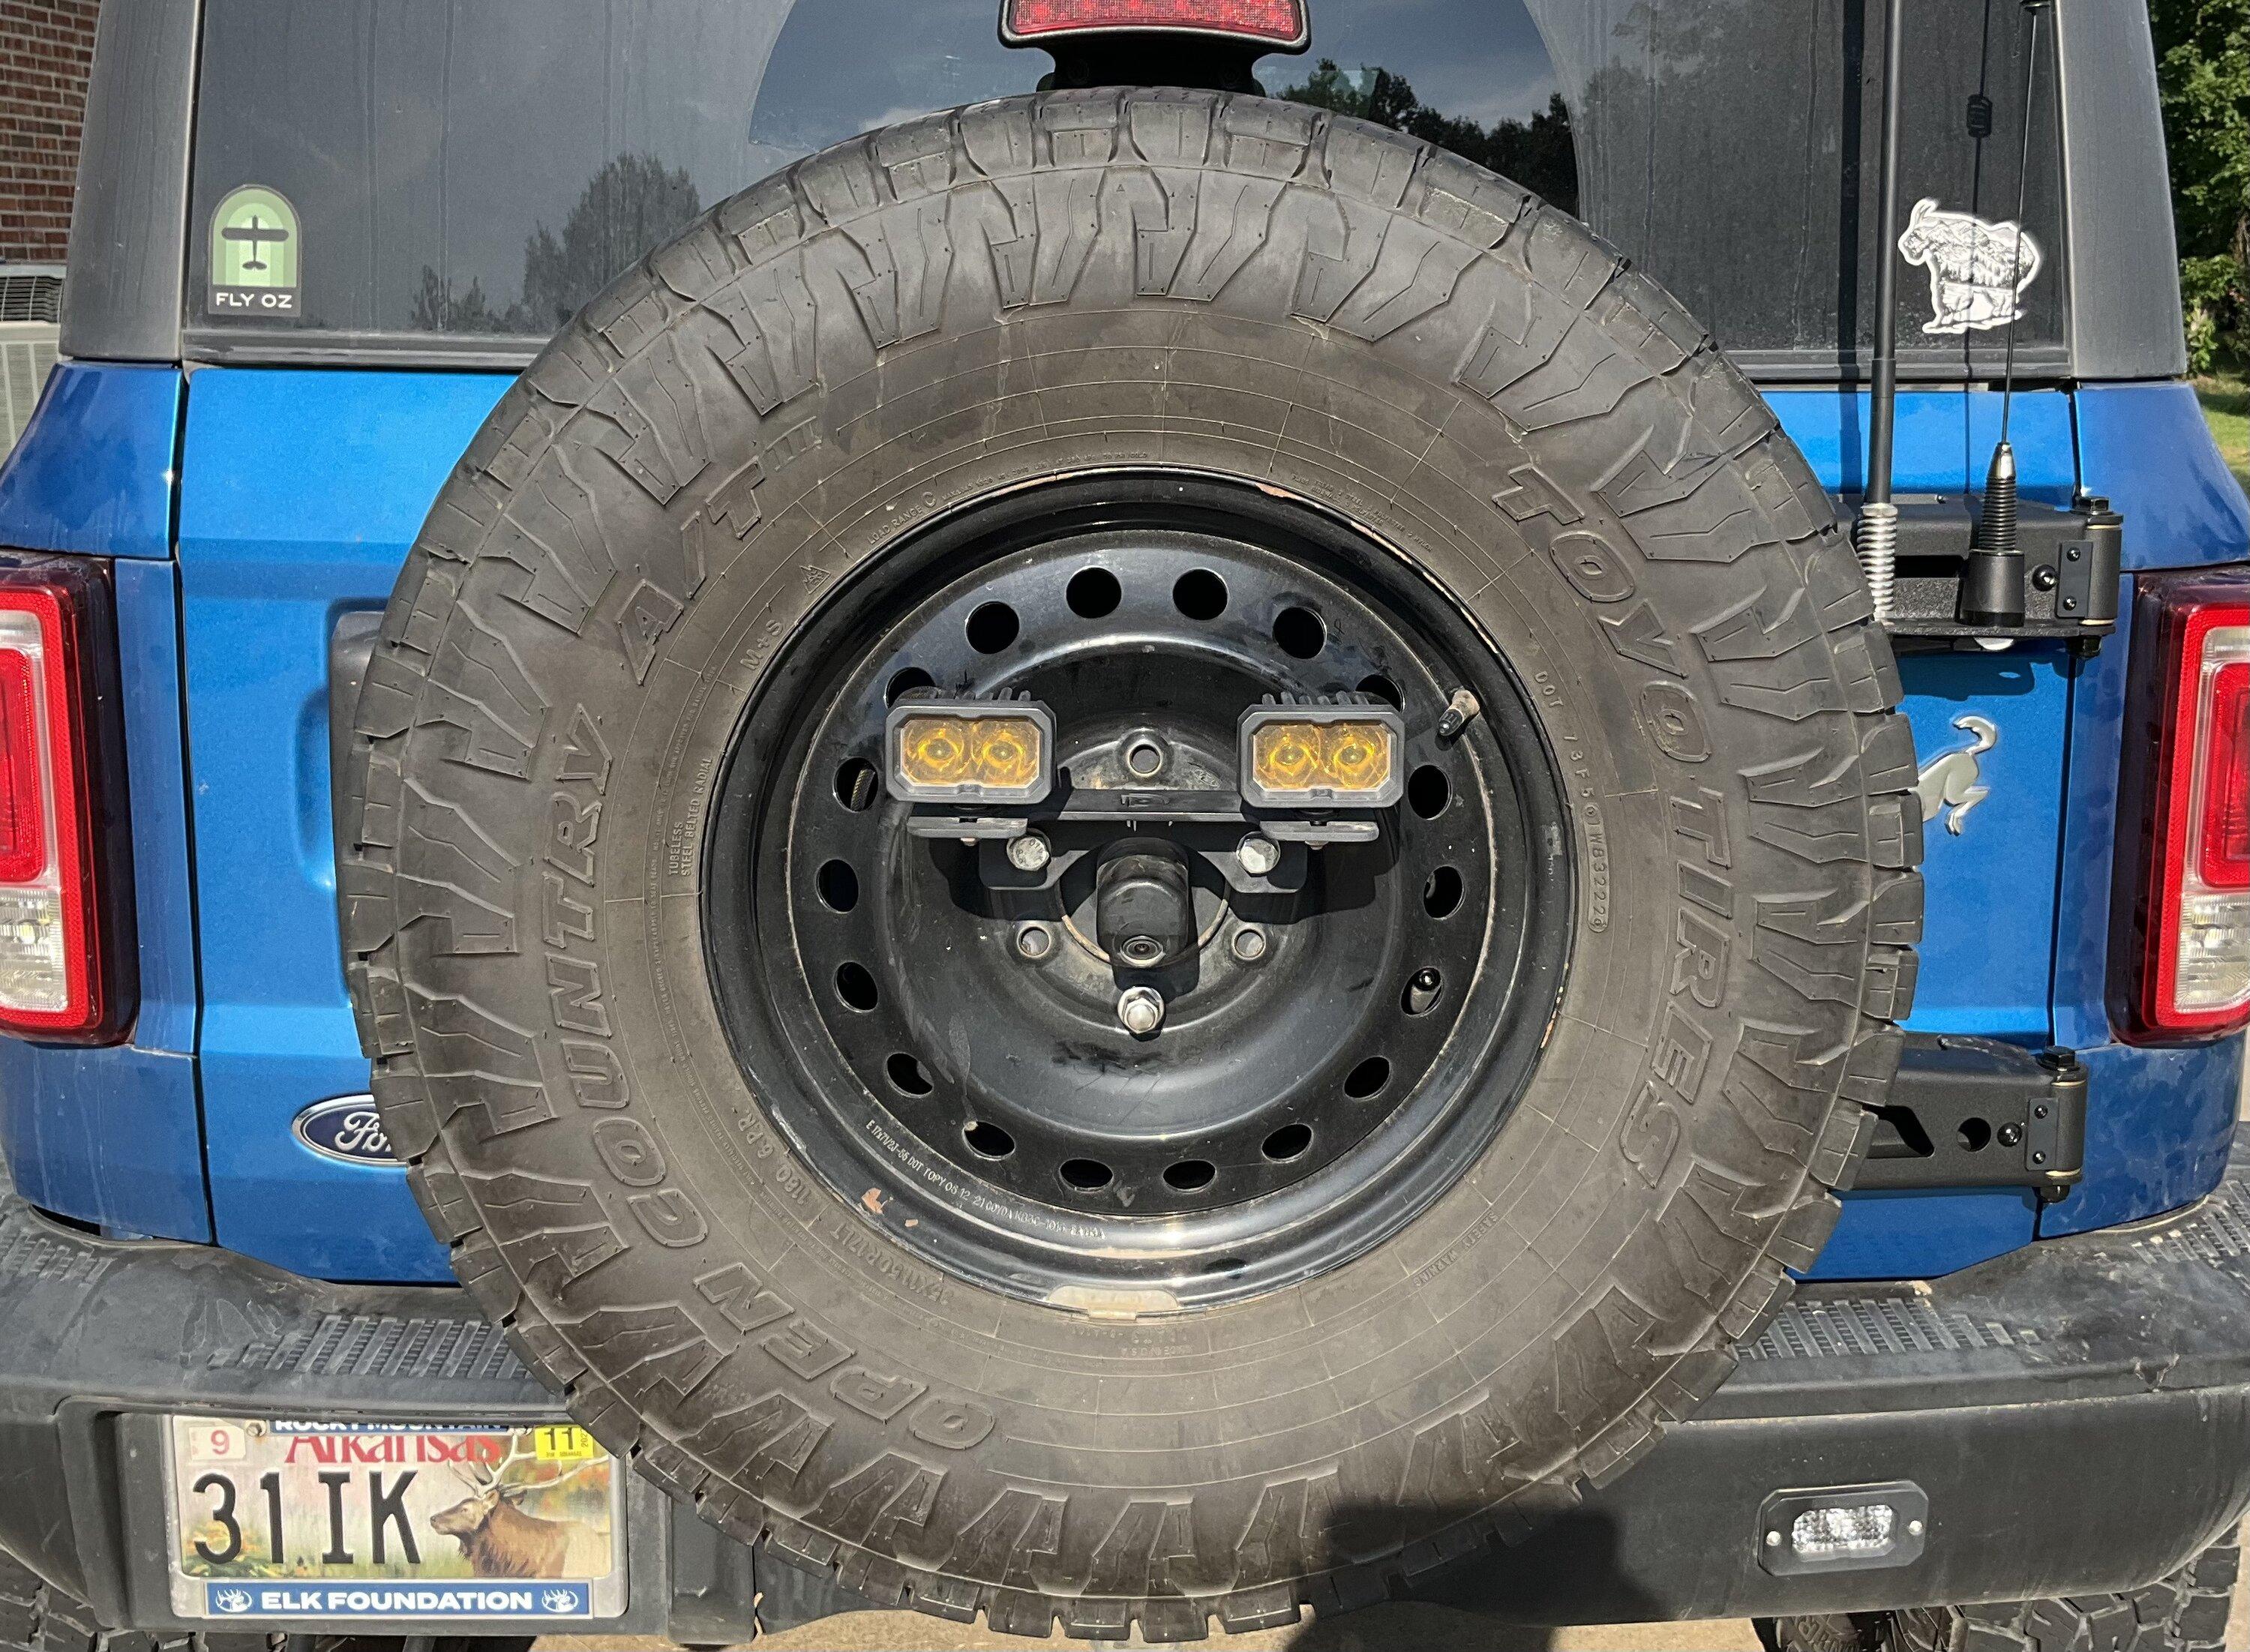
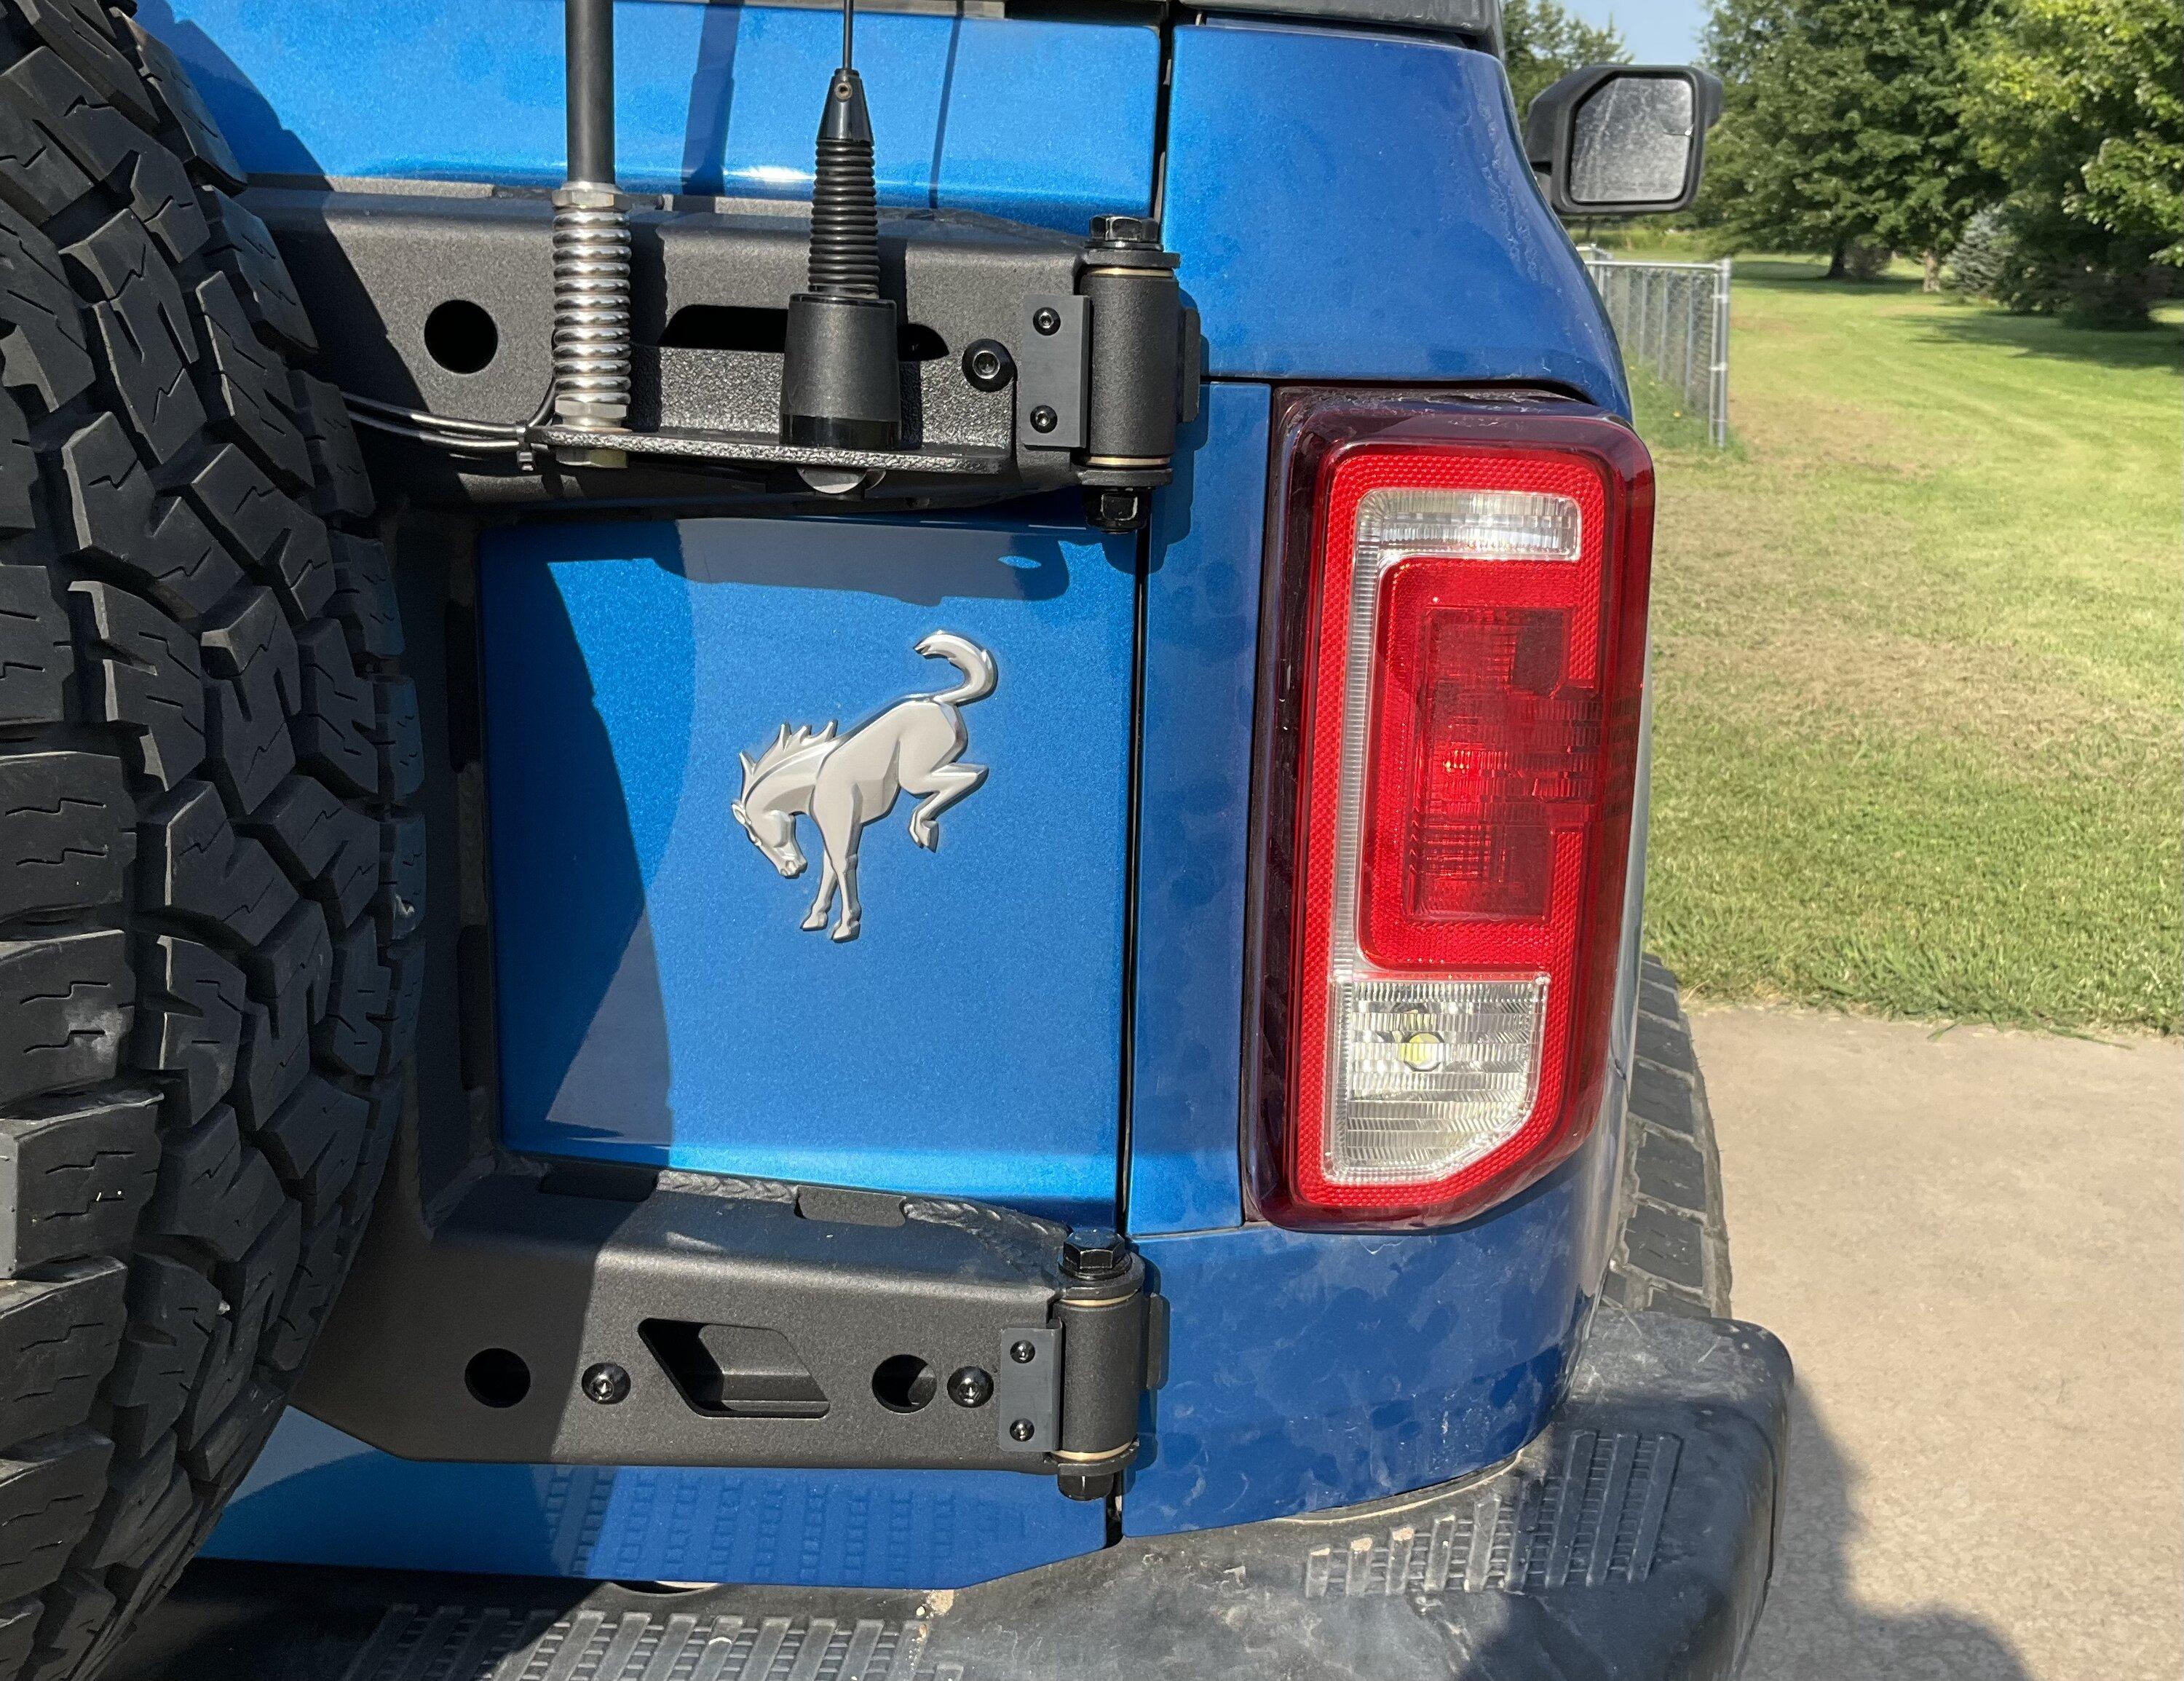
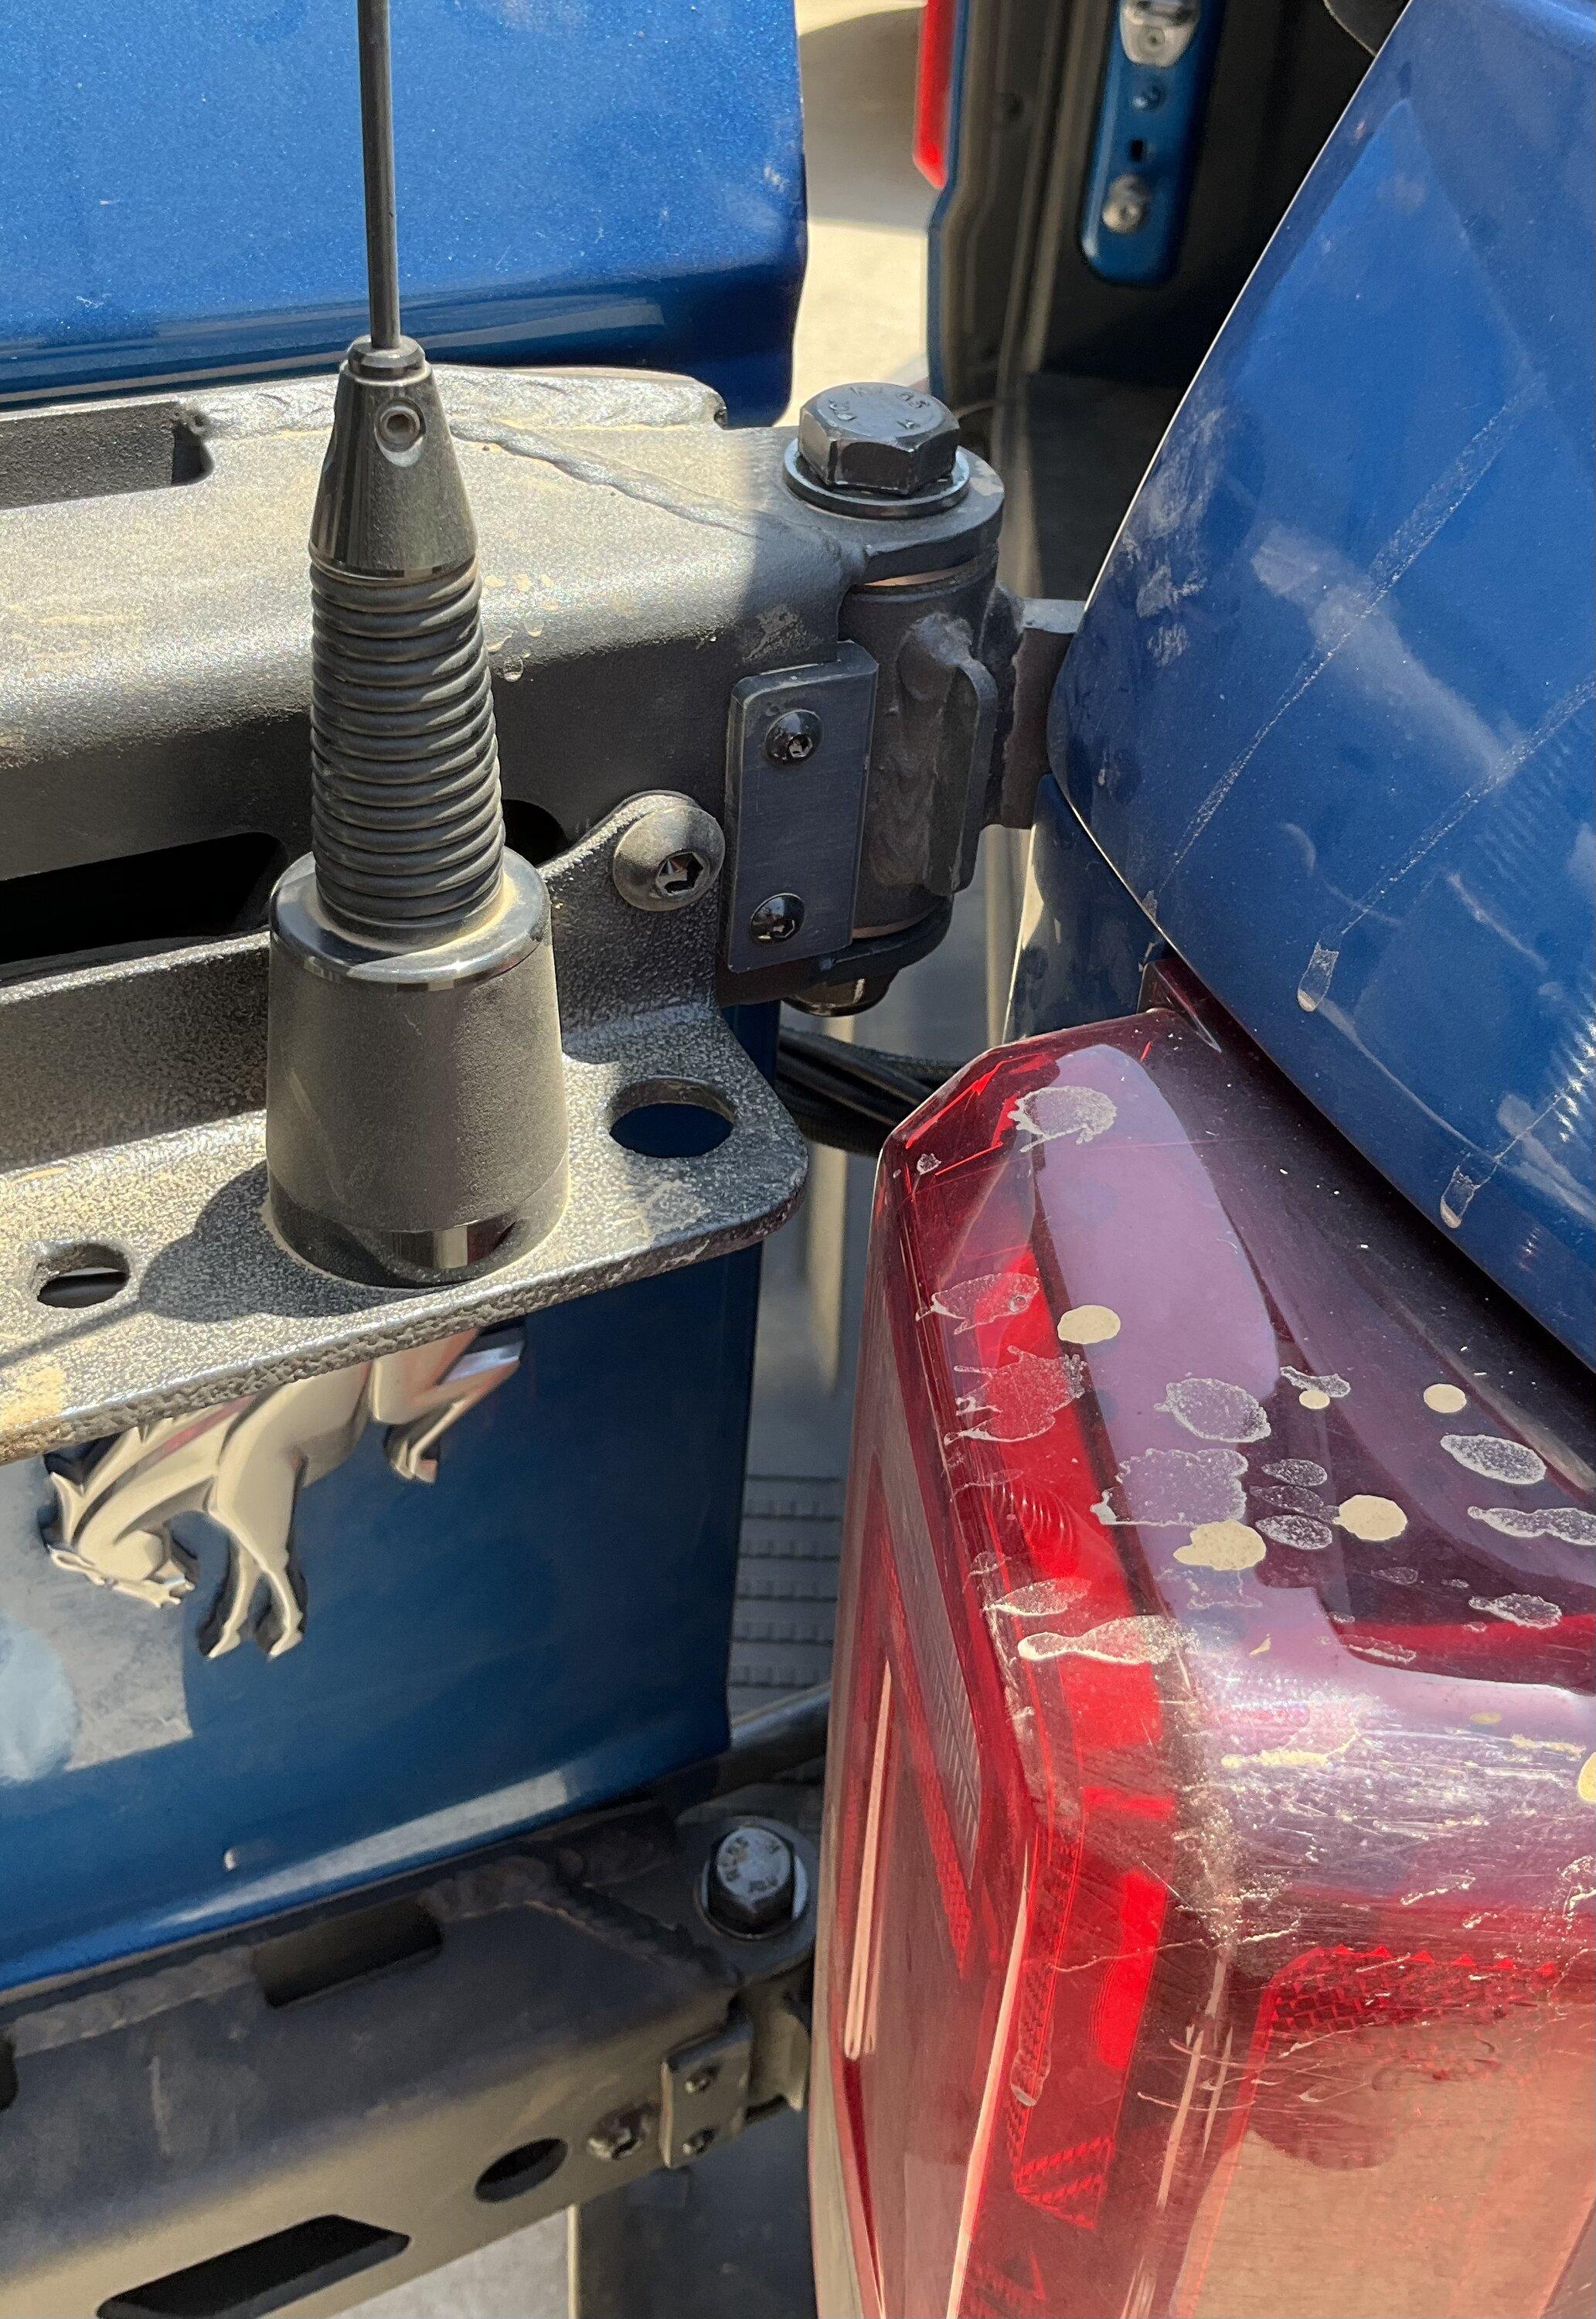
Turn Offroad is awesome and made an antenna mount for me. Having the WeBoost antenna and wanting to keep it at or below the height of the Bronco, I used the mount upside down. That lowered the mounting point by 2 inches, BUT what it did was put the mount right into the taillight before the tailgate hits the stop. That of course is on me as I know I mounted it upside down. I will cut the corner of the mount so it fits my needs.
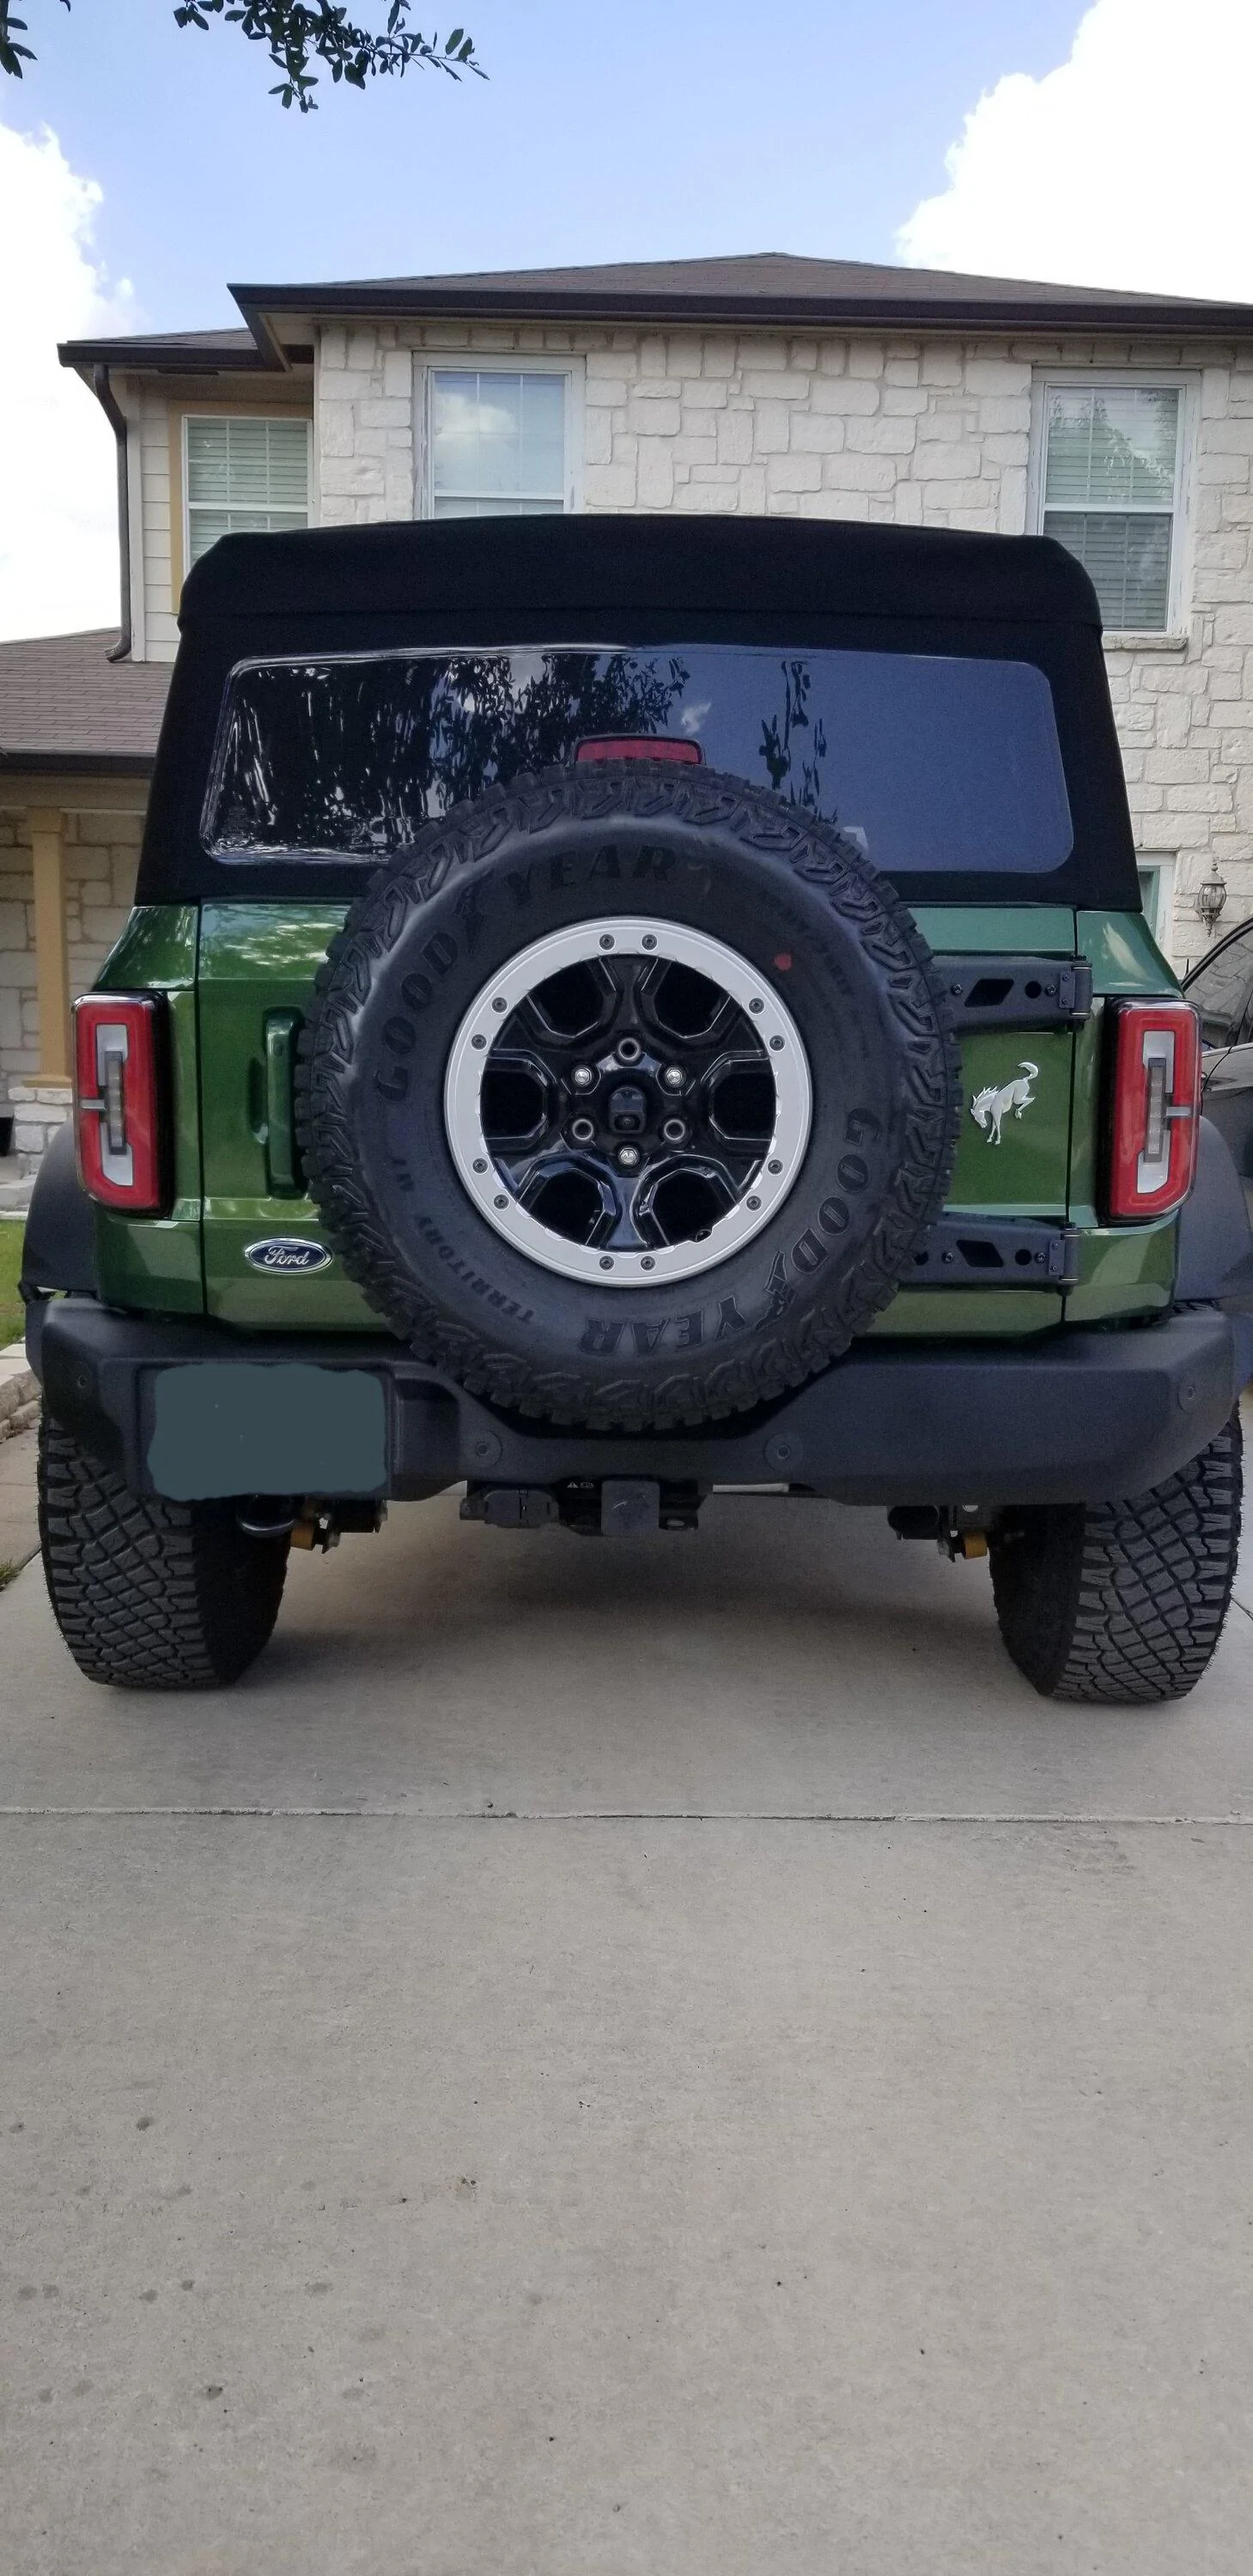
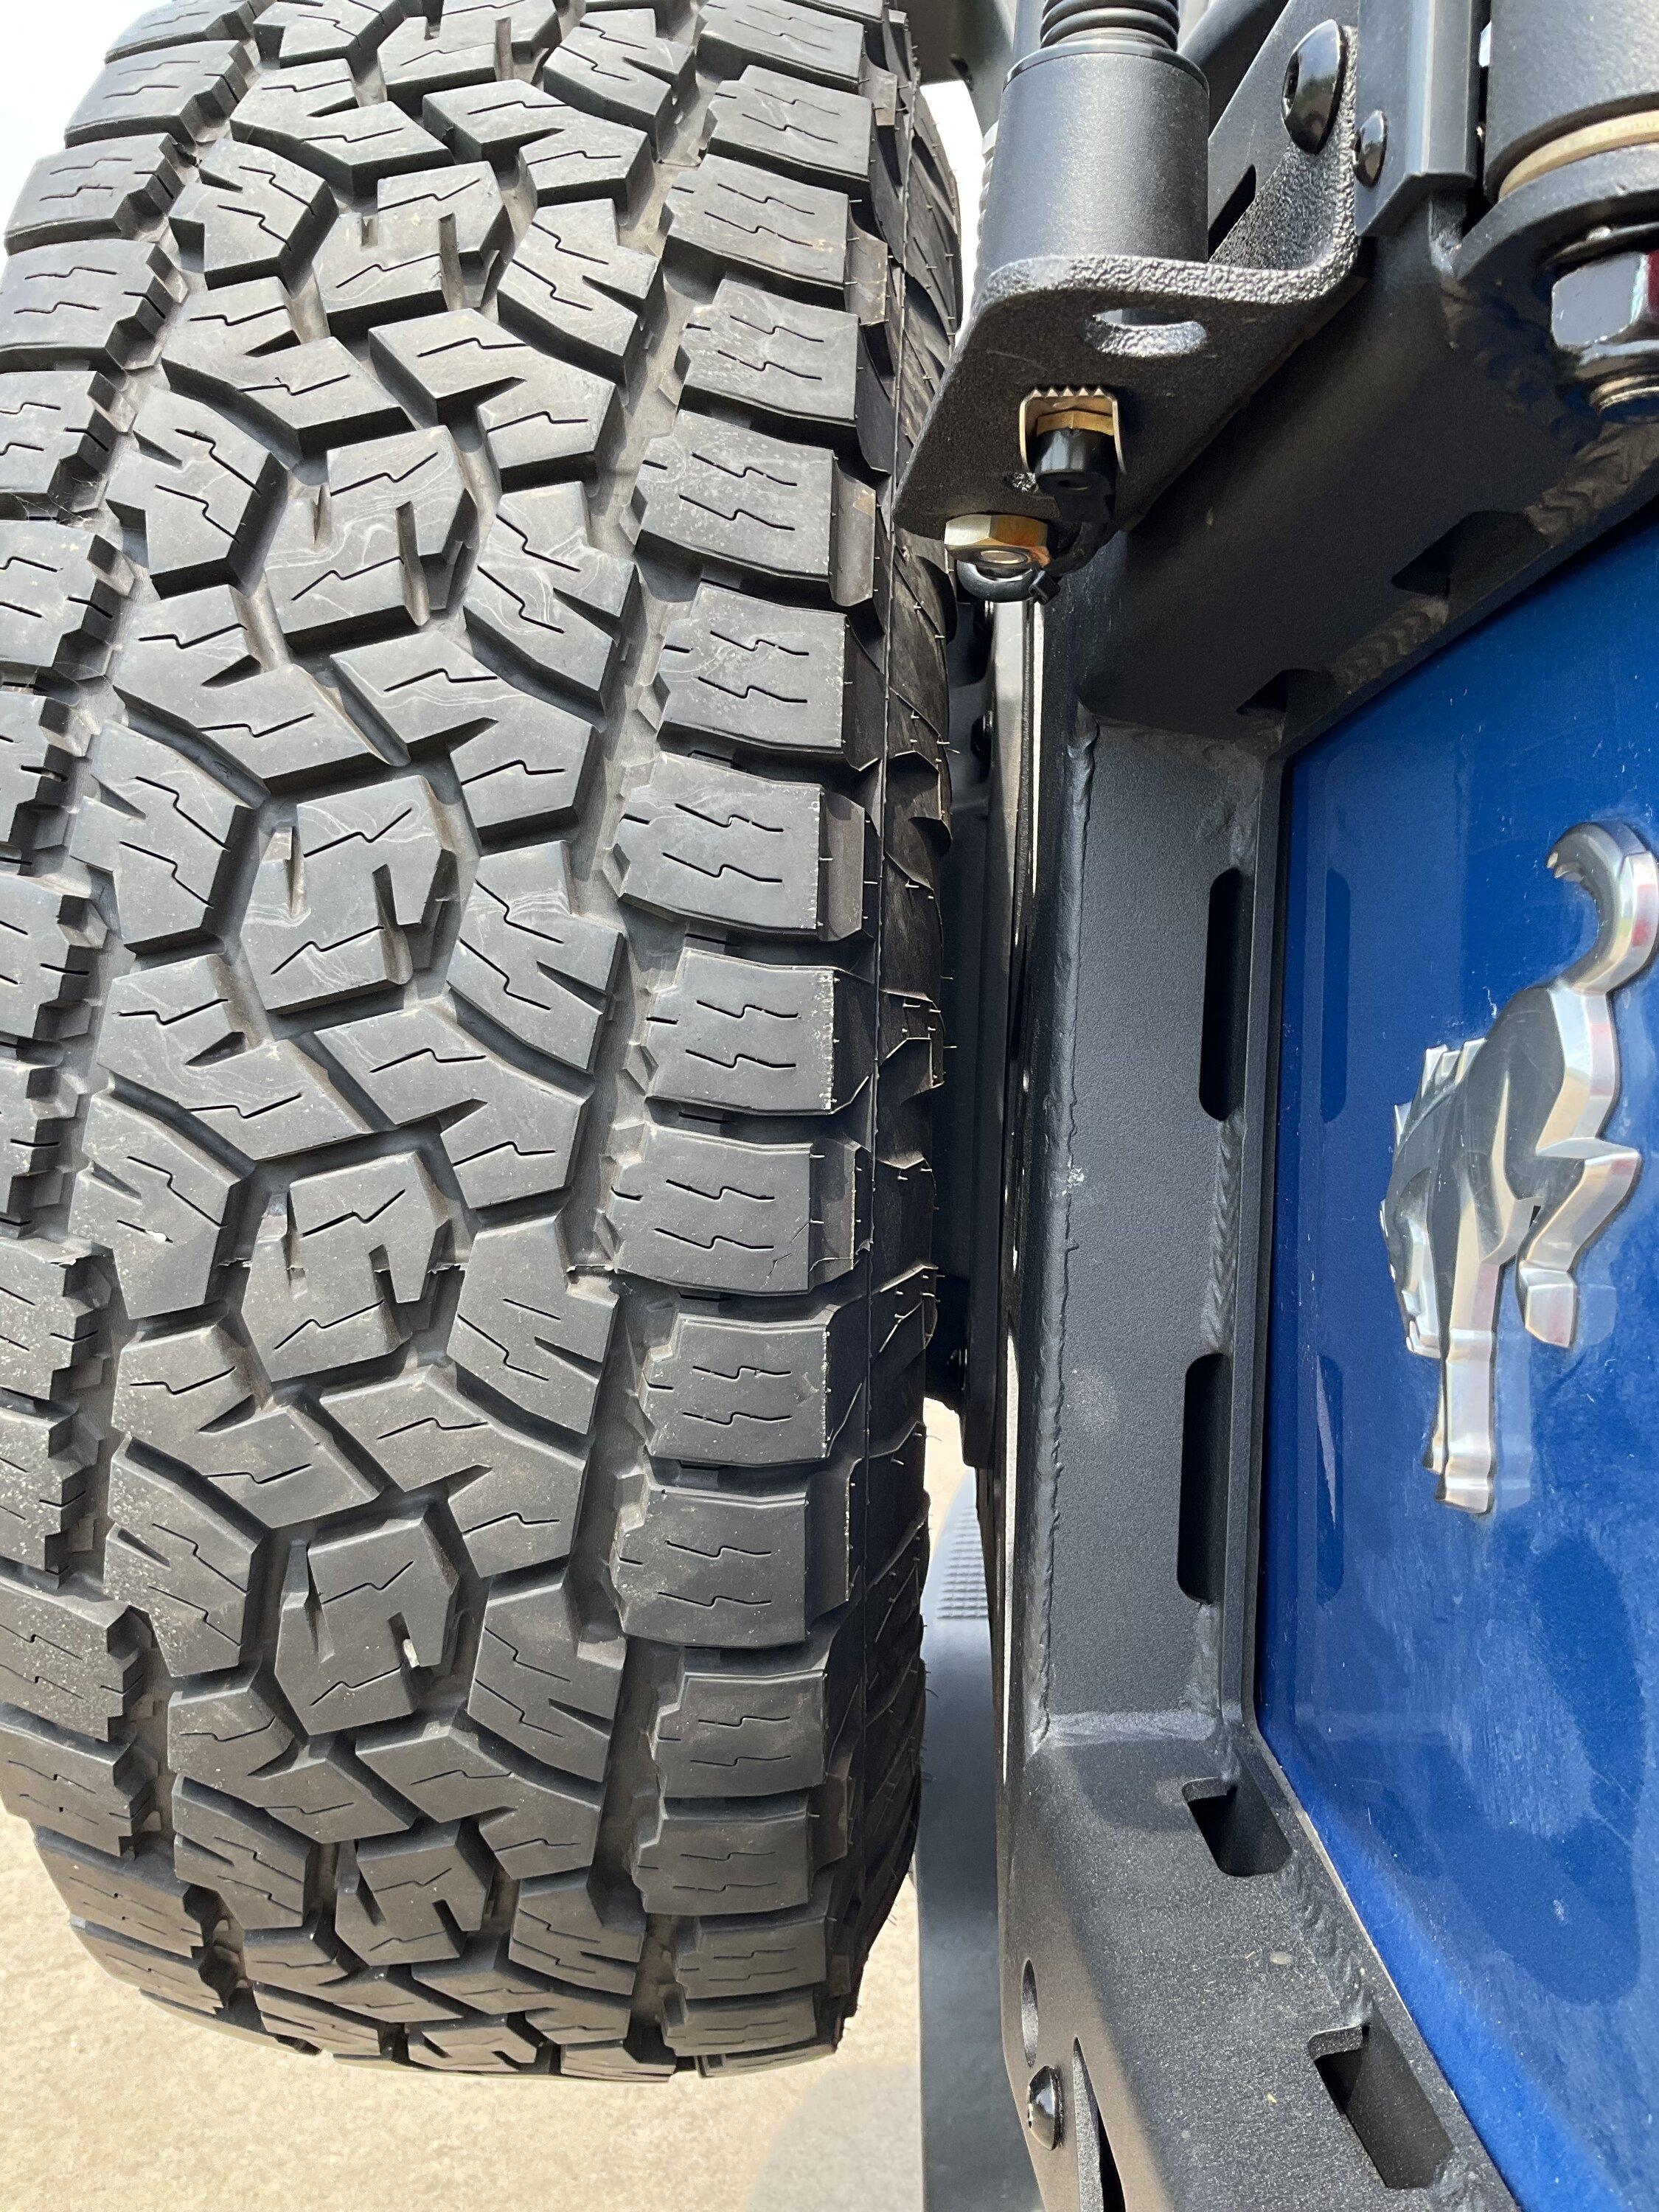
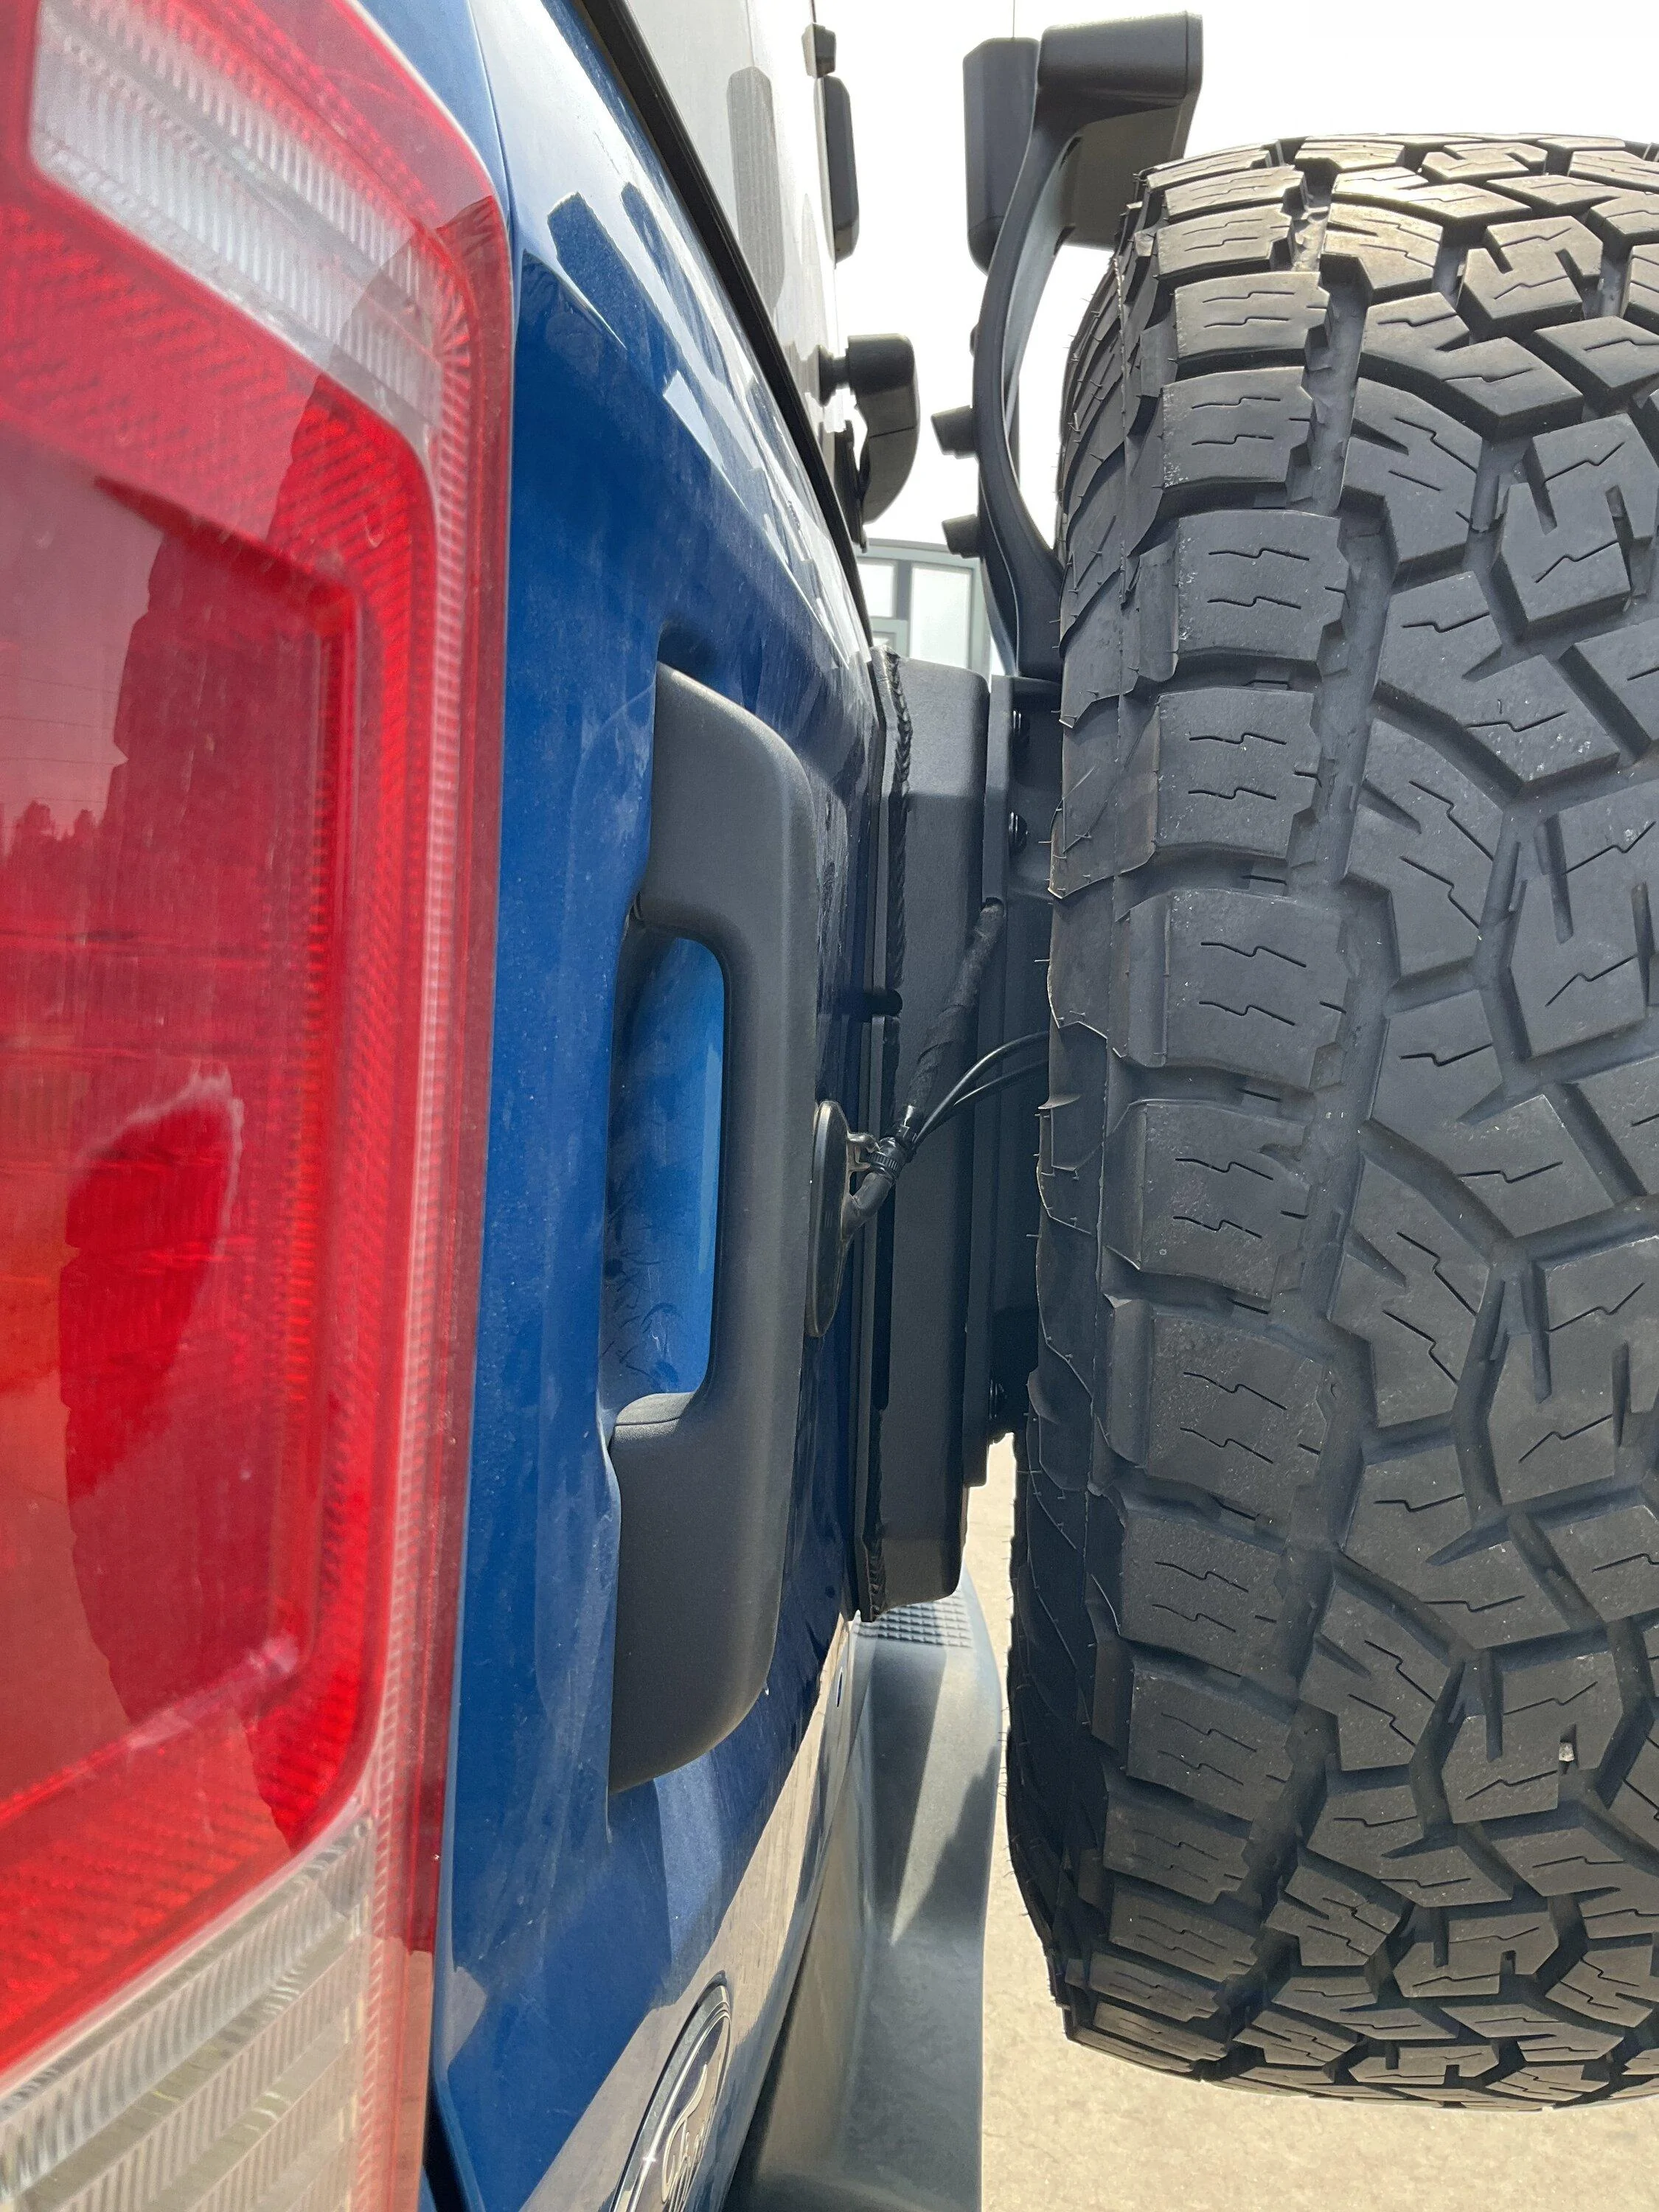
Overall I am very happy with it. I used my OEM carrier with OEM wheels. There are two different size OEM carriers that give about the same spacing with OEM wheels. If you have your stock wheels, you will have about an inch gap between the tire and the support. I am happy with an inch gap. If you have decreased the stock offset by an inch or more, you will most likely want the Turn carrier. Of course, if strength is a concern, get the Turn carrier.


Long Read:
I have wanted a bumper mounted swing gate, much like what BAMF makes for Toyotas and have been waiting for a product that met all my wants and needs. So far there are a few on the market I kinda liked, but not enough to pull the trigger.
For my current needs, the Turn reinforcement does almost everything by taking all the weight off the tailgate. Many supports just stiffen the tailgate, but the weight is still carried through the gate and the hinges. Turns product puts all the weight on the reinforcement and much larger hinges. The tub still carries the weight, so we'll see 10 years down the road how that works out.
I was impressed with the packaging. I can't tell you how many boxes I get that are nothing more than Kleenex and brown paper wrapping. Boxes with holes and missing or damaged items. It's frustrating ordering things these days. Well, Turn uses extremely heavy cardboard, plus plastic straps, plus tape to keep things tight. Inside the box it was packaged better than I would have. Wrapped in a cloth type thing and foam filled to conform to the box. Nothing was getting scratched, damaged, or lost in that box. Well done.
As far as instructions. Are there any? I don't know. I watched the video. There were no written instructions in the box and I didn't see a pdf anywhere on the website. Fairly self explanatory, but there were two different lengths of the same size bolts and it would have been nice to know where to use the long ones and the short ones. Sometimes it's obvious. It wasn't in this case, so I just used the long ones on the 4 upper holes and the short ones on the 4 lower holes. Seemed to work out fine, so maybe I guessed right or it doesn't matter. I am pretty old school and still like written instructions though, even if I don't read them first.
I installed it by myself in a garage that was over 90 degrees, so I can't say I was at my best, but everything went well enough. All the holes lined up easily except for one, and it was like 99% there. The bolt went in with a bit of resistance, but it's in there. The hinges have 2 piece brass bushings and a steel bushing. In the install video, the bushings stayed in the hinge. Gravity must have been a bit higher in my garage, because neither wanted to stay in. Would have been pretty easy with a second person, but I had to get the support started just enough on the hinges to hold the brass bushings in and then put the steel bushings in and slide it over to keep them in. Sounds easier than it was, holding a 50+lb support in one hand and trying to keep bushings in on two different hinges. After a few trail and error approaches I got it, but would have been much easier with a second person.
I did have to align my hinges slightly off from the factory hinges to maintain body lines. Honestly, I didn't look too closely before taking the gate off, so maybe it wasn't aligned that well to begin with. Once I got everything bolted on, I checked the fitment by opening and closing several times. Perfect. Then I put the spare on. Now the gate was hitting the latch and having to bump up to close. Looking at the service manual, that's to be expected with the extra weight of the spare. The Ford service manual tells you to account for the movement from adding the spare when adjusting the hinges.
OK, so no problem, all I needed to do was adjust the mounts on the tub that the hinges bolt to. Easy enough as I have removed the tail lights before and knew the drill. Well, not so fast. Those big hinges with the door stop make removing those plastic pieces a bit difficult. It can be done, just be careful and don't scratch anything. Luckily, I only needed to adjust the lower mount by moving it in about 1/16 inch or so. That was enough to kick the door up at a slight angle that leveled out perfect with the weight of the spare.
Alright, everything is done and looks good enough for me. I drive down the road and it sounded like I picked up a squirrel with a hammer looking for his nuts.
Son of a.... I had a perfectly quiet tailgate before all this. No way can I tolerate that noise. Looked over my options for adjustment and decided to remove the lower stop to see if that made a change. Immediately quiet again. OK, then I drove briskly over rough dirt roads for 3 hours. Still quiet. So I am convinced it was that stop causing all the noise. Look it over and don't see any adjustment, so I shimmed the rubber/plastic piece in the gate to make it fit tighter. That did it. We'll see how long term that is, but for now it's quiet.
Turn Offroad is awesome and made an antenna mount for me. Having the WeBoost antenna and wanting to keep it at or below the height of the Bronco, I used the mount upside down. That lowered the mounting point by 2 inches, BUT what it did was put the mount right into the taillight before the tailgate hits the stop. That of course is on me as I know I mounted it upside down. I will cut the corner of the mount so it fits my needs.
Overall I am very happy with it. I used my OEM carrier with OEM wheels. There are two different size OEM carriers that give about the same spacing with OEM wheels. If you have your stock wheels, you will have about an inch gap between the tire and the support. I am happy with an inch gap. If you have decreased the stock offset by an inch or more, you will most likely want the Turn carrier. Of course, if strength is a concern, get the Turn carrier.
Sponsored
Last edited: