
Third on the Milwaukee. I took it to Ol Florida...did not end up needing it, but as others said, I alredy have a Milwalkee tool sets, so getting it was a no-brainer. Works for my needs.
Sponsored
50-foot hose: https://www.amazon.com/gp/product/B08YXGVDK4 $26Thanks! I’d love to see your parts list and any build tips. i’m pretty good at breaking things on the first try.


I'm sure you are well on your way but when you get back you should invest in our ARB Onboard kit. We were the first ones to come out with this solution (patent pending design). It's the most elegant solution for an onboard air compressor under the hood. Easy to install and always available. They are popular here on Long Island as we have a big surf fishing community and we drive on the beaches here.I'm going to Sedona tomorrow with my two-door Badlands, and I don’t have a compressor. Do you have any recommendations on something I might pick up locally that will do the trick? I'm in Phoenix.
I saw that Napa has one similar to the Trickflate, and I might be able to track one of those down.
NAPA Horizontal Electric Air Compressor
I'm unsure what additional setup I would need with this, like a 2 or 4-hose setup, or if it’s OK to use straight out of the box without risk of overheating and damage.
Do you have any suggestions or recommendations on this or another model I might be able to find locally, and what hoses, adapters, etc., I might need?

Great write up! Thanks!50-foot hose: https://www.amazon.com/gp/product/B08YXGVDK4 $26
4-pack chucks: https://www.amazon.com/gp/product/B07D13V72Q $20
5-pack barb fittings: https://www.amazon.com/gp/product/B0823SDDPB $9.50
2qty 2-pack T fittings: https://www.amazon.com/gp/product/B082KRLRM7 $8ea
Shut-off valve: https://www.amazon.com/gp/product/B07PMPXC5X $8
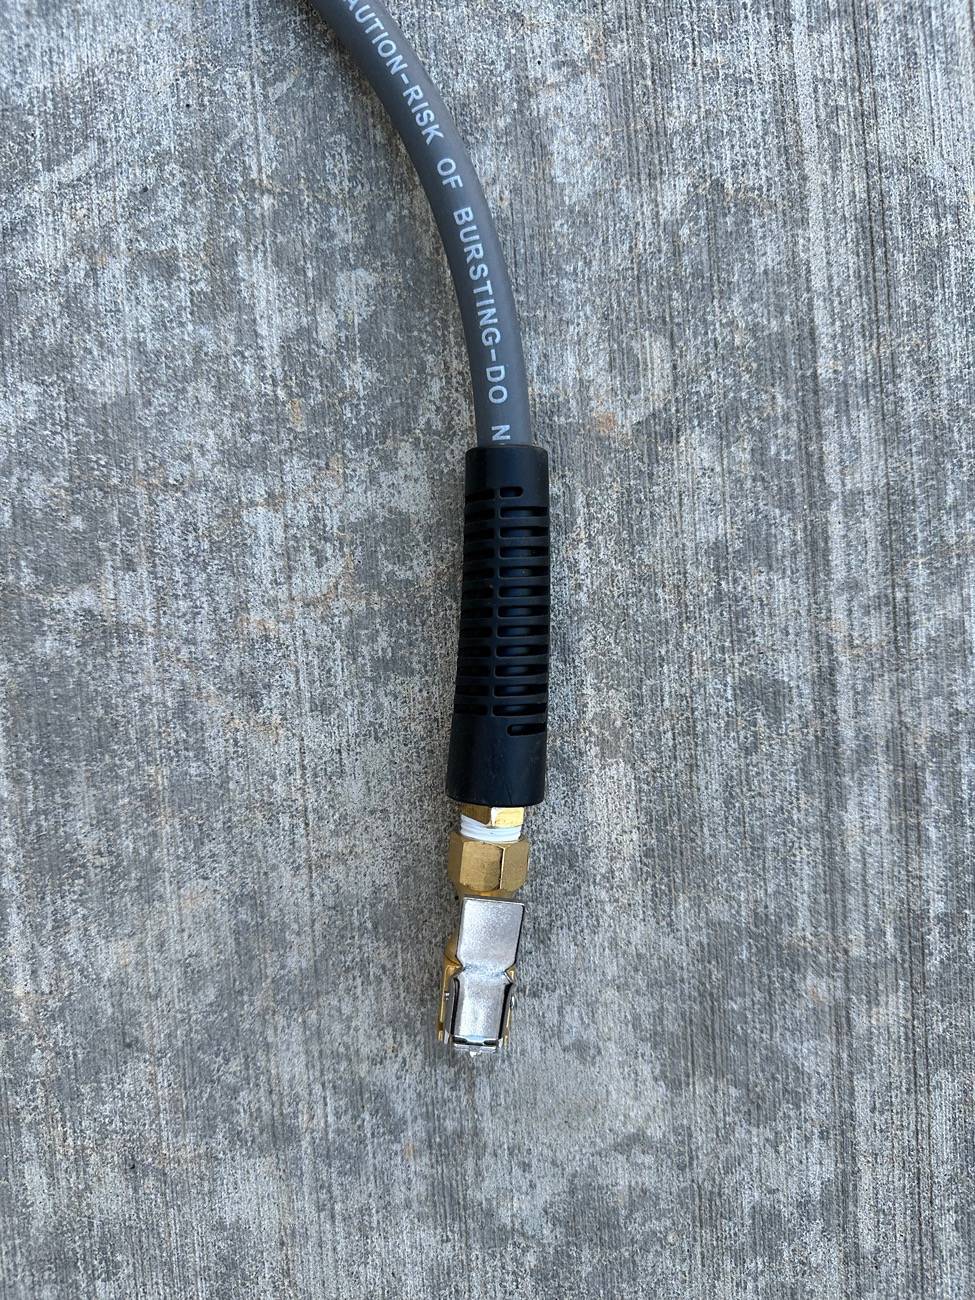
Optional, if you want to preserve the hose that came with your compressor (verify your compressor uses the Nitto J-Type fitting, which it very likely does):
Nitto adapter: https://www.amazon.com/dp/B0CQKCSTFH $15
I put the shut-off valve in between the two parts of the Nitto adapter. Then I cut a short length off the hose and attached to the The Nitto adapter. The shut-off valve isn't strictly necessary, but I thought it might be good to have.

I cut about 7' of hose twice and attached a T adapter and a hose to either end. These go to the front wheels. At the end of those hose pieces, I attached another T adapter. I cut two 3.5' lengths to go to the front tires and attached a barb fitting and a chuck at the end.
I cut two 10' lengths of hose, with one from the other end of the hose that had the connector on it so that I could use that:
These 10' pieces were attached to the remaining unconnected fitting of the T-adapters, and chucks were added to the ends. Although it can work either way, the oddball fitting that used the built-in connector from the hose tells me which hose goes to the right rear tire.
The chucks are a nice quick-connect and release style, so no air is lost attaching or removing.
To save even more space, (I have a 2-door), I could have shortened the 4' runs that go to each tire by 1' each, and even trimmed 1-2' off the 10' run that goes to the back tires. My setup lets the hoses easily lay on the ground unstressed regardless of where the tire valve is positioned. If I had a 4-door and needed more length to get to the back tire (I don't think it would be needed), I could have made the lines that tee off to the front tires a little shorter. As it was, I had a few feet of scrap hose left over.
As you can see, it fits in the bag with the compressor and a case with deflators and a pressure gauge:
Been using yours since it came out and love itI'm sure you are well on your way but when you get back you should invest in our ARB Onboard kit. We were the first ones to come out with this solution (patent pending design). It's the most elegant solution for an onboard air compressor under the hood. Easy to install and always available. They are popular here on Long Island as we have a big surf fishing community and we drive on the beaches here.
Coupon code BRONCO6G saves ya 10% as well: https://www.4x4truckleds.com/kr-off-road-air-compressor-engine-bay-kit-for-2021-ford-bronco/


Not sure if you're being serious or funny, but there are definitely a ton of opportunities not far from Cedar City. Not sure if you are going north or south from there, but check out Sand Hollow in Hurricane to see if that's your thing. LMK your direction/distance, and I (and others) can give you plenty of options.Having it installed at the Ford dealer in Cedar City, UT - wonder if there's any fun places around there...
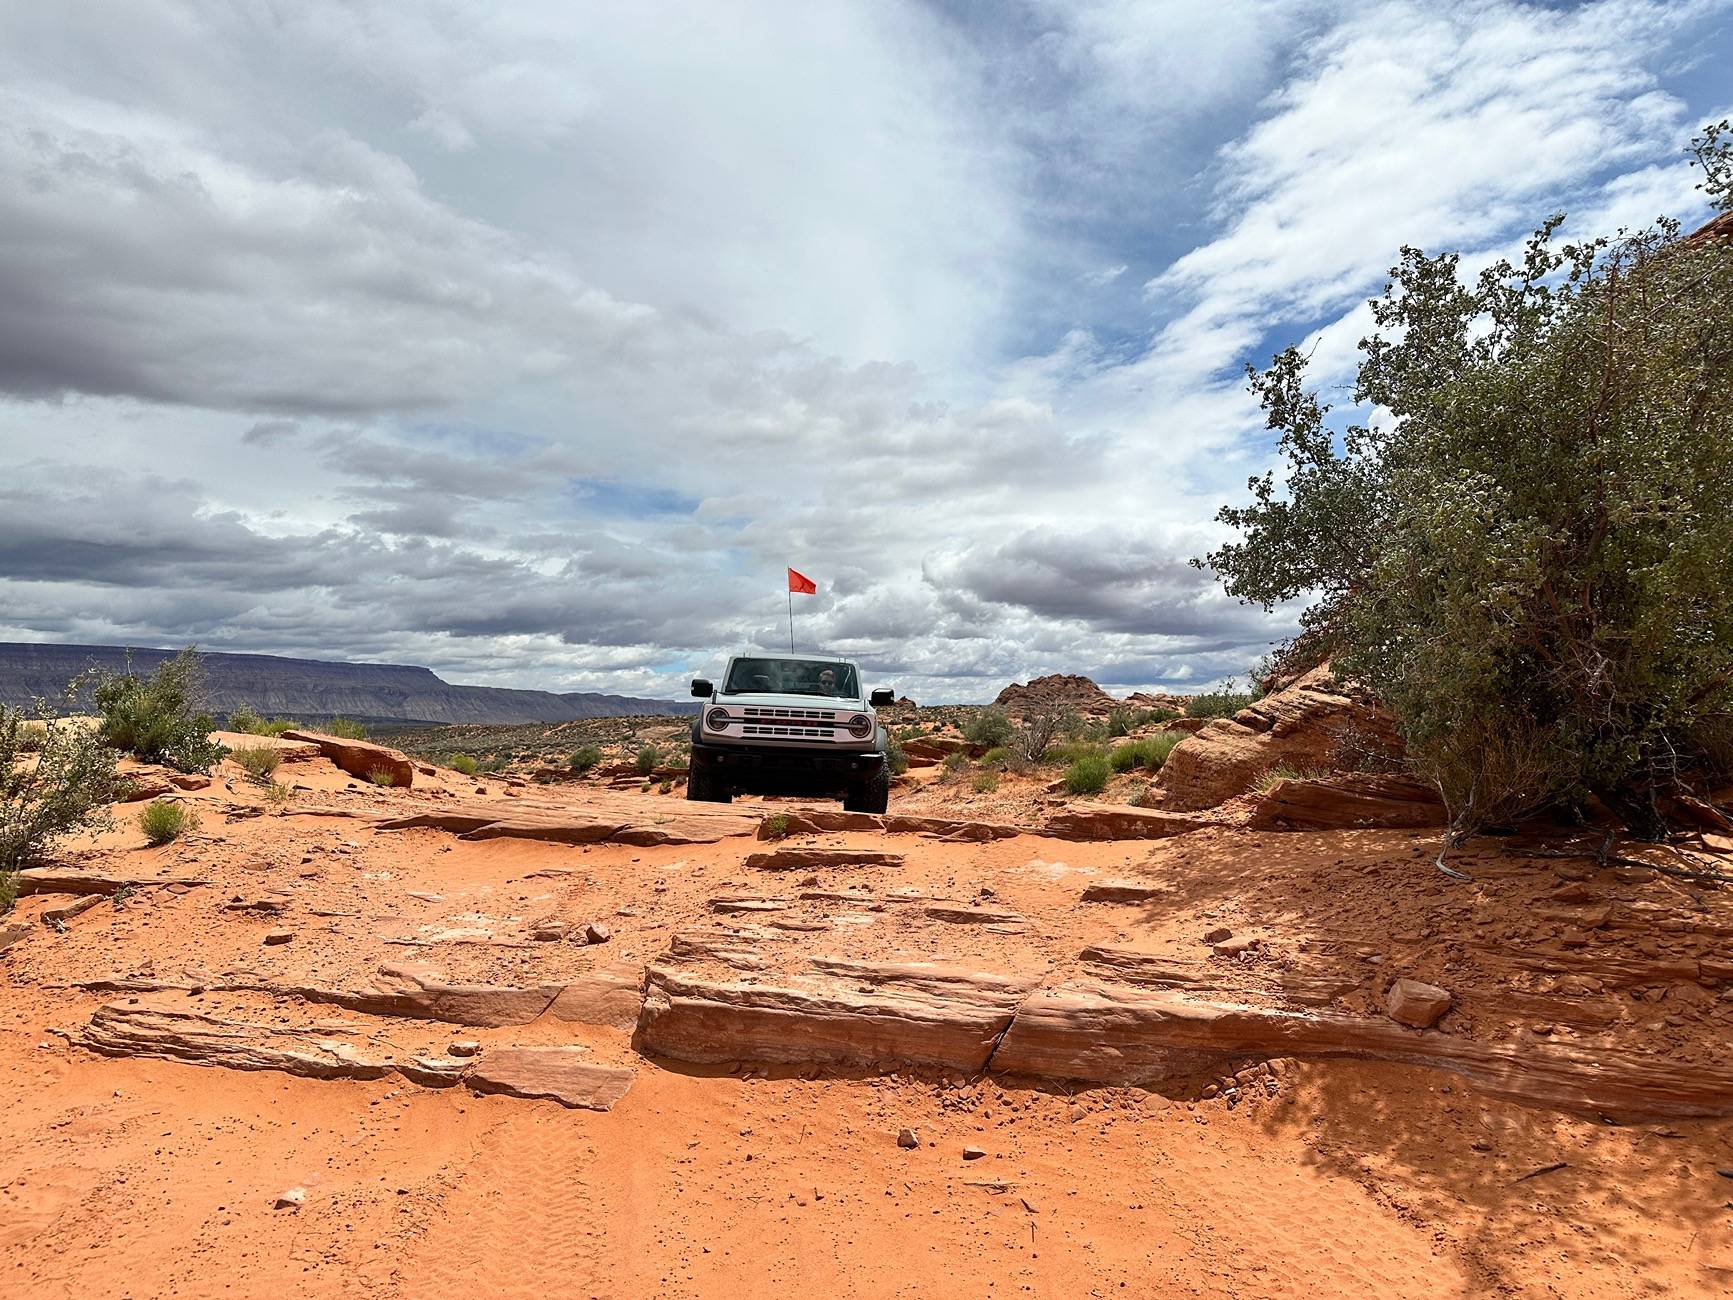
As I mentioned before, Sand Hollow State Park (you'll need a flag mounted to your Bronco--they sell flags at the park, but not mounts) is a great option for a variety of difficulty levels, and despite the name, there's a lot of rock crawling areas that are not sandy. There are also plenty areas of deep sand, so plan accordingly. We came in the main entrance and drove about 3/4 a mile or so, turned off to the right, went under the tunnel and did those trails back in that area. I can't find my map to remember the trail names, but there are a variety of easy and midlevel obstacles with bypasses for the hardest items. Here are some examples of the variety we encountered:Trying to be funny - I'll take any recommendations! Live in Las Vegas so we'll be heading south and this will be the first UT trip - thanks.


What parts would I need from the Trickflate site to convert the Napa compressor, or the Trickflate one, to a 4-hose setup?Kim is right, just use it right out of the box and worry about the rest after your trip.
Thanks much! We do easy for now - very kind of you to post and appreciate it!As I mentioned before, Sand Hollow State Park (you'll need a flag mounted to your Bronco--they sell flags at the park, but not mounts) is a great option for a variety of difficulty levels, and despite the name, there's a lot of rock crawling areas that are not sandy. There are also plenty areas of deep sand, so plan accordingly. We came in the main entrance and drove about 3/4 a mile or so, turned off to the right, went under the tunnel and did those trails back in that area. I can't find my map to remember the trail names, but there are a variety of easy and midlevel obstacles with bypasses for the hardest items. Here are some examples of the variety we encountered:
Here some buggies went on more extreme stuff that we bypassed. This guy was very close to having a bad day:
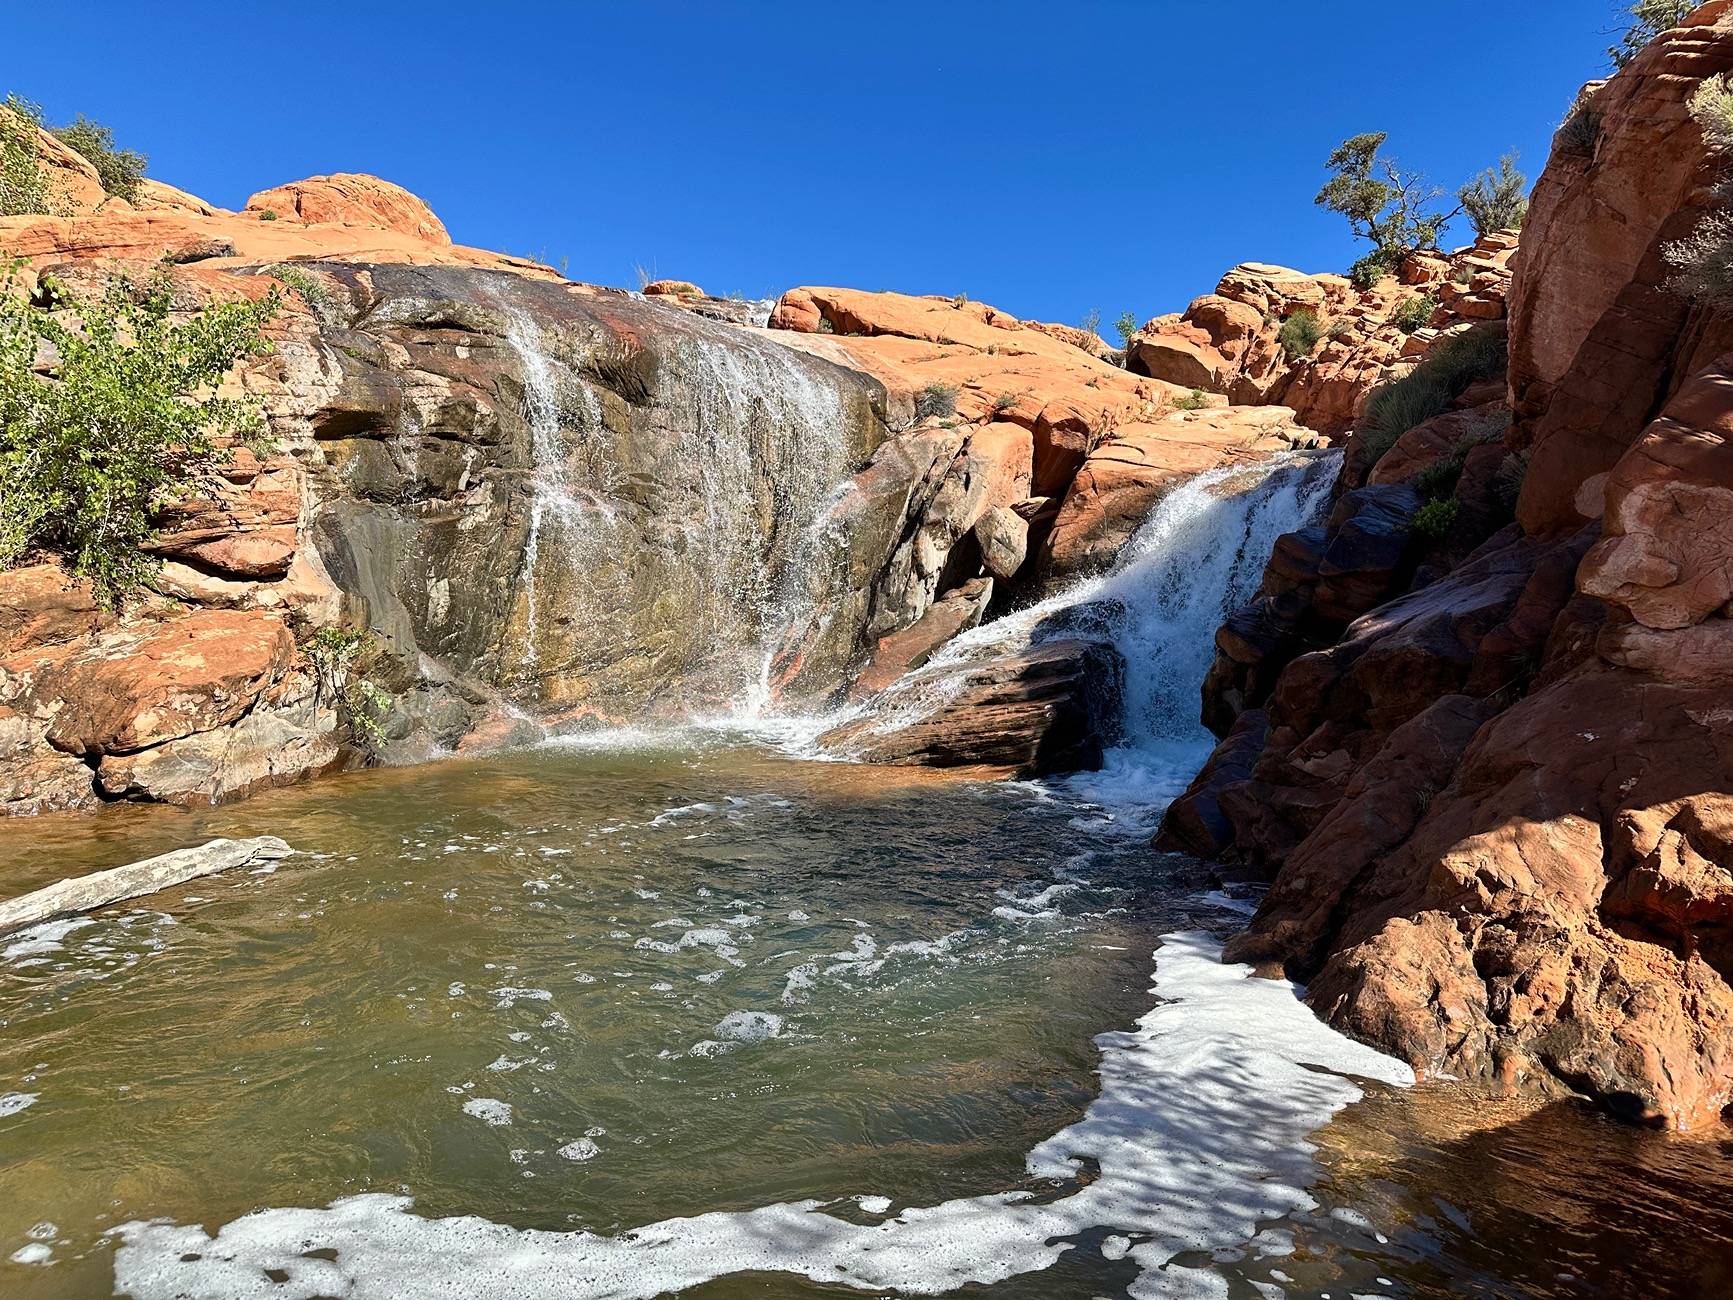
I liked Gunlock Falls about 1/2 outside St. George. I'm not sure how heavy the water flow would be this time of year, but you can do an easy short hike to the falls to swim or picnic or relax and/or take the Bronco "the back way" through a river (about 2' deep when I went), and along a trail to the top/backside of the falls where almost nobody else goes. That trail is where my profile pick is from. You can bypass that short, steep hill if you want. Once you are done with the falls, there are a ton of back roads that meander around the reservoir and into the back hills that you can explore for an hour or a half day. Most of it is fairly easy, so it's more about the exploration than the technical challenge.
There's an easy trail to take you to the Three Corners area (Nevada, Arizona, Utah borders) if you like visiting spots like that. There are some interesting views, and it's mostly a dirt road with scattered small rock obstacles in the canyon area, so it's good for those who don't like the more intense rock crawling.
I can throw out a few other ideas if you specify easy, medium or difficult.
Maybe the easiest way, which I don't have, is to cut the Asian style fitting off the hose and put a barbed female US style coupler on instead. The other way that is really popular is the pressure switch conversion. There are several you tube videos on the process. I do have that kit, sans wiring.What parts would I need from the Trickflate site to convert the Napa compressor, or the Trickflate one, to a 4-hose setup?
Thanks! I saw the YouTube link from your site and was a little intimidated when they were talking about the drilling and tapping to install. What’s the upside of having a pressure switch? This is all new to me.Maybe the easiest way, which I don't have, is to cut the Asian style fitting off the hose and put a barbed female US style coupler on instead. The other way that is really popular is the pressure switch conversion. There are several you tube videos on the process. I do have that kit, sans wiring.
You can buy a J-Type adapter from Amazon or other places. Then you don't have to cannibalize the hose that came with your compressor. I did that because I figured I'd have other uses for the compressor, like inflating camping mattresses, etc. The one I got added $15 to my cost but still put me at about 1/2 the price of buying a pre-made kit vs. DIY. But you can buy the kit and add the $15 adapter if you want to save your hose and don't want to go the pressure switch route.Thanks! I saw the YouTube link from your site and was a little intimidated when they were talking about the drilling and tapping to install. What’s the upside of having a pressure switch? This is all new to me.


